Problem Statement
Detecting anomalies in a product necessitates a complex system, often involving the labeling of various potential issues, such as damage or missing parts in specific areas. This process presents endless possibilities for anomalies. Consequently, developing machine learning models with numerous classes or labels requires robust systems containing a CPU or GPU. This results in significant costs, high energy consumption, and latency issues.Our Solution
By using Edge Impulse’s Visual Anomaly Detection (FOMO-AD), it’s possible to train machine learning models using images using only “ideal” or “normal” products. If an anomaly is detected, its location can be identified, allowing for immediate determination of the damaged or missing part. The compact size of this ML model enables deployment on microcontrollers such as the Arduino Nicla Vision or Sony Spresense (as used here). Low latency, cost efficiency, accuracy, and ease of deployment are the reasons we chose FOMO-AD for this project.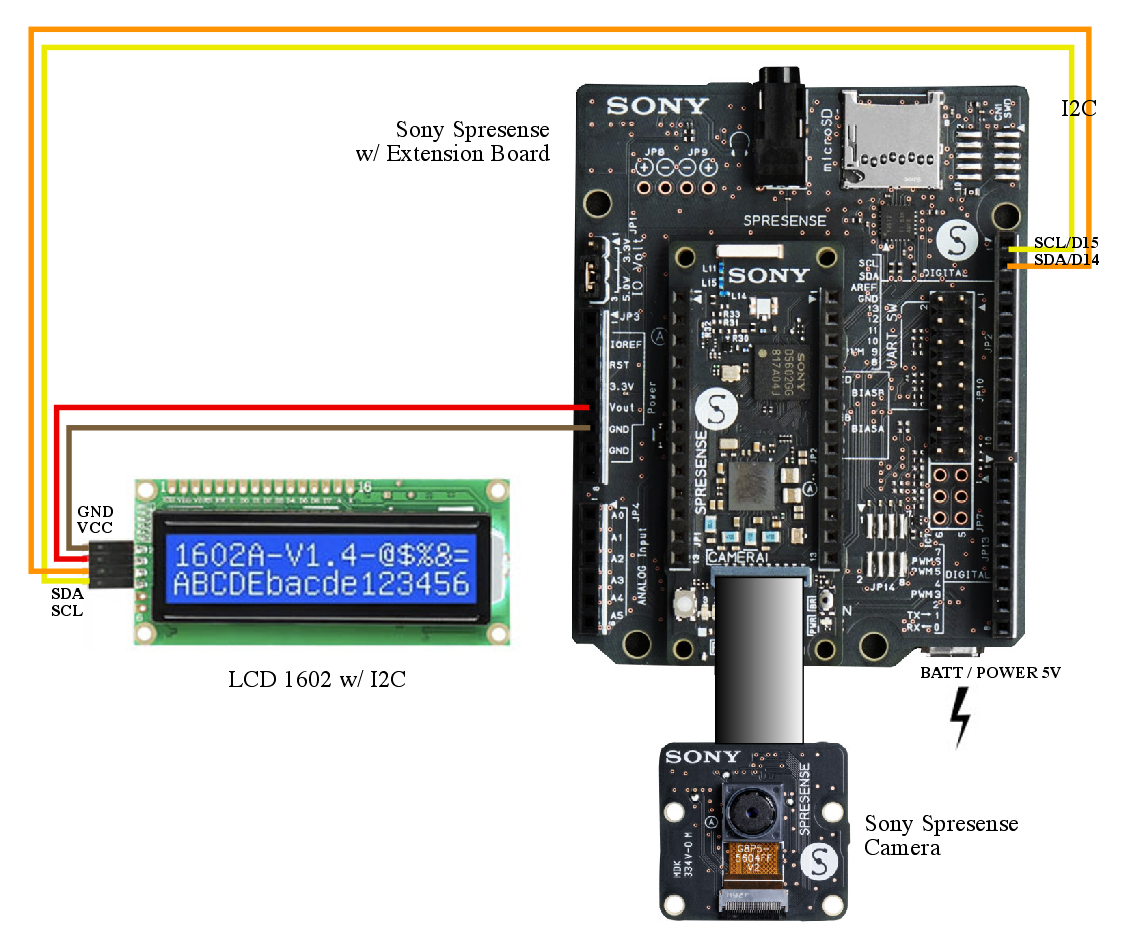
How it Works
This project uses Edge Impulse’s FOMO-AD (Faster Objects, More Objects - Anomaly Detection) learning block based on GMM (Gaussian Mixture Model) which clusters data points with similar characteristics, then will compare and provide an anomaly value for which a threshold can be determined. This can then be used to determine which parts are considered anomalies. In this ML model, the resulting anomaly value also contains the coordinates, and with some translation code we can use the coordinates to identify which parts are broken or not complete. The setting we’ll use is an electronics manufacturing process, with a conveyor belt and sorting system or an LCD display for information on anomalies or missing parts. Hardware: Sony Spresense with camera and 1602 LCD display.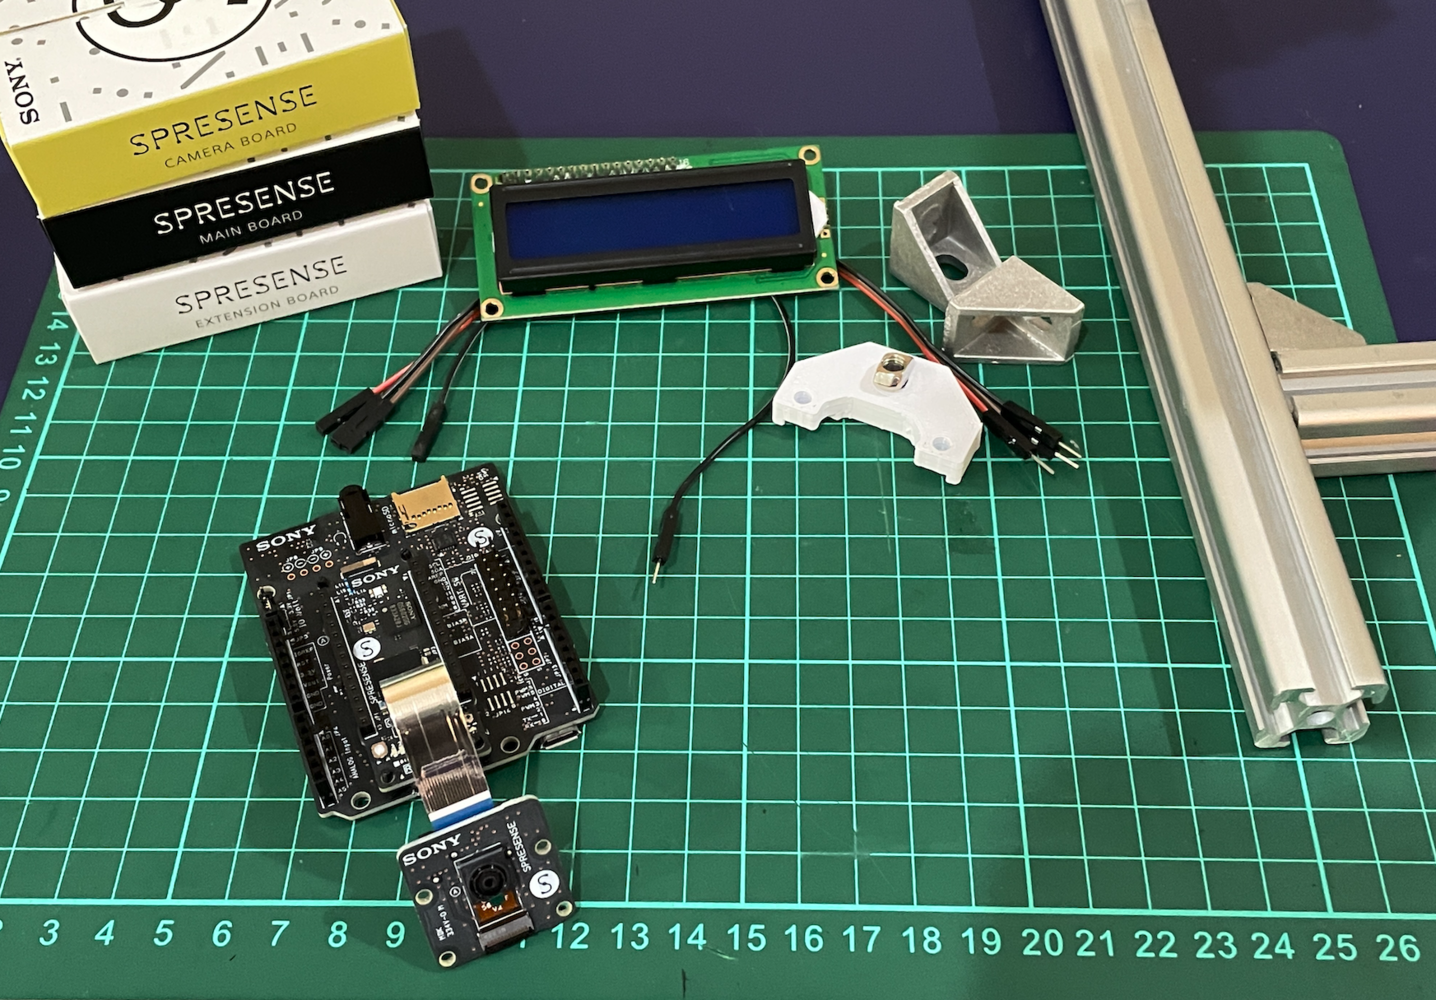
Hardware Components
- Sony Spresense Main Unit
- Sony Spresense Extension Board
- Sony Spresense Camera
- 3d print parts (case & mount)
- Jumper cables
- Aluminium extrusion/frame
- Battery/Powerbank
- Objects
Software & Online Services
- Edge Impulse Studio (FOMO-AD learning block only available in Enterprise account)
- Arduino IDE
- Terminal
Steps
1. Prepare Data / Images
We will first determine the object that will serve as the standard for an ideal (normal) product. This involves taking photos at a consistent distance, with similar angles and lighting. This can be done using a tripod and a smartphone camera or by creating a stand with a mounted Sony Spresense and its camera. There will be two types of objects photographed: those used for Training data with a single classification of “no anomaly”, and others photographed under conditions that would be considered “anomaly”, such as a removed button or a covered LED. These “incorrect” images will later be included in the Test Data section, mixed with some “no anomaly” images.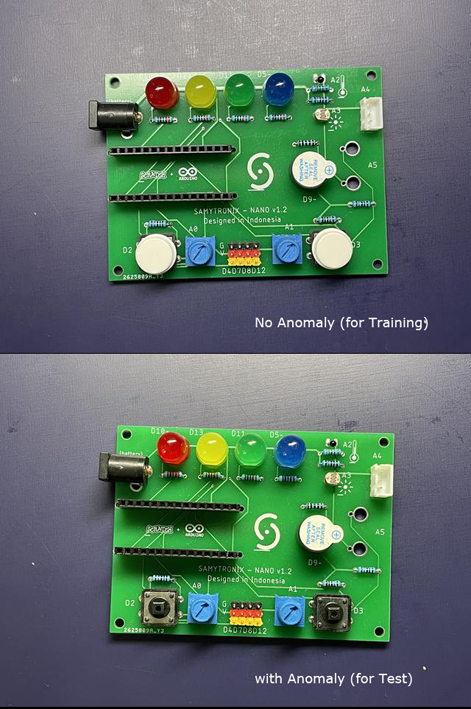
2. Data Acquisition
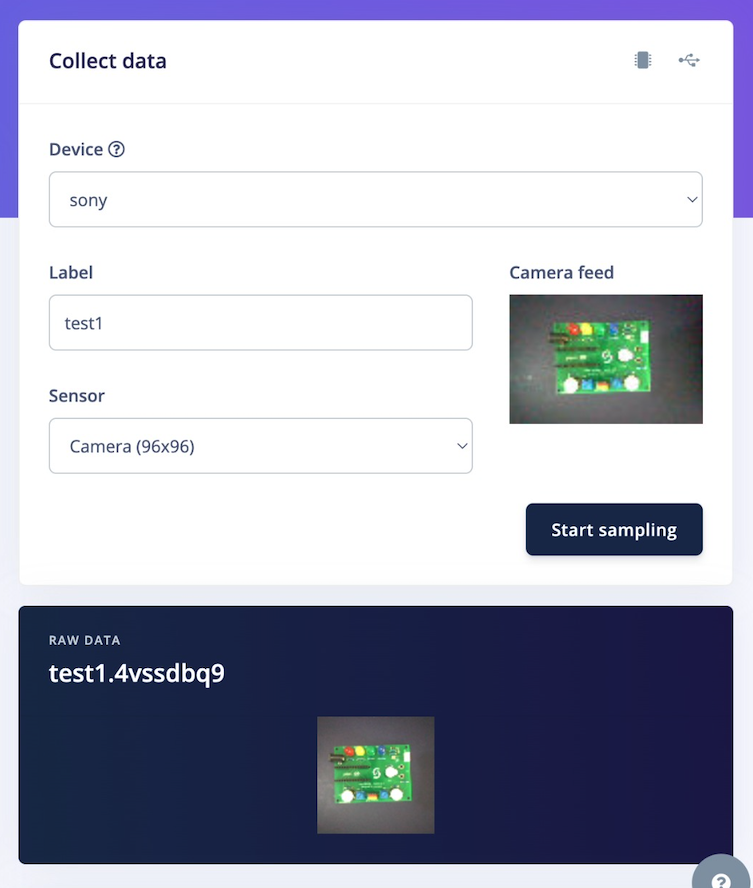
Open http://studio.edgeimpulse.com, login, then create a new project. In Dashboard > Project Info, choose One label per data item and Sony Spresense for the target device. Then click on the Collect new data icon, or in Data acquisition, click on the Upload Data tab, and choose your photo files. Besides using existing photos, you can also collect data directly by using the Sony Spresense with its camera connected to Edge Impulse Studio by uploading the Edge Impulse firmware to the Sony Spresense and runningedge-impulse-daemon, which is explained in detail at this link.
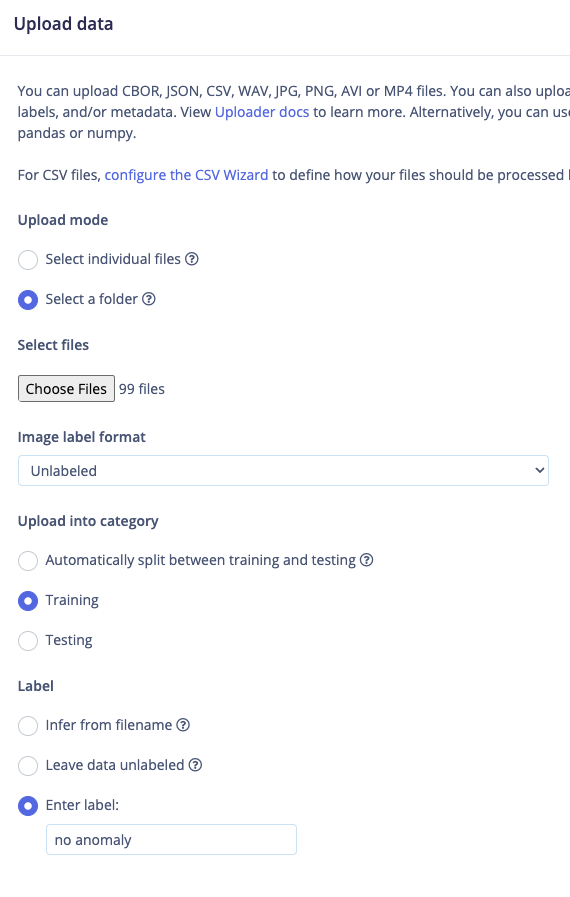
Whichever method you use, make sure to label each normal product photo as “no anomaly” for the Train Data category, as shown in the photo below. Ensure that the Train Data contains only “no anomaly” photos, while the Test Data contains some “no anomaly” photos as well as “anomaly” photos.
3. Build Model using FOMO-AD
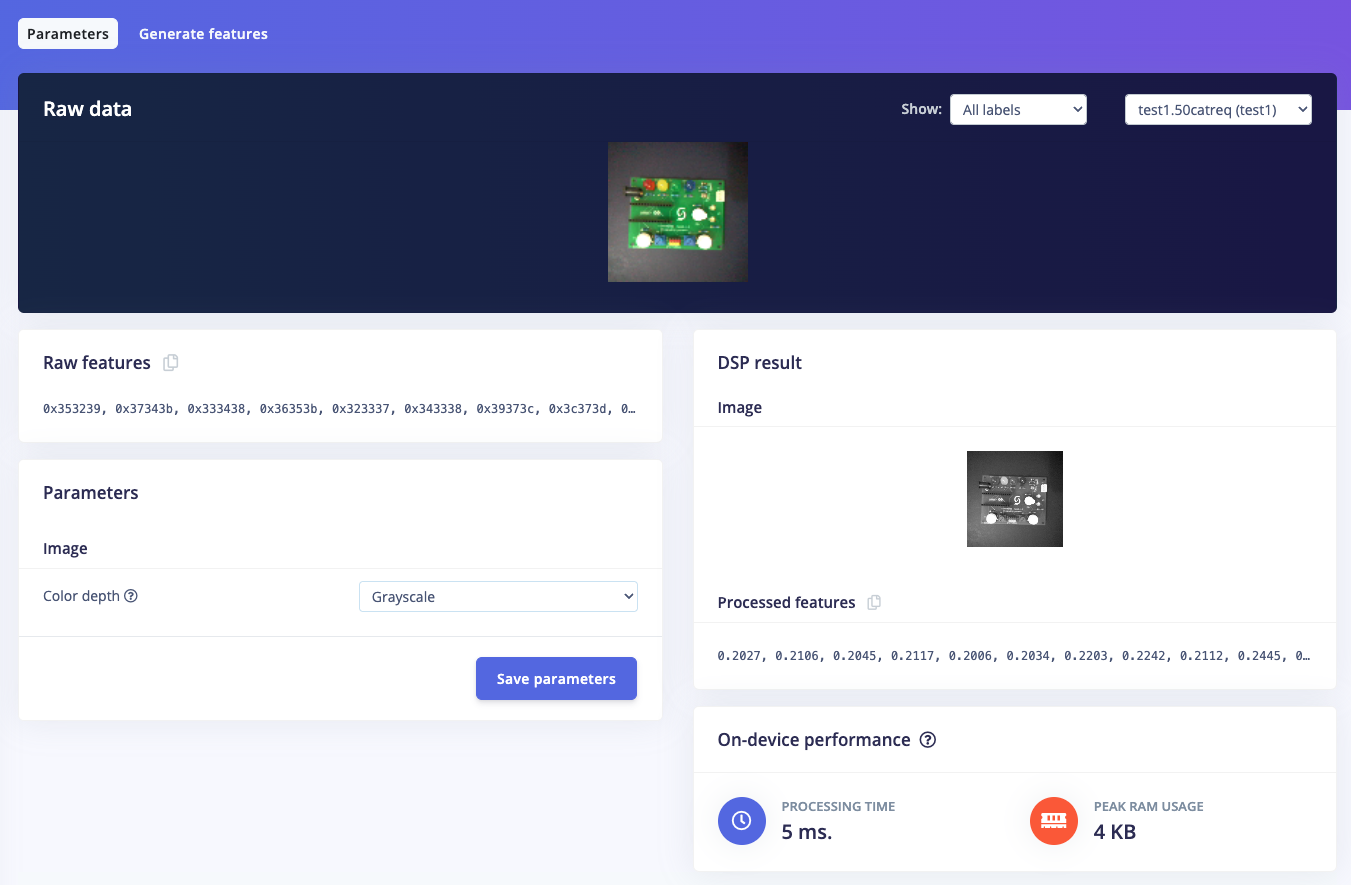
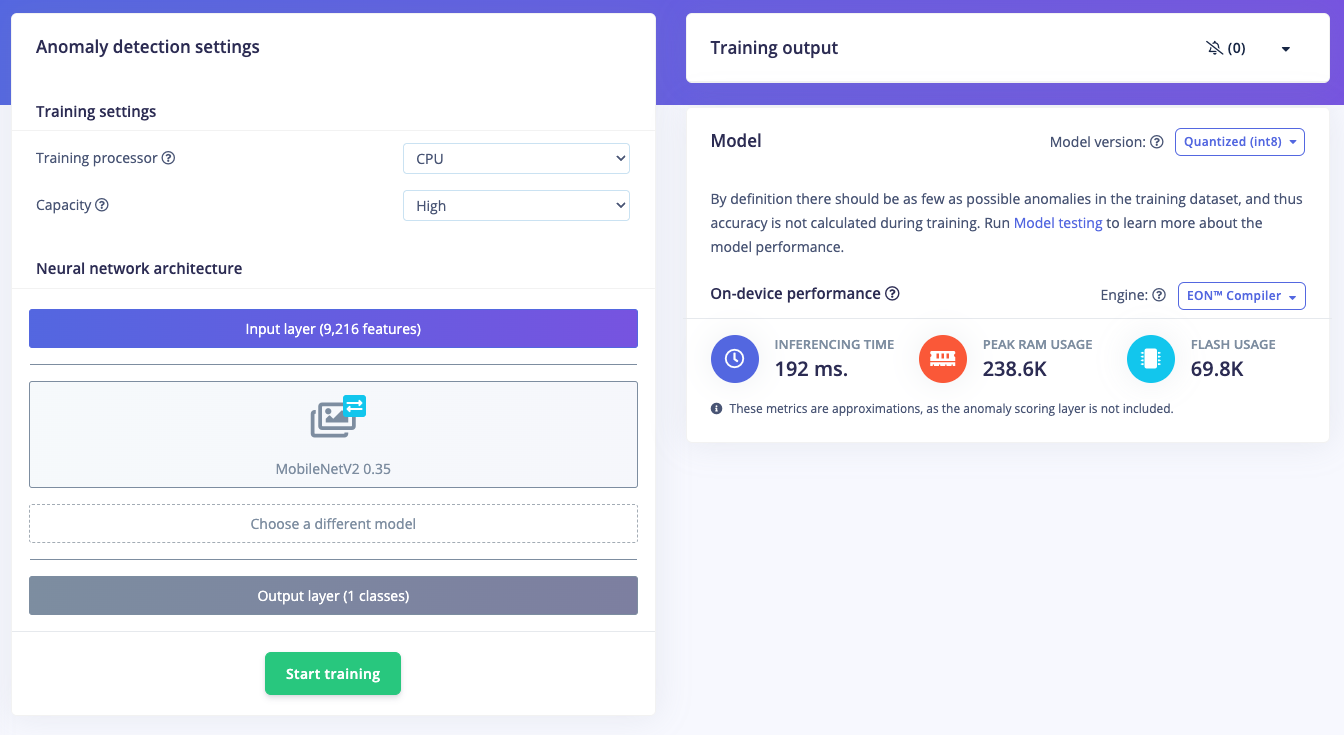
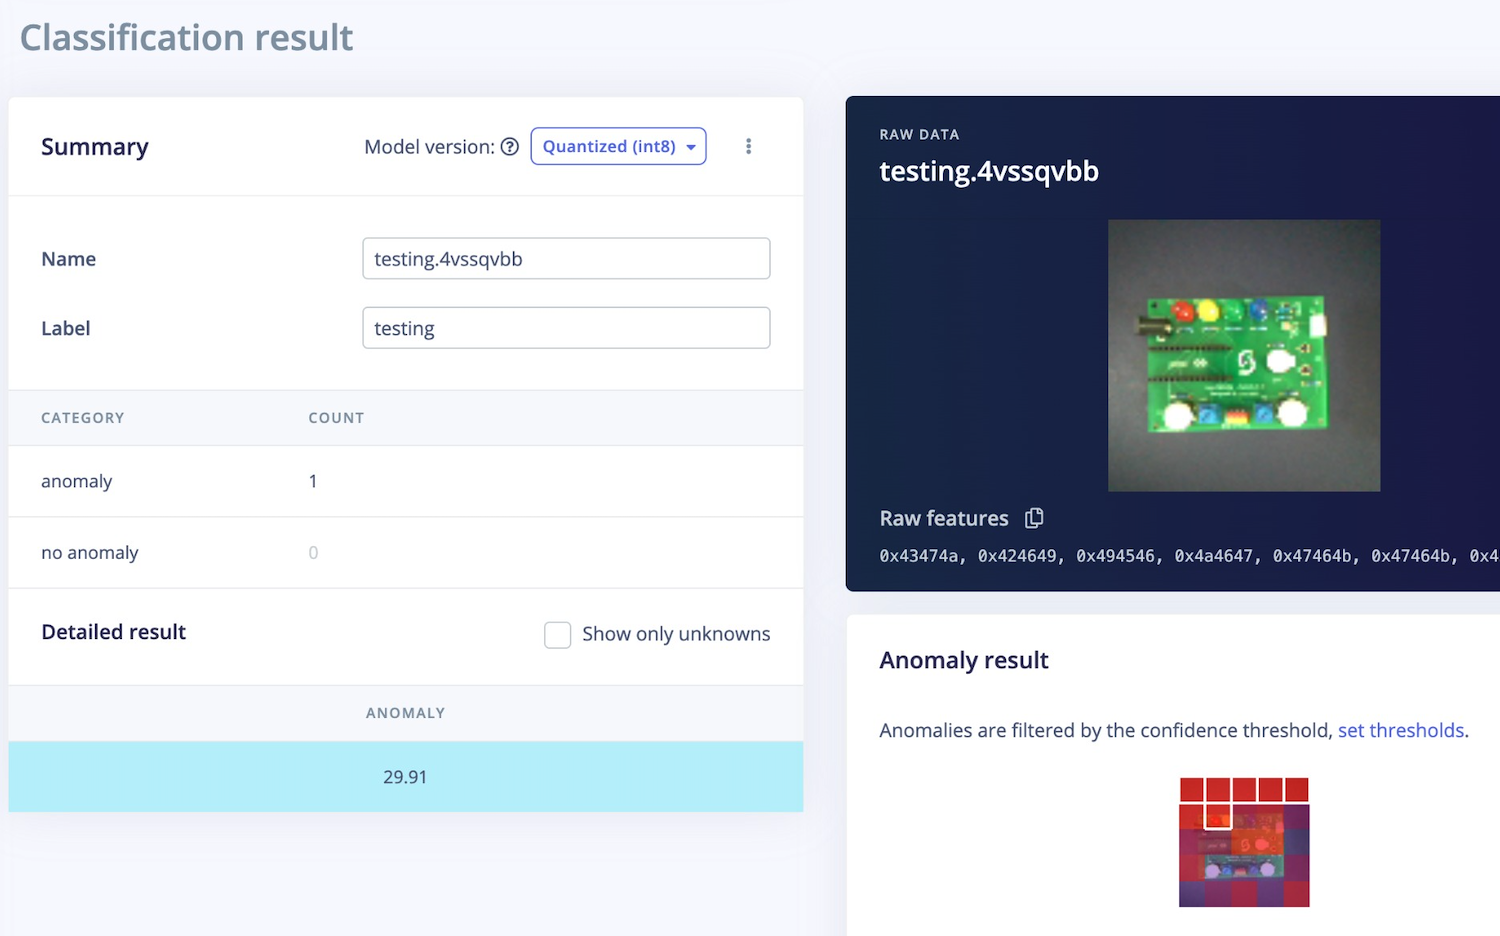
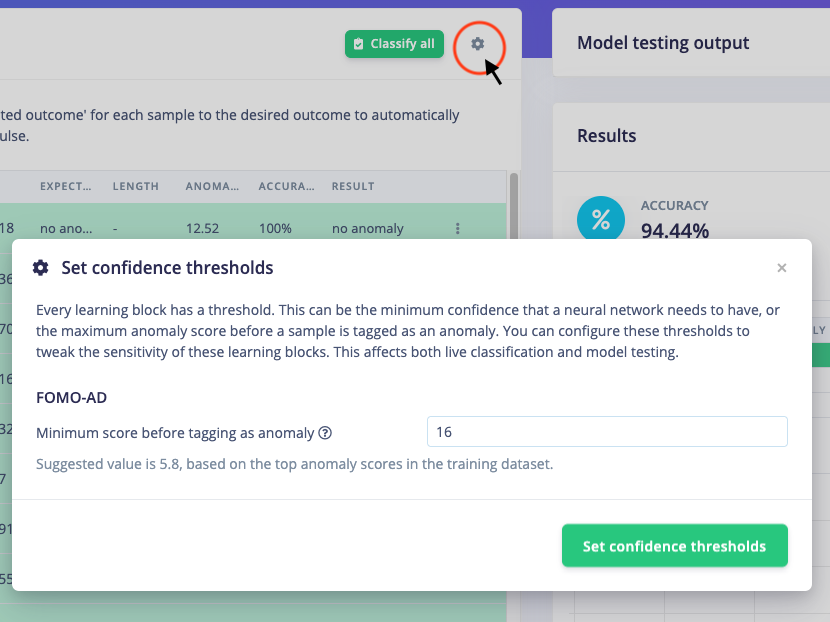
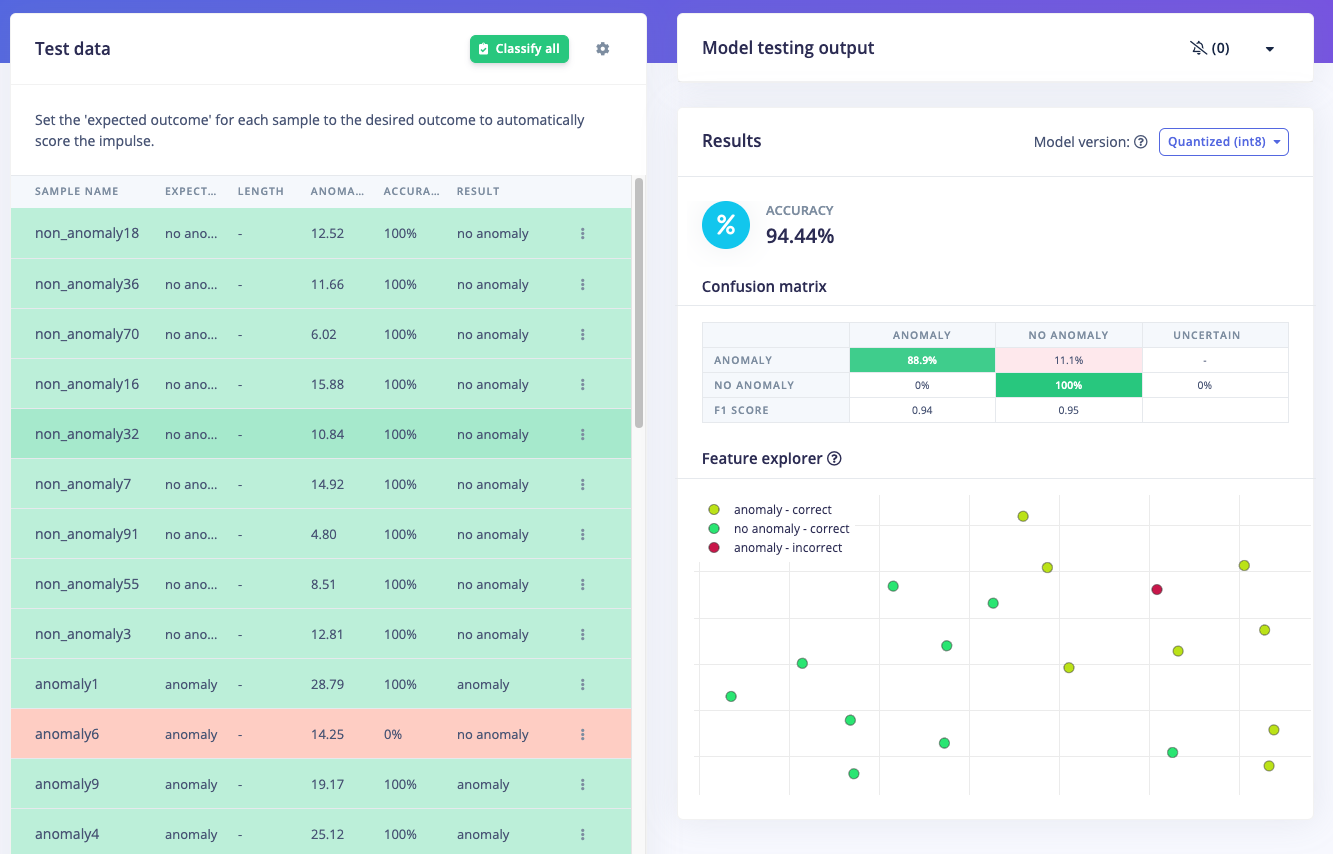
Once your dataset is ready, go to Create Impulse and set the image width and height to 96 x 96. Choose Squash as the image crop method, and select Image and FOMO-AD as the Learning and Processing blocks, then click Save Impulse. Next, go to the Image parameter section, select Grayscale for the color depth, and Save Parameters, then click on Generate features. In the Anomaly Detection settings, set the training processor to CPU with a capacity of High. Choose MobileNet V2 0.35 for the neural network architecture with a 1-class output layer. Start training the model by pressing Start Training and monitor the progress. If everything is functioning correctly, once complete proceed to the Live Classification with a connected camera or test the model by going to the Model Testing section and clicking Classify all. After these steps, you can adjust the confidence thresholds to set the minimum score required before tagging as an anomaly and click Classify all again. If your model’s test result is above 80%, you can proceed to the next step: Deployment.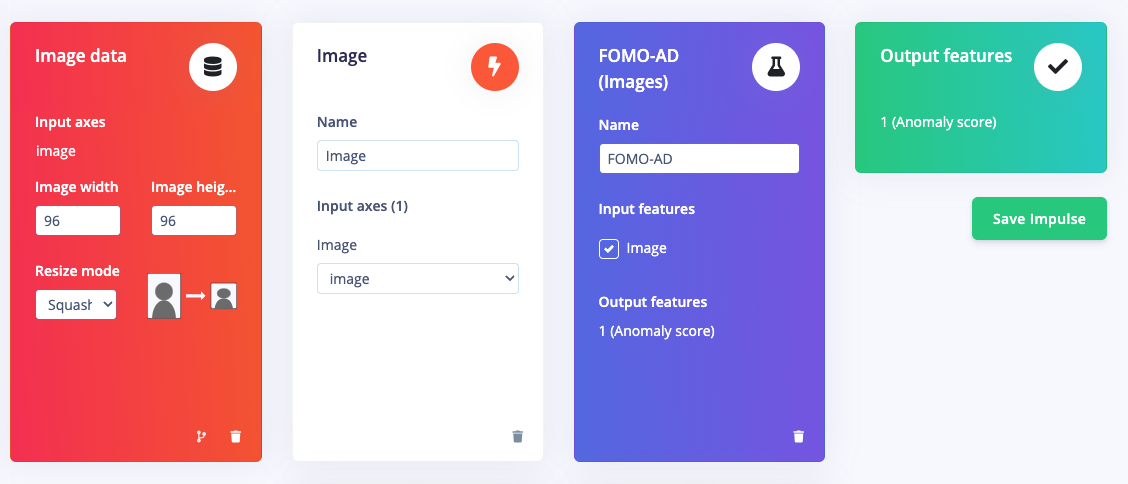

4. Deploy Model for Sony Spresense (or Arduino)
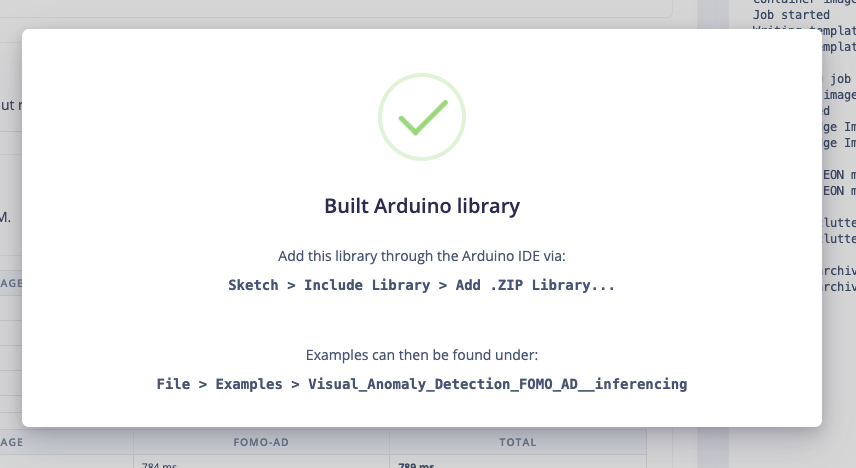
Click on the Deployment tab then search for Arduino Library then select Quantized (int8) and click Build. This will build an Arduino library for running inferencing targeting Arduino compatible devices, such as the Sony Spresense we’re using. After the .ZIP library downloads, open the Arduino IDE, click on Sketch > Include Library > Add ZIP Library, then follow the next step.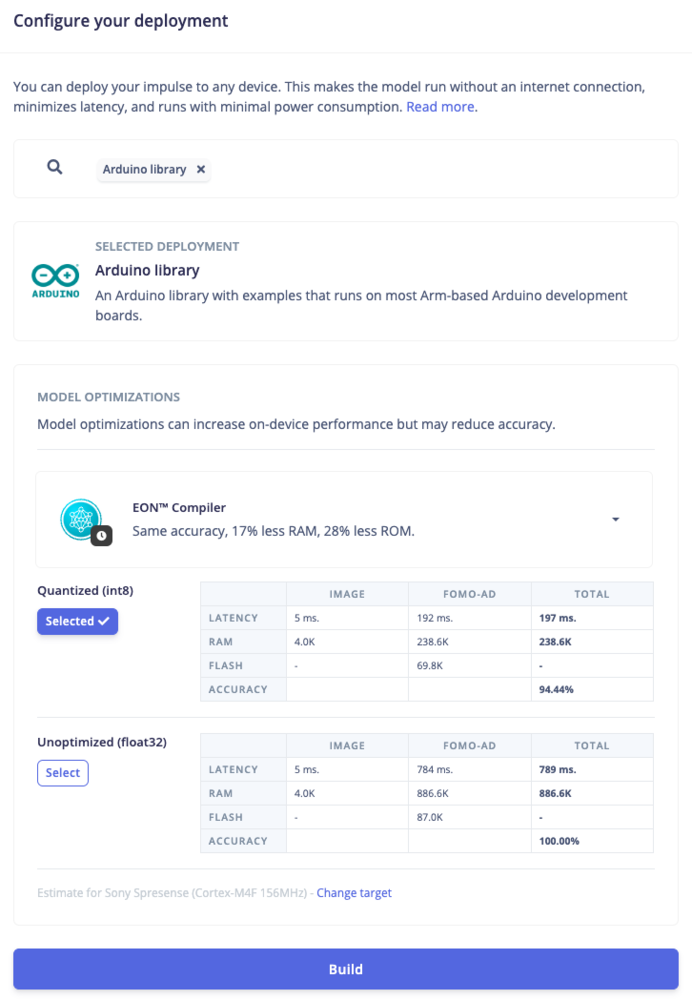
5. Build the Program (Arduino code)
Before we start with the program, we need to install the Spresense Library using the Board Manager in Arduino IDE. Follow the steps from this link to complete the install: https://developer.sony.com/spresense/development-guides/arduino_set_up_en.html#_installation_through_arduino_ide_board_manager To connect the Spresense to Arduino IDE, choose Tools > Board: “Spresense”, then set the Debug, Core, Memory, Upload Speed, Programmer values setup as shown in the image below. With the Spresense connected, then we can open the program example in File > Examples > Visual_Anomaly_Detection_FOMO_AD > Sony Spresense Camera. Upload this code to your Spresense and now you can test the model with the physical Spresense hardware and camera setup, and one of the “normal” products. Click on Serial Monitor icon and check the output results.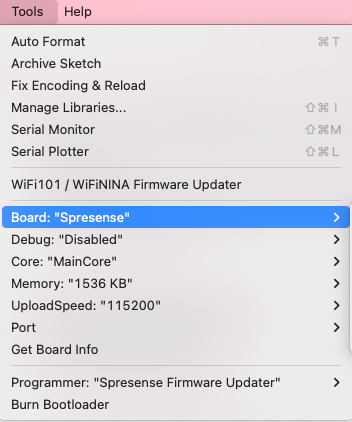
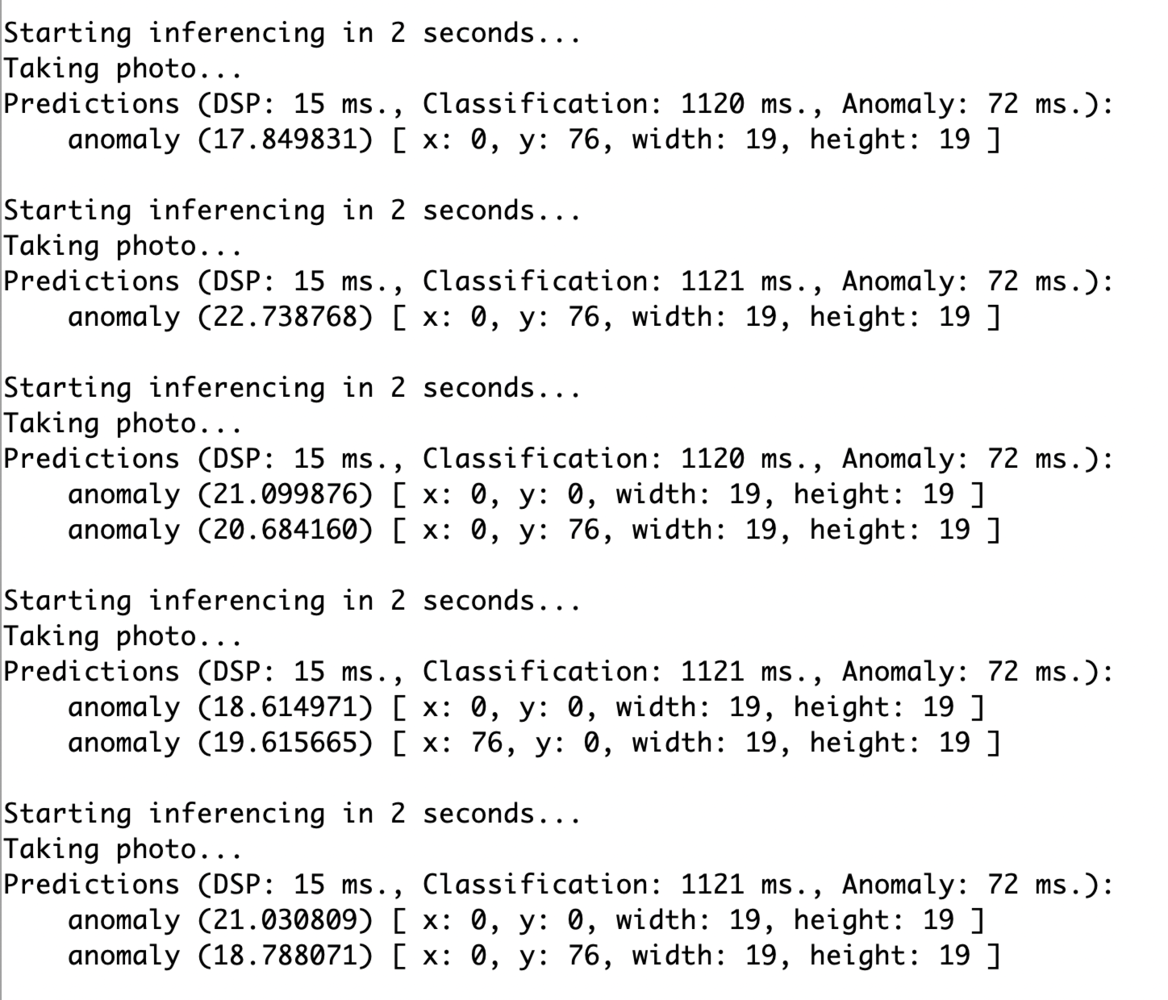
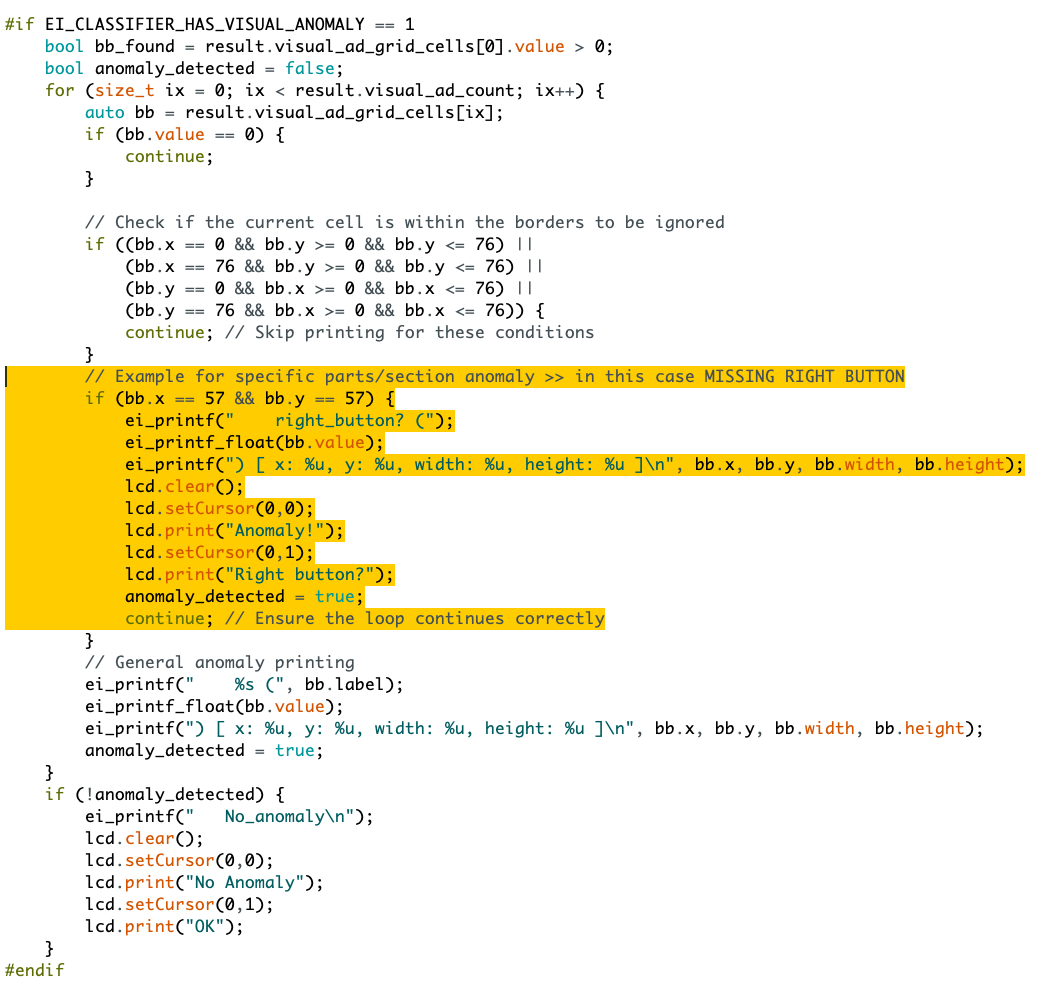
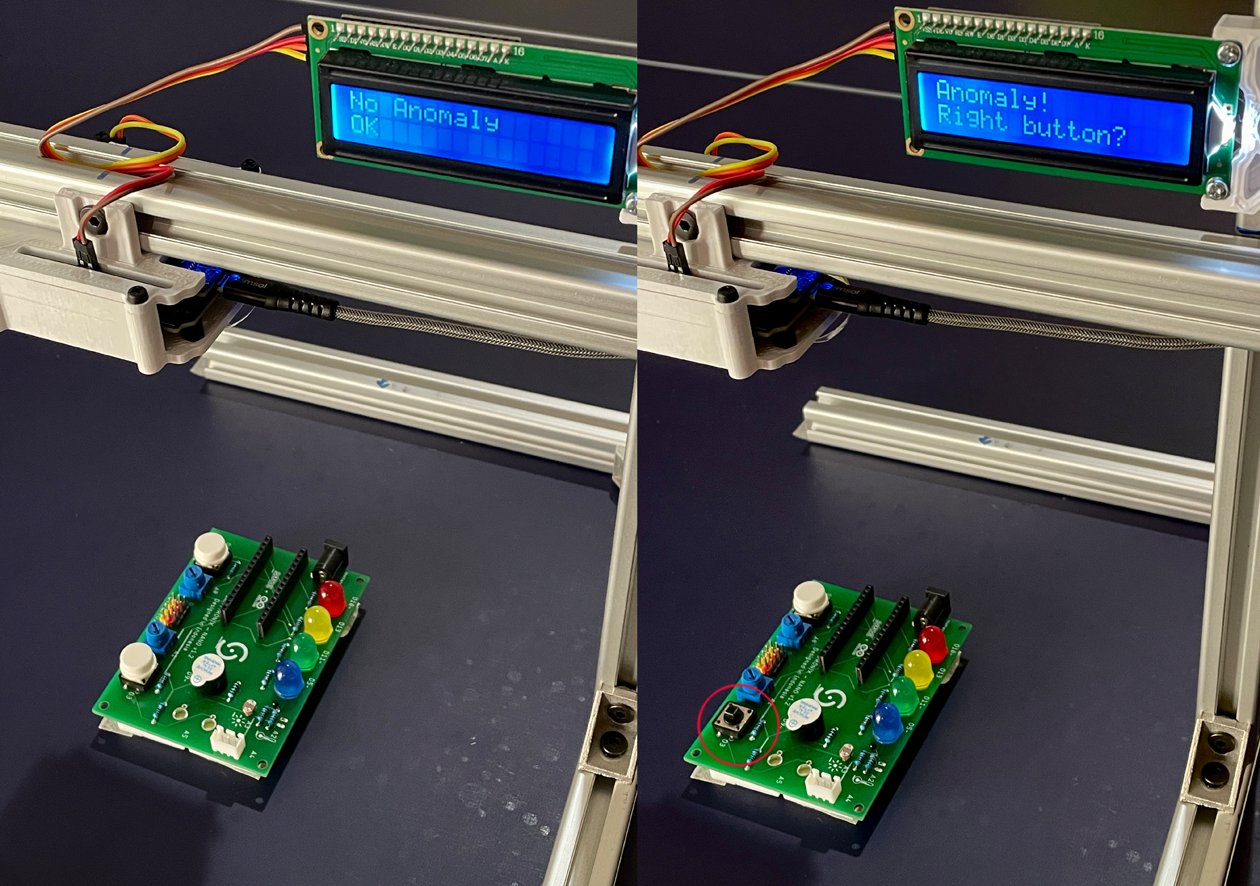
x and y can be mapped to specific parts or sections of the inspected product. For example, x: 57 and y: 57 correspond to the right button, so we can add a condition that, if an anomaly is detected at that location, the LCD will display “Anomaly! Right button?”. Apply the same approach for other anomaly conditions, and if no anomaly is detected, the LCD will display “No Anomaly, OK”.
For more detail, you can check or download and modify my code in this GitHub repository, https://github.com/Jallson/FOMO_AD-with-Sony-Spresense