Project Overview
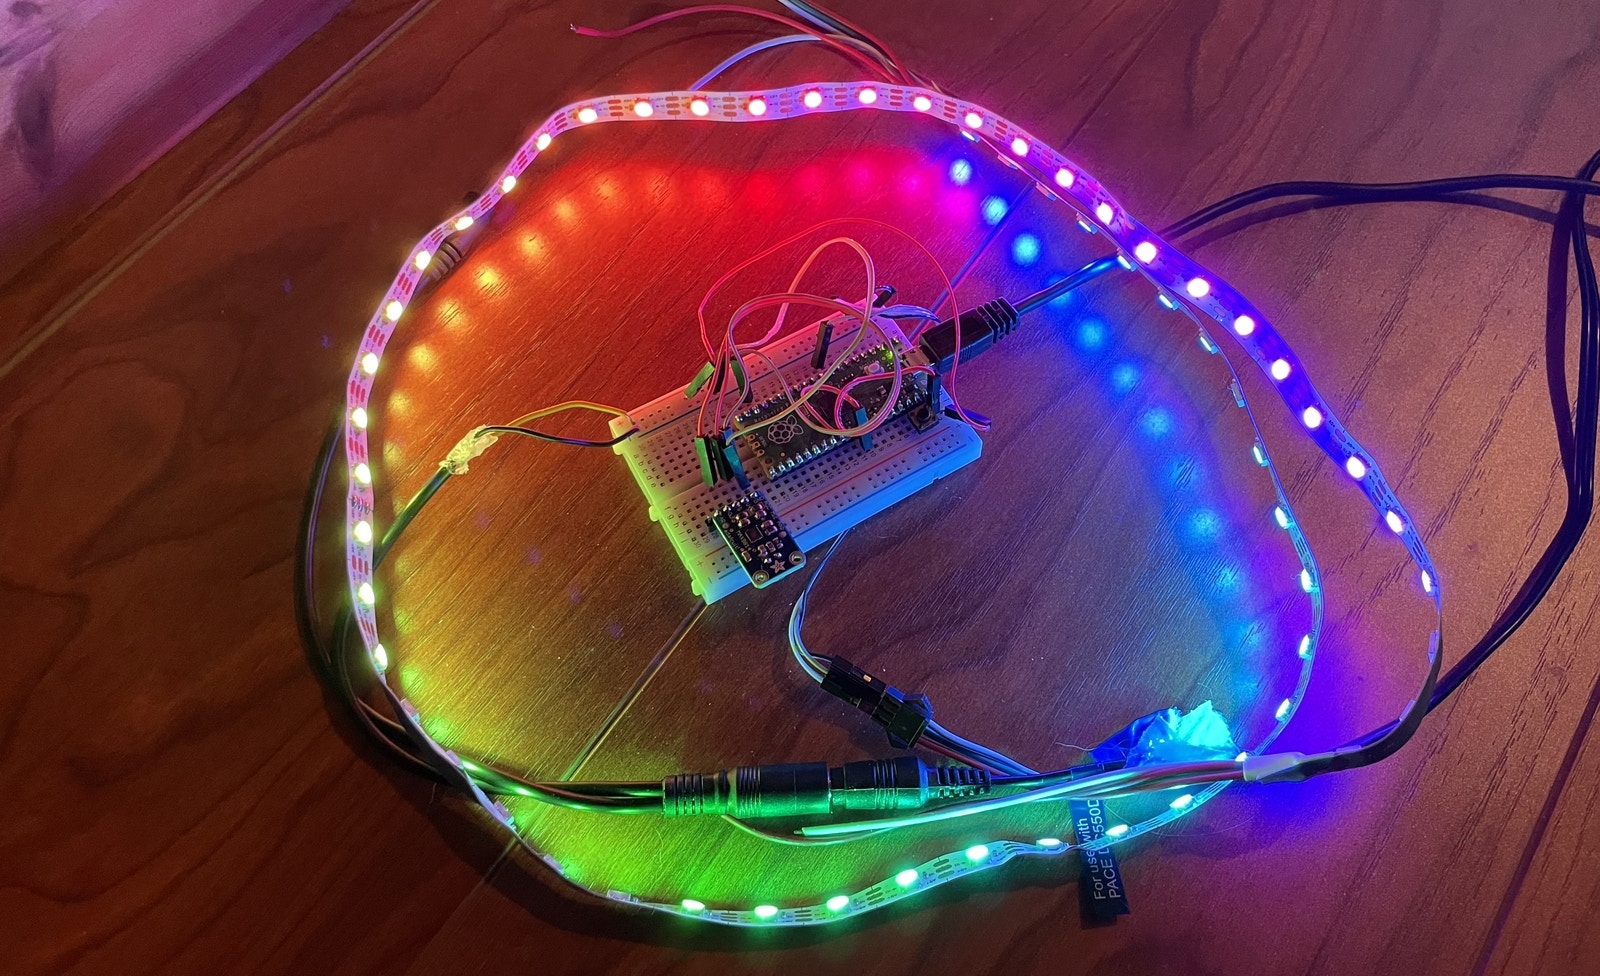
LED light strips, sometimes called “Neopixels” in the maker community, are the perfect choice for interior lighting. They’re easy to install, inexpensive, and are completely programmable. Simply connect the light strips to a microcontroller, write some code to make whatever lighting pattern you want, and you’re good to go!
Unfortunately for me, however, I’m lazy. I have no desire to get up and change the pattern if I get bored or turn it off if I want to go to bed. I could buy some Wi-Fi connected light strip on Amazon, but these are expensive and fiddling with some app on my phone is not peak laziness. Some light strips come with remotes, but I know that I’d lose the remote within days of having it.
What if we could use the $4 Raspberry Pi Pico to control lighting strips with voice commands? With Edge Impulse, we can! With just the Pico, a cheap microphone, and a power supply, you can make a voice-controlled lighting system.
Why Raspberry Pi Pico?
Parts

- Raspberry Pi Pico
- Microphone with AGC
- LED Light Strip
- 5V Power Supply
- Breadboard
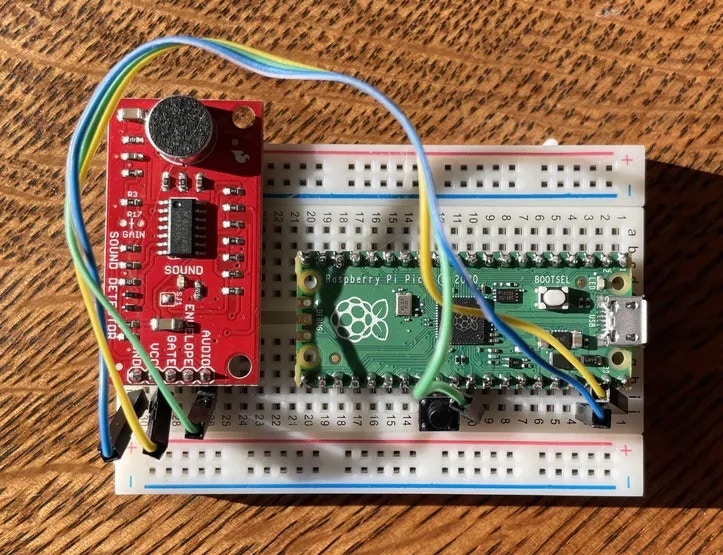
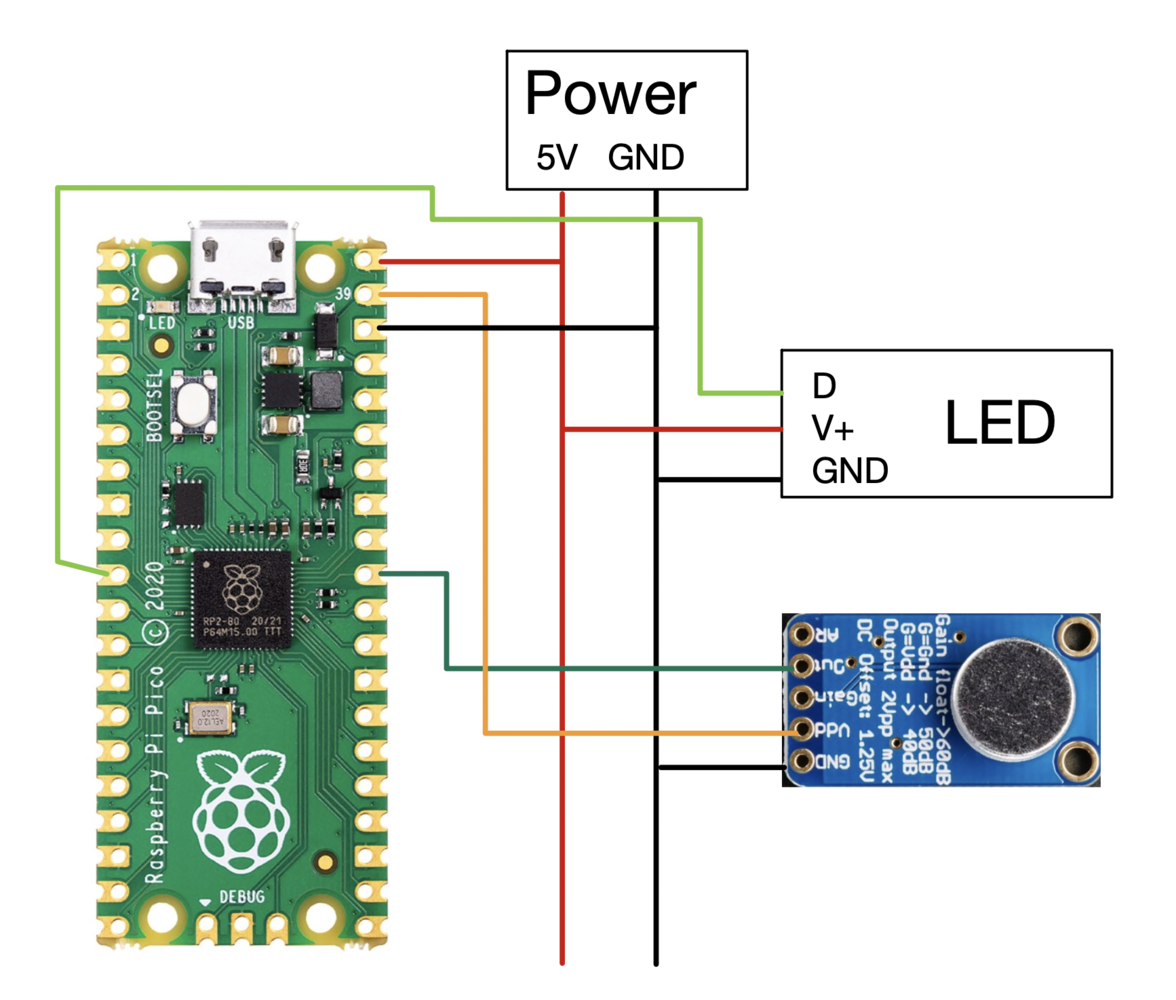
Step 1: Assembling the Circuit
Step 2: Collecting Training Data
The Edge Impulse Studio only supports collecting data from Pico at a relatively low sample rate, so we need to use some custom code to collect training data. See this tutorial for information on how to collect data from the Pico’s AGC, upload it to Edge Impulse, and train a machine learning model on it. You’ll need two keywords for this project. I used “start” and “stop”. When the lights are off, “start” will turn them on. When the lights are on and you say “start” again, the lights will cycle to a new lighting mode. Saying “stop” when the lights are on will turn them off. It took me a few tries to get my model working well, so don’t get discouraged if your system doesn’t work well at first!Step 3: The Code
The code for this project really pushes the Raspberry Pi Pico to its limits. I use a variety of Pico-specific features, including direct memory access (DMA), PIO state machines, and multicore processing. First, we’ll start with the things you need to modify to make your project work. Start by cloning theawulff-pico-playground repository, and navigate to the pico-light-voice folder. This is the main folder for this project.
Things you need to modify
- Check the indices of the keywords used in your model, and make sure those match with what the
if (ix == ...)part of the code inmain.cpp. Your “start” and “stop” keywords should match with what’s in the code. - Adjust
threshinmain.cppto control the sensitivity of the keyword detection. - Change
NUM_LIGHTSinlights.cppto the number of LEDs in your strip.
Folder Structure
The base of this code is built on top of Edge Impulse’s standalone inferencing starting point. You can follow the instructions here for setting up your development environment and downloading the Pico SDK. Additionally, once you’re finished with your voice model, copy over the folders from your deployed C++ library into the main project folder as described in this project’s README.Main Sampling Code
Let’s start in themain code loop. You can find this in source/main.cpp.
Input Parameters
At the top of the file, you can find parameters for the model inputs and sample rates. A CLOCK_DIV of 12,000 gives a sample rate of 4 kHz. This is low for audio, but still intelligible to a machine learning model. This value needs to match the sample rate that you used to collect data in the data collection tutorial! We trained the model to respond to sample lengths of 4,000 samples (NSAMP), which works out to be exactly 1 second of data.
For more information on ADC sampling and DMA with Pico, check out my tutorial on this subject.
In this code I also do something called continuous inferencing, which can improve the performance of the keyword detection drastically by passing in overlapping buffers of samples into the model. All the math takes under 250ms to execute, so I maintain a sliding buffer of data and run the model on it every quarter of a second. Edge Impulse doesn’t support continuous inferencing natively on Pico, so I implemented a form of it in software.
Setup Code
All the code in main() before the while (true) portion gets executed once. This is all setup code used to configure the model and sampling.
Main Code Loop
We take advantage of Pico’s many hardware features to form a very efficient data processing pipeline, which you can find in the while (true) portion of the code. The basic operation of this is as follows:
- The code starts the ADC sampling routine on Pico. This tells the ADC to start running, and fill up the memory location we passed to the function with samples. All of this happens in the background and does not hang the main loop, so while we’re sampling we can also be running the machine learning code.
- As soon as the ADC setup is finished, we move samples from the raw sample buffer into the feature buffer for the model in a form the model expects (floats normalized to between 2^15 and -2^15). The very first time this function runs, the buffer will be filled with garbage (since the ADC hasn’t populated it yet), but every subsequent time this runs it will be filled with actual audio data.
- Next we begin executing the machine learning routine on the populated feature buffer.
- Based on the output from the model, we send a state update to the other core that handles the lighting. One keyword is used to turn the lights on and cycle through different lighting modes, and the other keyword will turn the lights off.
- We now block and wait for the ADC sampling to finish:
dma_channel_wait_for_finish_blocking(dma_chan) - As soon as sampling is done we move samples into an intermediate buffer. We want to minimize the amount of time here spent not sampling, so we don’t do any processing here and just leave that for while the ADC is busy.
- We then loop and do it all again!
Continuous Inferencing Complications
The execution time of your model is very important for this application. As the code is configured, we run the model four times a second. The ADC is set to collect 1000 samples per shot (NSAMP); every time this collection is done, we shift samples out of the ADC buffer and into an intermediate buffer with past audio data.
The green LED on the Pico is configured to be on while the Pico is busy executing the ML code and off while the Pico is waiting for the ADC. Thus, you can use the duty cycle of the flashing to get a handle on how close your model is to the 250 ms inferencing limit. You are losing data if the light stays on continuously—if this is the case, try reducing the execution time of your model, or increase NSAMP so the model runs more often.
Lighting Code
We execute code to control the lighting on Pico’s second core while the first handles the sampling and machine learning. You can find the code for this insource/lights.cpp.
The second core executes a simple state machine based on input from the first core. Let’s look at the core1_entry() function to see how this works.
Setup Code
The first part of this code sets up the light strip. The Adafruit_NeoPixel library API should be the same as that which you find in other tutorials online, with some caveats. See the library’s GitHub page for more information.
Lighting Loop
The lights operate in a relatively simple manner. If we get the off keyword, the lights will stay off. When we get the “on” keyword, the lights will turn on in the previous lighting mode active when the lights were turned off. When we get the “on” keyword when the lights are already on, the code will cycle to a new lighting state. Add new lighting modes as you see fit, and make sure to update NUM_STATES to reflect how many states you’d like to use.
If your lighting code is relatively computationally intensive, make sure you periodically check for state updates (like I do in the rainbow mode) to ensure that your lighting system is responsive.
Multicore Communications
The update_state() function handles the communication between the two cores. Pico implements this communication using two FIFO queues — we can use this as a bi-directional pipe to send information back and forth between the cores. From the lighting core we tell the sampling core that we’re ready for data using multicore_fifo_push_blocking(0). If the sampling core sees that the lighting core is ready for a state update, and it has a state update to give, it will send this update to the lighting core. Once the lighting core receives an update it will change the state accordingly.
This code initially looks a little complicated, but it’s a relatively simple way to synchronize two independent processing cores. Read the Raspberry Pi documentation on FIFO and multicore processing if you’re stuck.
Step 4: Building and Flashing
You should be able to build this code using standard CMake tools. Follow the instructions here to compile the project usingCMake and make, and flash it using the .uf2 file. If your code is failing to build, you might not have copied all the folders you needed from your deployed C++ Edge Impulse model, or the path to the Pico SDK might not be set correctly.
Troubleshooting and Modifying
Machine learning can be very tough. Any deviation from an environment similar to your training data can cause your model to stop working entirely. Here is a small selection of the many mistakes I made along the way while making this project:- Using a different sample rate in my training data vs. the actual data collected by this code
- Accidentally passing in buffers of
uint16_ts to the model when it was expecting floats - Consuming too much RAM on the Pico which causes it to silently break things instead of erroring out (keep
NSAMP/INSIZEsmall!) - Not rate-limiting the FIFO buffers and causing them to fill up with stale state data
- Switching the index of the keywords used in my model