Introduction
Accurate inventory management is critical for any business that relies on the sale of physical goods. Inventories can represent a significant investment of capital, and even a small error in inventory levels can have a major impact on a company’s bottom line. Furthermore, customers expect to be able to find the products they need when they want them, and out-of-stock items can lead to lost sales. In order to properly manage their inventories, businesses need to keep track of both the level of stock on hand and the rate at which stock is being sold. By using this information to forecast future demand, businesses can avoid both overstock and out of stock events. In today’s competitive marketplace, effective inventory management can be the difference between success and failure. Machine Learning algorithms power automatic inventory tracking systems that can automatically detect and classify objects in images, even as items are moved around. This is important because it helps to ensure that inventory levels are accurate, which is essential for businesses to run smoothly. Machine Learning can also be used to automatically count items in containers, such as boxes on a shelf. This is important because it helps to reduce the amount of time that employees need to spend counting inventory manually. As a result, automatic inventory tracking can save businesses time and money.Our Solution
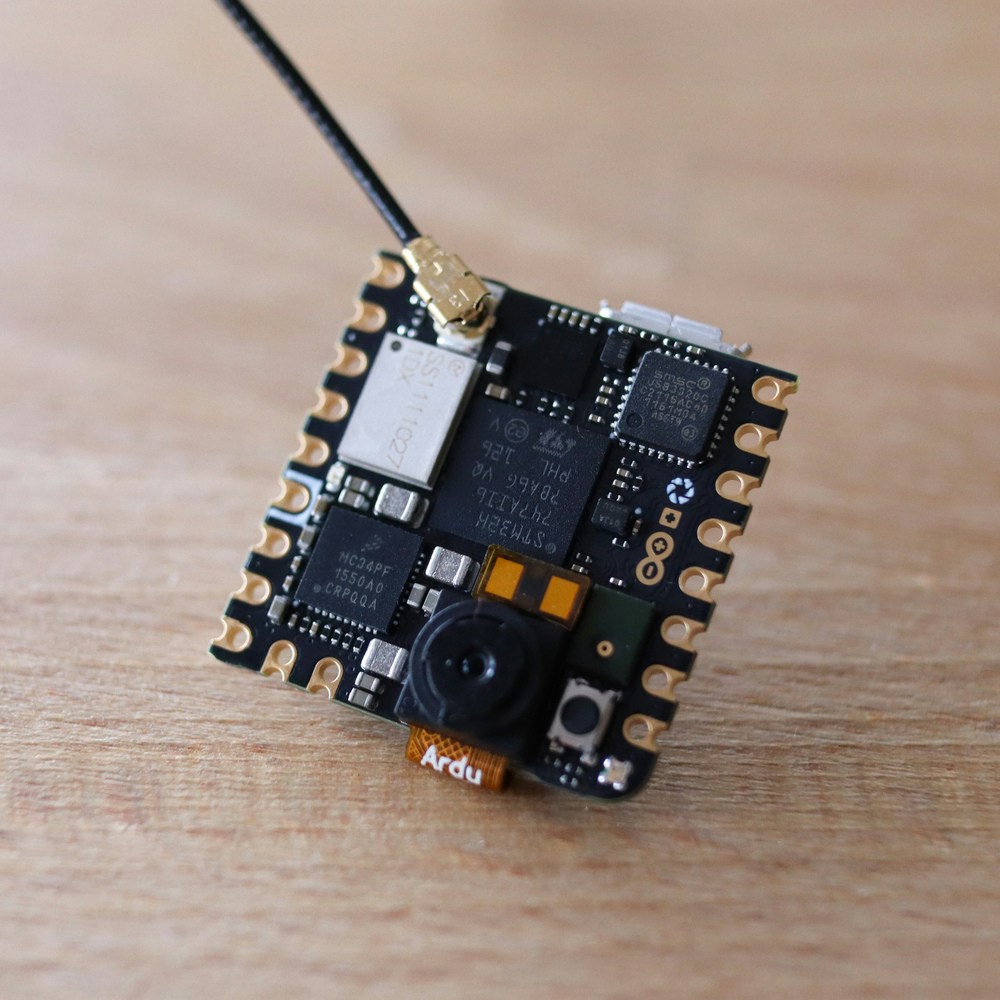
In this tutorial we’ll show you how to use Computer Vision and Machine Learning to count the number of containers that enter a warehouse in real-time. We will use the Arduino Nicla Vision camera to capture the training data and run the ML model. The Edge Impulse platform will enable us to build, train and deploy an object recognition model. We’ll explain how to use the FOMO (Faster Objects, More Objects) novel machine learning algorithm that enables object detection for highly constrained devices, such as the Arduino Nicla Vision.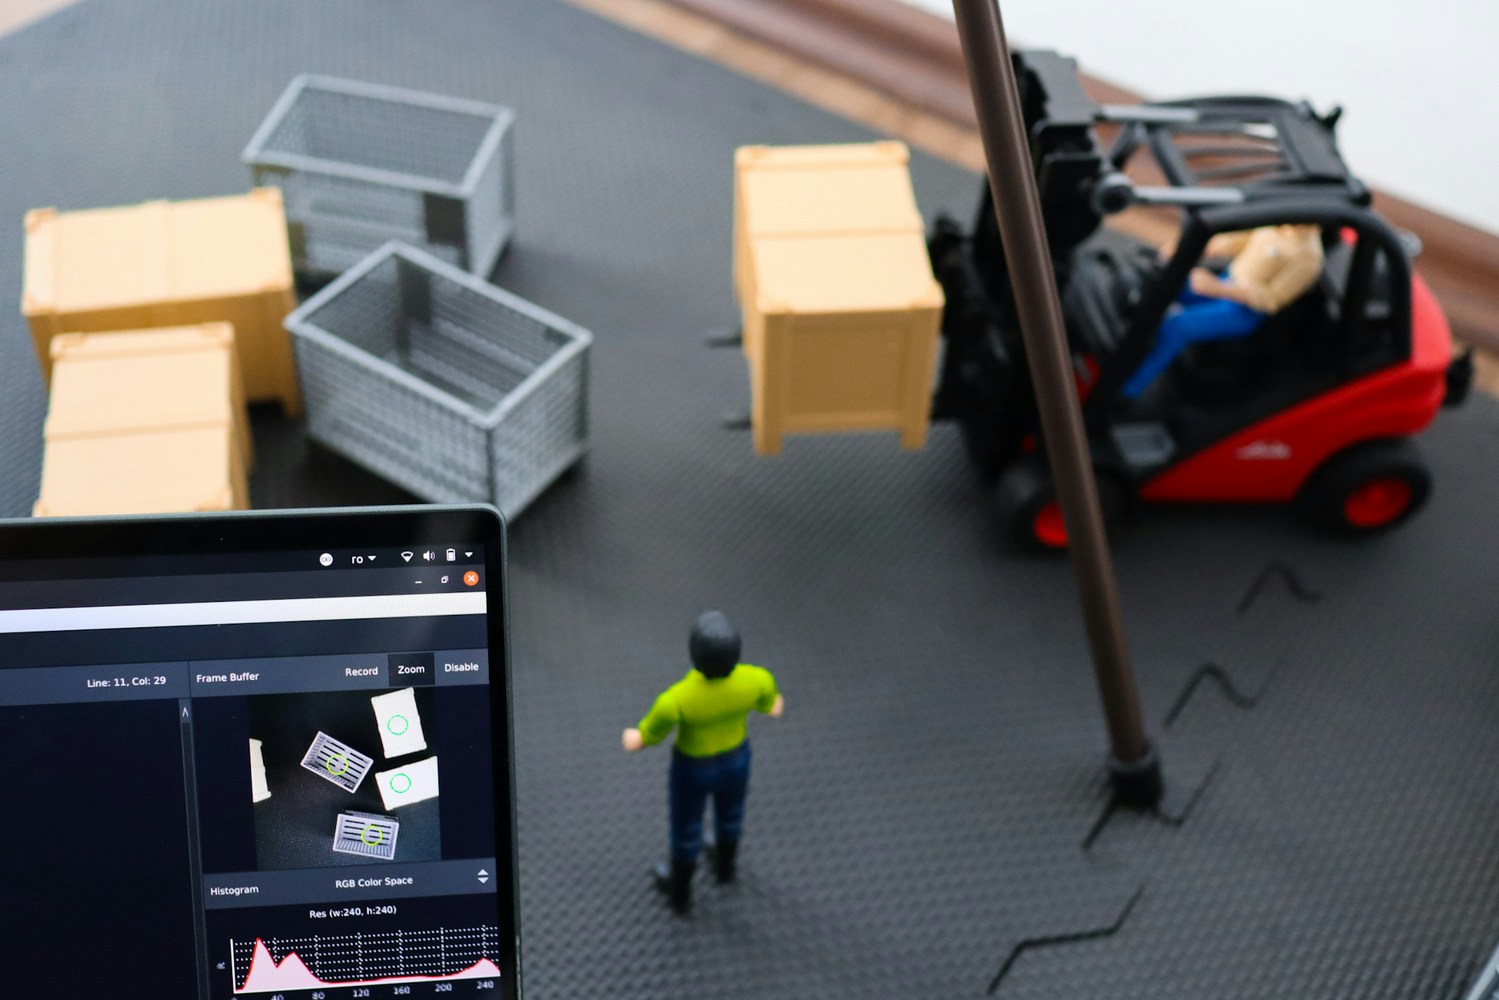
Hardware requirements
- Arduino Nicla Vision
- Micro USB cable
Software requirements
- Edge Impulse account
- Adafruit IO account
- OpenMV IDE
Hardware Setup
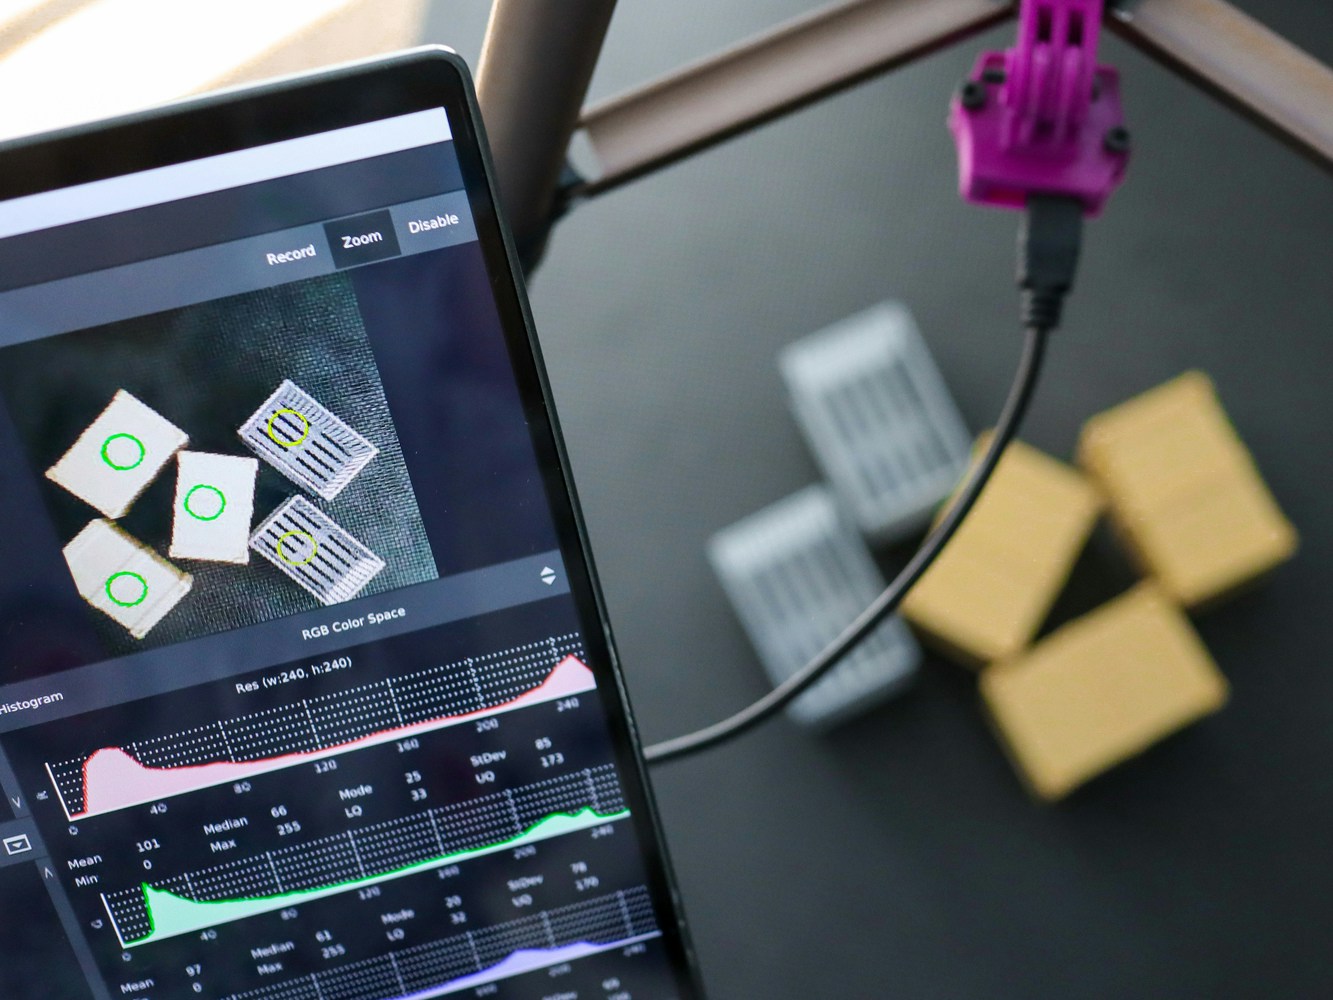
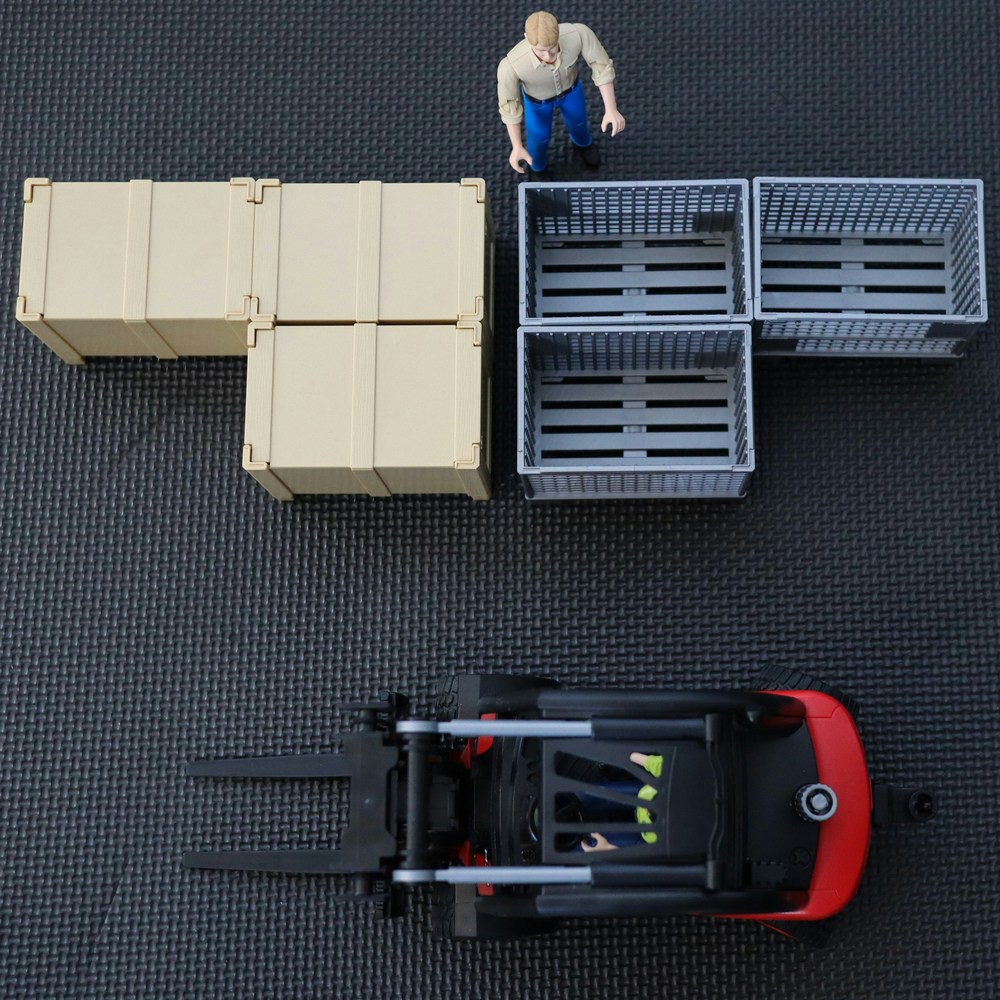
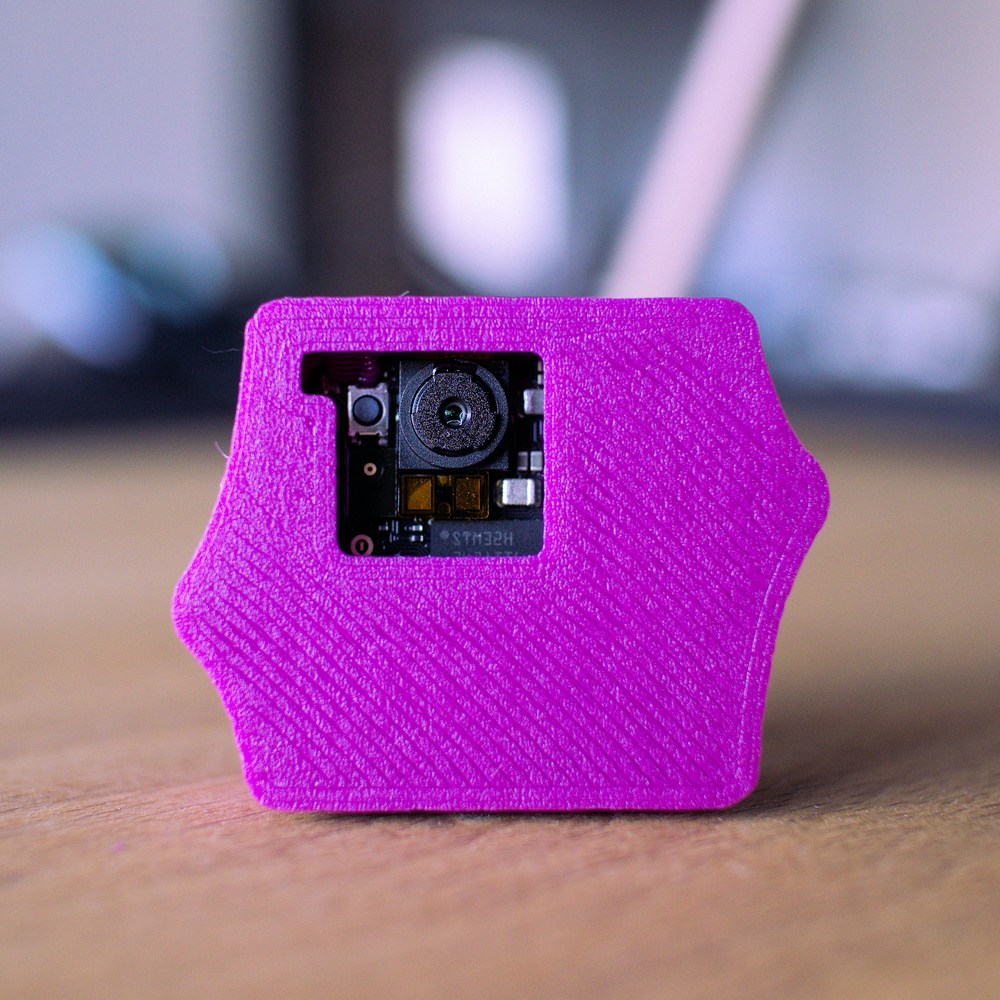
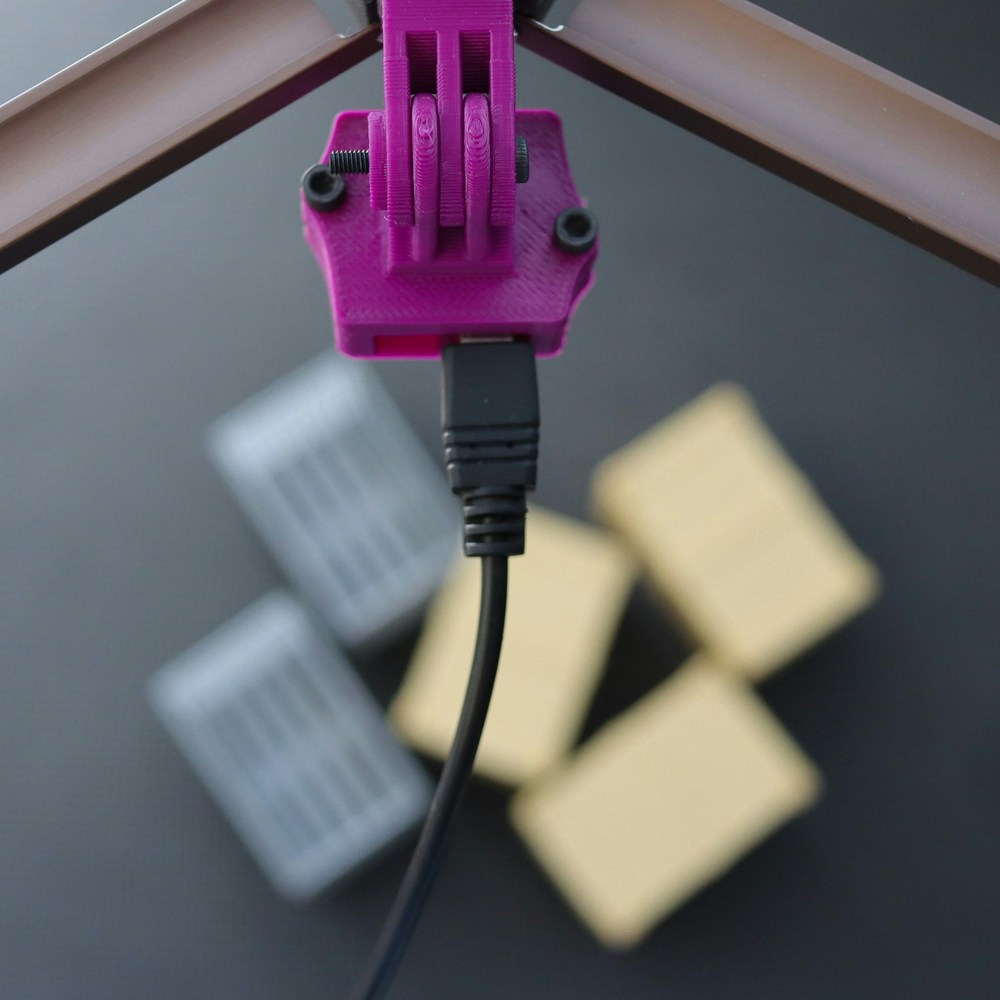
We’ve 3D printed an enclosure for the Arduino Nicla Vision board (you can download it from here) and mounted it at a high enough point to get a bird’s-eye view that captures all the important objects from the scene (the entire storing area and the containers on it). The case provides an extra layer of protection against environmental factors. The lid is secured by using M3 bolts and threaded inserts that were placed inside the base piece using a soldering iron. This ensures a good fit of the lid over the base piece and allows the case to be opened and closed repeatedly without having to worry about damaging a 3D printed thread. Moreover, we have opted to use a GoPro mount on the lid, a common pick in the open-source hardware community, that makes this design compatible with numerous other mounts available online that will fit your application.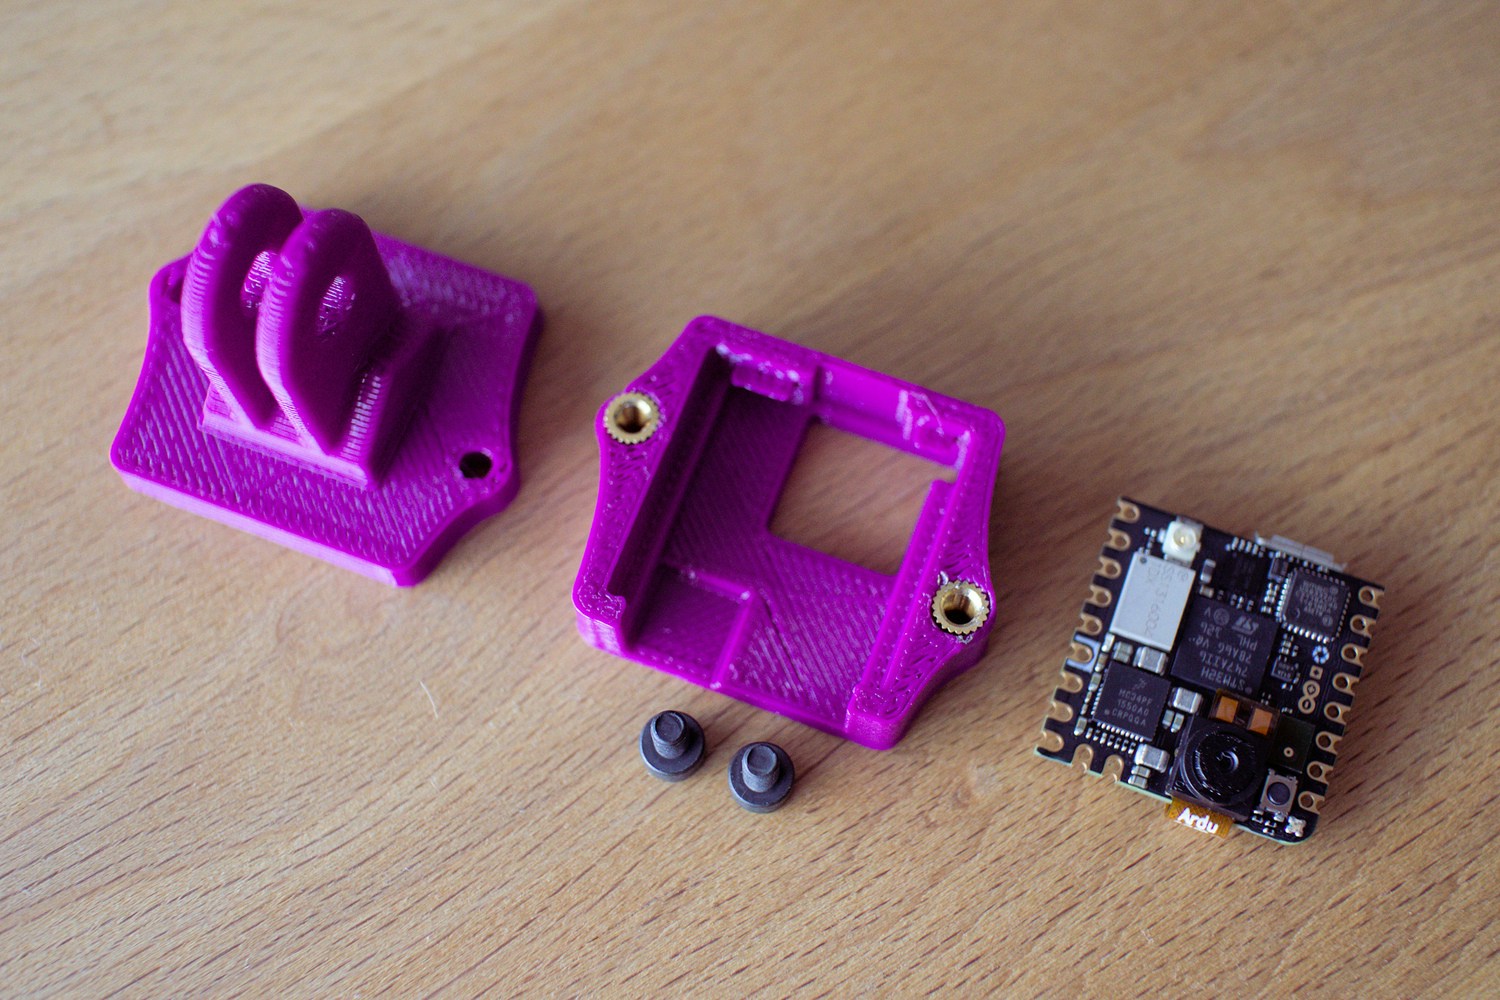
Software Setup
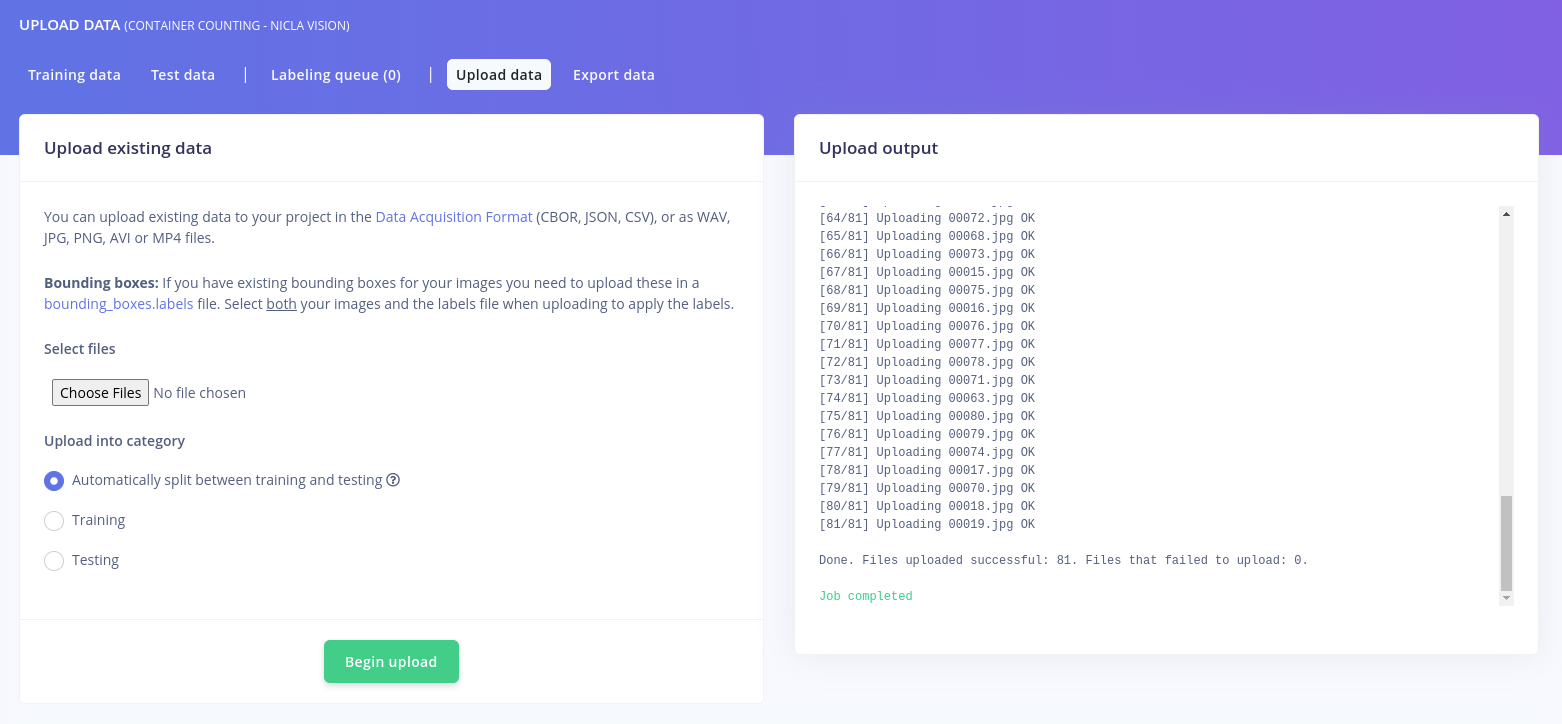
Start by installing the OpenMV IDE and creating an Edge Impulse account if you haven’t already.Data Collection
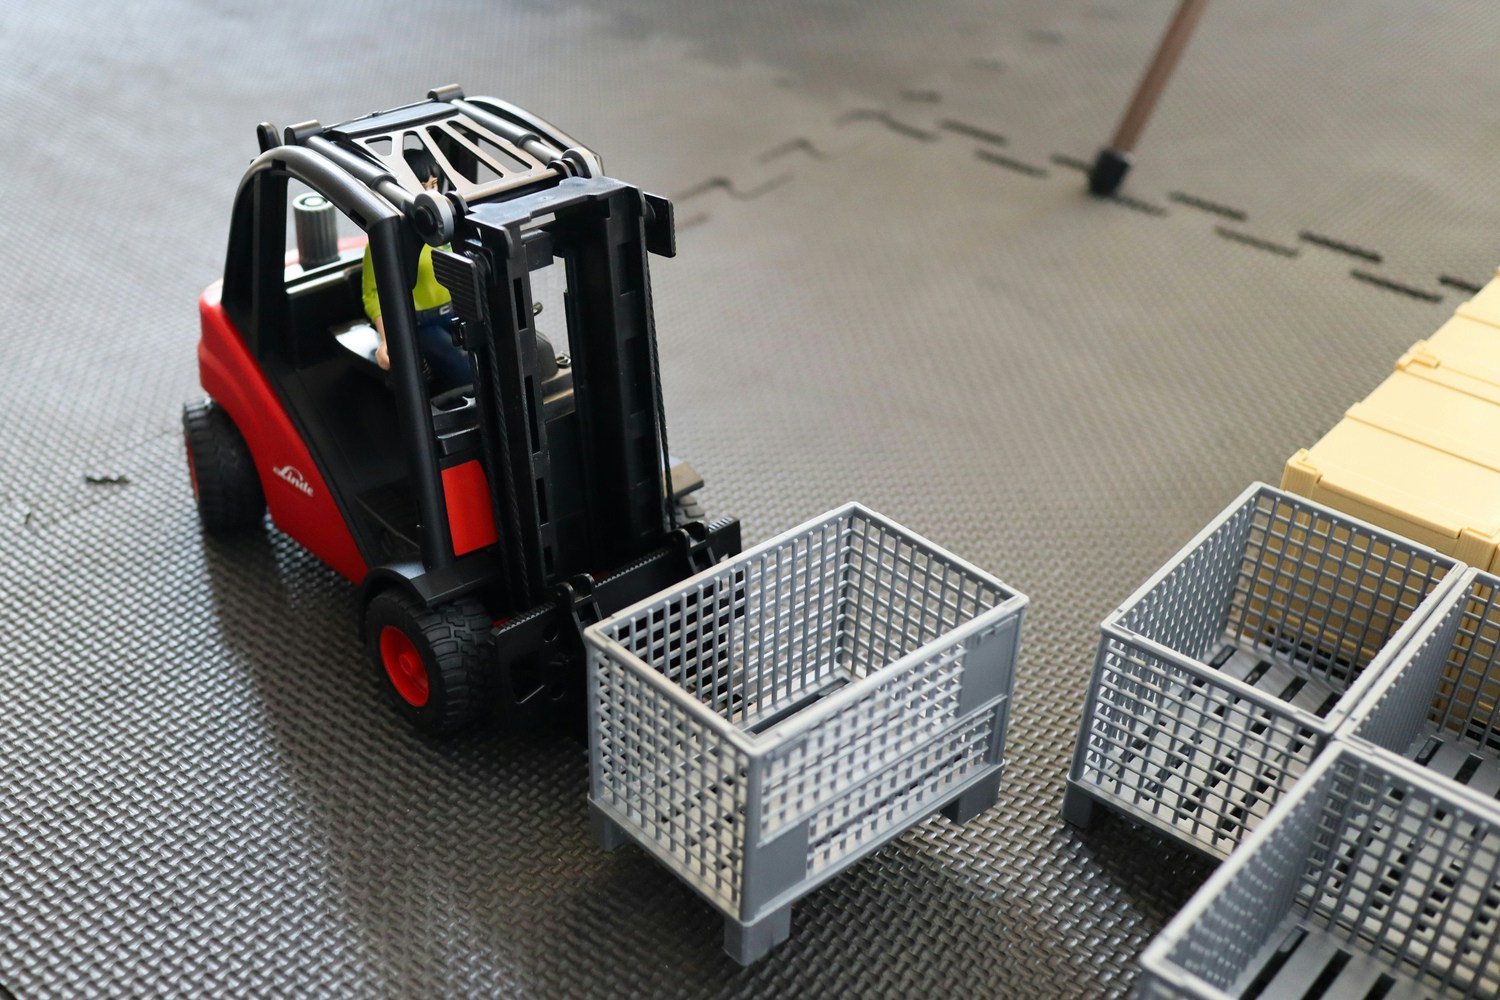
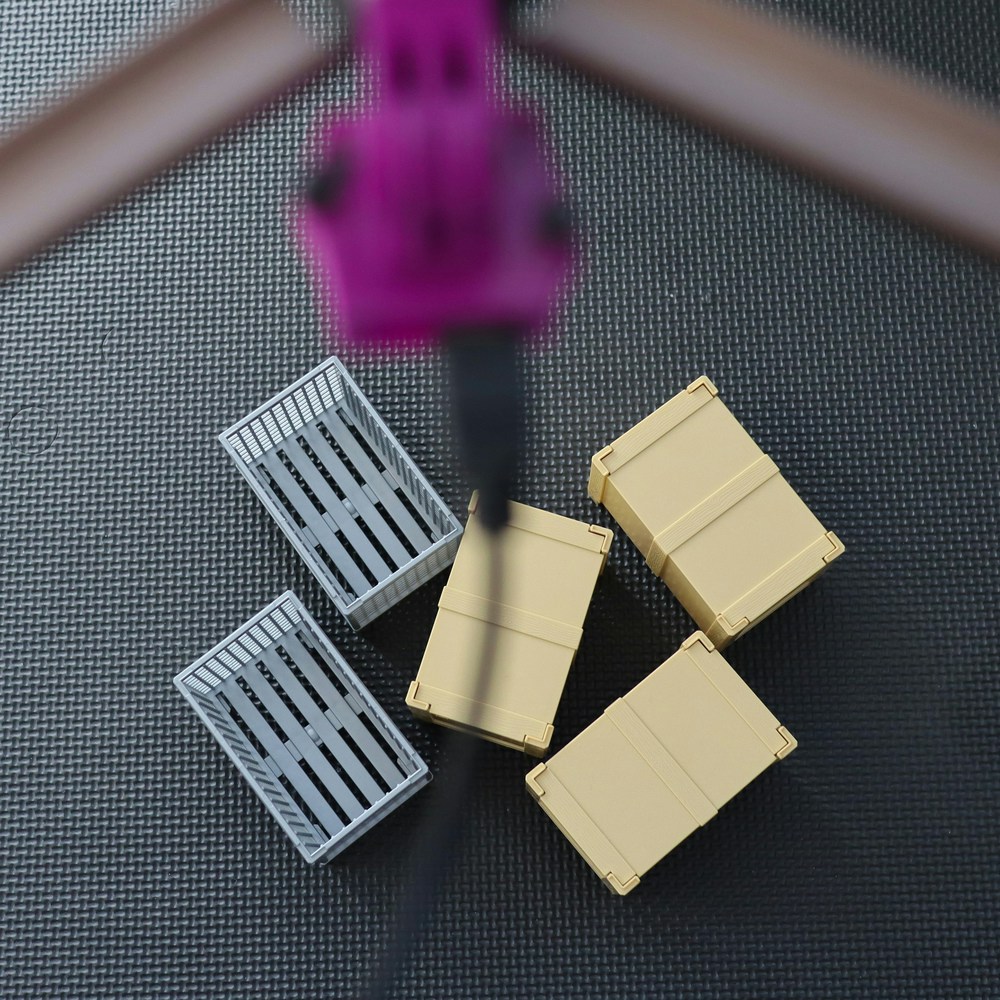
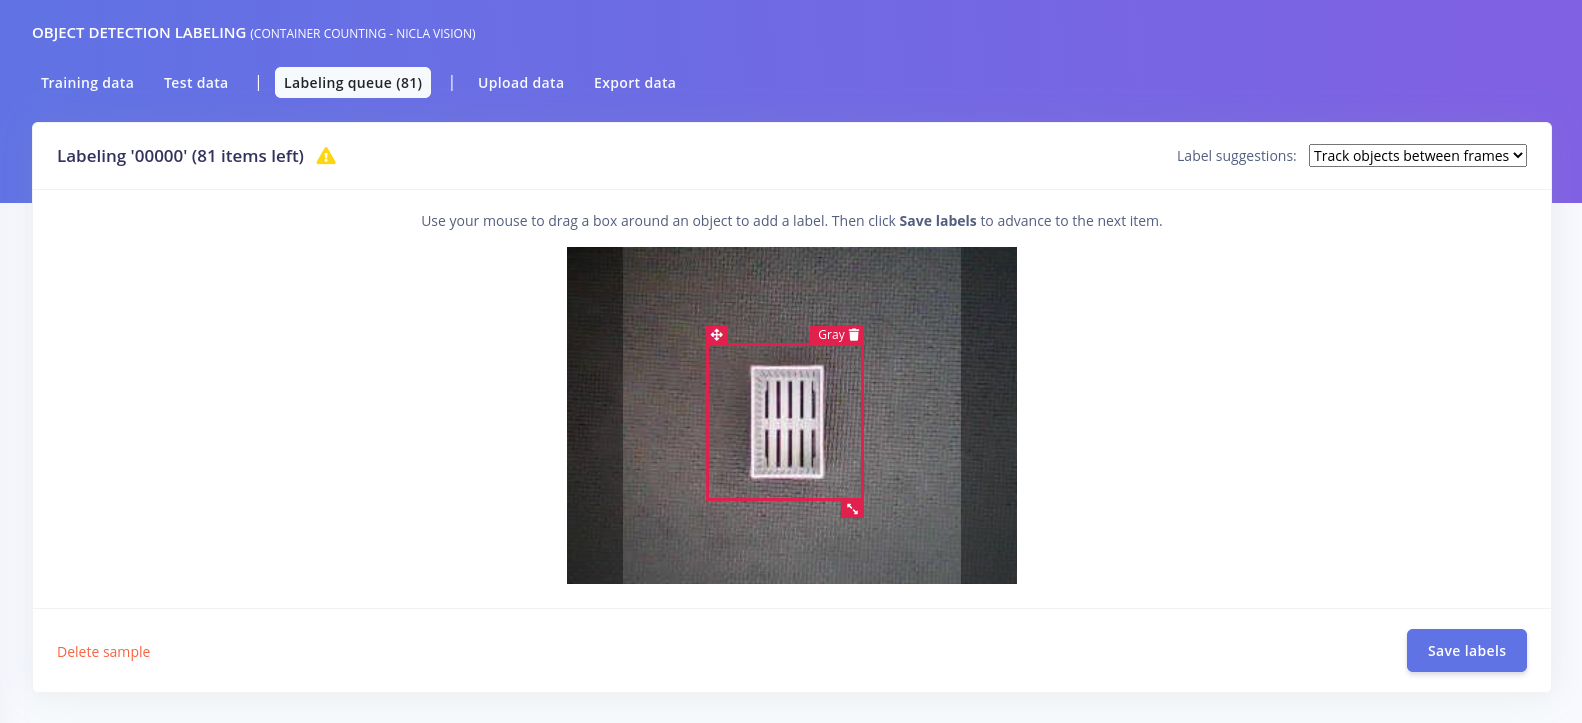
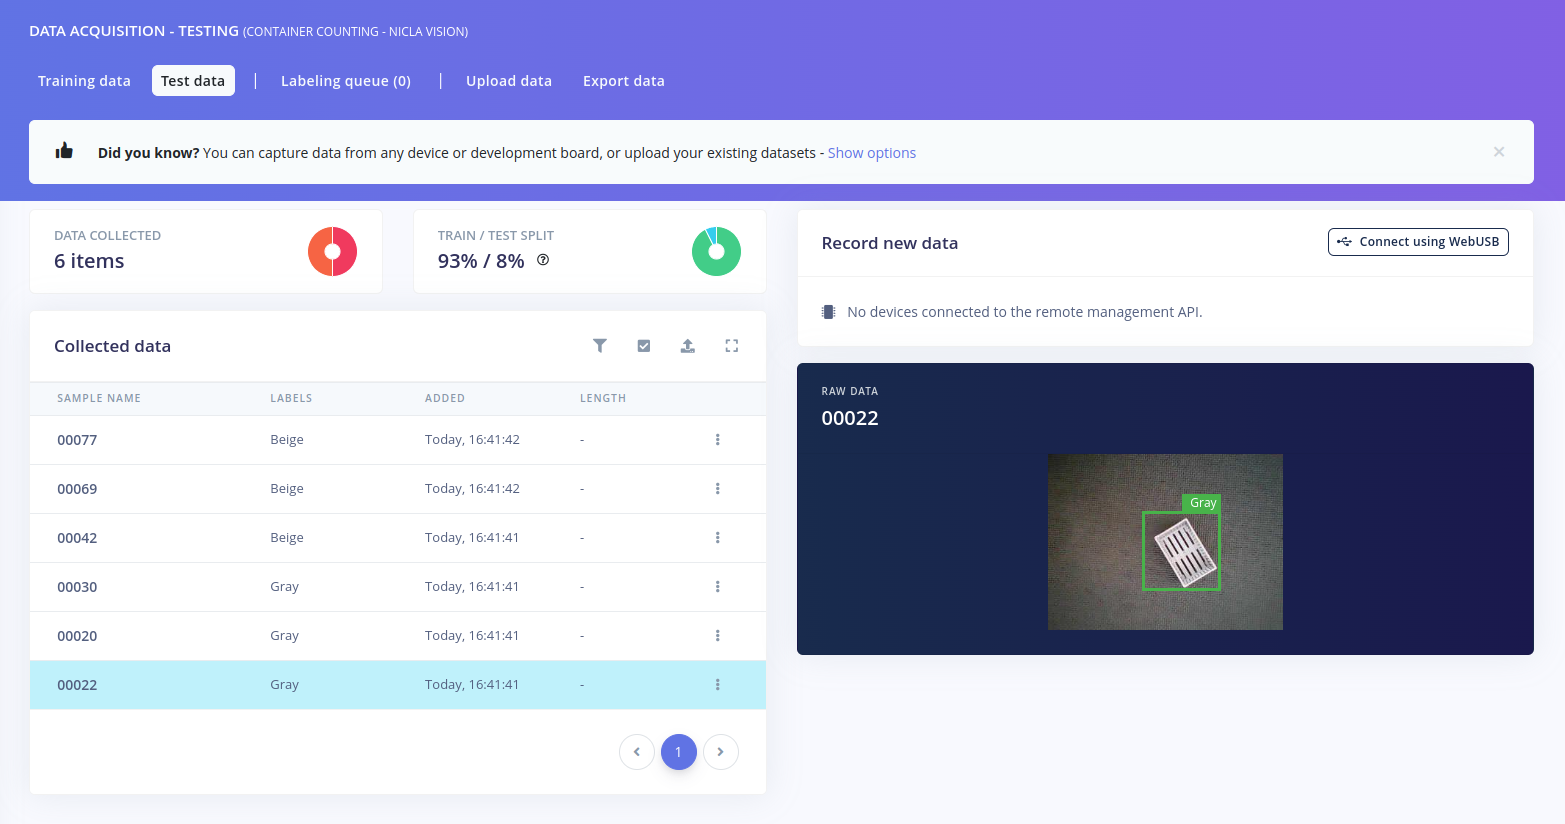
First, we must gather some images to train the model. We’ve used two types of containers, so we’ll define two corresponding classes (Gray and Beige). If your containers come in all sorts of sizes and colors you could go for adding a marker on them and training the model to recognize the marker rather than the entire container. Connect the Nicla Vision board to your laptop, go to OpenMV and click on the Connect button in the bottom left corner. If you cannot connect the board from the first try, double click the button on the Nicla Vision to put the board into bootloader mode (the green LED should be blinking). Then go to Tools -> Dataset Editor -> New Dataset and choose a folder where you want to save the images. Click on New Class Folder and give it a name, do this for each class. Select the class by clicking on it and then click on the image button under New Class Folder to capture an image. Rotate the container each time you take a picture to make sure you capture all the possible angles. You can take around 40 pictures for each class.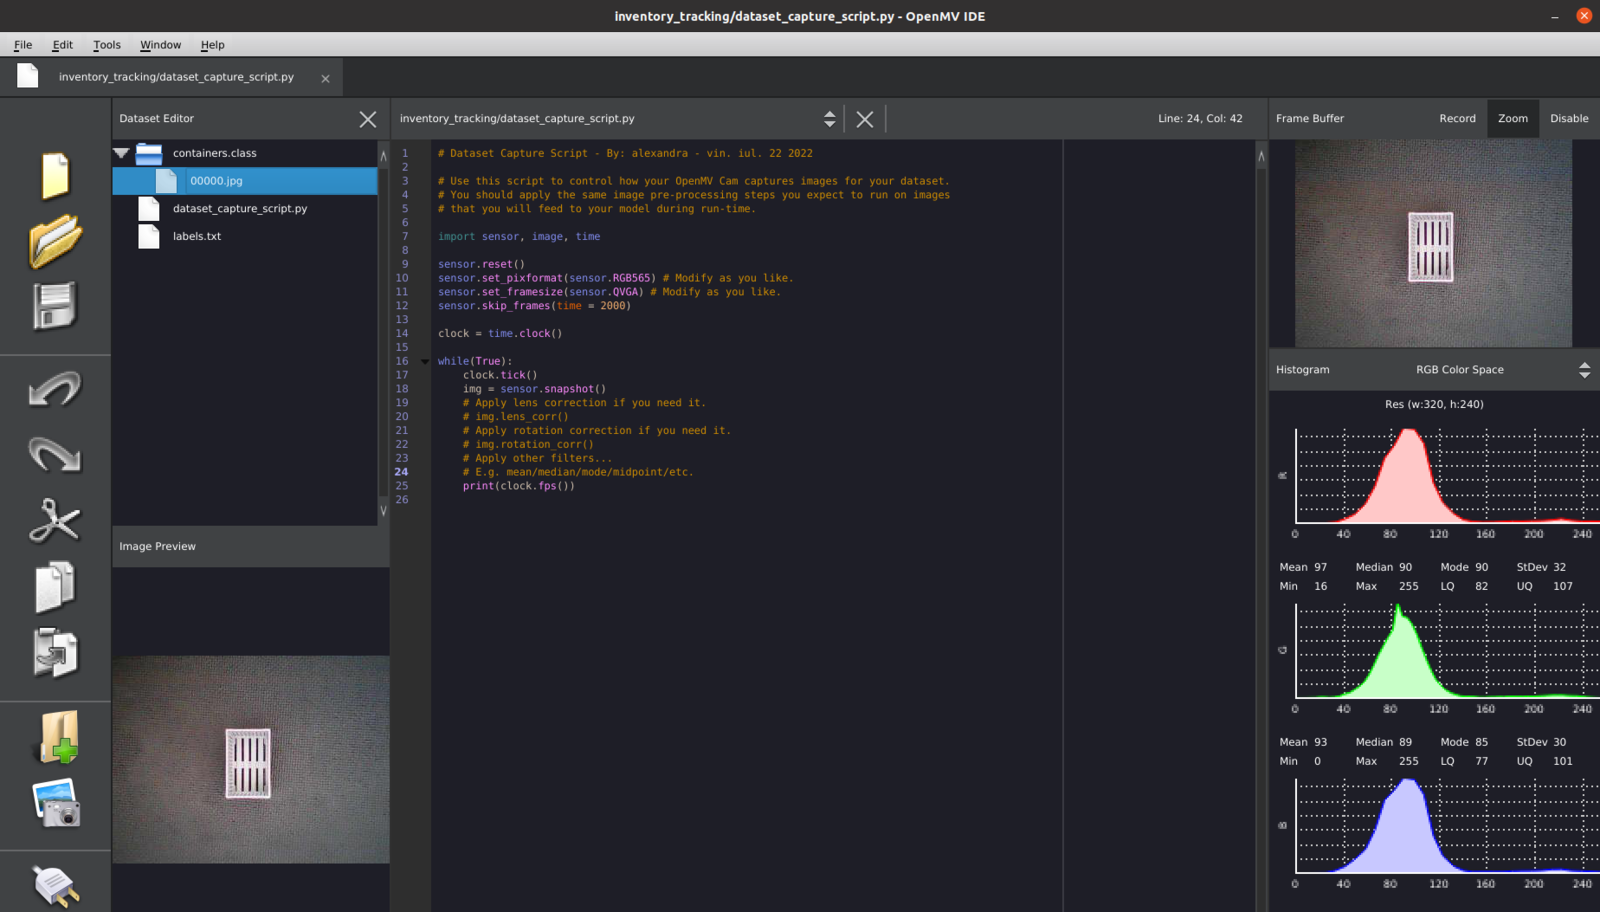

Creating the Impulse
Now we can create the Impulse. Go to Impulse Design and set the image size to 96x96px, add an Image processing block, and an Object Detection block. We chose to use 96x96px images because the Nicla Vision board only has 1MB RAM and 2MB Flash memory available. We use Object Detection as the project type because we want to detect multiple objects in an image. The output features will be our categories, meaning the labels we’ve previously defined (high, low, and normal).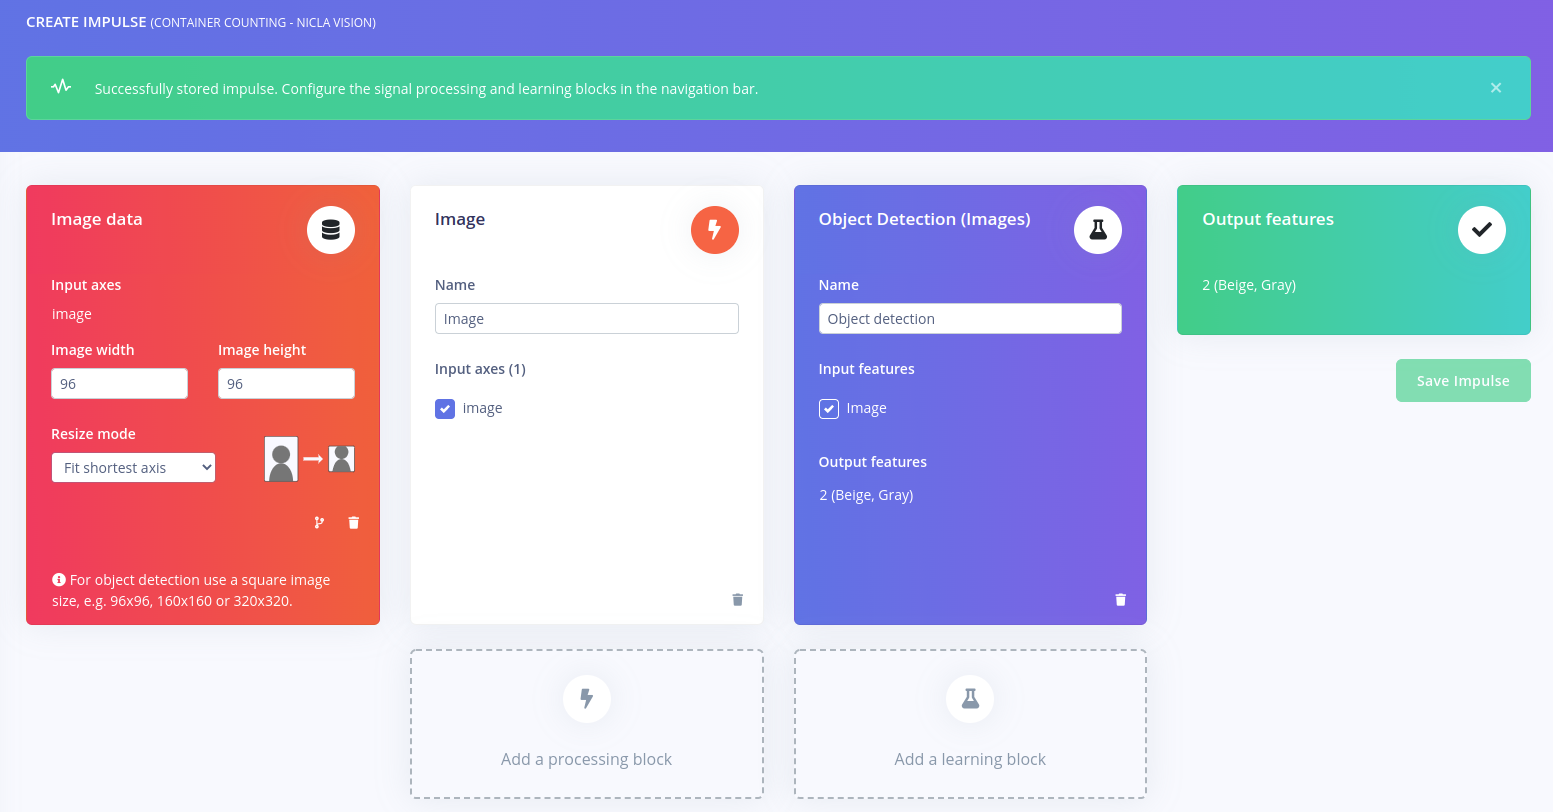
Generating Features
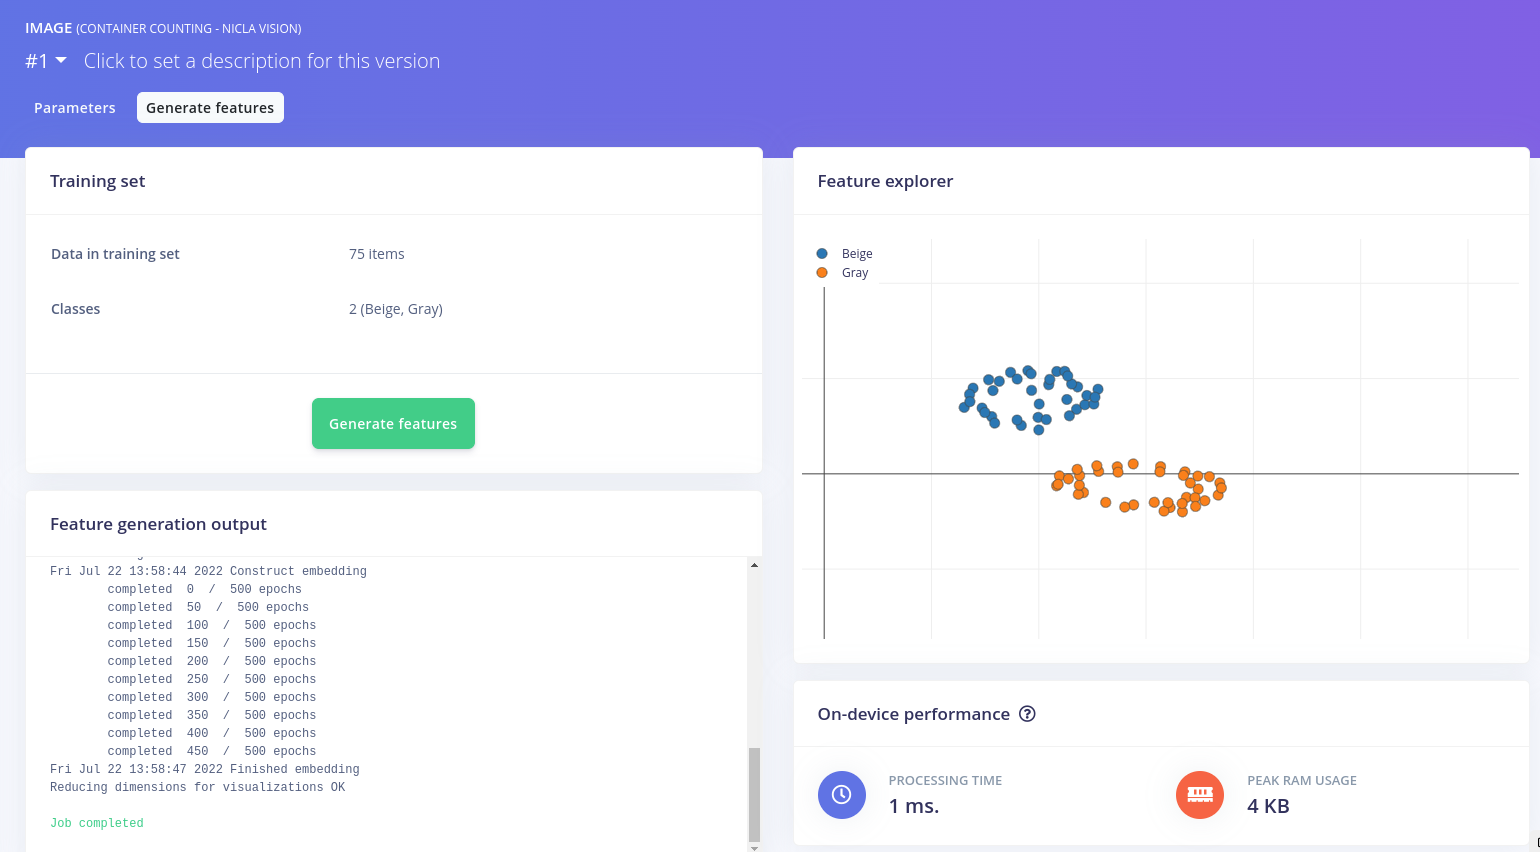
Now go to the Image menu in the Impulse Design menu. Select Grayscale as the Color depth (the FOMO algorithm only works with this option, not RGB) and click on Save Parameters and Generate Features. This will resize all the images to 96x96px and change the color depth of the images. You’ll also be able to visualize the generated features in the Feature Explorer, clustered based on similarity. A good rule of thumb is that clusters that are well separated in the feature explorer will be easier to learn for the machine learning model.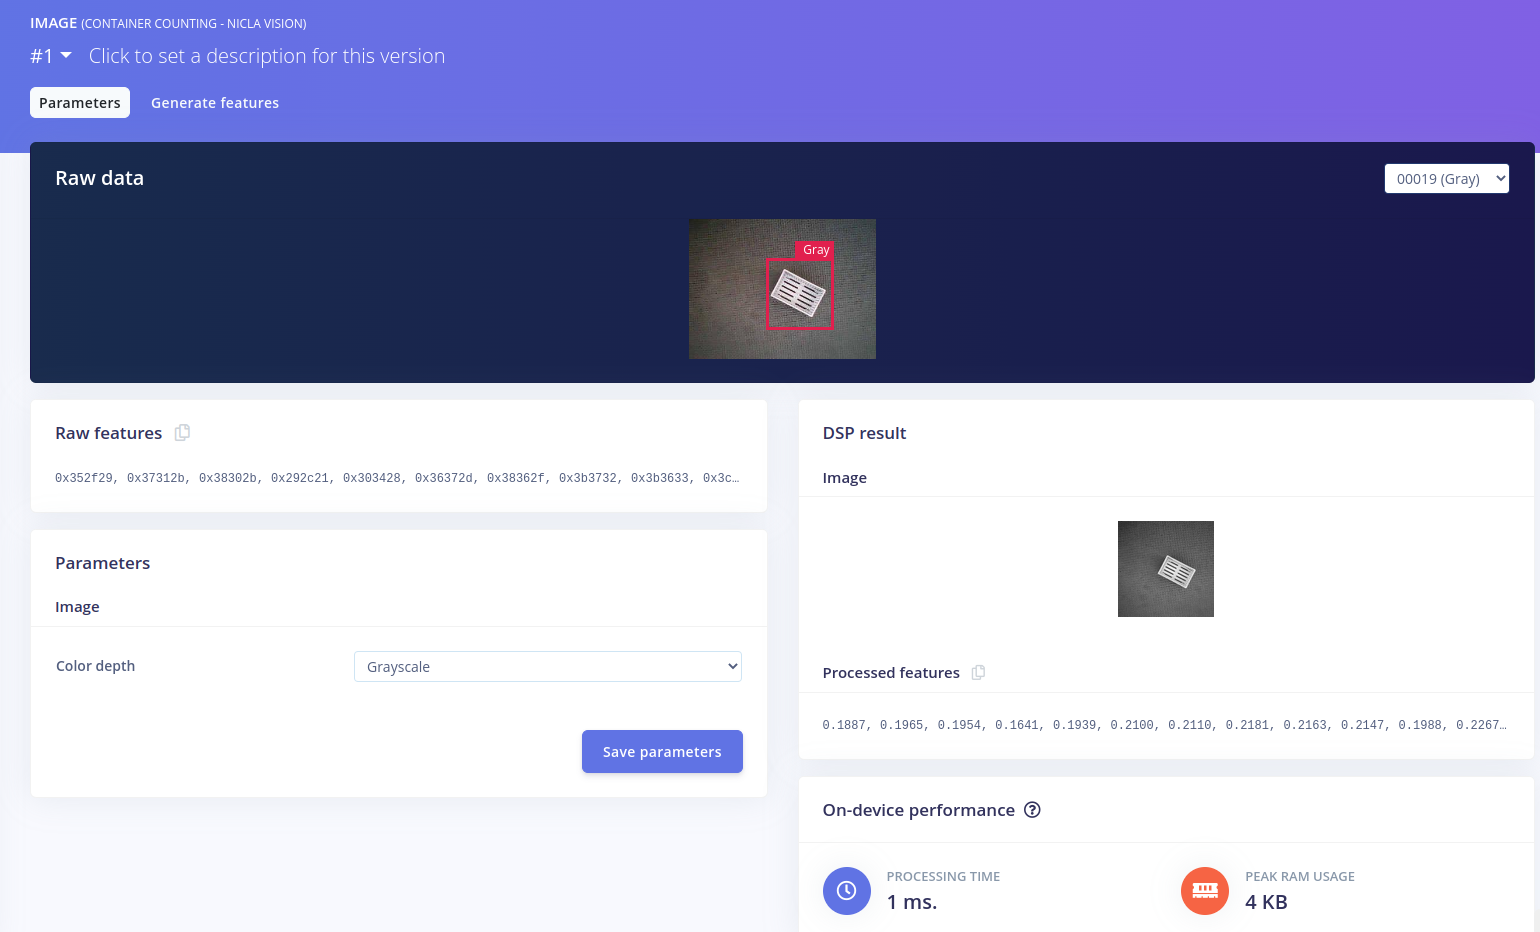
Training the Model
Now that we have the features we can start training the neural network in the Object Detection menu. When choosing the model we have to consider the memory constraints of the Nicla Vision board (1MB RAM and 2MB Flash memory). The FOMO (Faster Objects, More Objects) model is perfect for this use case as it uses 30x less processing power and memory than MobileNet SSD or YOLOv5 for real-time object tracking. Specifically, we’ve used the FOMO MobileNetV2 0.35 model. You can select the model and check out its memory requirements by clicking Choose a different model. Make sure the Learning rate is 0.001 and you can use the rest of the settings with their default values. After training the model you can come back and tweak them to obtain better accuracy. There is no certain answer to what are the best settings for the model, as it depends from case to case, but you can experiment with different values, making sure to avoid underfitting and overfitting. As an example, this is what worked for us: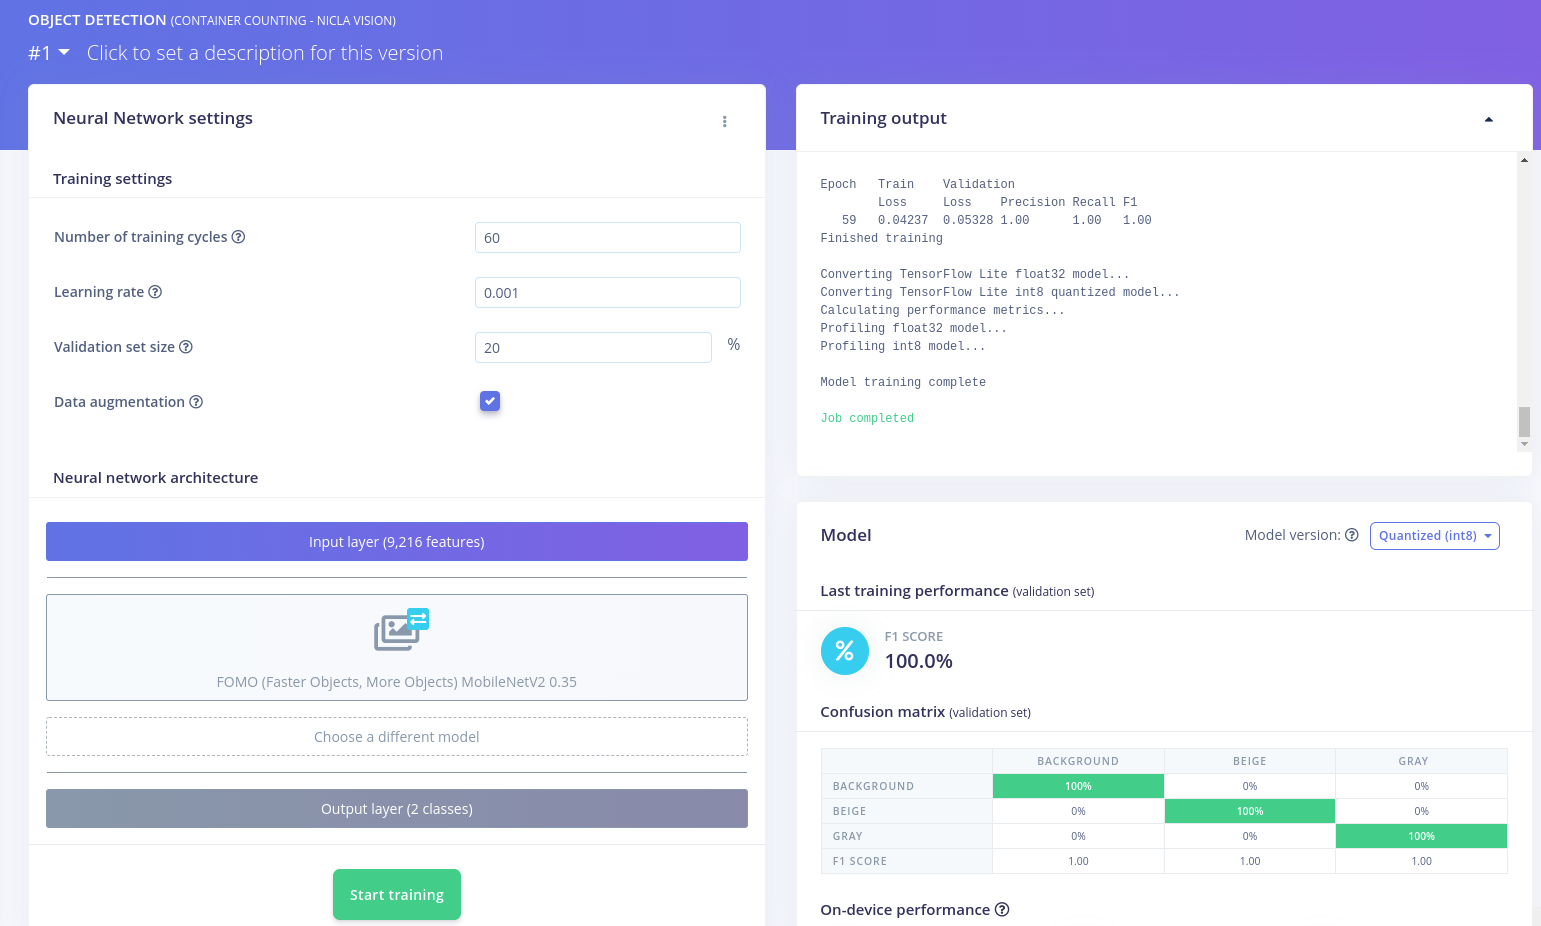
Testing the model
To test the model, go to Model testing and select Test all. The model will classify all of the test set samples and provide you with an overall accuracy score for the model.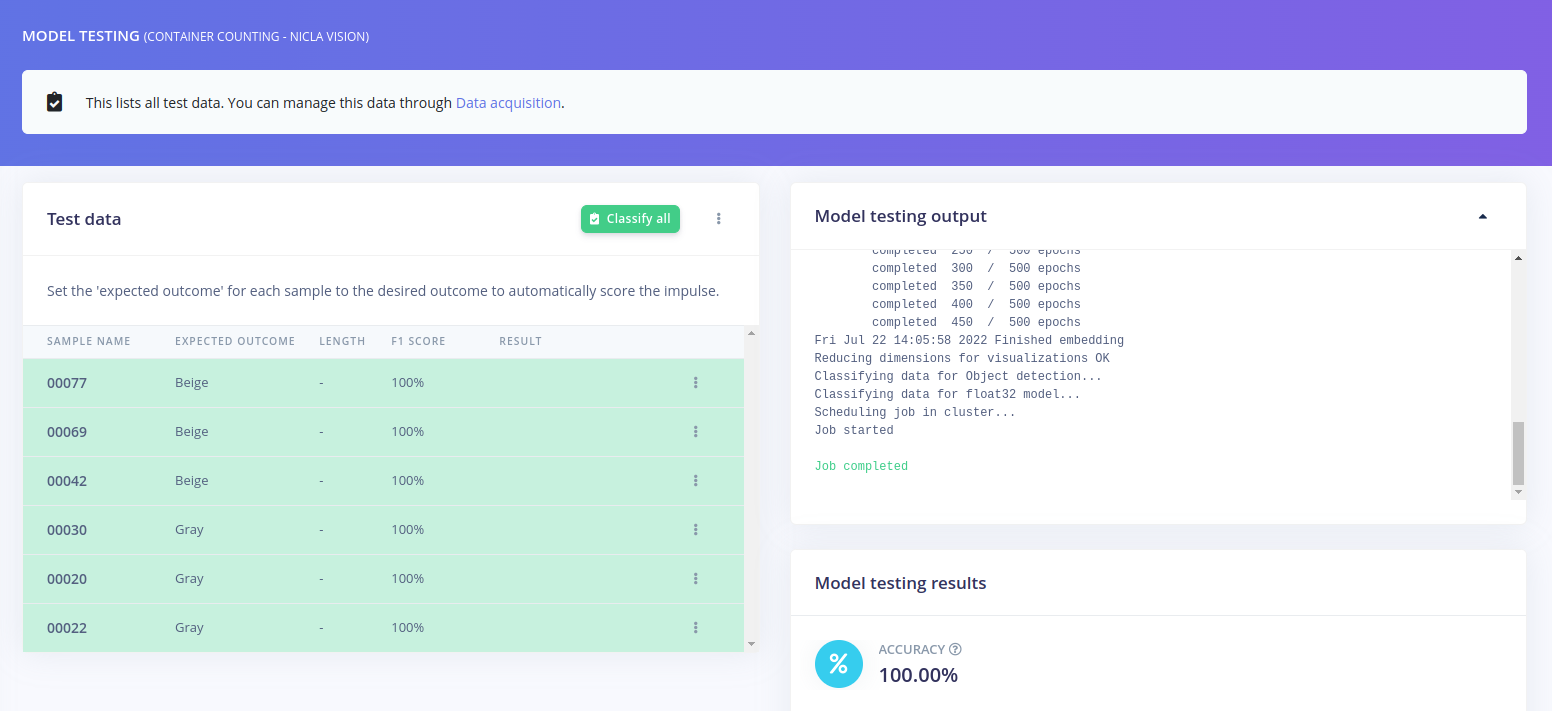
Deploying the Model on the Edge
We’ve created, trained, and validated our model, so now it’s time to deploy it to the Nicla Vision Board. Go to Deployment in the Edge Impulse menu, select OpenMV Firmware and click on the Build button at the bottom of the page. This will generate an OpenMV firmware and download it as a ZIP file. Unzip it and you’ll find inside several files including edge_impulse_firmware_arduino_nicla_vision.bin and ei_object_detection.py, which we are interested in.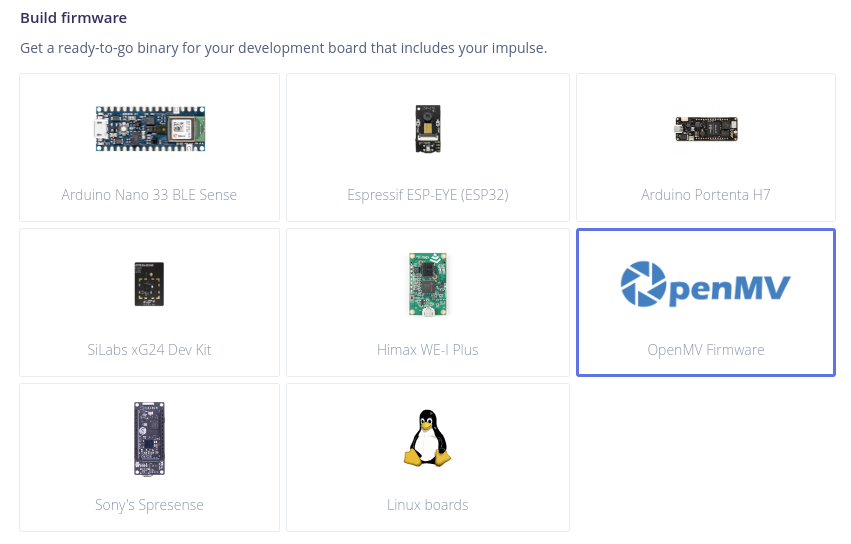
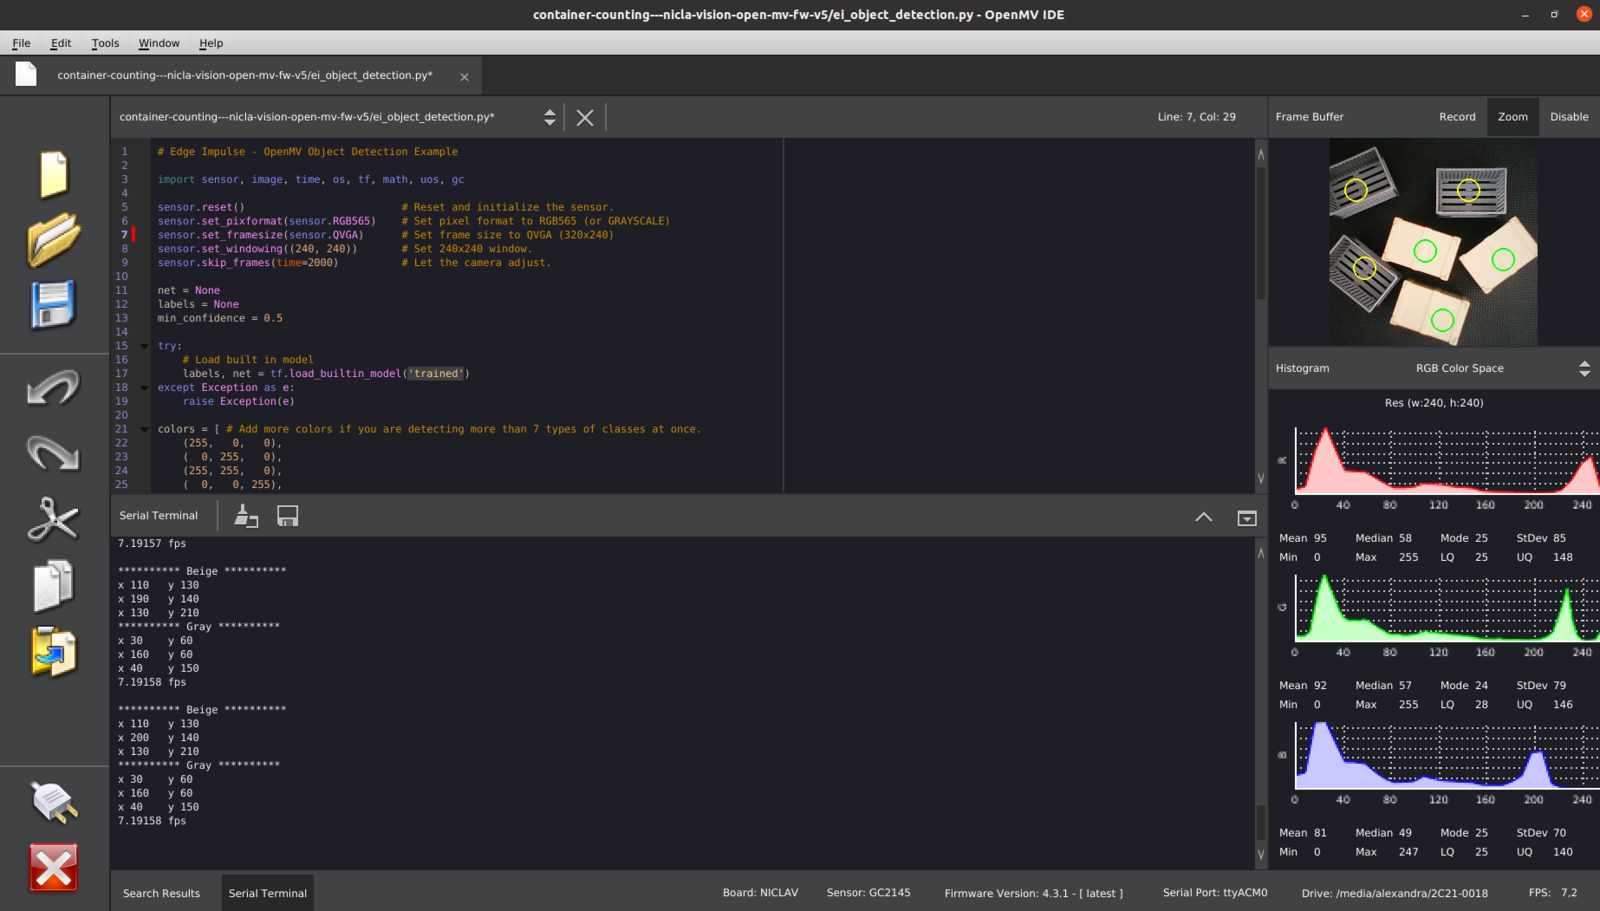
.bin file, and click Run. Now go to File -> Open File and select the Python file from the archive.
To save memory, you can adjust the frame size and the window size:
Sending Data to the Cloud Using Adafruit IO
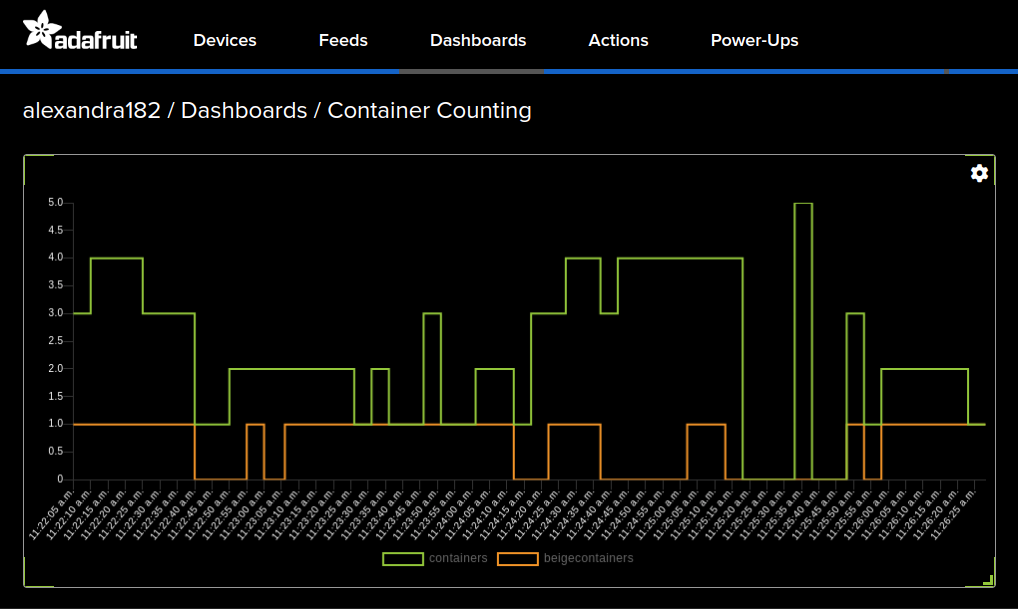
Adafruit IO is a cloud-based platform that allows you to easily interact with embedded devices. For example, you can use Adafruit IO to collect data from sensors and control actuators in real-time. You can also use Adafruit IO to create interactive interfaces, such as dashboards and data visualizations. It is easy to get started with Adafruit IO, and there is a large community of users who can provide support. In addition, Adafruit IO is compatible with a wide range of hardware platforms, making it a versatile tool for IoT applications. For this use case, we’ve used Adafruit IO to visualize the number of detected containers in real-time, through a Dashboard. To do this, first go to io.adafruit.com and define a feed for each detected class.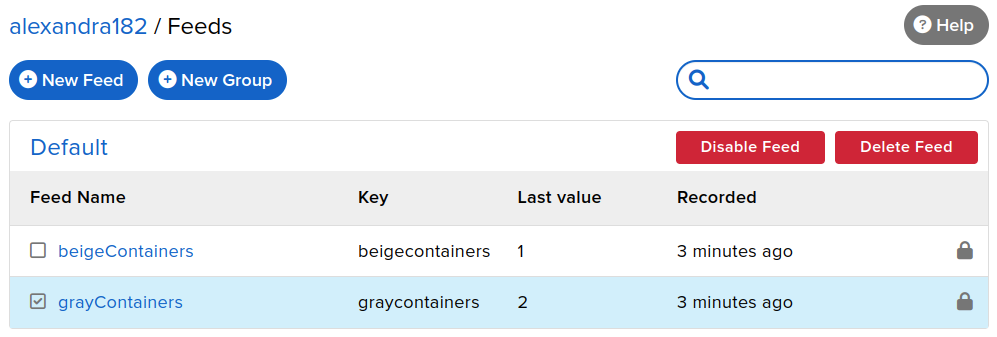
client.publish().
Conclusion
Arduino Nicla is an innovative computer vision system that is ideal for a variety of uses, and it can detect and track objects in real-time, even under challenging conditions. Furthermore, it is highly customizable, making it possible to tailor it to suit any specific application. Whether you need to monitor traffic flows or count containers in real-time like in our example, Arduino Nicla is a perfect choice. Combining it with the new FOMO feature from Edge Impulse you can run a slim but powerful Computer Vision system at the edge.