
Description
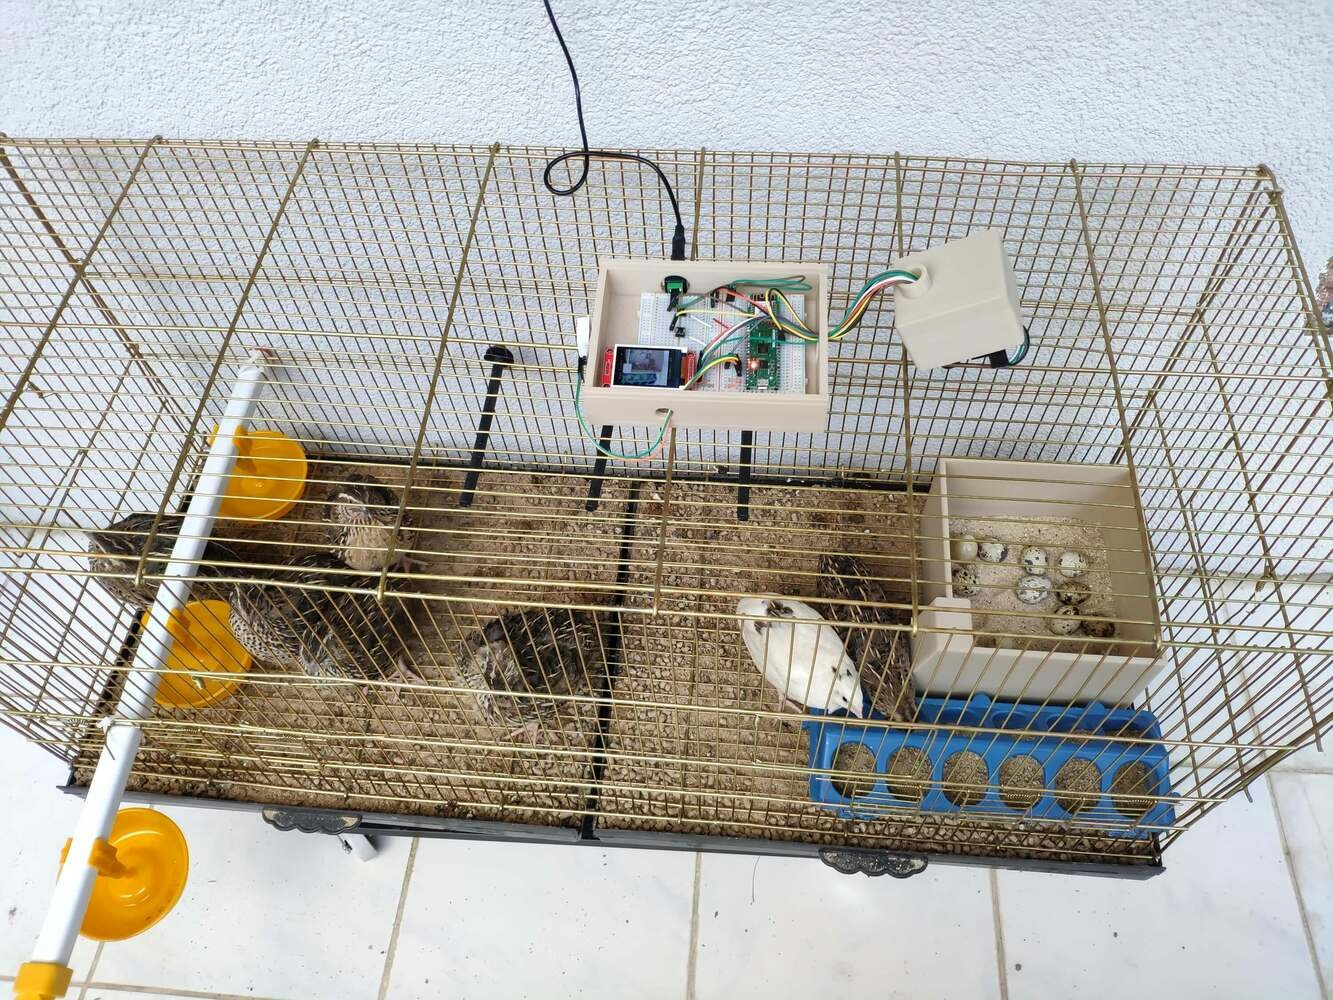
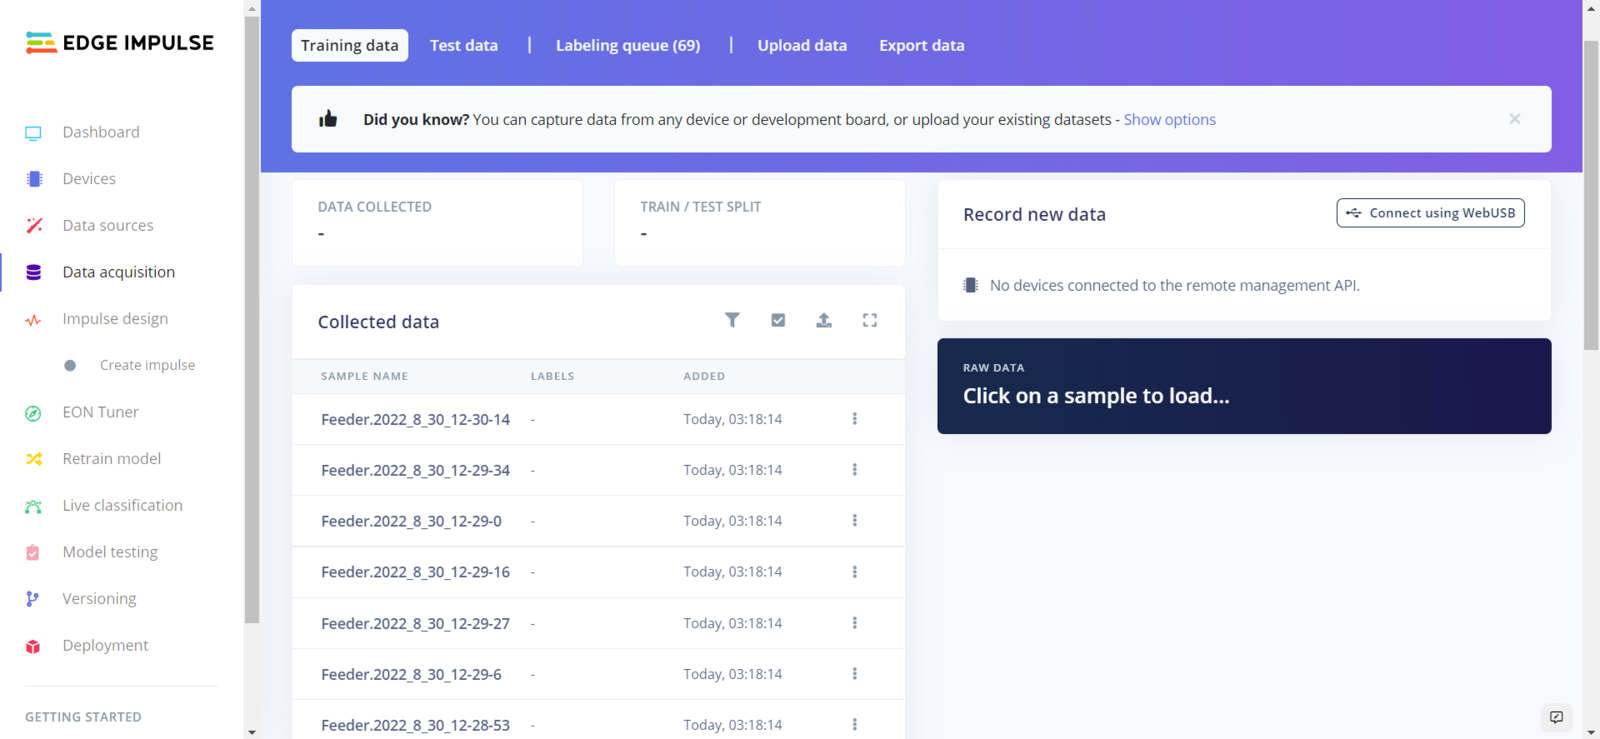
In poultry reproductive flocks, it is essential to achieve a large number of eggs with solid structure, optimal morphological composition, and interior quality. Also, these traits have a significant impact on the egg’s biological value determining the development stages of the embryo. However, the egg quality is determined based on many traits important for global egg production: and depends on many factors, including the diet, age of hens, and the feeding schedule. According to the latest experiments, the best performance by breeder hens is obtained by controlling their body weight by restricting their feed intake. A rationed feed is generally provided in a strict feeding schedule each morning and is expected to be consumed in about 4 hours. Since poultry eating habits and calcium consumption are related to their diurnal rhythm and time of ovulation to a lesser extent, it is crucial to follow a regular feeding schedule to maintain the high poultry health status and maximize egg quality[^1]. Even though there are various nutrition and management factors affecting egg production and quality, the feeding schedule proportional to cage density affects egg production considerably since hens can stop laying eggs intrinsically when they notice a sporadic feeding schedule or paltry feed. Hence, applying a regular and nutritional feeding regimen helps hens lay eggs abundantly. Furthermore, as the hen’s age increases, the weight of the produced egg usually increases, and the weekly produced egg number decreases. Although each hen has an inveterate laying time, the weekly produced egg number denotes the overall health condition of the hens in the coop. Therefore, tracking unhatched eggs and logging the daily produced egg number assist farmers in determining a potential contagious poultry disease or malnutrition. However, these processes can be compelling and arduous for small businesses in the poultry industry or people raising domesticated birds in their houses or backyards to produce eggs for profit. Since I am also raising quails as pets on my balcony, I am well aware of the struggles with tracking the poultry feeder status and the produced egg number daily. Hence, I decided to create this budget-friendly and accessible device to track the poultry feeder status and the produced egg number automatically with object detection. To recognize eggs in the coop (cage) and track the poultry feeder status accurately, I needed to collect data from the coop in order to train my object detection model with notable validity. Since OpenMV Cam H7 is a considerably small high-performance microcontroller board designed for machine vision applications in the real world, I decided to utilize OpenMV Cam H7 in this project. Also, I could easily capture images of my coop and store them on an SD card since OpenMV Cam H7 has a built-in MicroSD card module. Then, I employed a color TFT screen (ST7735) to display a real-time video stream and the prediction (detection) results. After completing my data set by taking pictures of the produced eggs and the poultry feeder in my quail coop, I built my object detection model with Edge Impulse to recognize (count) the produced eggs and track the poultry feeder status: OK or EMPTY. I utilized Edge Impulse FOMO (Faster Objects, More Objects) algorithm to train my model, which is a novel machine learning algorithm that brings object detection to highly constrained devices. Since Edge Impulse is nearly compatible with all microcontrollers and development boards, I had not encountered any issues while uploading and running my model on OpenMV Cam H7. As labels, I appended two main classes to the file names while capturing and storing pictures:- Egg
- Feeder
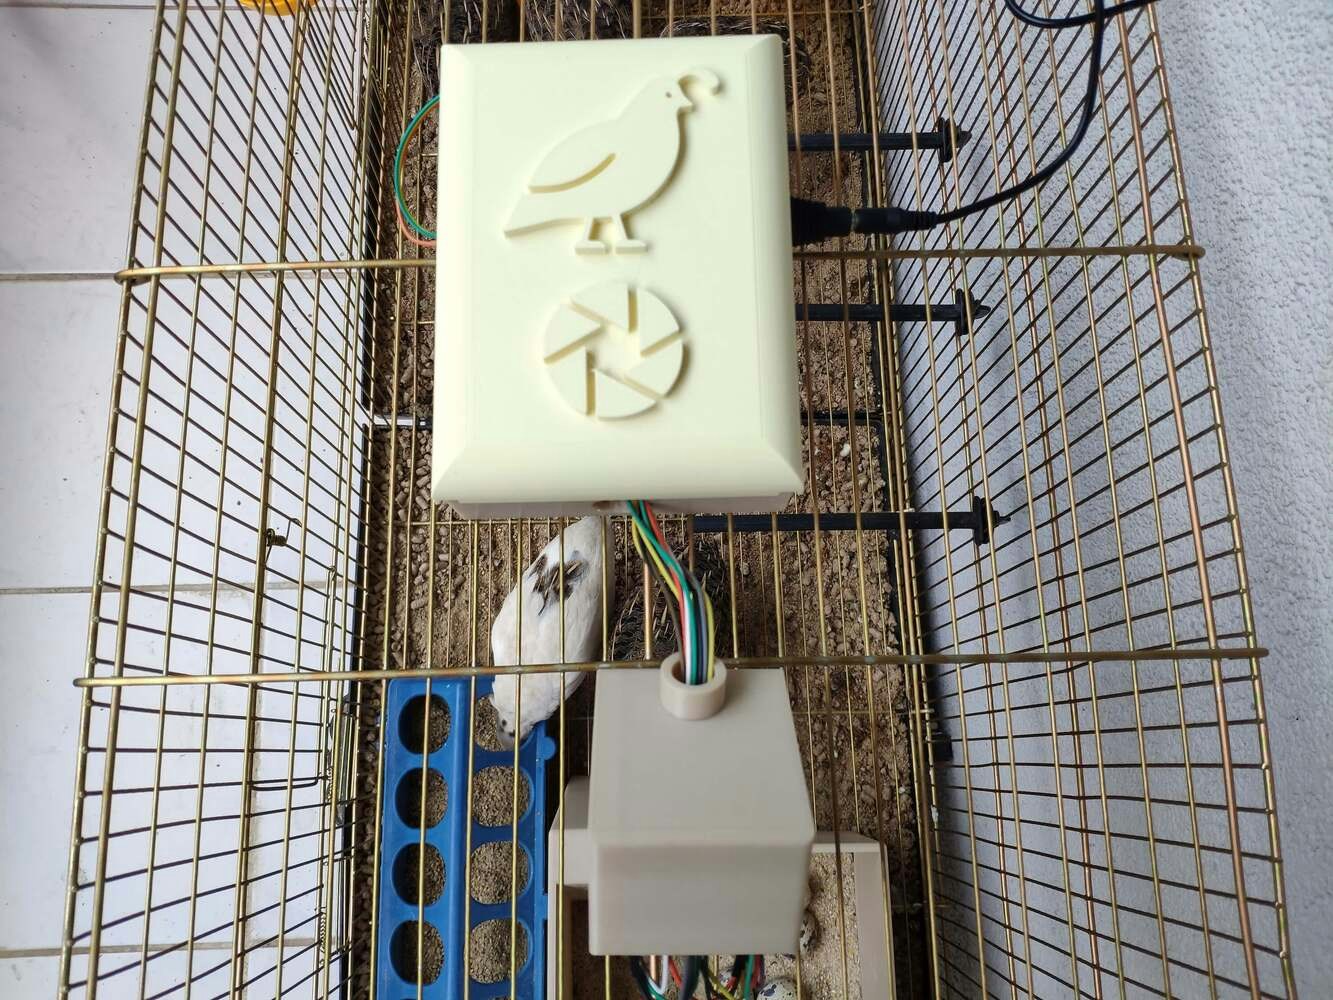


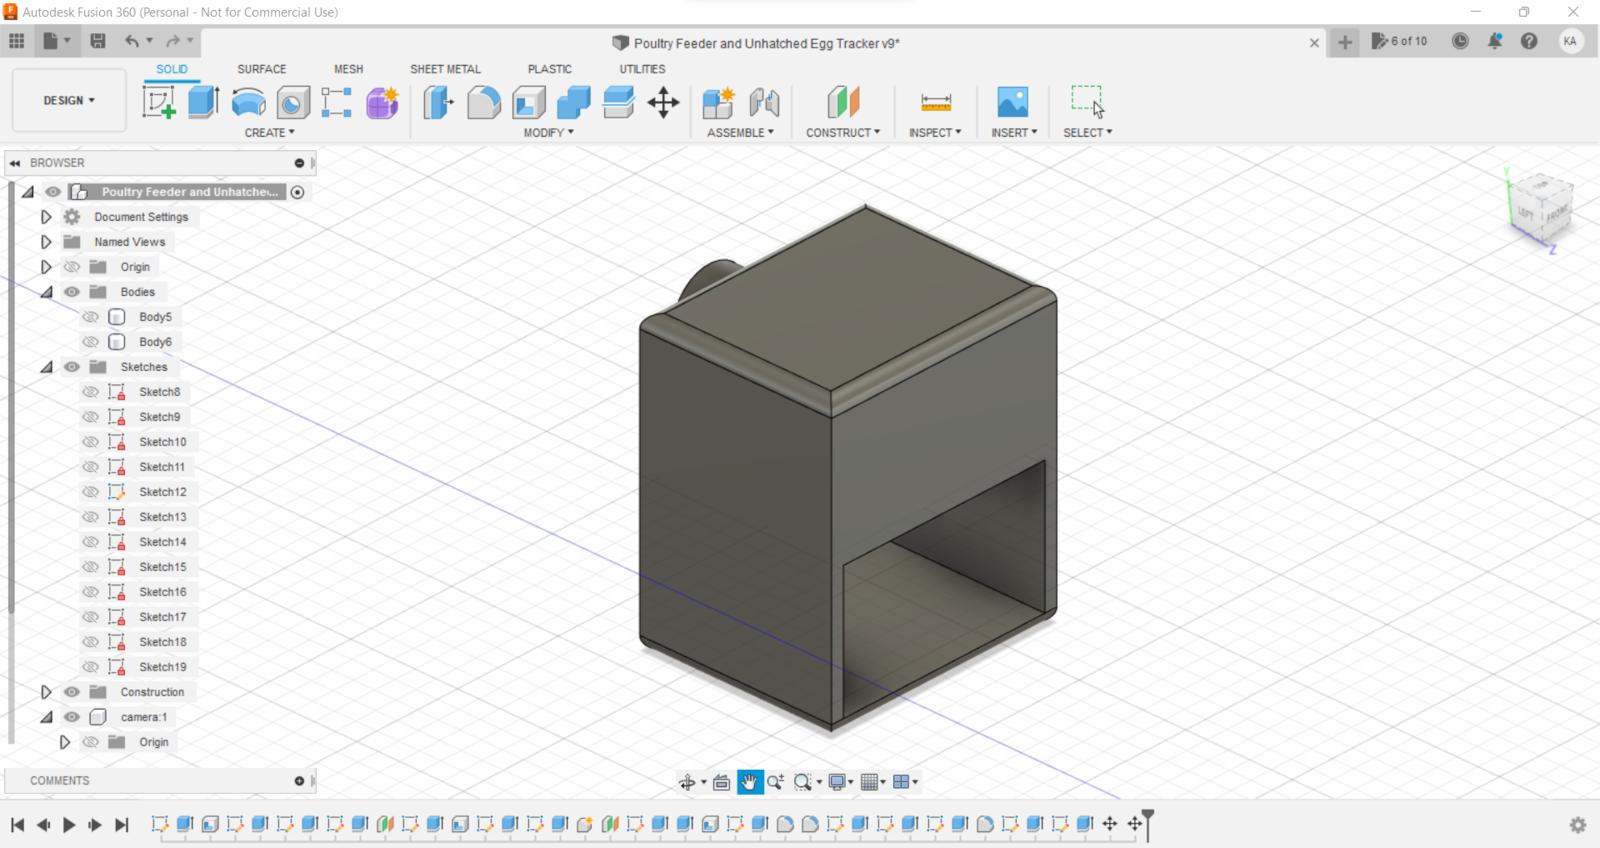
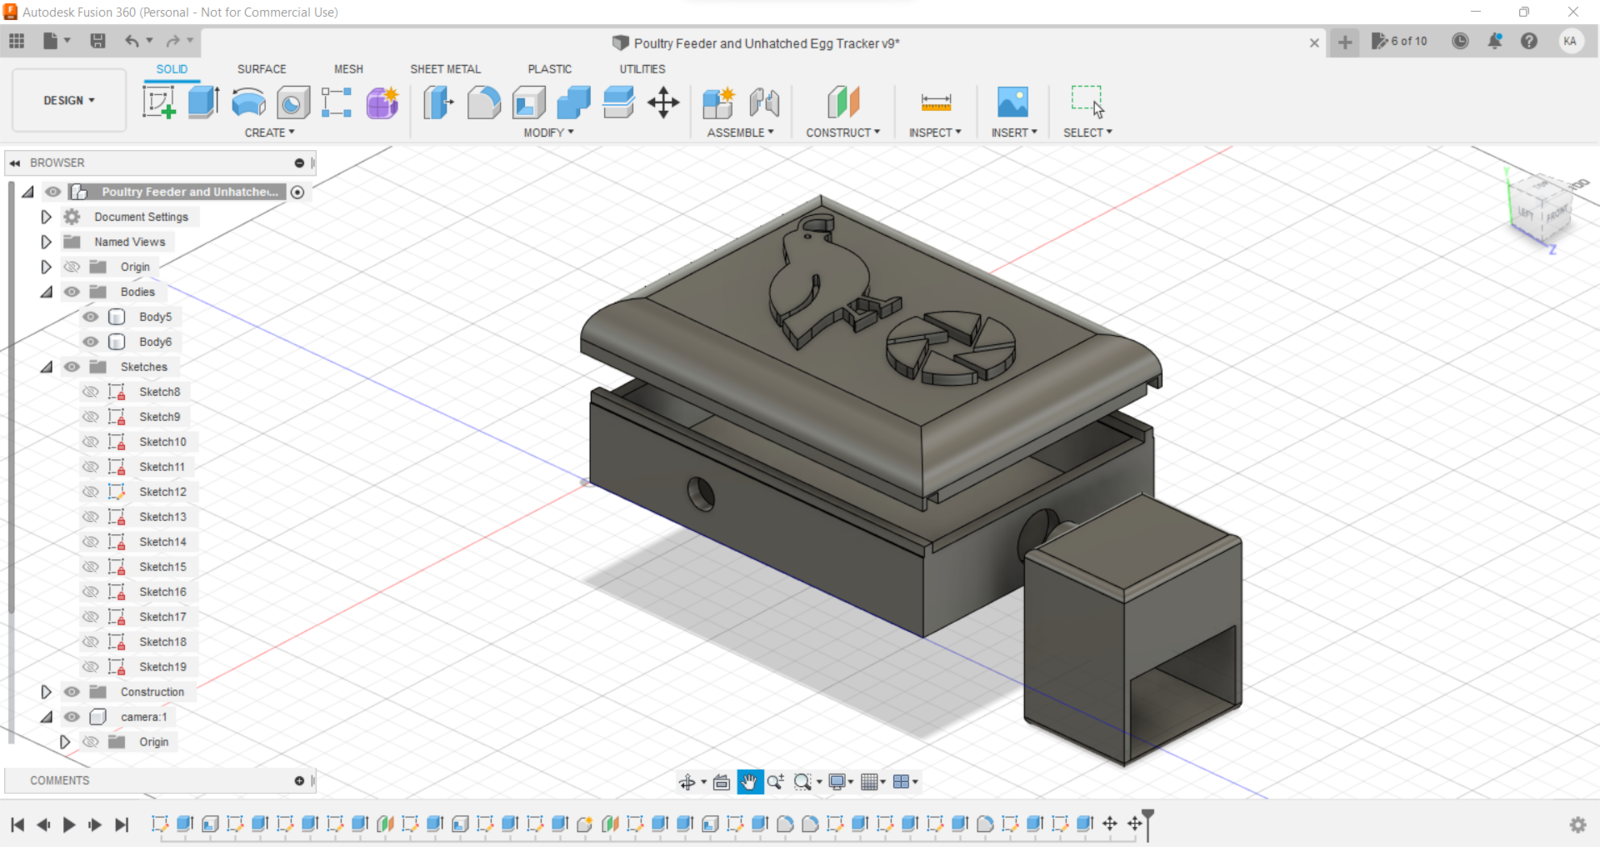
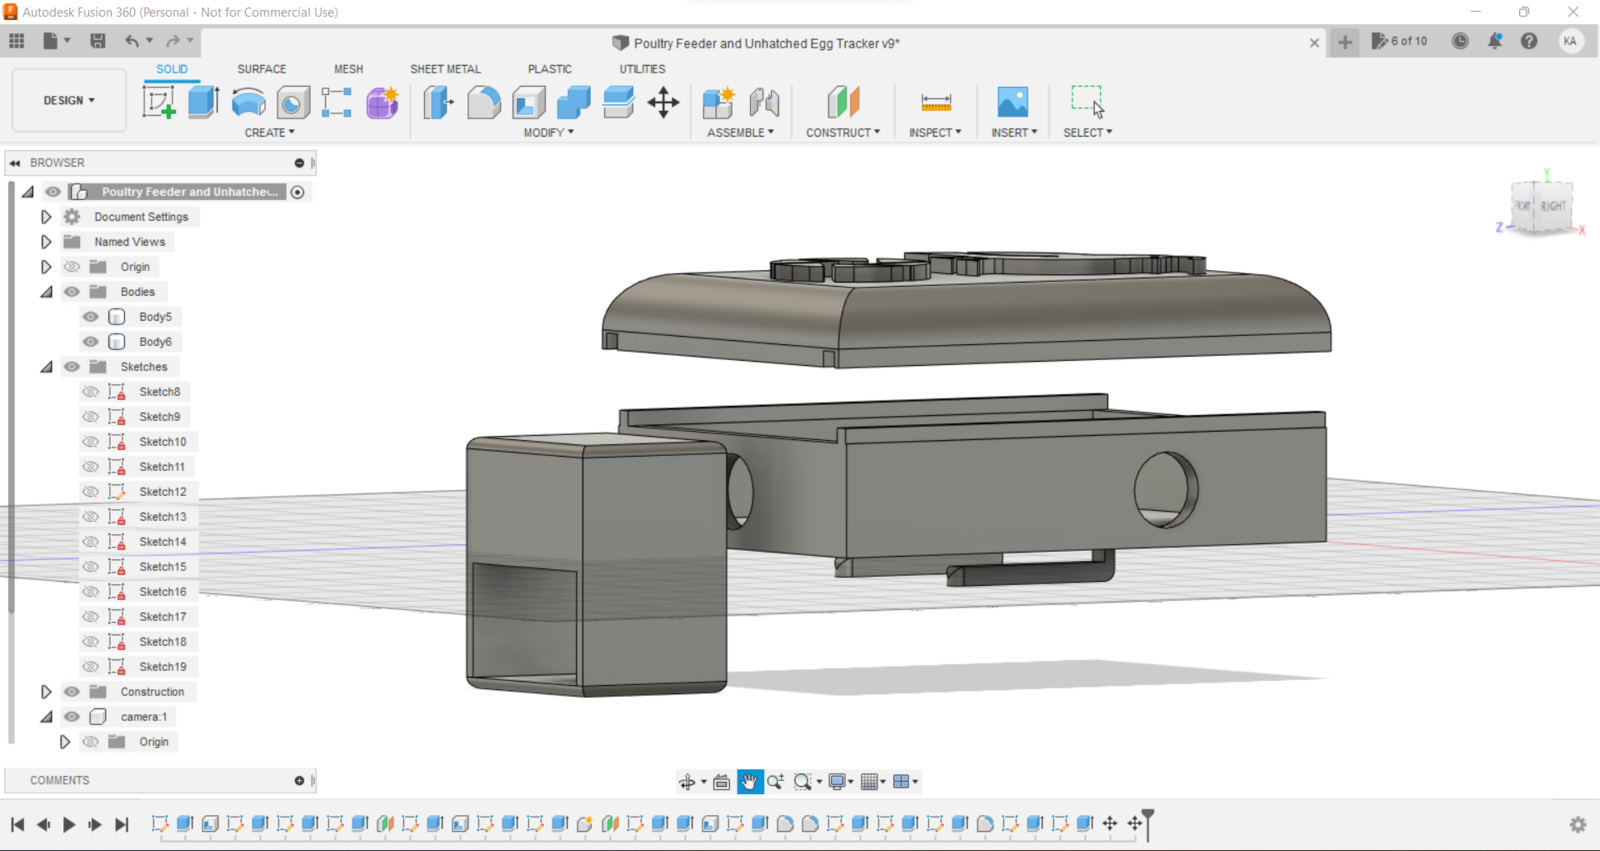
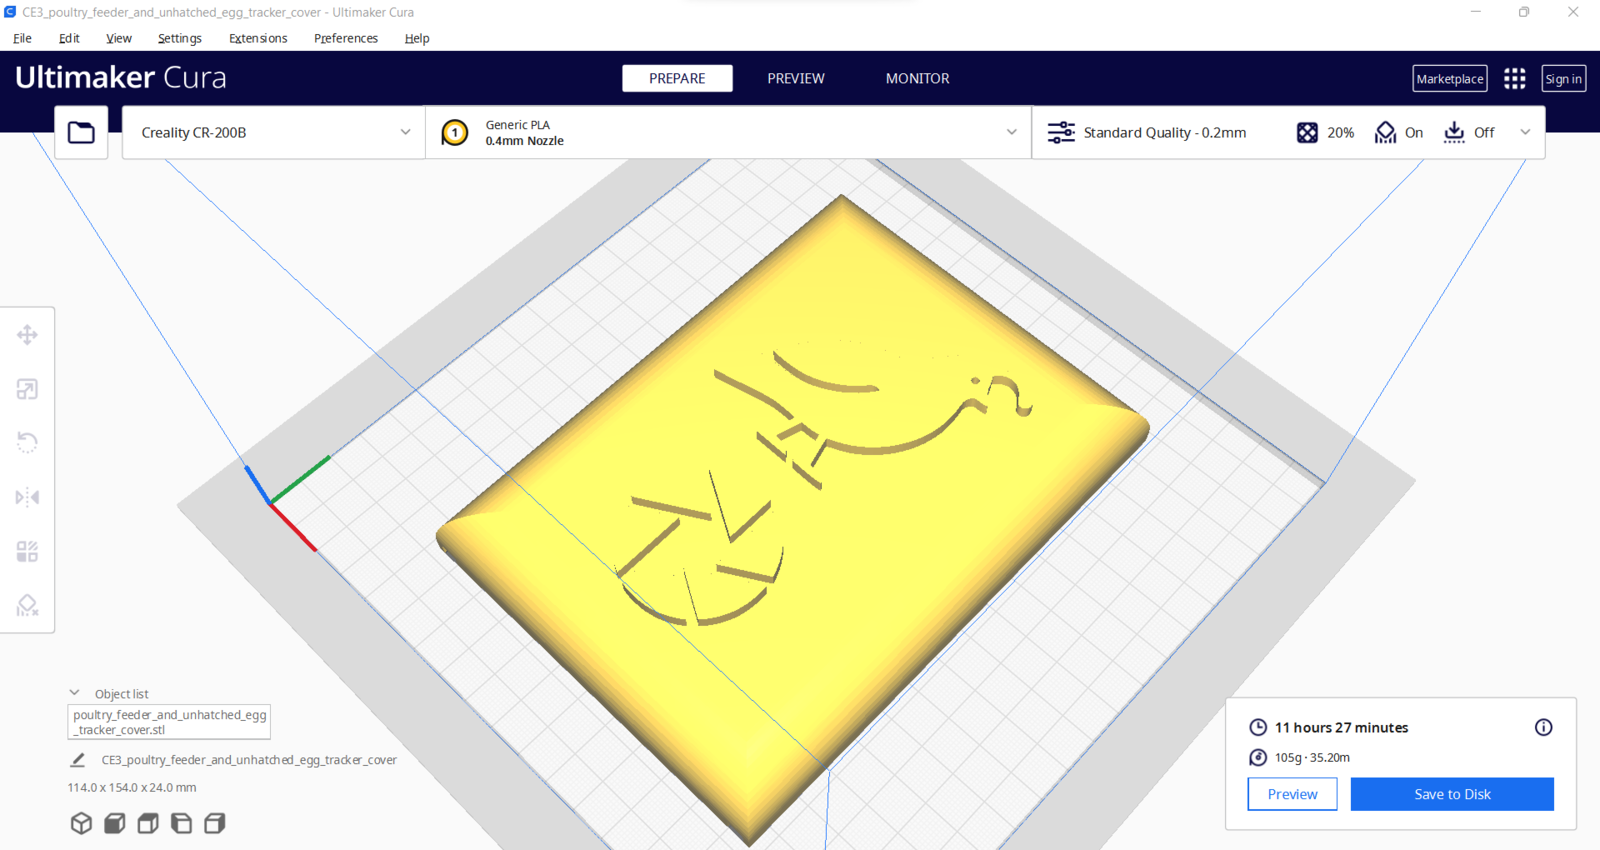
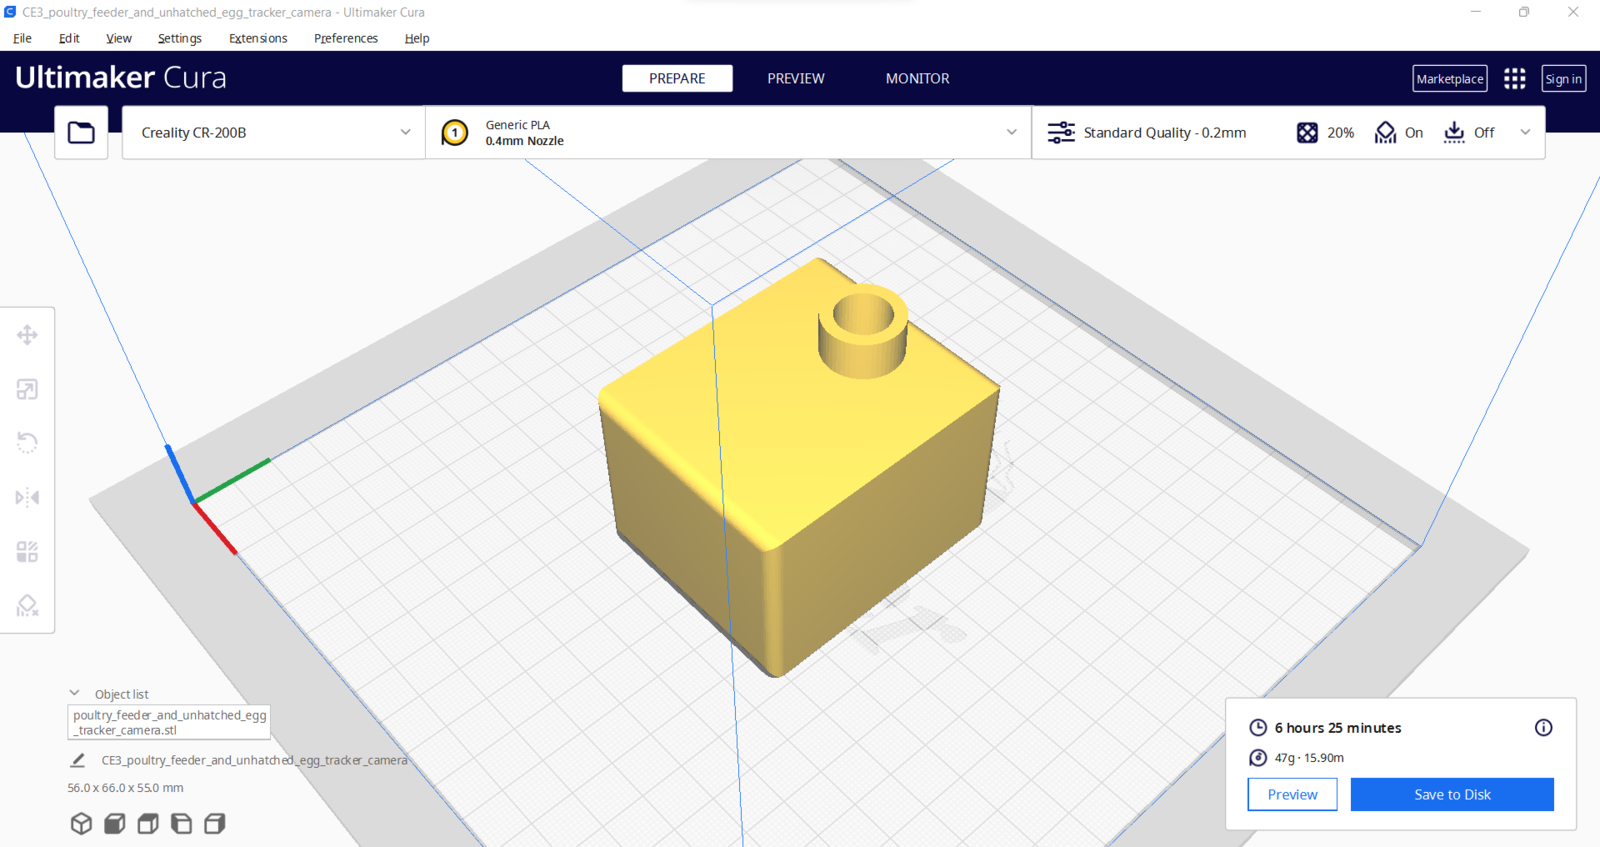
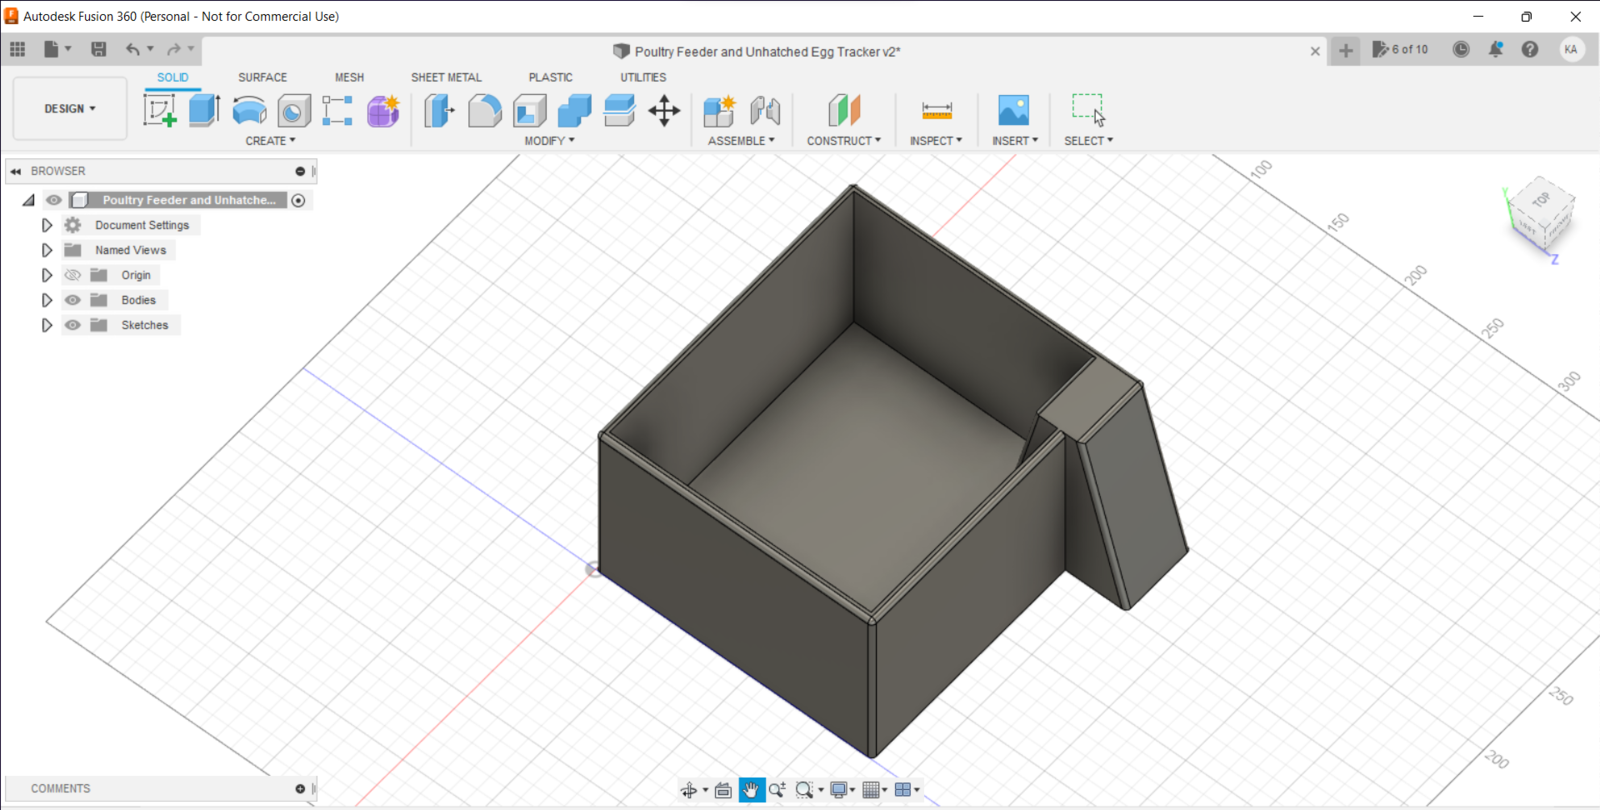
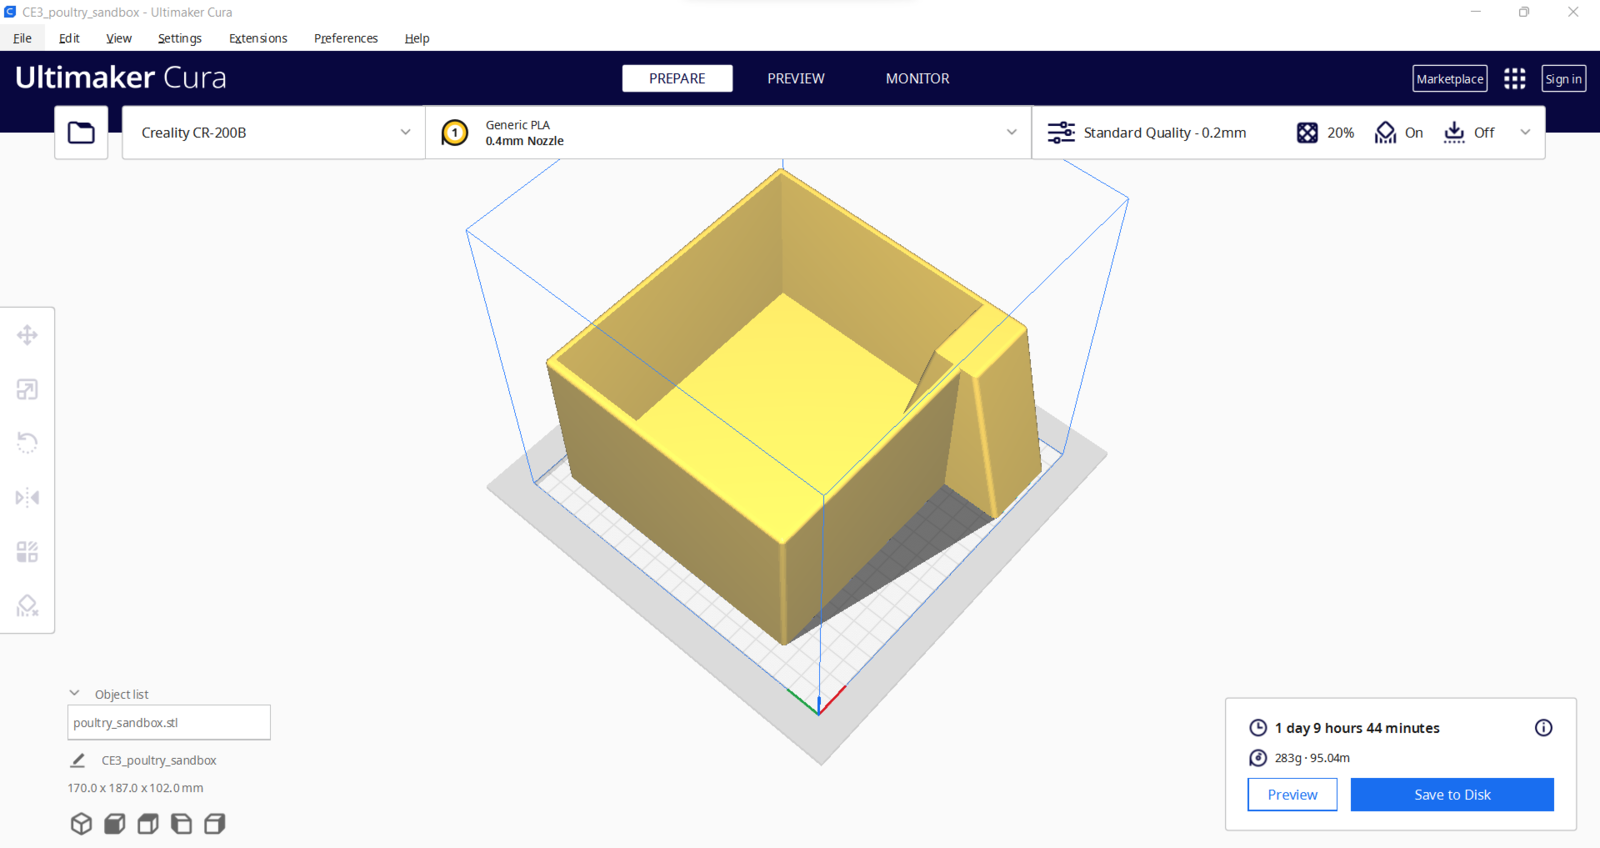
Step 1: Designing and printing a quail-themed and coop-compatible case
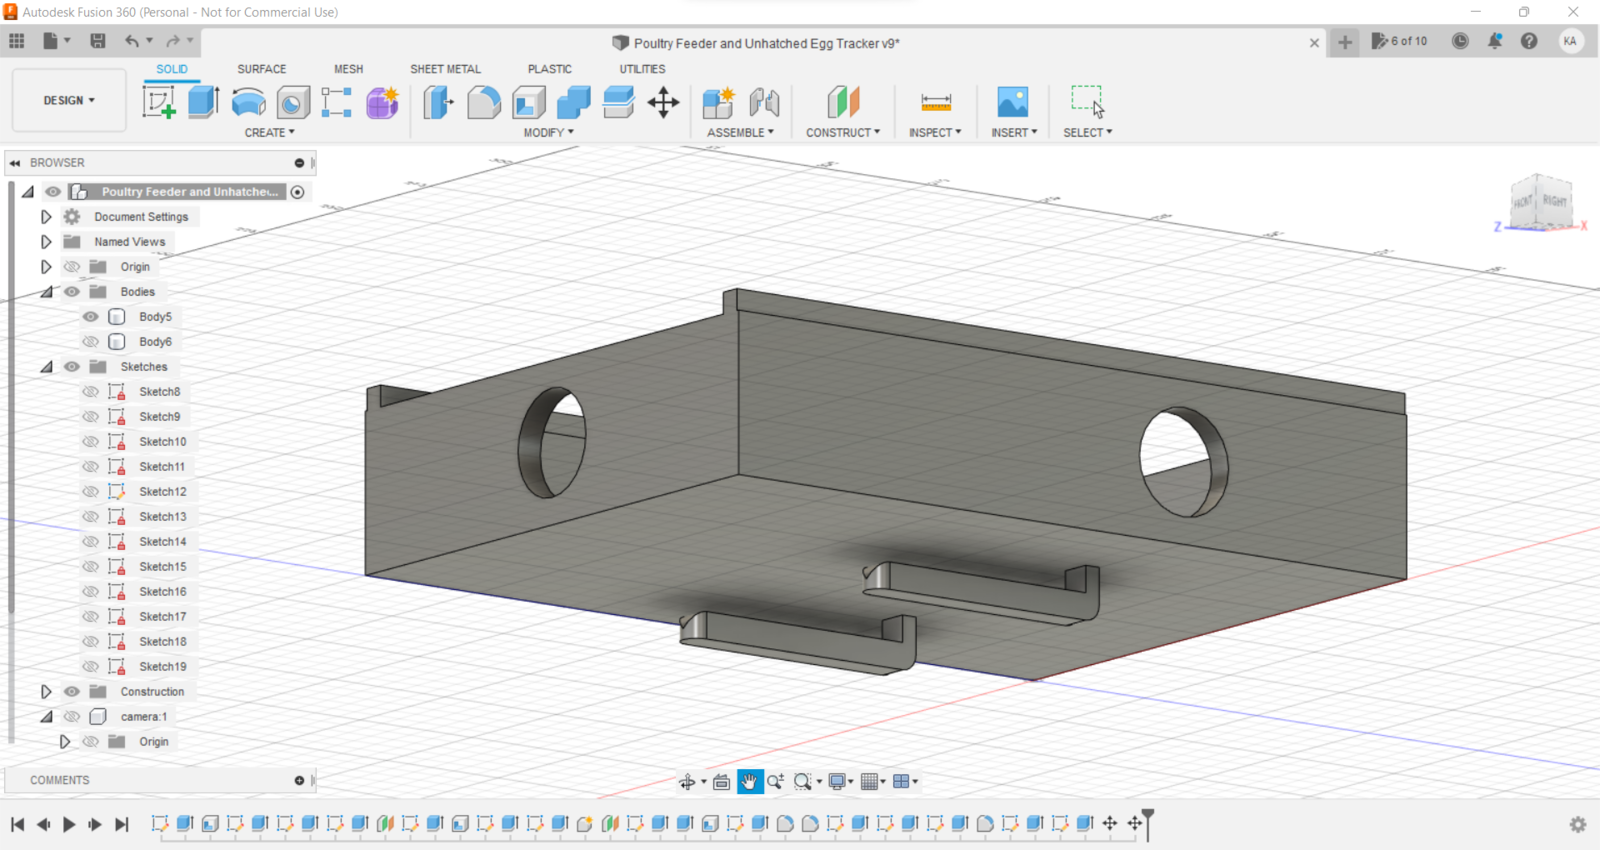
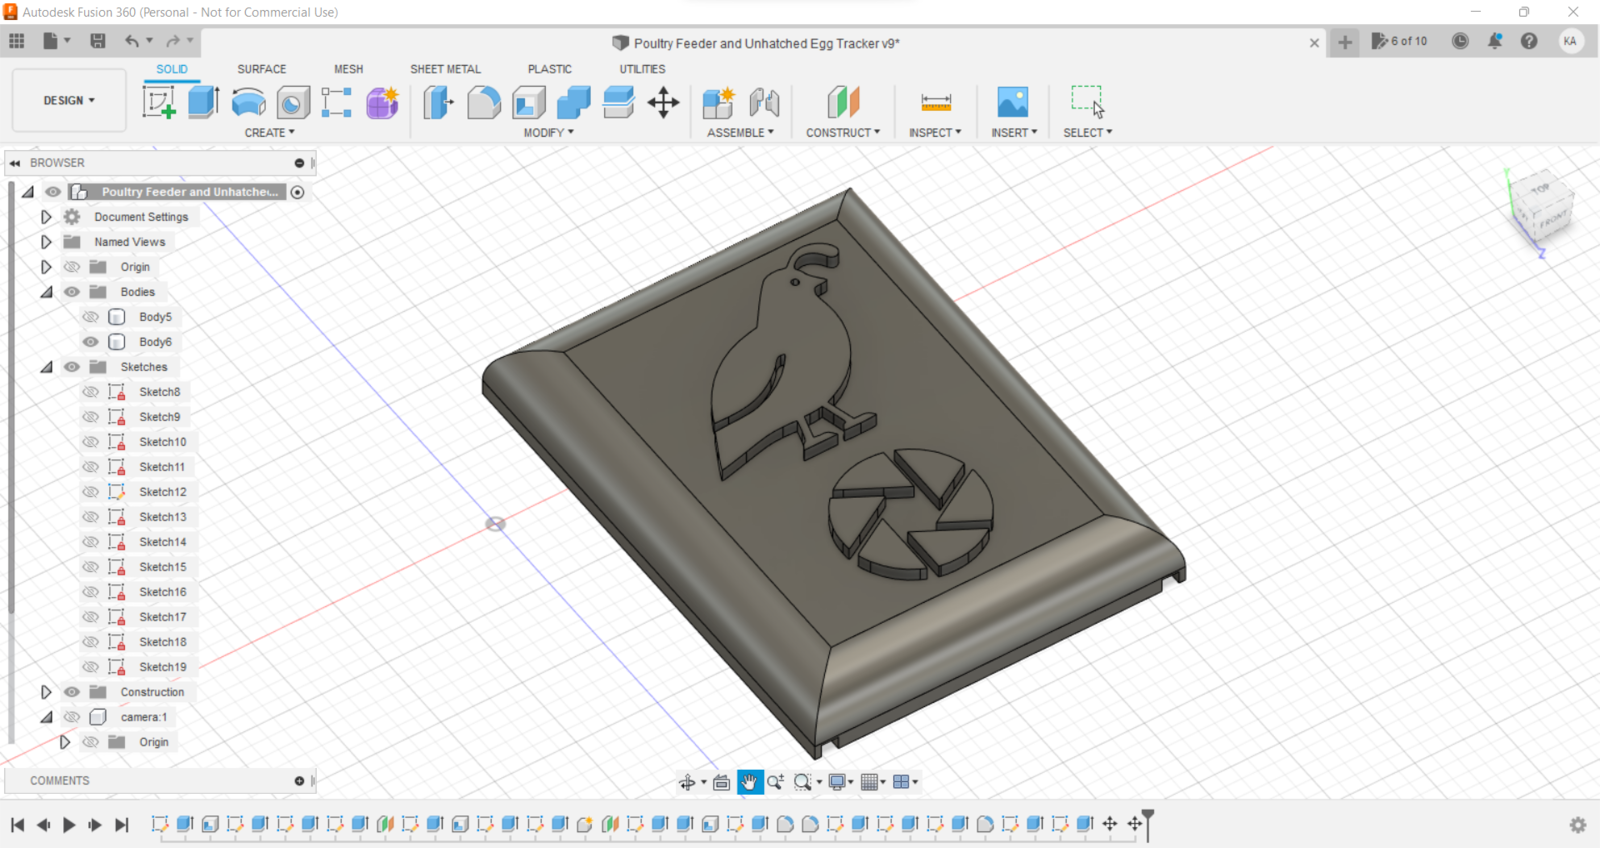
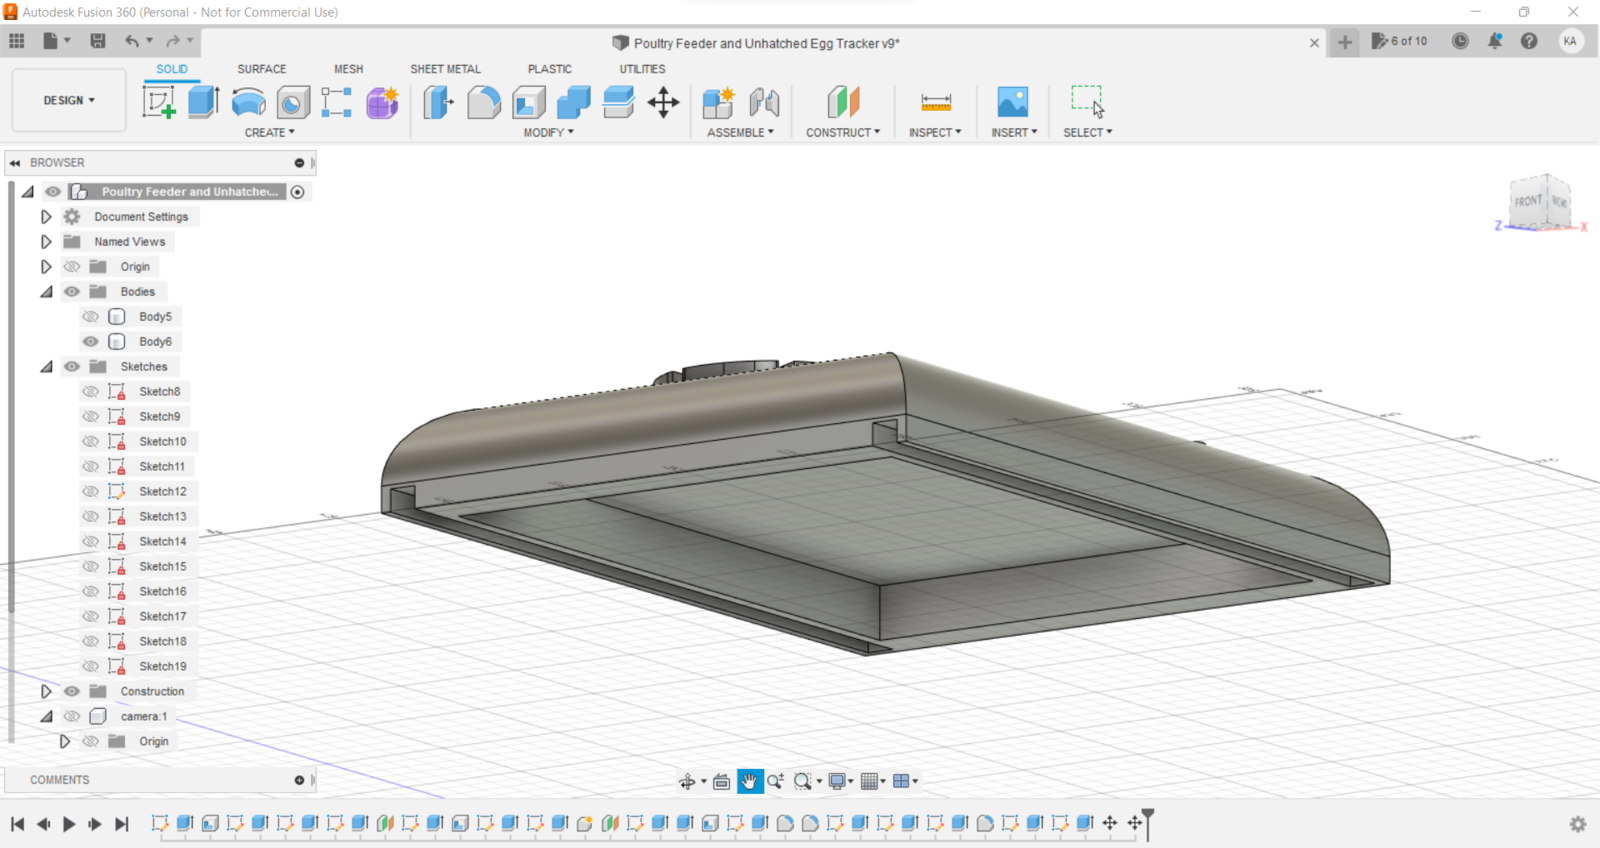
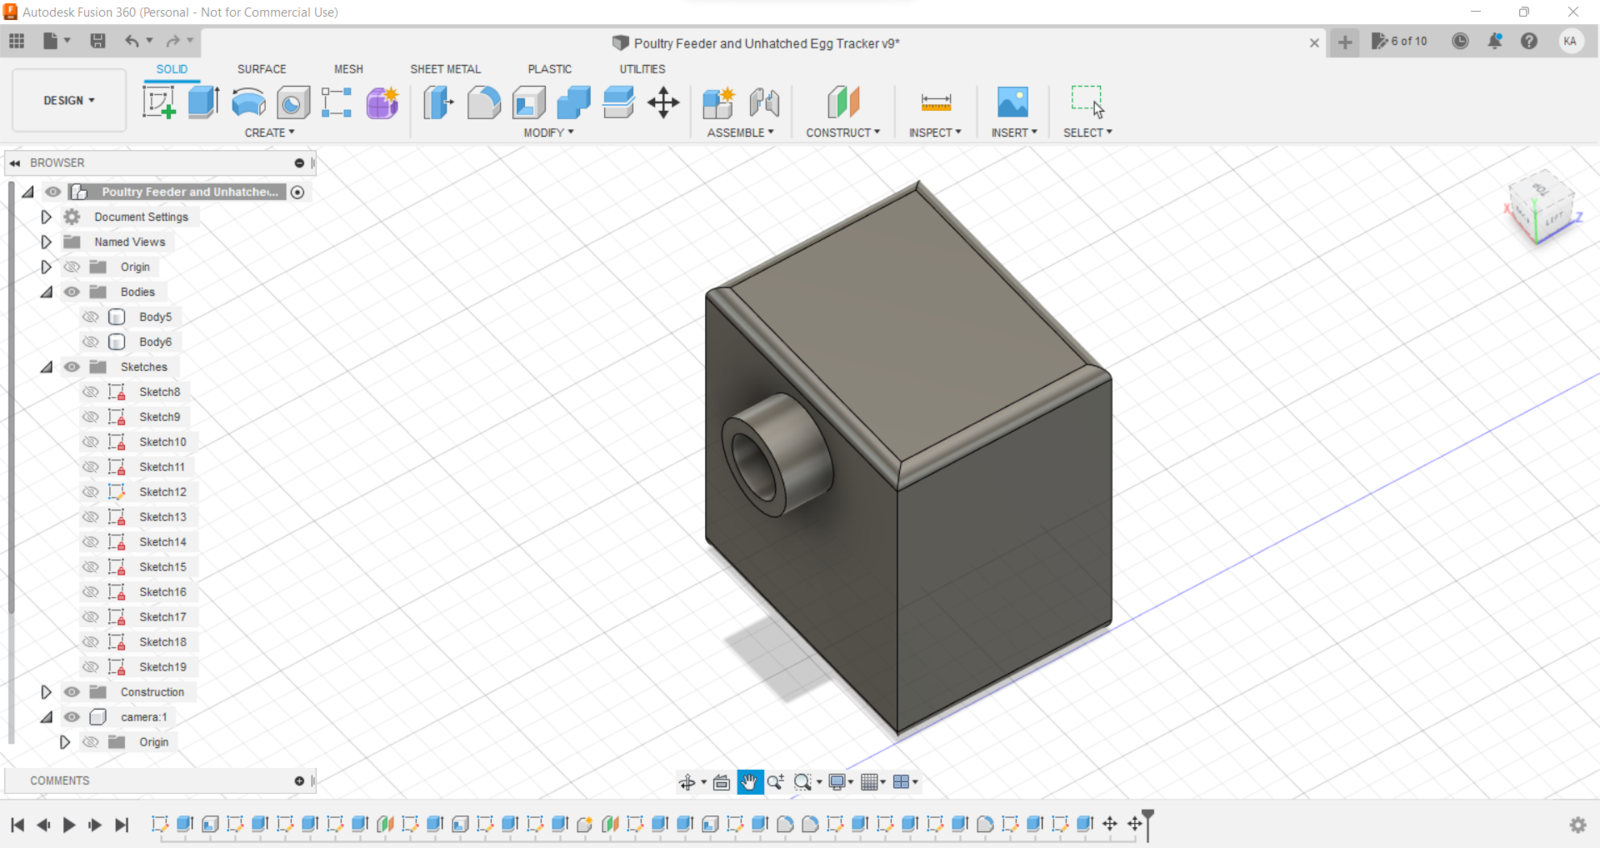
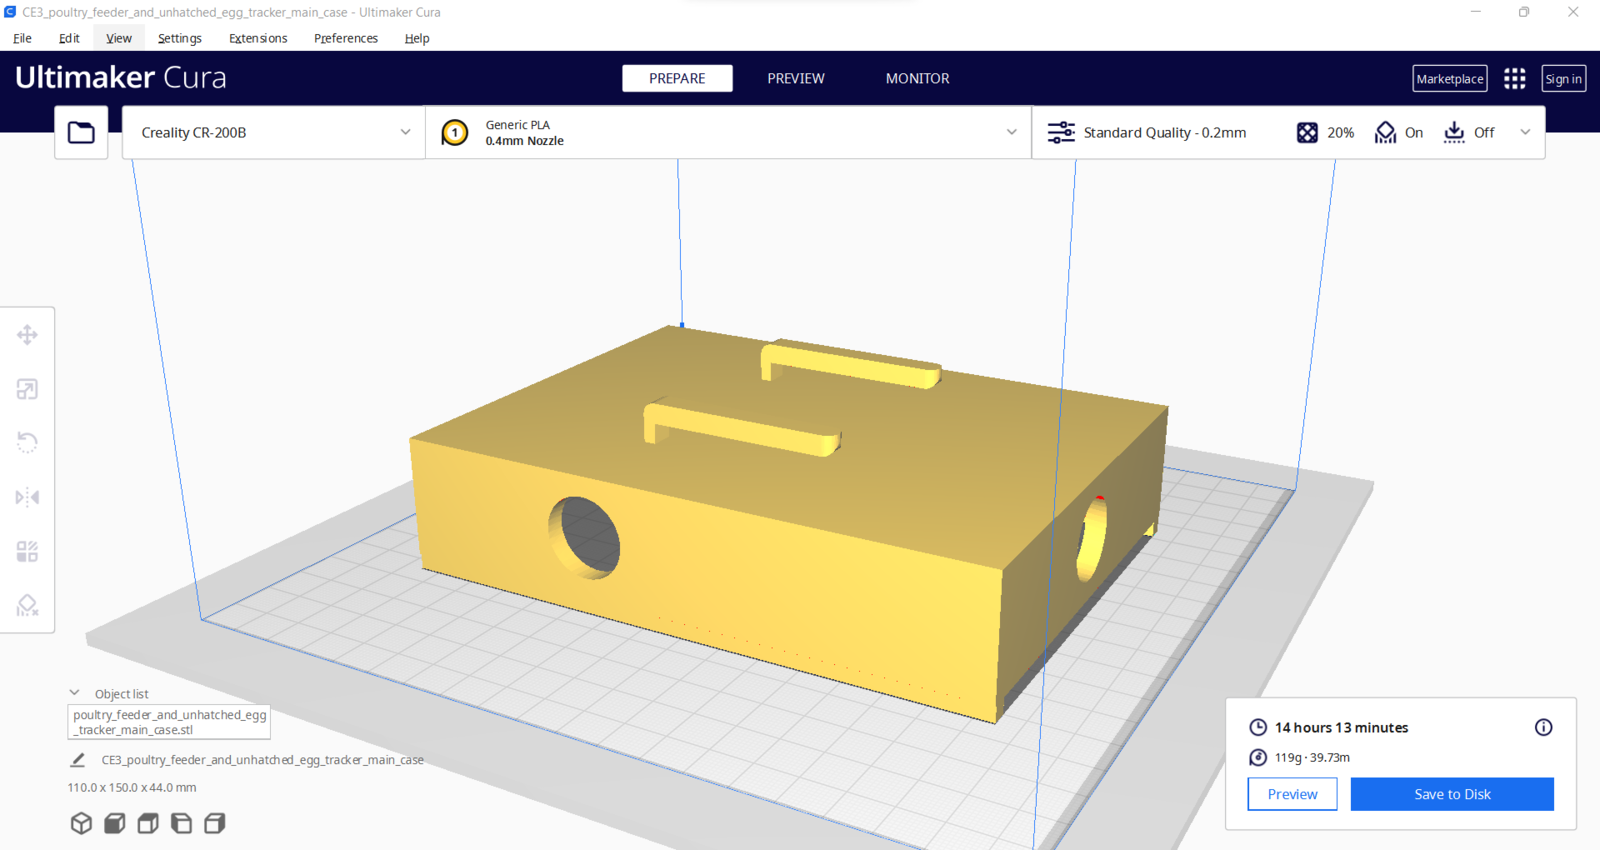
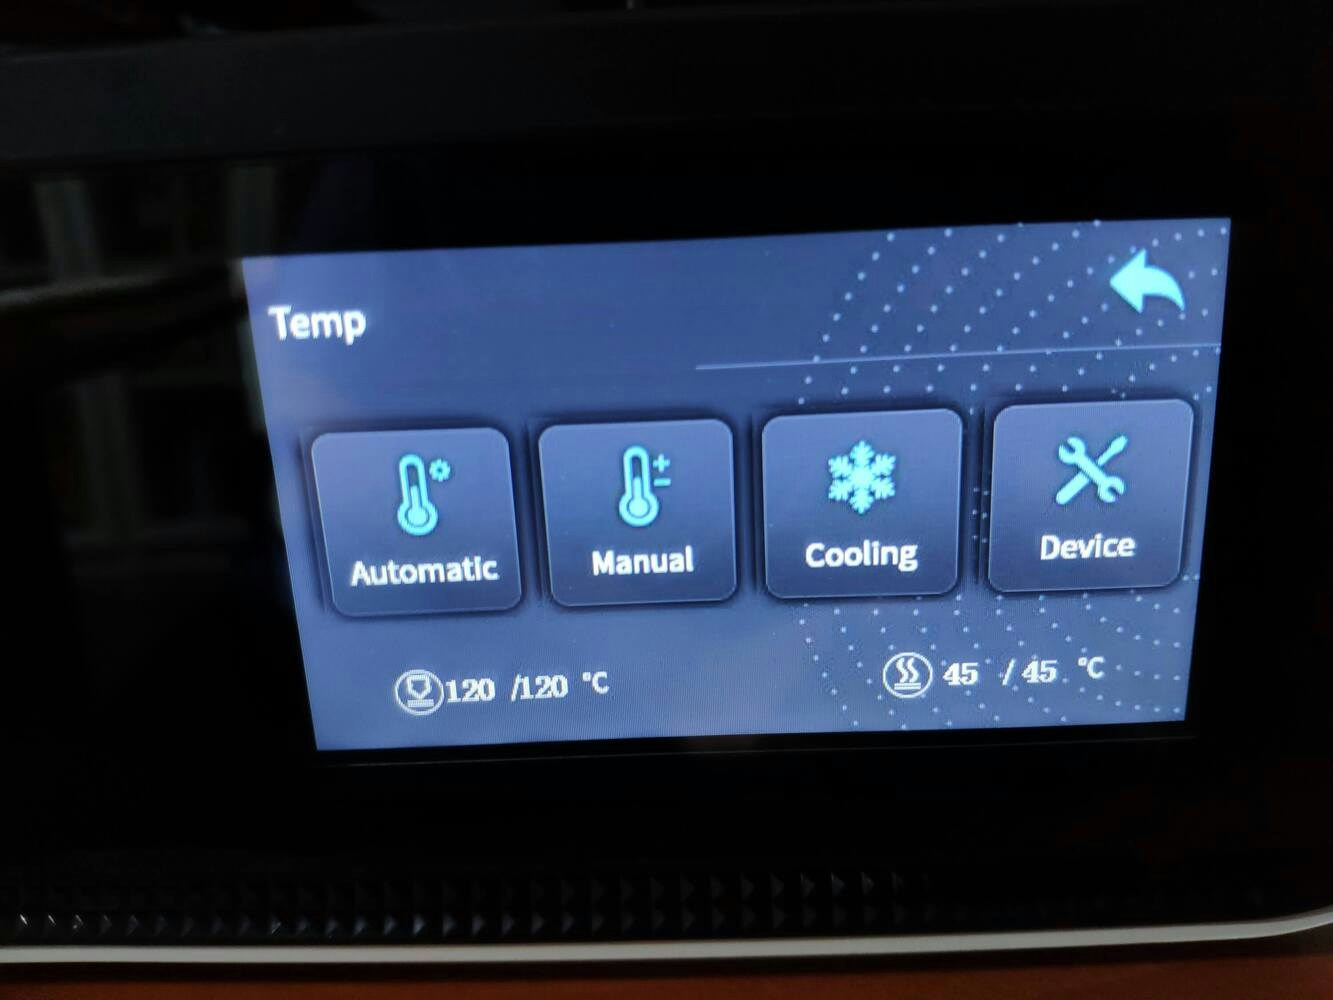
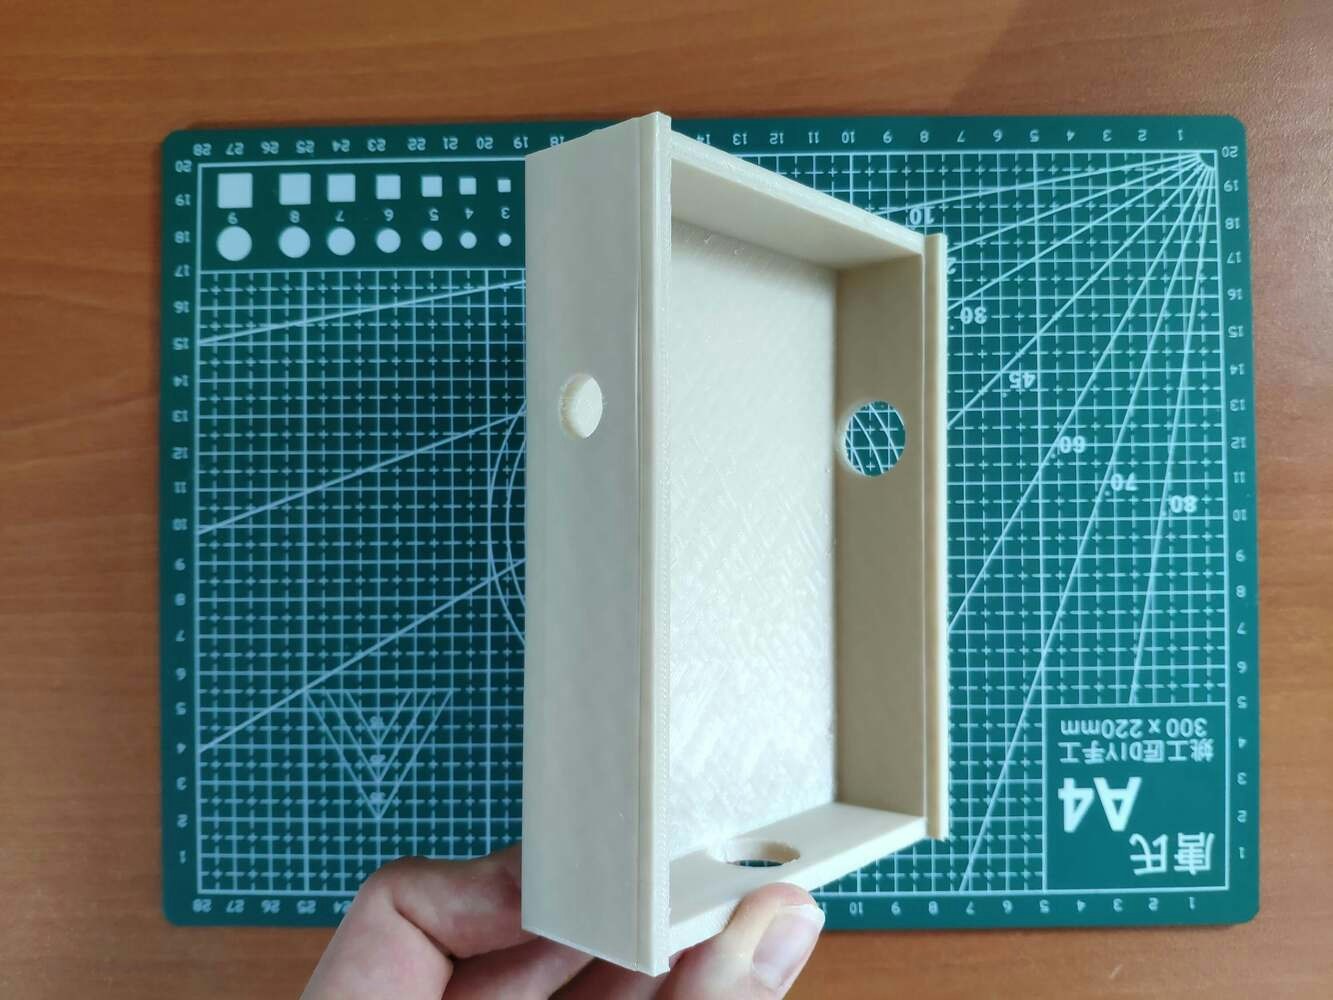
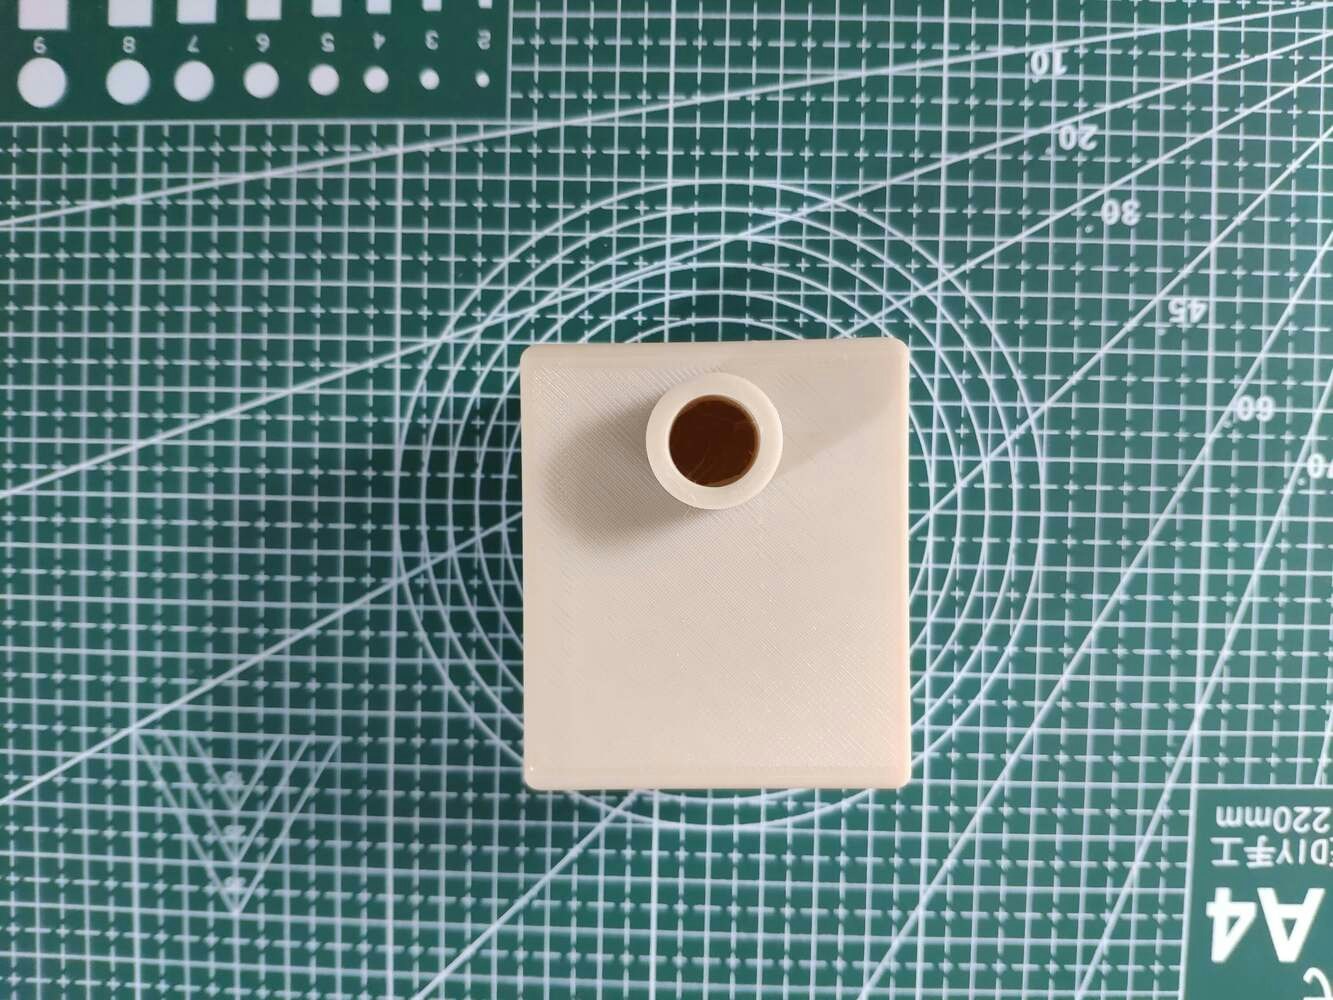
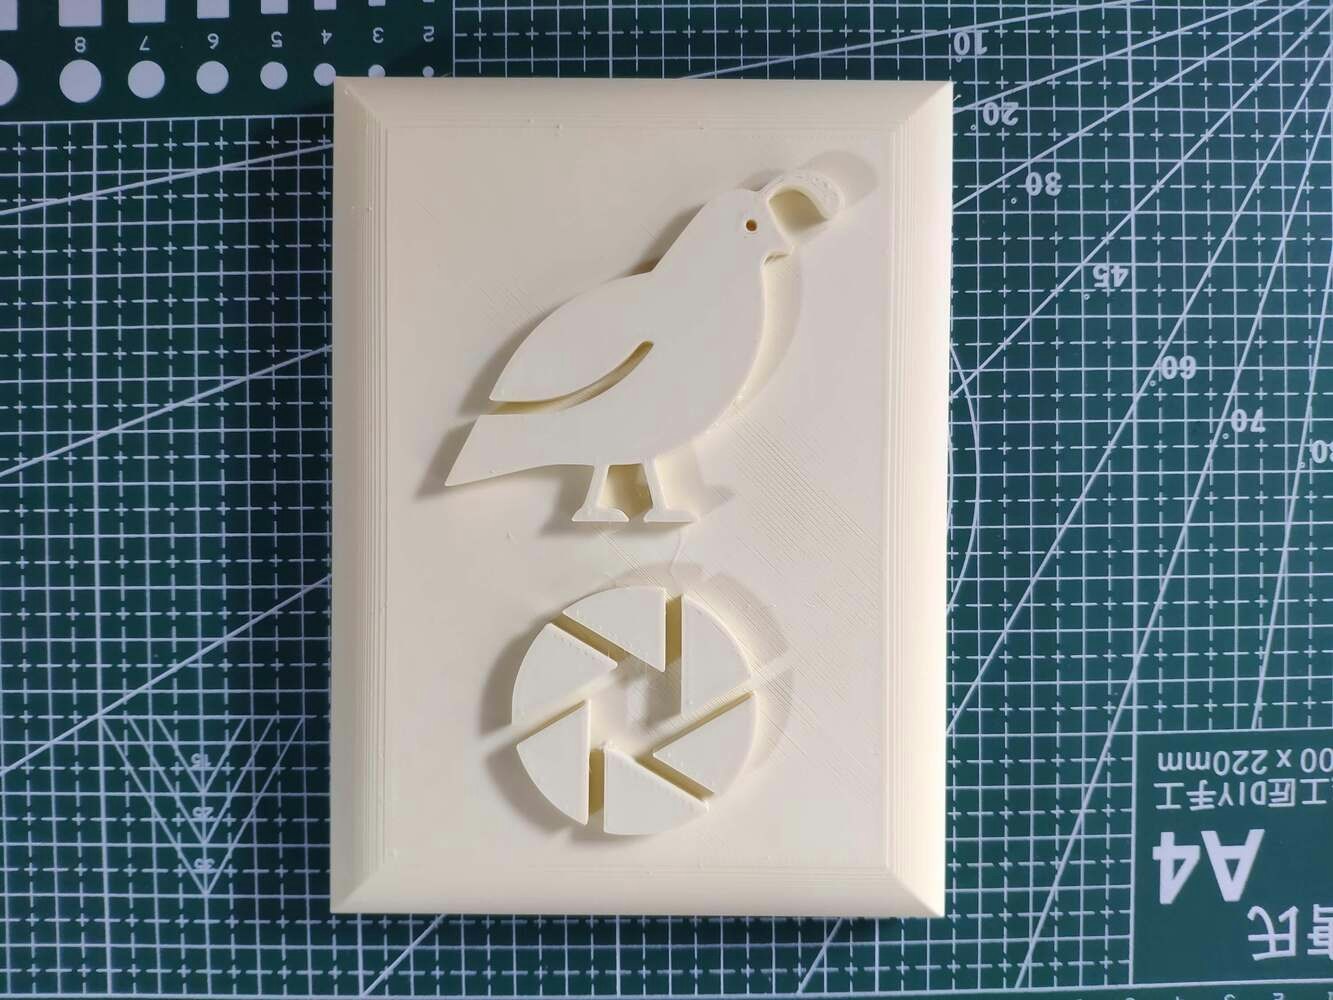
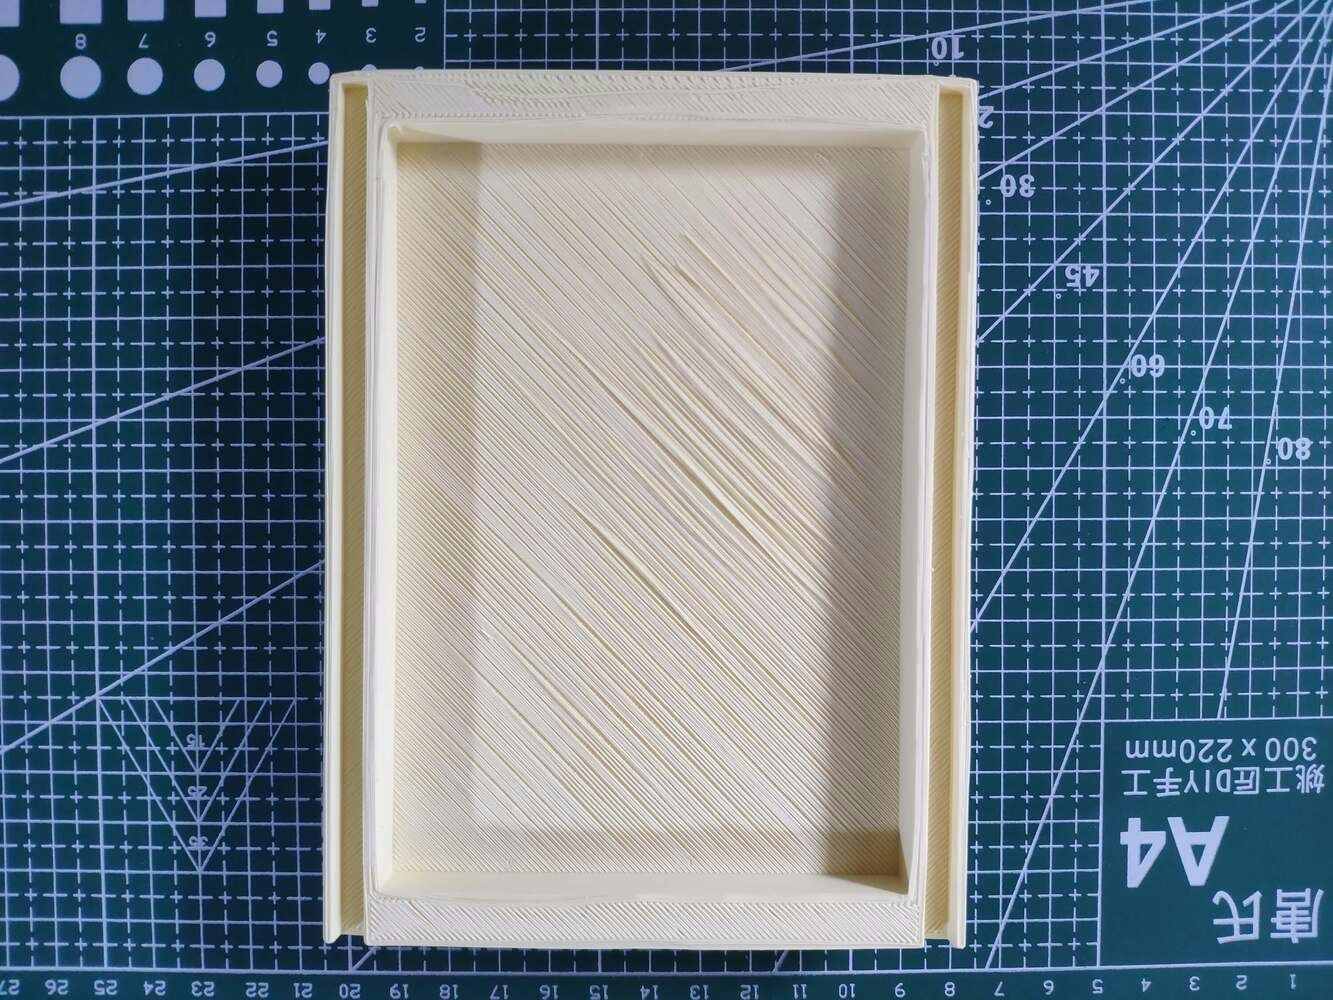
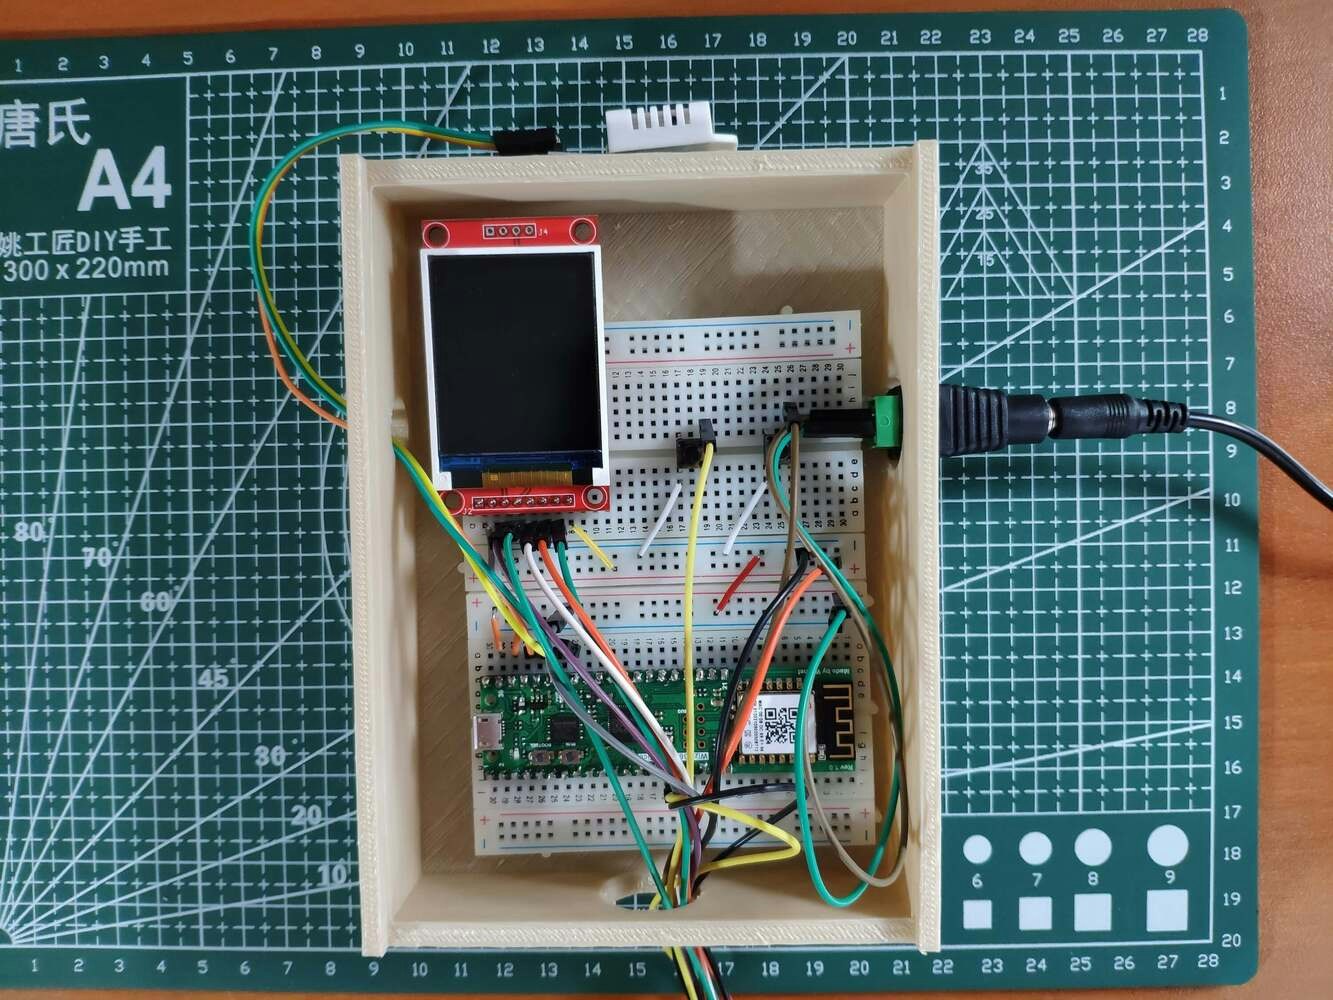
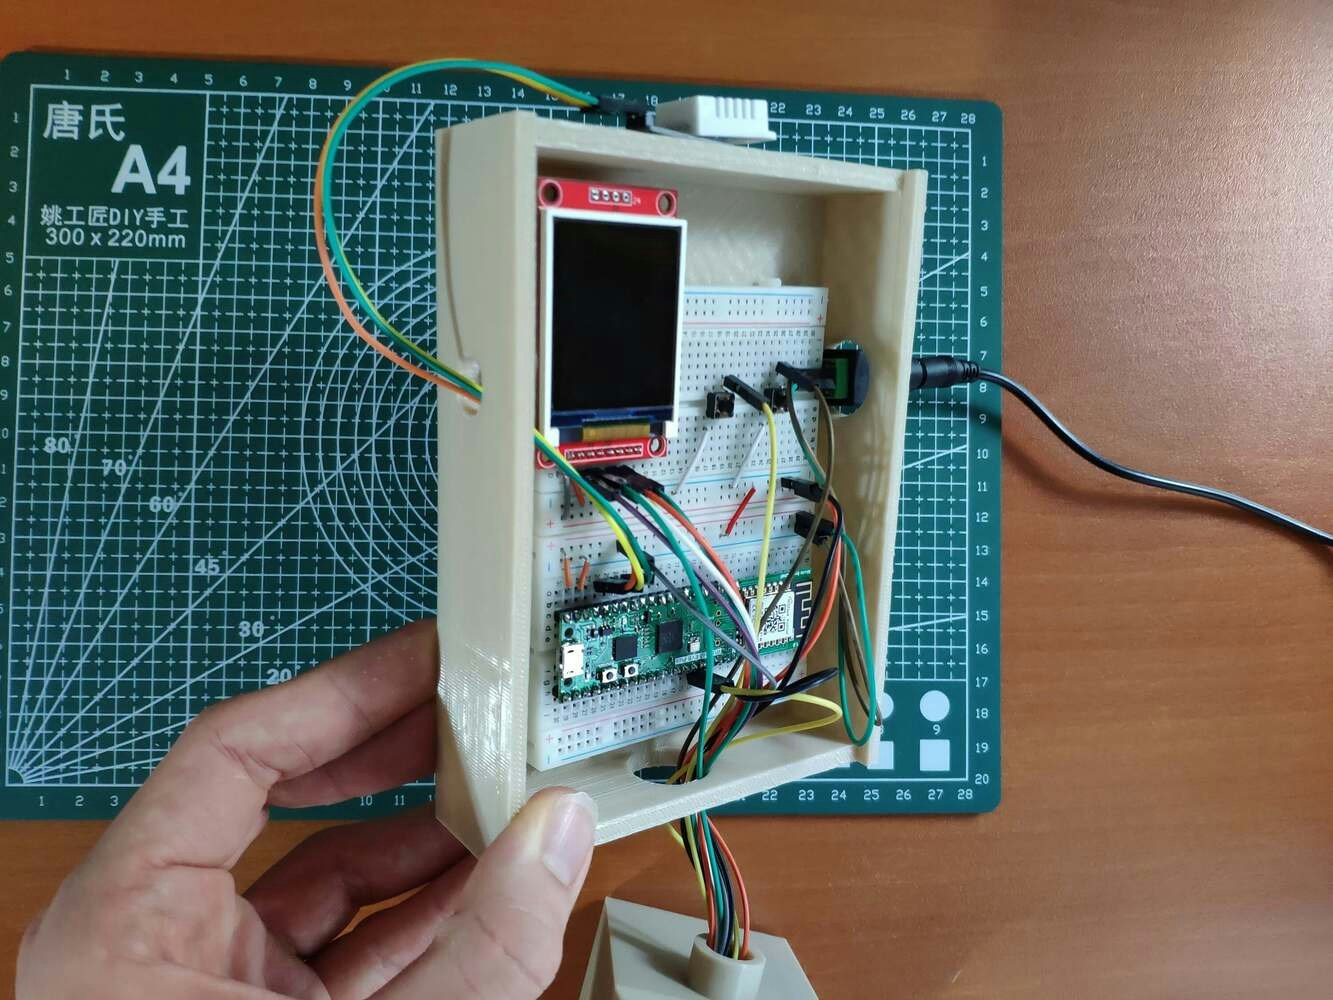
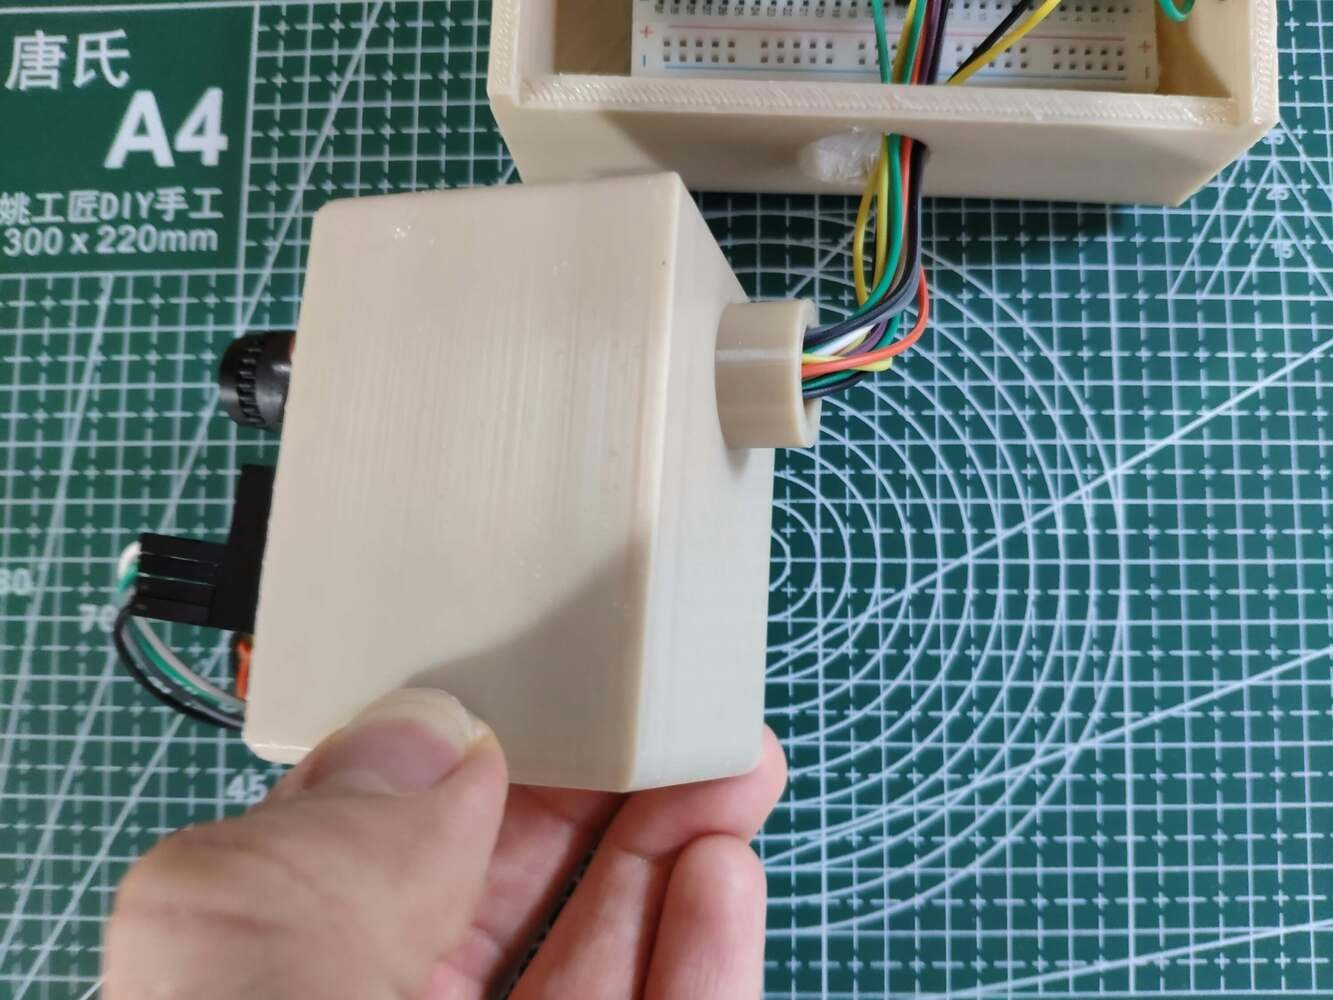
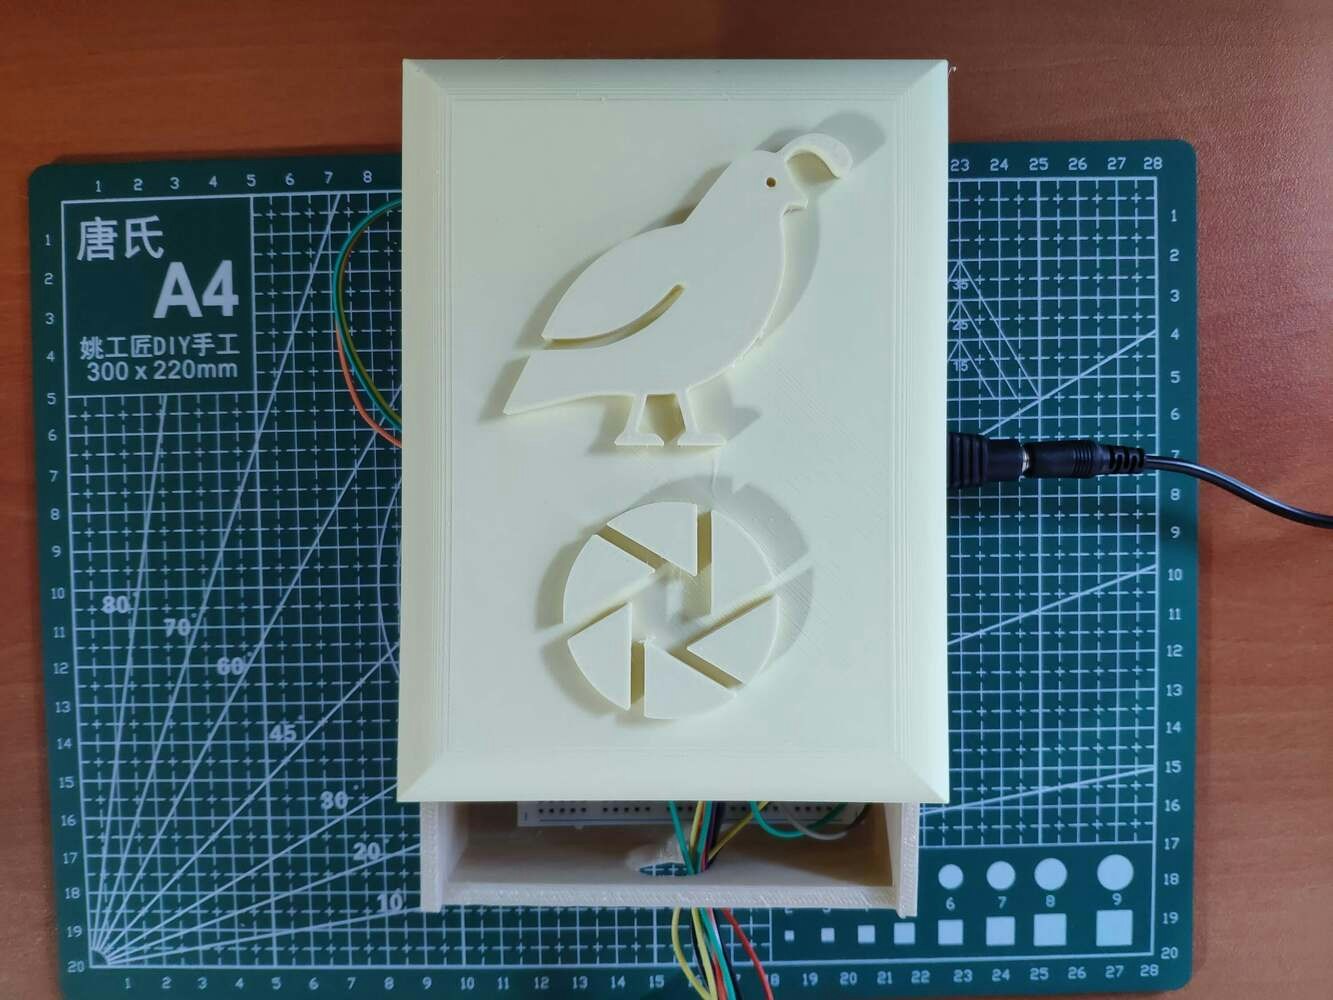
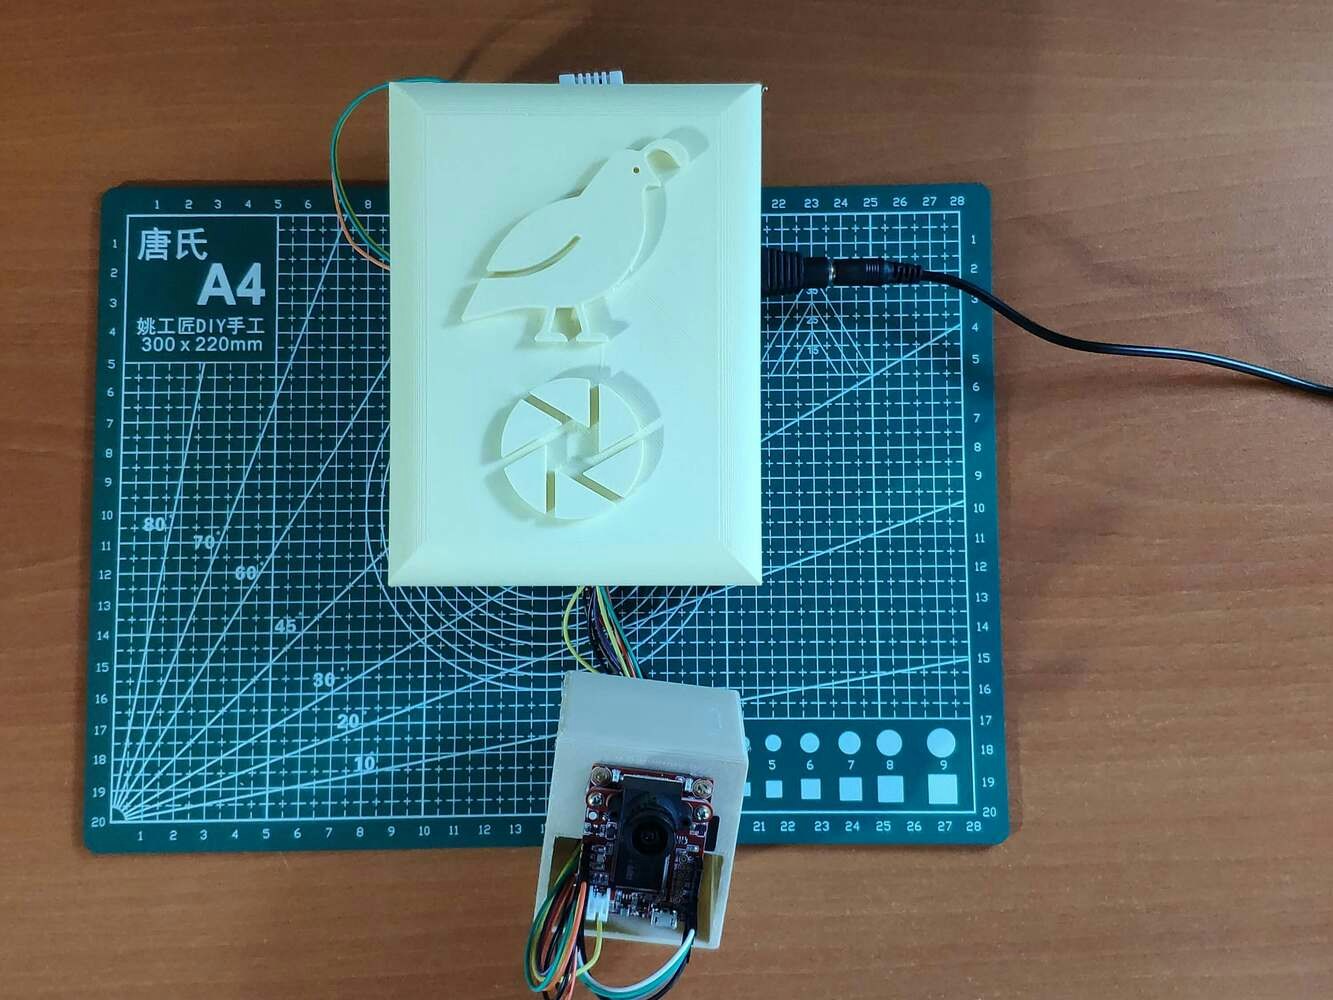
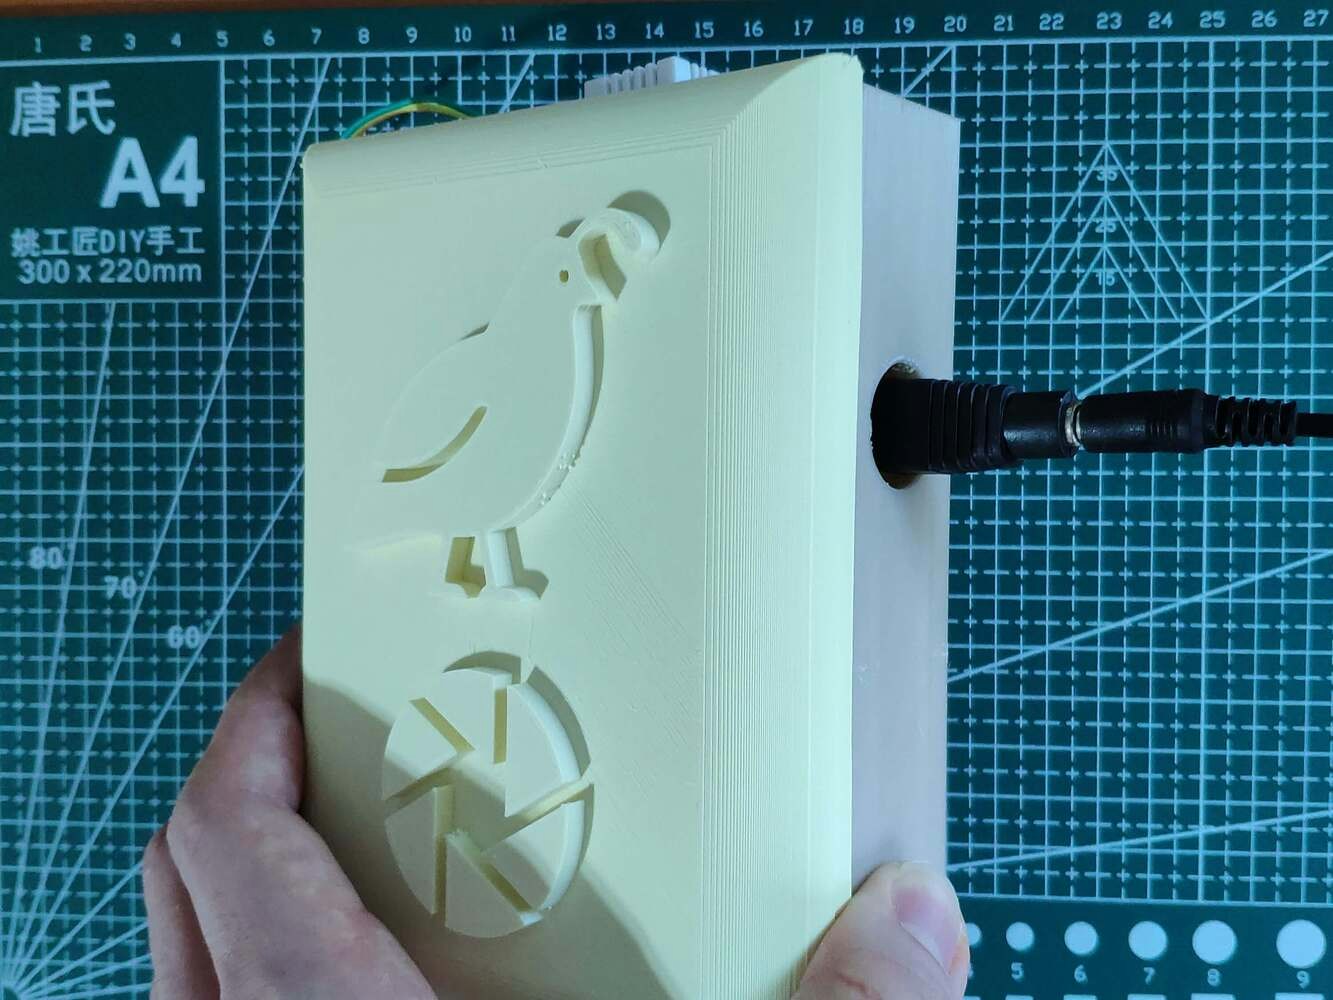
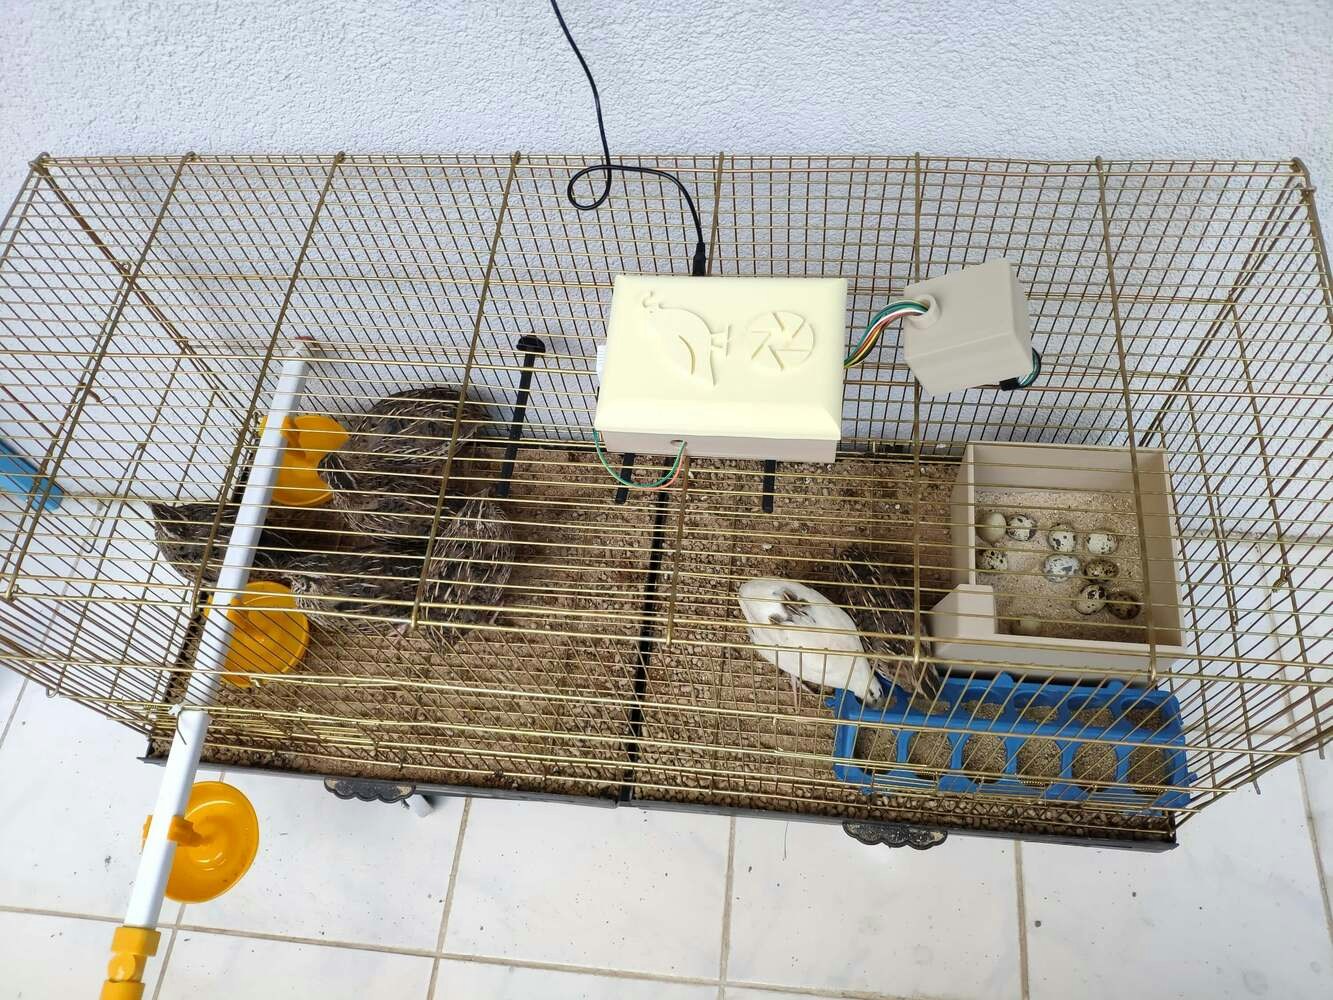
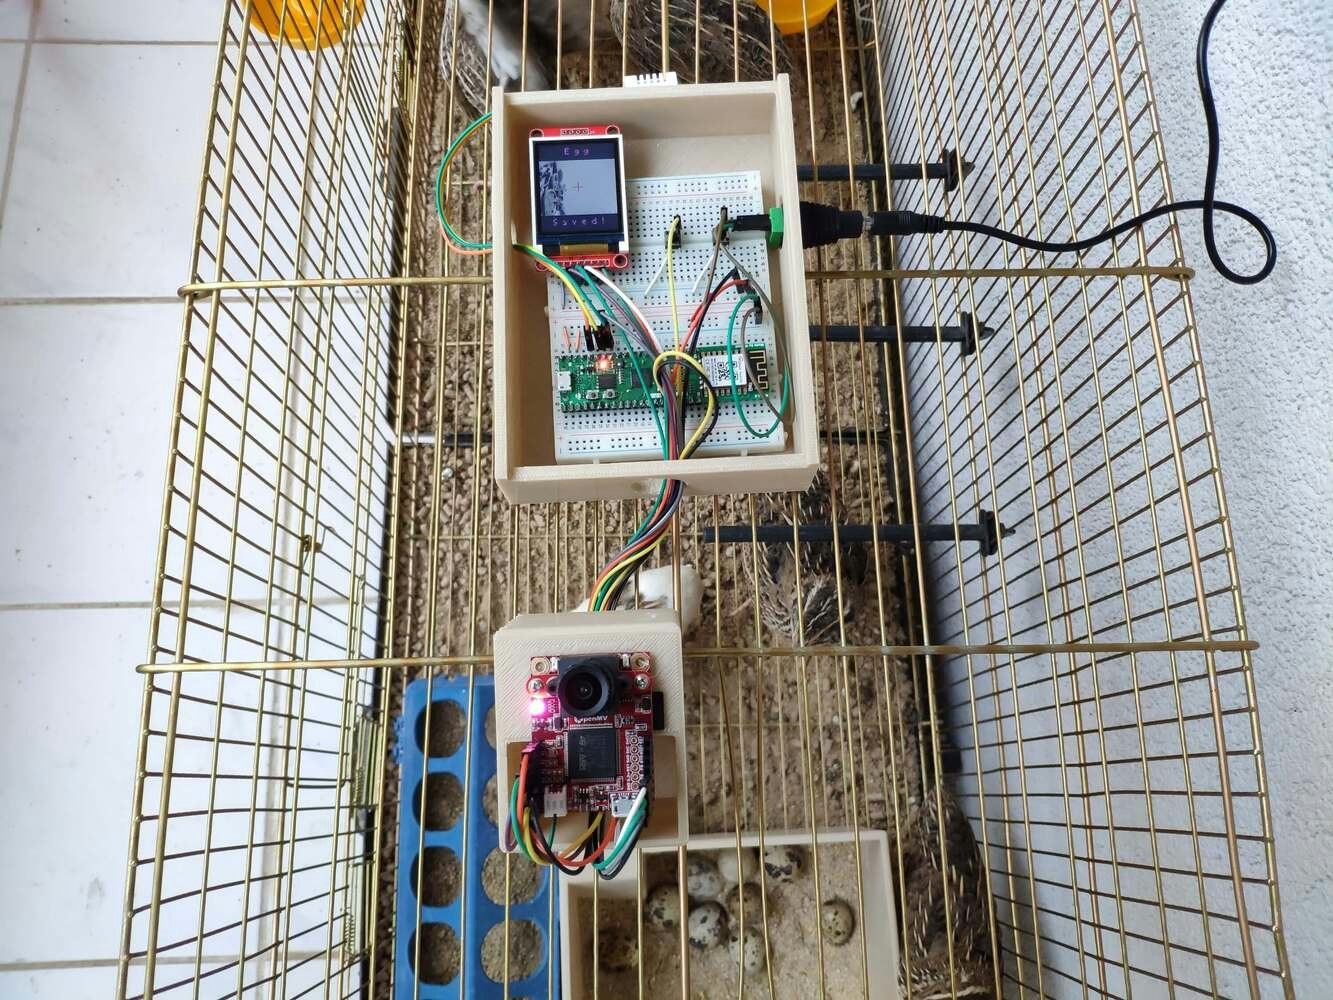
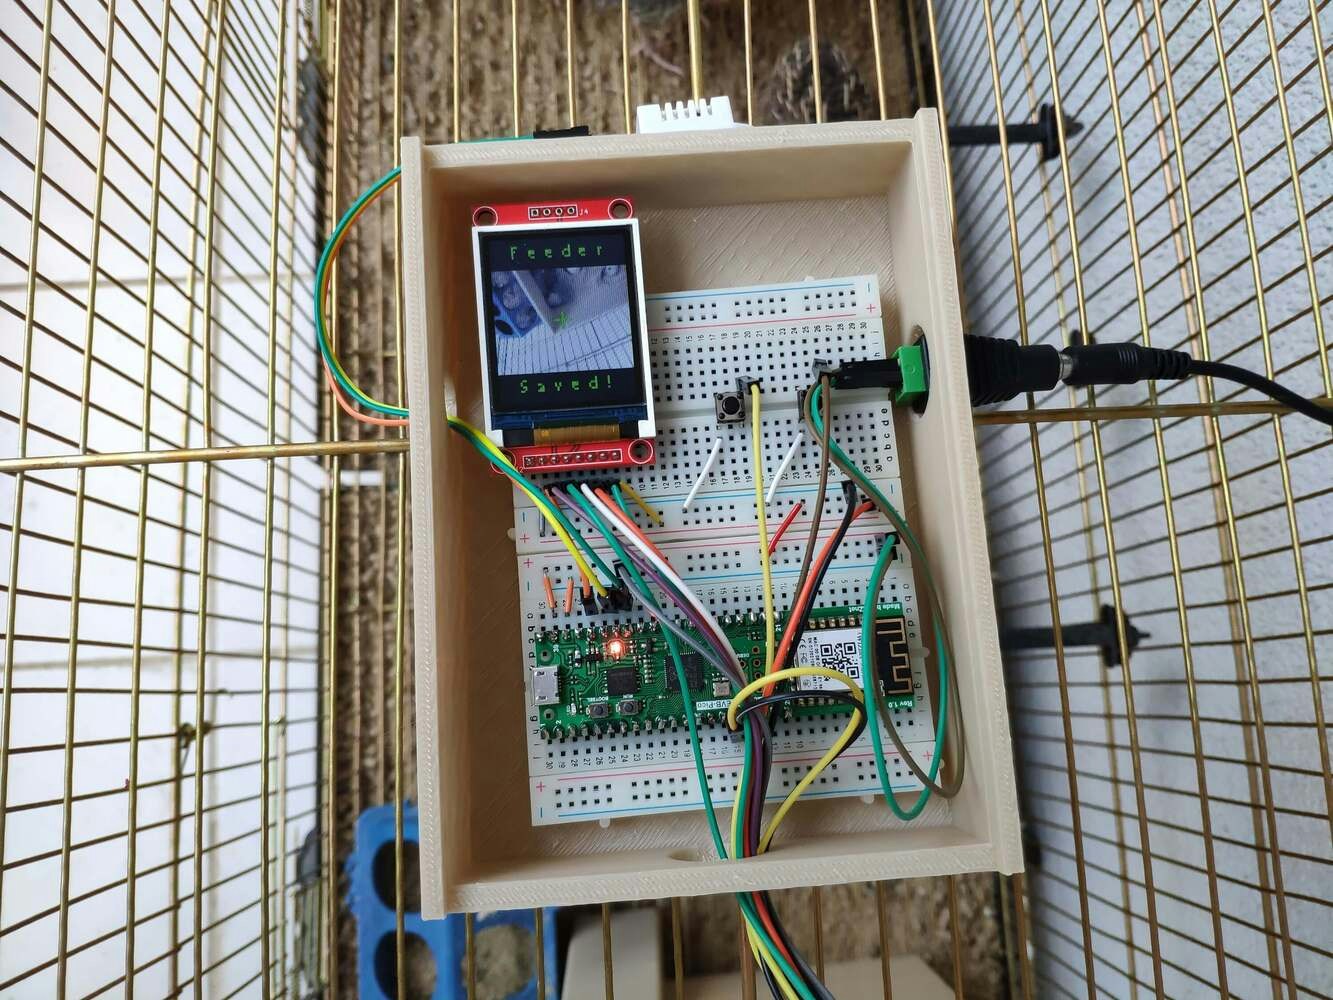
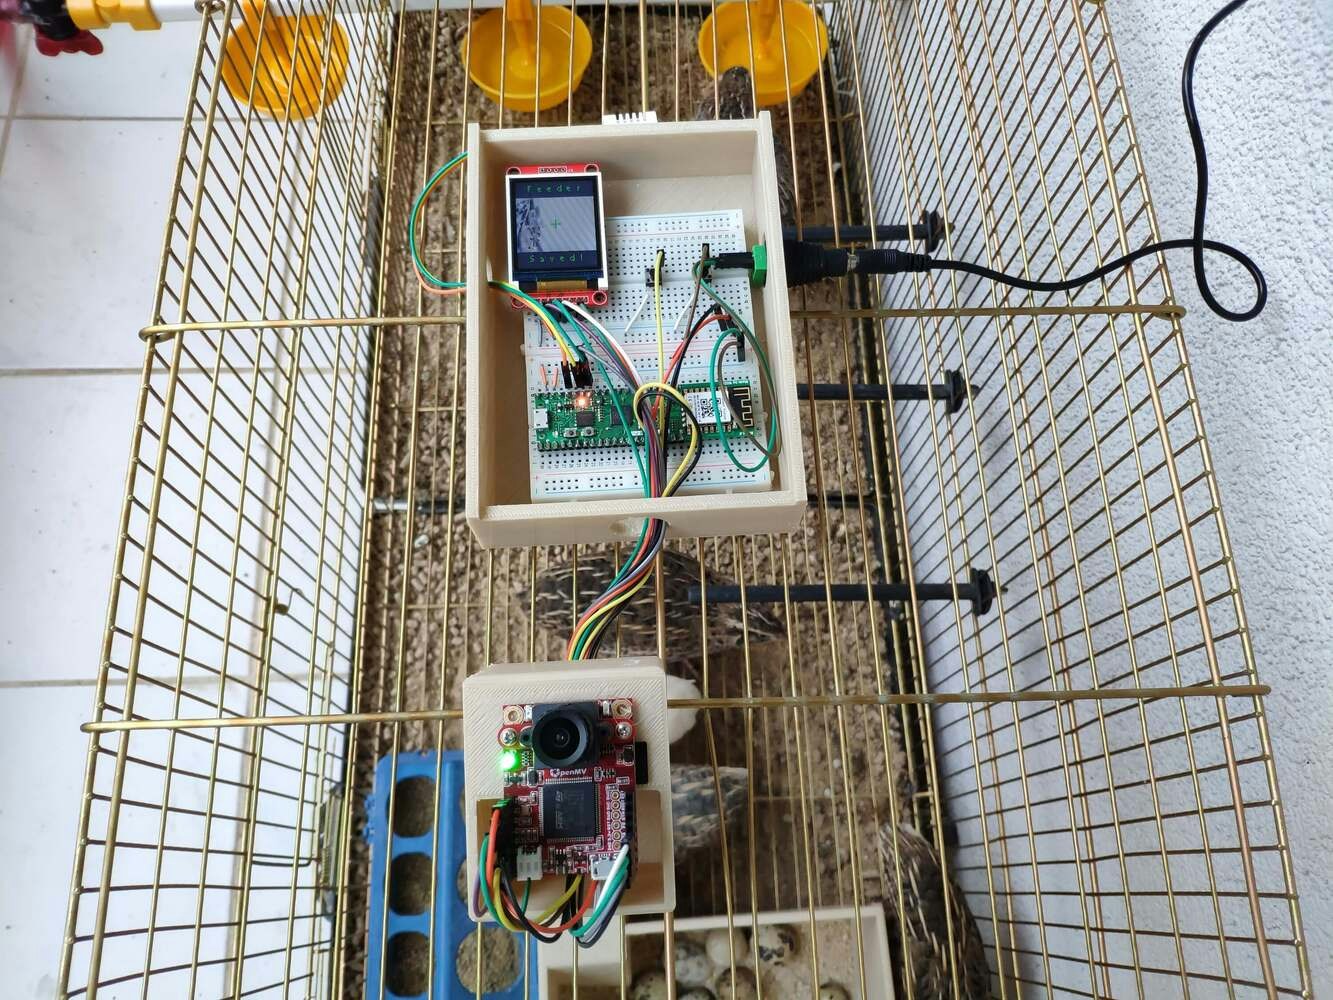
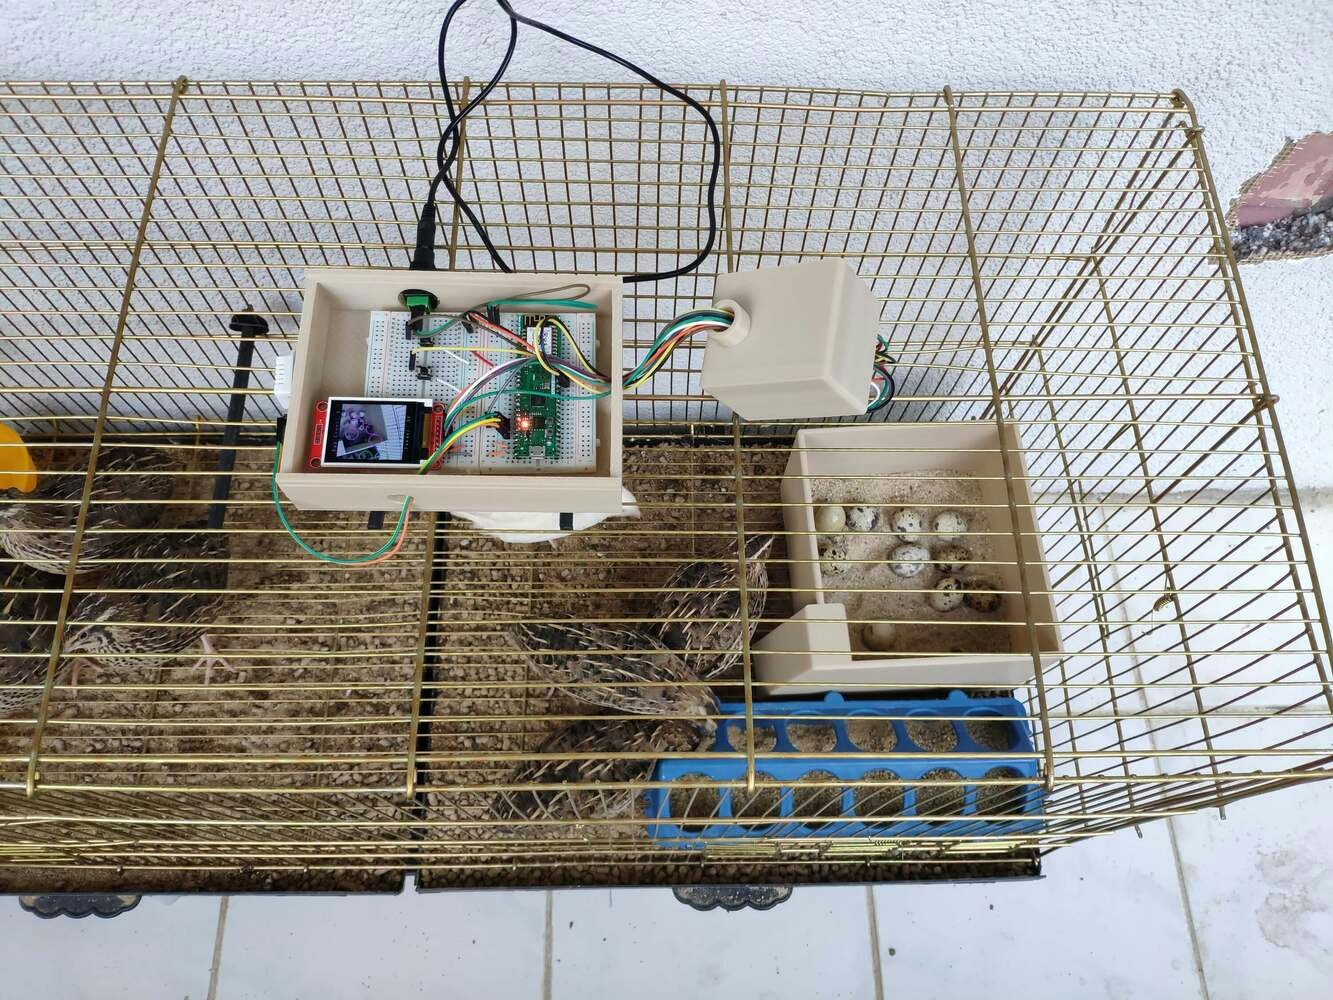
Since I focused on building a user-friendly and accessible device compatible with a wire quail coop (cage) in this project, I decided to design a robust and compact case allowing the user to attach the device to the wire cage via hooks and capture coop images effortlessly. To avoid overexposure to dust and prevent loose wire connections, I added a sliding front cover to the case. Then, I designed a separate movable camera handle to capture coop images at different angles with OpenMV Cam H7. Also, I decided to adorn the sliding front cover with a quail logo and the OpenMV icon so as to highlight the poultry theme gloriously. I designed the main case, its sliding front cover, and the movable camera handle in Autodesk Fusion 360. You can download their STL files below.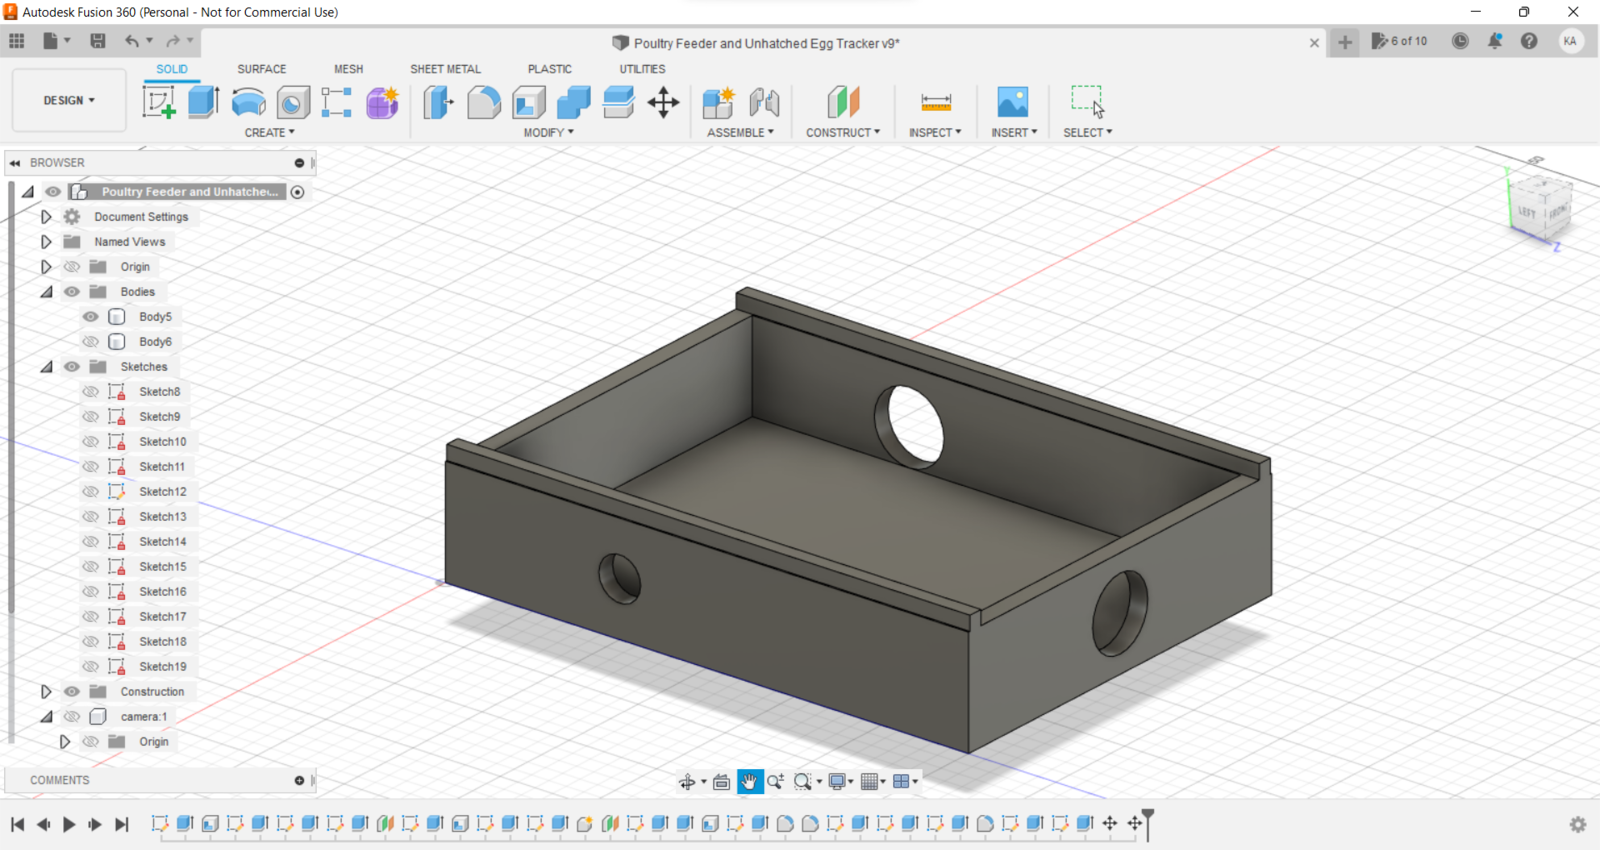
- Bone White
- ePLA-Matte Almond Yellow

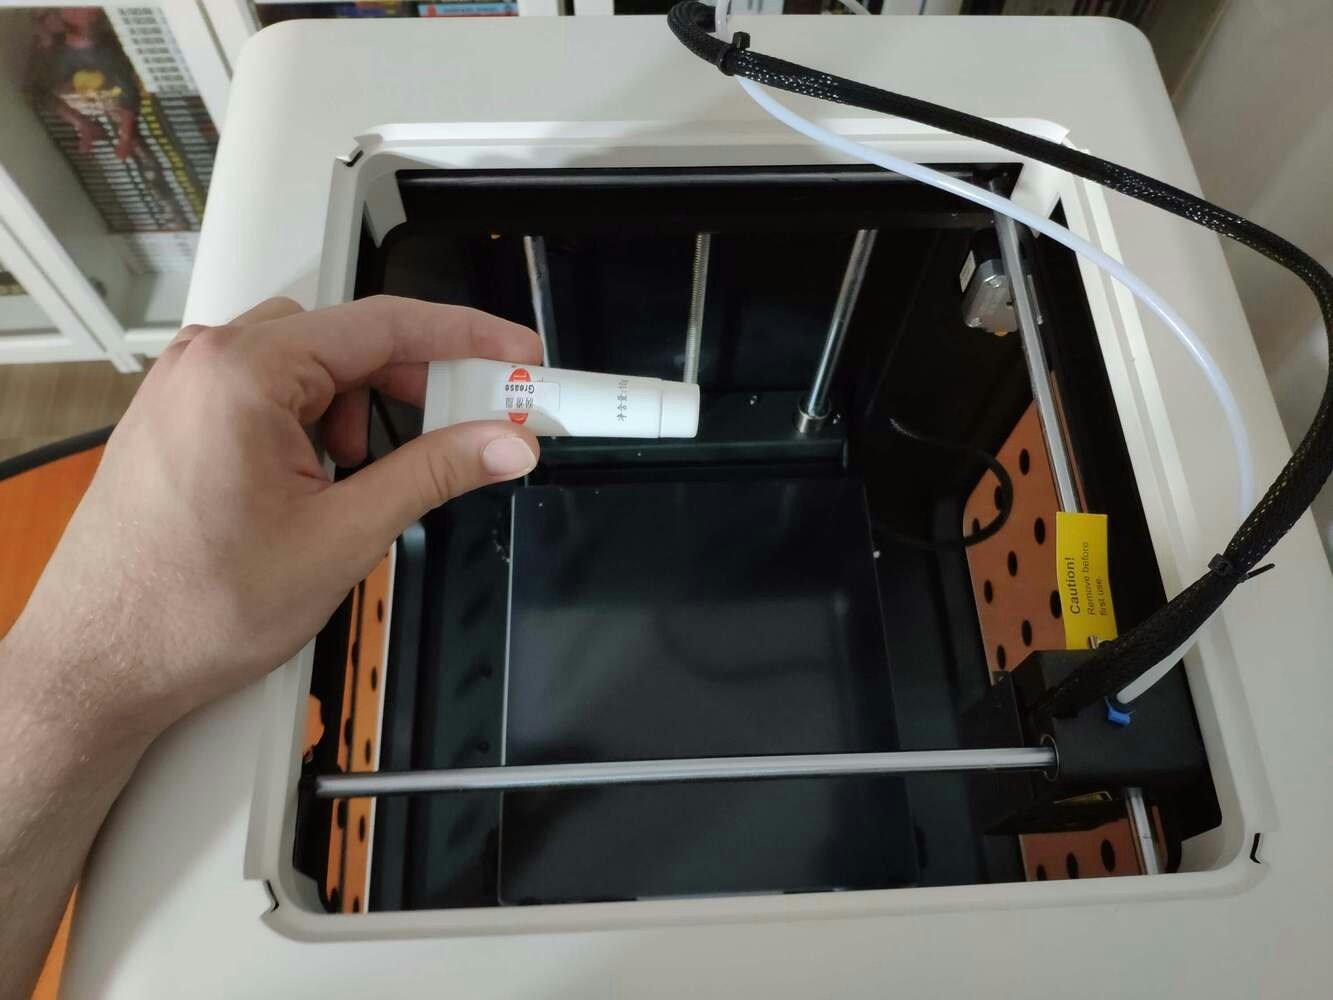

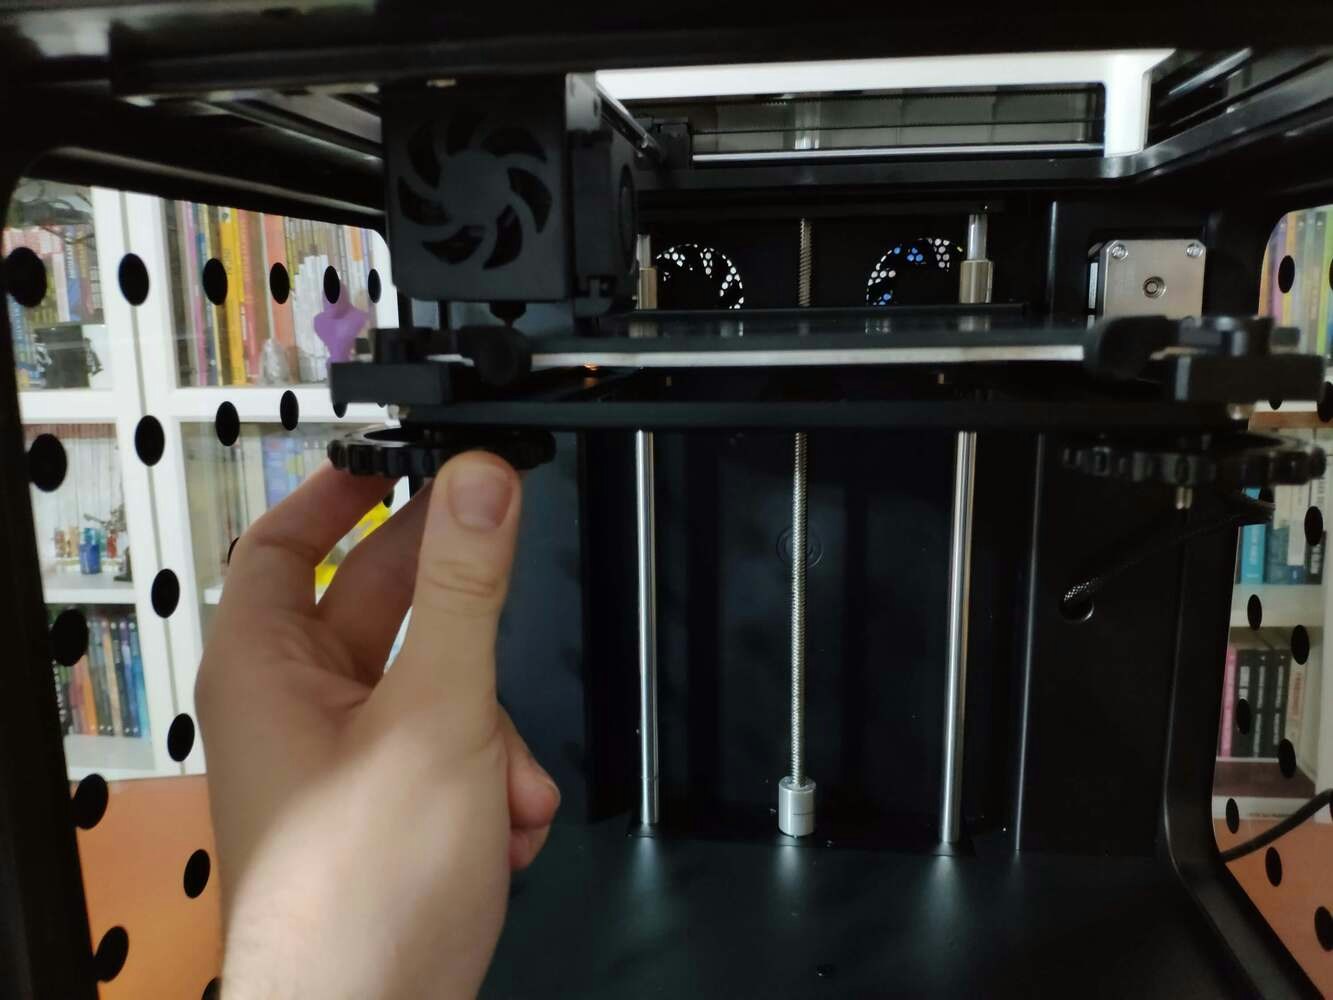
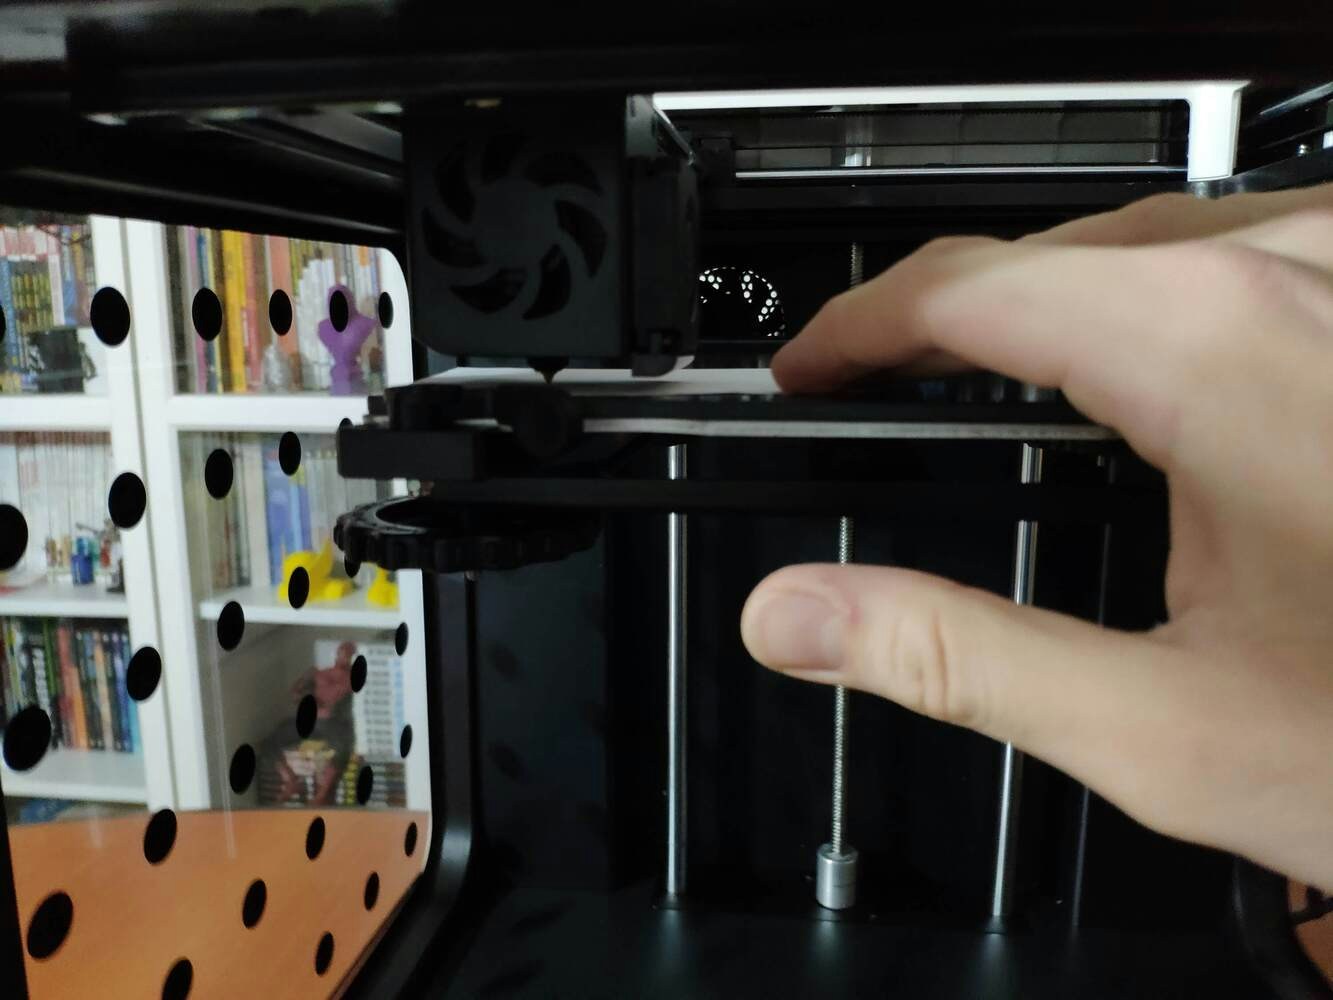


Step 1.1: Assembling the case and making connections & adjustments


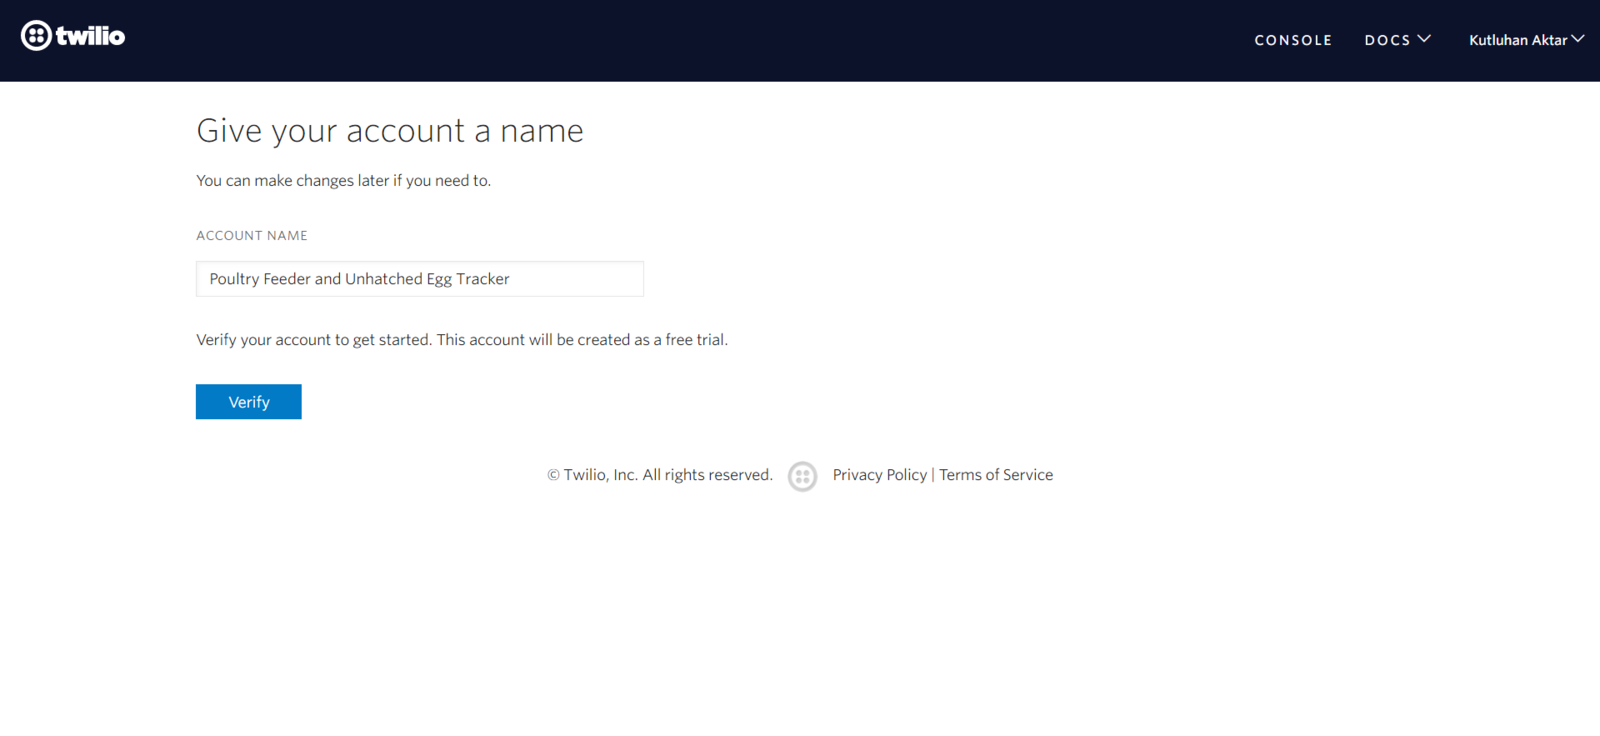
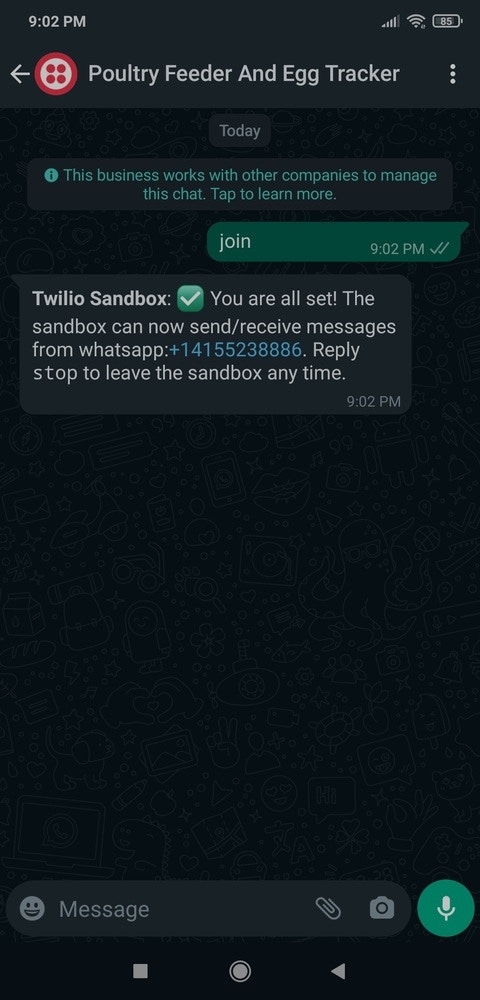
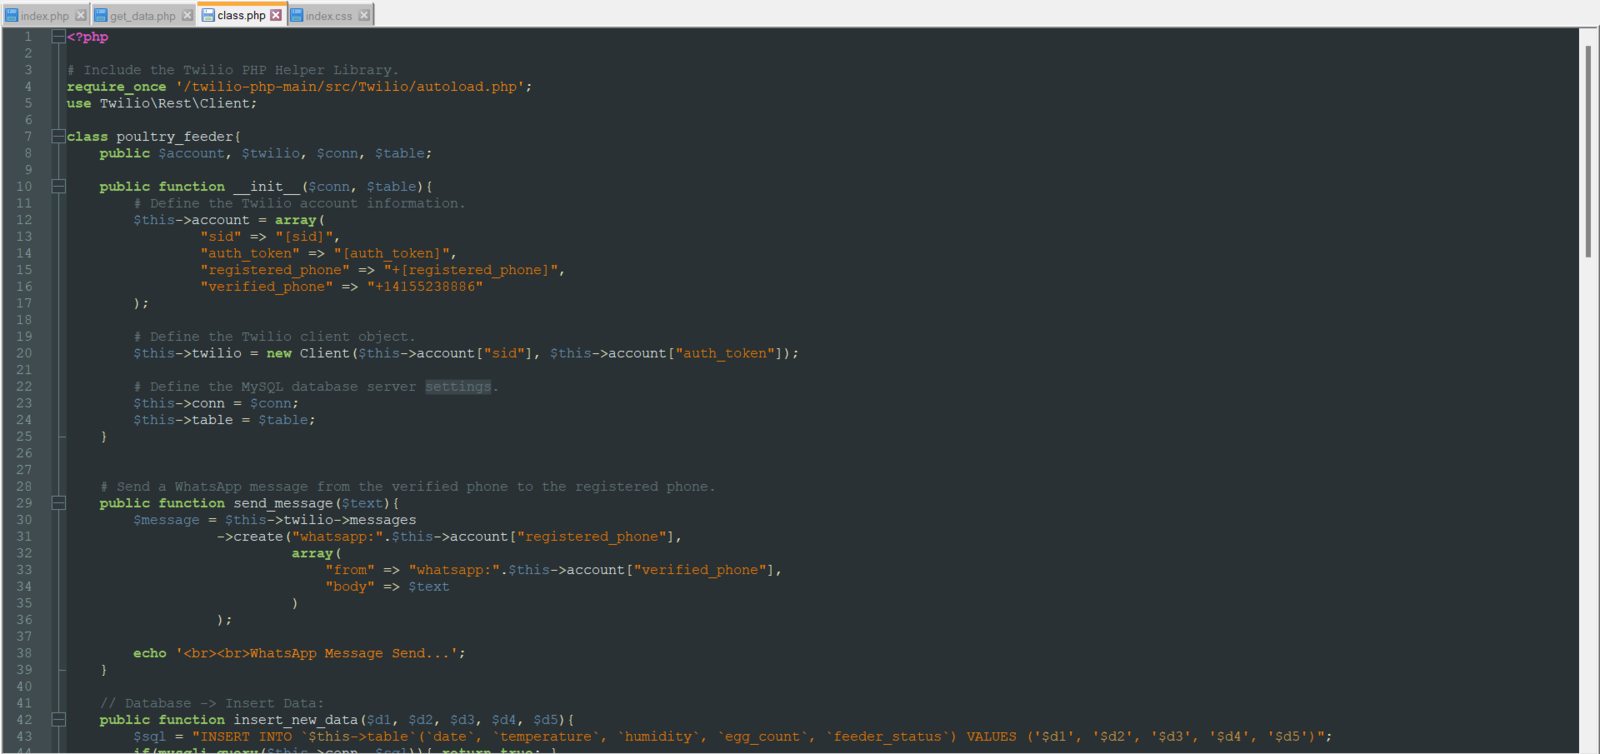
Step 2: Creating a Twilio account to send messages over WhatsApp
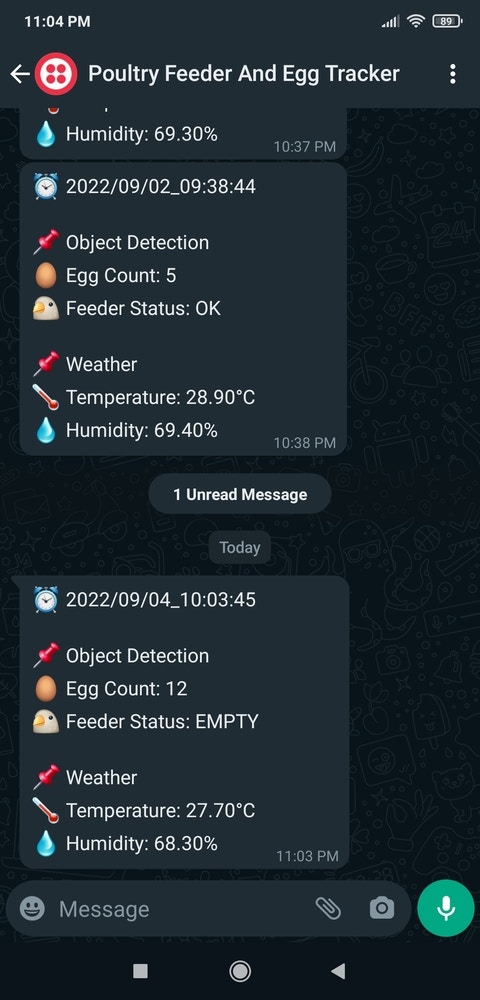
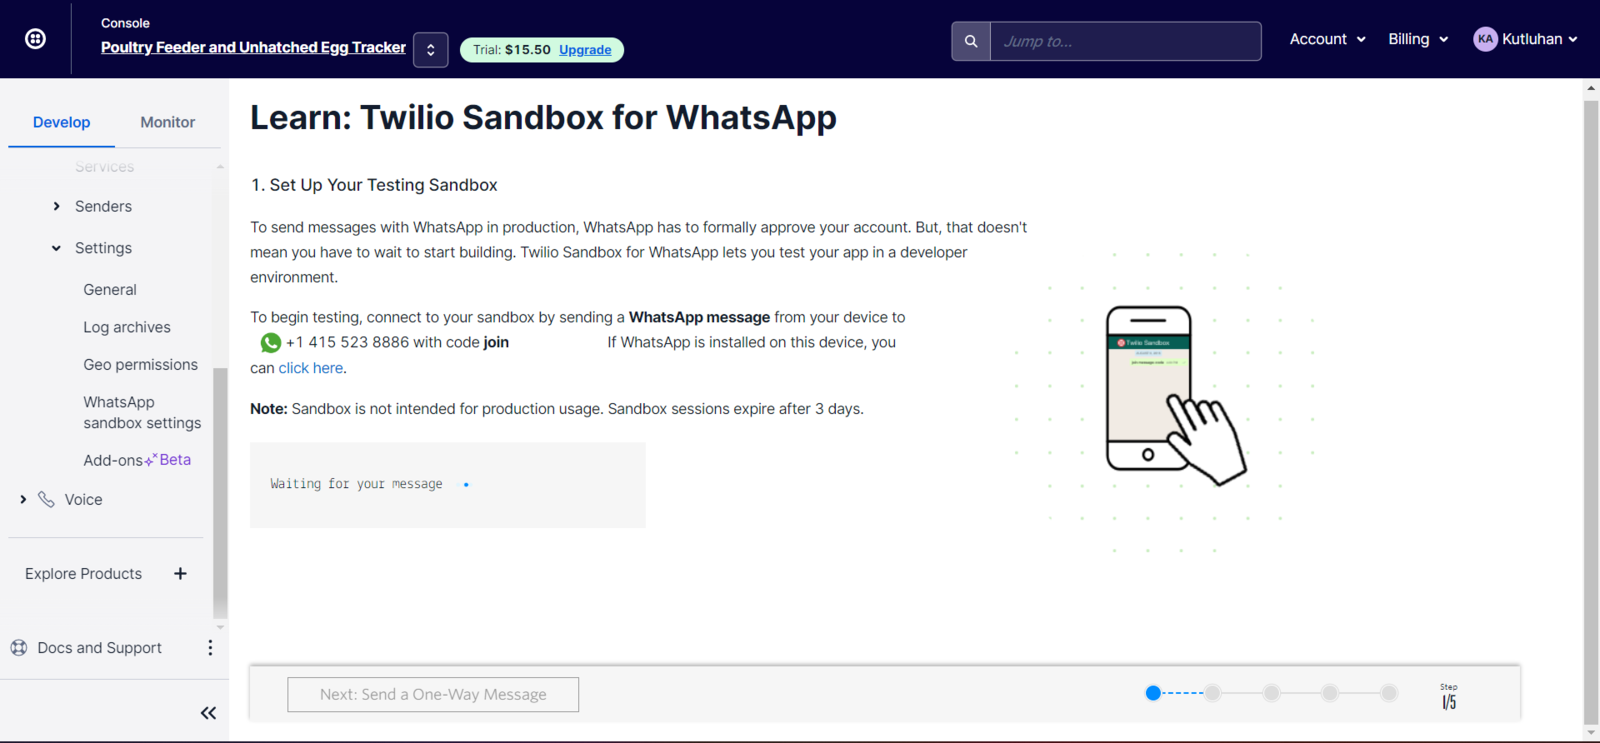
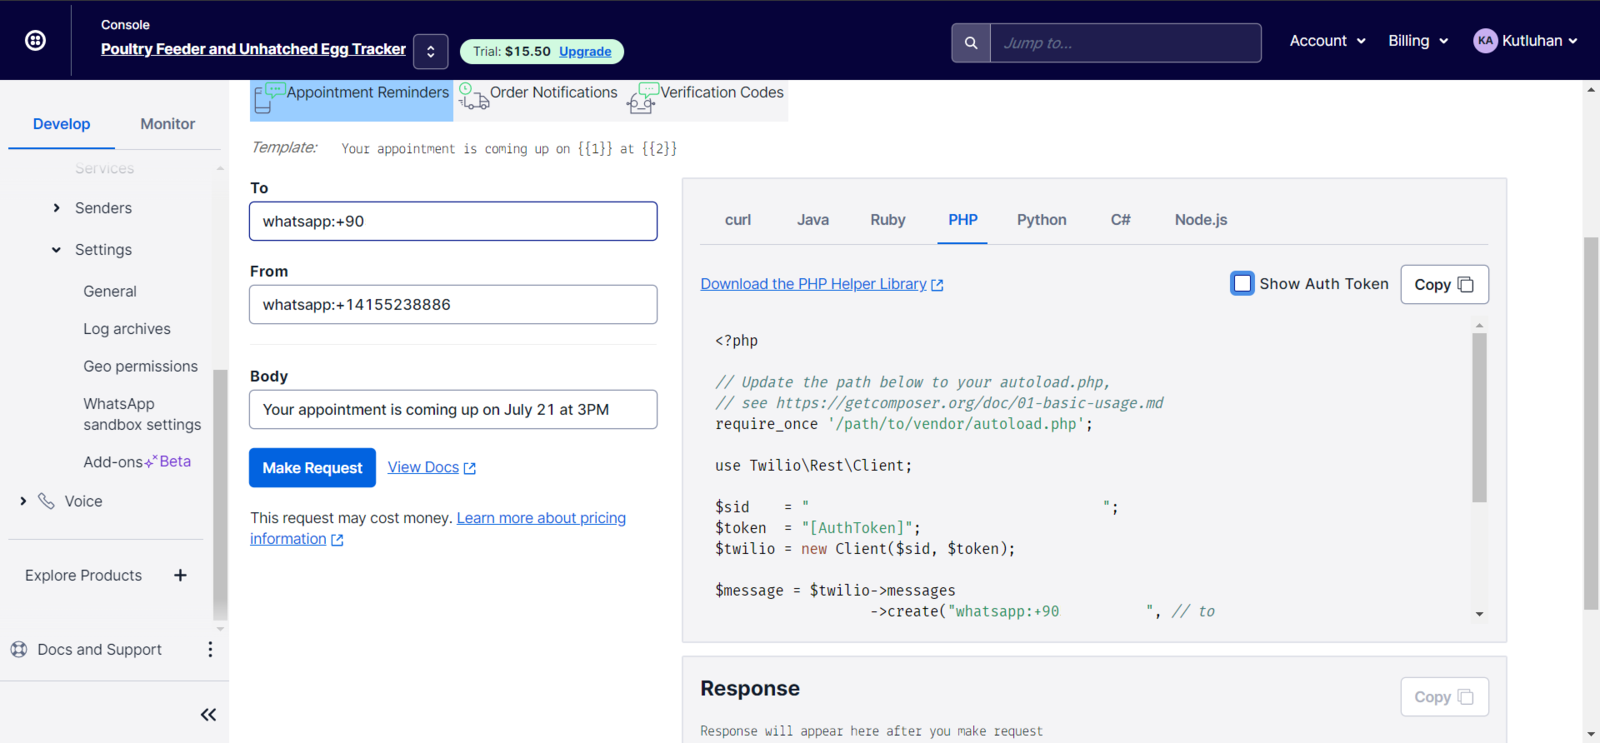
To get notification messages over WhatsApp, I utilized Twilio’s API for WhatsApp. Twilio gives the user a simple and reliable way to send WhatsApp messages to a verified phone number free of charge. Also, Twilio provides official helper libraries for different programming languages, including PHP. :hash: First of all, sign up for Twilio and create a new free trial account (project).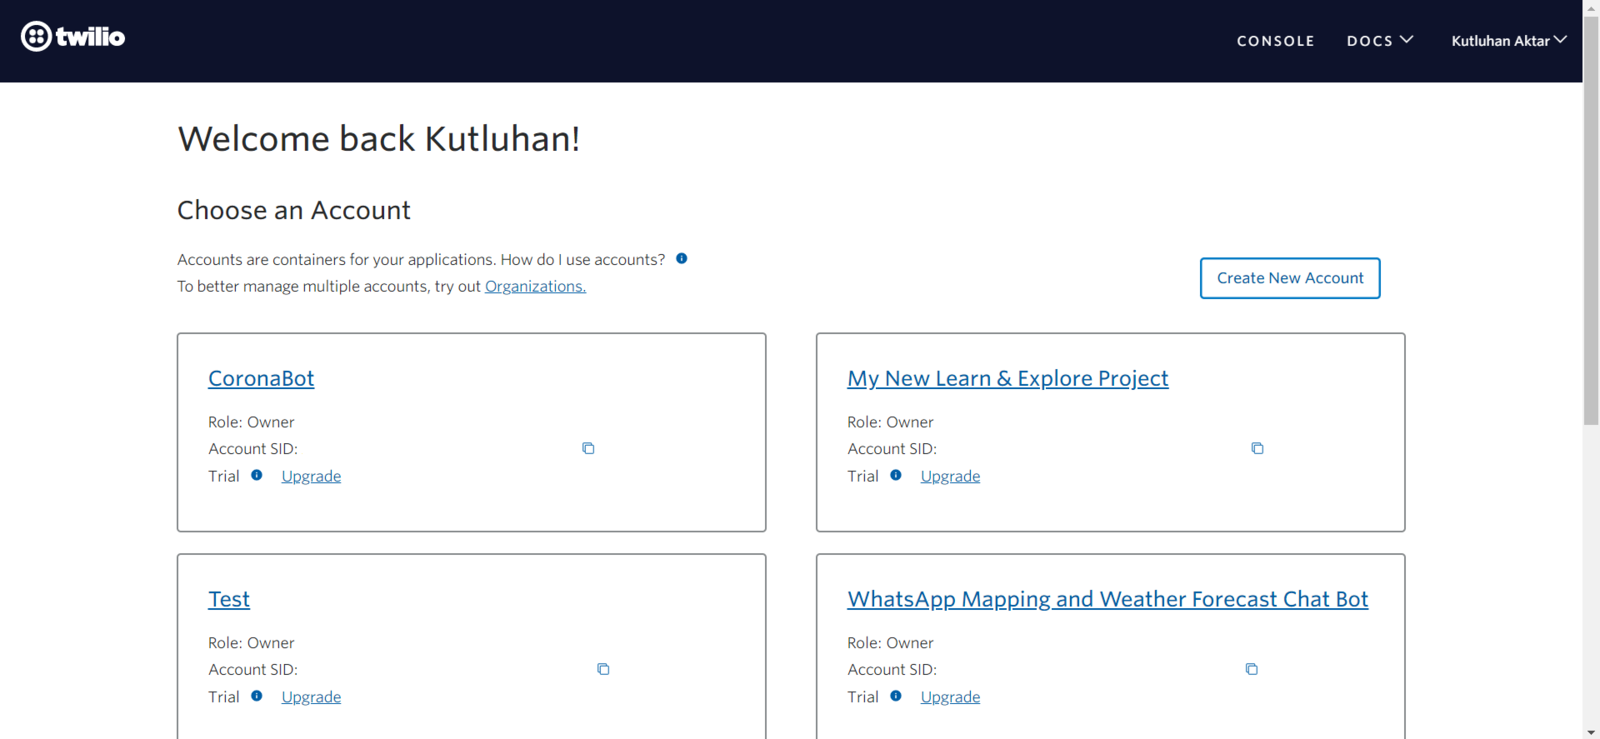
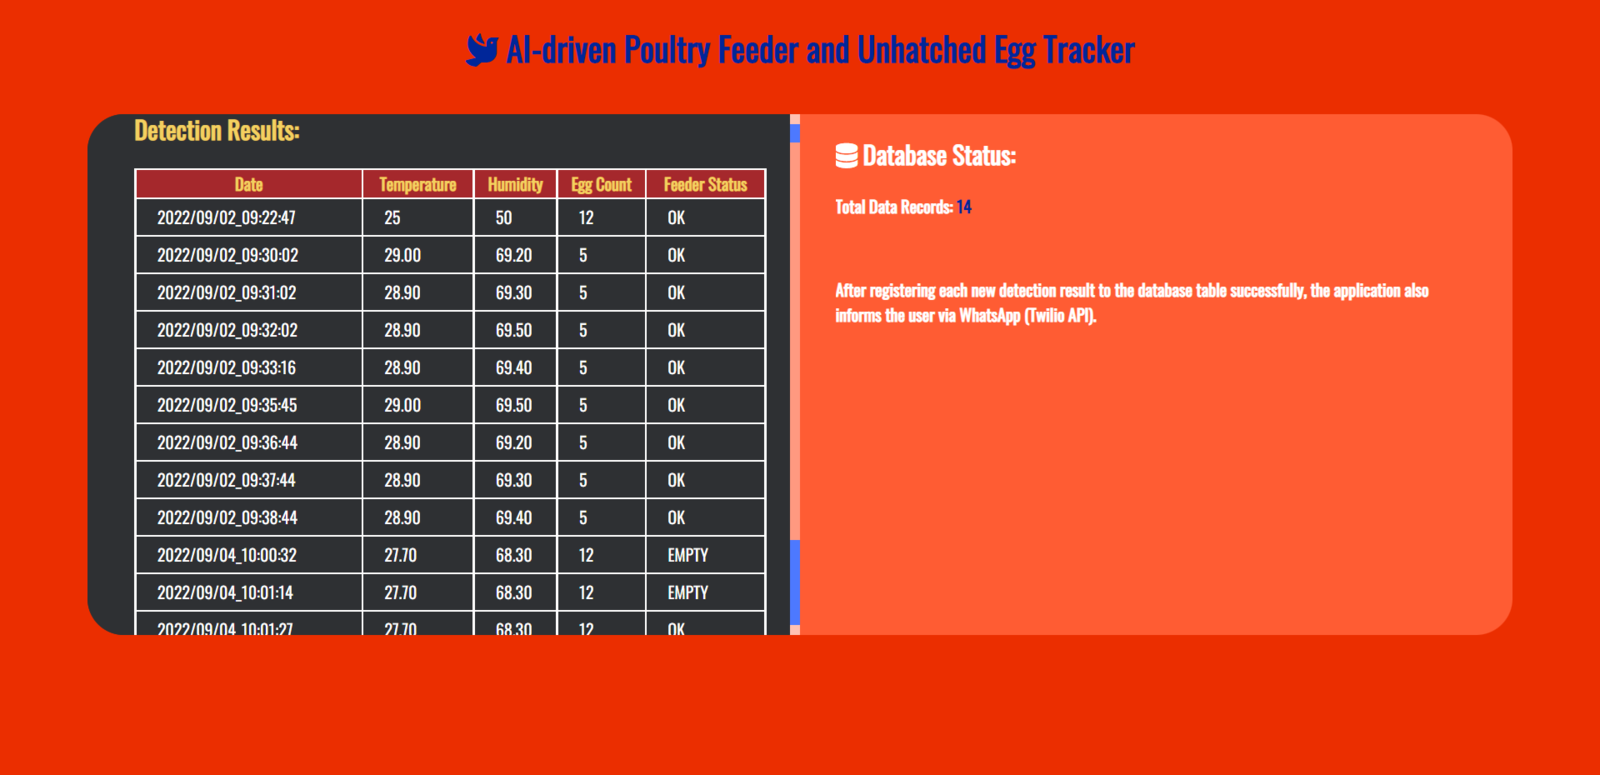
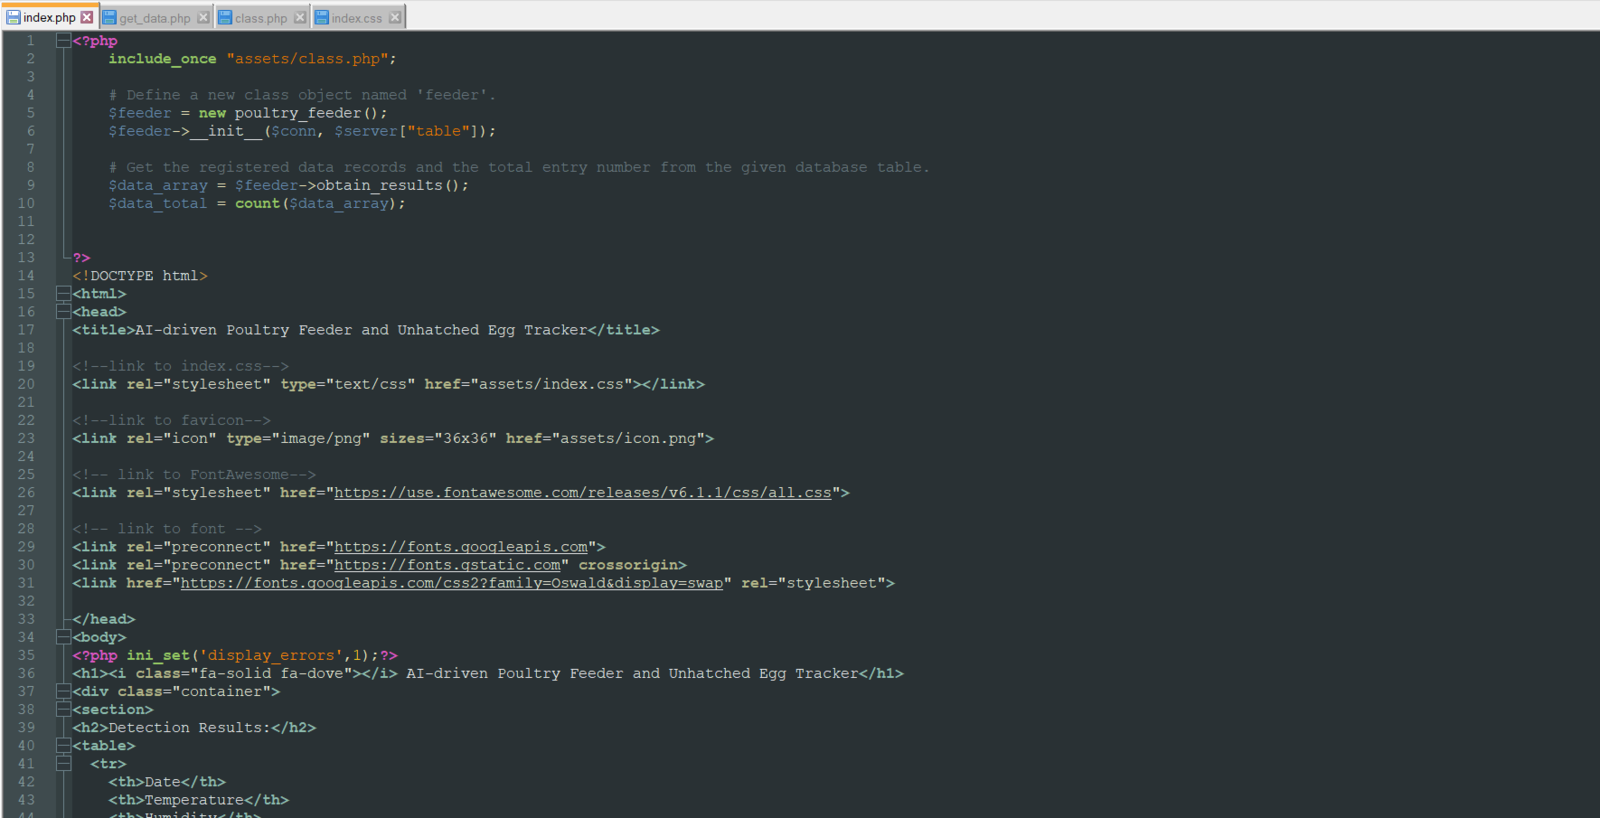
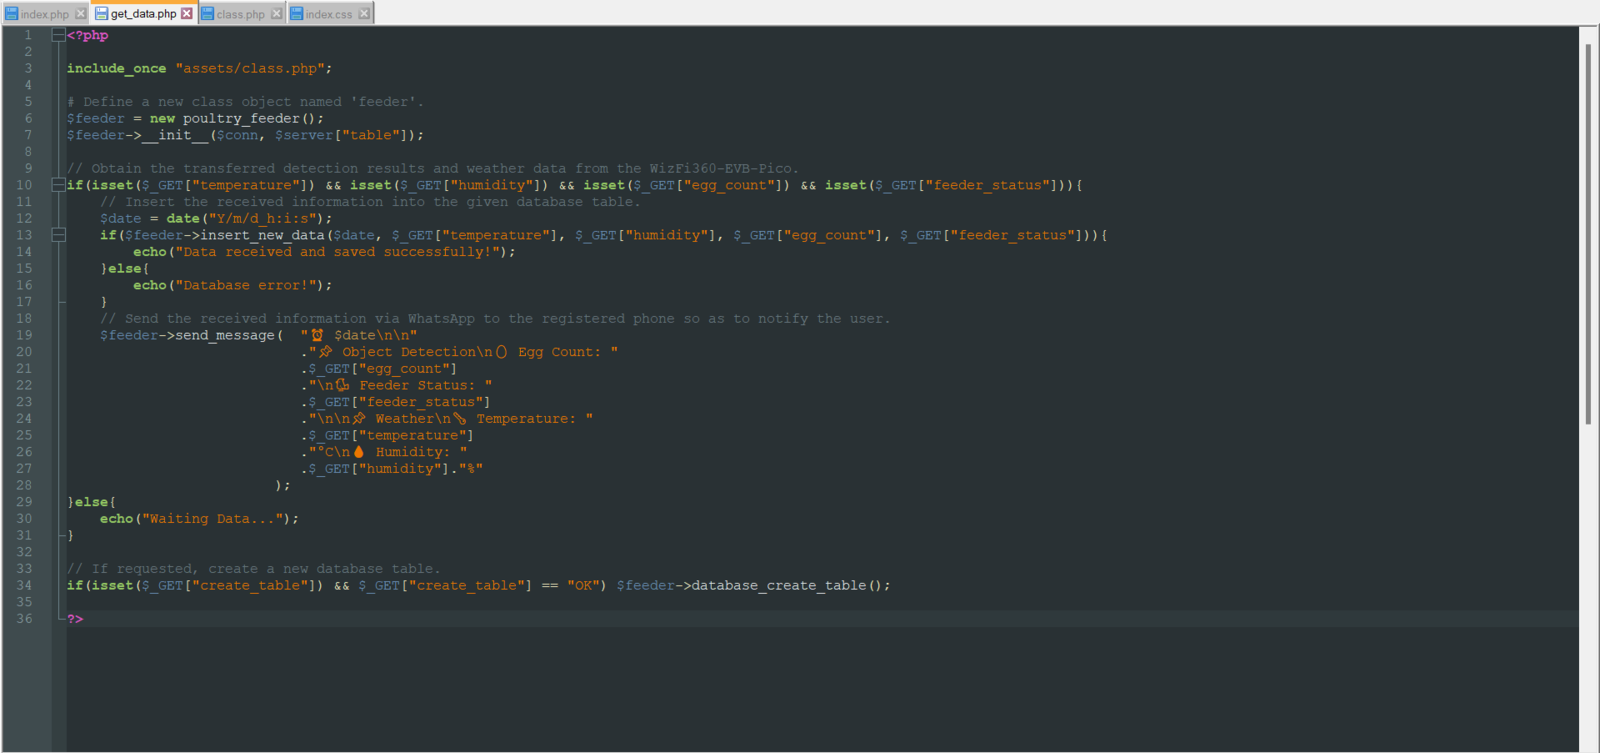
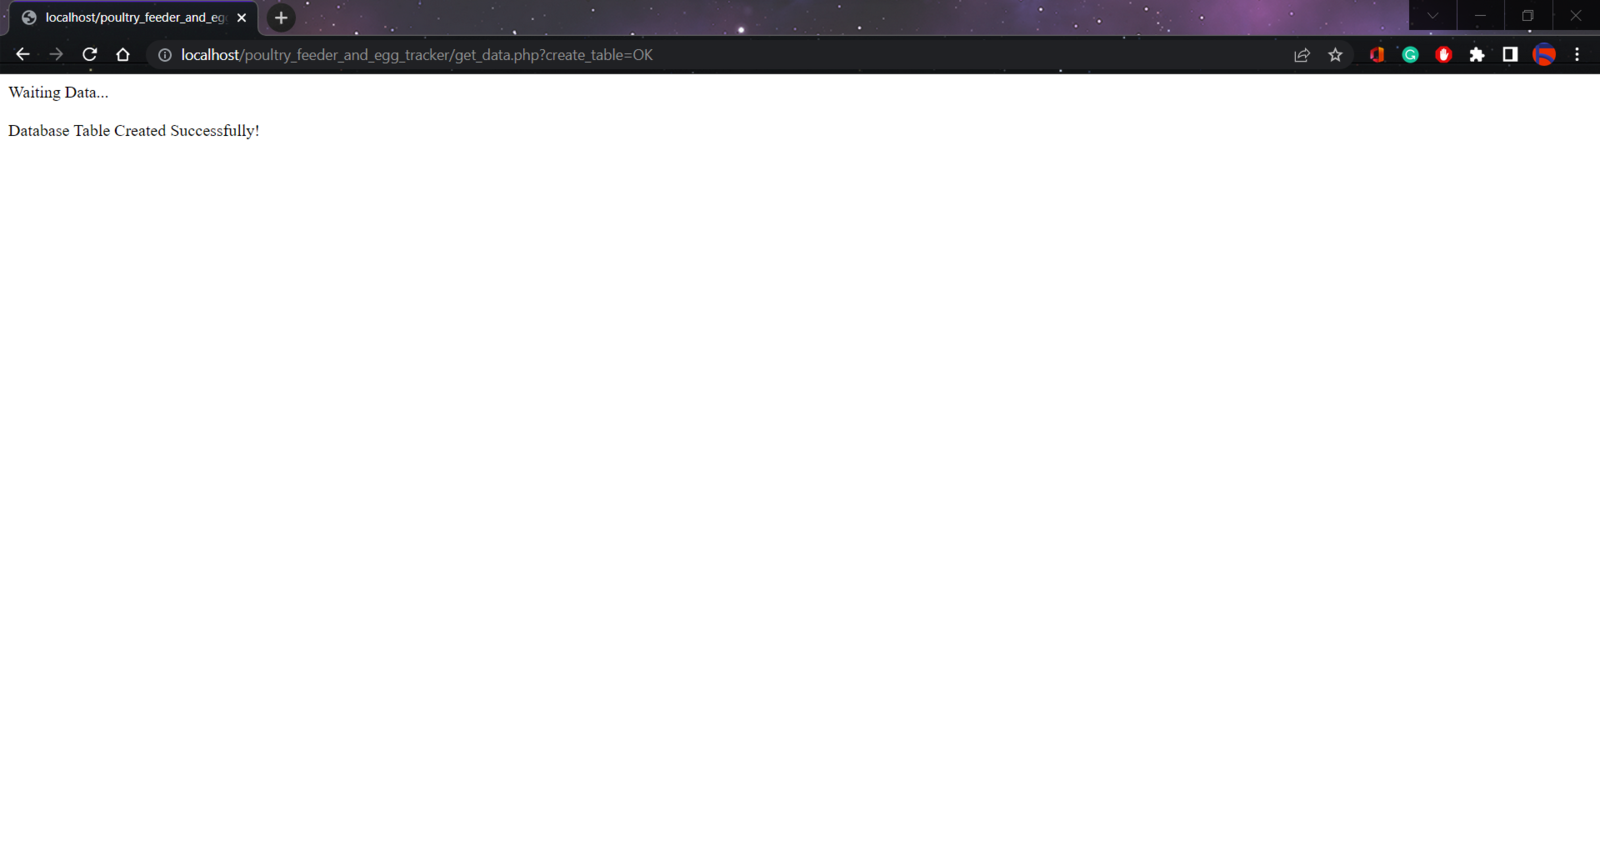
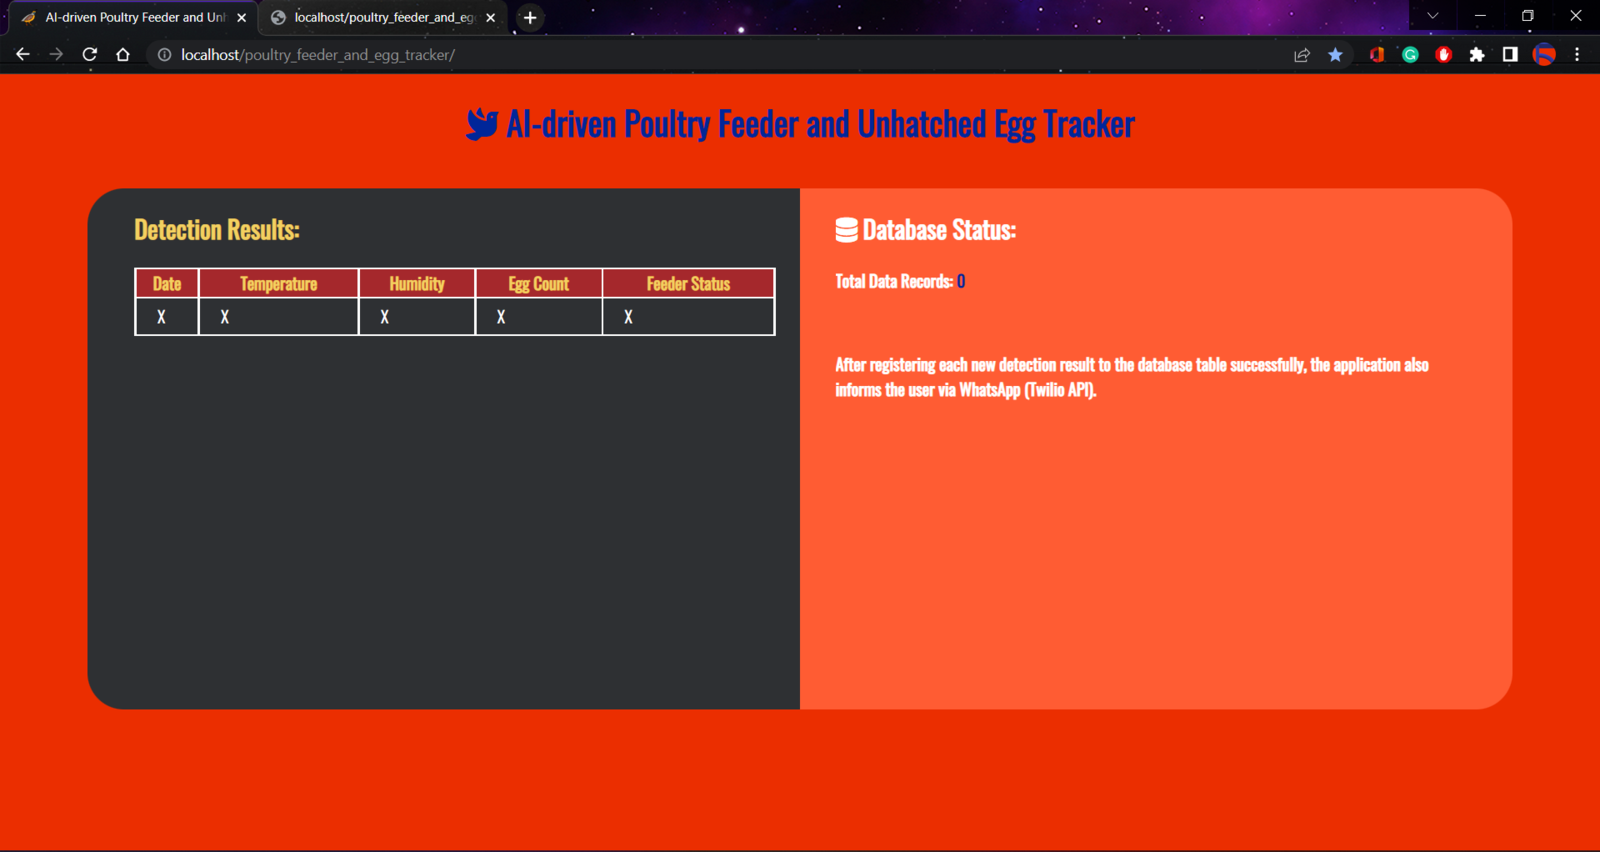
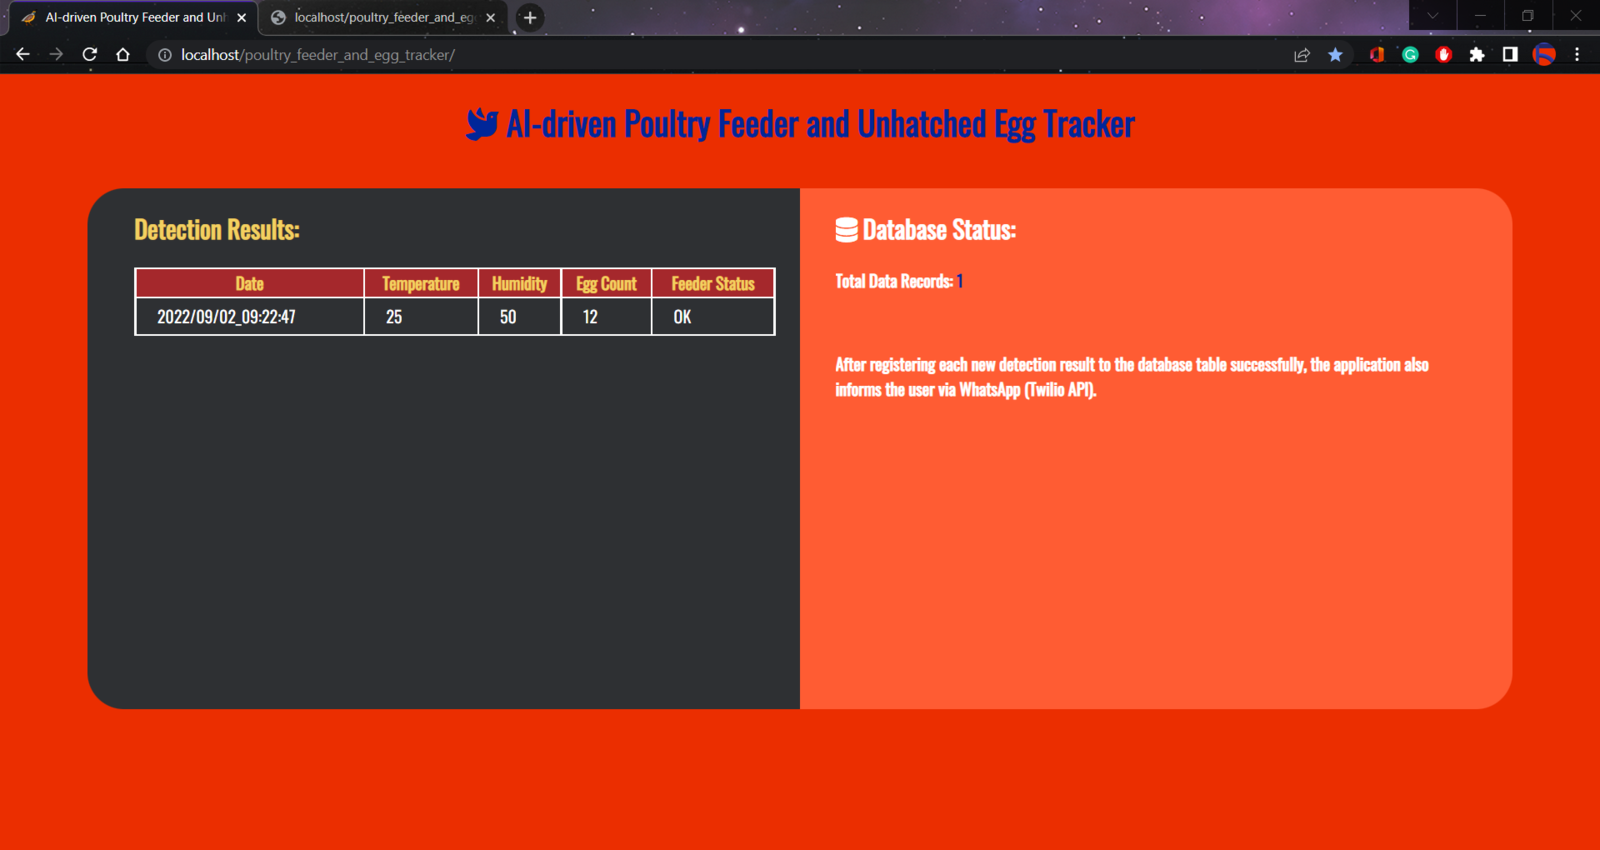
Step 3: Developing a web application in PHP to log detection results
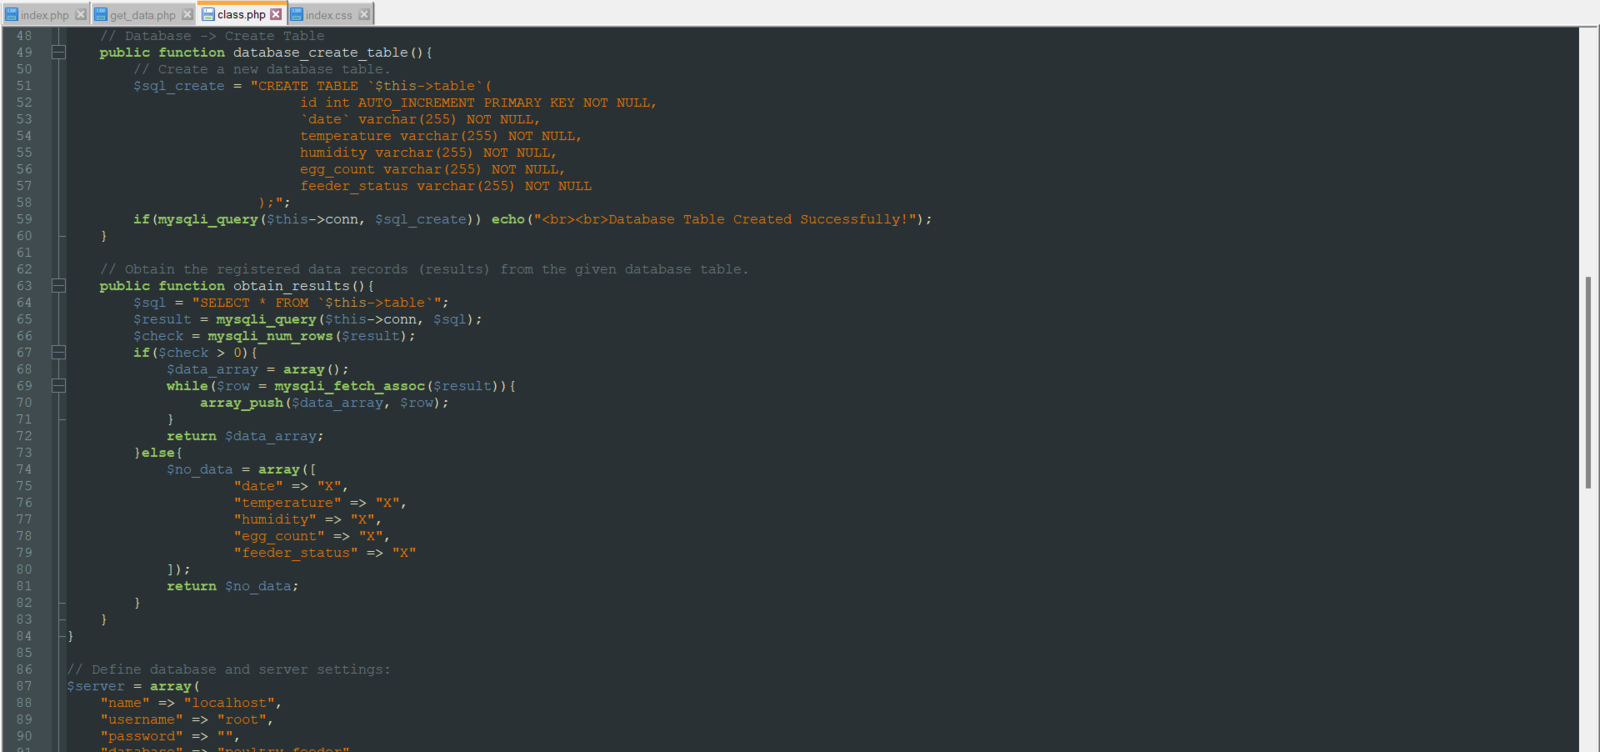
To be able to log the detection results with the collected weather data transmitted by WizFi360-EVB-Pico and send WhatsApp messages via the Twilio PHP Helper Library to inform the user of the detection results, I decided to develop a web application in PHP named poultry_feeder_and_egg_tracker. As shown below, the web application consists of one folder and five files:- /assets
- class.php
- icon.png
- index.css
- get_data.php
- index.php
- Date
- Temperature
- Humidity
- Egg Count
- Feeder Status
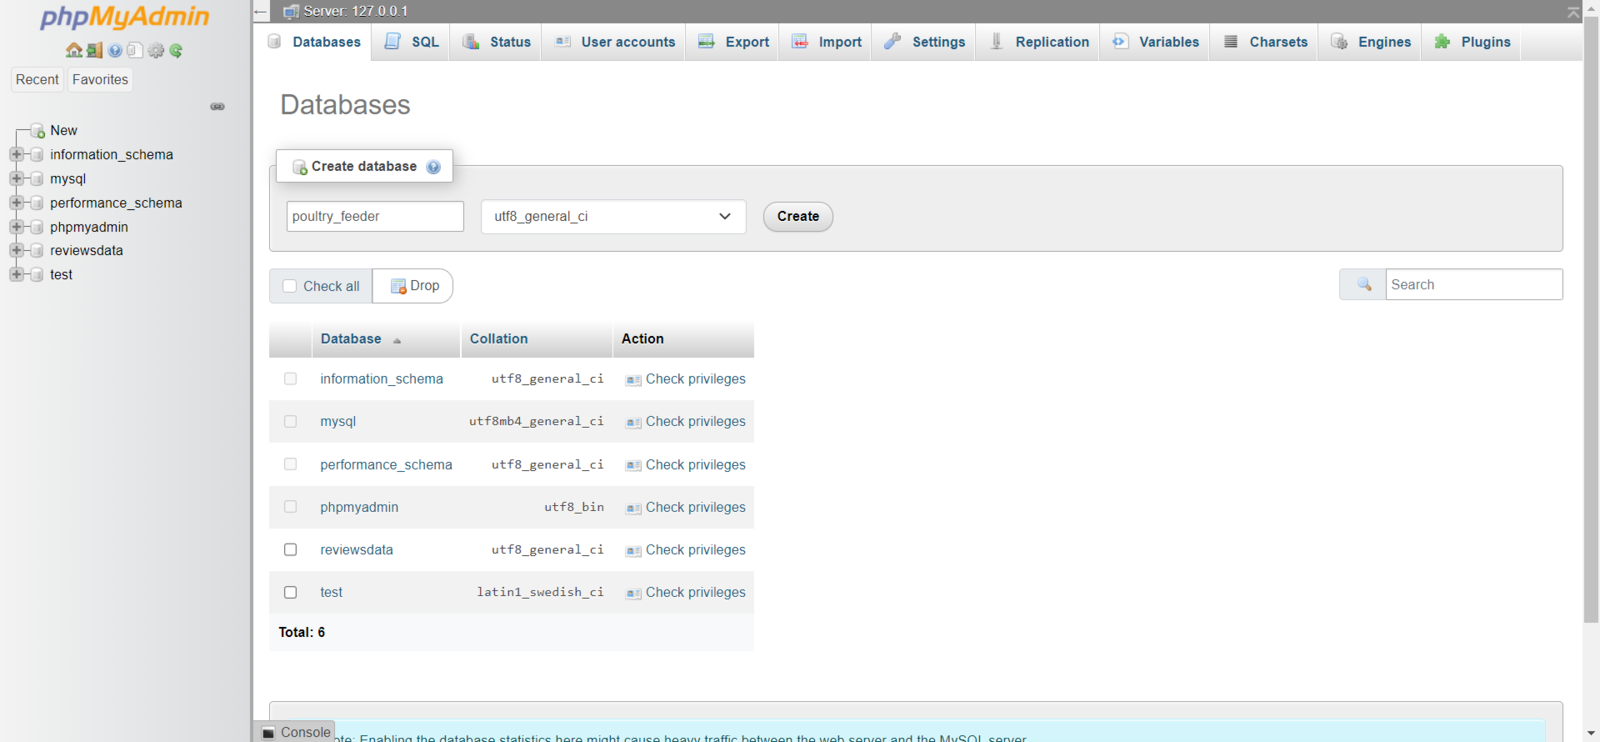
Step 3.1: Setting and running the web application on LattePanda 3 Delta 864
Since I have got a test sample of the brand-new LattePanda 3 Delta 864, I decided to host my web application on LattePanda 3 Delta. Therefore, I needed to set up a LAMP web server. LattePanda 3 Delta is a pocket-sized hackable computer that provides ultra performance with the Intel 11th-generation Celeron N5105 processor. Plausibly, LattePanda 3 Delta can run the XAMPP application. So, it is effortless to create a server and a database with LattePanda 3 Delta.
.png?fit=max&auto=format&n=A2Bwlb7Fn9Ob3CFt&q=85&s=f506a16cb52584734d5725ec18a6ced3)
- Date
- Temperature
- Humidity
- Egg Count
- Feeder Status
Step 4: Capturing and storing images of the coop w/ OpenMV Cam H7
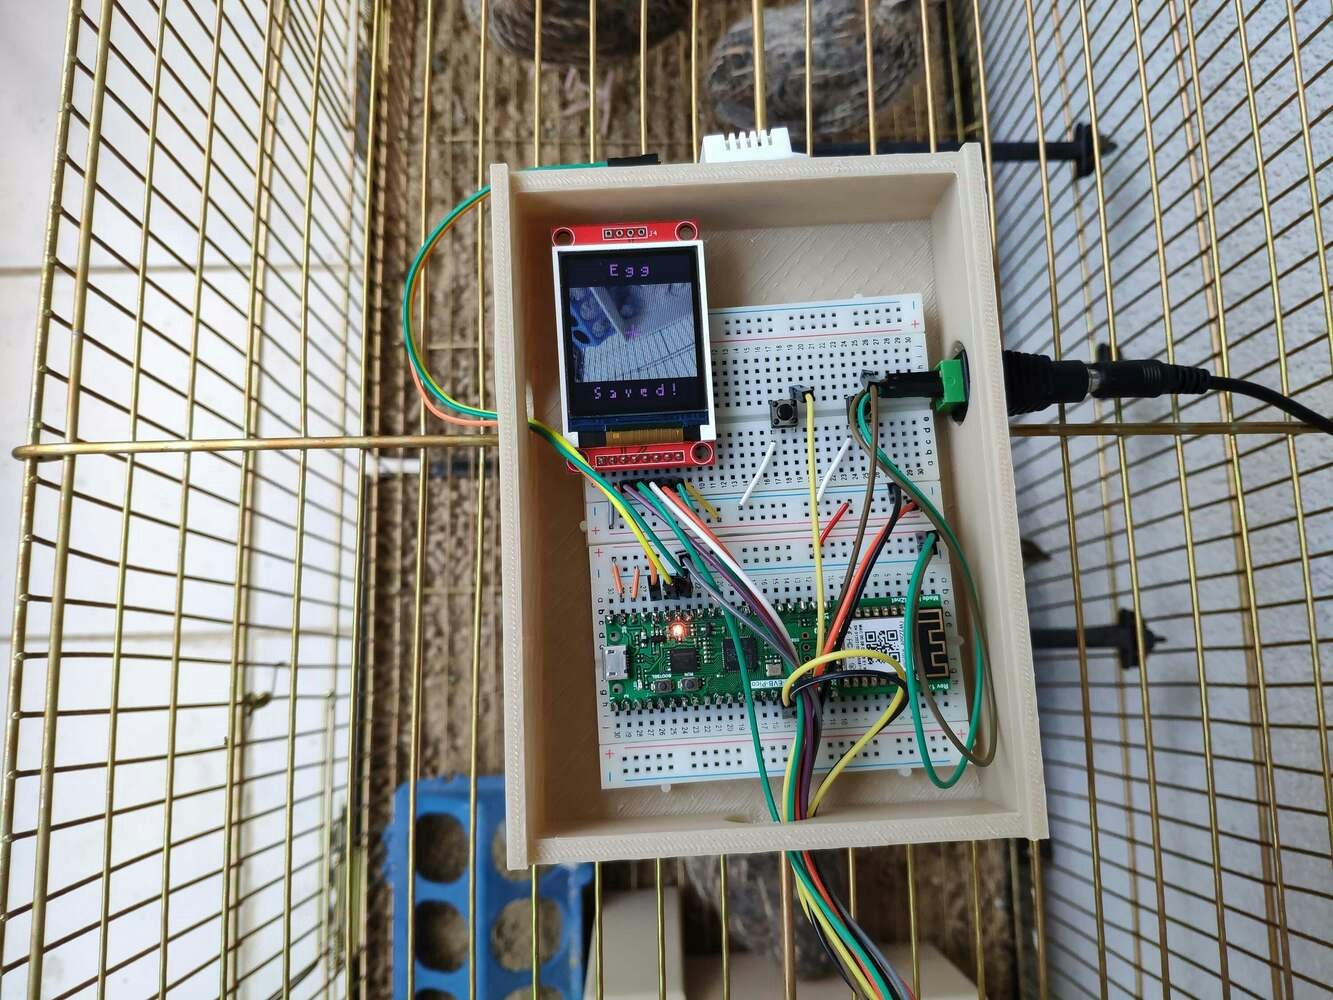
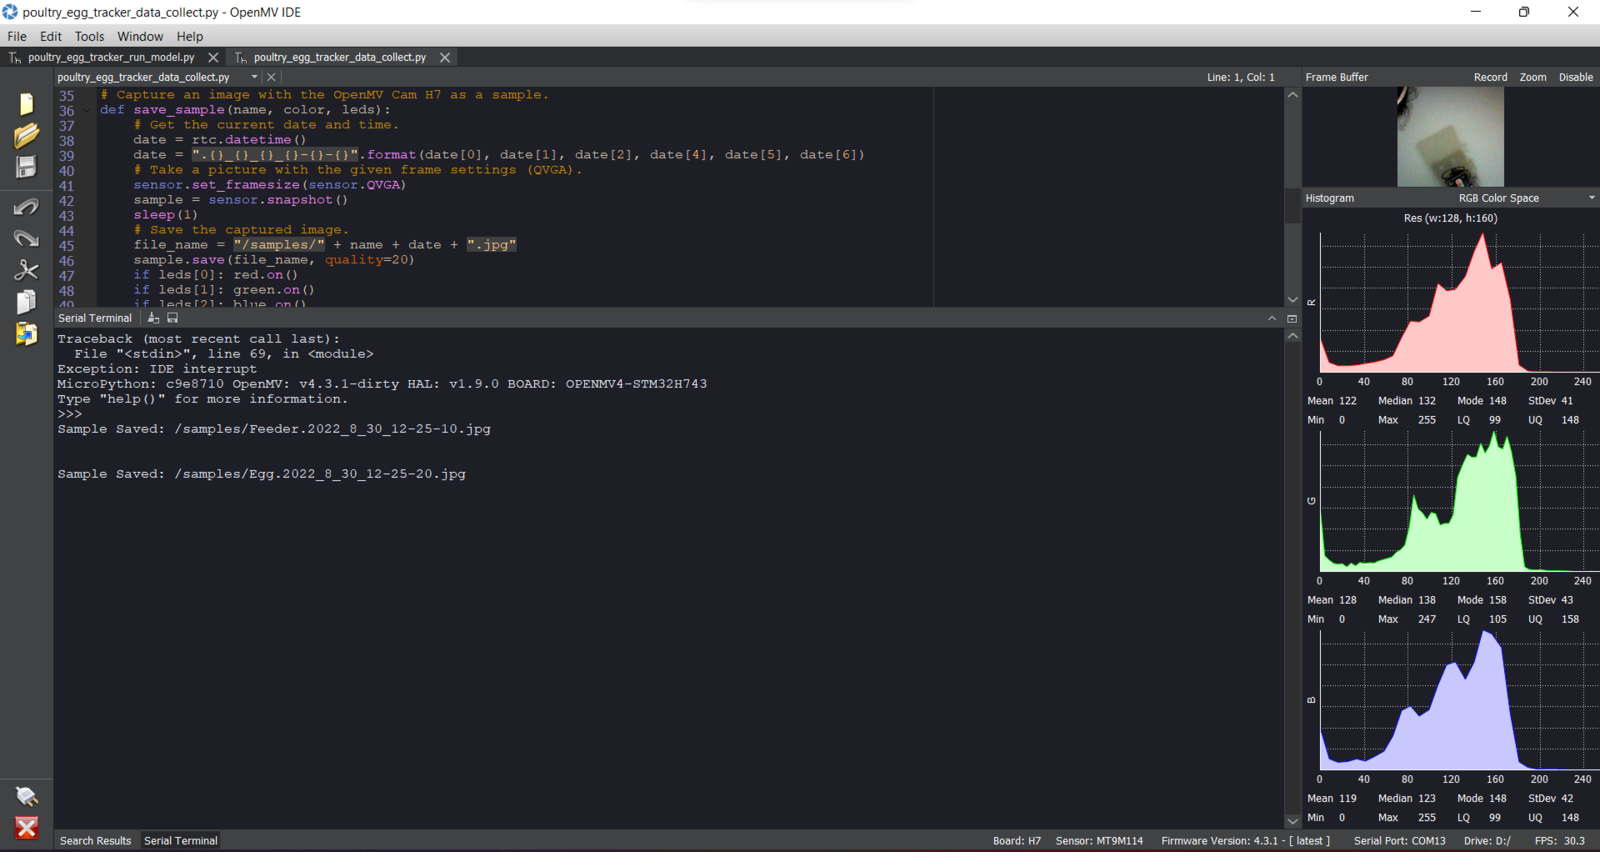
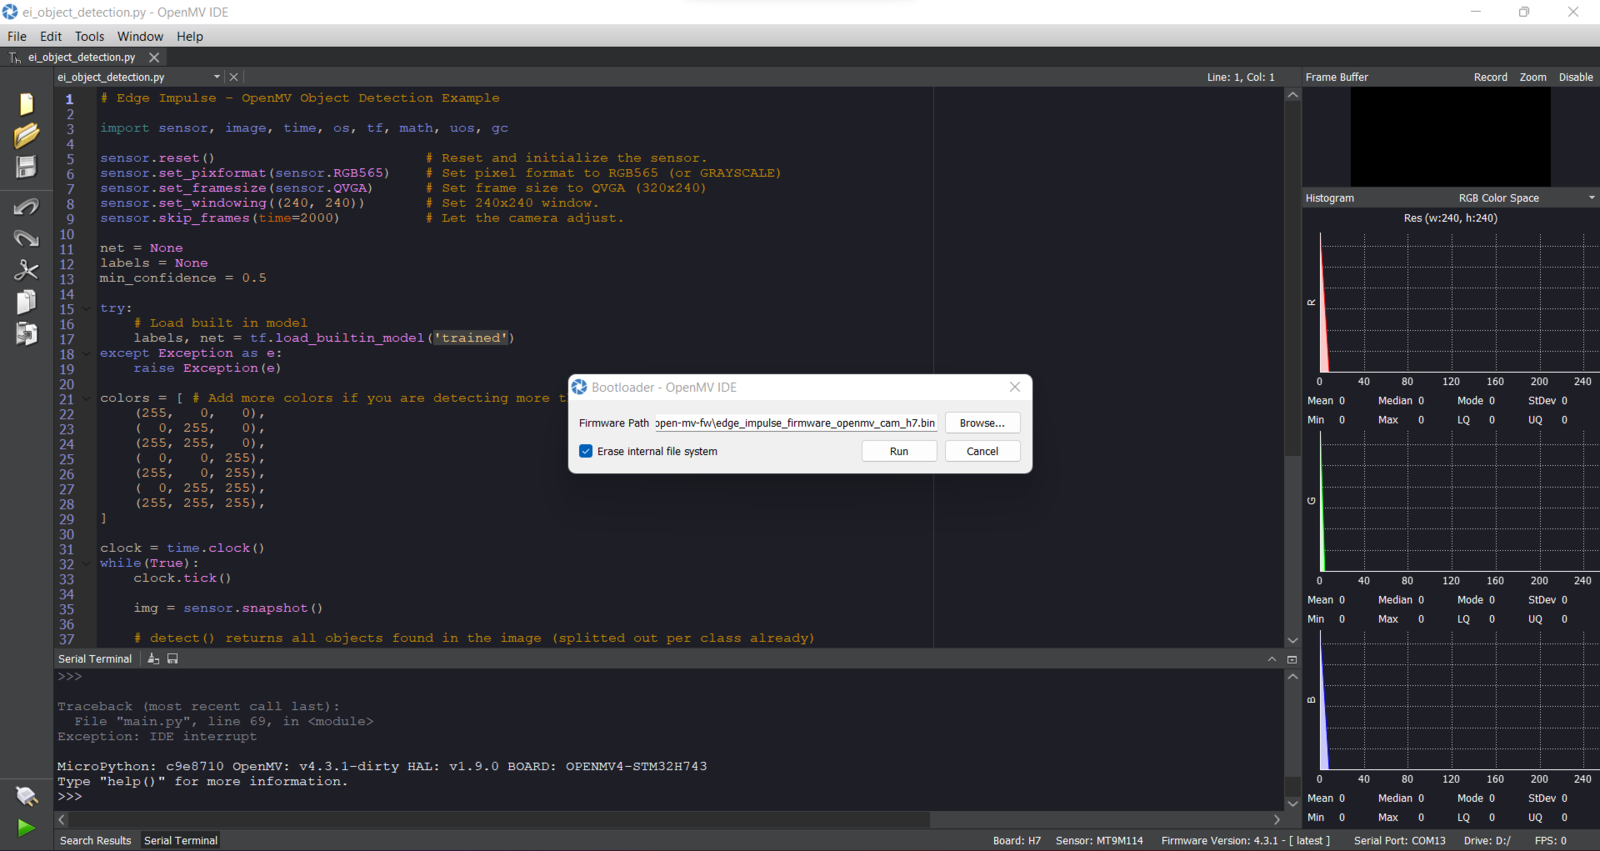
Before proceeding with the following steps, I needed to install the OpenMV IDE in order to program OpenMV Cam H7. Plausibly, the OpenMV IDE includes all required libraries and modules for this project. Therefore, I did not need to download additional modules after installing the OpenMV IDE from here. You can get more information regarding the specific OpenMV MicroPython libraries from here. After setting up OpenMV Cam H7 on the OpenMV IDE, I programmed OpenMV Cam H7 to capture coop images showing the produced eggs and the poultry feeder in order to store them on the SD card and create appropriately labeled samples for the Edge Impulse object detection (FOMO) model. Since I needed to assign labels for each captured coop image to create a valid data set for the object detection model, I utilized the control buttons attached to OpenMV Cam H7 so as to choose among two different classes. After selecting a class, OpenMV Cam H7 captures a picture, appends the selected class name (Egg or Feeder) with the current date & time to the file name, and then saves the captured image to the SD card under the samples folder.- Control Button (A) ➡ Egg
- Control Button (B) ➡ Feeder
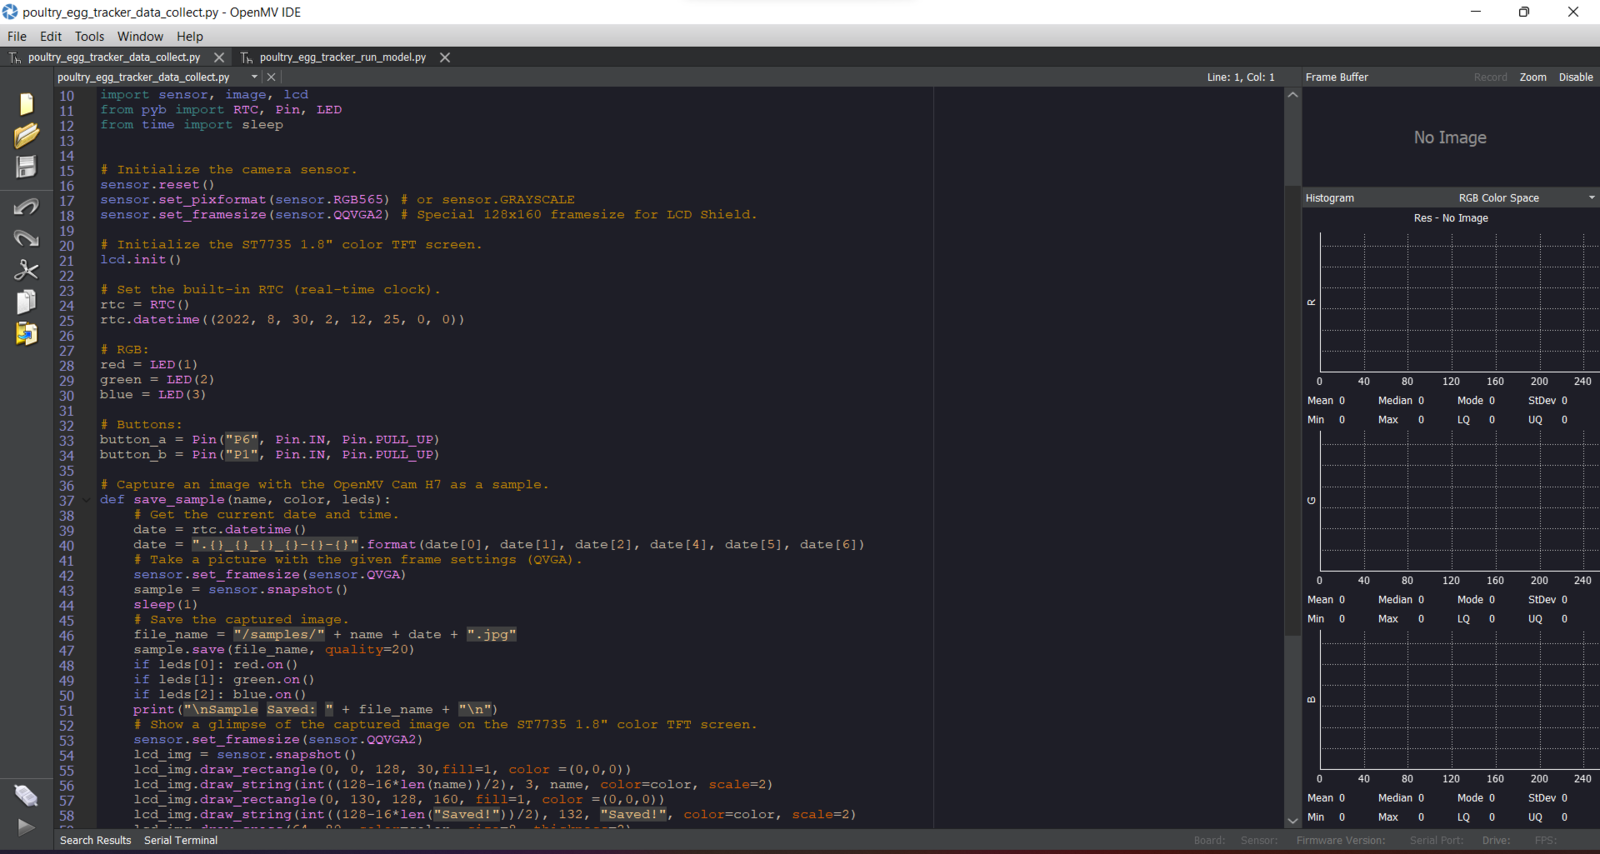
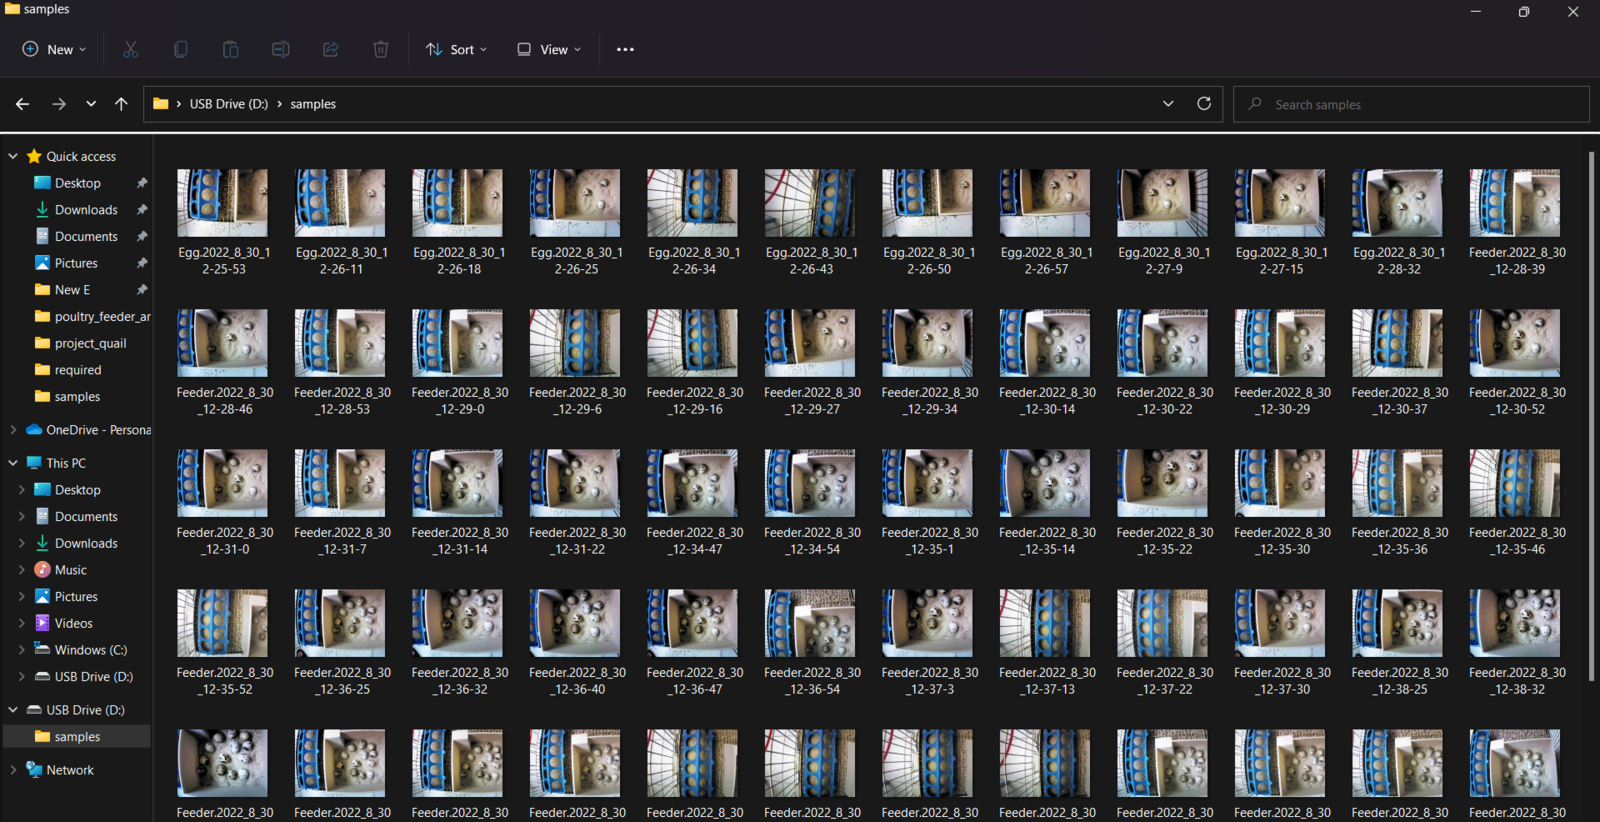
Step 4.1: Saving the captured coop pictures to the SD card as samples
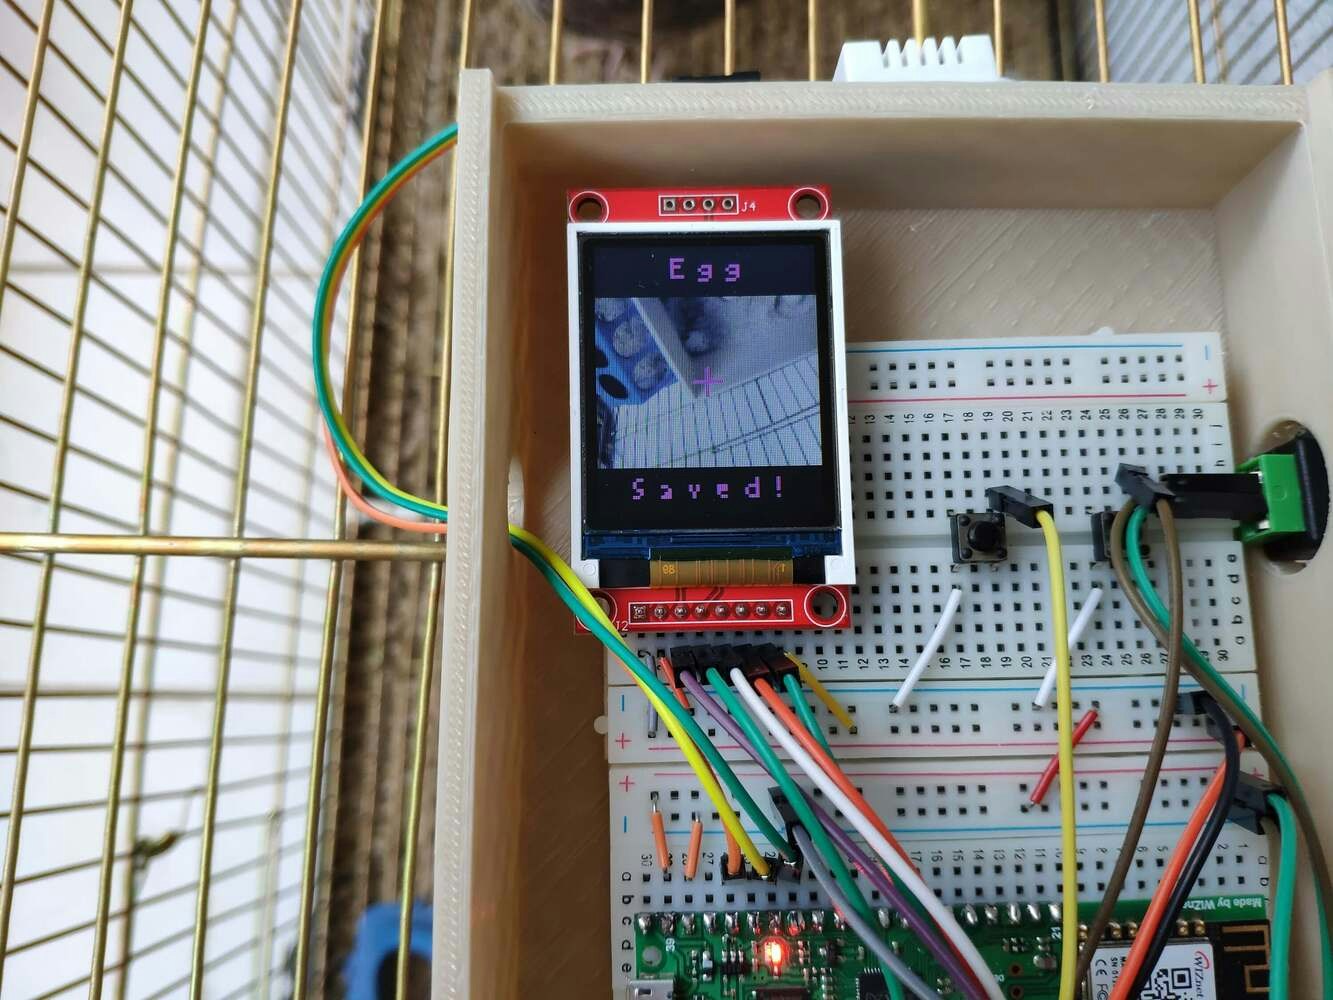
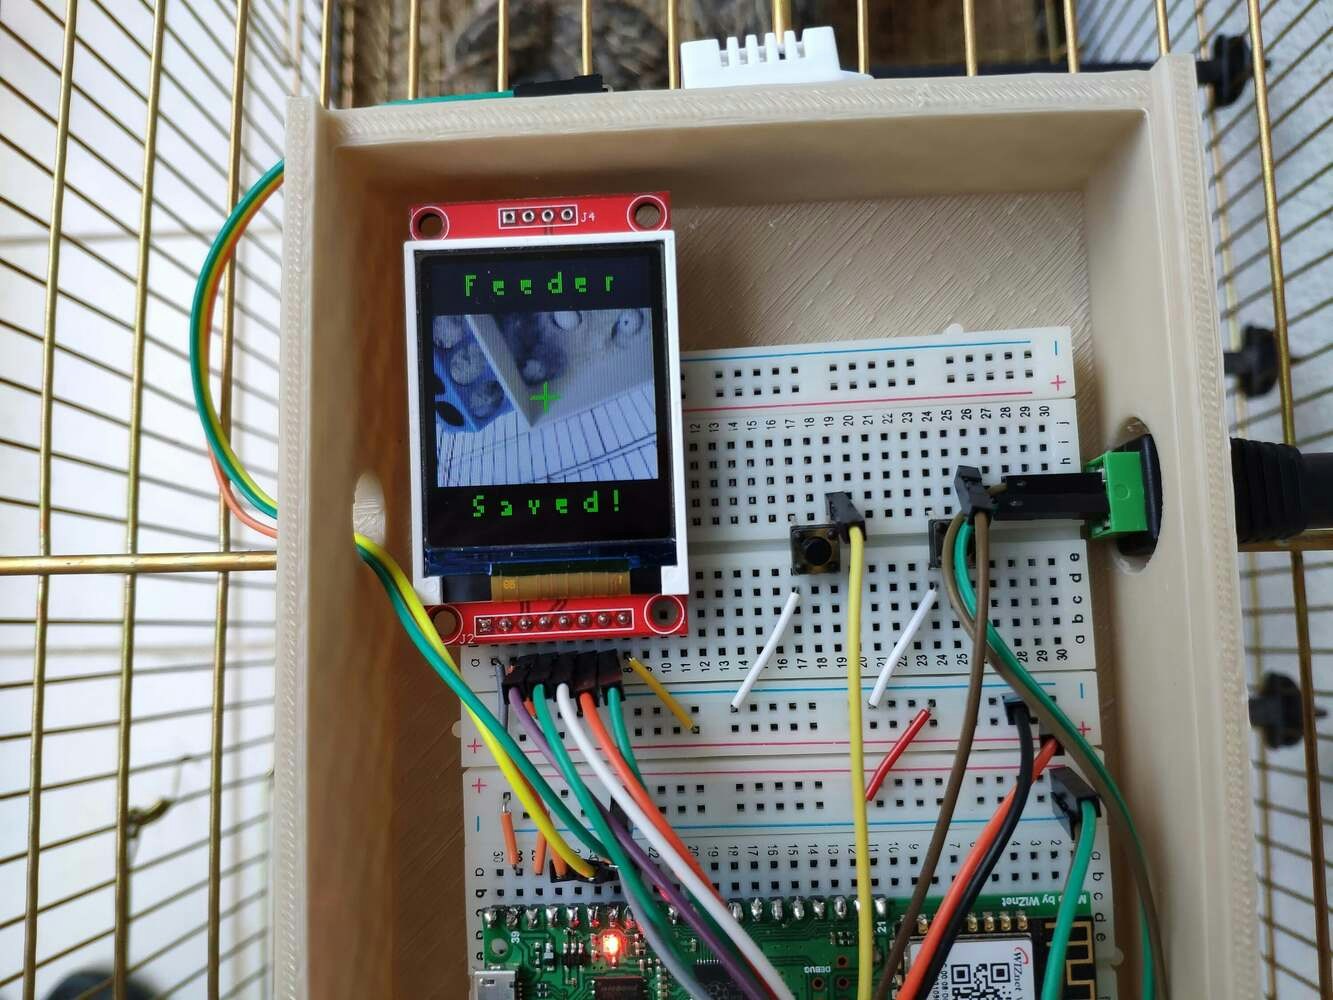
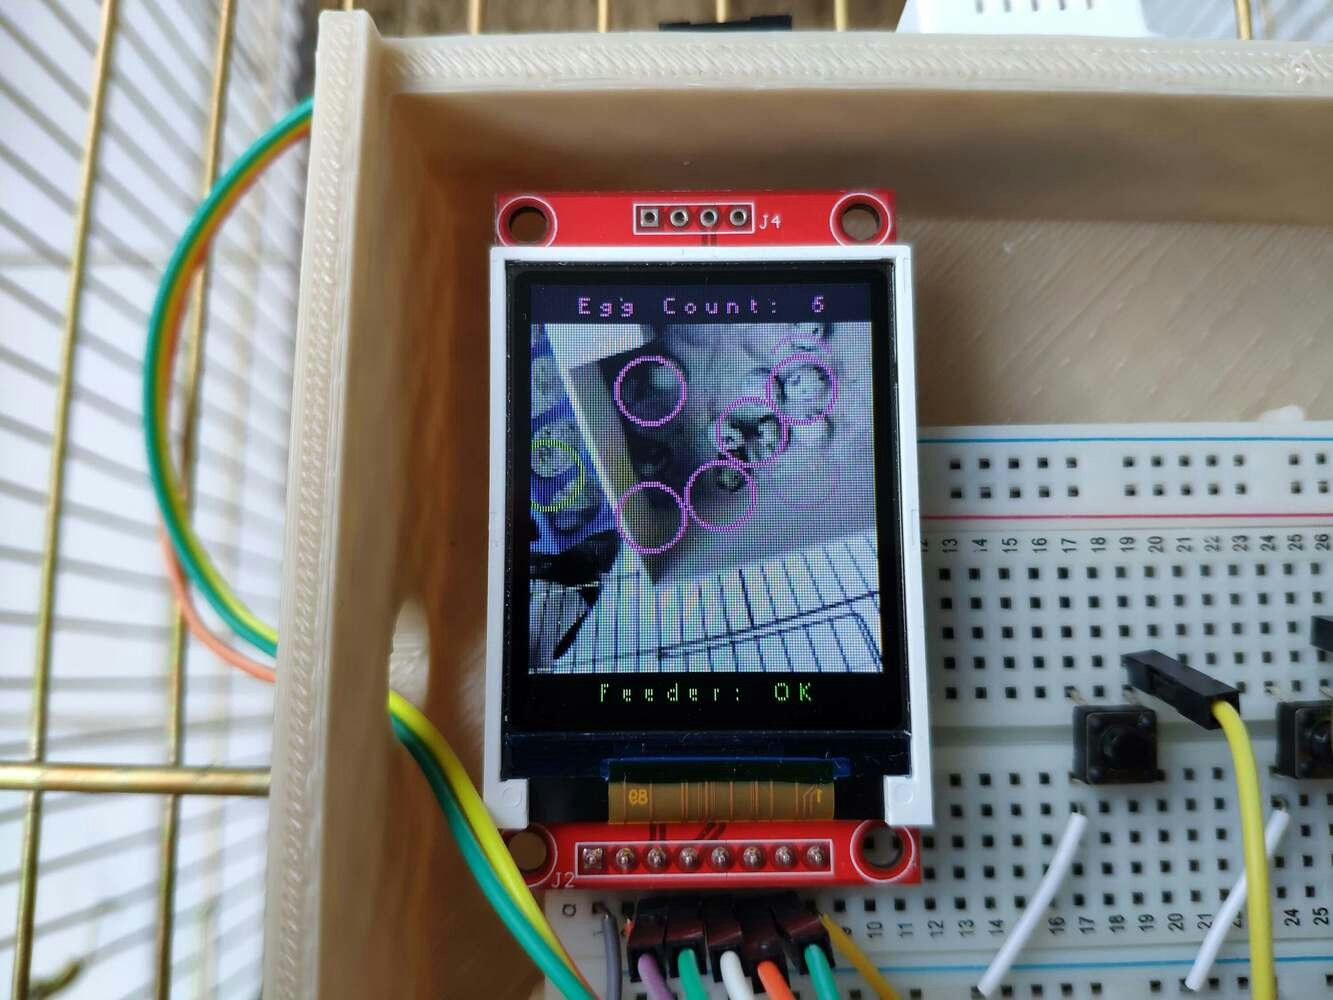
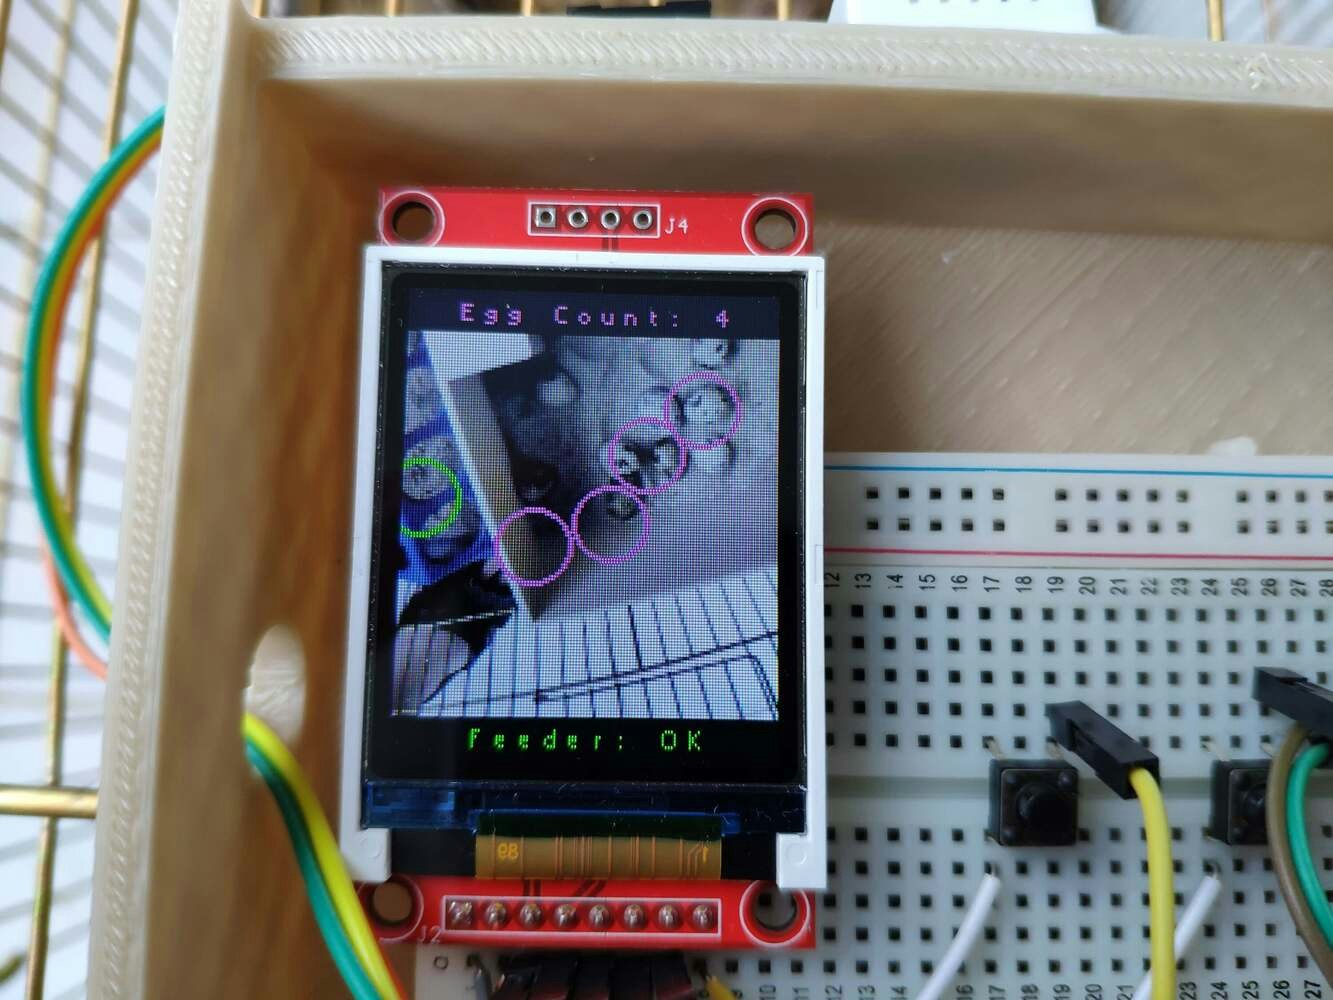
After uploading and running the code for capturing coop pictures and saving them to the SD card on OpenMV Cam H7: 🐤🥚 The device displays a real-time video stream on the ST7735 1.8” color TFT screen.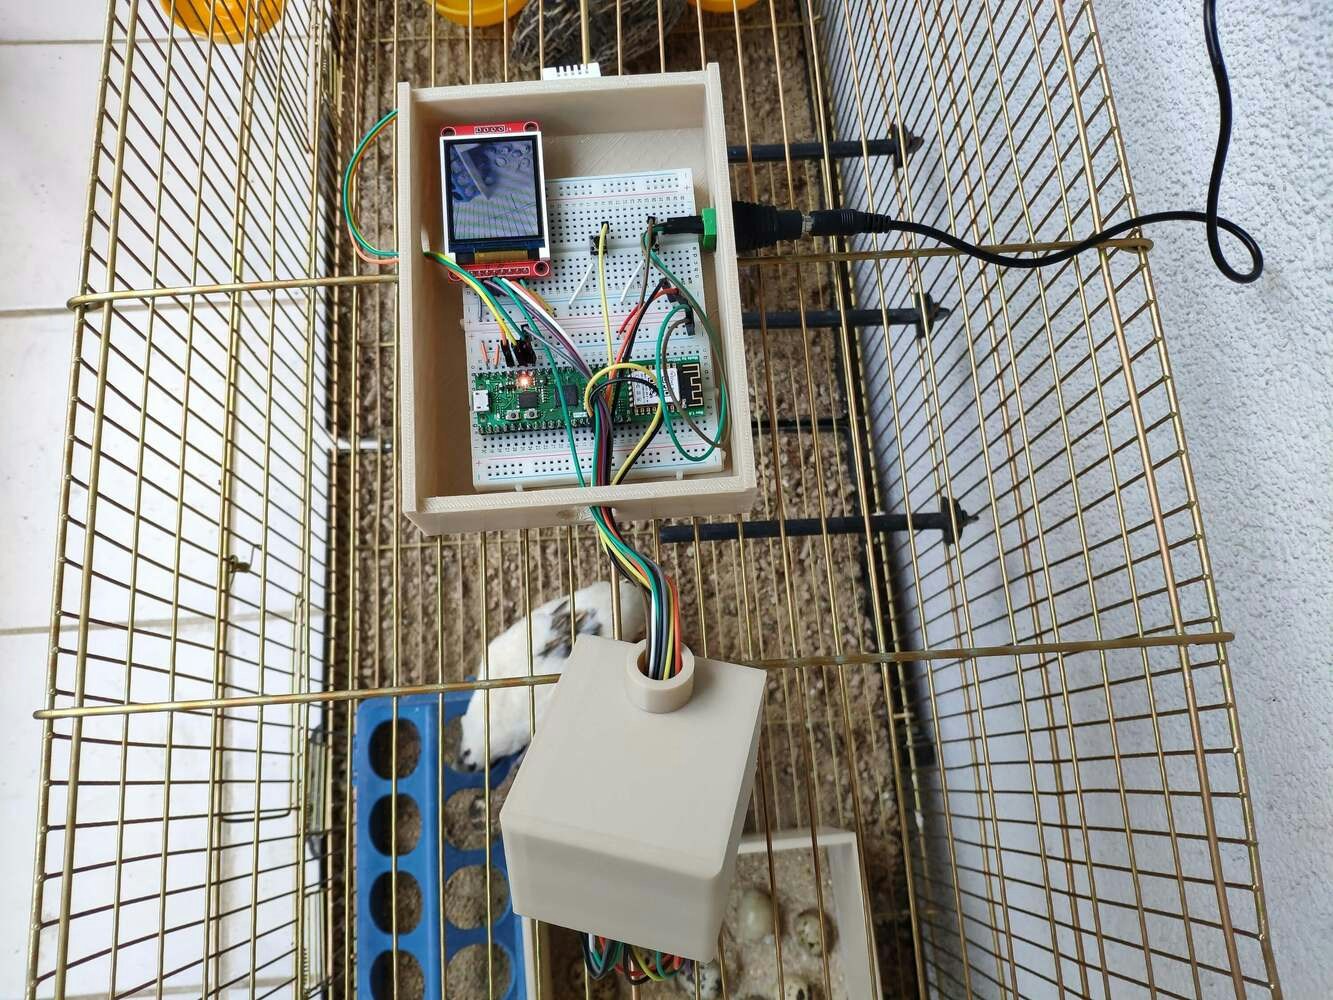
Step 5: Building an object detection (FOMO) model with Edge Impulse
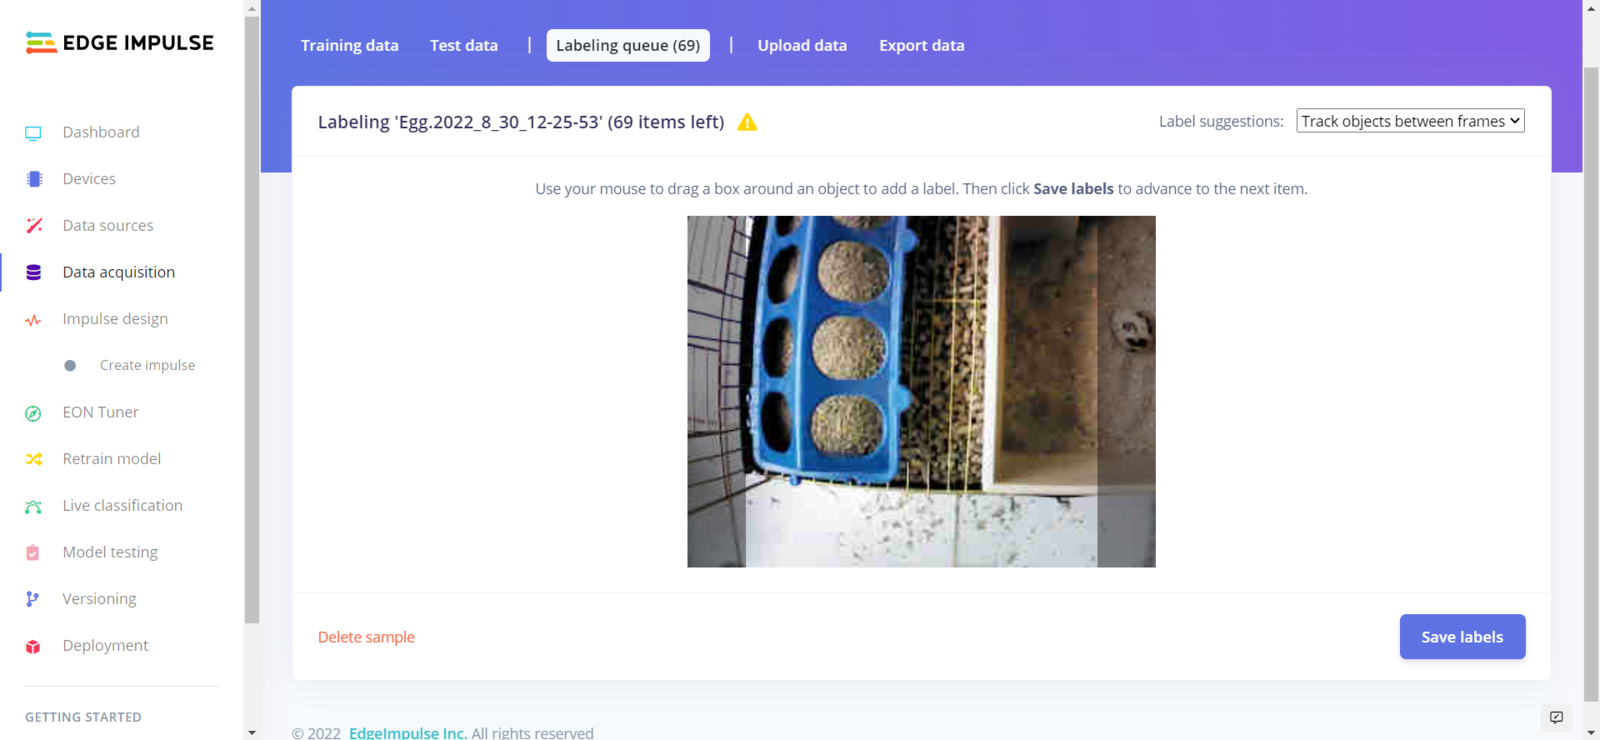
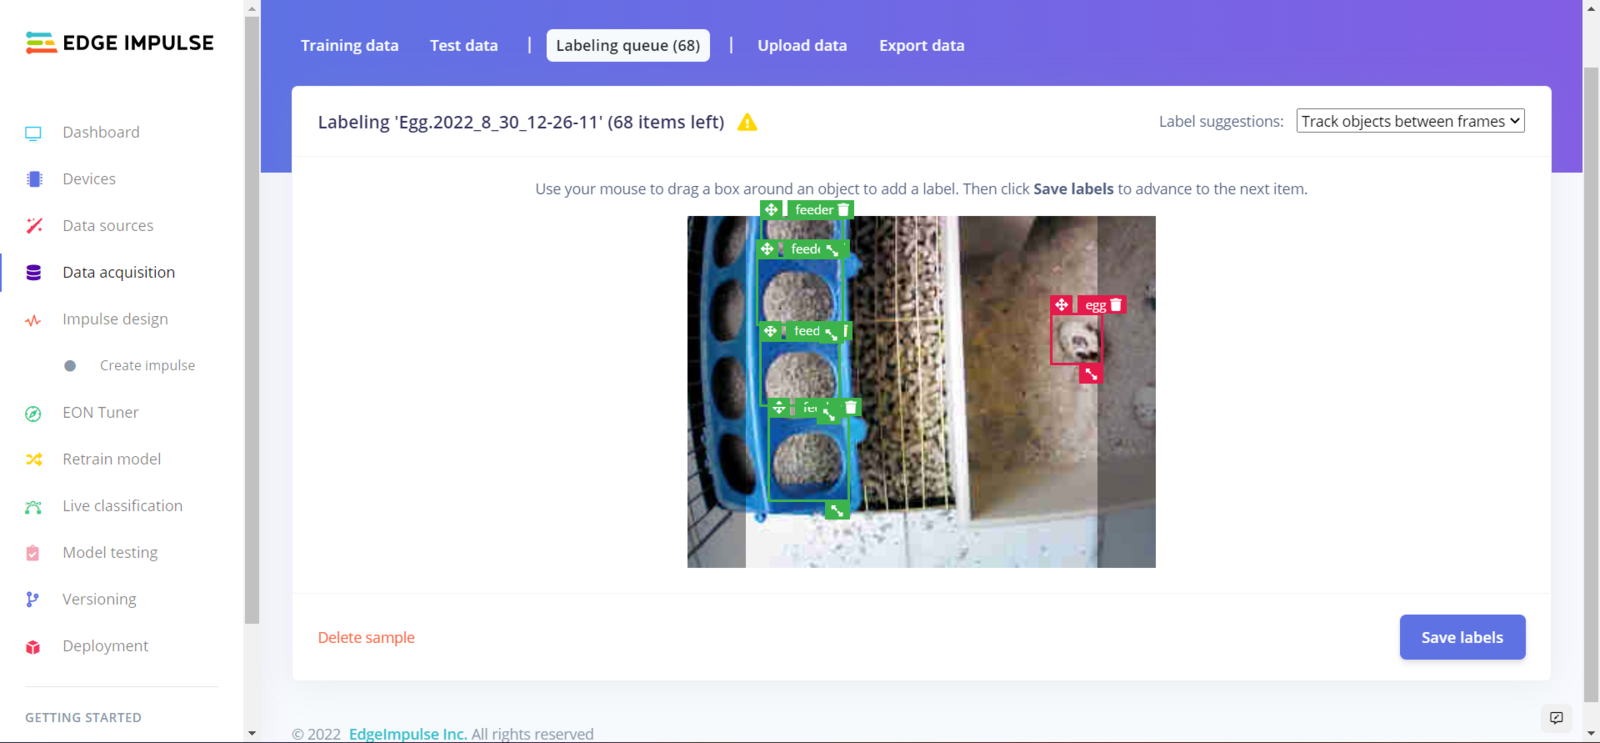
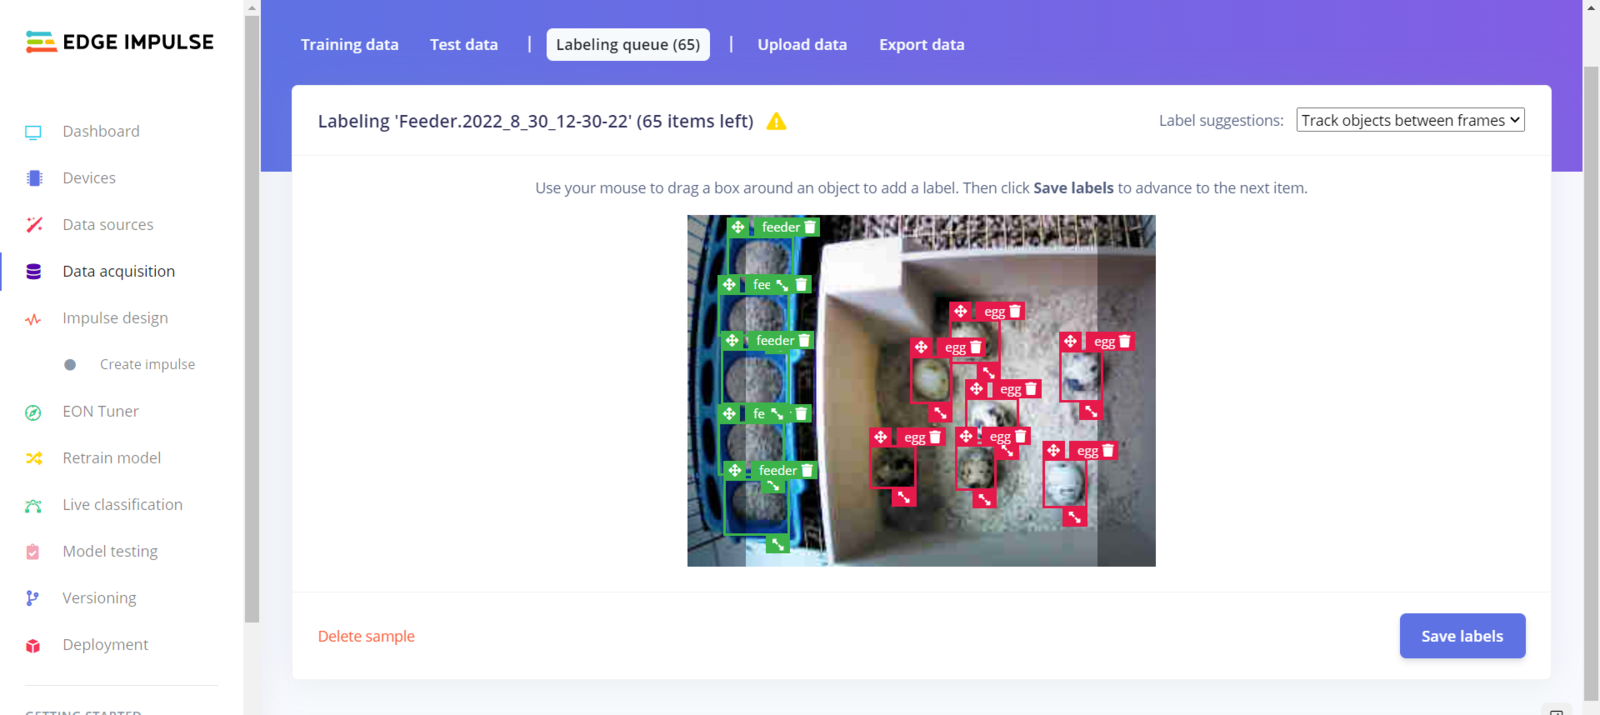
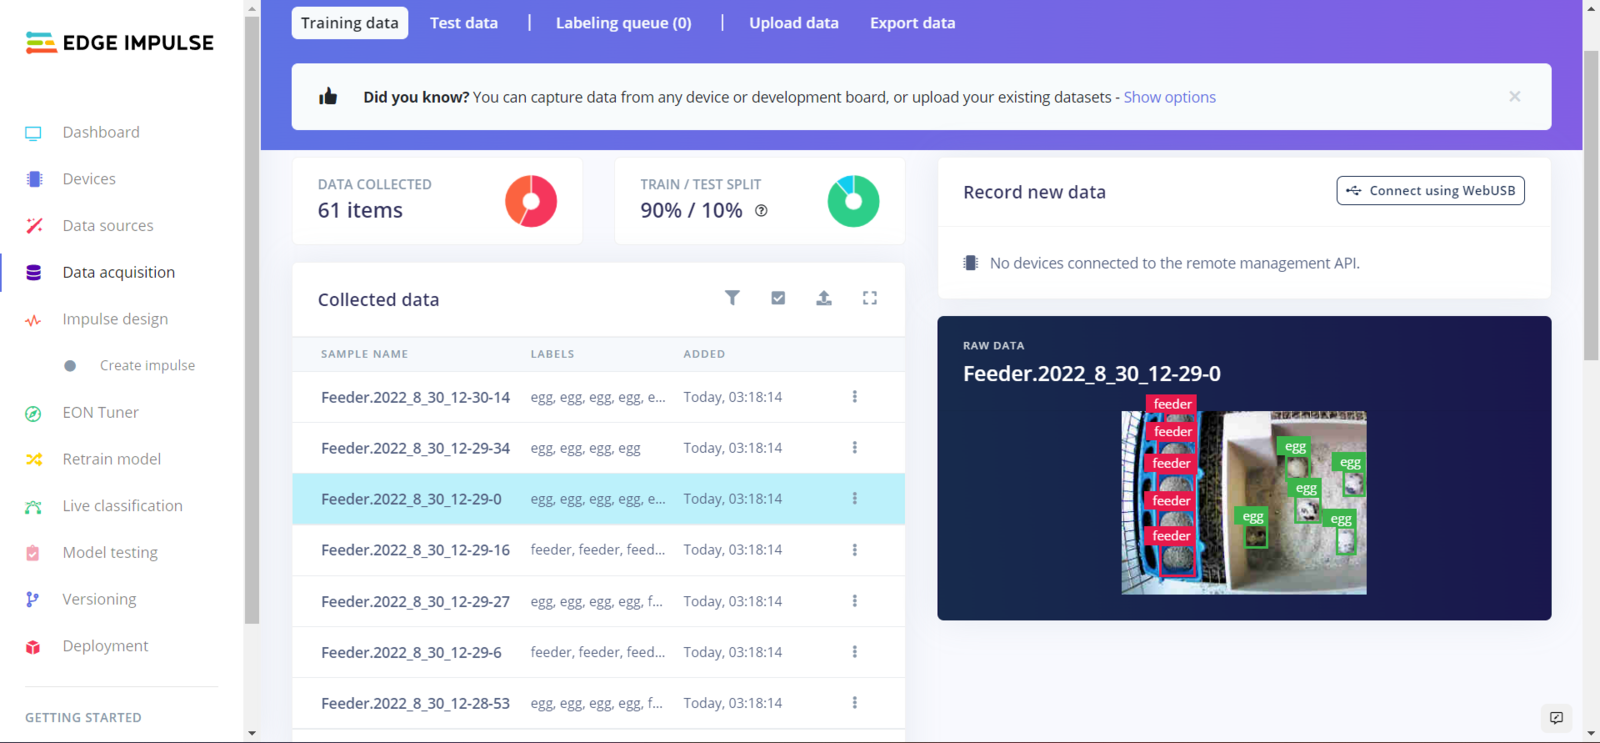
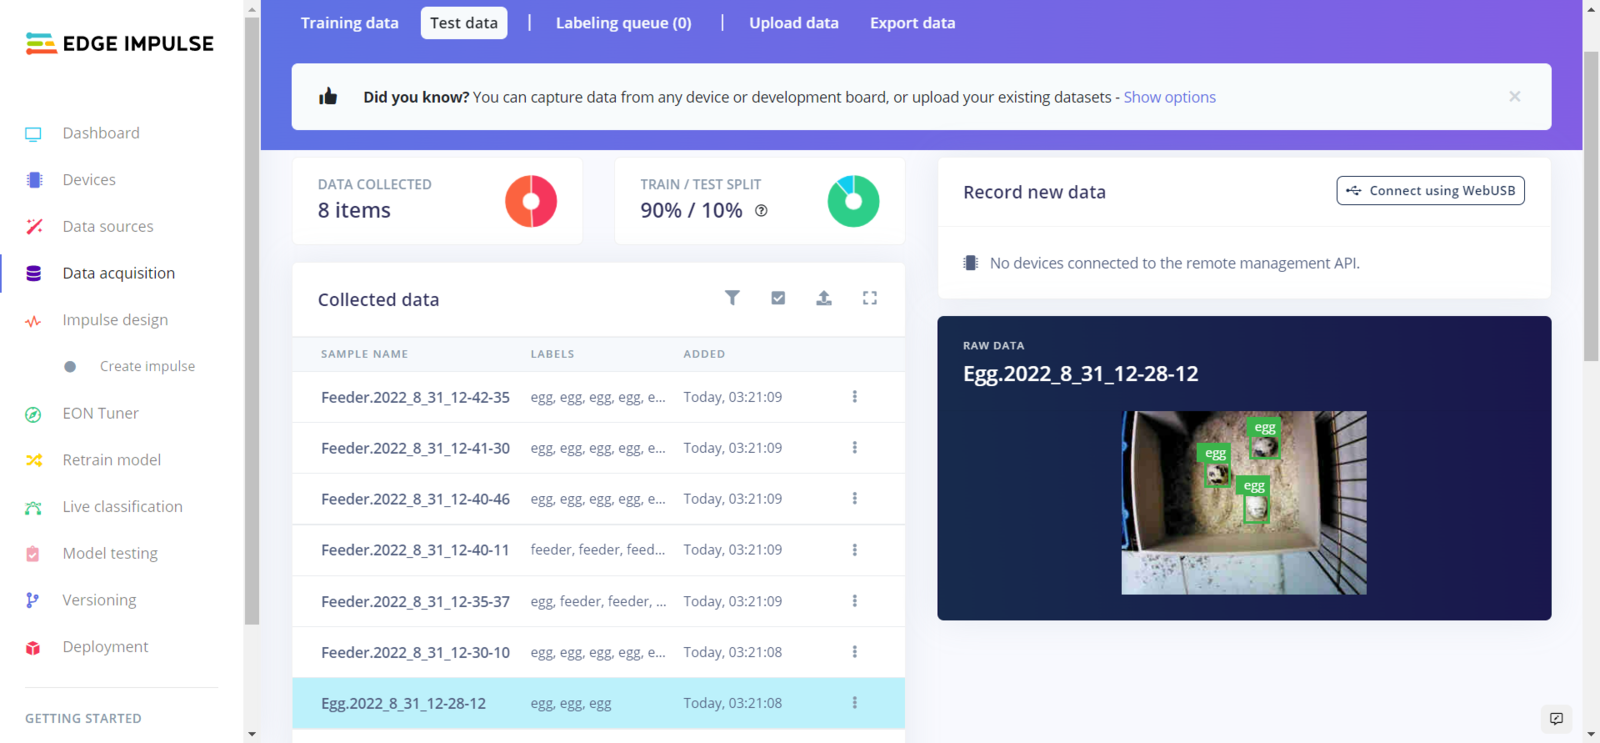
When I completed capturing coop images and storing them on the SD card, I started to work on my object detection (FOMO) model to track (count) the daily produced eggs and detect the poultry feeder status. Since Edge Impulse supports almost every microcontroller and development board due to its model deployment options, I decided to utilize Edge Impulse to build my object detection model. Also, Edge Impulse provides an elaborate machine learning algorithm (FOMO) for running more accessible and faster object detection models on edge devices such as OpenMV Cam H7. Edge Impulse FOMO (Faster Objects, More Objects) is a novel machine learning algorithm that brings object detection to highly constrained devices. FOMO models can count objects, find the location of the detected objects in an image, and track multiple objects in real time, requiring up to 30x less processing power and memory than MobileNet SSD or YOLOv5. Even though Edge Impulse supports JPG or PNG files to upload as samples directly, each training or testing sample needs to be labeled manually. Therefore, I needed to follow the steps below to format my data set so as to train my object detection model accurately:- Data Scaling (Resizing)
- Data Labeling
- Egg
- Feeder
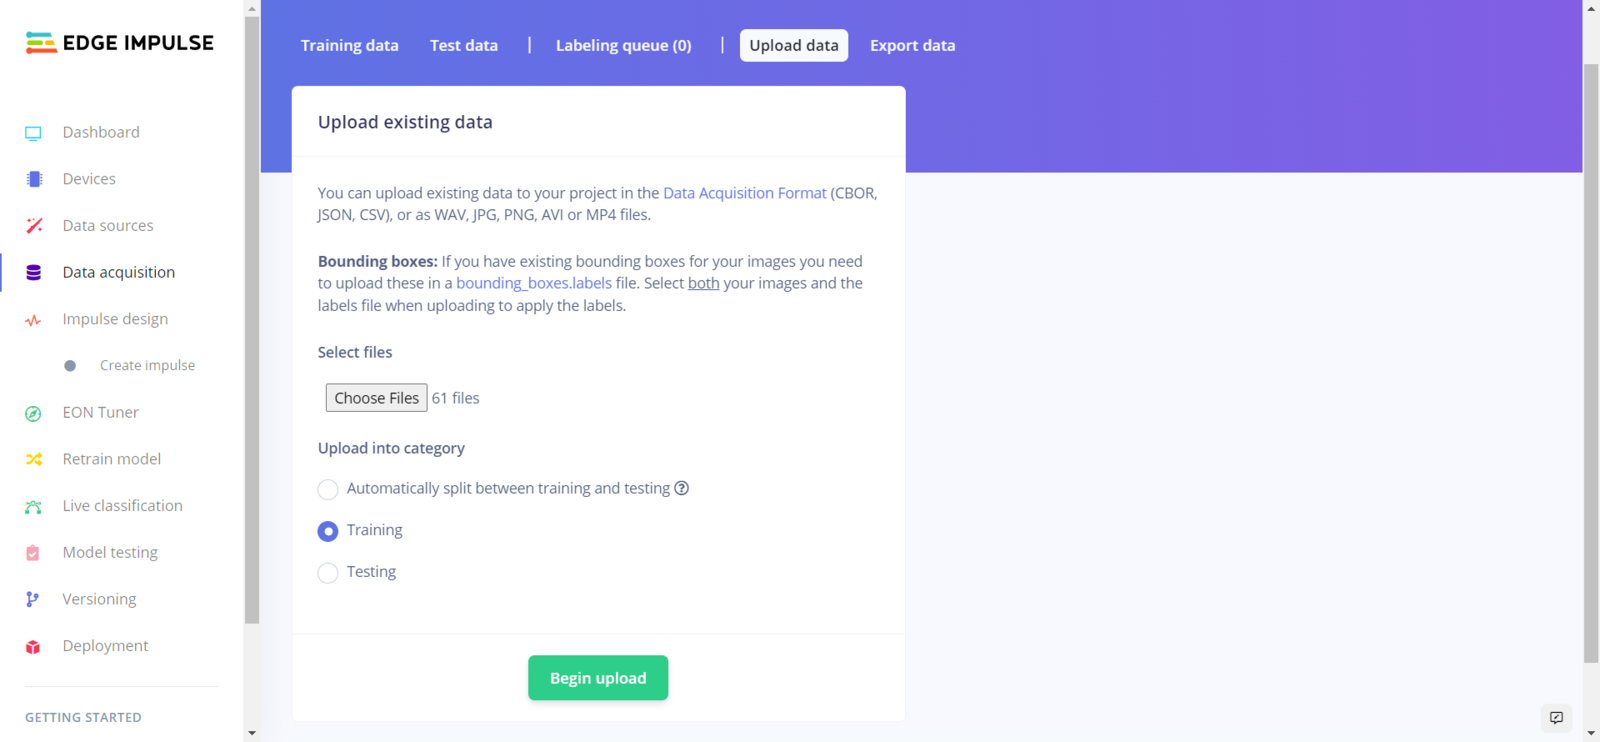
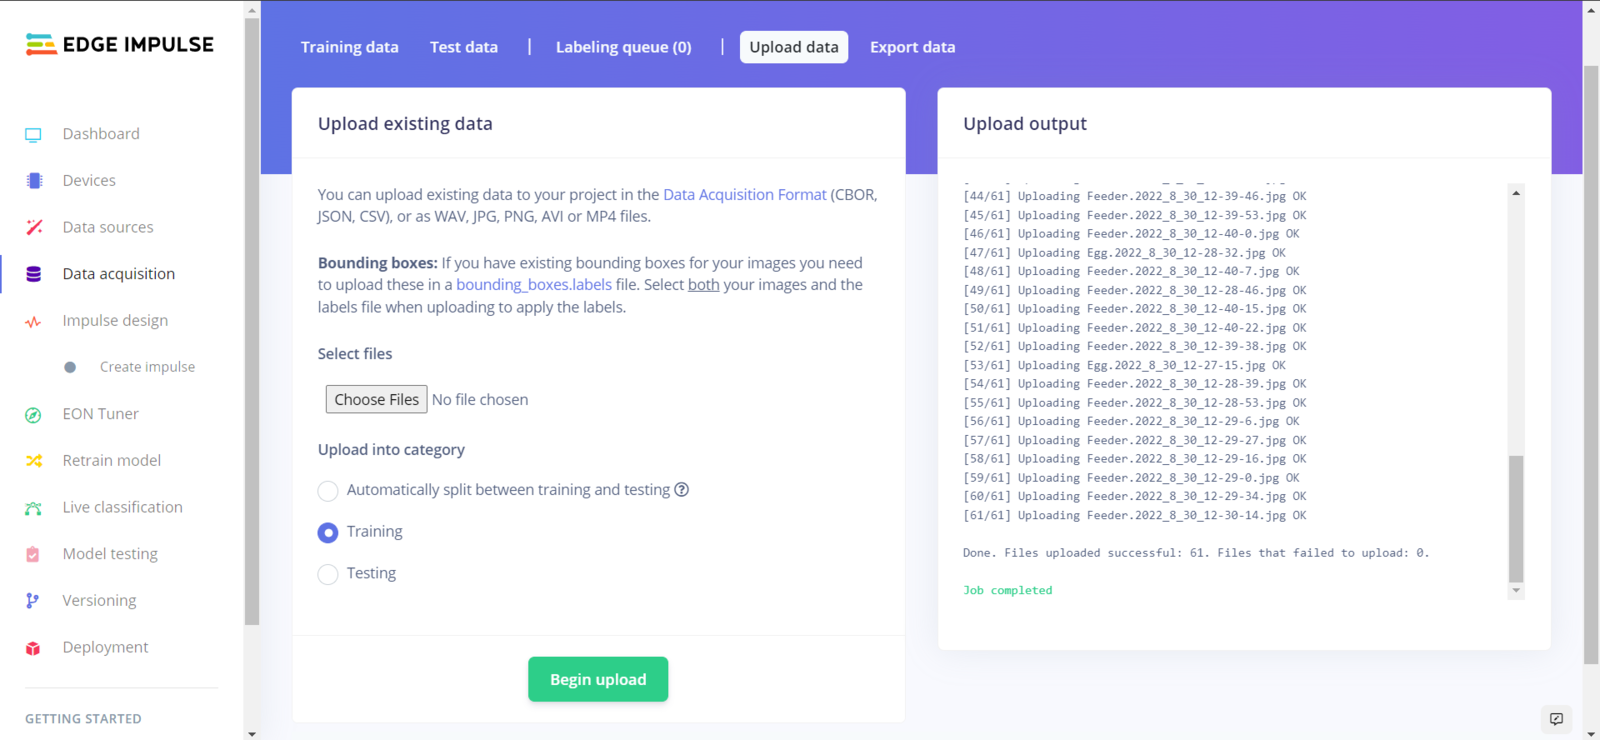
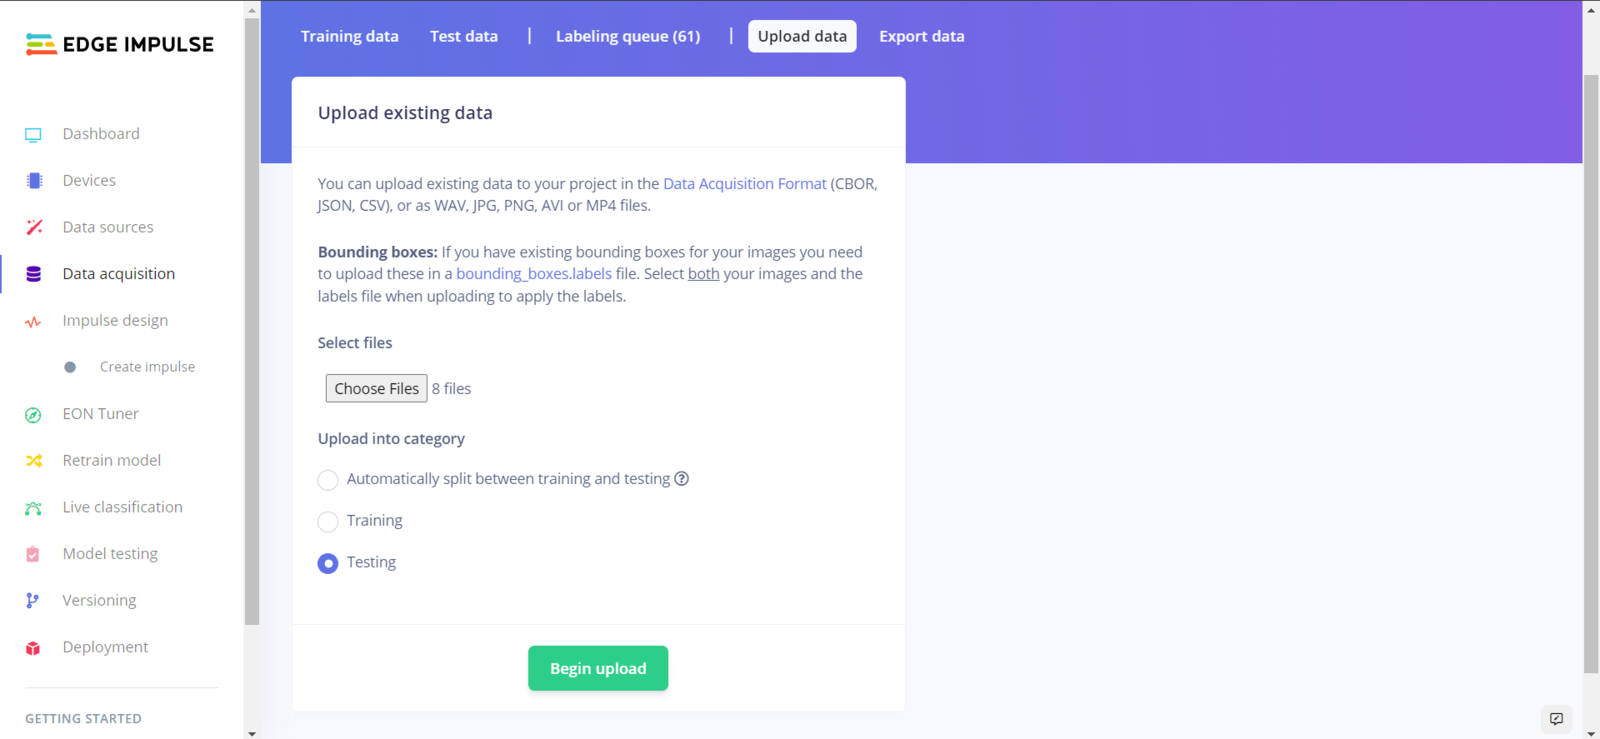
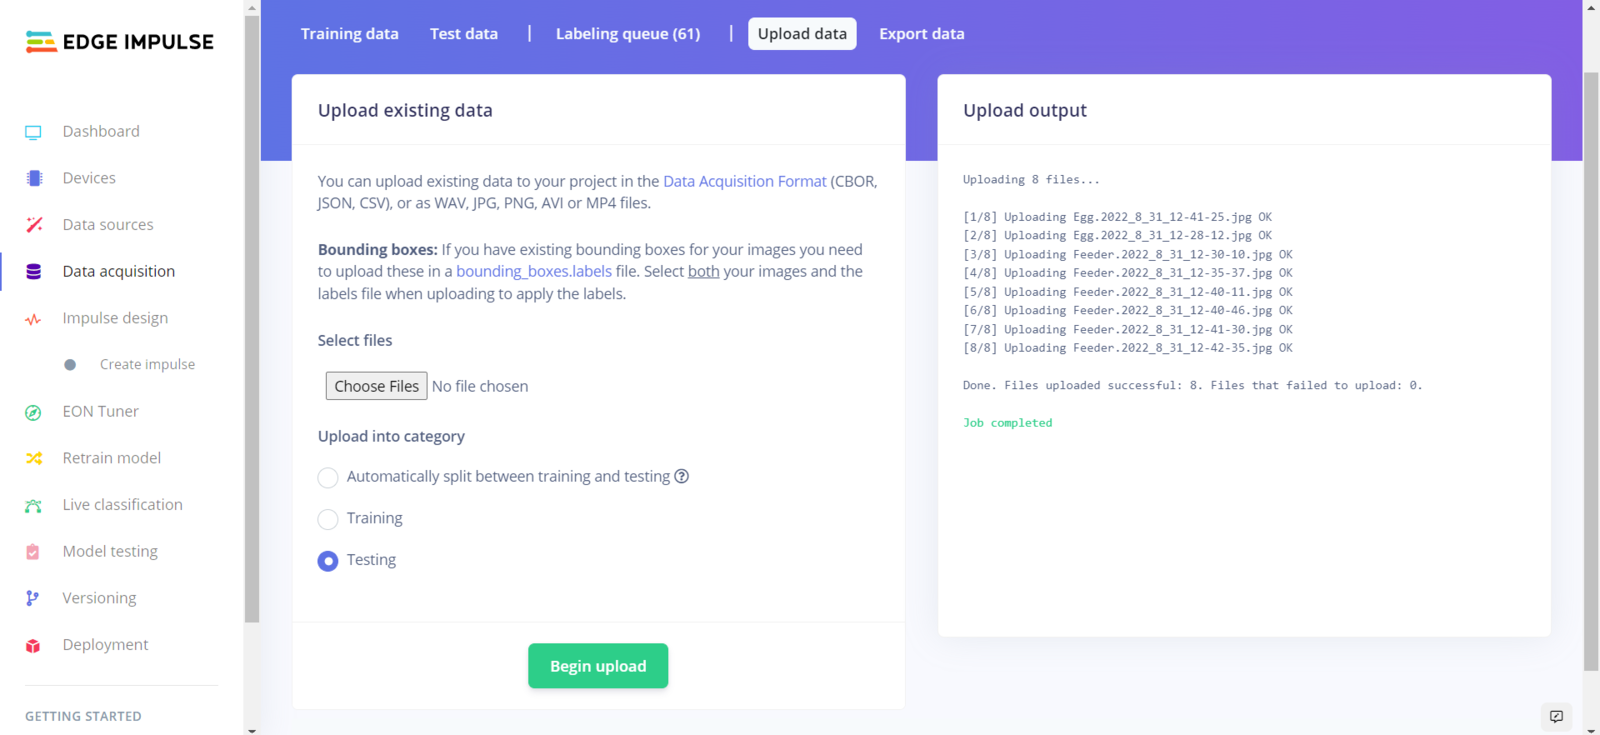
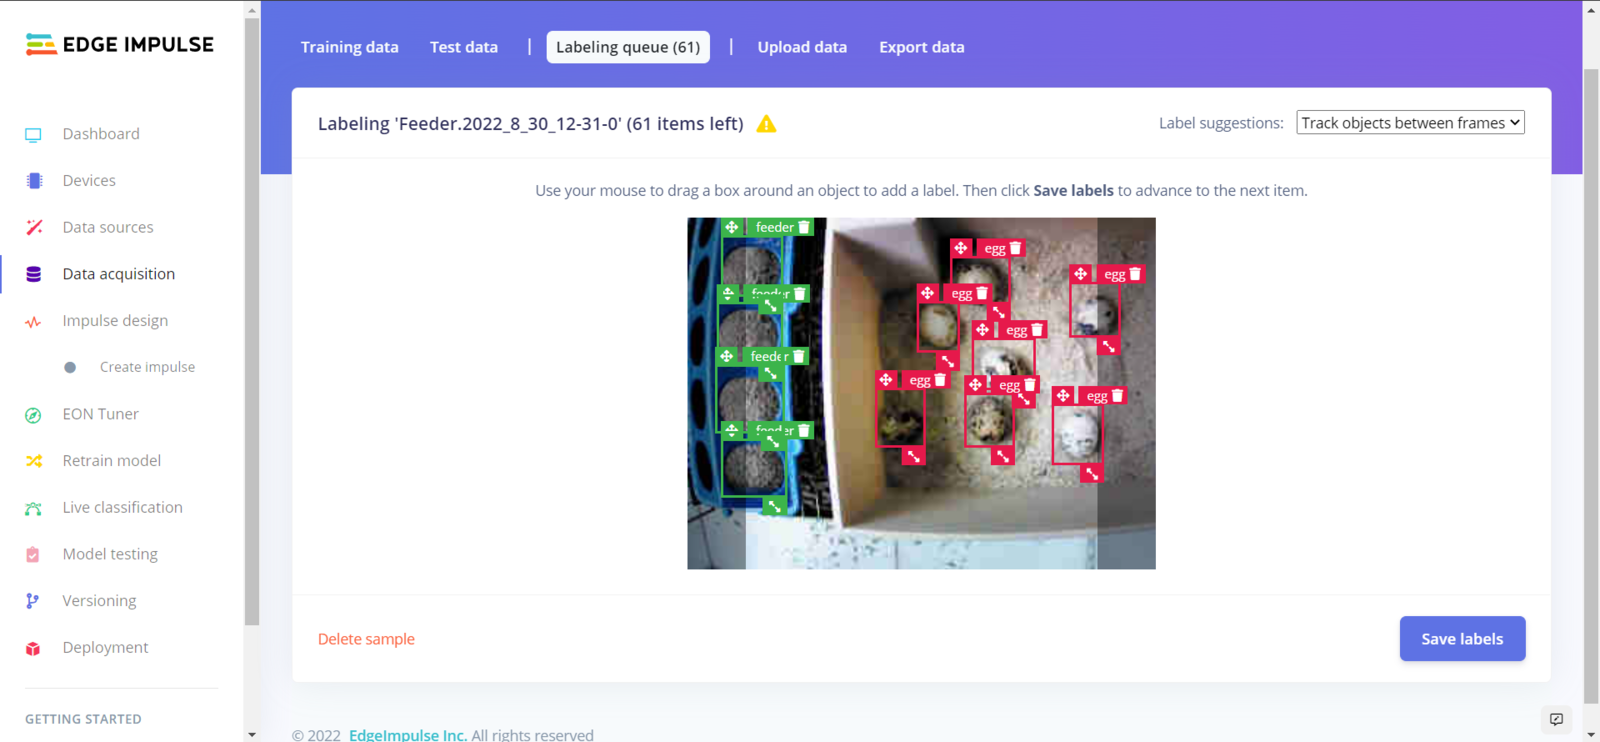
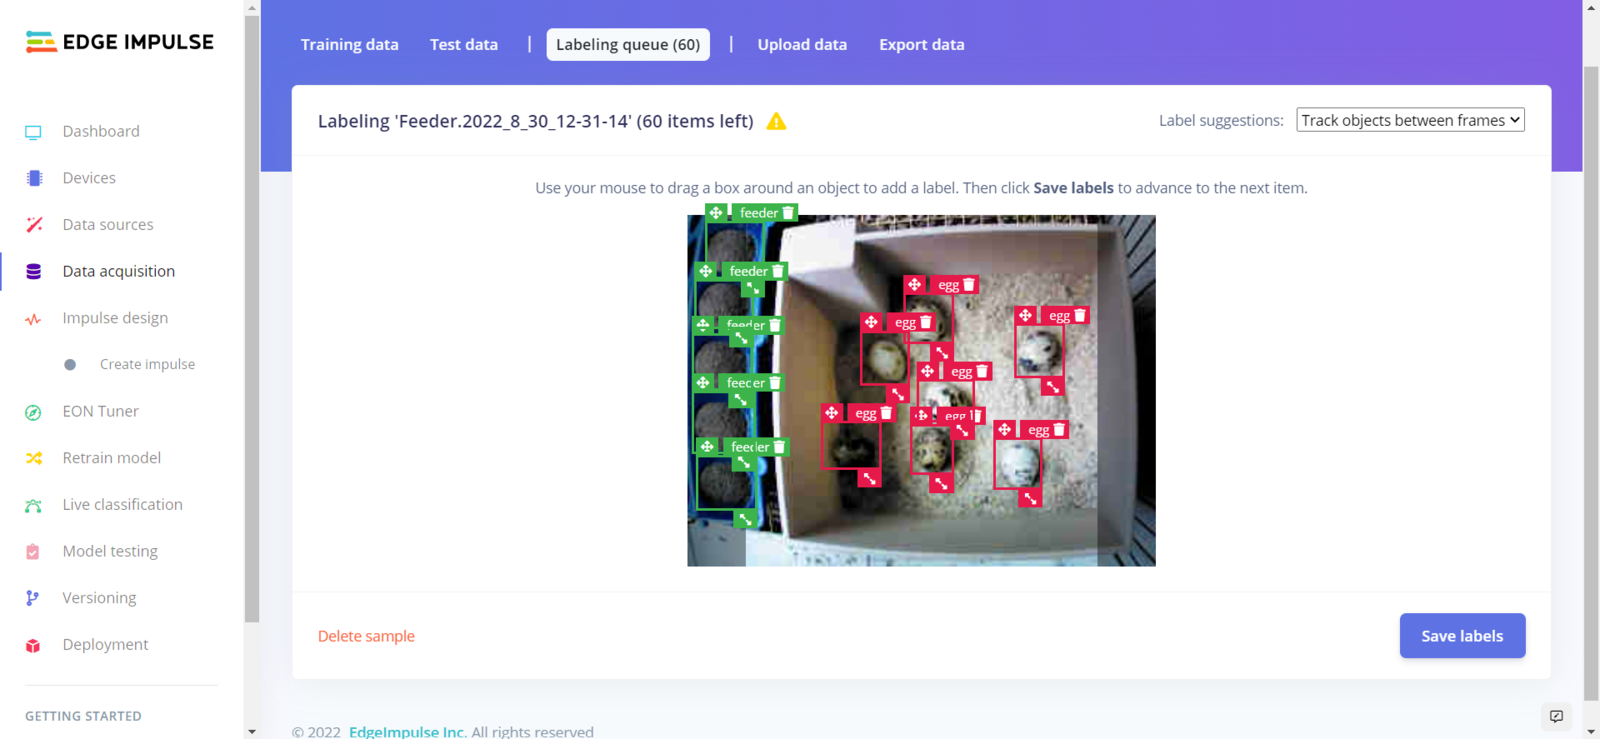
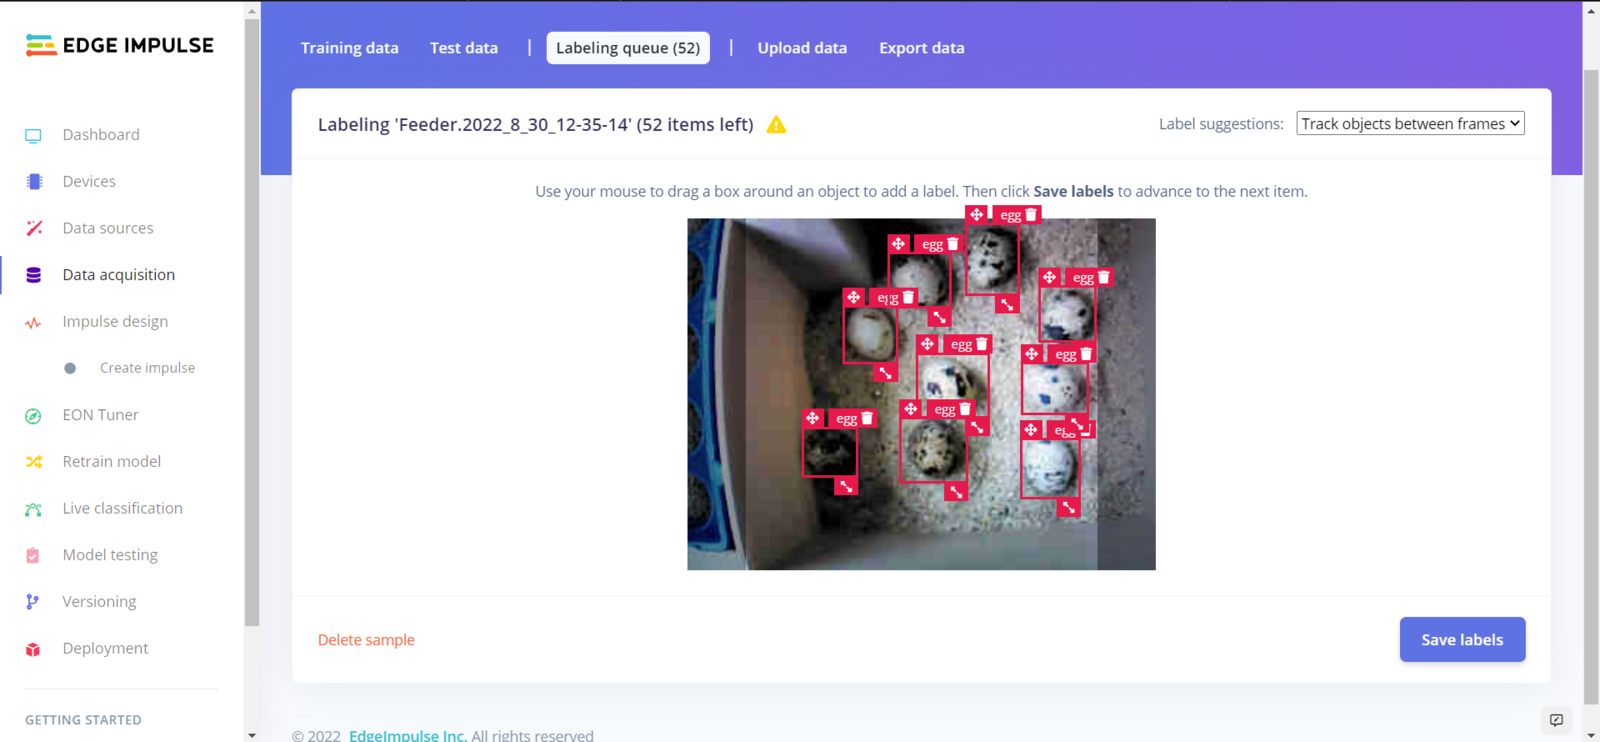
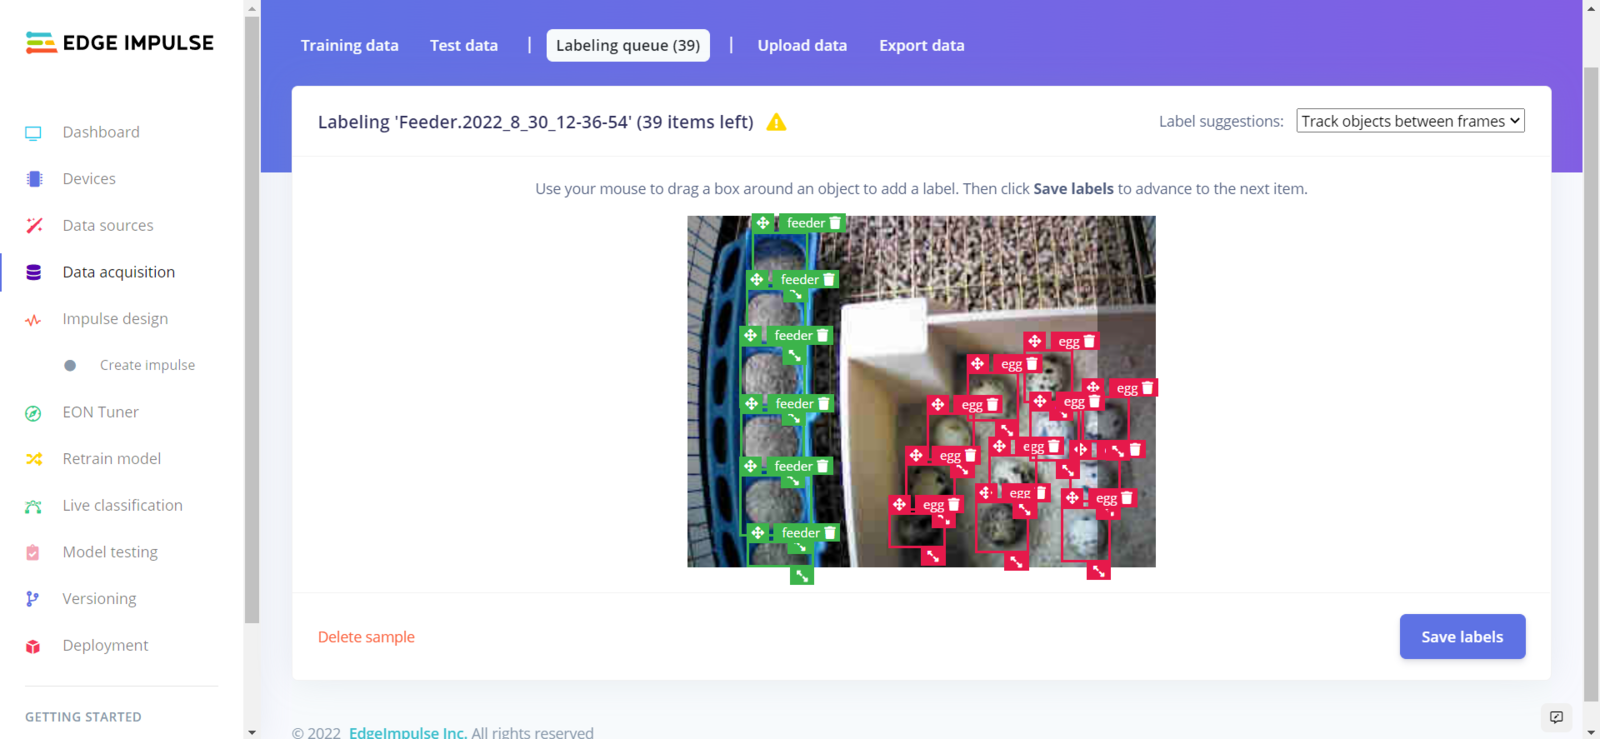
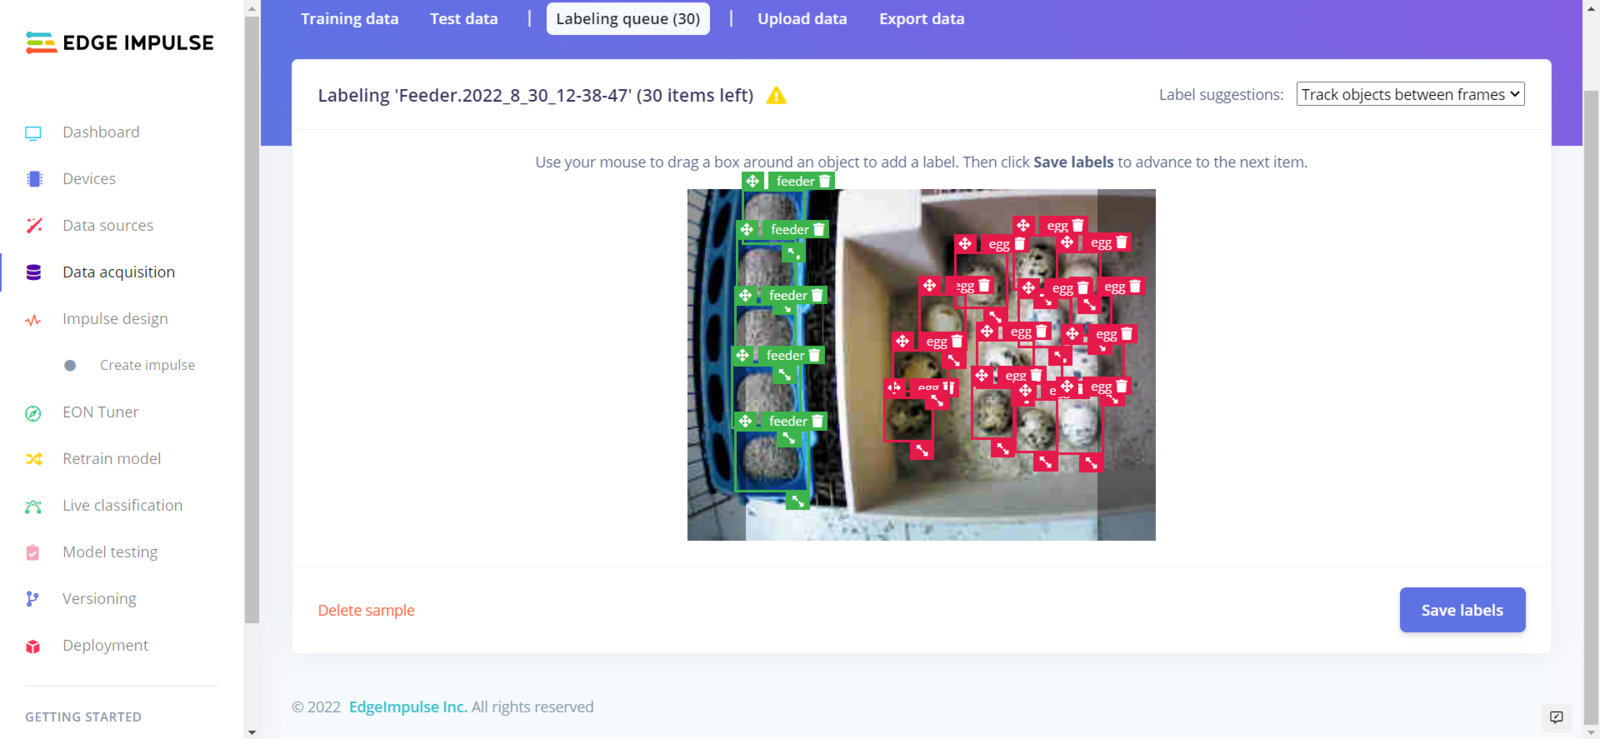
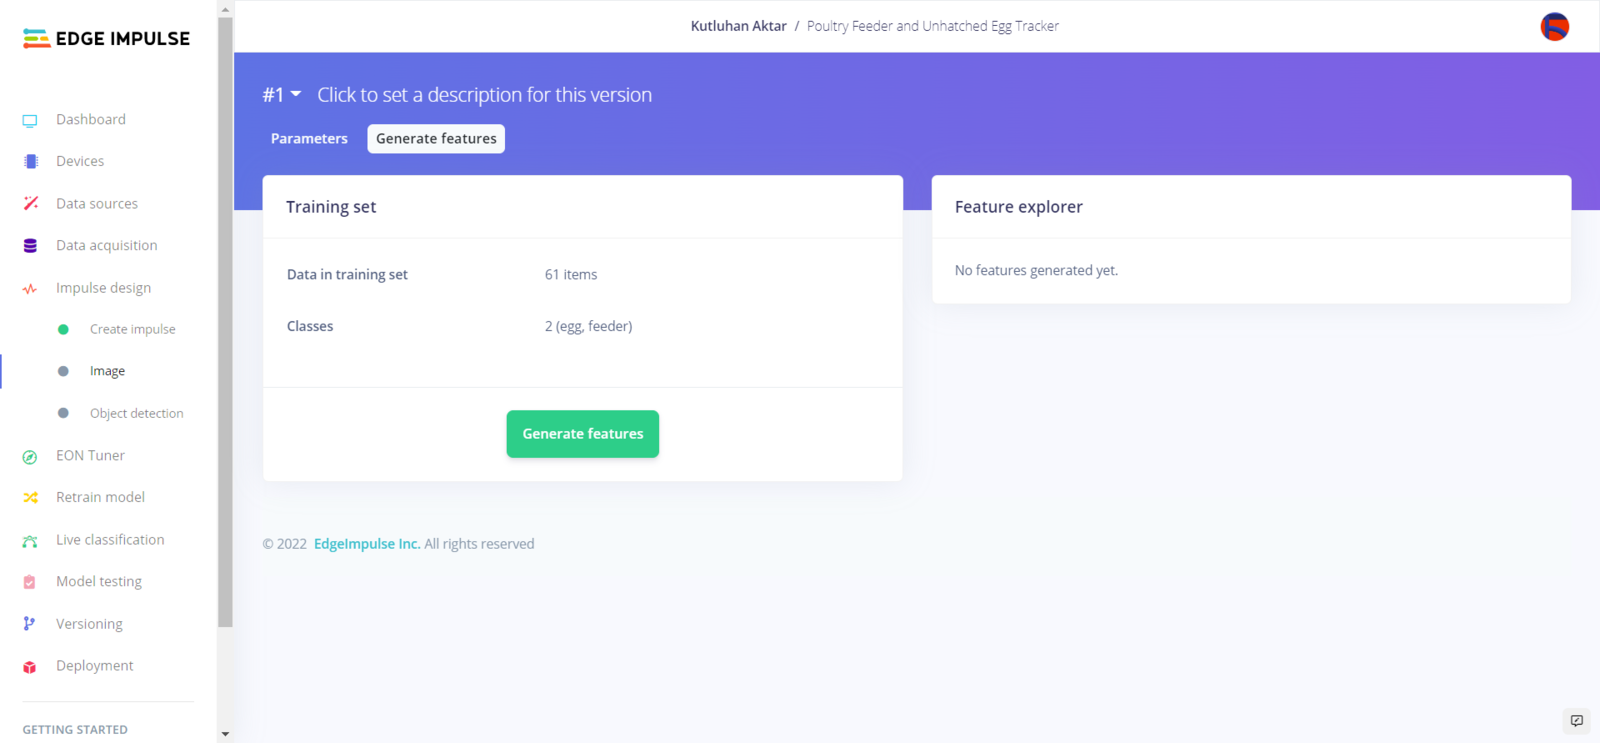
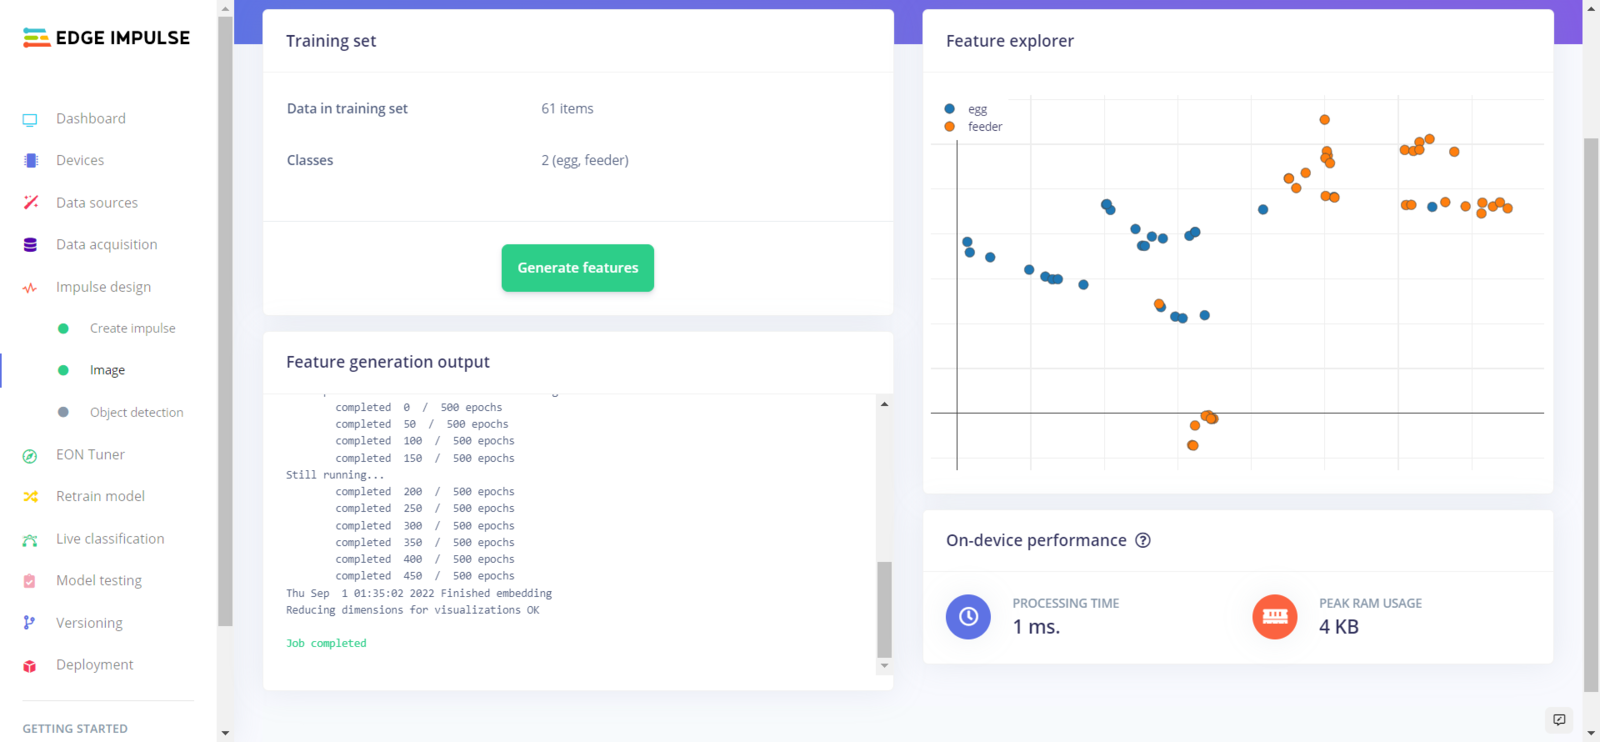
Step 5.1: Uploading images (samples) to Edge Impulse and labeling samples
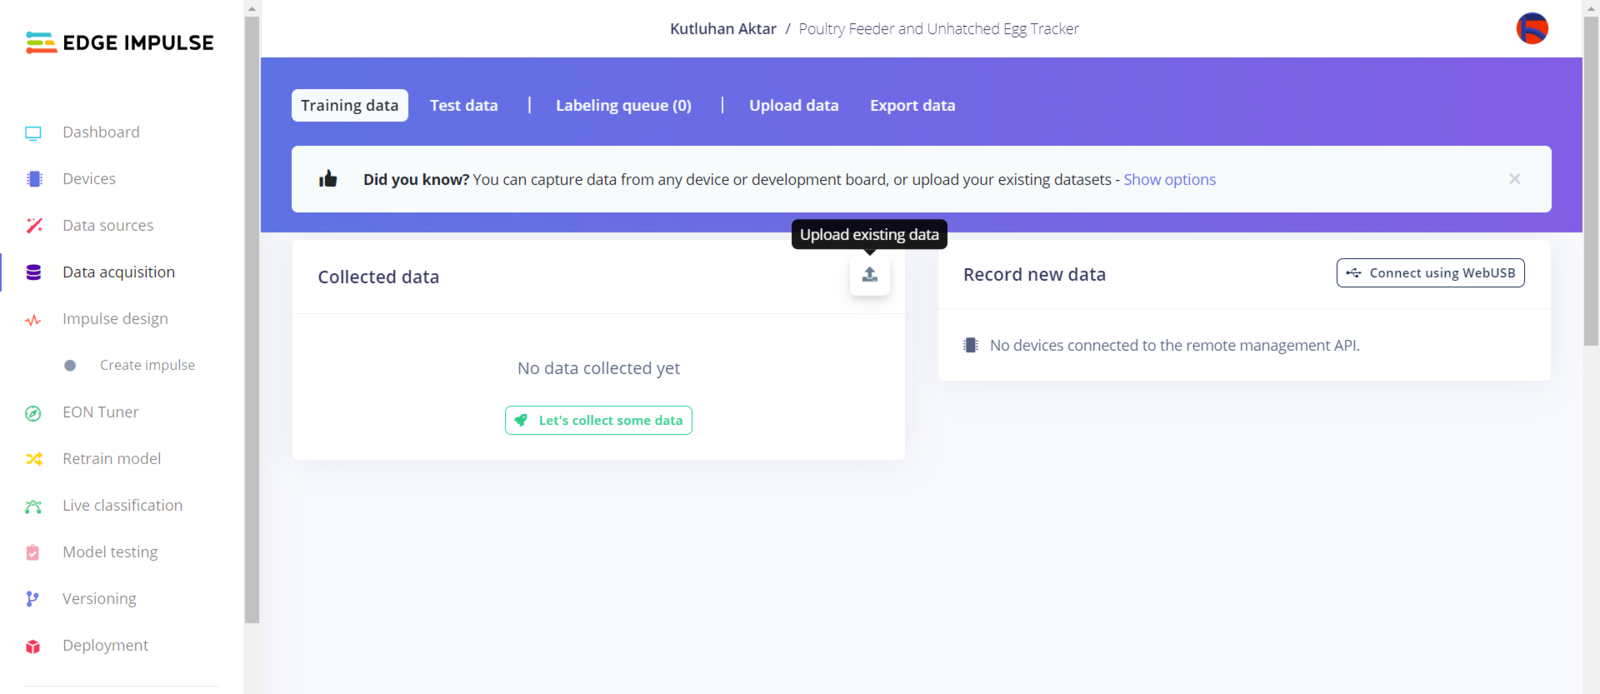
After collecting training and testing image samples, I uploaded them to my project on Edge Impulse. Then, I labeled the filled poultry feeder and the daily produced eggs on each sample with egg and feeder classes. Since I have a plastic ground poultry feeder in my quail cage, I decided to train my object detection model on recognizing the filled feeding holes. If the model cannot detect any feeding holes, which means that the poultry feeder needs to be refilled. :hash: First of all, sign up for Edge Impulse and create a new project.


Step 5.2: Training the FOMO model on quail eggs and poultry feeder status
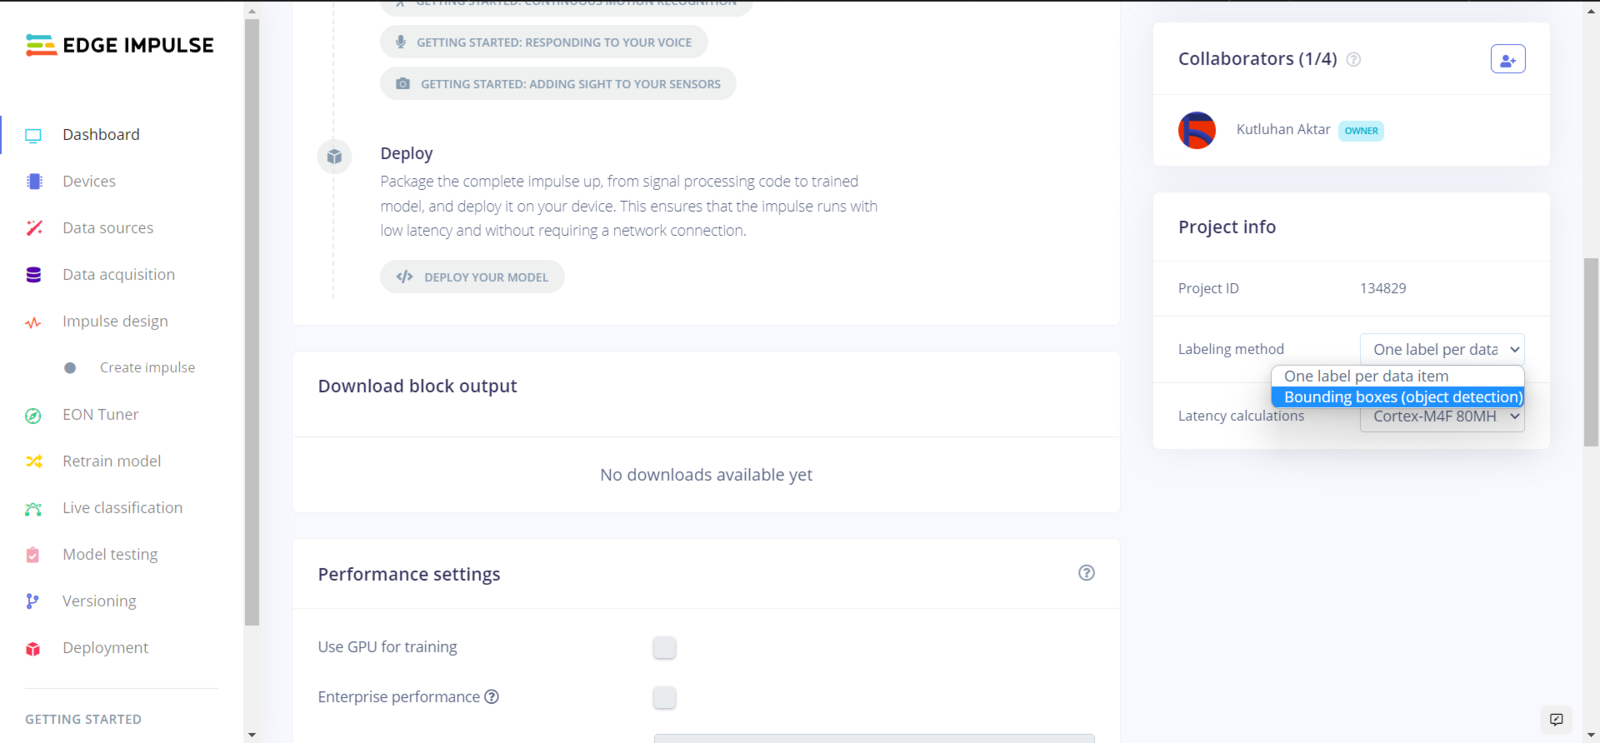
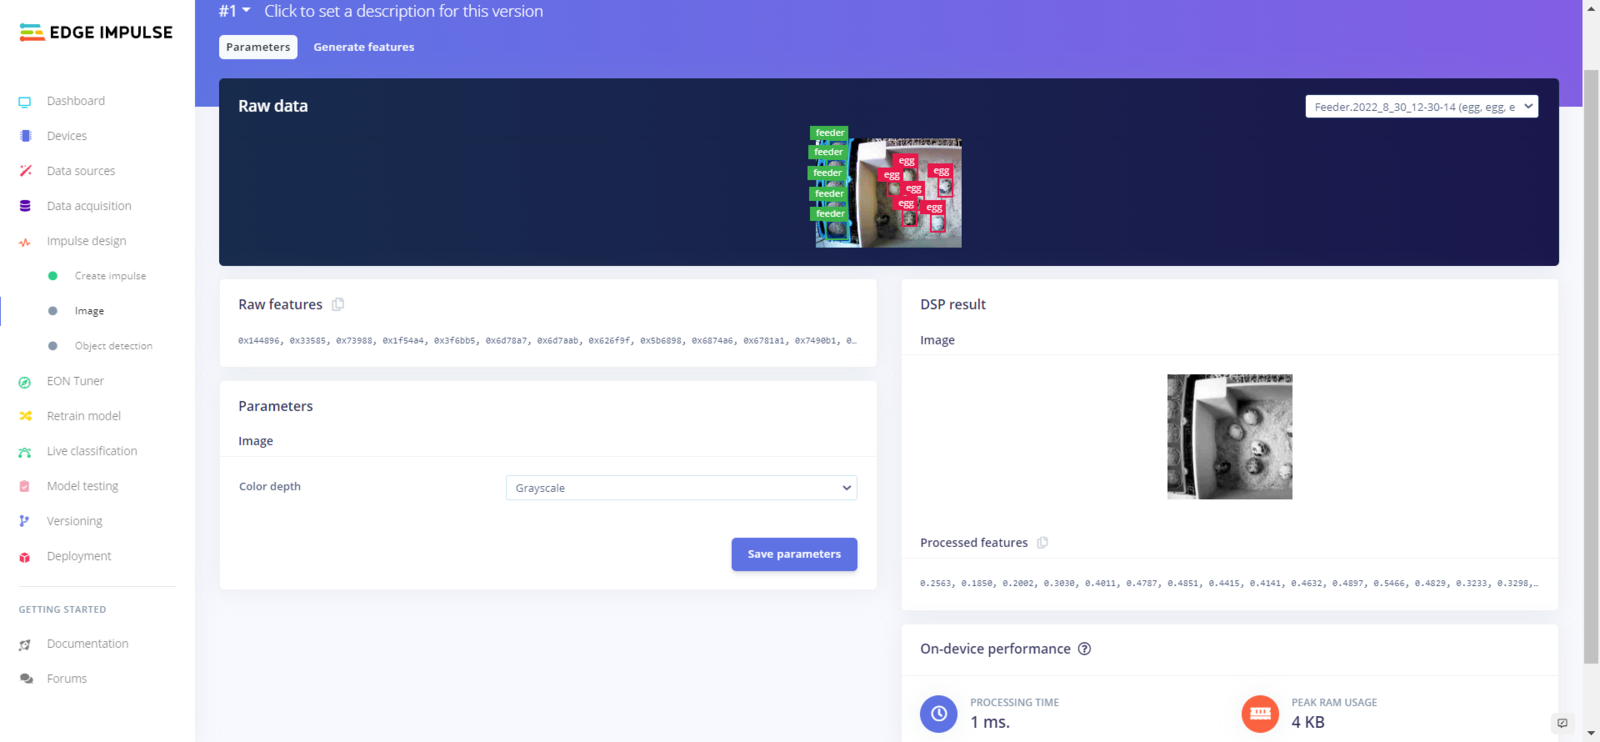
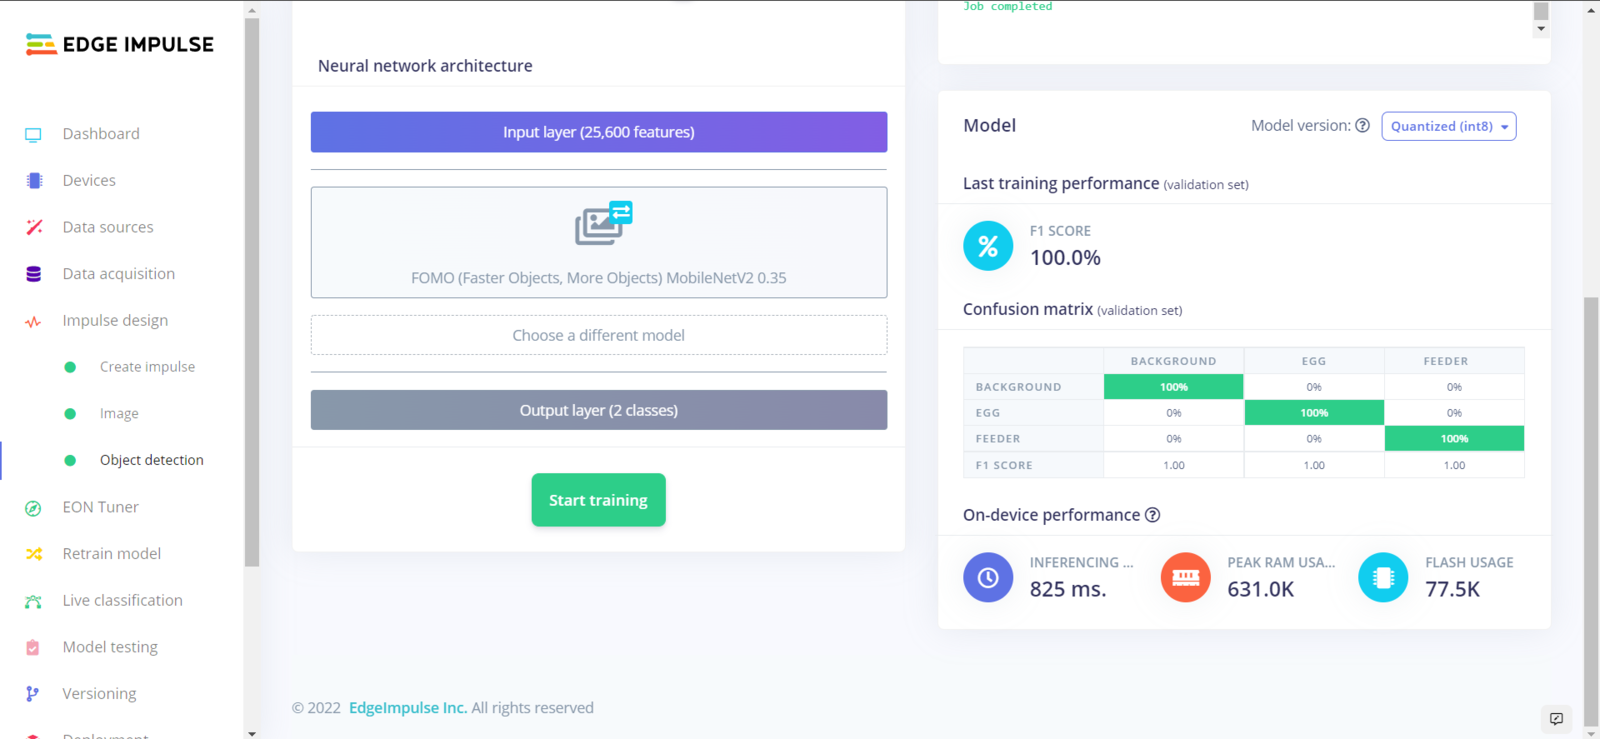
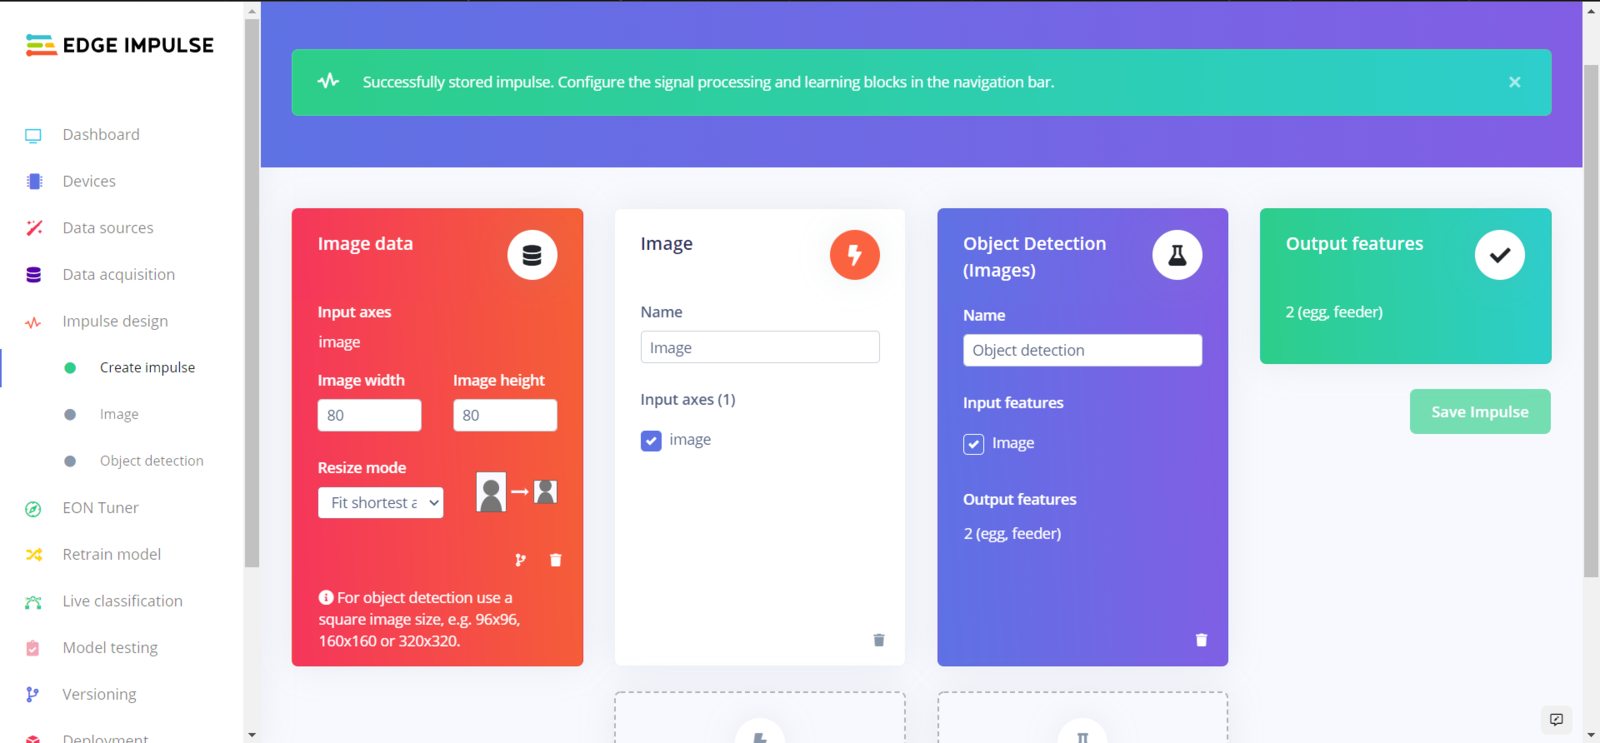
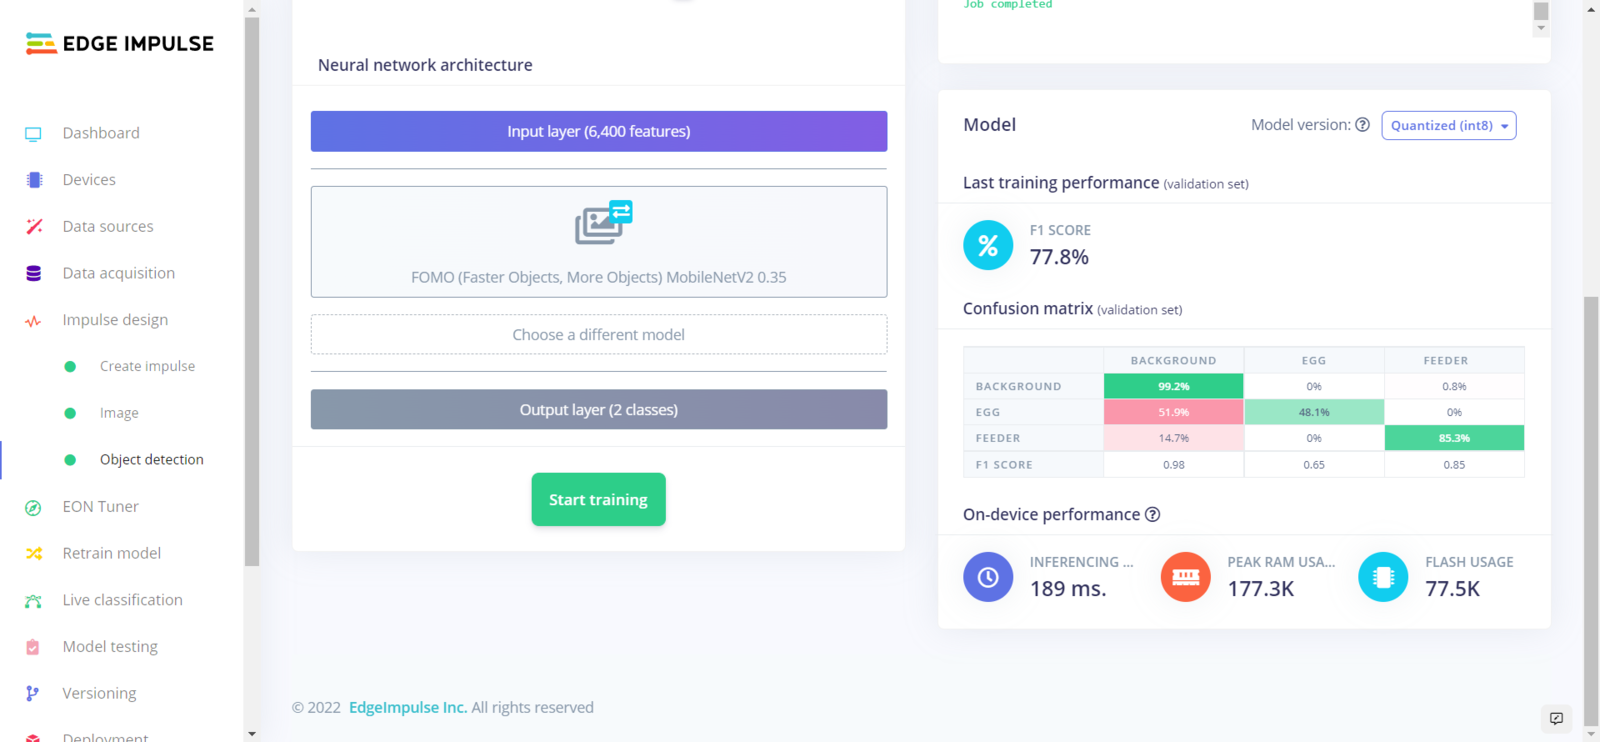
After labeling my training and testing samples successfully, I designed an impulse and trained it on detecting the two mentioned classes — egg and feeder. An impulse is a custom neural network model in Edge Impulse. I created my impulse by employing the Image preprocessing block and the Object Detection (Images) learning block. The Image preprocessing block optionally turns the input image format to grayscale and generates a features array from the raw image. The Object Detection (Images) learning block represents a machine learning algorithm that detects objects on the given image, distinguished between model labels (egg and feeder). :hash: Go to the Create impulse page and set image width and height parameters to 160. Then, select the resize mode parameter as Fit shortest axis so as to scale (resize) given training and testing image samples. :hash: Select the Image preprocessing block and the Object Detection (Images) learning block. Finally, click Save Impulse.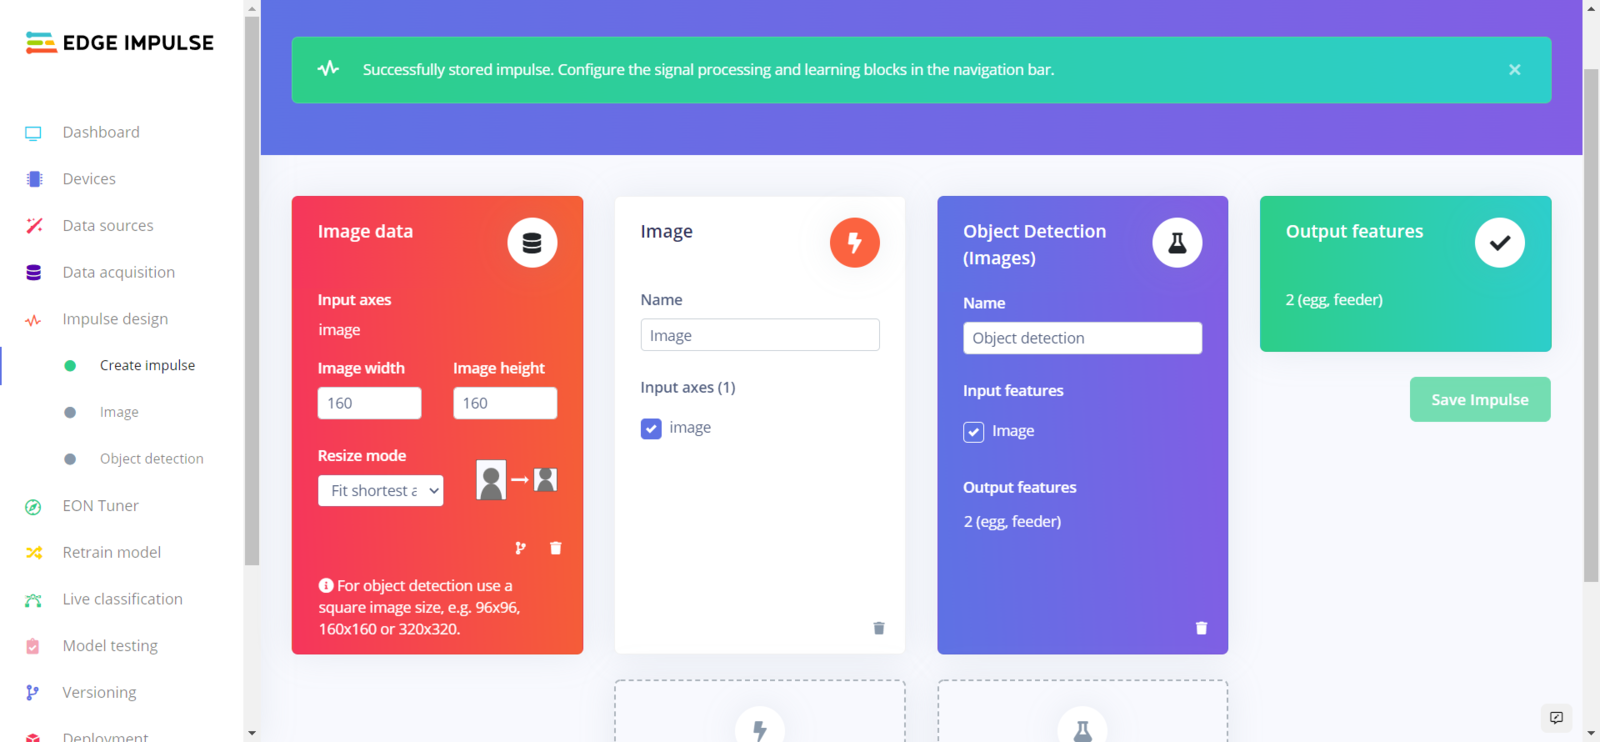
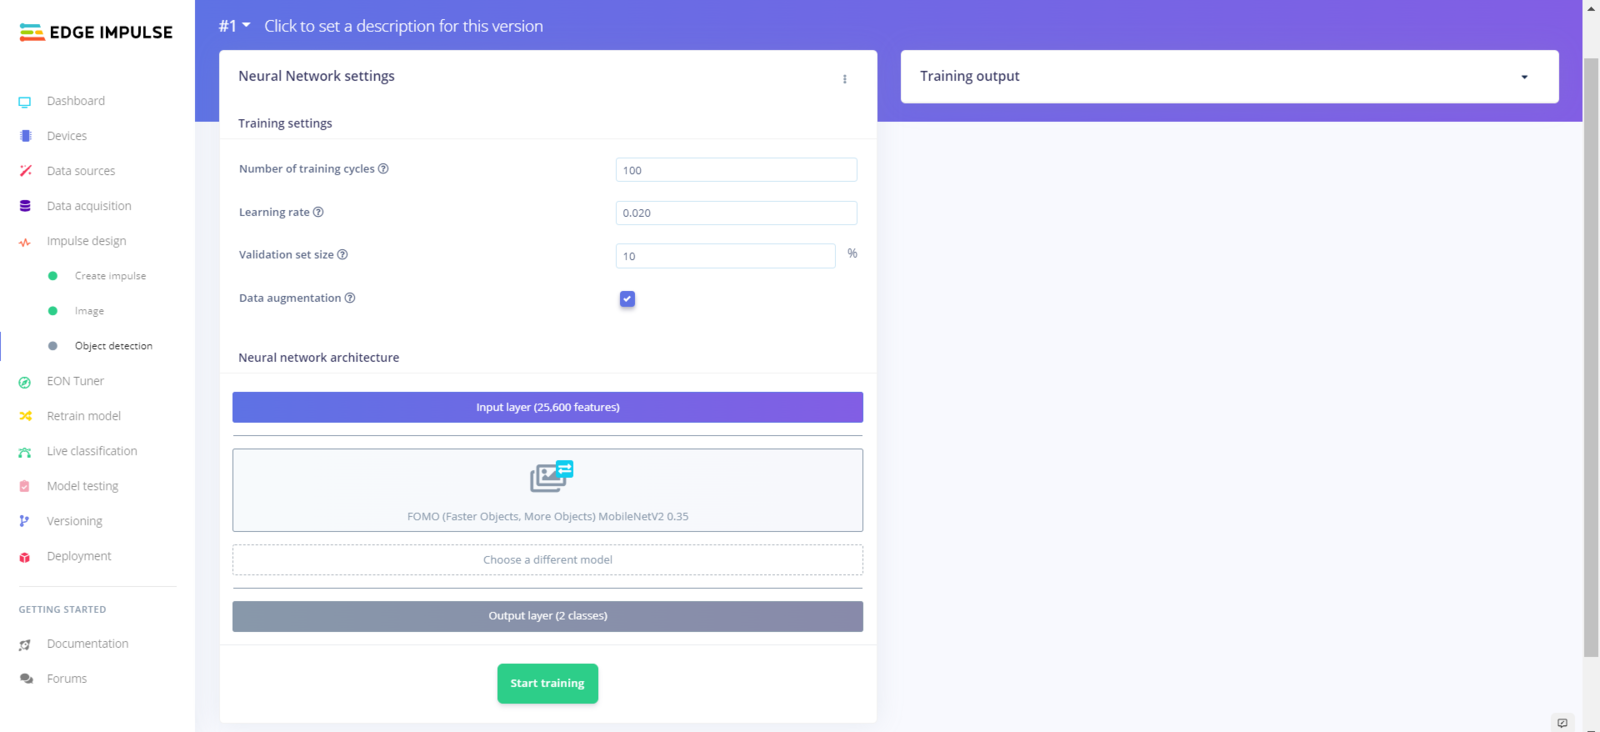
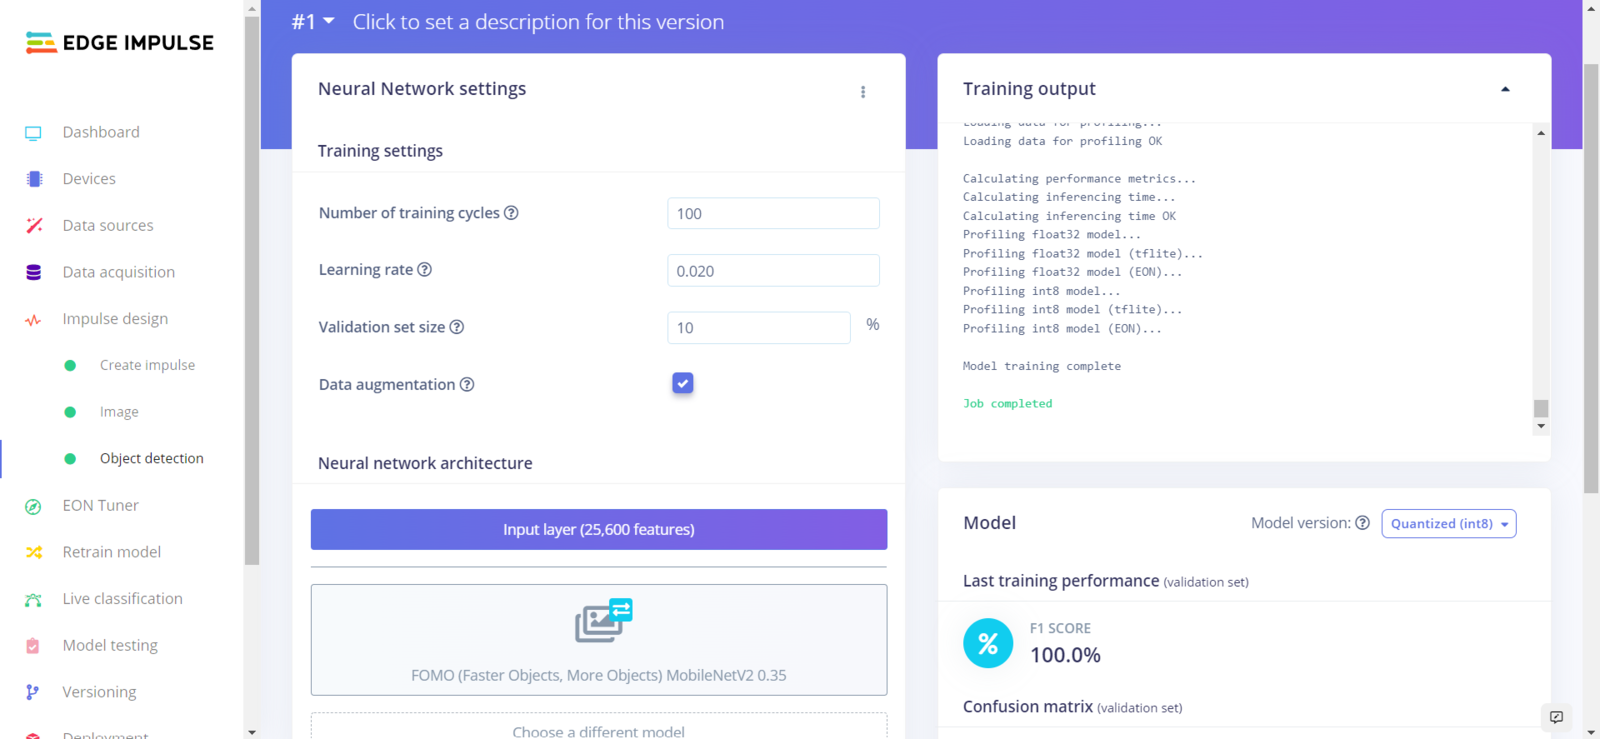
- Number of training cycles ➡ 100
- Learning rate ➡ 0.020
- Validation set size ➡ 10
- FOMO (Faster Objects, More Objects) MobileNetV2 0.35
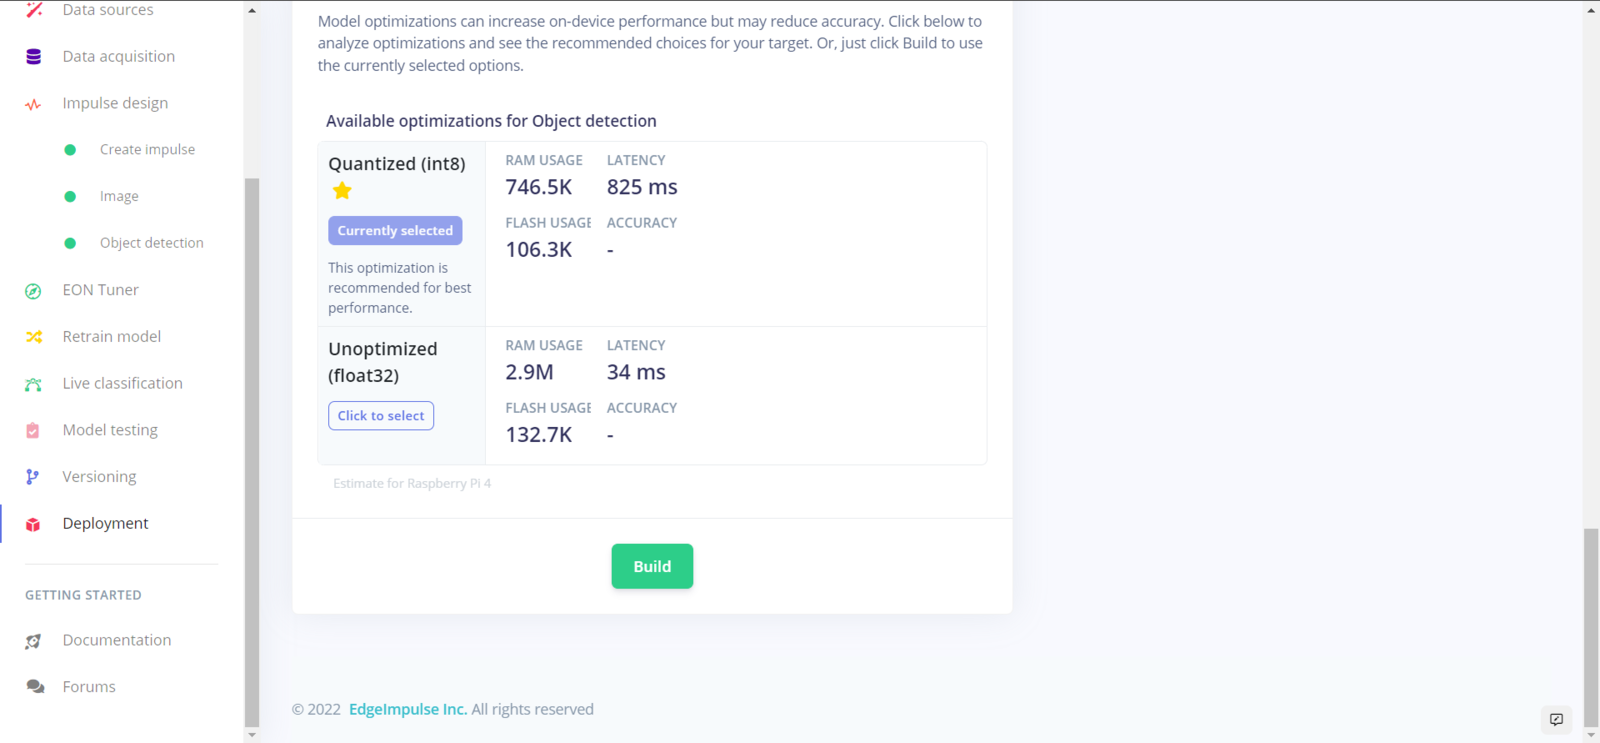
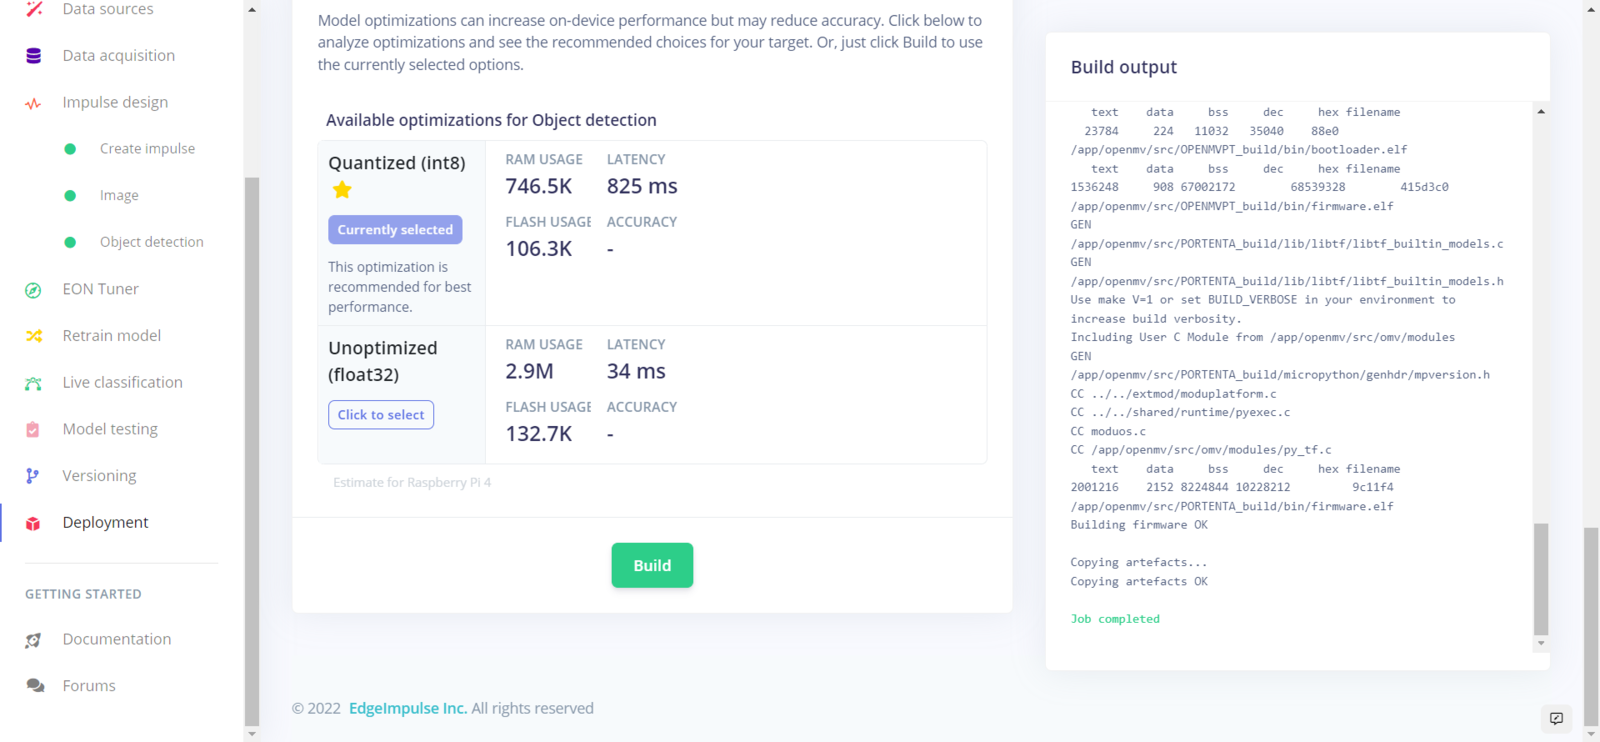
Step 5.3: Evaluating the model accuracy and deploying the model
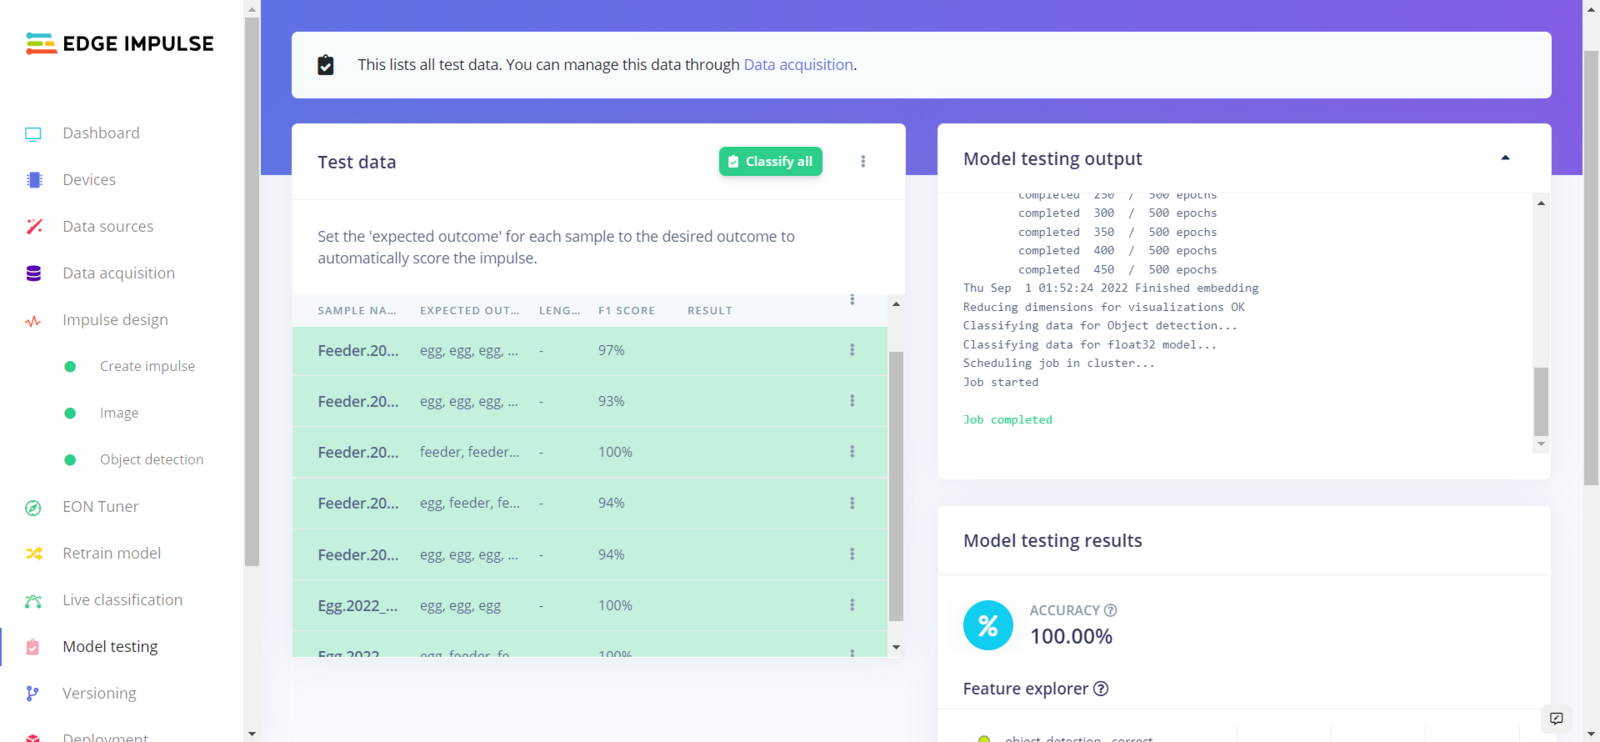
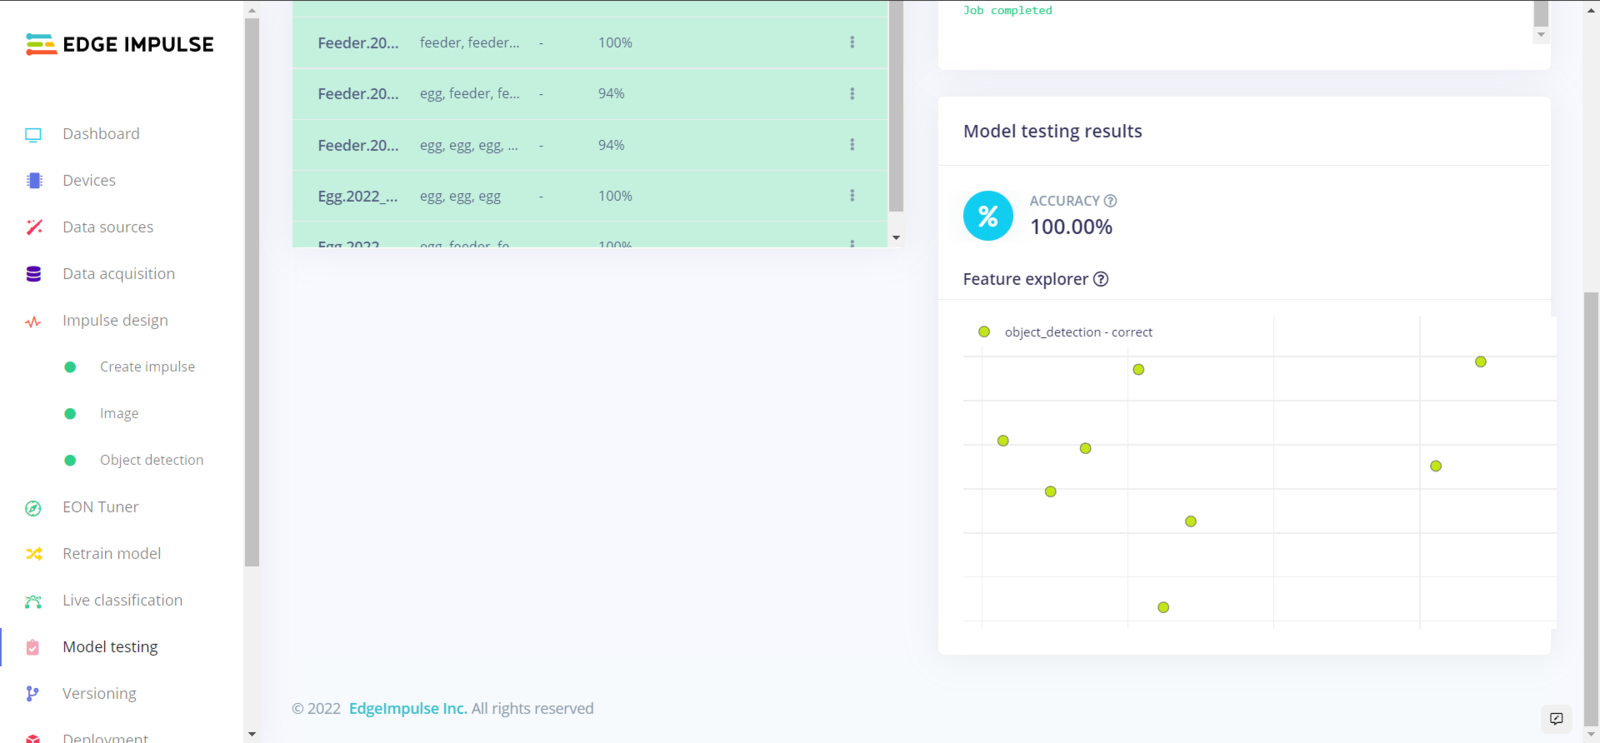
After building and training my object detection model, I tested its accuracy and validity by utilizing testing image samples. The evaluated accuracy of the model is 100%. :hash: To validate the trained model, go to the Model testing page and click Classify all.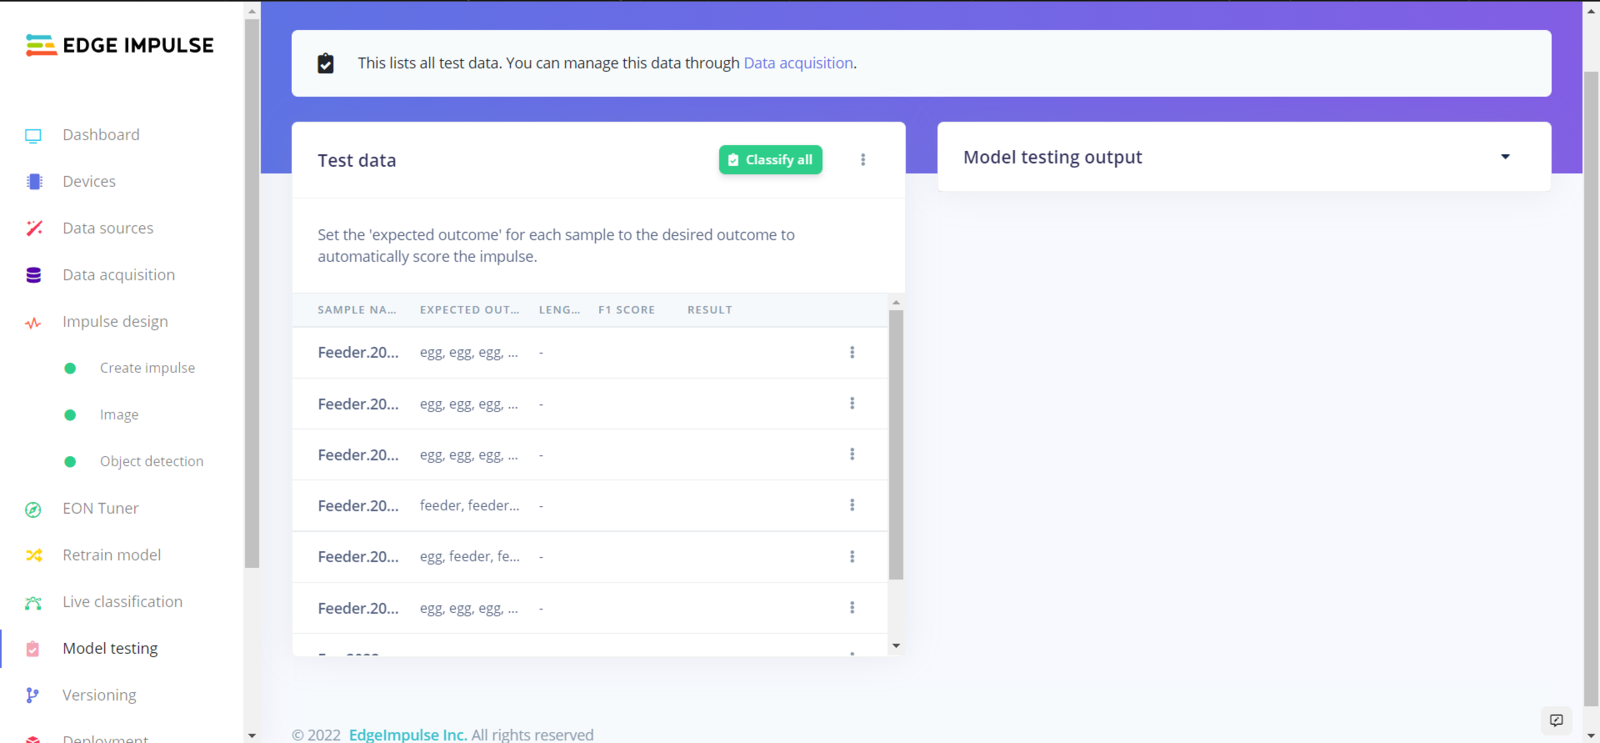
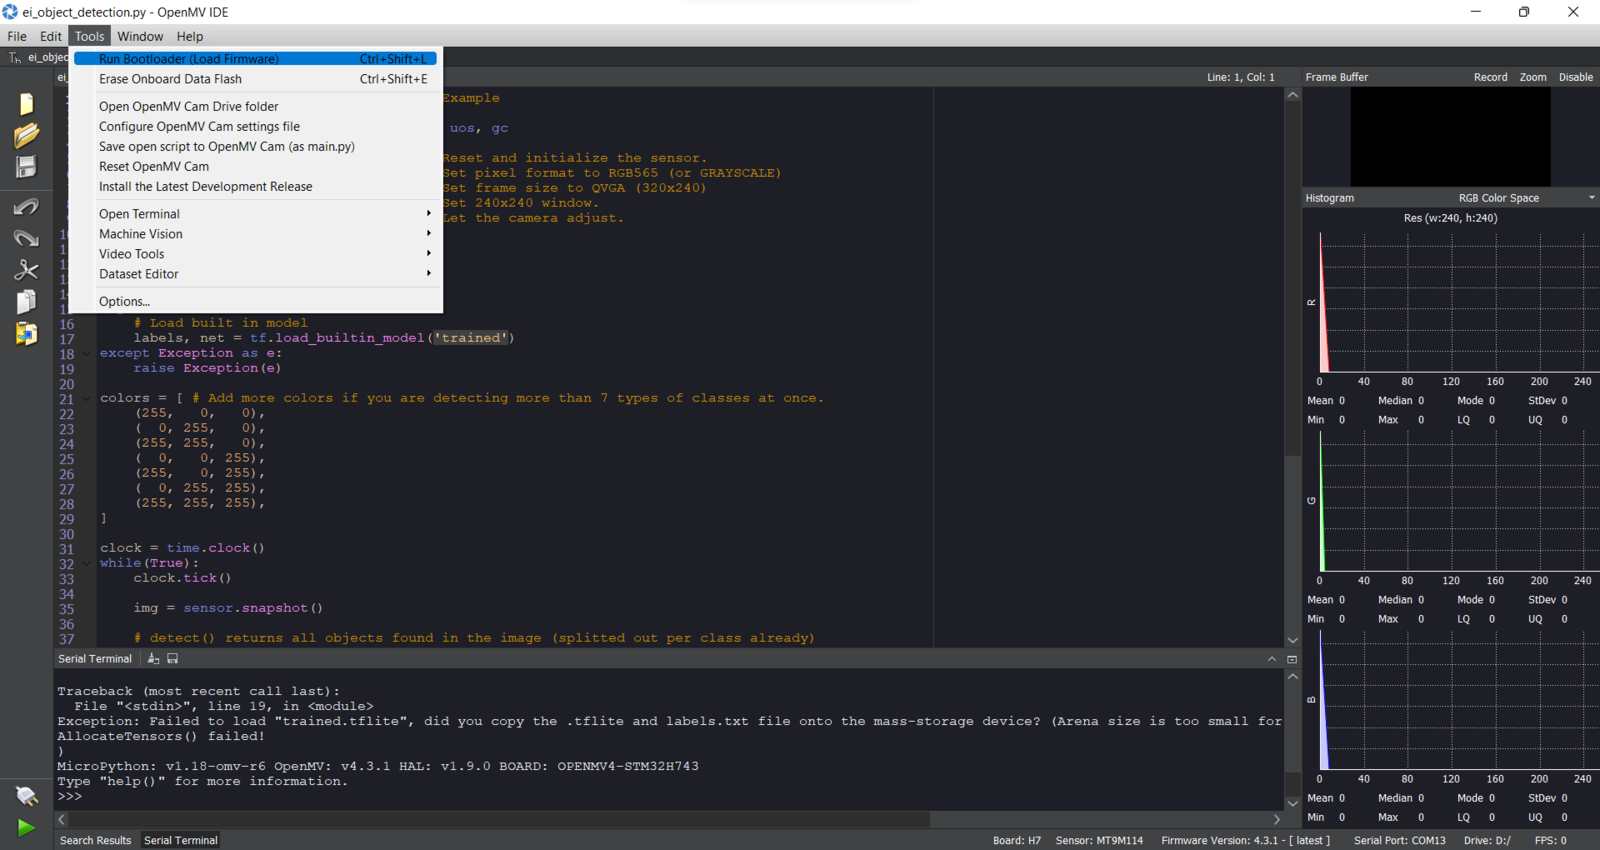
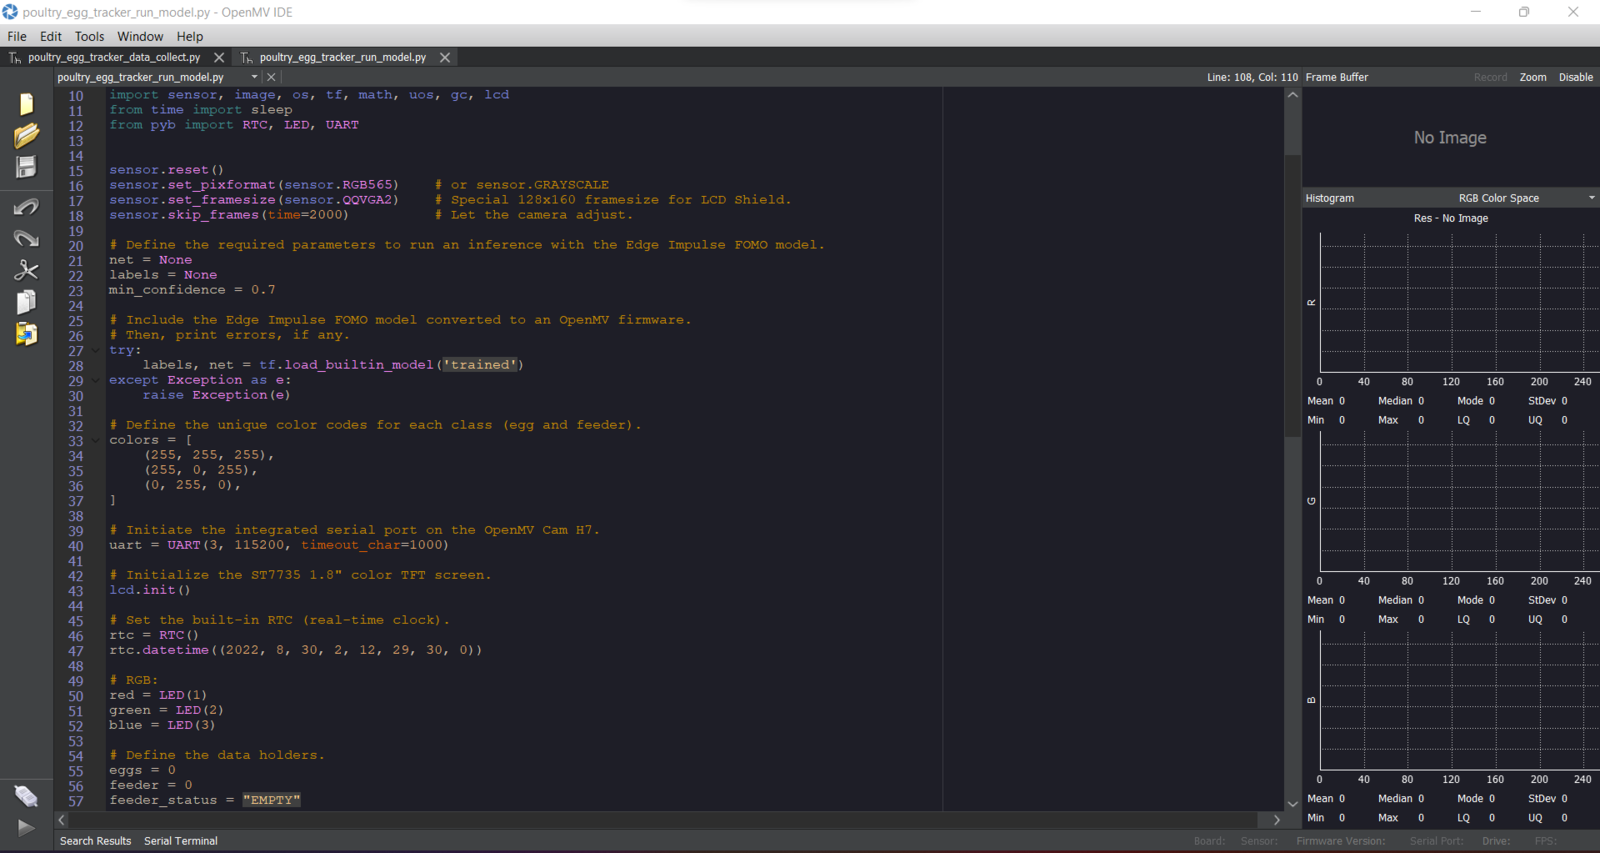
Step 6: Setting up the Edge Impulse FOMO model on OpenMV Cam H7
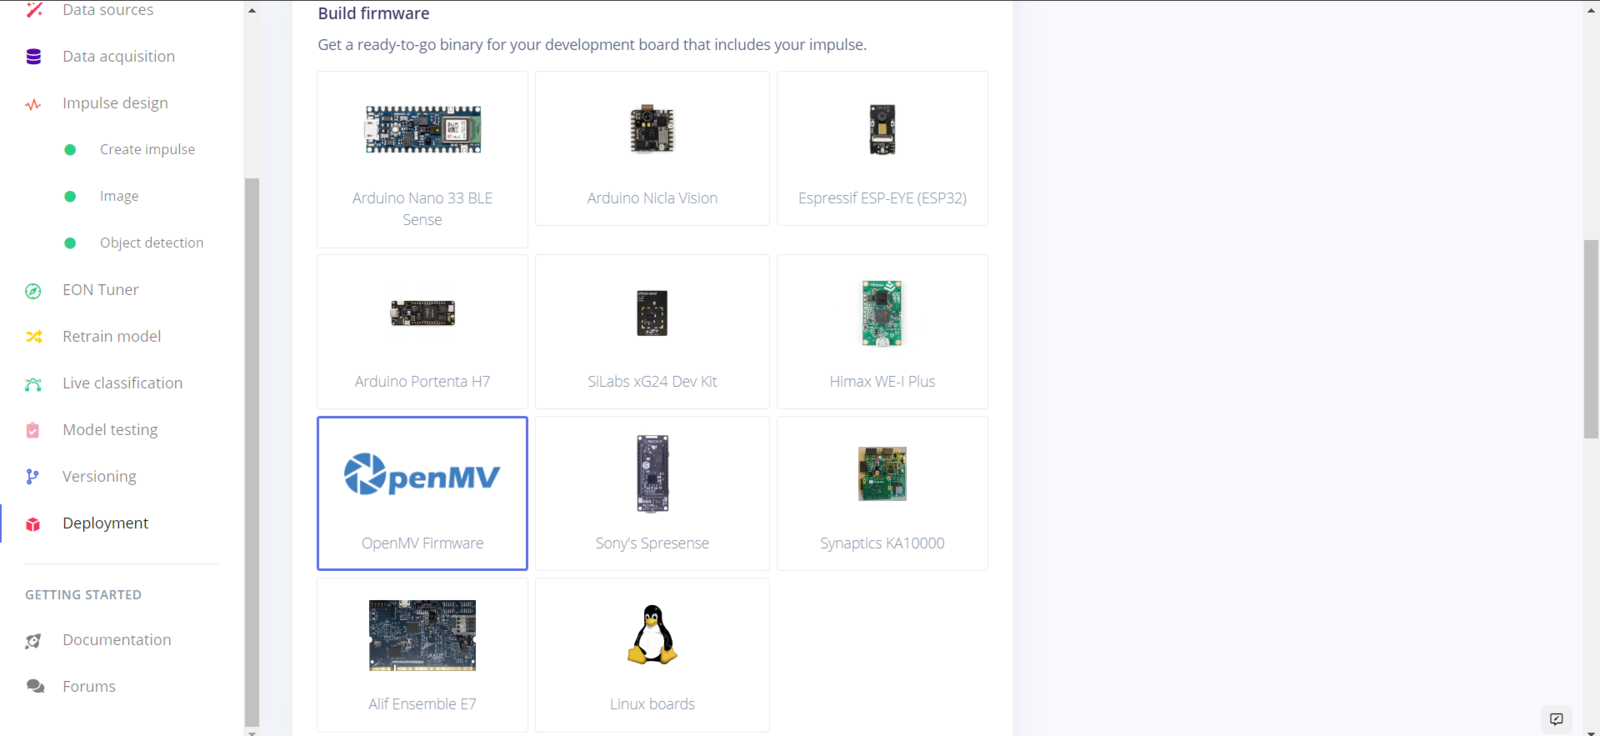
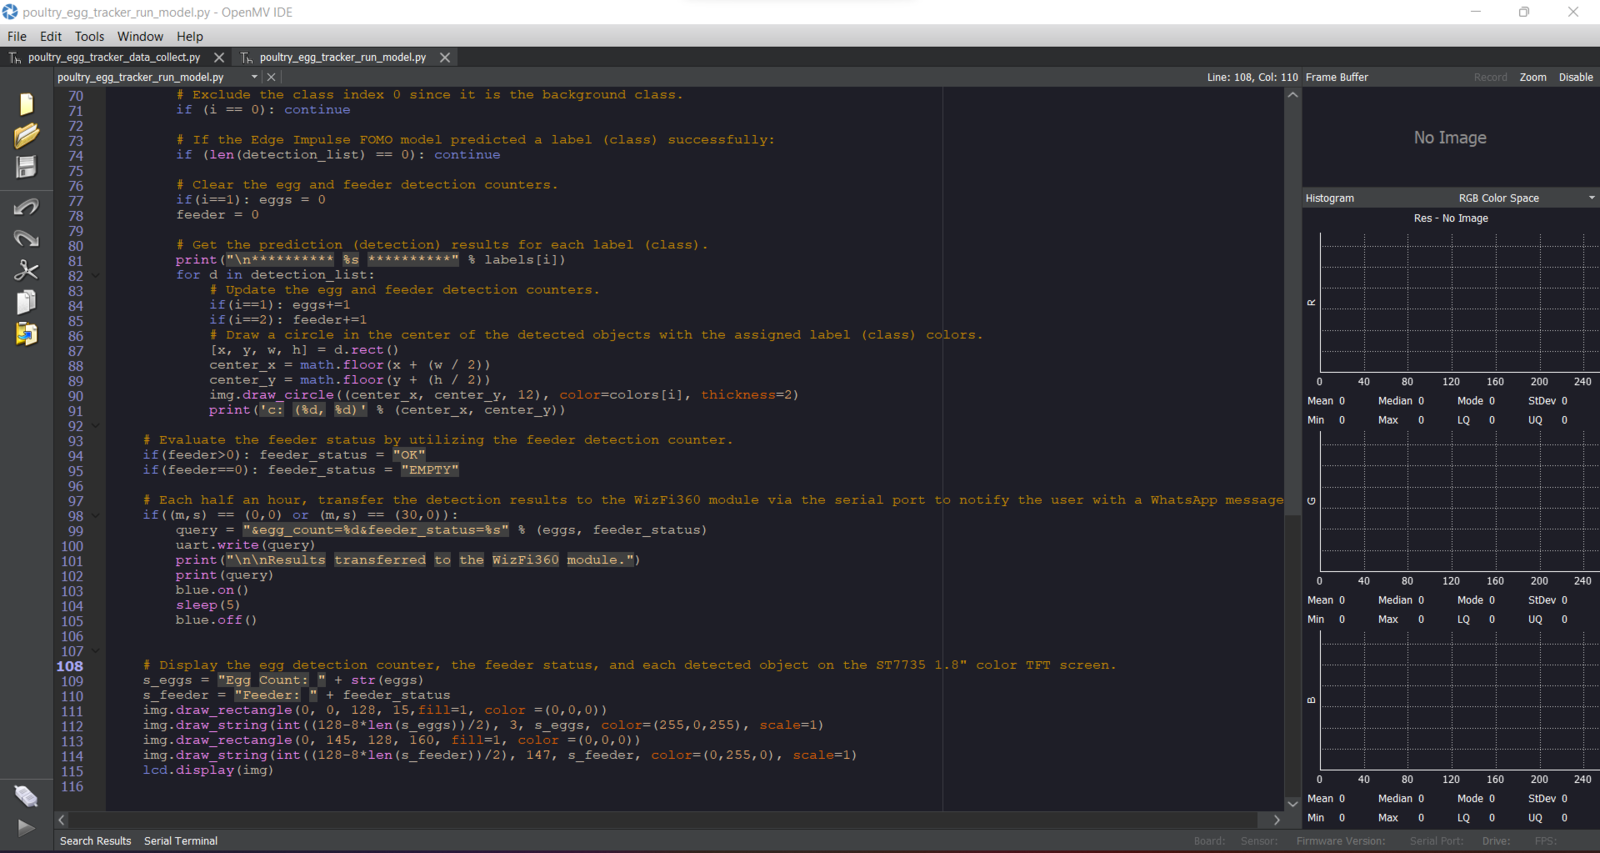
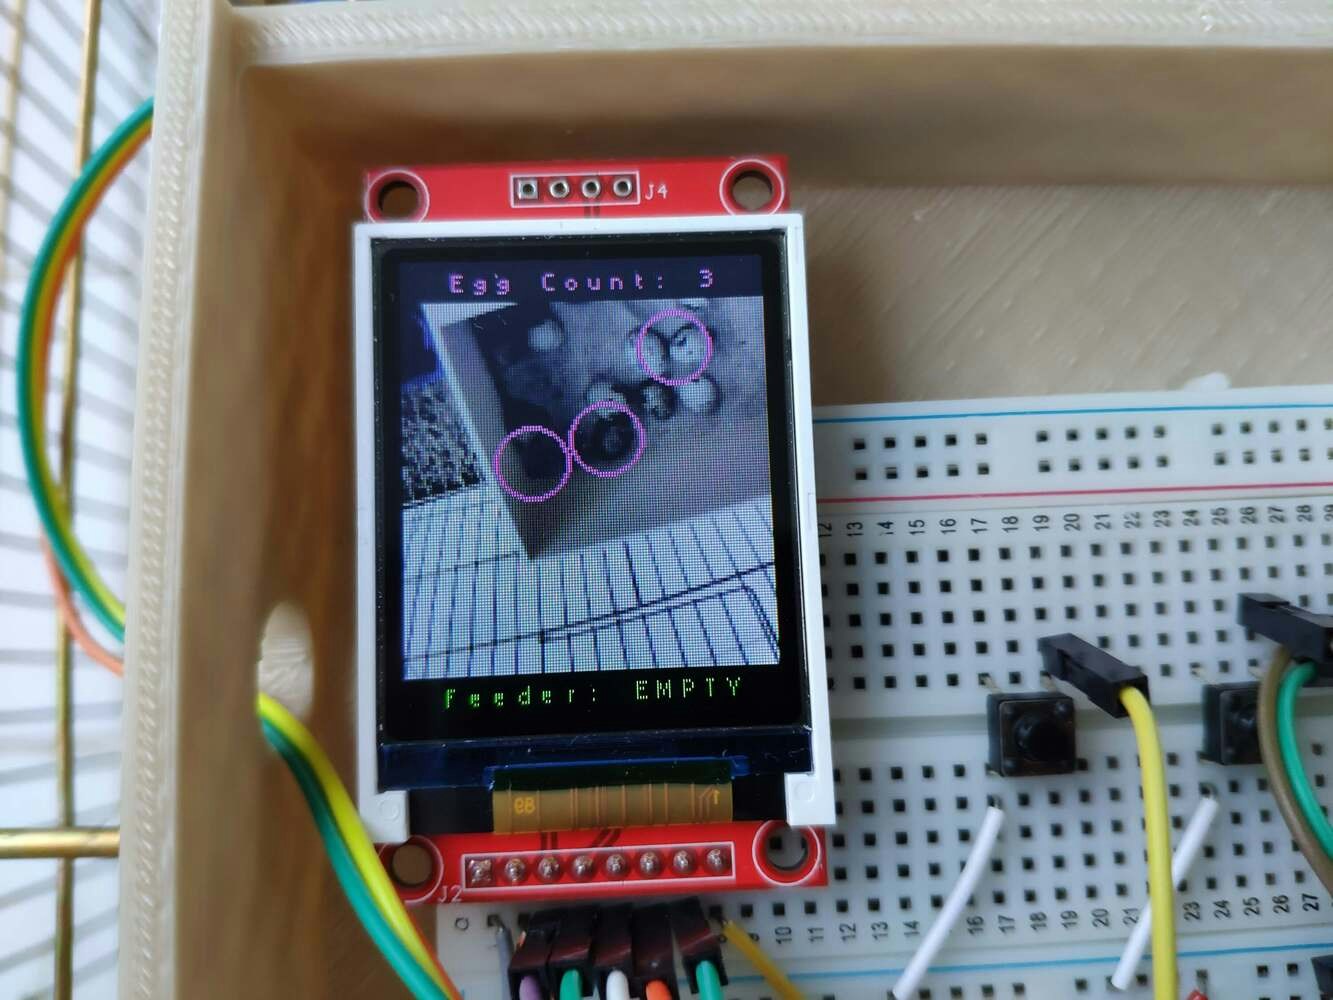
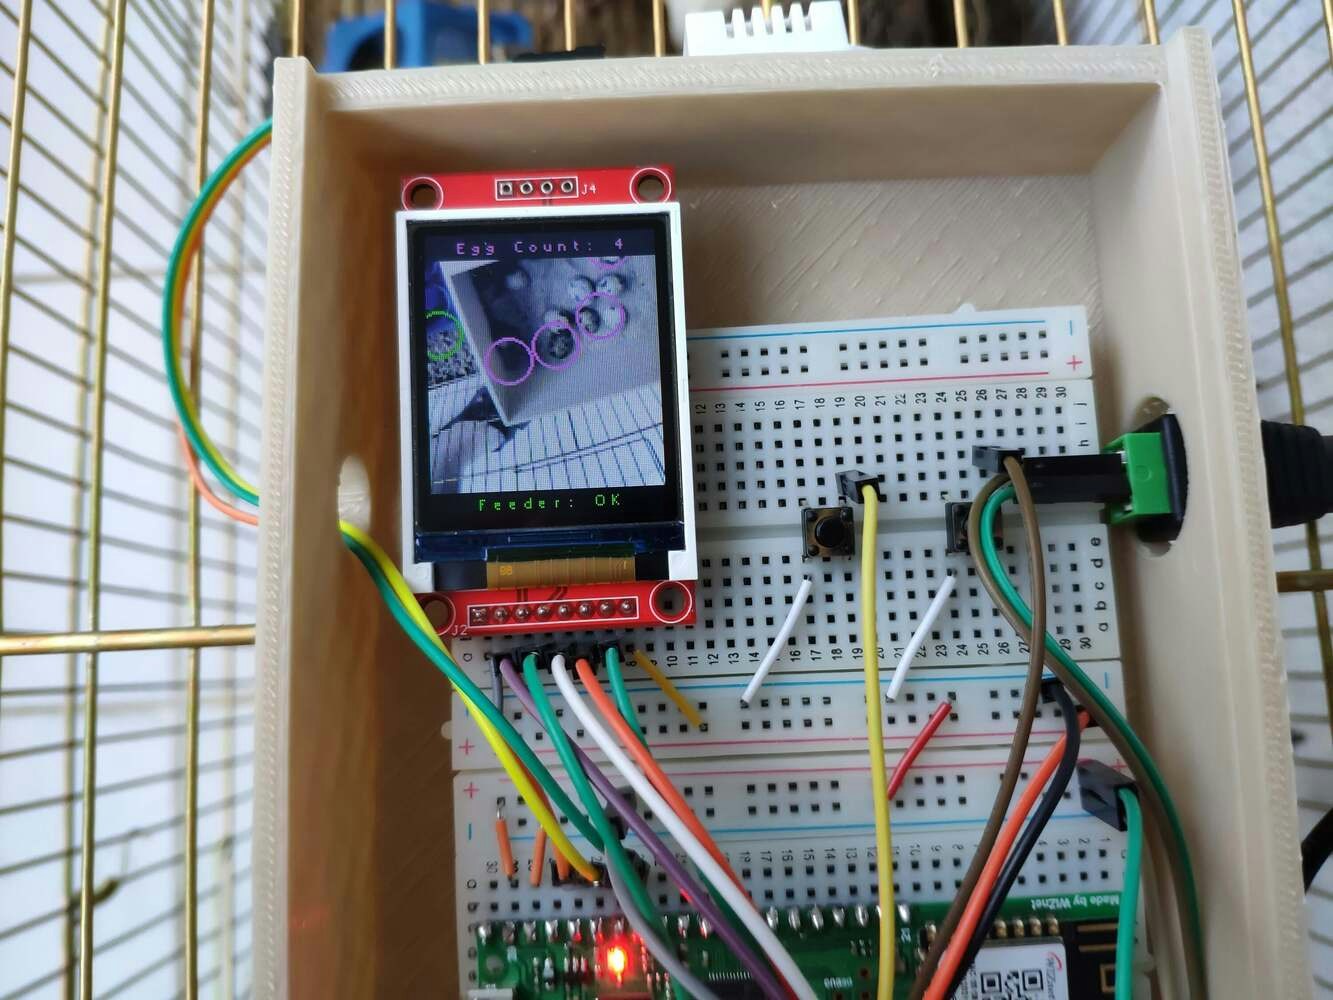
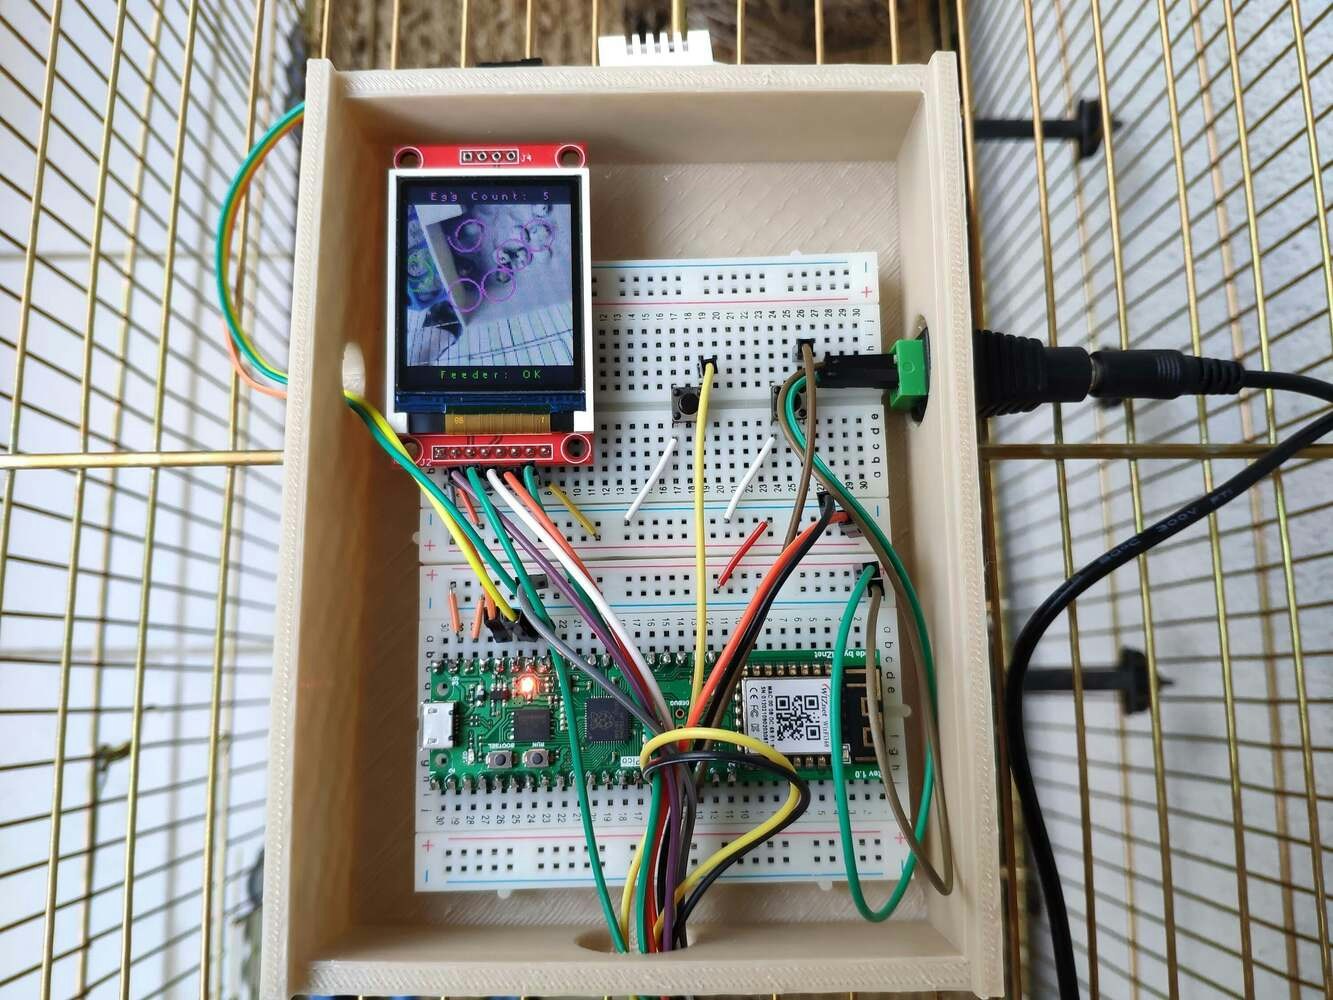
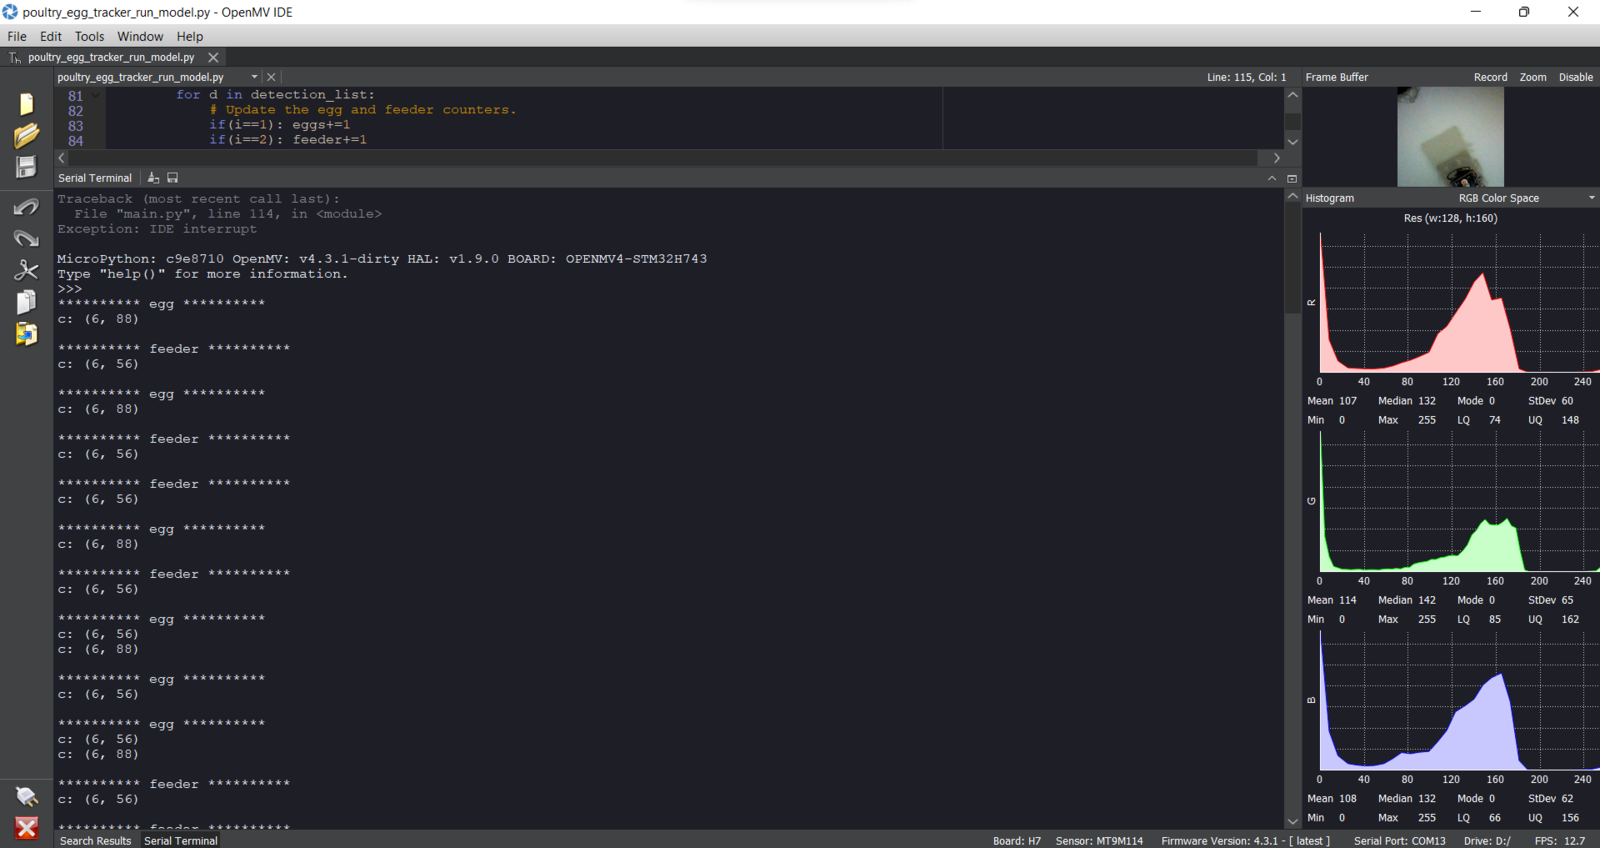
After building, training, and deploying my object detection (FOMO) model as an OpenMV firmware on Edge Impulse, I needed to flash OpenMV Cam H7 with the generated firmware to run the model directly so as to create an easy-to-use and capable device operating with minimal latency, memory usage, and power consumption. FOMO object detection models can count objects under the assigned classes and provide the detected object’s location using centroids. Therefore, I was able to display all detected objects on the ST7735 color TFT screen with the assigned class colors.- Egg ➡ Magenta
- Feeder ➡ Green

Step 7: Running the FOMO model on OpenMV Cam H7 to track unhatched eggs and the poultry feeder status
My Edge Impulse object detection (FOMO) model scans a captured image and predicts possibilities of trained labels to recognize an object on the given captured image. The prediction result (score) represents the model’s “confidence” that the detected object corresponds to each of the two different labels (classes) [0 - 1], as shown in Step 5:- Egg
- Feeder

- Egg ➡ Magenta
- Feeder ➡ Green


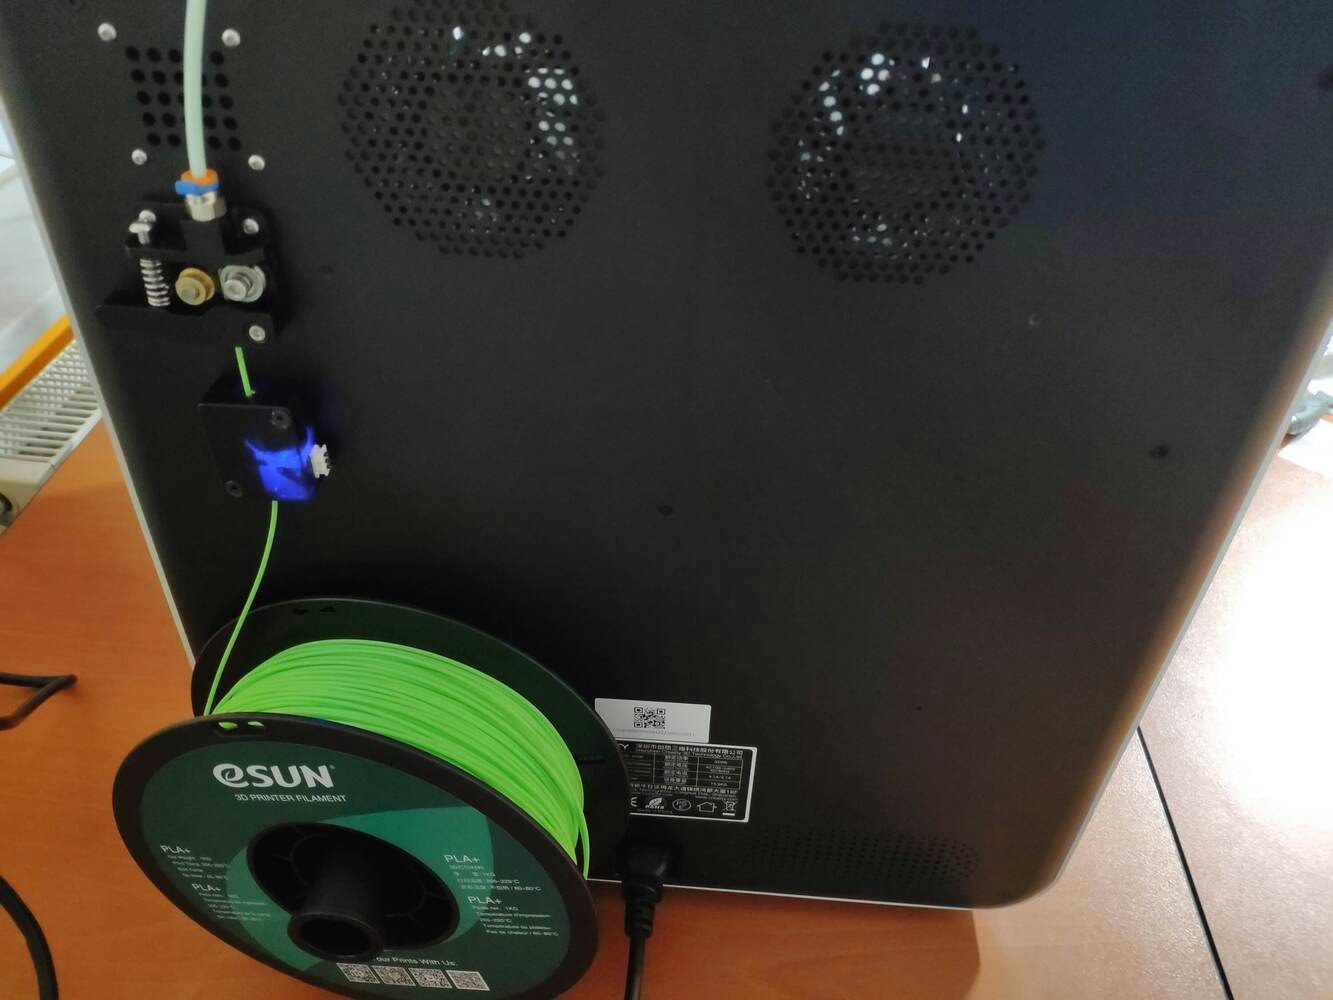
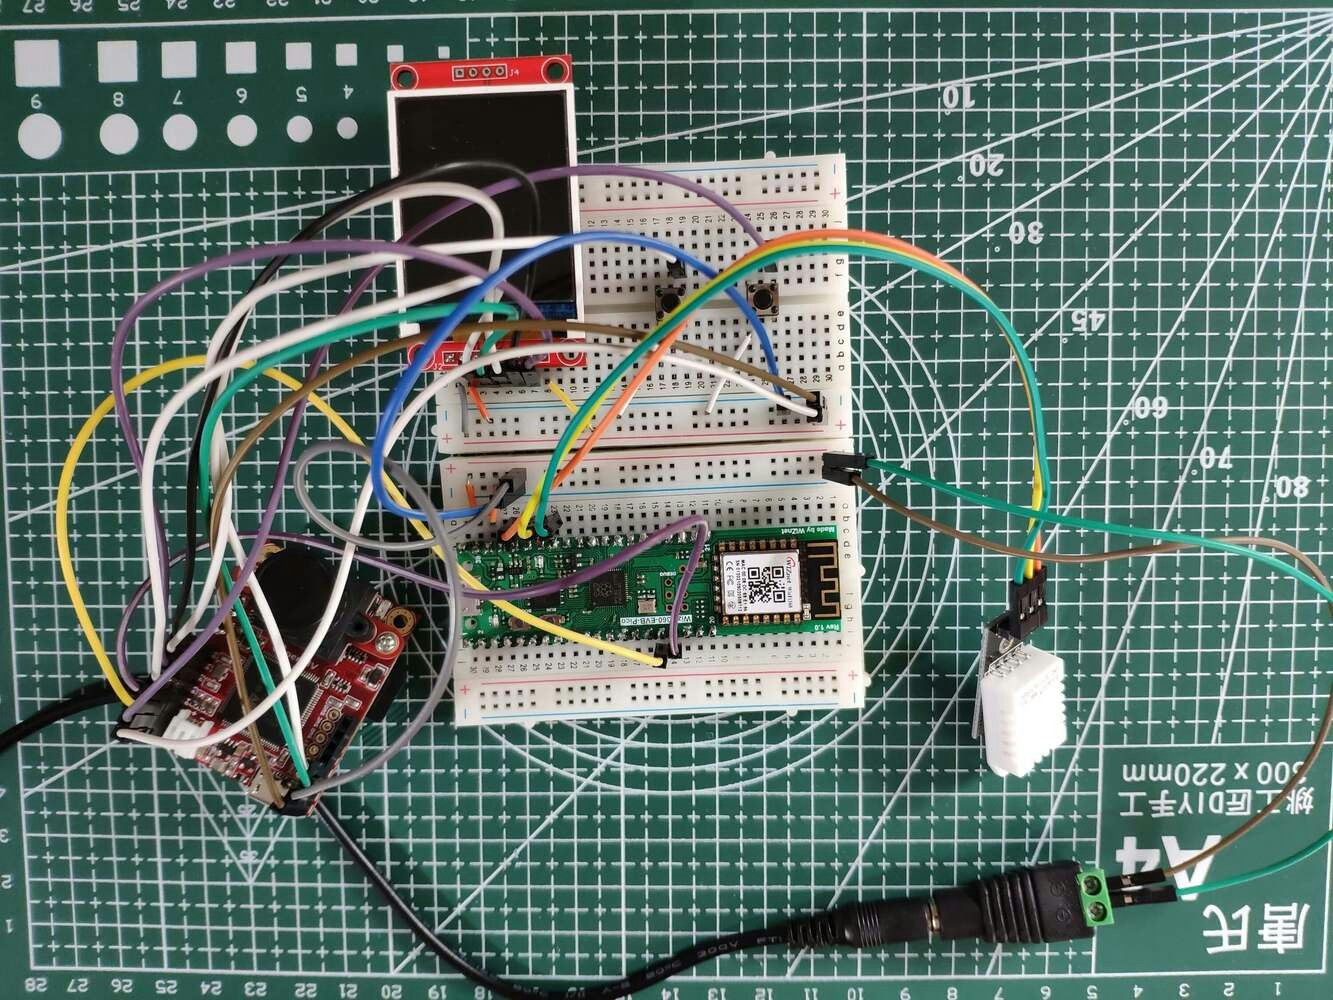
Step 8: Setting up WizFi360-EVB-Pico to collect weather data and communicate w/ OpenMV Cam H7
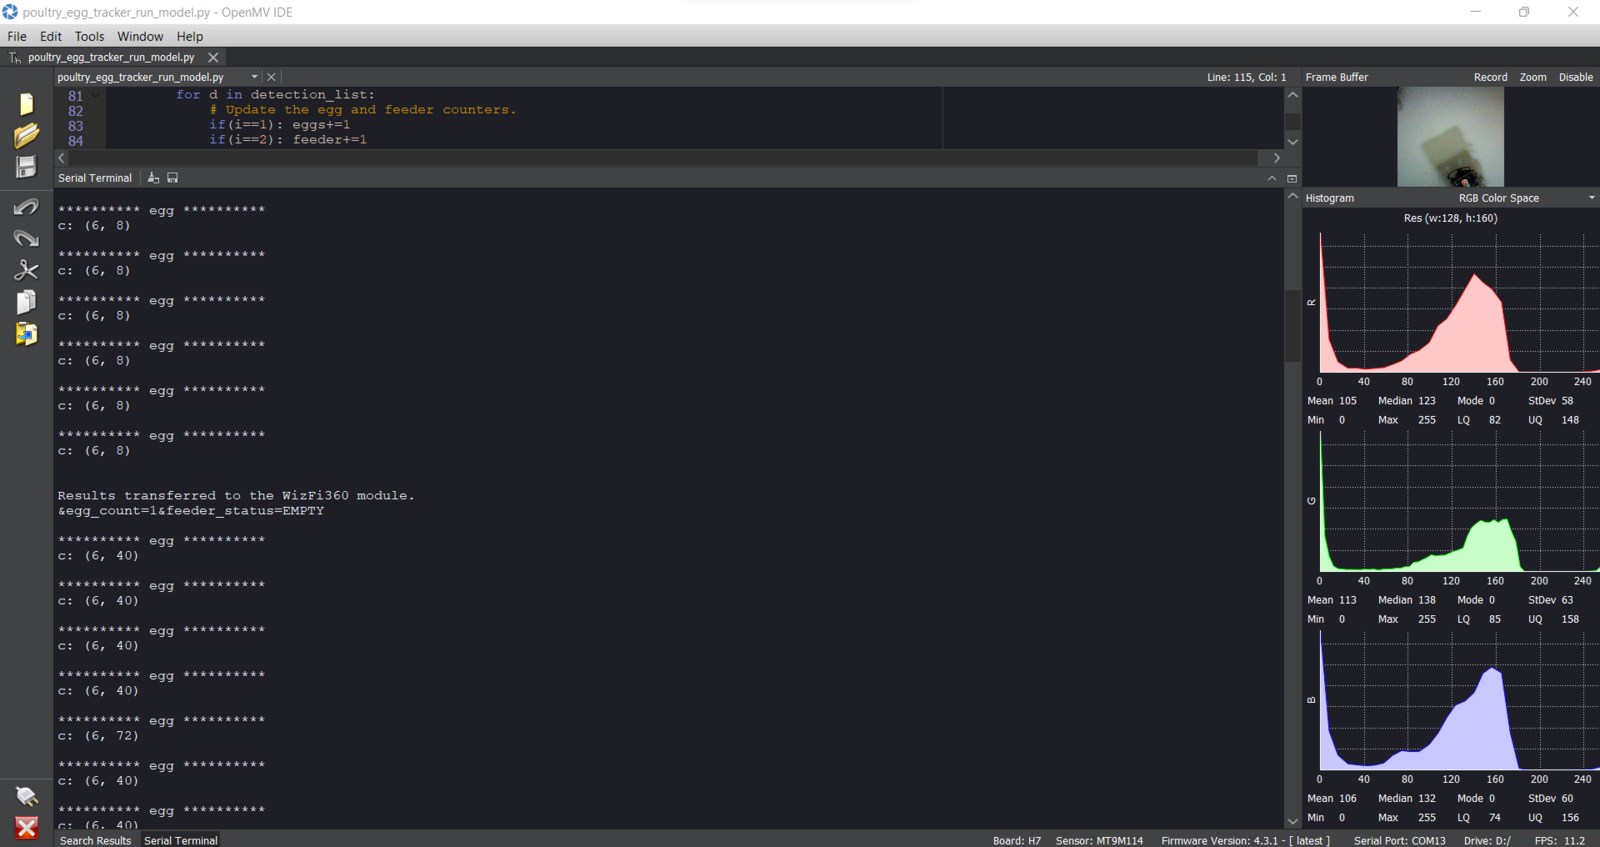
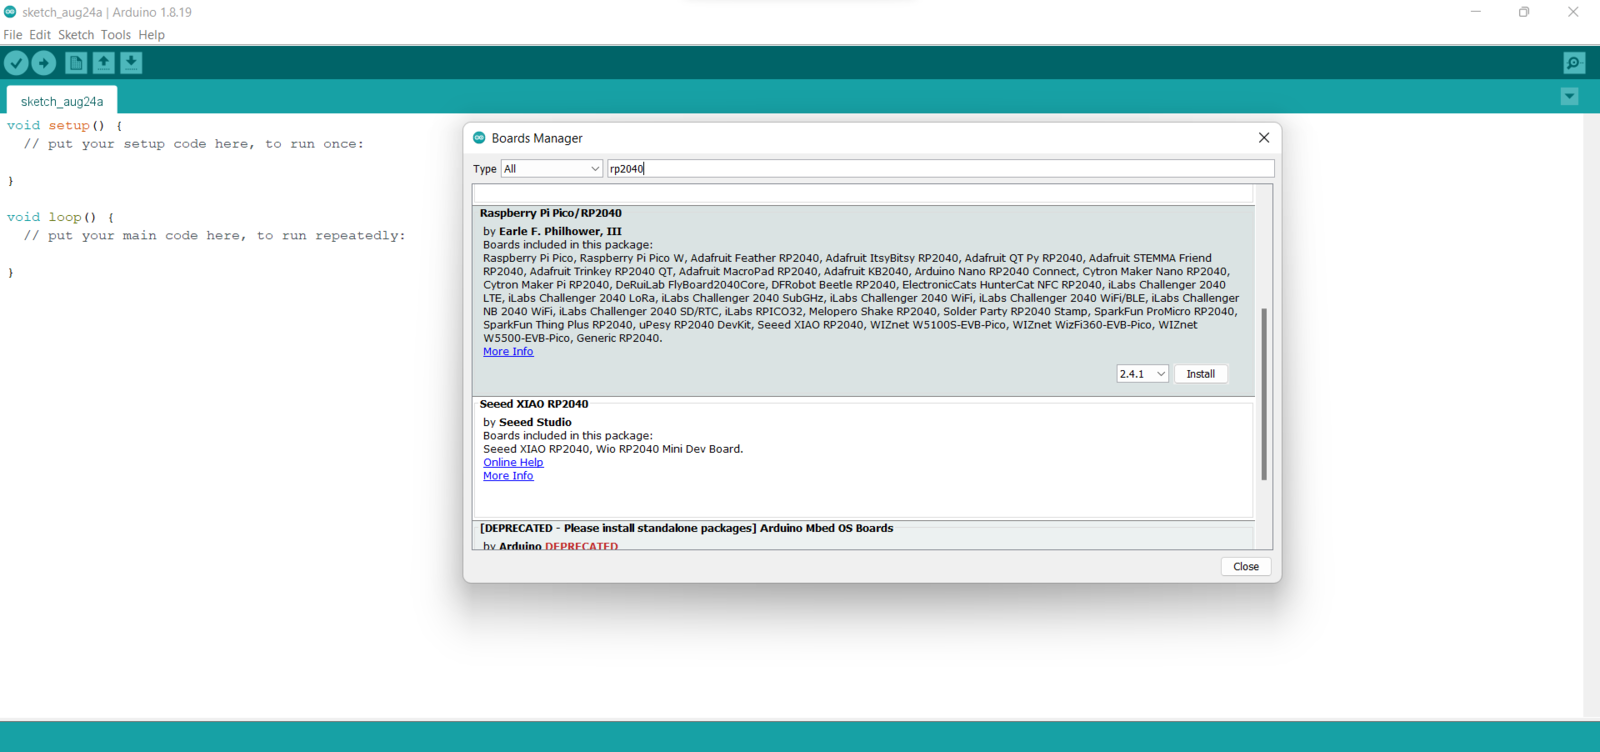
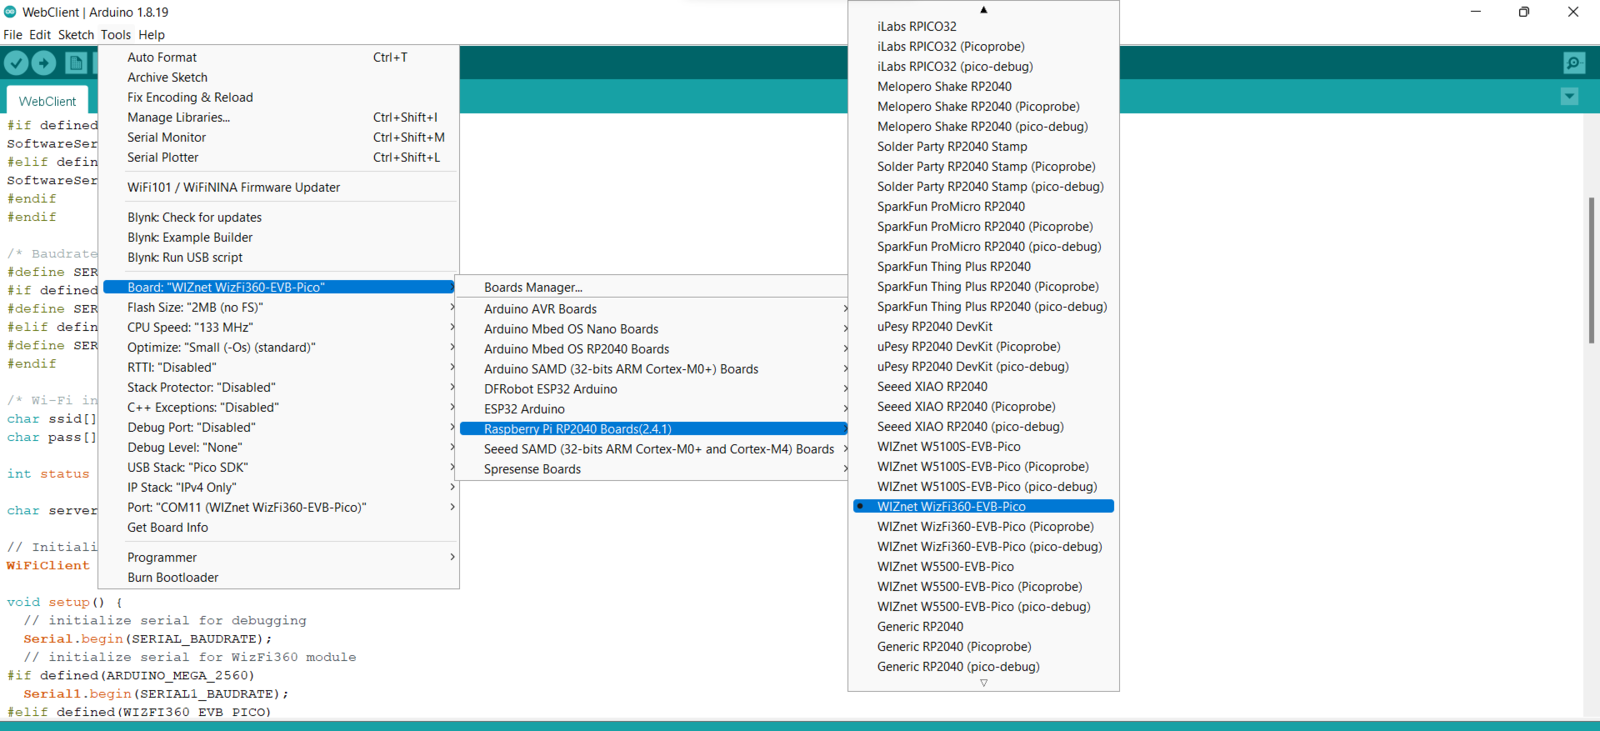
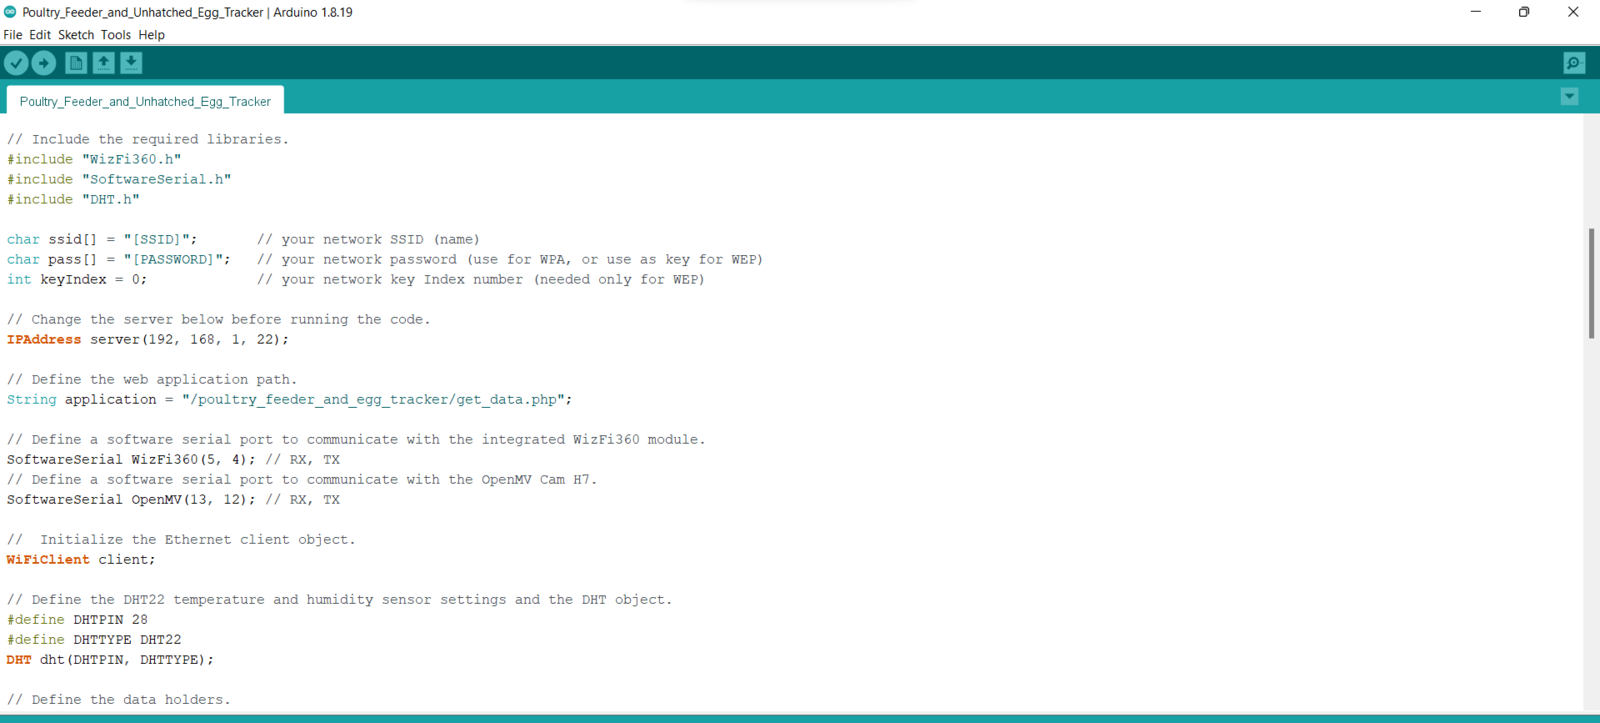
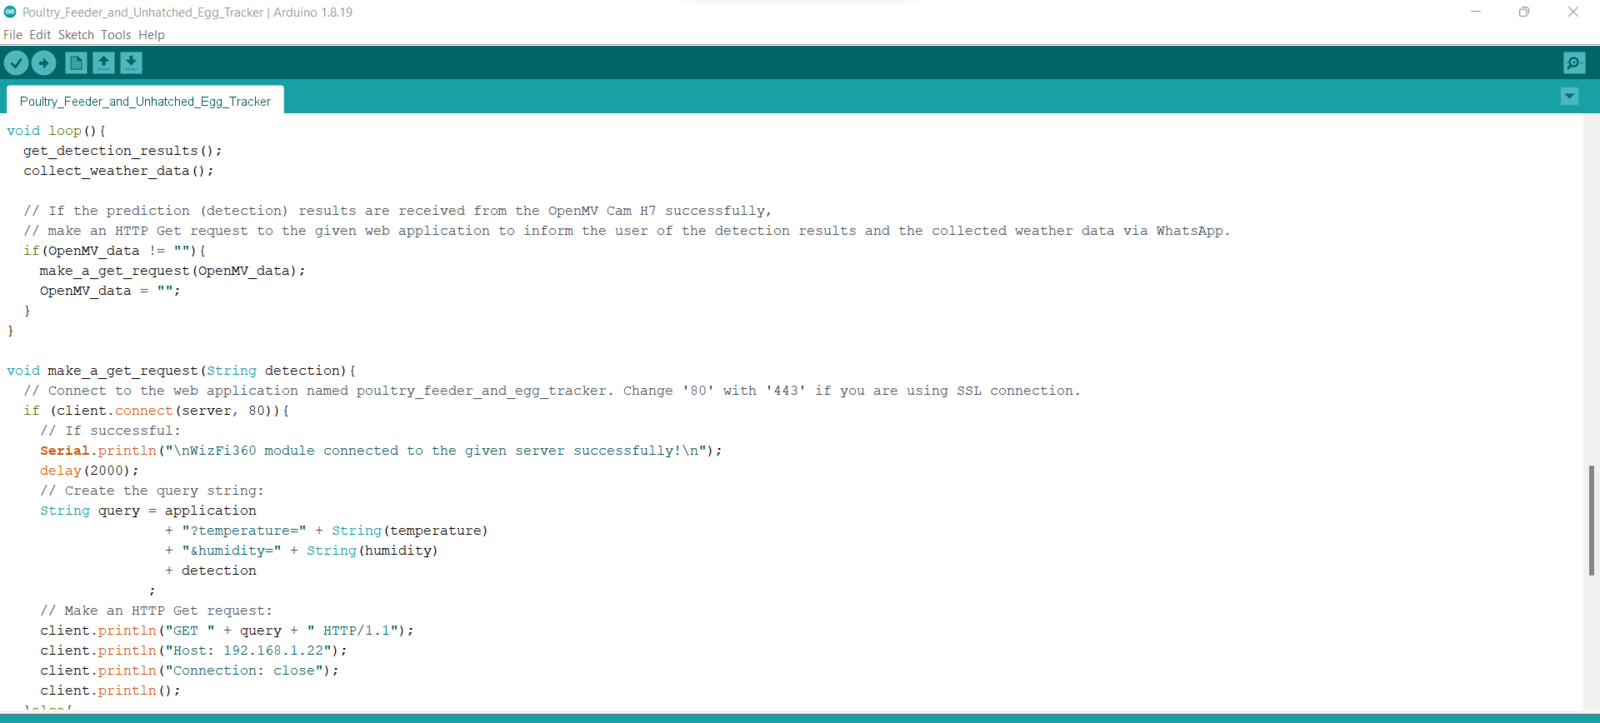
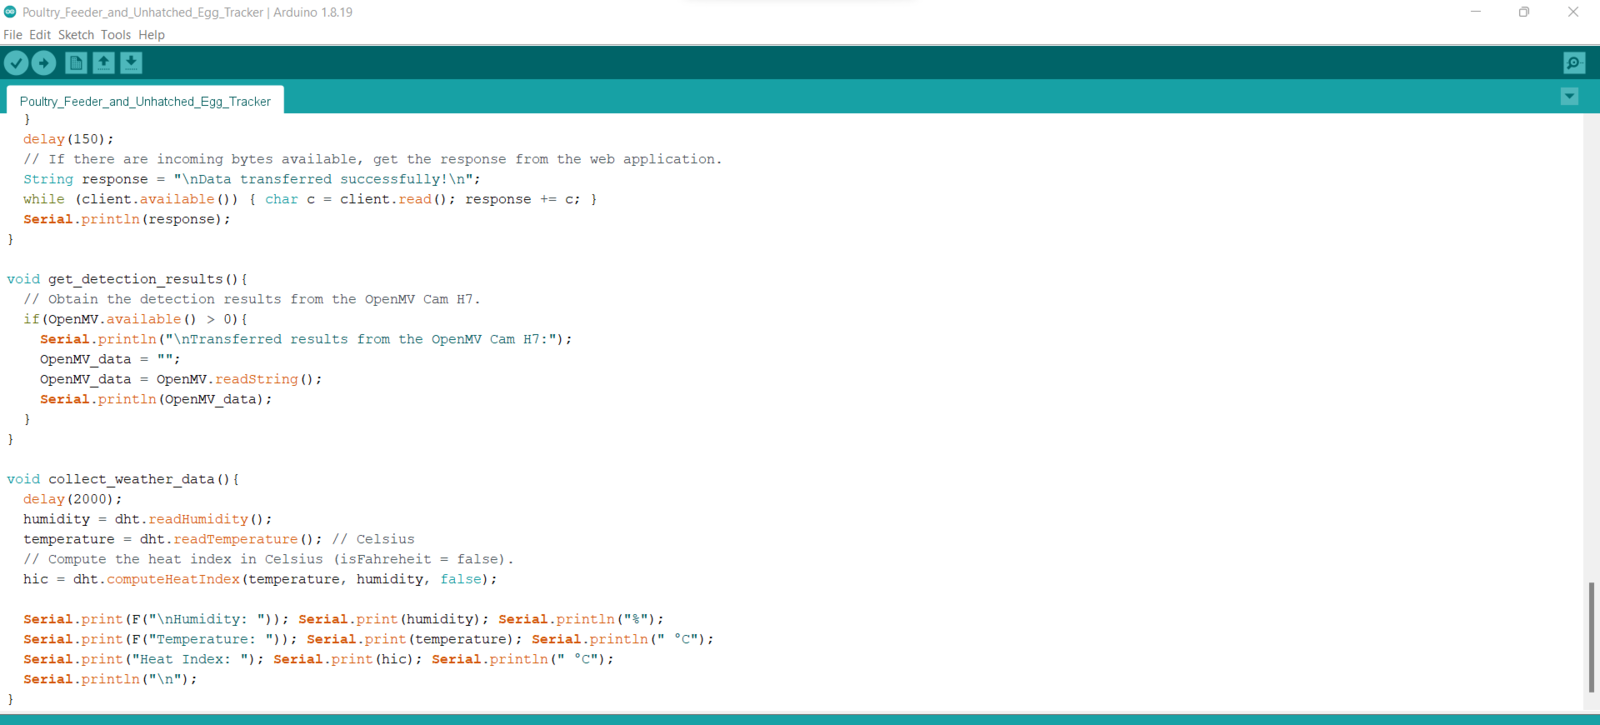
To inform the user of the detection results via WhatsApp, I needed to transfer the detection results to the PHP web application. Since OpenMV Cam H7 does not support Wi-Fi connectivity, I decided to utilize WizFi360-EVB-Pico to transmit the detection results. WizFi360-EVB-Pico is a budget-friendly development board based on the RP2040 microcontroller and pin-compatible with Raspberry Pi Pico. WizFi360-EVB-Pico enables Wi-Fi connectivity with the integrated WizFi360, an industrial-grade Wi-Fi module. Also, I connected a DHT22 temperature and humidity sensor to WizFi360-EVB-Pico to collect the current weather information and send the detection results with the collected weather data to the web application. Before proceeding with the following steps, I needed to set up WizFi360-EVB-Pico on the Arduino IDE and install the required libraries for this project. :hash: To add the WizFi360-EVB-Pico board package to the Arduino IDE, navigate to File ➡ Preferences and paste the URL below under Additional Boards Manager URLs. https://github.com/earlephilhower/arduino-pico/releases/download/global/package\_rp2040\_index.json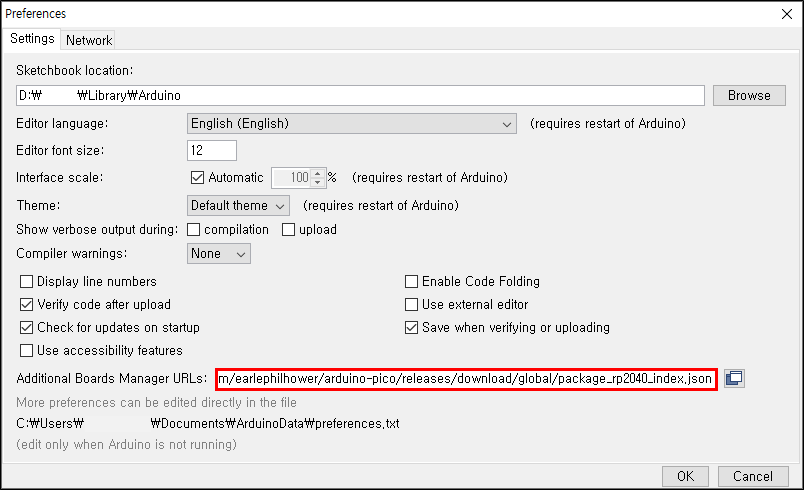

Step 8.1: Logging the detection results and notifying the user over WhatsApp
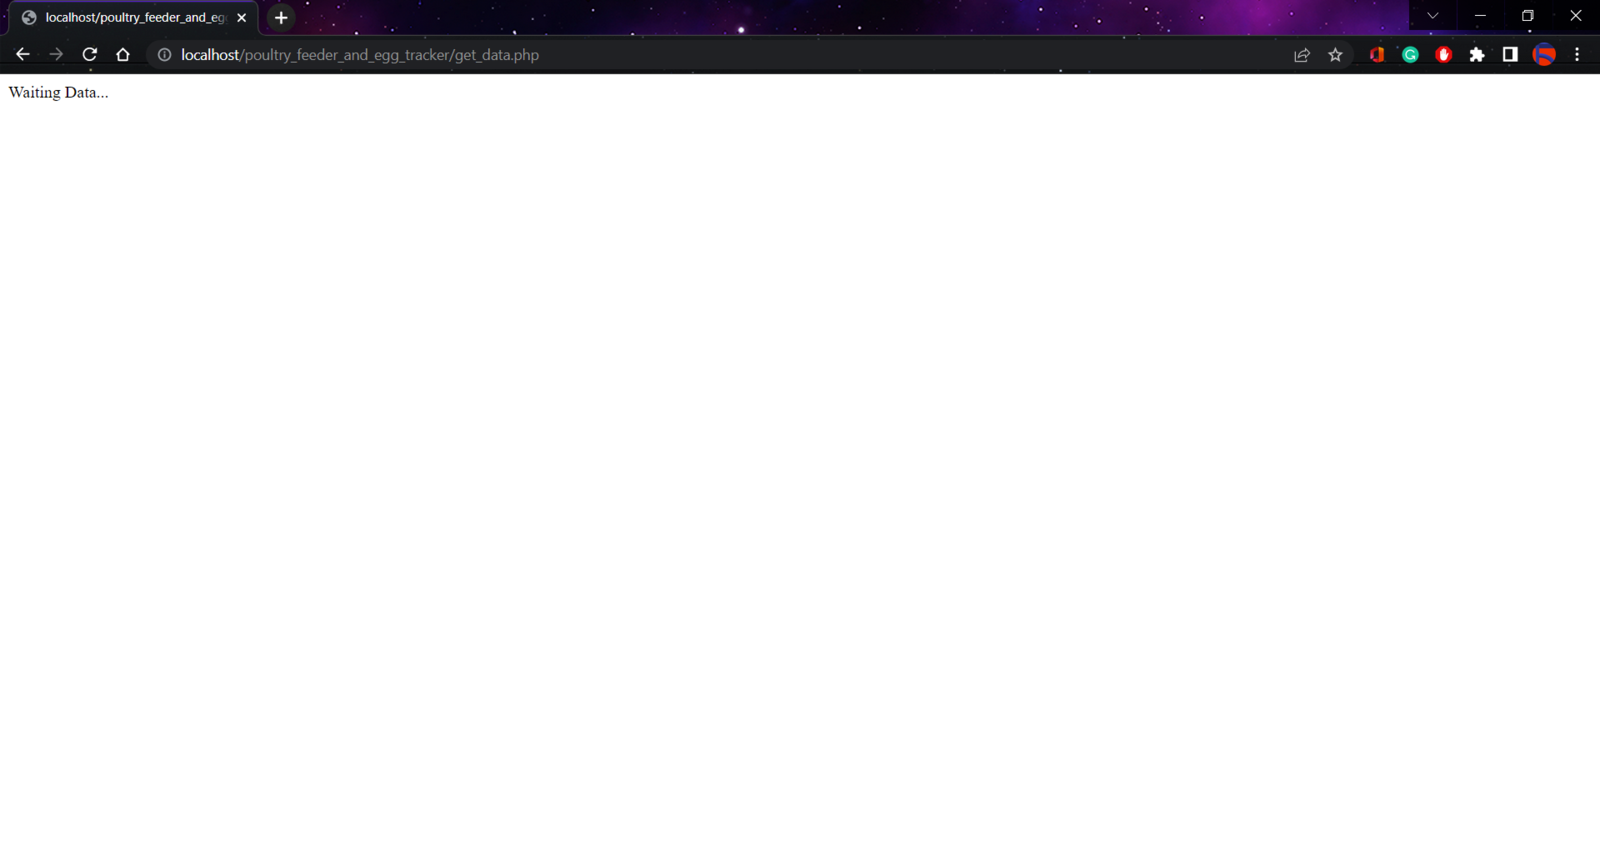
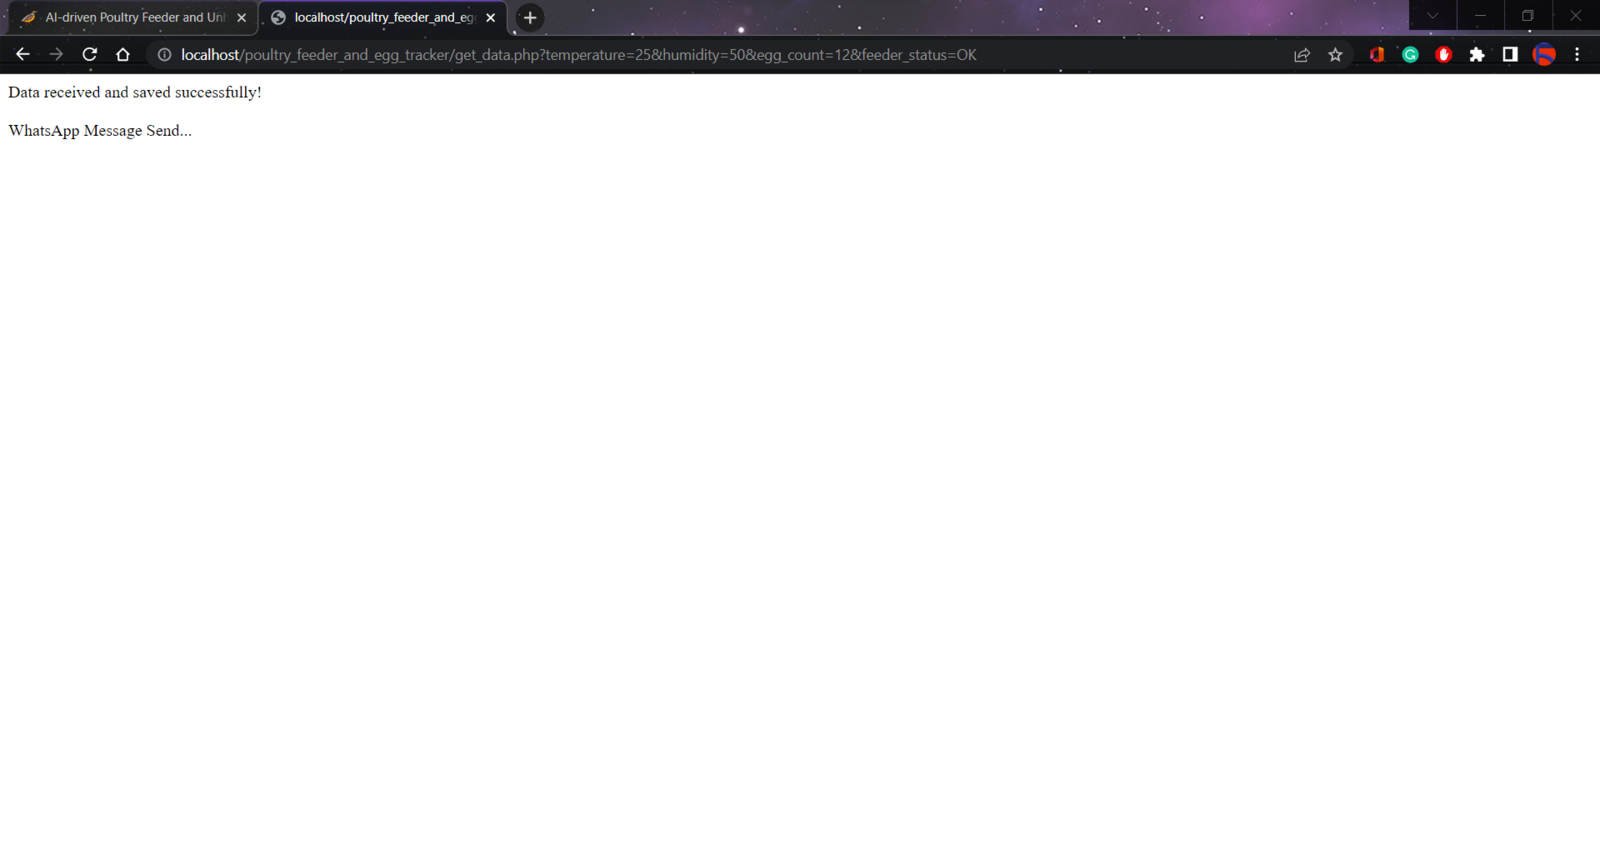
After running the Poultry_Feeder_and_Unhatched_Egg_Tracker.ino file on WizFi360-EVB-Pico: 🐤🥚 The device transmits the detection results and the collected weather data to the PHP web application when WizFi360-EVB-Pico receives the detection results from OpenMV Cam H7 via serial communication every half an hour. 🐤🥚 As explained in Step 3, when the web application obtains the detection results and the collected weather data via an HTTP GET request, the application appends the current date & time and logs the received data to the given MySQL database table. 🐤🥚 Then, the application shows all registered data records as a list on the home page.


Videos and Conclusion
Further Discussions
By applying object detection models trained on captured coop images in tracking unhatched eggs and detecting the poultry feeder status automatically, we can: 🐤🥚 mitigate strenuous workload while logging the daily produced eggs and applying a regular feeding schedule, 🐤🥚 maintain a high poultry health status, 🐤🥚 maximize egg quality and quantity, 🐤🥚 determine a potential contagious poultry disease or malnutrition.