Intro
This project focuses on how to port an existing audio recognition project built with a SiLabs Thunderboard Sense 2, to the latest EFR32MG24 as used in the newer SiLabs xG24 Dev Kit. For demonstration purposes, we will be porting Manivannan Sivan’s “Vehicle Predictive Maintenance” project, which is an Edge Impulse based TinyML model to predict various vehicle failures like faulty drive shaft and brake-pad noises. Check out his work for more information. The audio sensor on the Thunderboard Sense 2 and the xG24 Dev Kit are the same (TDK InvenSense ICS-43434), so ideally we’re not required to collect any new data using the xG24 Dev Kit for the model to work properly. Had the audio sensor been a different model, it would most likely be necessary to capture a new dataset. However, note has to be taken that the xG24 has two microphones, phones placed at the edges of the board. In this project, I am going to walk you through how you can clone Mani’s Public Edge Impulse project for the Thunderboard Sense 2 board, build it for the xG24, test it out, and then deploy to the newer SiLabs xG24 device instead.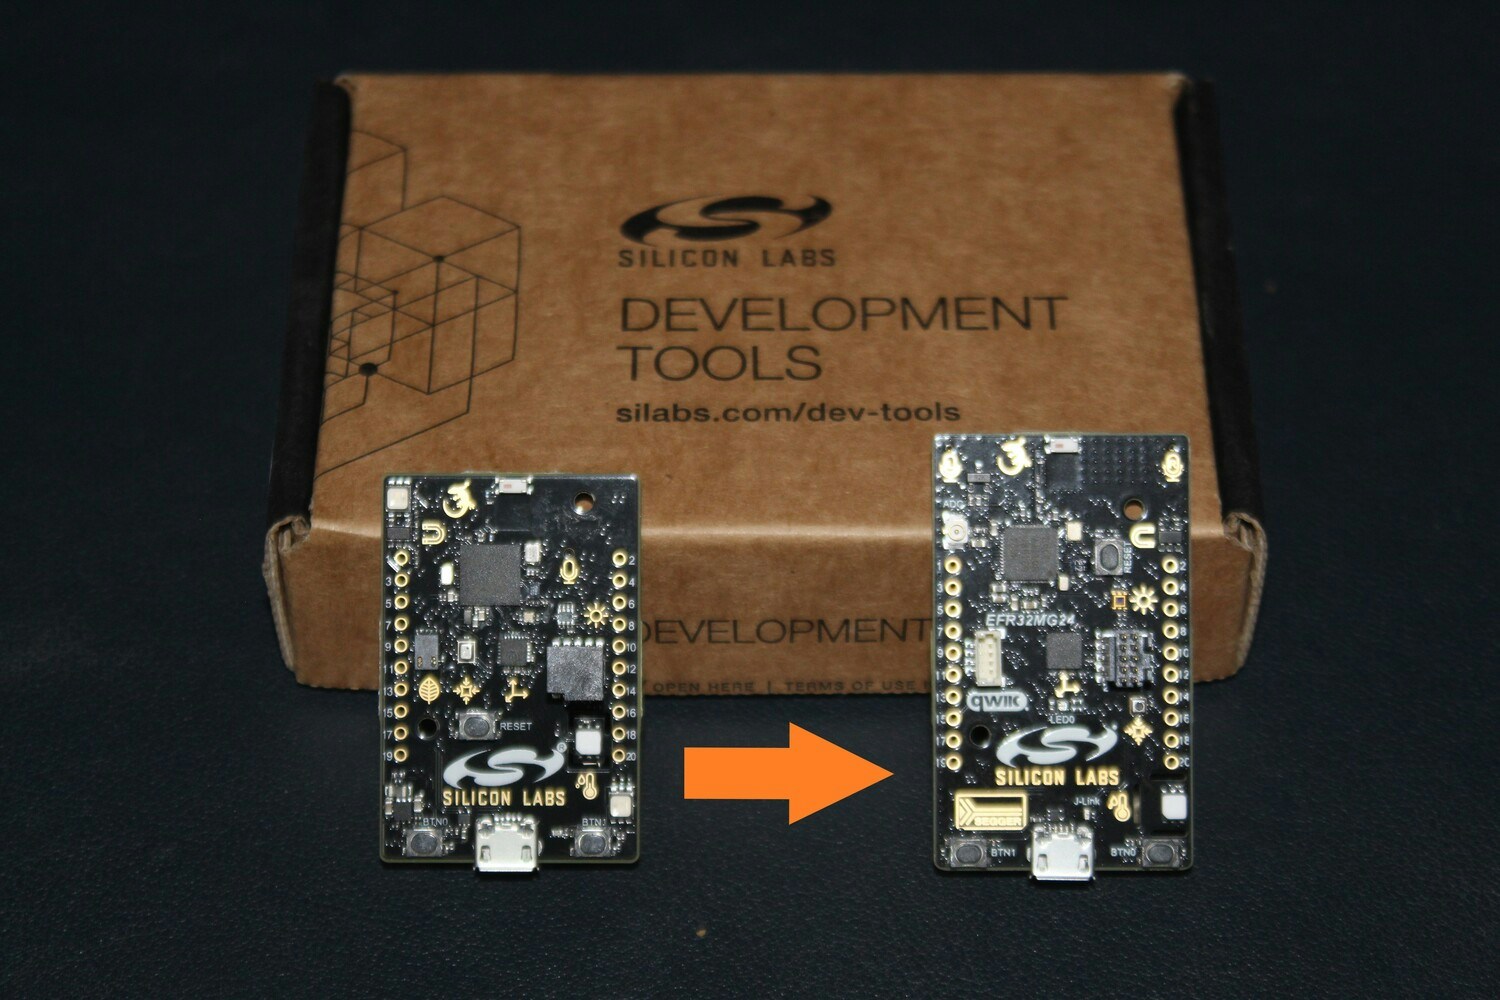
Installing Dependencies
Before you proceed further, there are few software packages you need to install.- Edge Impulse CLI - Follow this link to install the necessary tooling to interact with the Edge Impulse Studio and also run inference on the board.
- Simplicity Studio 5 - Follow this link to install the IDE
- Simplicity Commander - Follow this link to install the software. This will be required to flash firmware to the xG24 board.
Clone And Build
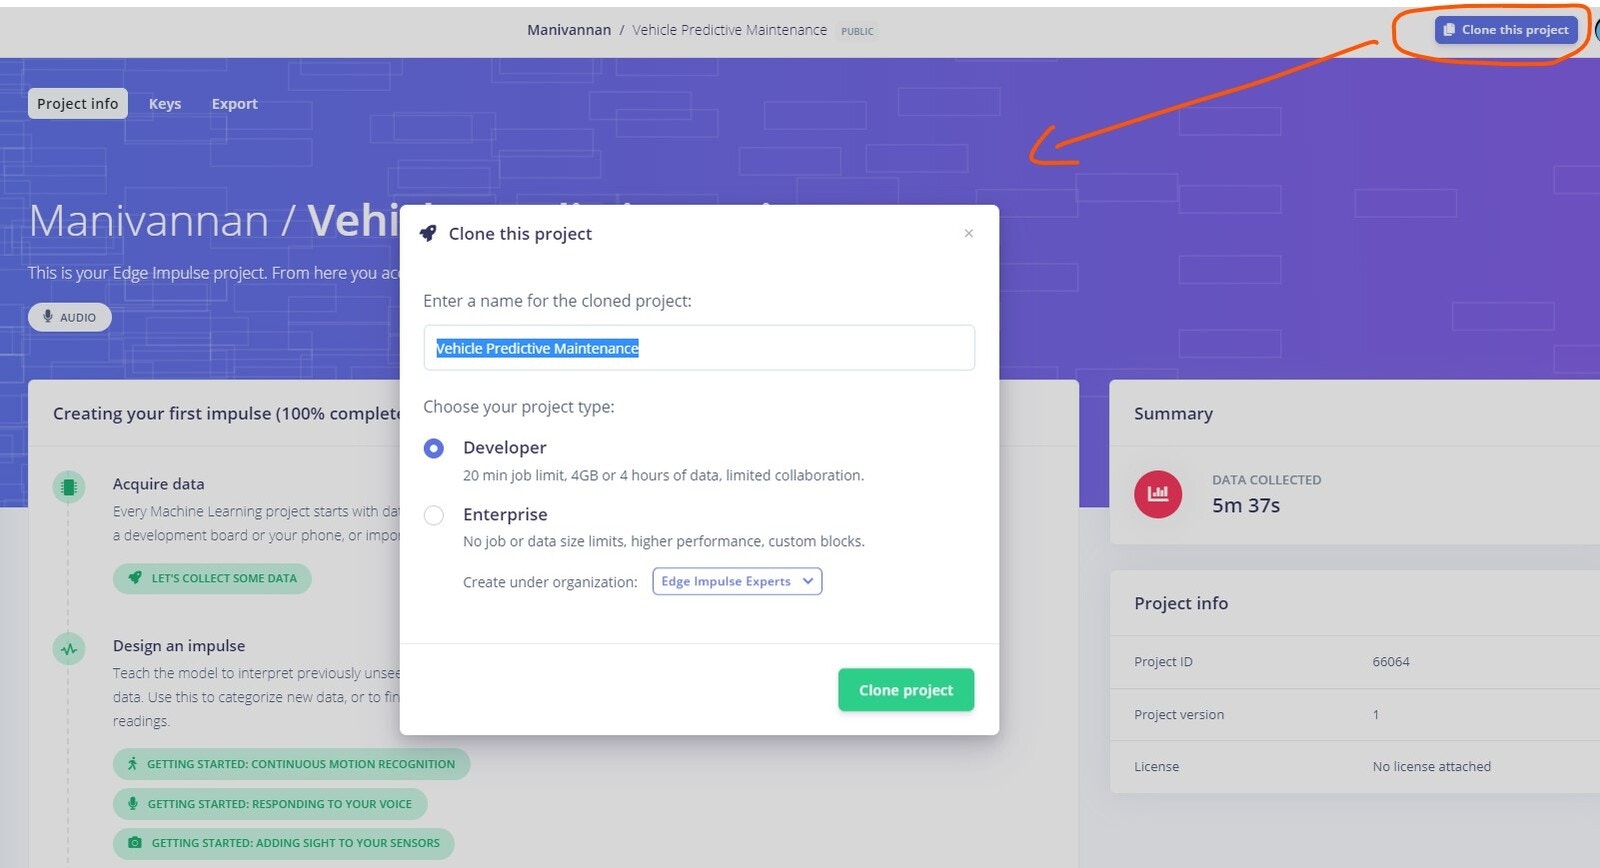
If you don’t have an Edge Impulse account, signup for free and log into Edge Impulse. Then visit the below Public Project to get started.https://studio.edgeimpulse.com/public/66064/latestClick on the “Clone” button at top-right corner of the page. That will bring you to the below popup tab. Enter a name for your clone project, and click on the “Clone project” button.
edge-impulse-daemon to connect the device to the Studio.
You can follow the guide below to go through the process, if you are interested in adding more data samples to your cloned project:
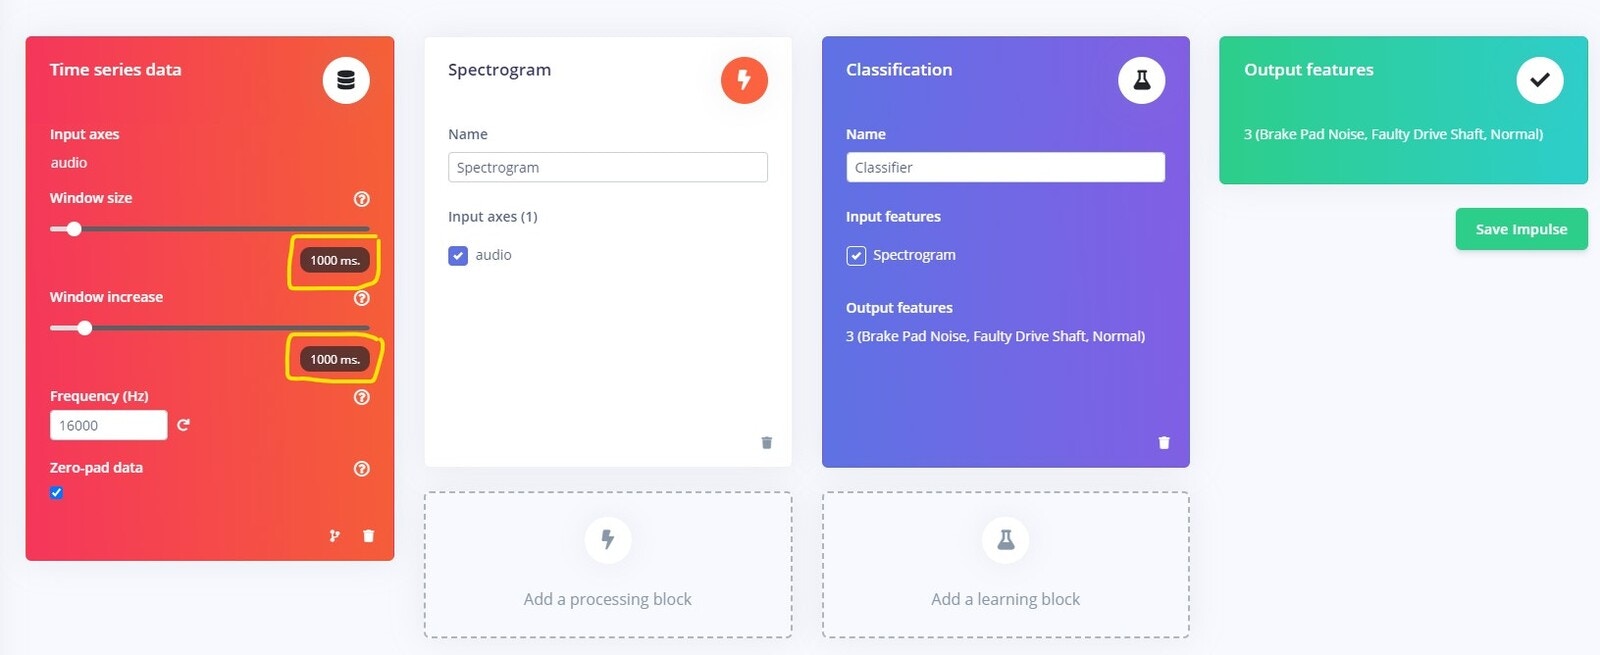
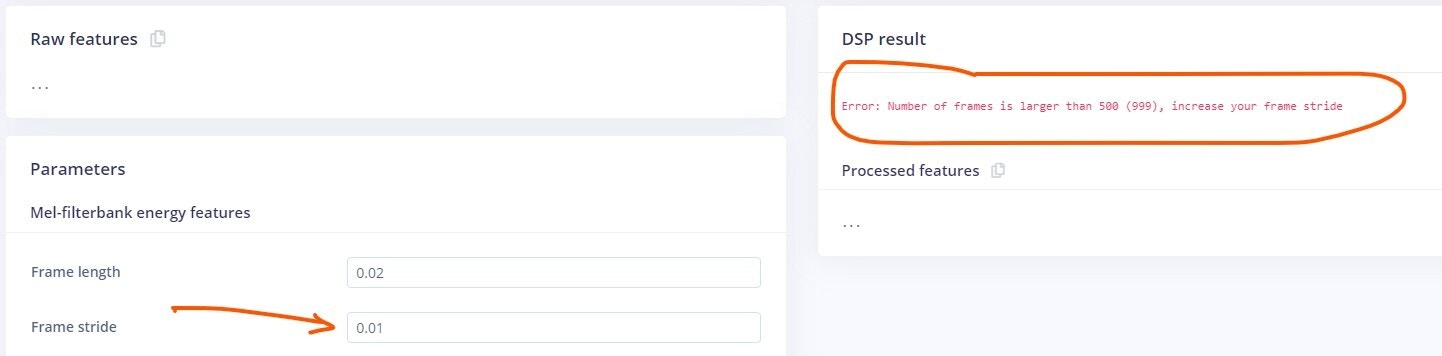
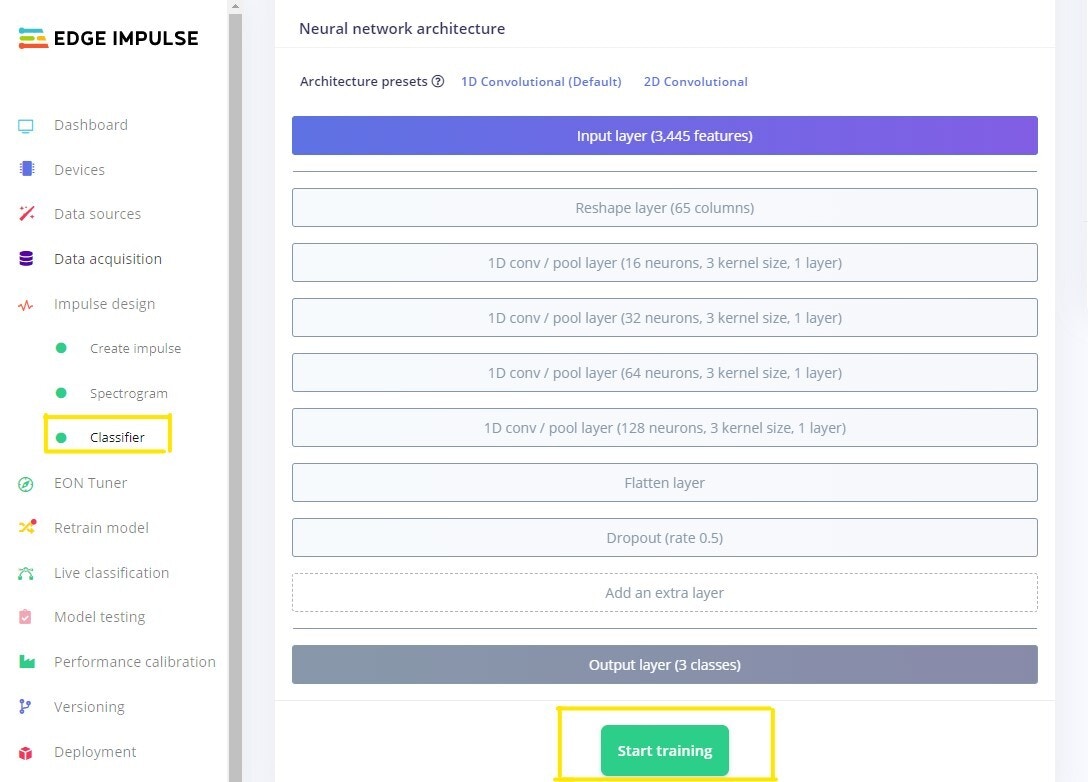
“Edge Impulse xG24 Dev Kit Guide”.With default value of Window Size (10s) and Window Increase (500 ms), the processing block will throw an error, as represented below:

Test
When you are done training, navigate to the “Live Classification” page from the left menu. This feature of Edge Impulse comes in handy when migrating projects to different boards. Rather than deploying the model and then testing it on the hardware, with this feature we can actually collect audio data from the hardware immediately, and run the model in the Studio on the collected data. This saves time and effort before hand. For Edge Impulse supported boards we can directly download the base Edge Impulse firmware, and then directly record audio (or other) data from the target device. You can refer to the previously mentioned official Docs link to get the latest firmware and connect the xG24 to the Edge Impulse Studio: “Edge Impulse xG24 Dev Kit Guide”. Once done, you can select the device name, select the sensor as “Microphone”, sample length and the sampling frequency (ideally equally to collected samples).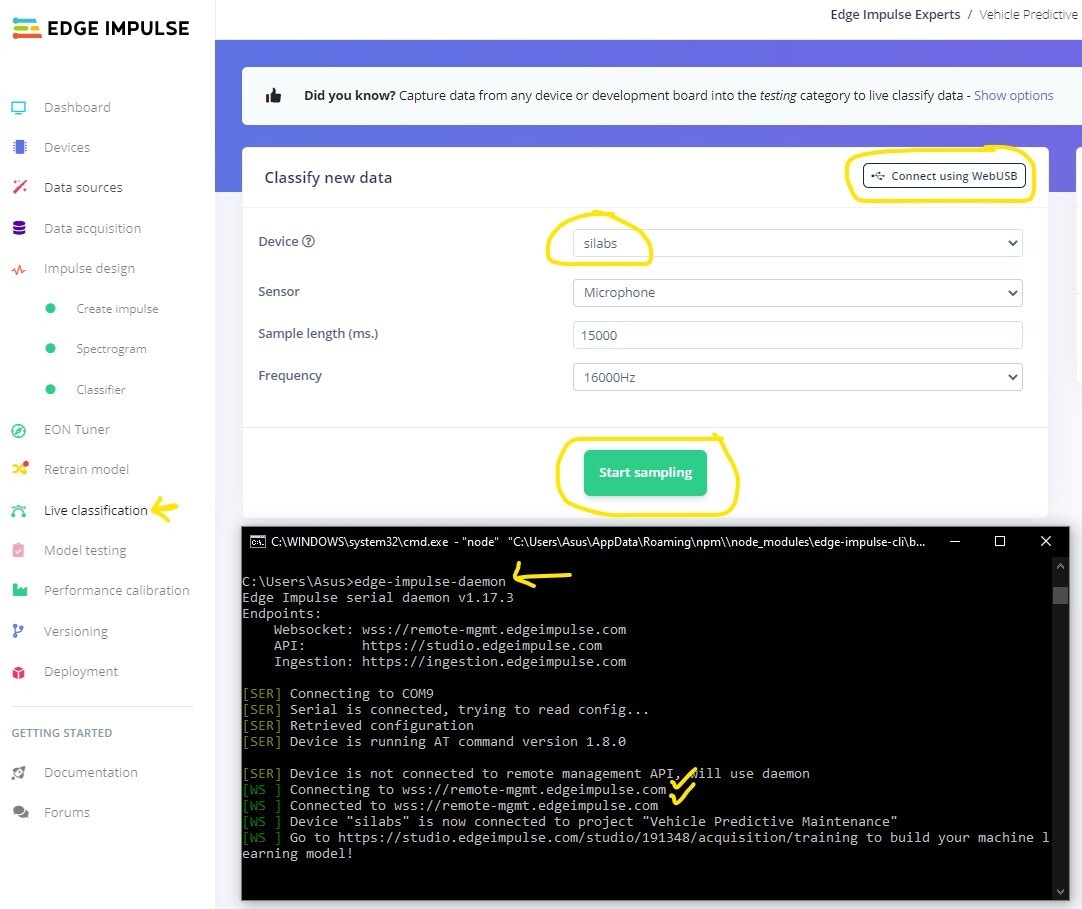
Deploy
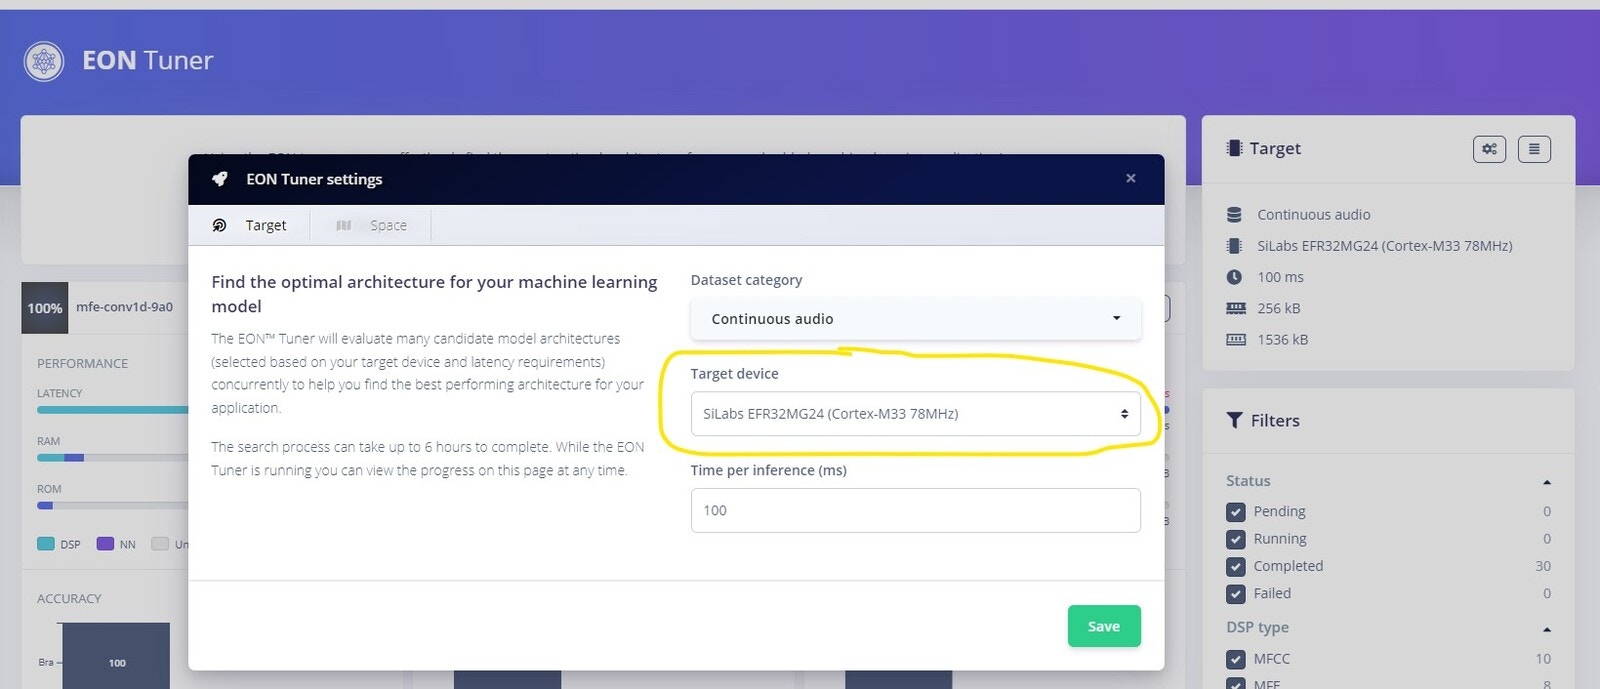
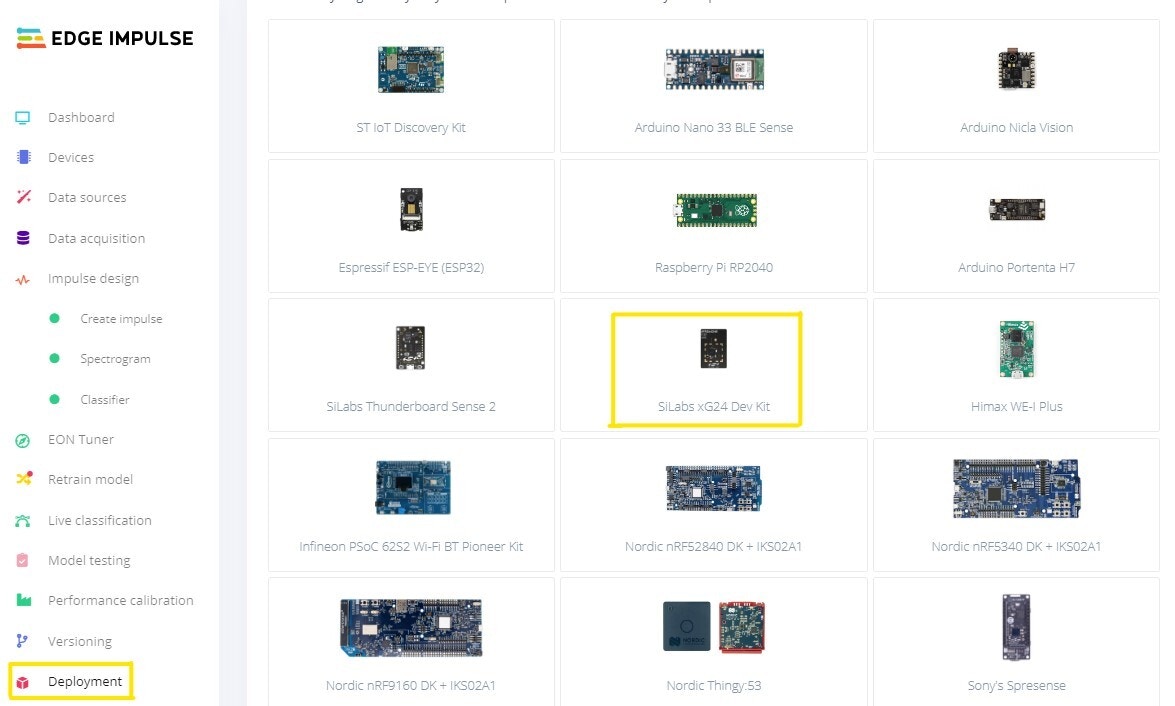
When you are done retraining, navigate to the “Deployment” tab from the left menu, select “SiLabs xG24 Dev Kit” under “Build firmware”, then click on the “Build” button at the bottom of the page. This will build your model and download a .zip file containing a.hex file and instructions.
.hex file and flash it to the board.
To start the inferencing run the following command in your terminal:
edge-impulse-cli version to get this running and avoid a package mismatch as shown below:

