Introduction
The Seeed Studio Grove Vision AI Module is a small TinyML-capable board equipped with a Himax HX6537-A processor and an OV2640 camera, capable of running computer vision models directly on the board. There is also a microphone, accelerometer, and gyroscope, and Arduino library support for simple programming. The board is also fully supported by Edge Impulse, so you can build and deploy machine learning models with ease. In this project, we’ll build a machine learning model that can identify Batman versus Superman, deploy the model to a Grove Vision AI, capture the inference results from the board, and send the results to a Ubidots cloud dashboard for visualization.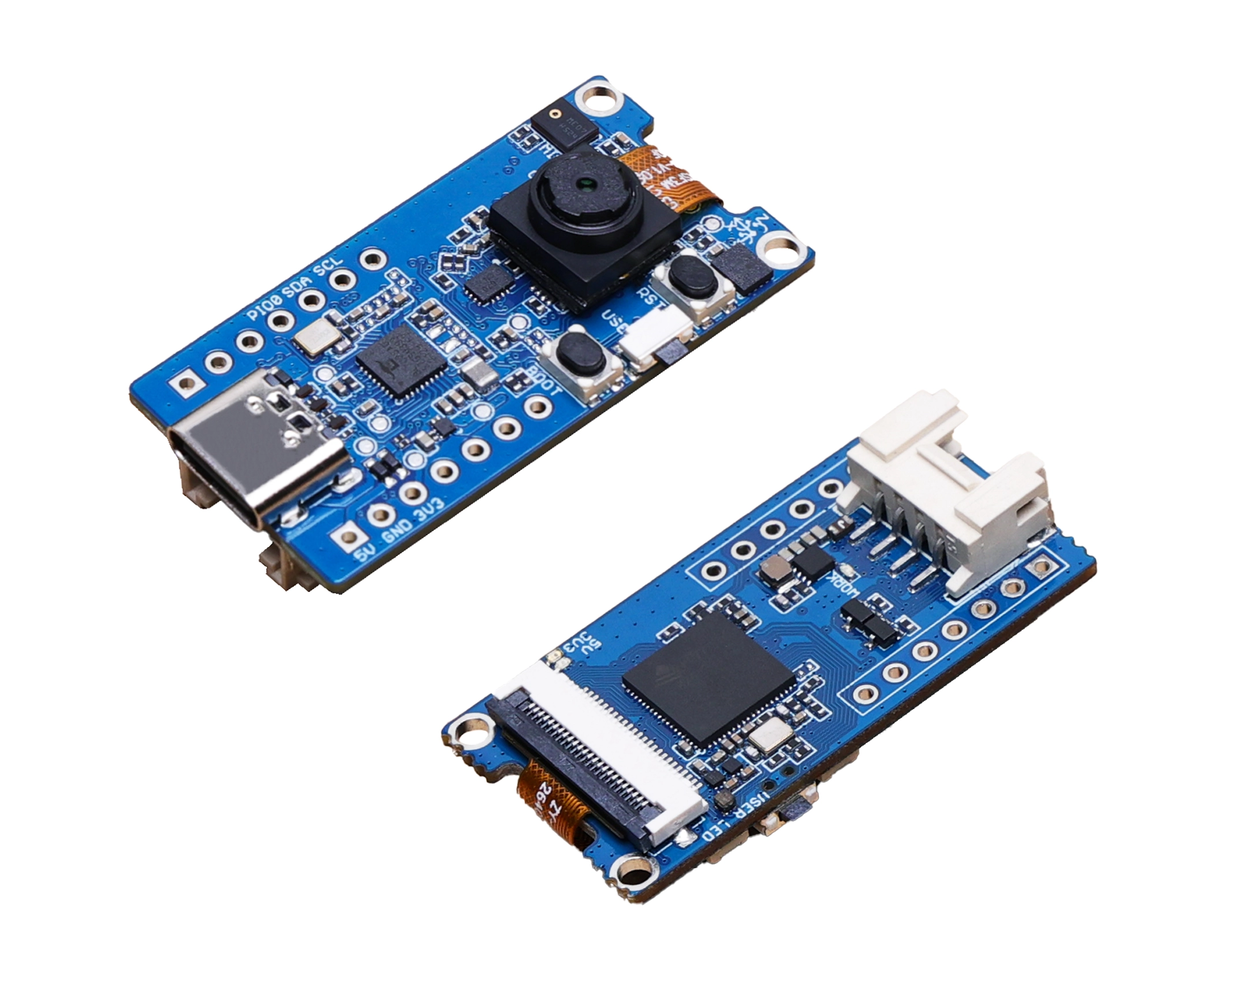
Prerequisites
- Create an Edge Impulse Project.
- Install the Edge Impulse CLI.
- Flash the latest Edge Impulse Firmware to the Grove Vision AI, as described here
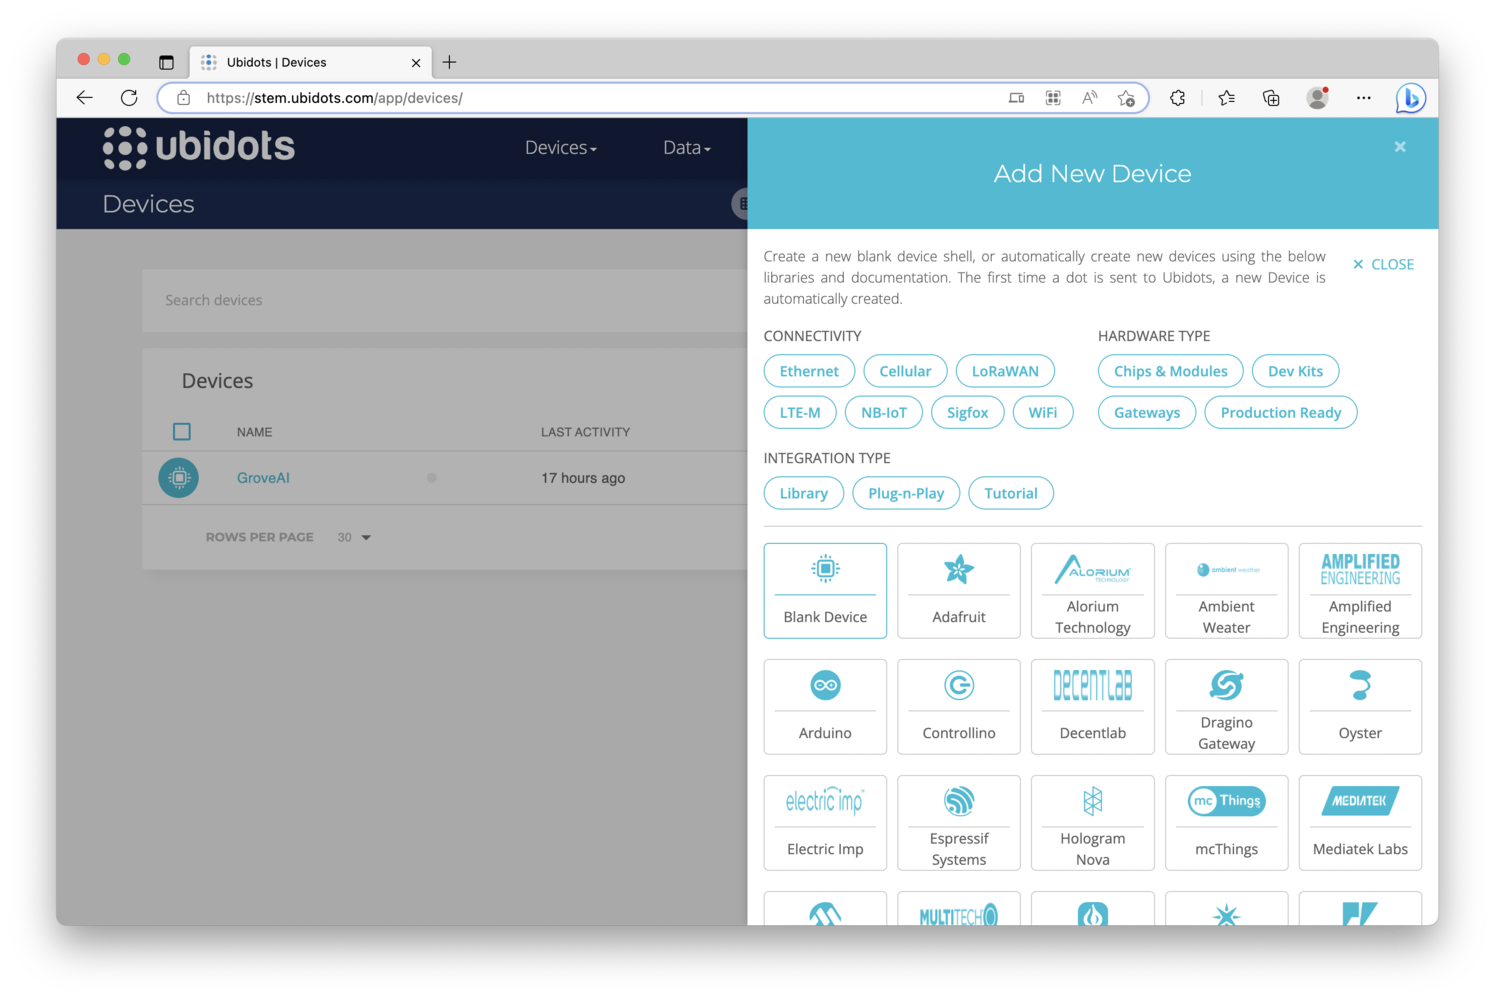
- Create a Ubidots account and add a Device (a “Blank Device” will work fine).
Data Acquisition
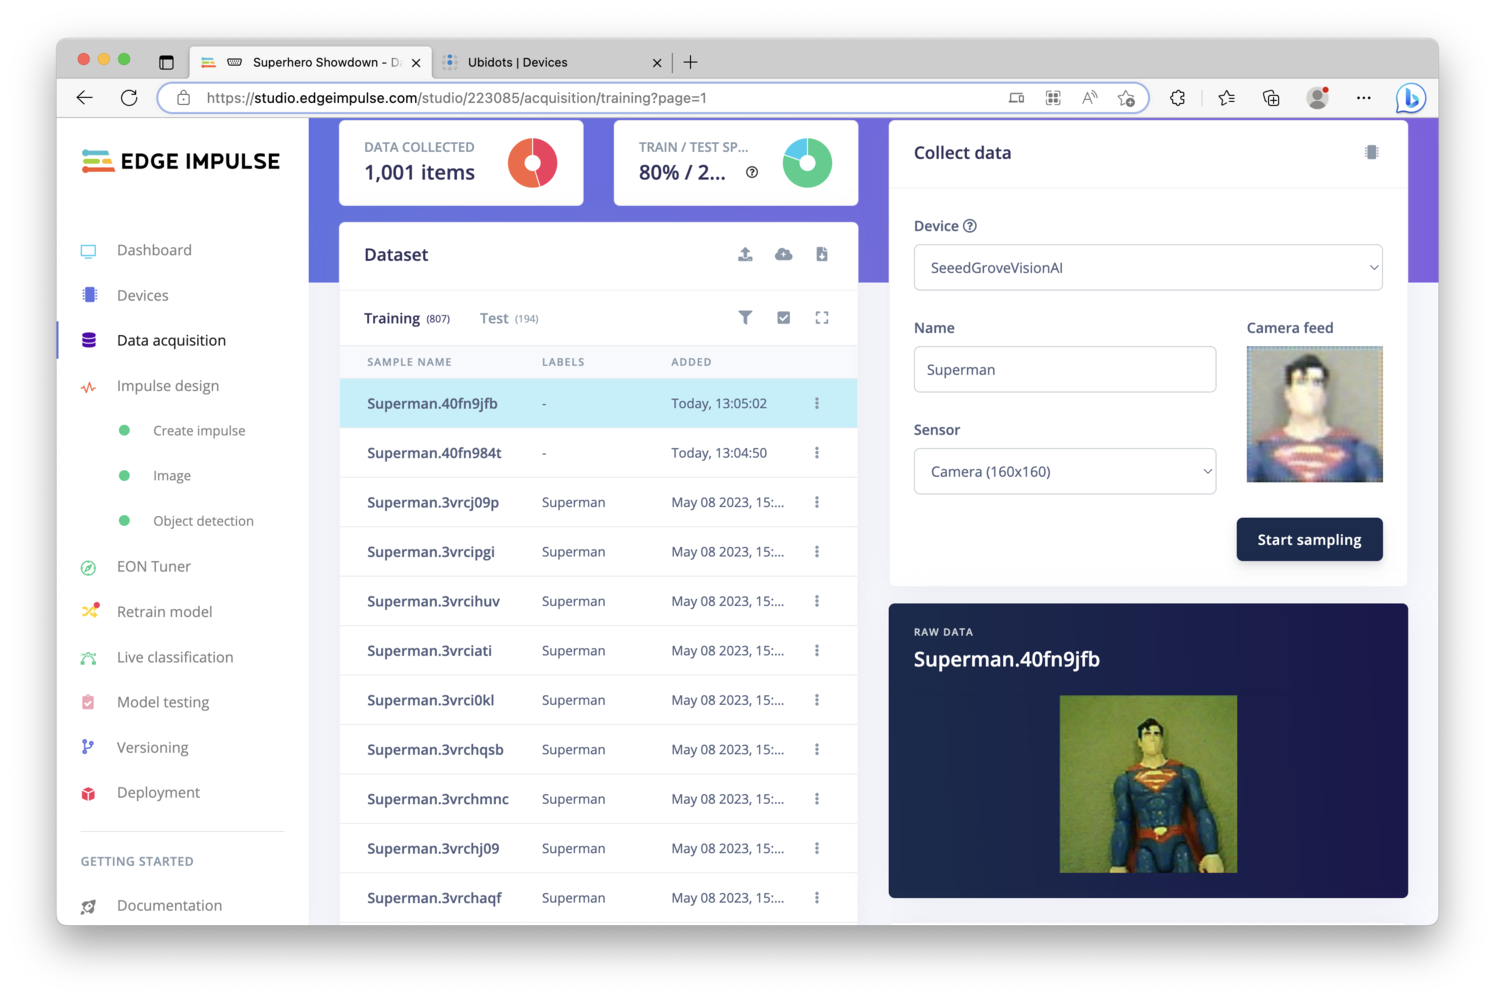
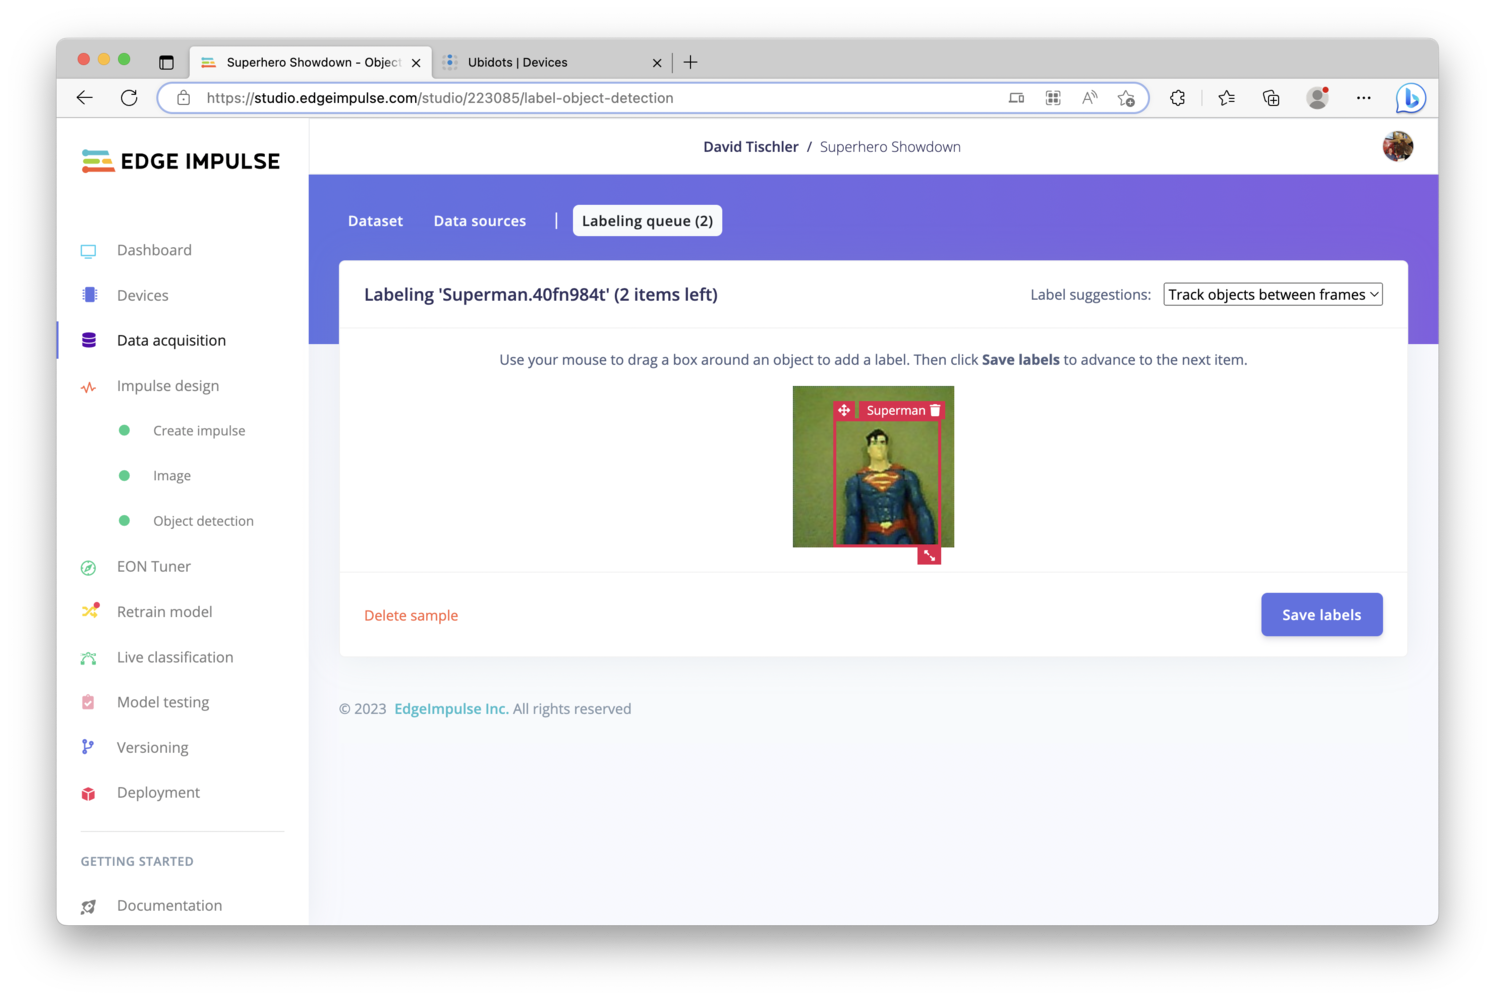
Machine learning projects typically begin with building a dataset. Capturing and collecting data can be time consuming, but better data will result in a better model, so this is a crucial step. To get started, attach the Grove Vision AI to your development machine via USB (make sure you have completed Prerequisite #3 above), and click on Data Acquisition on the left side of the Edge Impulse Studio. Next, over towards the right side of the page that is loaded, click on the USB icon, which will allow the Studio to directly connect to the Grove Vision AI board and access it’s camera.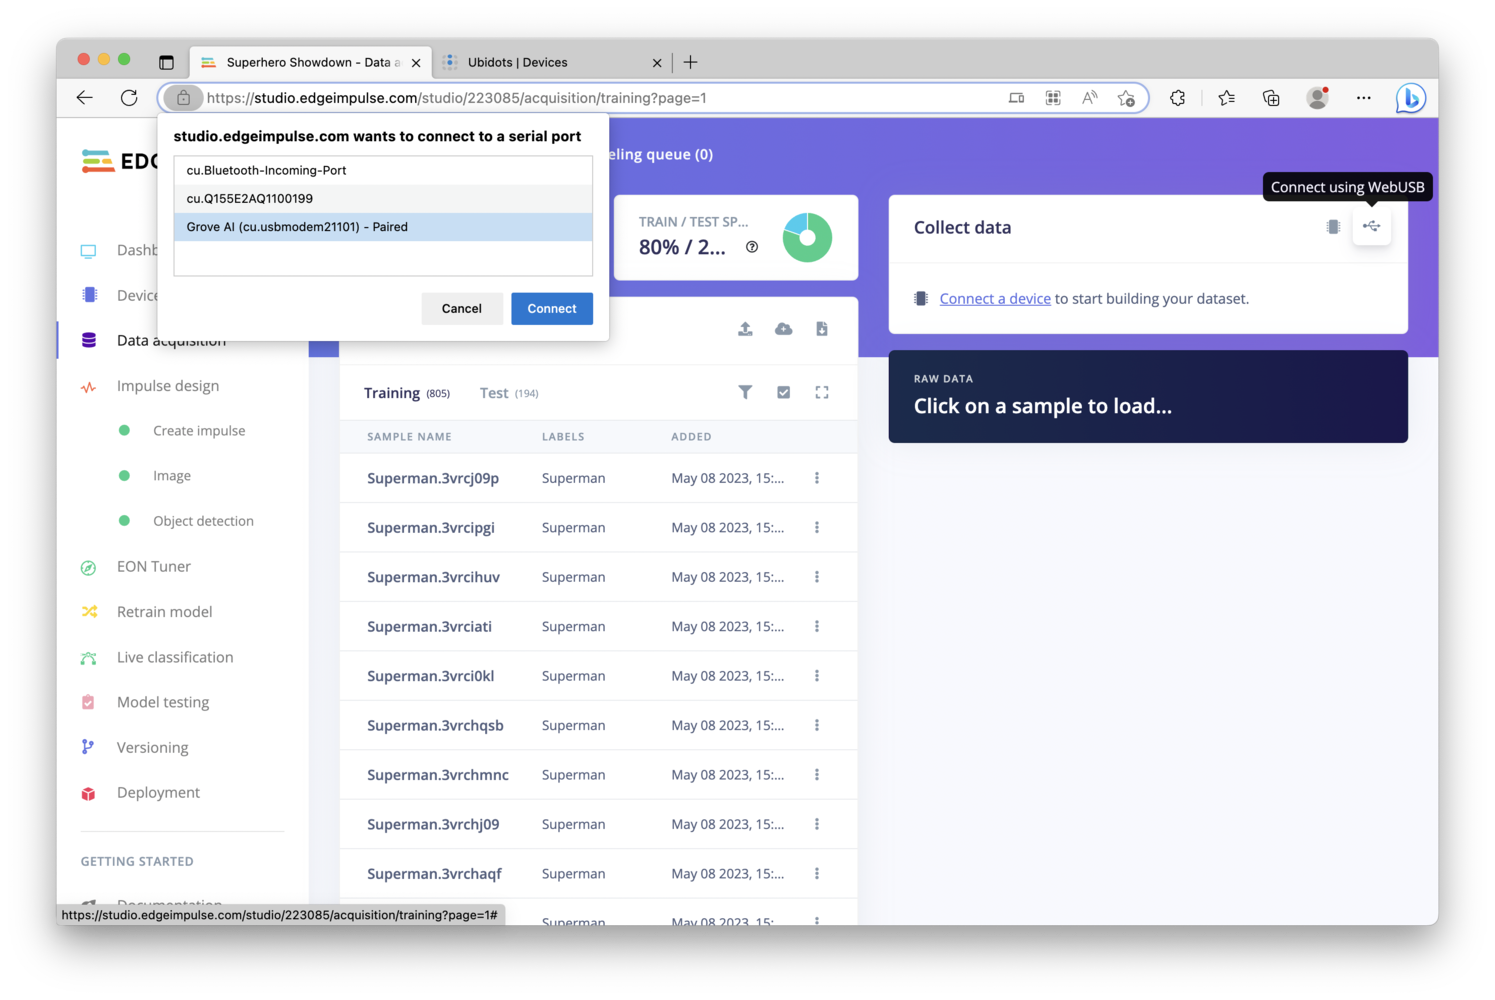
Impulse Design
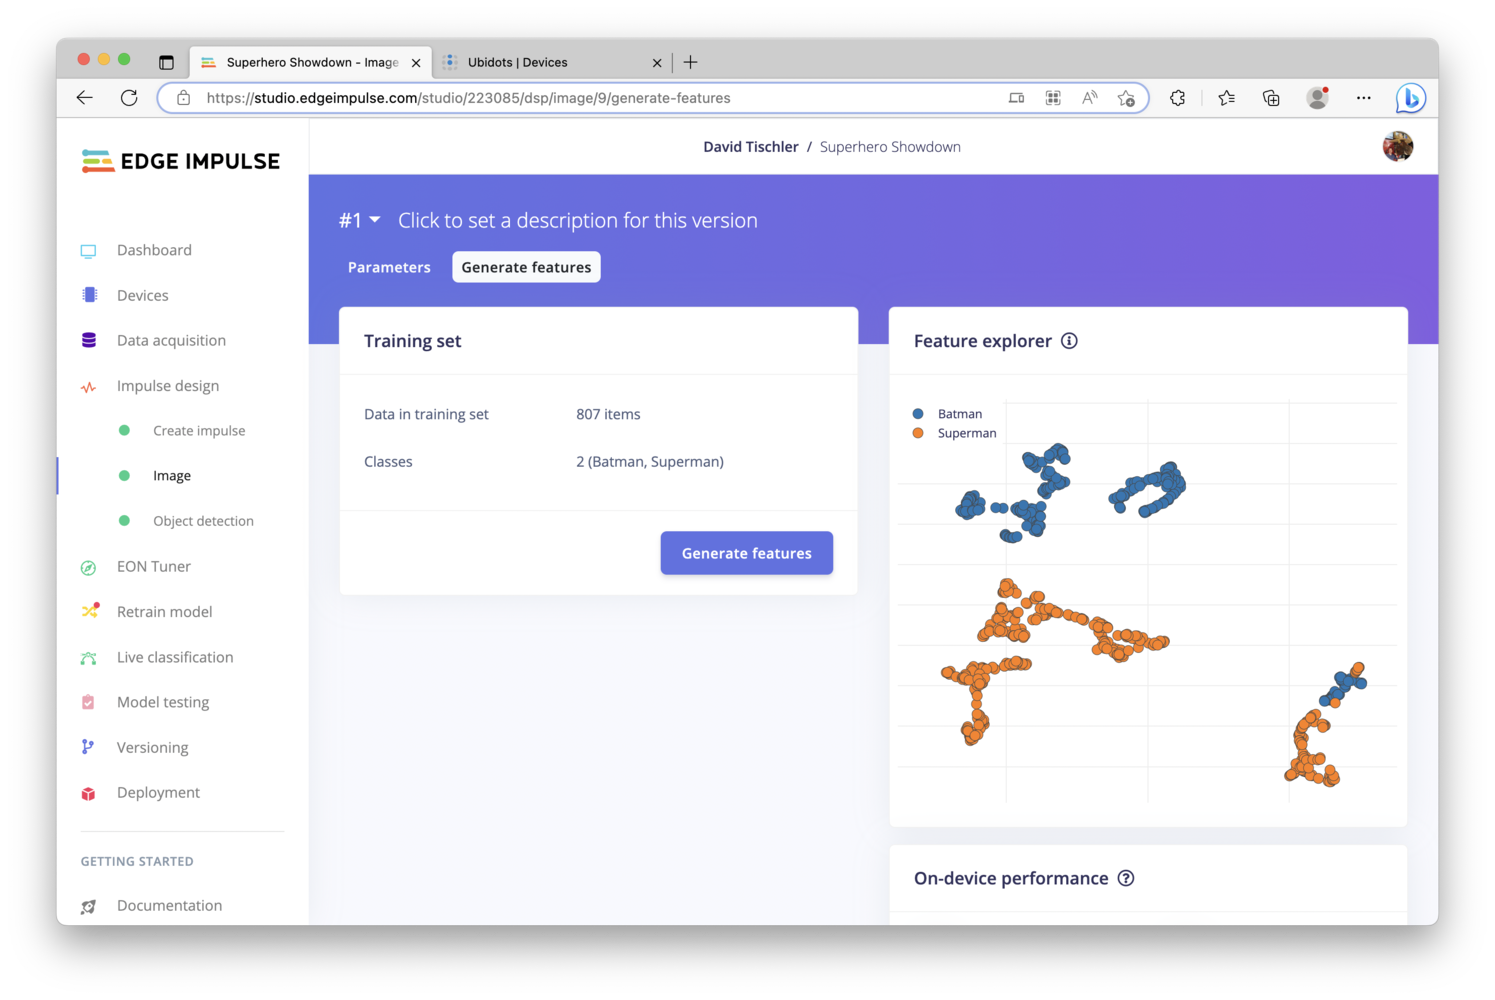
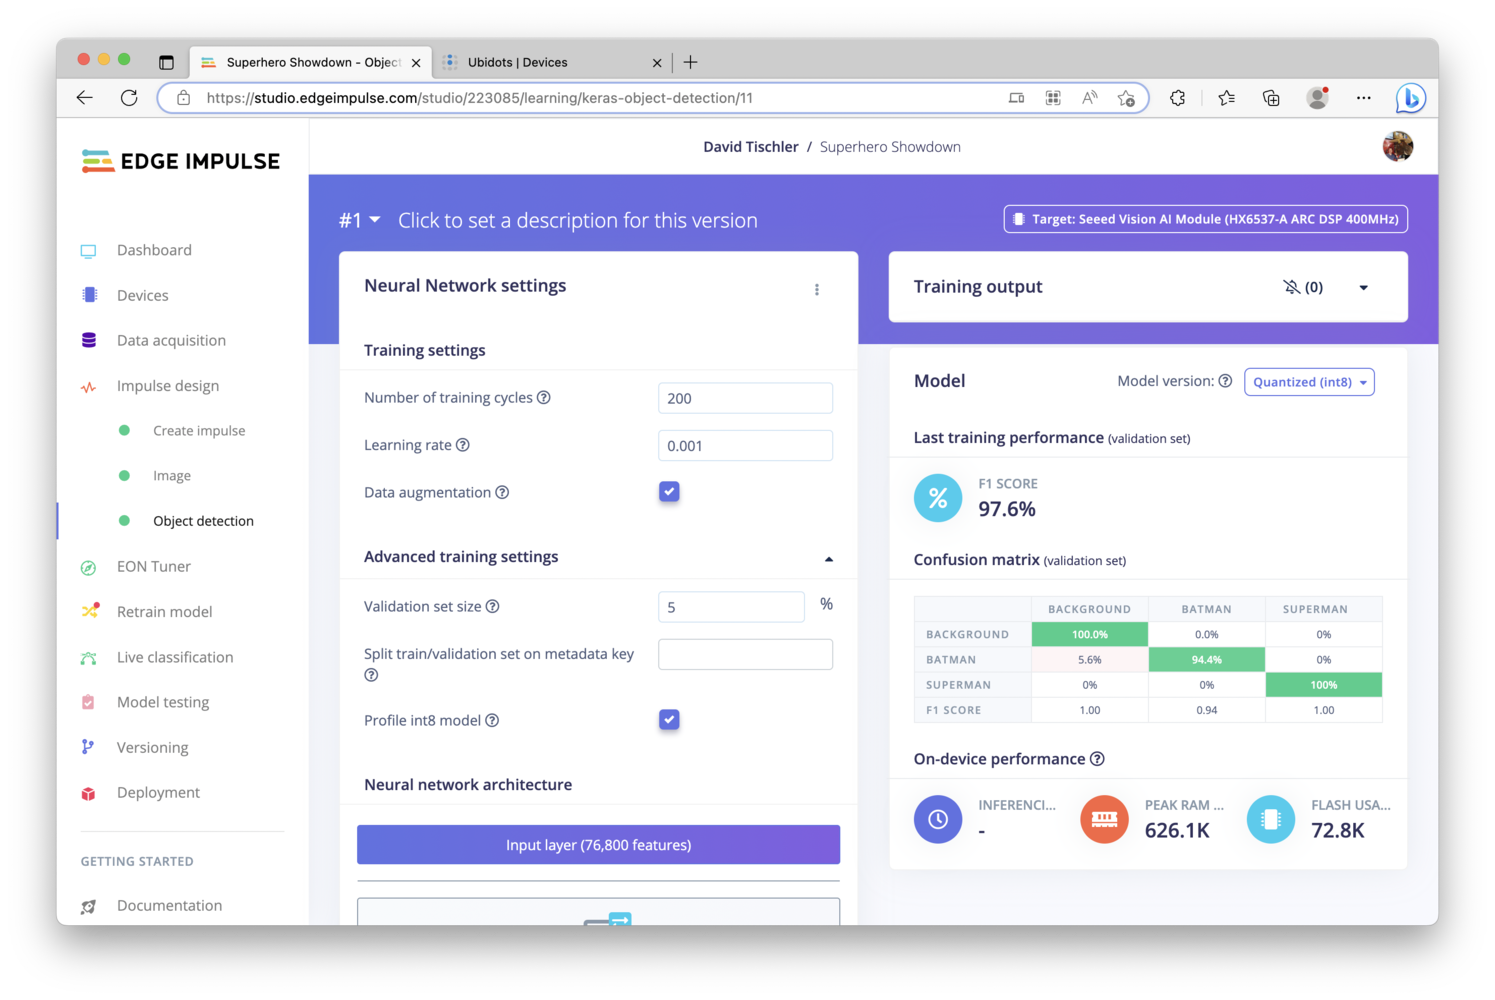
Once you have a few hundred images captured and labeled, it is time to build an Impulse, which is the machine learning model that will ultimately run on the Grove Vision AI Module. An Impulse consists of a Processing Block and a Learning Block. These can vary depending upon the type of project you are building, but as this is an object detection project, we’ll add an Image Block and Object Detection Block, make sure the Image Width and Height are set to 160 pixels in the Image Data block, and then click the “Save Impulse” button towards the right.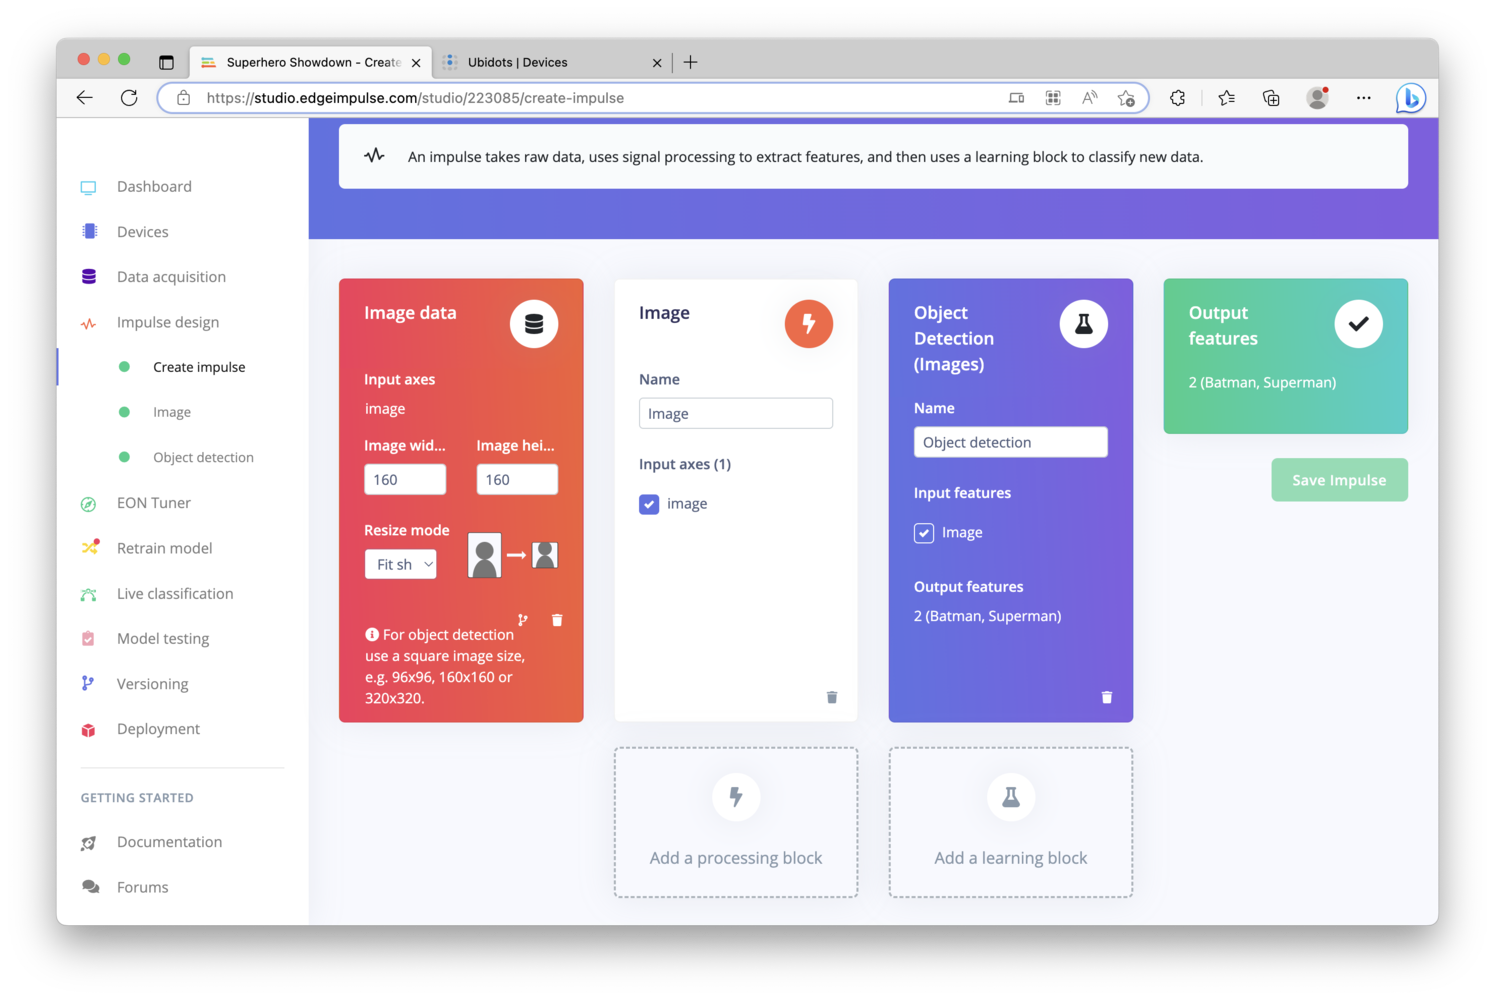
Firmware Deployment
With the computer vision model created and promising results shown in the Confusion Matrix, we can now build firmware and load it onto the Grove Vision AI Module. Click on “Deployment” on the left navigation, then scroll down and click “Build” (the Grove Vision AI Module should already be selected. If not, simply choose it.) and wait a moment for the process to complete.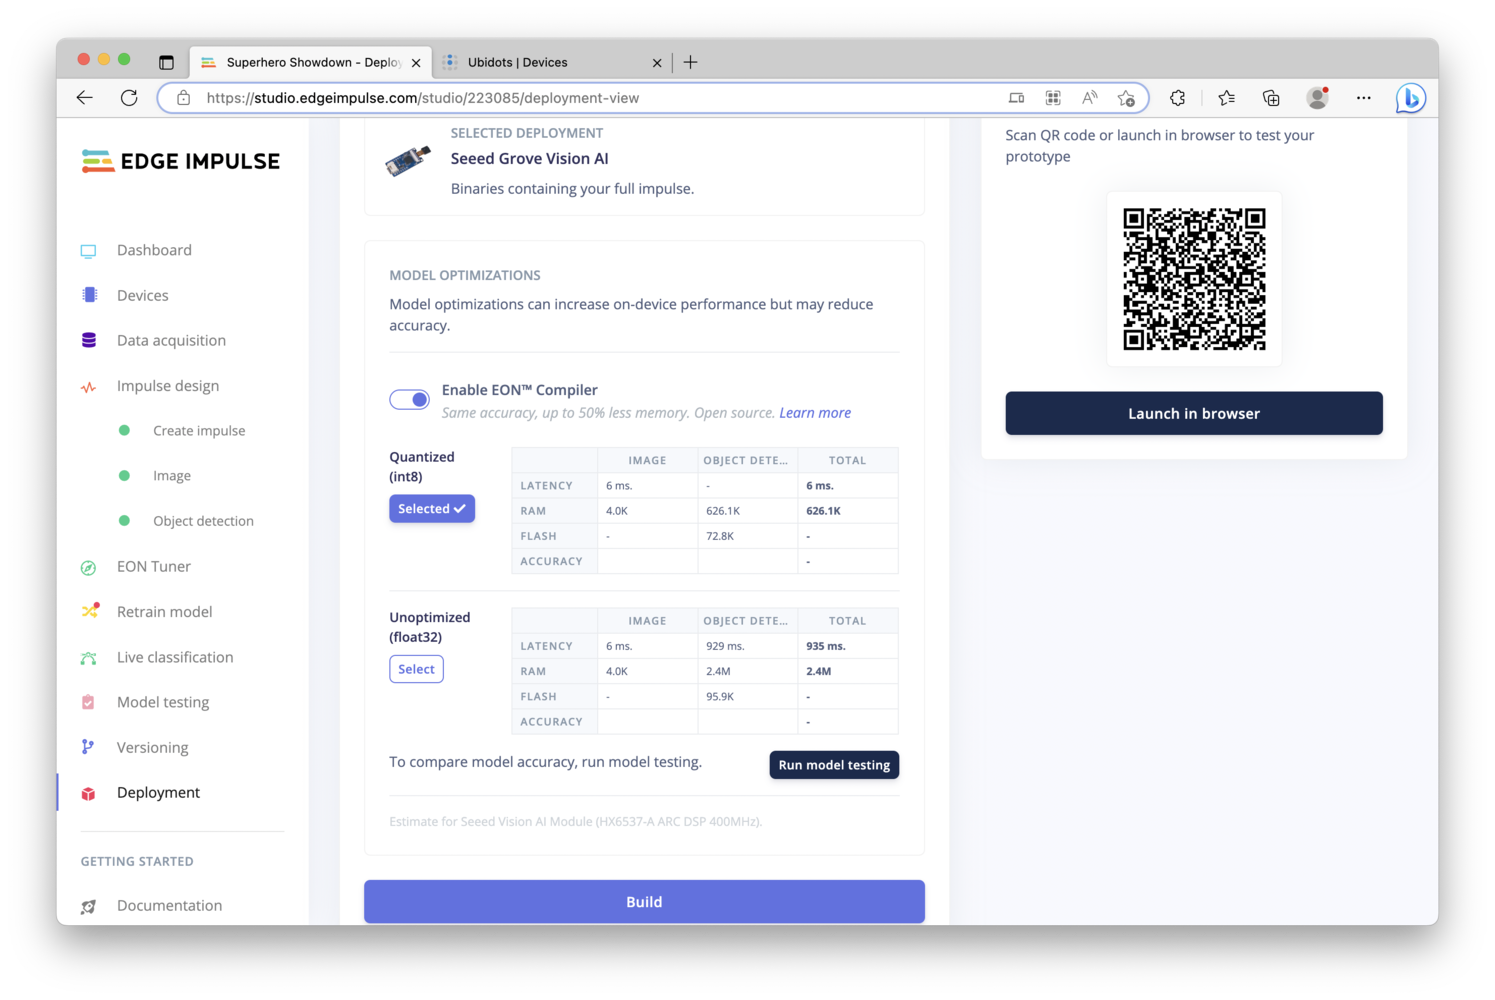
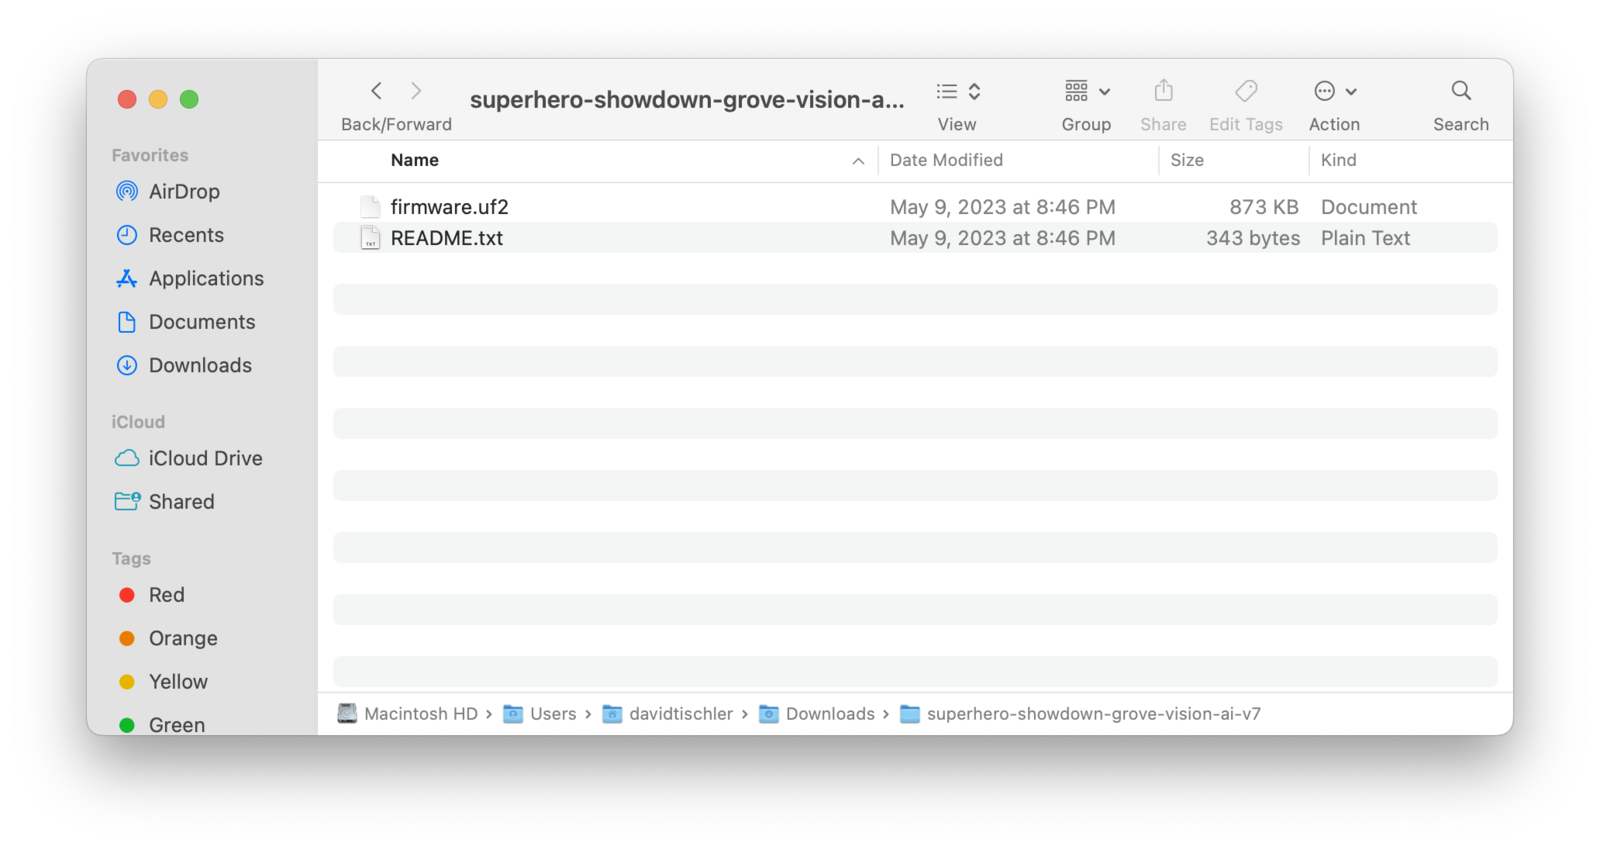
.zip file will be generated and downloaded. Unzip it, and you will find a file named firmware.uf2. To transfer it to the Grove Vision AI, double click the “boot” button on the board, to place the device into storage mode. A new storage location should show up on your computer, essentially like a USB drive. Then, you can simply drag-and-drop the firmware file into the storage device. The file will copy over, and once it’s complete, the device will reset and the drive will unmount itself.
Model Testing
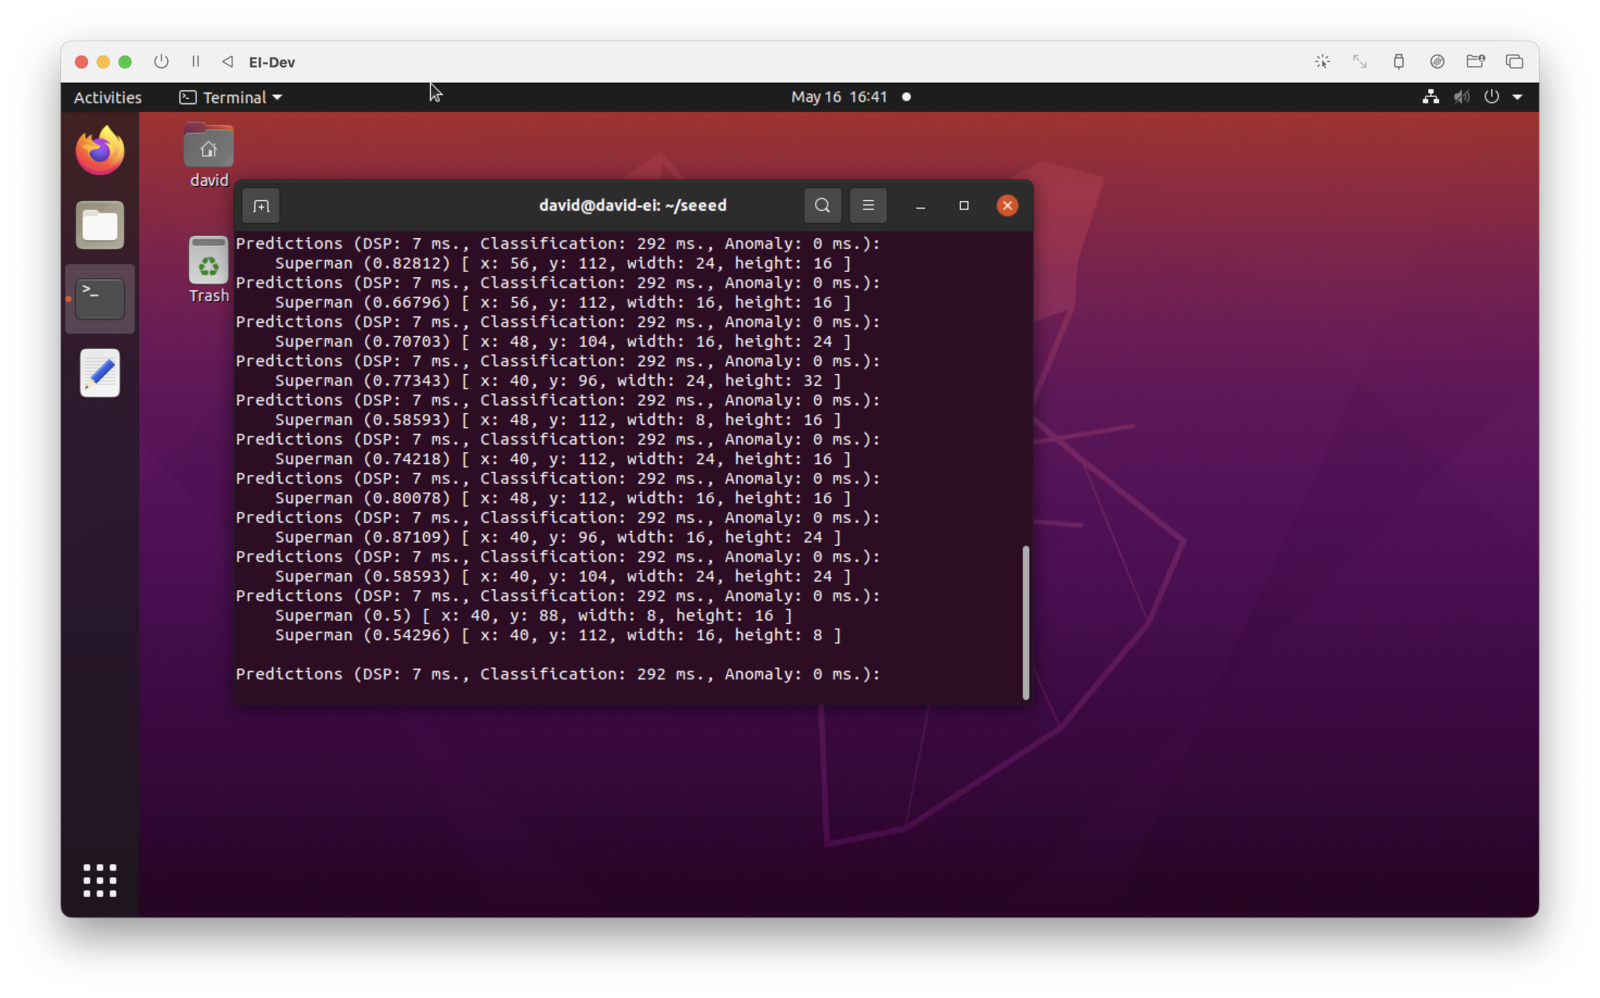
With the new firmware flashed to the board, we can now use the Edge Impulse CLI to start inferencing on the Grove Vision AI. Make sure the Grove Vision AI Module is still attached via USB, and open up a terminal on your development computer, and runedge-impulse-run-impulse --debug to start inferencing (make sure you installed the CLI tooling as outlined in Prerequisite #2 above). Aim the Grove Vision AI at your object, Superman in this case, and you should see the Label and x-y coordinates of the detection in the image if identification is successful.
The console will continue to print out inference results while the object is detected in the camera frame.
Application and Dashboard
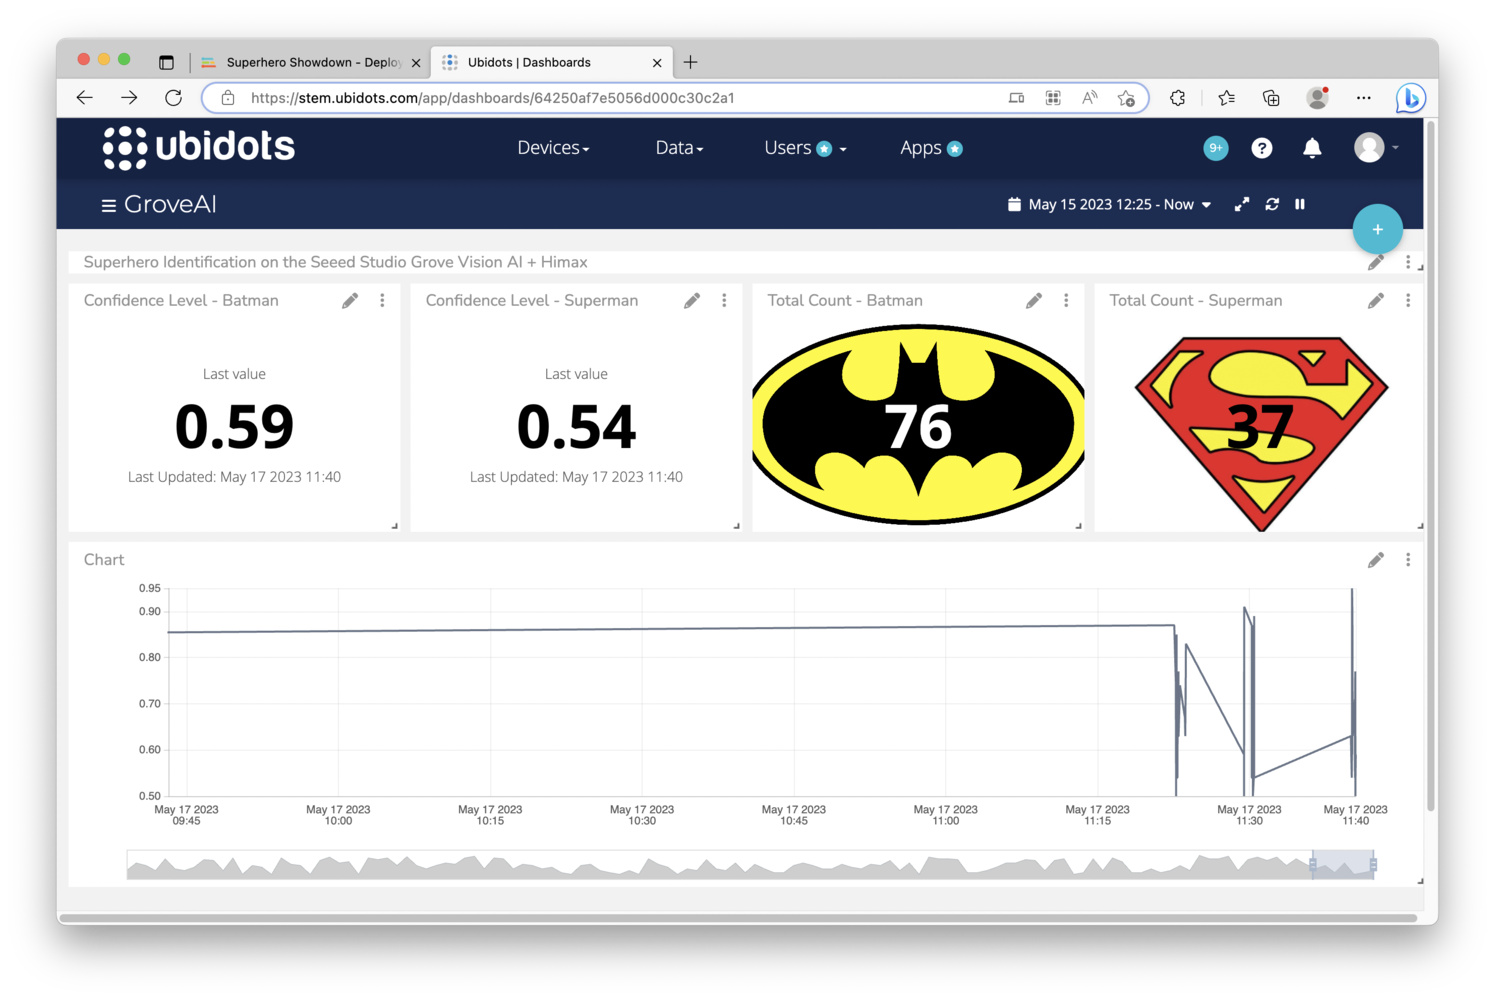
This console output of the inference results is a nice start, but it’s also useful to visualize the results and quantify the data over time. For this, a dashboard that collects and aggregates the inference data is helpful. There are many options for gathering and storing data, including options from AWS and Azure, but for this project we’ll use Ubidots, which has a user-friendly implementation and is built with IoT and Edge devices in mind. As theedge-impulse-run-impulse command is already outputting the data we are interested in, a small python application that captures the results and sends them to Ubidots is all we need. The following python snippet will dump the results into a file, parse the file for our objects of interest, and then send only the data (not the actual image) to Ubidots. You’ll need to modify the code to parse for your Labels, and, to provide your Ubidots API Auth Token. Save the file locally on your development machine as grove-ai.py.
python3 grove-ai.py. Once the script has begun running, aim the Grove Vision AI Module at the objects of interest once again, and if all goes well the Dashboard you create will begin updating in real-time.