Intro
In industrial settings, many factories need to handle pallets. It is a storage format that spans almost all sectors.

The Rationale
The methodology behind this measurement technique is pretty simple: the pallet machine has a rotating motor at its core that is necessary to wrap the plastic film around the pallet. During its rotation, the motor is subject to a friction that is proportionate to the weight on the platform. We can capture slight variations in the rotation pattern by means of an IMU. We’ll then use the accelerometer and gyroscope data as a proxy for the friction on the motor. By modelling this relation through machine learning, we aim to be able to predict the weight based on the IMU readings. This will work wonderfully, because the machine always applies the same rotation force to the motor: if a large weight is on the platform, it will rotate slower than if the platform had no weight upon it.Predictive Maintenance
Once we’ve modelled the relation between IMU data and weight, we can use it another way too: if we know the true weight of the pallet that’s on the platform, we can compare it with the predicted weight, and look for discrepancies. If they do not match by a large amount, it means that something is not working as usual. If the predicted weight is much higher than the actual one, it may mean that the motor is subject to more friction than it should be and that friction is not due to the pallet itself. Perhaps it needs to be oiled to work more smoothly, or some other issue is causing added strain on the motor.Hardware Requirements and Settings
The requirements are pretty simple: on the hardware side you only need an IMU and a microcontroller (or a board with an integrated IMU, such as the Arduino Nano BLE Sense). To avoid using cables that may interfere with the operation of the machine, it is advisable to choose a board that has either WiFi or Bluetooth radio, so you can stream data to your PC wirelessly. The setup is simple too: assemble your board with a battery in a plastic box, and anchor it on the rotating platform, near the edge of the rotating platter (at the border, linear velocity is greater than in the center, so the IMU can pick-up pattern variations more easily). This project is articulated in 3 steps:- Collect training data
- Design the Impulse
- Deploy the model and use it
Collect Training Data
The first step is to collect training data for our model.Code
If using the Arduino Nano BLE Sense (or similar board with integrated IMU and BLE), you can use the following two code snippets: the first one has to be flashed on the board to enable the BLE data streaming, the second one has to run on your PC to receive the streamed data. On the Arduino:Data Collection
To accurately model the IMU <—> weight relation, you need a few reference weights. How much of them and at what increments, depends on your use case. For this guide, I collected data at the following weights (in kg):- 0
- 40
- 80
- 120
- 160
- 200
- 240
- 280
- 320
- 430
- 600
- 1000
- Put the microcontroller board on the platform and turn it on
- Put the weight on the platform
- Start the machine and let it go for a few seconds (so it reaches its normal speed)
- Run the Python script and wait for the data collection to complete
- Input a name for the CSV file that will contain data for the given weight
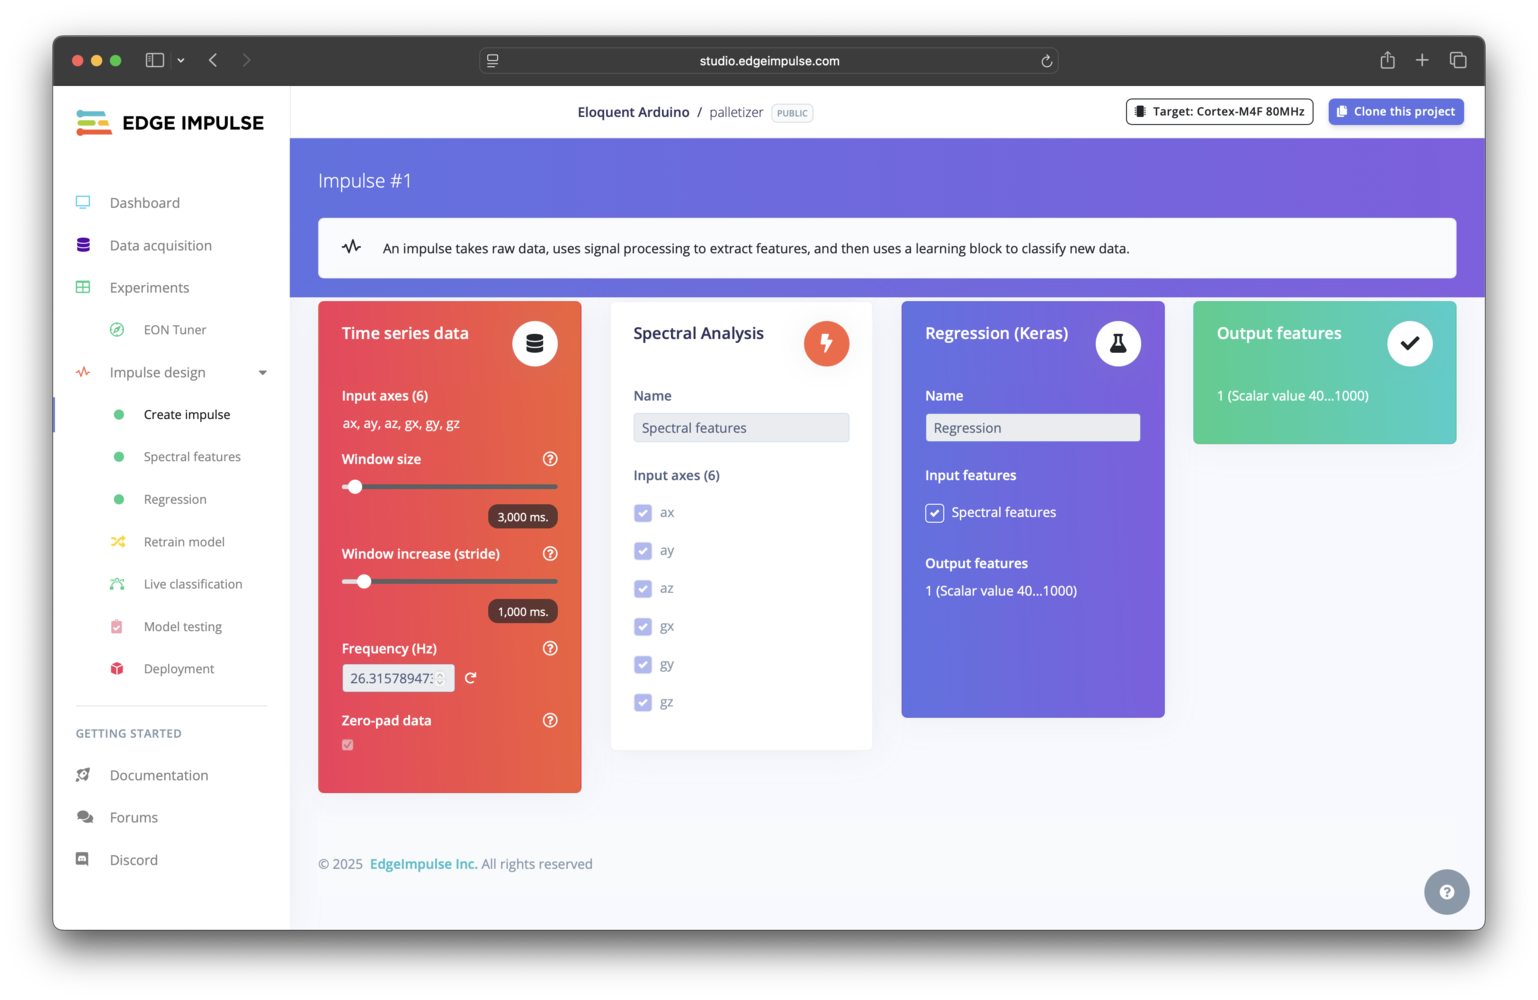
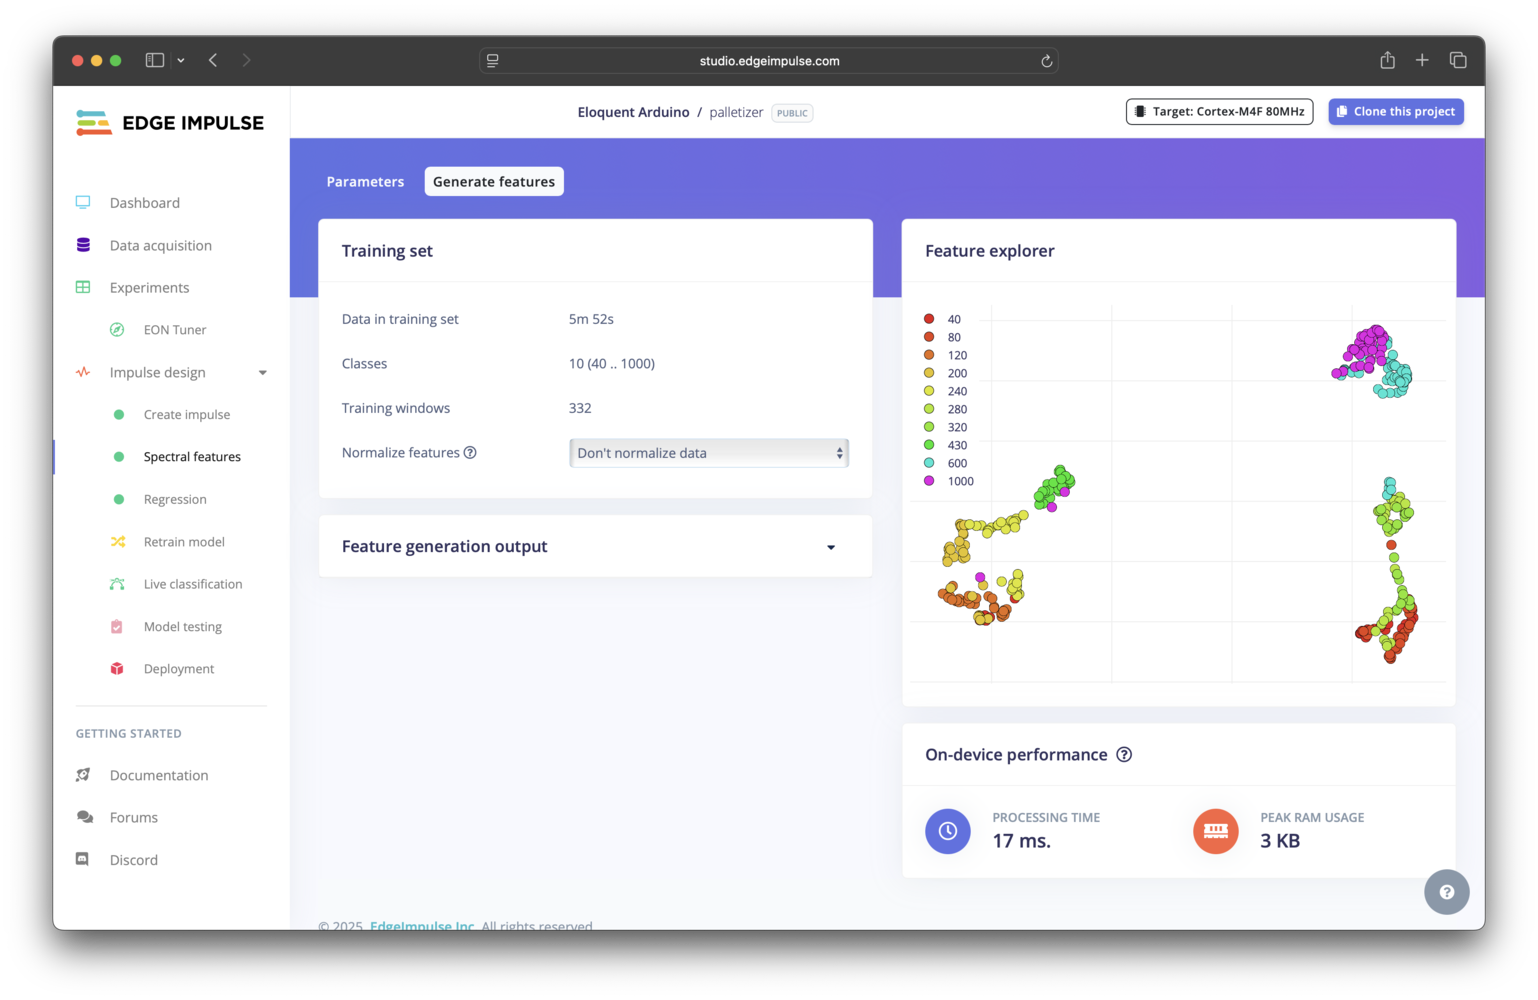
Impulse Design
Edge Impulse allows for 3 different tasks:- Classification
- Regression
- Anomaly detection
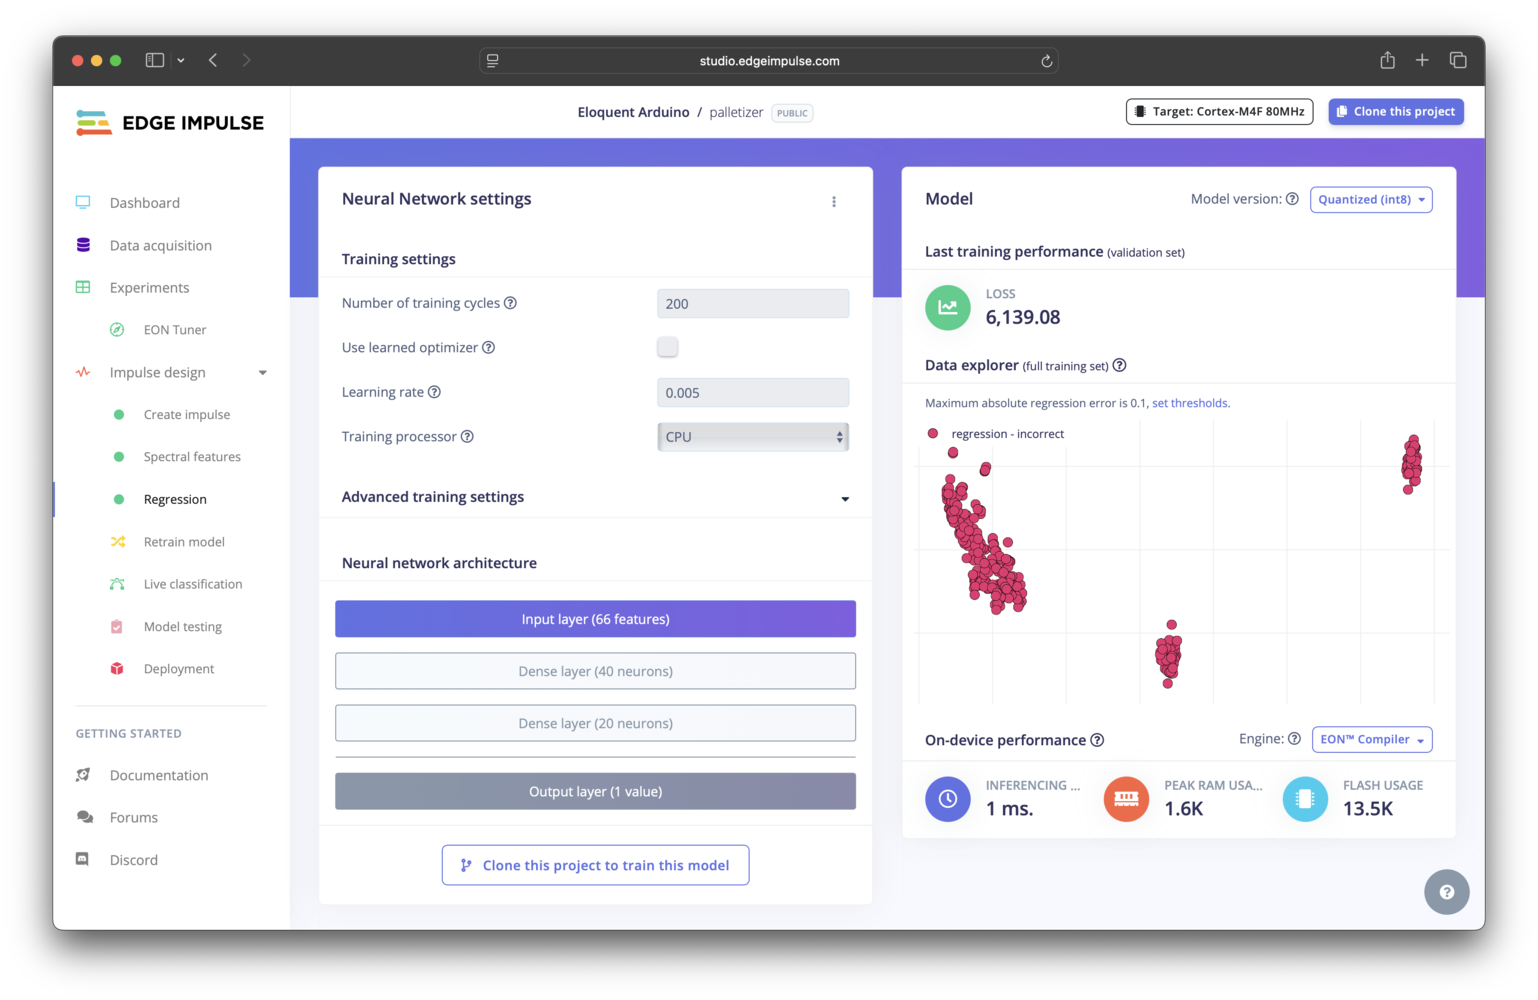
Firmware Deployment
Once you’re satisfied with the results, it is time to deploy the trained Neural Network back to your board. If using the Eloquent Arduino library, this part is very straightforward. Once again, we’ll use BLE to stream the predicted weight wirelessly to a PC. On the Arduino, run this snippet:ImpulseBuffer is a data structure that holds an array where you can push new values. When the buffer is full, it shifts the old elements out to make room for the new ones. This way, you have an “infinite” buffer that mimics the windowing scheme of Edge Impulse.
To perform the prediction over the window of collected data, you only need to call impulse.regression(buffer.values) and use the result as per your project needs.
In this example, we stream the value over BLE. In your own project, you could also use the value to control an actuator or raise an alarm when certain weights are detected.
Real-world Deployment Example
To give you a real-world example on how to use this project, we’ll pretend we have an LED display near the stretch-film machine where we want to see in real-time the predicted weight. Since we’re already streaming the data over BLE, we need a receiver device connected to the display. For the sake of the example, we’ll use another Arduino BLE Sense.