Project Demo
Intro
This wearable device detects and reports user’s coughs. This can be useful in treatment of patients suffering from chronic obstructive pulmonary disease, COPD, a group of diseases that cause airflow blockage and breathing-related problems. The increase in number and intensity of coughs can indicate ineffective treatment. Real-time monitoring enables caregivers to intervene at an early stage.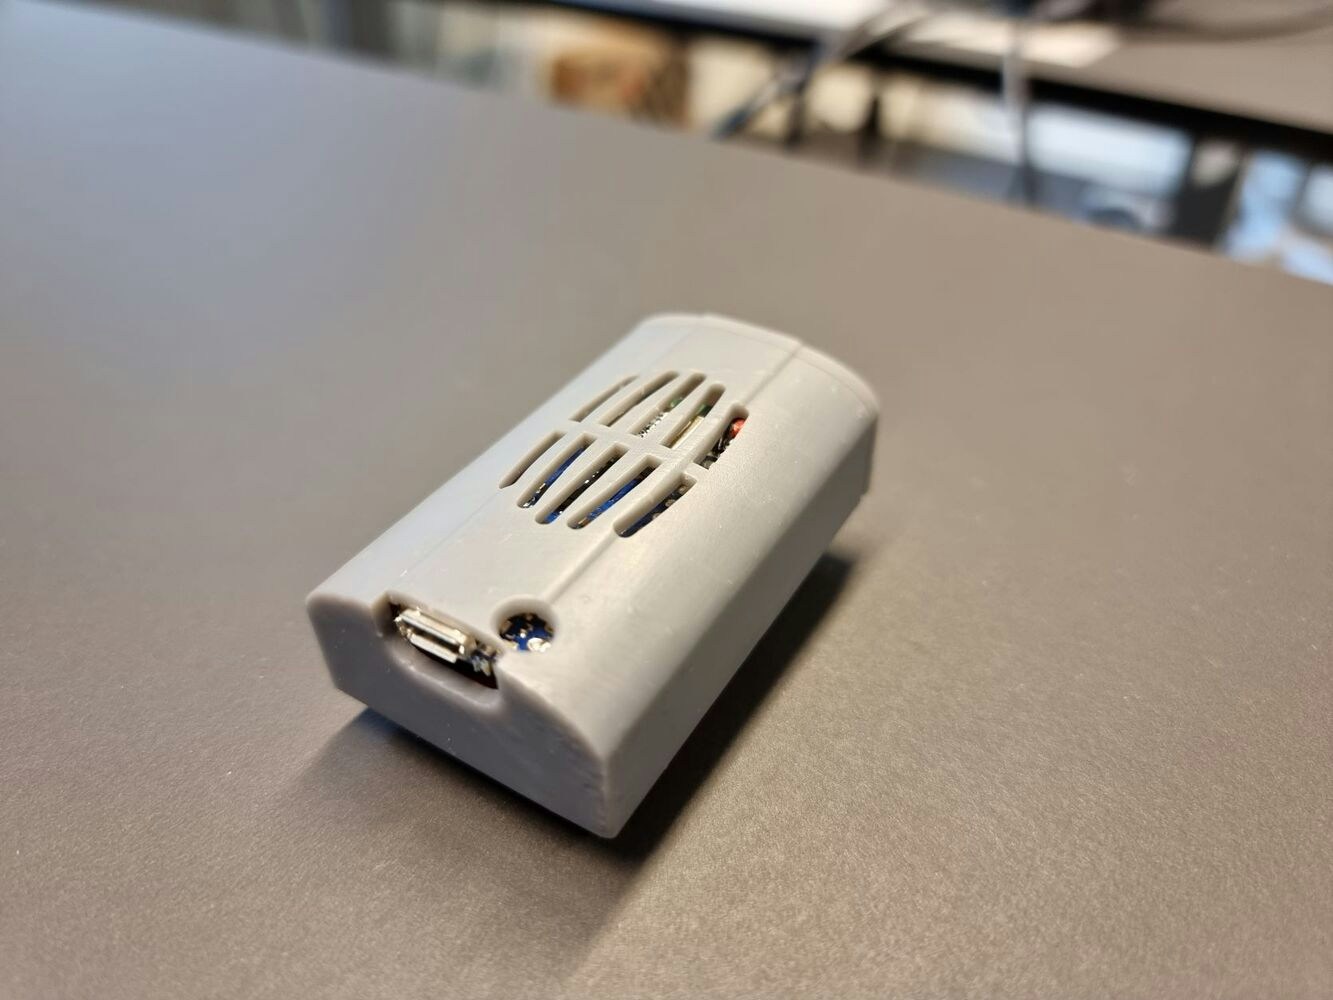
Advantages over existing solutions
Using cough frequency and intensity as and indicator of COPD condition has proven useful, but impractical to monitor over time outside hospital wards using existing technology. The main traditional approach consists of audio recording a patient at ward, then using manual or software based cough counting. While developing this new proof-of-concept no similar approaches were found.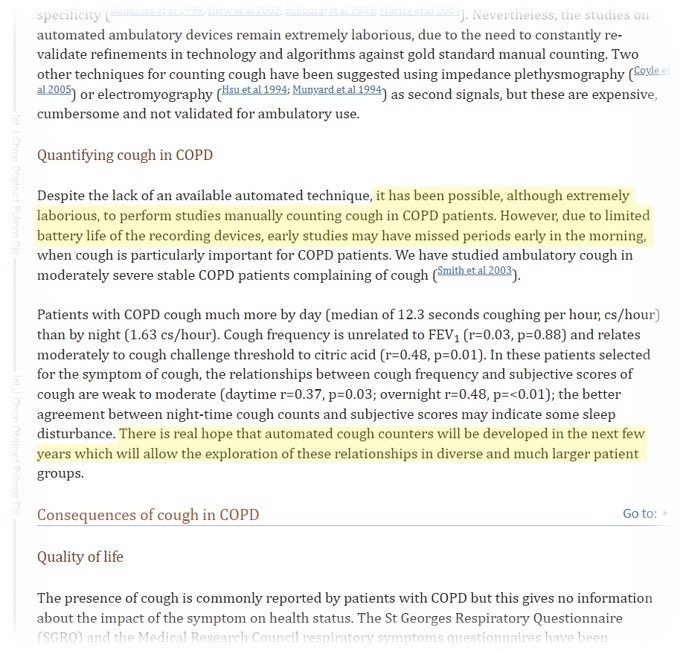
Privacy
Existing methods of analyzing audio recordings greatly invades privacy of the patient, caregivers and peers. This proof-of-concept does not store any audio for more than a fraction of a second. This audio buffer never leaves the device, it is constantly being overwritten as soon as the application has determined if the small fragment of audio contains a cough or not. In fact, the hardware used is not capable of streaming audio using the low-energy network in question. Further, the application is hard-coded to detect coughs or noise. To be able to detect new keywords, for instance “bomb”, or “shopping”, the device would have to be physically reprogrammed. Firmware Over-the-Air is not currently supported in this project. Each keyword consumes already constrained memory, limiting the practical amount of different keywords to a handful. Compared to commercial voice assistants, such as Google Nest, Amazon Alexa or Apple Siri on dedicated devices or on smartphone, this device works a bit differently. The aforementioned products are split into two modes: activation and interpretation. Activation runs continuously locally on the device and is limited to recognizing “Hey google” etc. This puts the device in the next mode, interpretation. In this mode an audio recording is made and transmitted to servers to be processed. This opens up for greatly improved speech recognition. It also opens up to secondary use, better know as targeted advertisement. The device in this project only works in the activation mode.Hardware, software, tools and services used
- Arduino Nano 33 BLE Sense
- LiPo battery
- JSH battery connectors
- Edge Impulse Studio
- VS Code/Arduino IDE
- Nordic Semiconductor nRF Cloud
- nRF Bluetooth Low Energy sniffer
- Nordic nRF52840 Dongle
- Fusion 360
- 3D printer
- Qoitech Otii Arc
How it works
A model was trained to distinguish intense coughs from other sounds. An Arduino Nano 33 BLE Sense was programmed to continuously feed microphone audio into an application. The application then runs inference on small audio fragments to determine the probability of this fragment containing a cough. If it does, a counter is incremented and this is securely advertised using Bluetooth Low-Energy, BLE. An other BLE device, such as a smartphone or a USB-dongle, can be paired with the device and re-transmit the event to a service on the internet. I have used Nordic nRF Cloud for this purpose. nRF Cloud exposes several APIs (REST web services, MQTT brokers) that enables the events to be integrated with other systems. With this as a basis it’s possible to transform the event into an internationally clinically recognizable message that can be routed into an Electronic Medical Record system, EMR. Popular standards include openEHR and HL7 FHIR.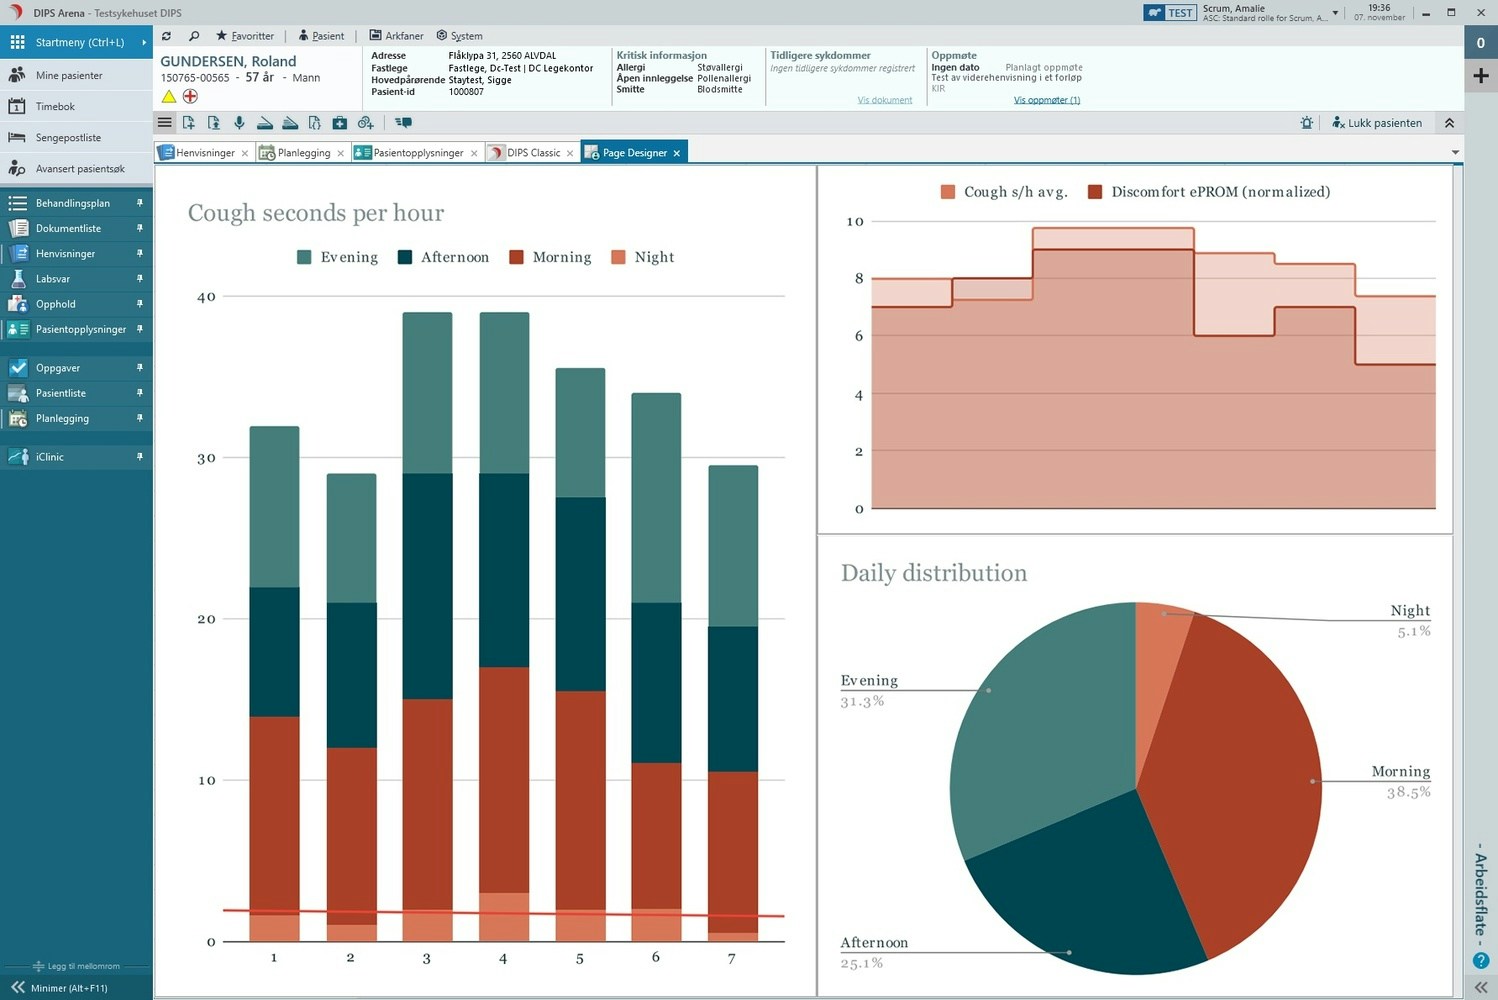
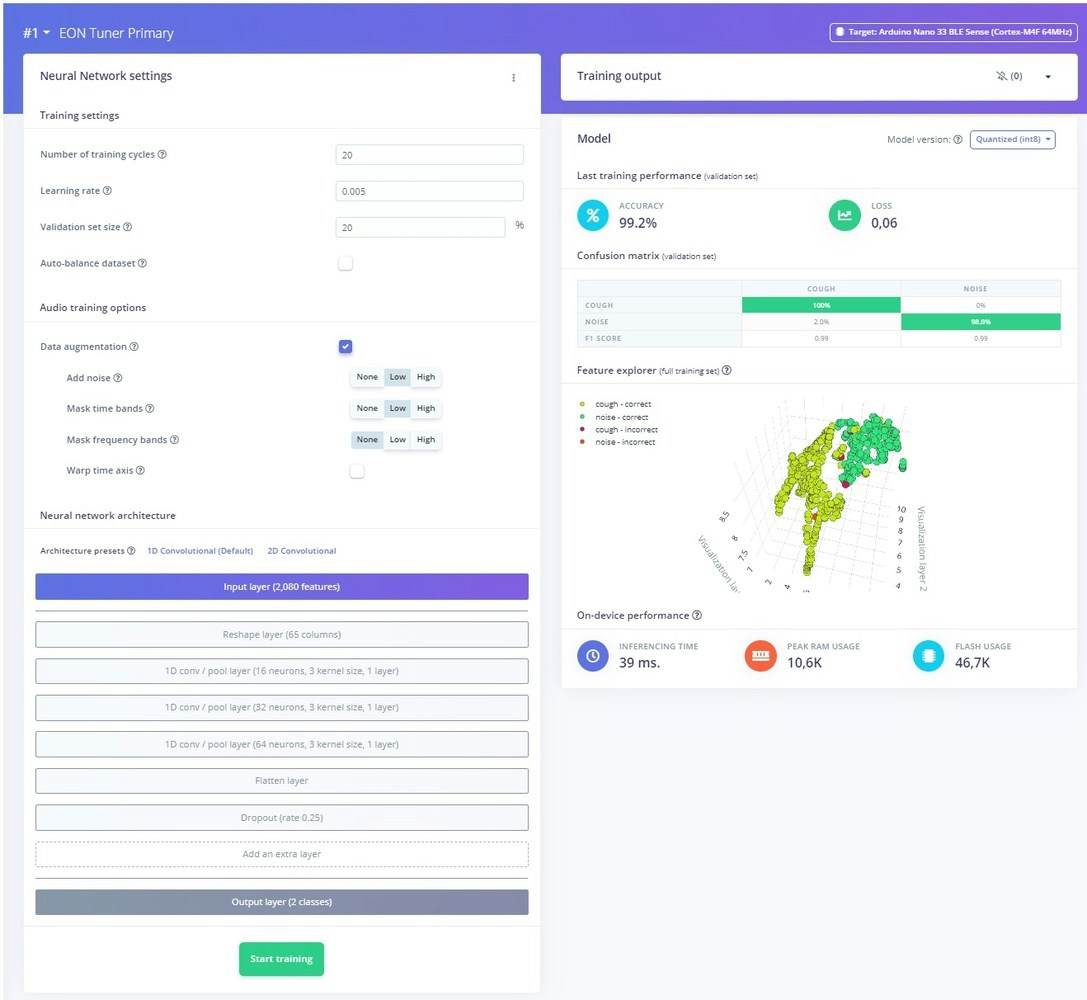
Edge Impulse
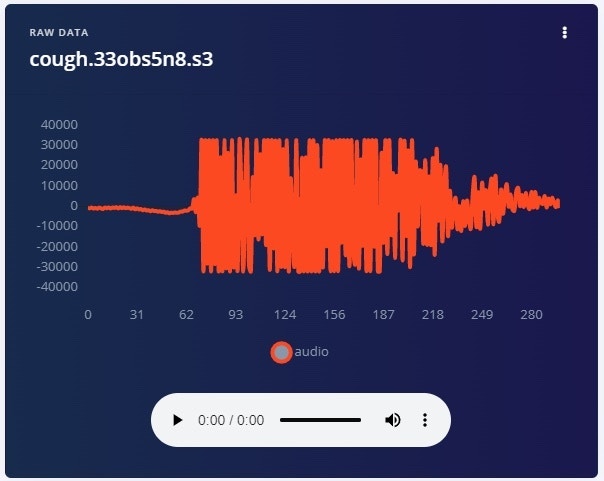
Edge Impulse is the leading development platform for machine learning on edge devices and it’s free for use by developers. The documentation is some of the best I have experienced in my two decades as a professional developer. I also wish to recommend the book TinyML Cookbook by Gian Marco Iodice as a practical, project based introduction to TinyML and Edge Impulse. I will highlight some particulars of my application. You may explore my project here. A model was trained using 394 labeled audio samples of intense coughs, a total of 2 minutes and 34 seconds. An almost equal amount of audio samples of less intense coughs, sneezes, clearing of throat, speech and general sounds was also labeled, 253 samples, 2 minutes and 38 seconds. All samples were captured using the Arduino Nano, positioned at the intended spot for wear.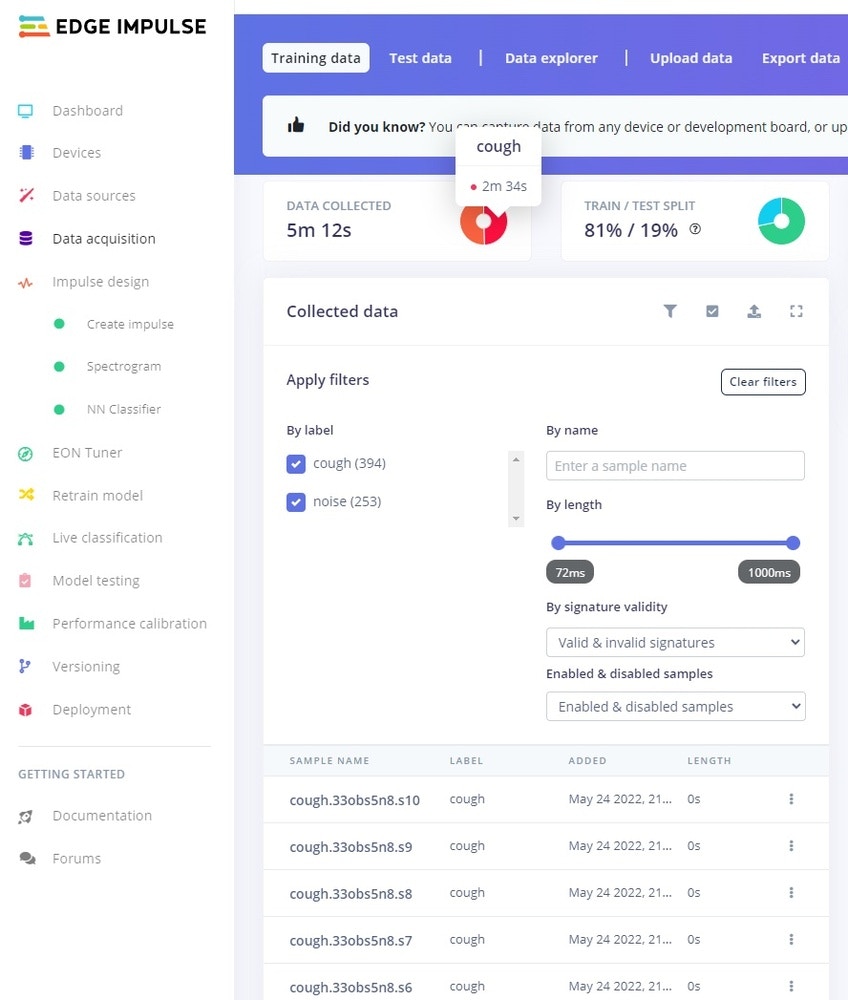
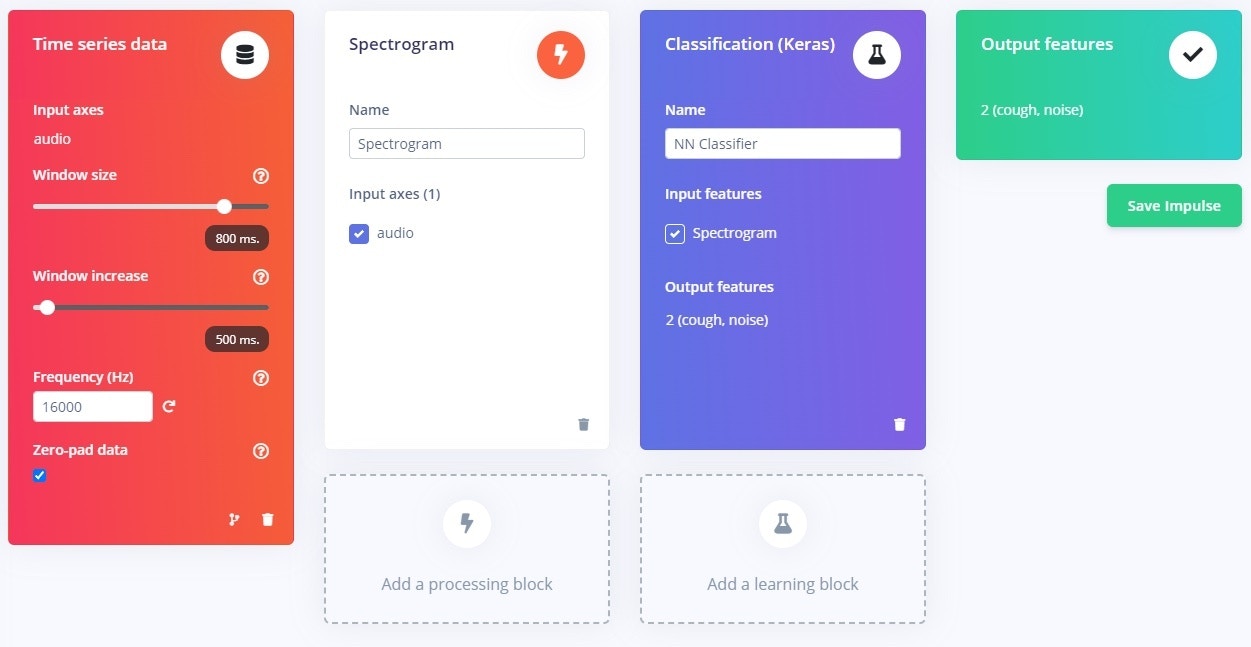
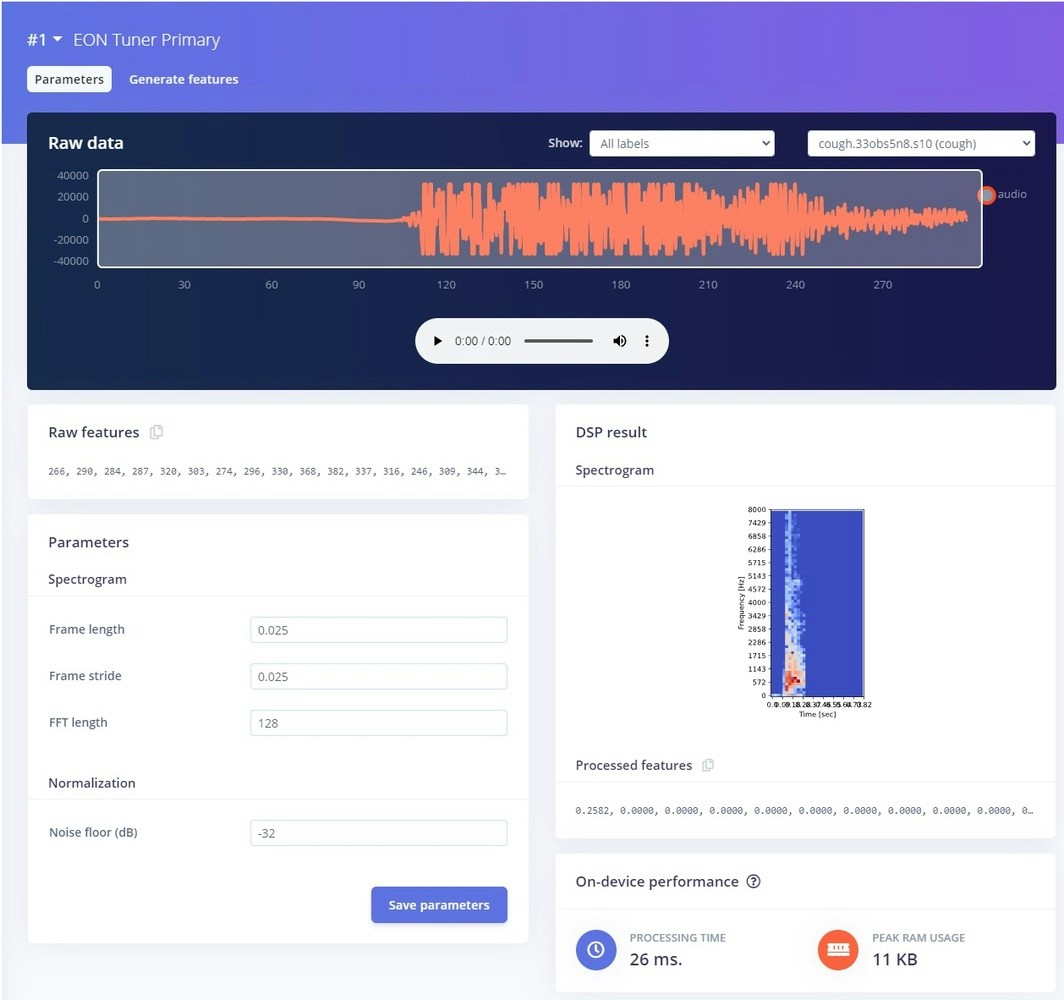
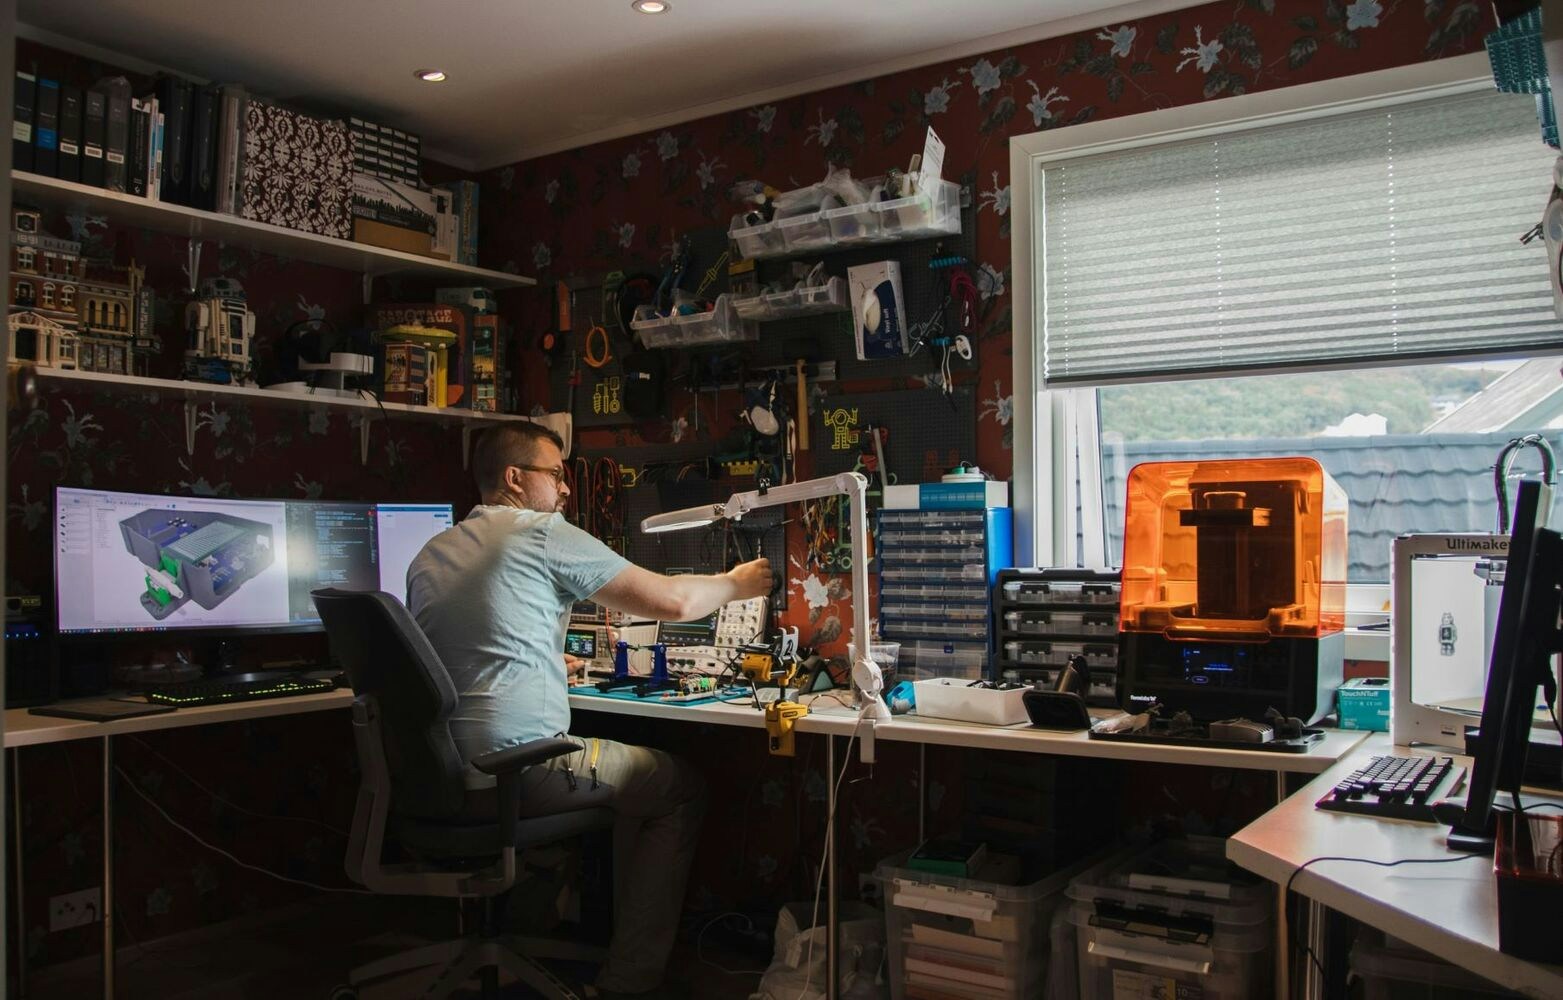
Programming Arduino application
The Arduino ecosystem is wonderful for this kind of explorative prototyping. Setting up the Arduino Nano for programming using Visual Studio Code or Arduino IDE/web IDE was a breeze and access to e.g. BLE-APIs was intuitive. You may explore the source code here. I followed some samples on how to use the generated Arduino libraries from Edge Impulse and how to perform inference on the audio input. If attempting to build my source code, make sure to include the /lib folder. I had to experiment a bit with parameters on the length of the audio window and slices. As each audio sample might start and end in any number of places for a given cough, each piece of audio is analyzed several times, preceeding and following adjoining samples. The results of the inference, the classification, is checked and triggers cough increment if probability is above 50%. A LED is flashed as an indicator. If you are used to RPC or even REST types of communication paradigms, BLE will require a bit of reading and experimentation. The docs over at Arduino give great explanation of key concepts and sample code to get started. Nordic also have insightful webinars on BLE. In short my application defines a custom BLE service, with a characteristic of type unsigned integer, with behaviors Notify, Read and Broadcast. Not very sophisticated, but enough for demonstration. Any connected device will be able to subscribe to updates on the value. I used a Nordic nRF52840 Dongle in conjunction with nRF Connect for Desktop Bluetooth Low Energy sniffing app for initial BLE development.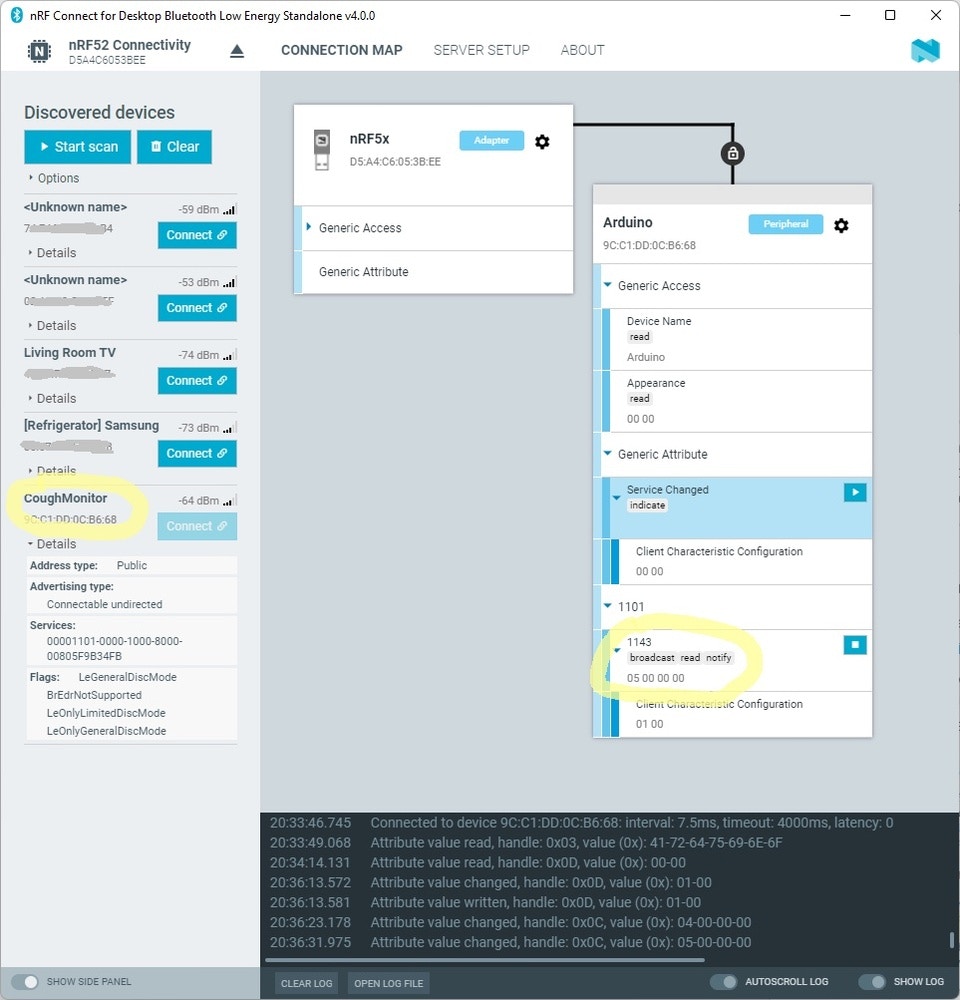
Nordic nRF Cloud
Next I used the nRF Android app on my phone as a gateway between the device and nRF Cloud.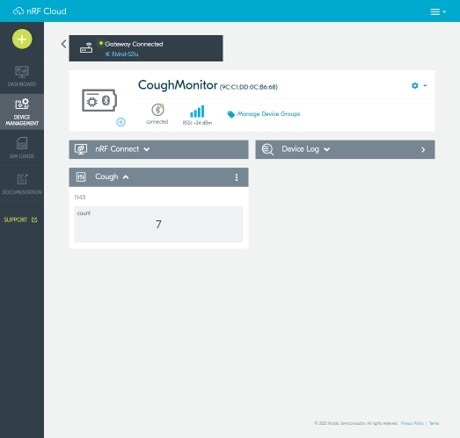
Energy consumption profiling
I didn’t spend a whole lot of time profiling and optimizing this project, as I would be moving to different hardware in the next iteration. Remember, the current implementation is simultaneously buffering audio from the microphone and performing inference. The key to long battery life is 1) energy efficient hardware and 2) as much down time (deep sleep) as possible. I did however make sure it could perform continuous inference for a few days. The Otii Arc by Qoitech is an excellent tool for profiling projects like this. Please see my other projects at Hackster and element 14 for more in-depth tutorials.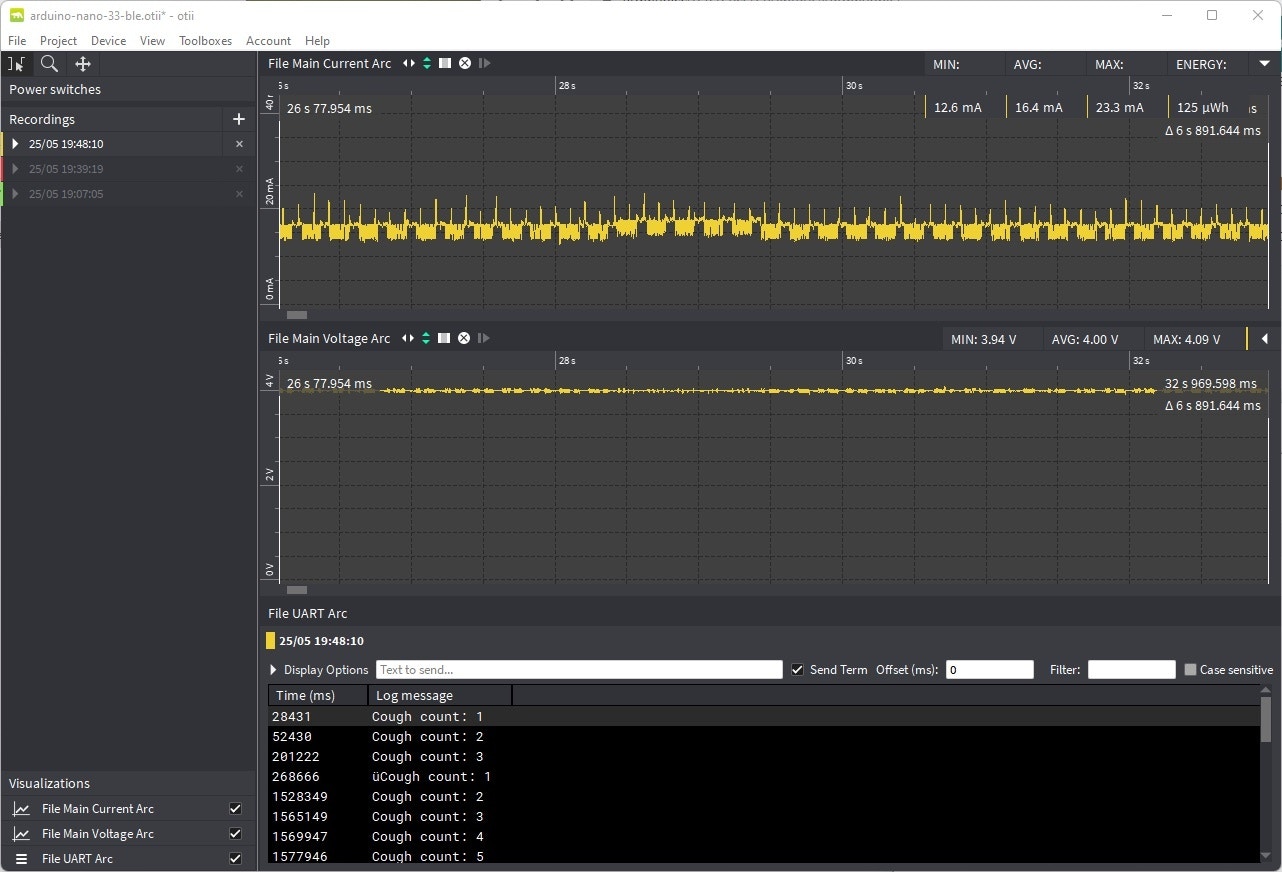
Energy source
I used lithium polymer batteries for compact size and ease of recharging. I only had spare 500 mAh batteries available, shipping options for assorted batteries by air is limited. To extend battery life I connected two in parallel by soldering 3 JSH female connectors. Warning: This wiring is subjectable to short circuit and is only connected under supervision. This gives twice the capacity while keeping the voltage at the same level.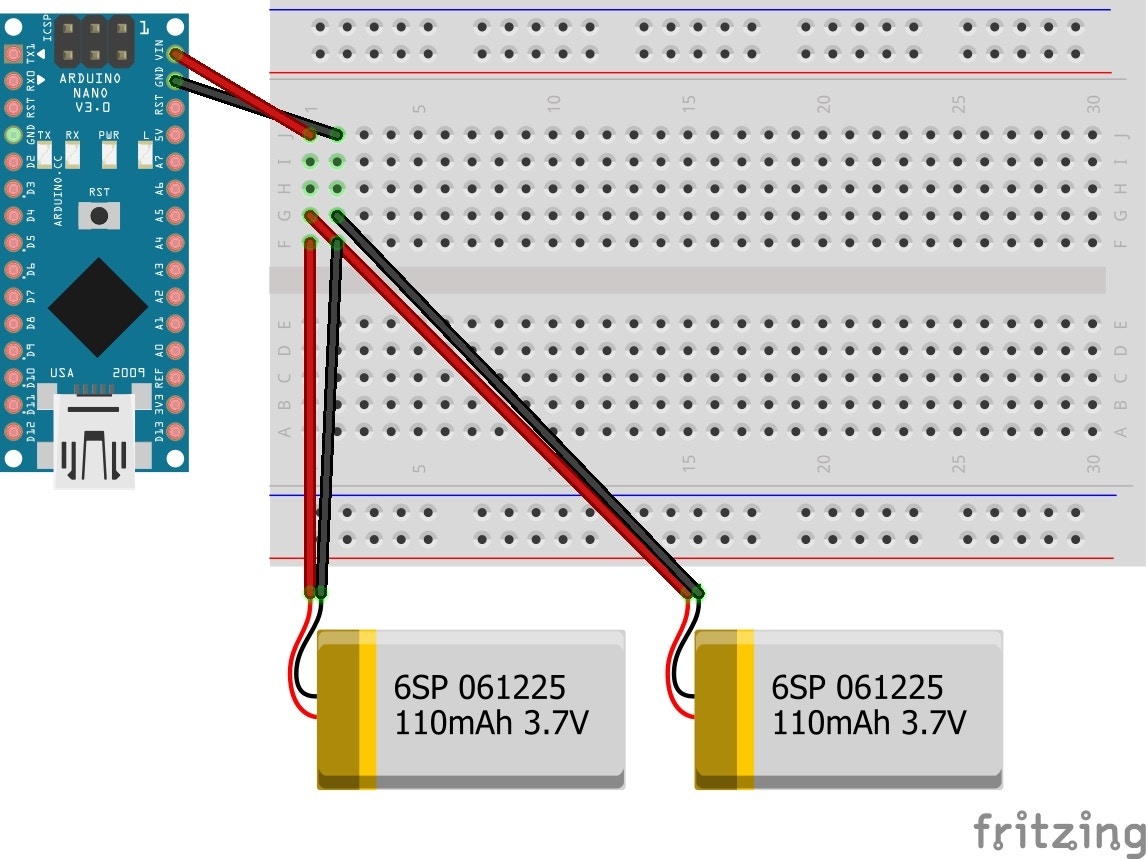
Electronics work
I made the mistake of assuming I would have to connect more components to the Arduino Nano via a protoboard. On a whim I ordered the Nano with pre-soldered headers. This only took up space and I had to undergo the tedious work of removing the headers by hand using a regular soldering iron. Sacrificing the headers by snipping them every other pin greatly eased the required finger acrobatics.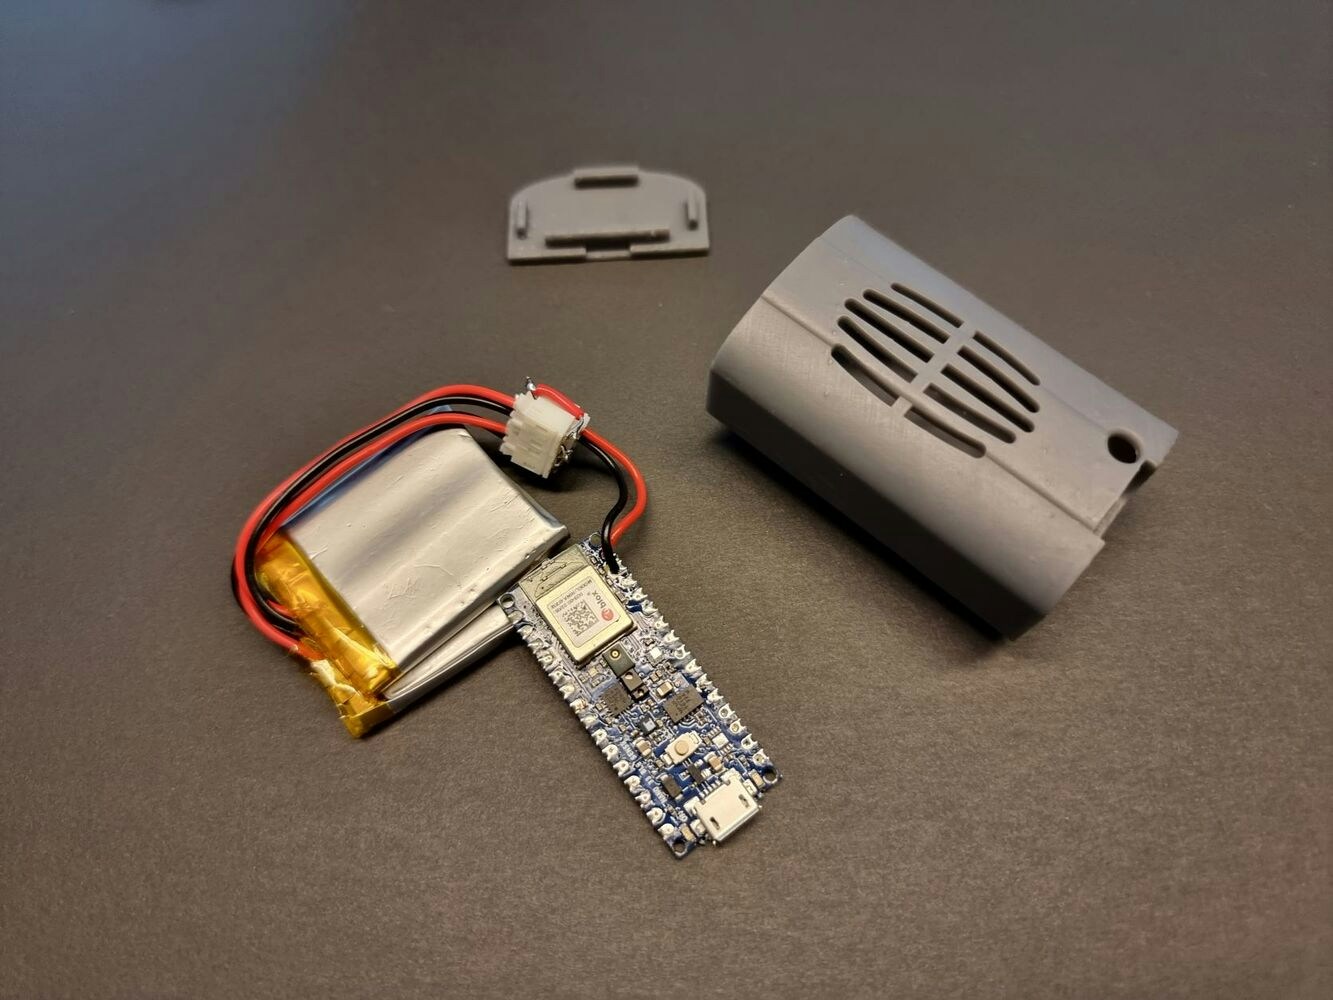
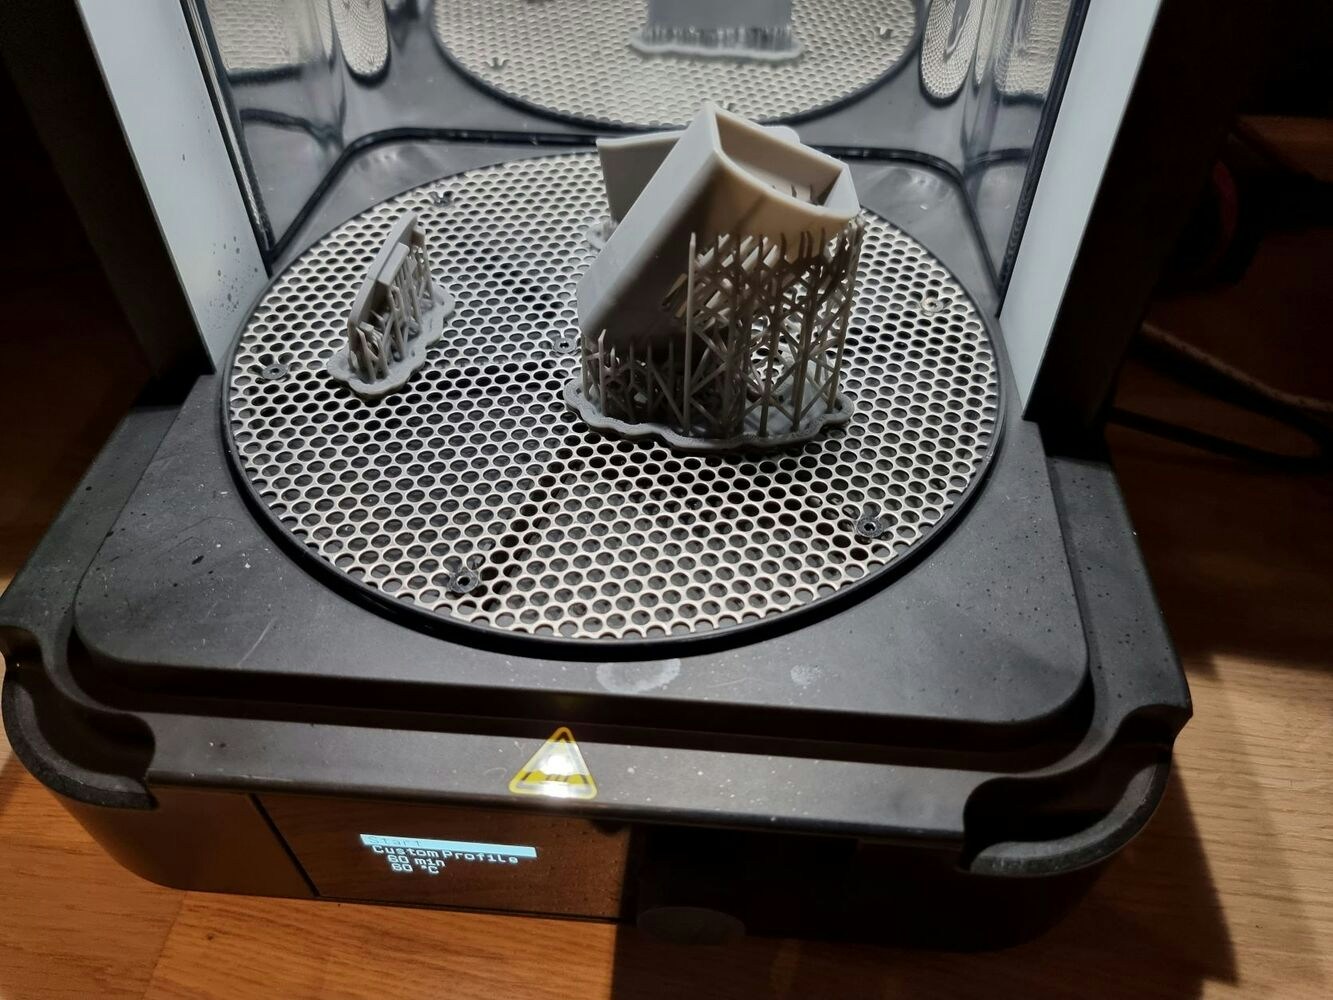
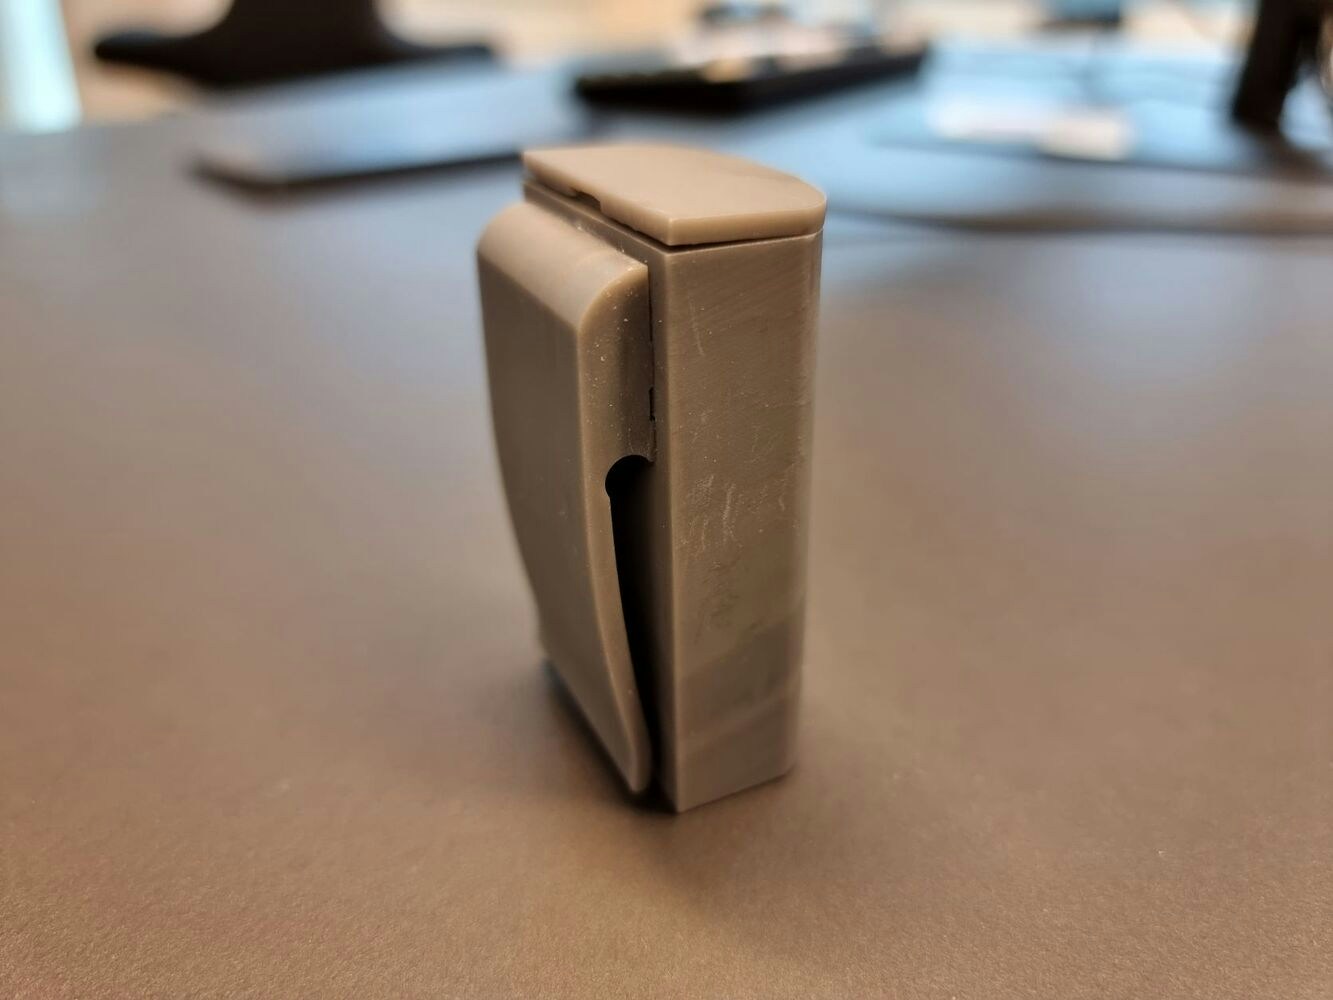
Physical prototype
I wanted to make a prototype for demonstrating the concept for clinicians. It needed to contain and protect the electronics and batteries, while allowing sound waves to reach the microphone. I realized this would complicate making the enclosure watertight and quickly crossed that off the list. I also wanted to make a practical mechanism for securing the device on the wearer. I used Autodesk Fusion 360 as CAD to design the enclosure. I always start by making rough digital replications of the hardware using calipers to take measurements on a sketch.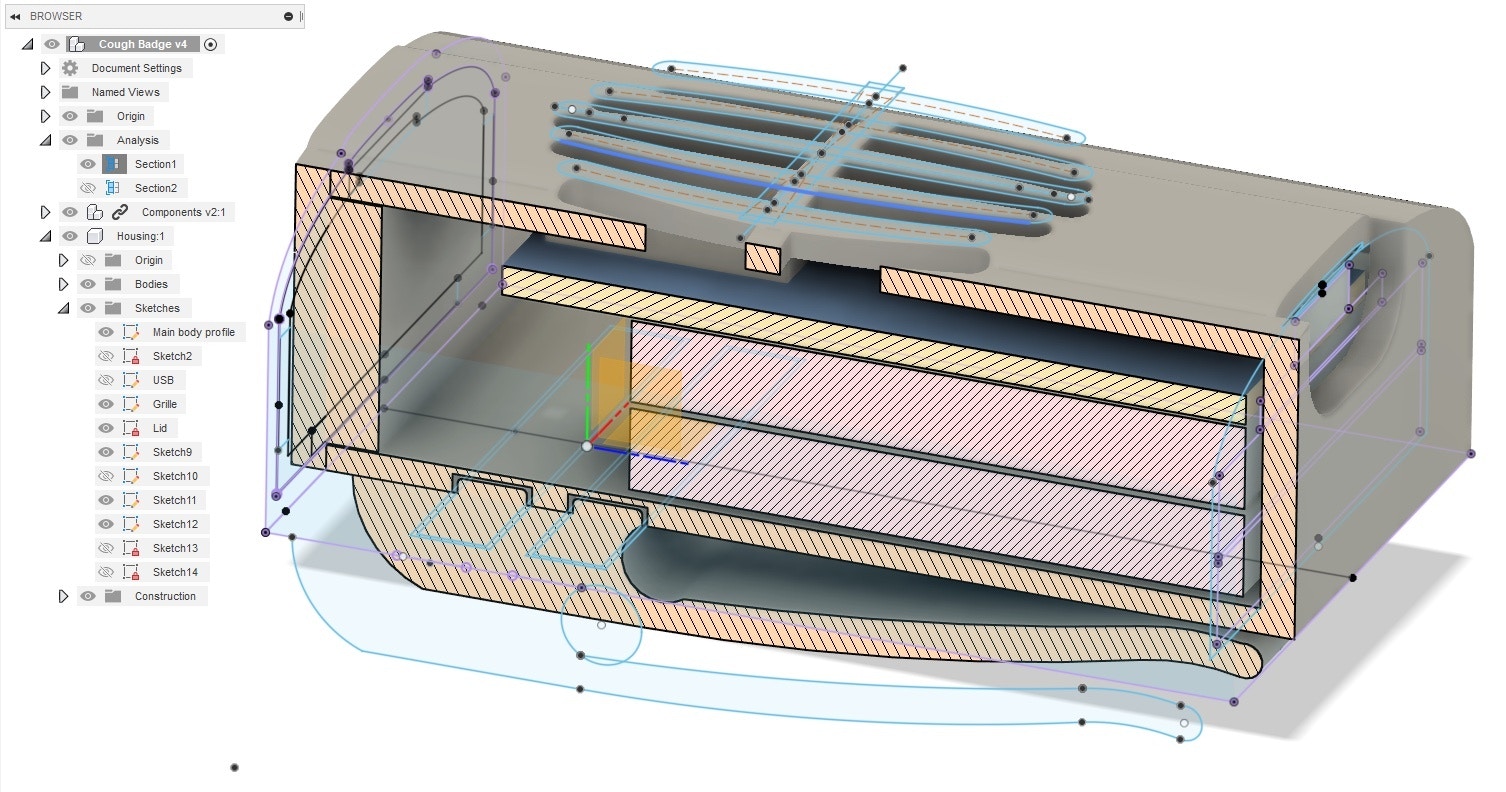
Limitations
Battery life is limited to a few days. I am in the process of reimplementing the device using a Neural Decision Processor, NDP, that is able to perform the inference with a fraction of the energy a conventional MCU requires. I tried to limit audio inference to only perform when the Arduino Nano accelerometer triggers due to some amount of movement (chest movement during a cough). I was disappointed to discover that the interrupt pin on the LSM9DS1 IMU is not connected to the MCU. You might also have realized that the device will pick up coughs by bystanders, something I discovered when demonstrating the device to a large audience during a conference! Limiting activation to both movement and audio will sort this out.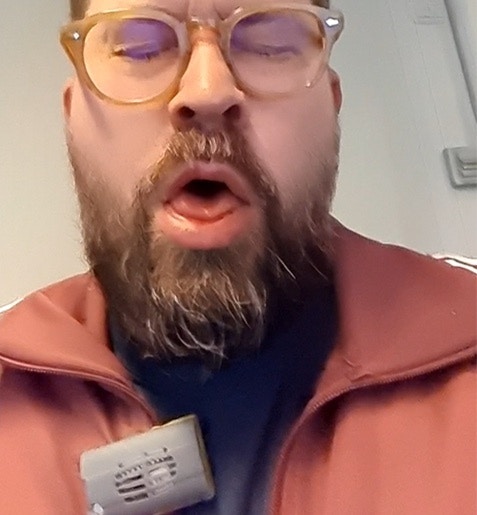
Future improvements
When demonstrating the device to doctors and nurses I received a great suggestion. A COPD patient that stops taking their daily walk is a great source for concern. My device could be extended to perform monitoring of physical activity using accelerometer data and report aggregated daily activity. It might be useful to support simple keywords so a patient could log events such as blood in cough, types of pain, self-medication etc. I plan to move from BLE to LoRaWAN or NB-IoT for transmissions. This way patients won’t have to worry about IT administration or infrastructure, it will just work. Please see my other projects at Hackster and element 14 for demonstrations of these lpwan technologies.Reception
I have had the opportunity to demonstrate the device to clinicians both in person and at expositions and it has received praise, suggestions for further features and use in additional conditions. This project has also spawned several other ideas for wearables in e-health.