- https://studio.edgeimpulse.com/studio/139770 - VoC
- https://studio.edgeimpulse.com/studio/140871 - Vibration
Introduction
Predictive maintenance can help you avoid costly downtime and repairs, by predicting when equipment is going to fail. This allows you to schedule maintenance before the problem occurs. Additionally, predictive maintenance can improve safety by identifying potential hazards before they cause an accident. This allows companies to take steps to prevent accidents from occurring. And last but not least, predictive maintenance can help avoid costly downtime and repairs by predicting when equipment is going to fail. This allows you to schedule maintenance before the problem occurs, instead of waiting for something to break.The Challenge
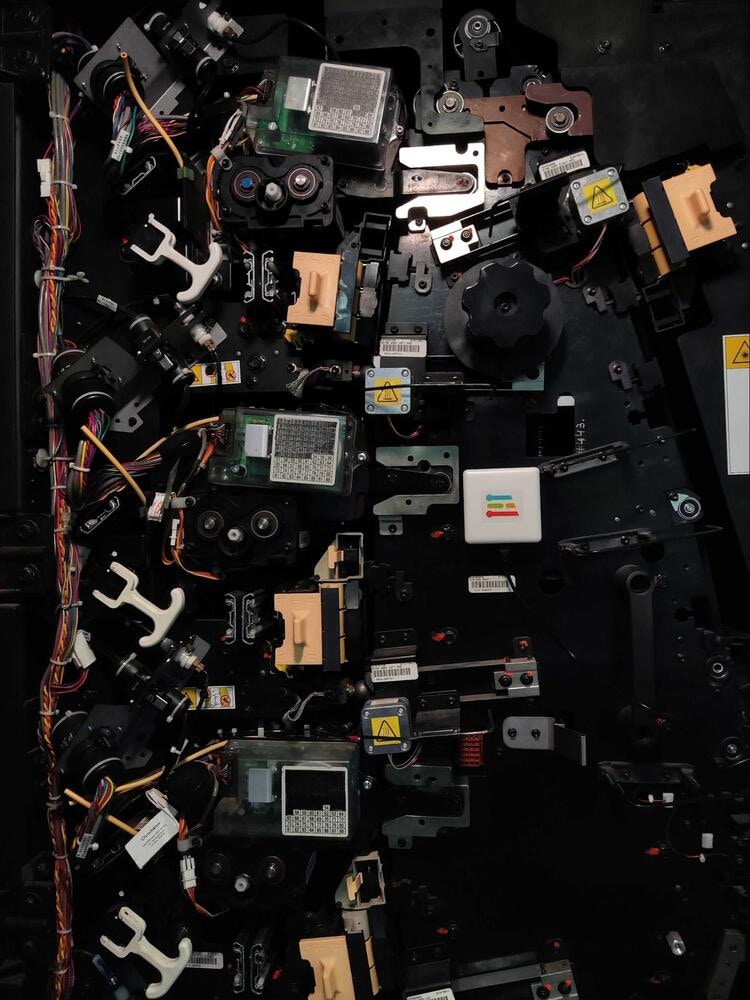
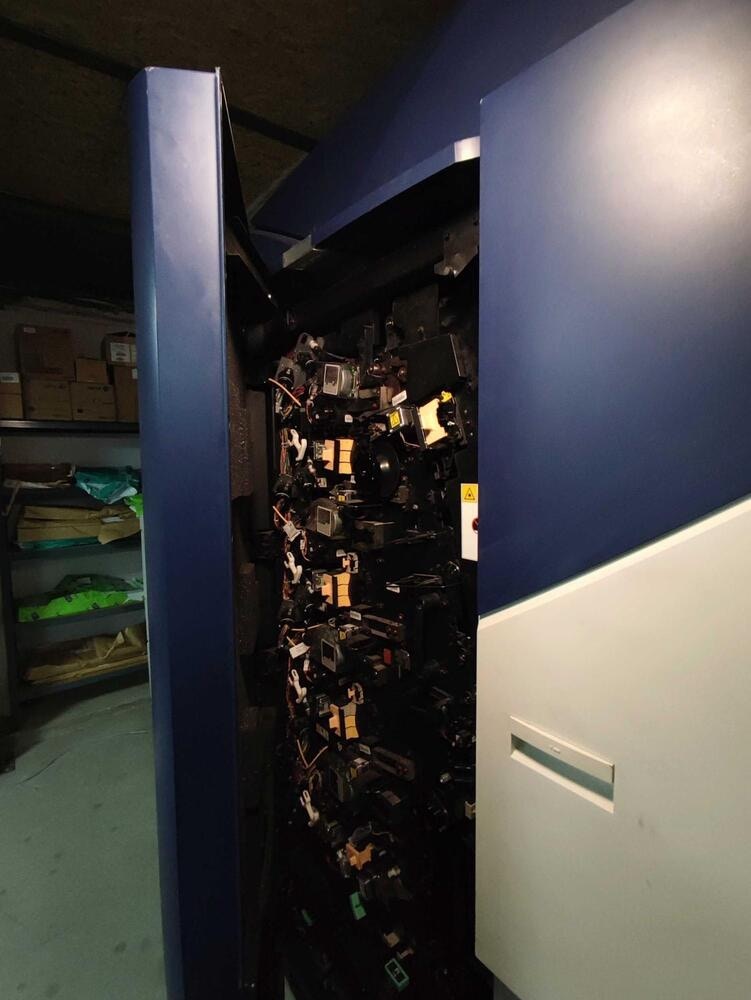
The machinery present in a print shop include printers, copiers, and scanners. These machines are used to print, copy, and scan documents. Additionally, there are often other machines present in a print shop such as shredders and laminators.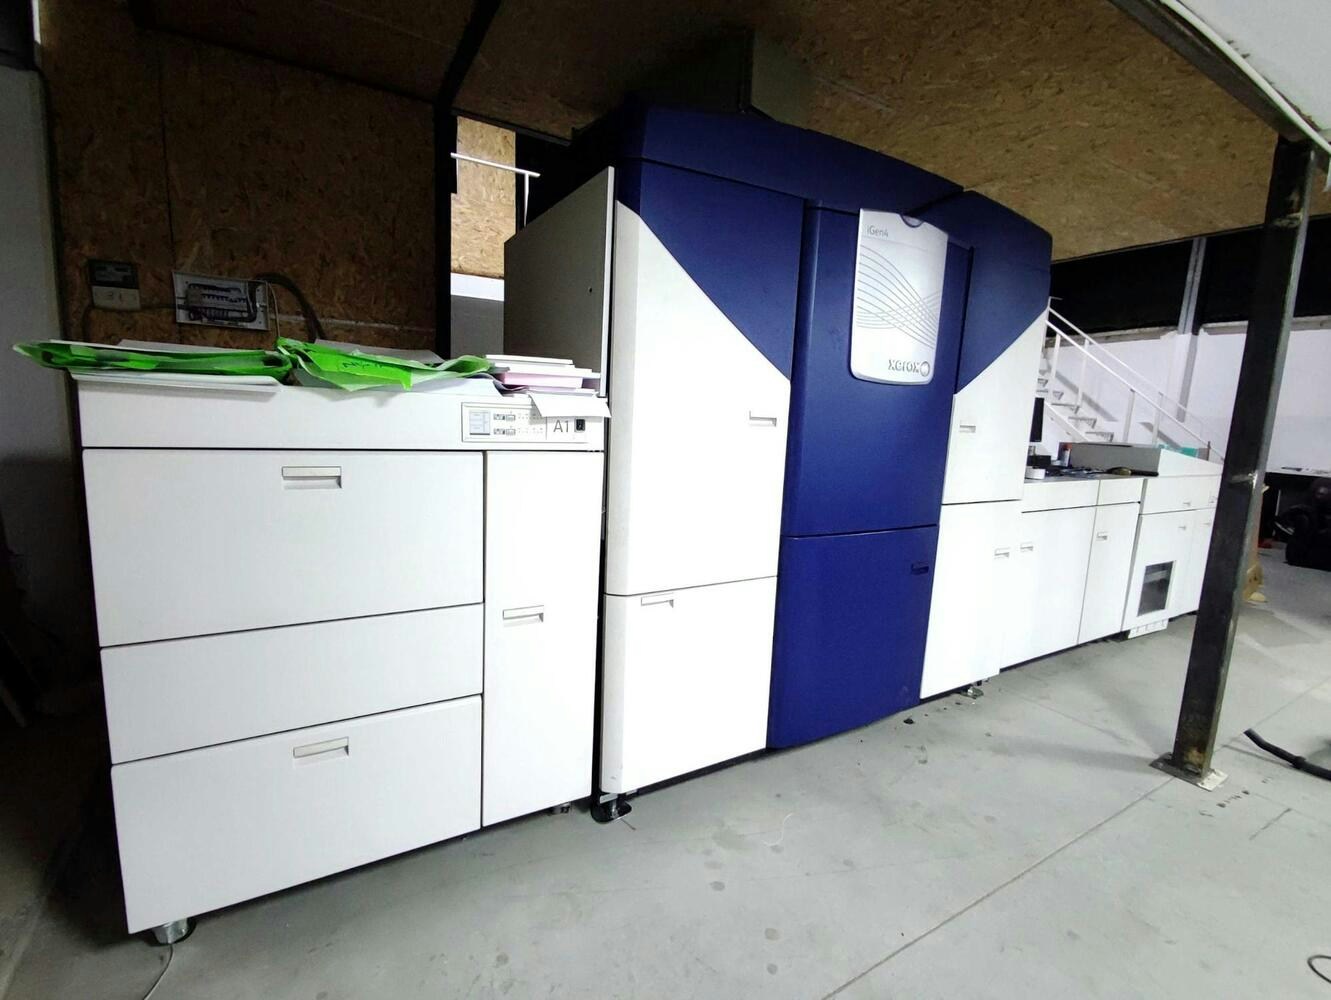
Our Solution
Hardware Requirements
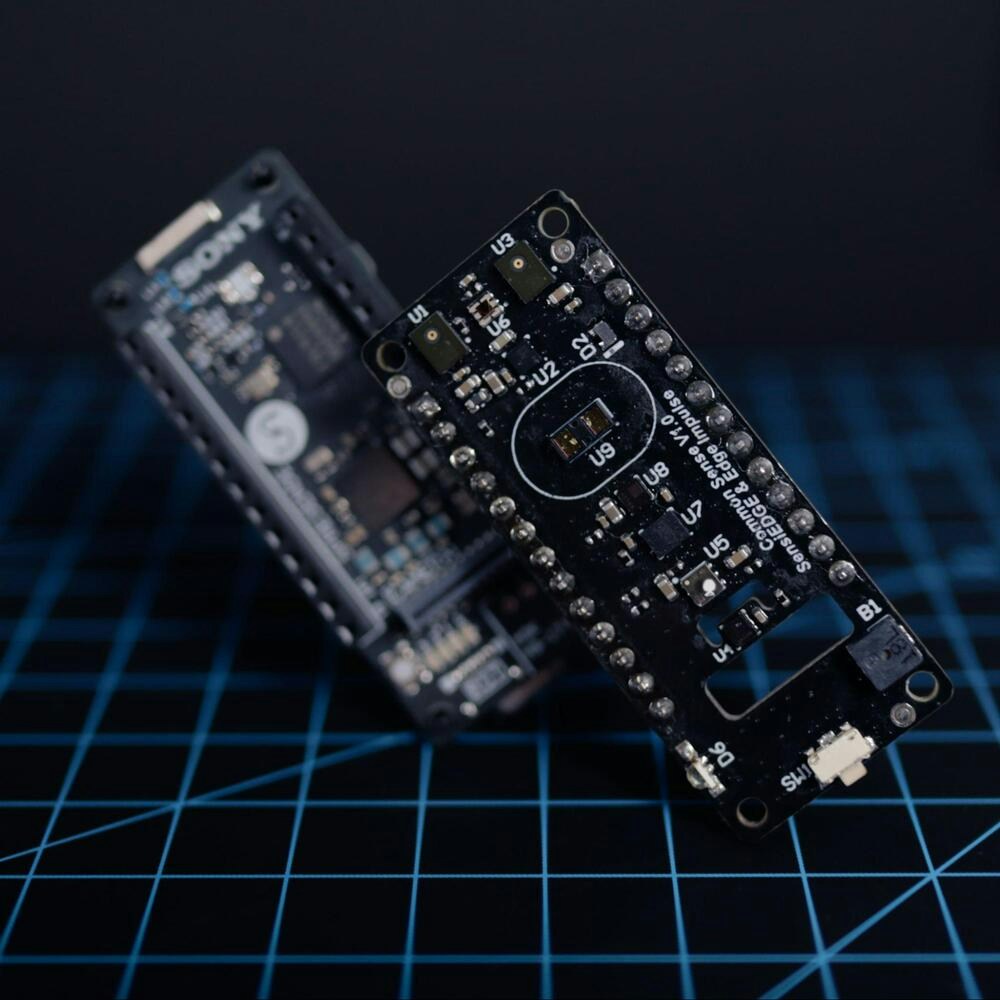
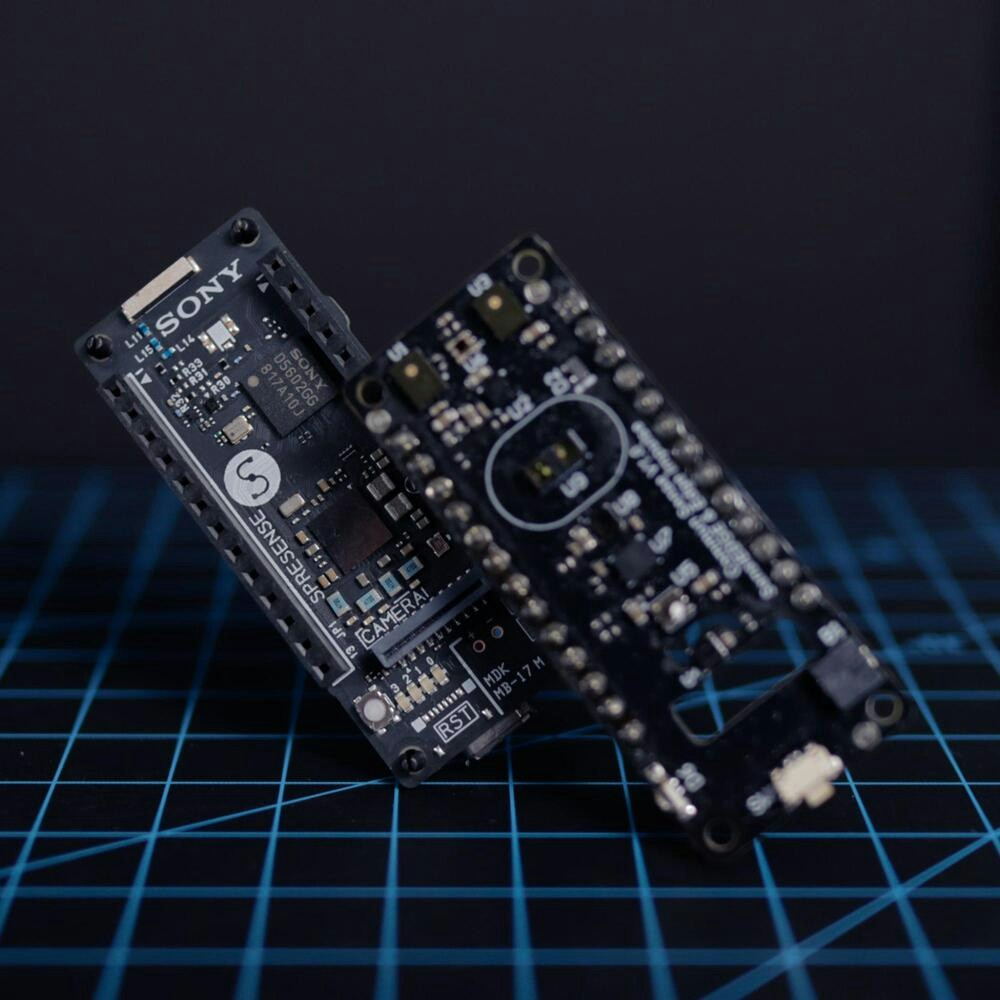
- Sony Spresense
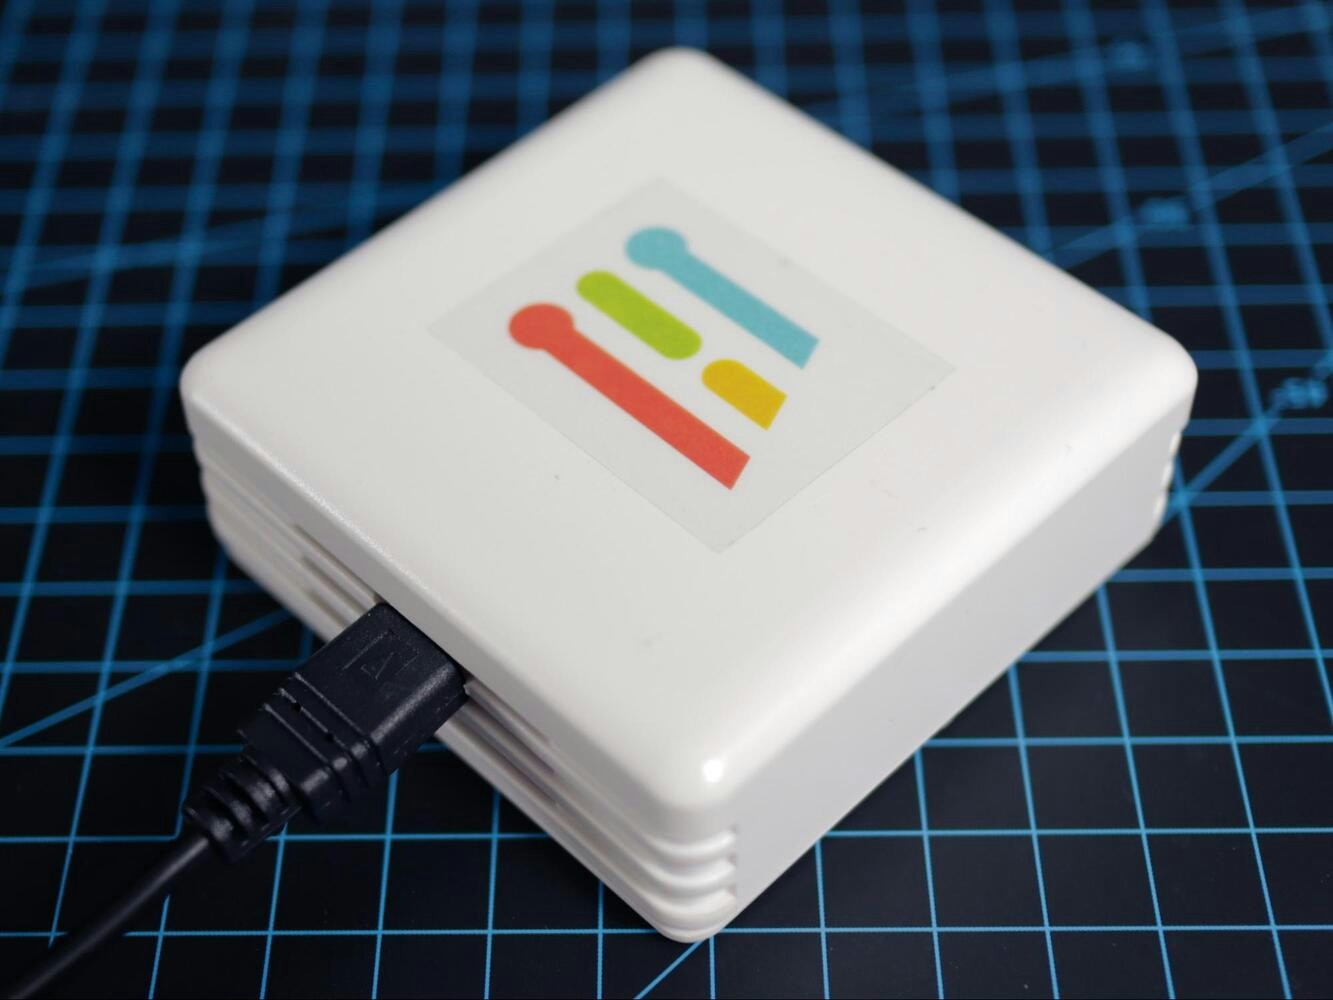
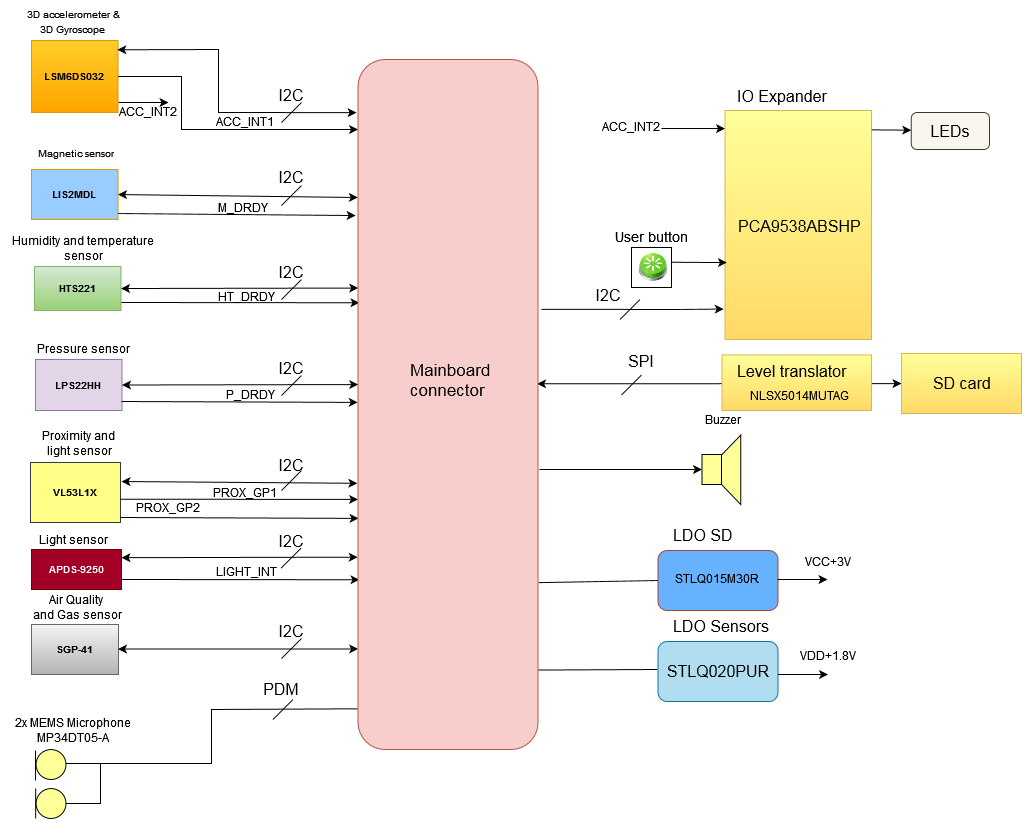
- CommonSense expansion board developed by SensiEdge
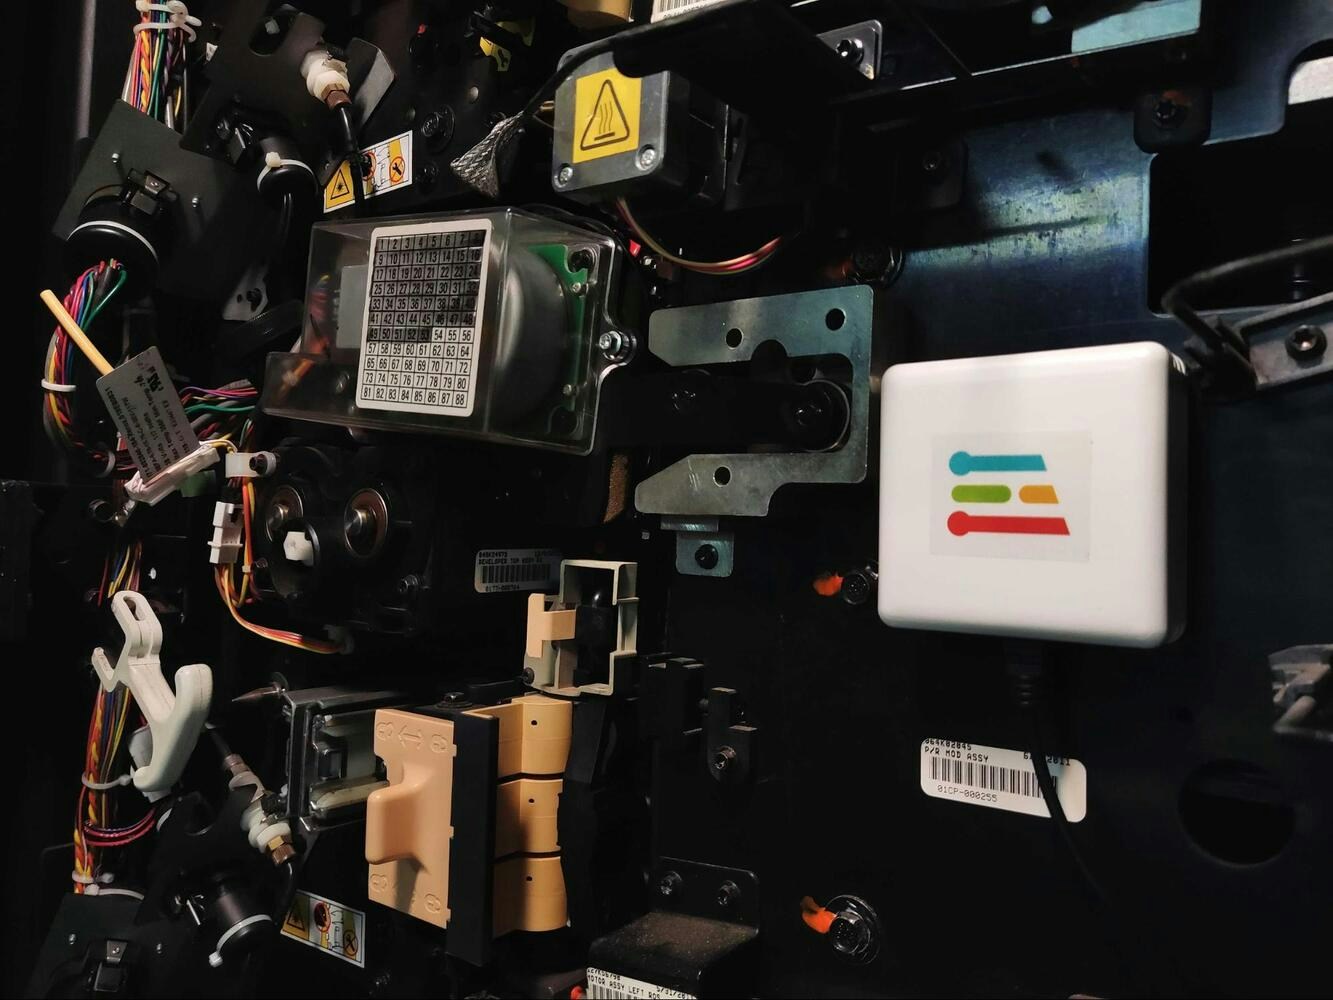
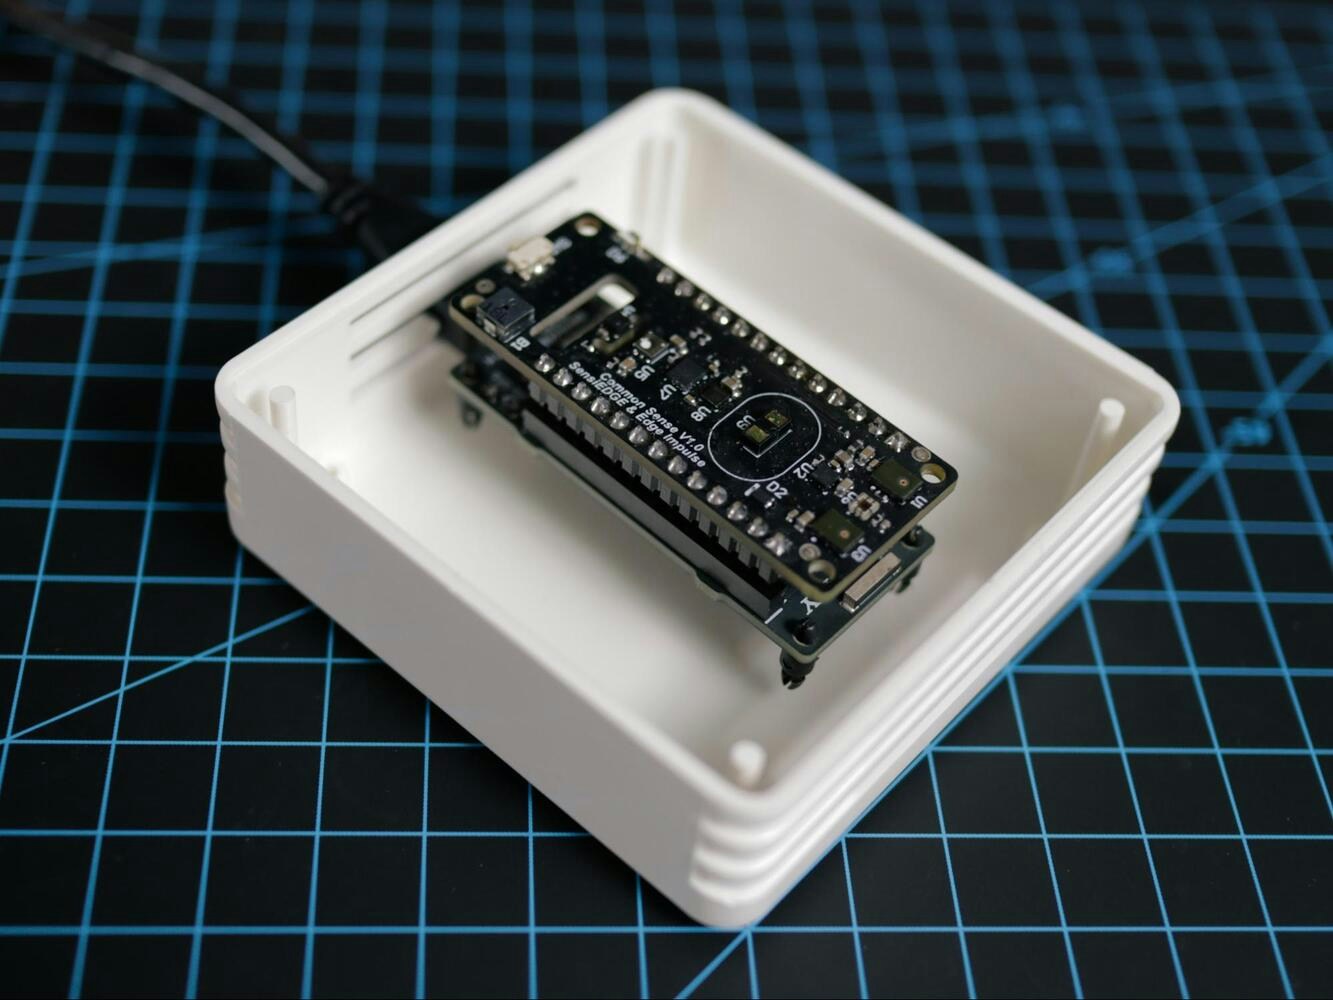
- Enclosure with wall mount options
Software Requirements
- Edge Impulse account
- Arduino CLI
- Edge Impulse CLI
- Git
Hardware Setup
The Spresense main board has the following features: Sony’s CXD5602 Processor, 8 MB Flash memory, PCB with small footprint, Dedicated camera connector, GNSS (GPS) antenna, Pins and LEDs, Multiple GPIO (UART, SPI, I2C, I2S), 2 ADC channels, Application LED x 4 (Green), Power LED (Blue), USB serial port.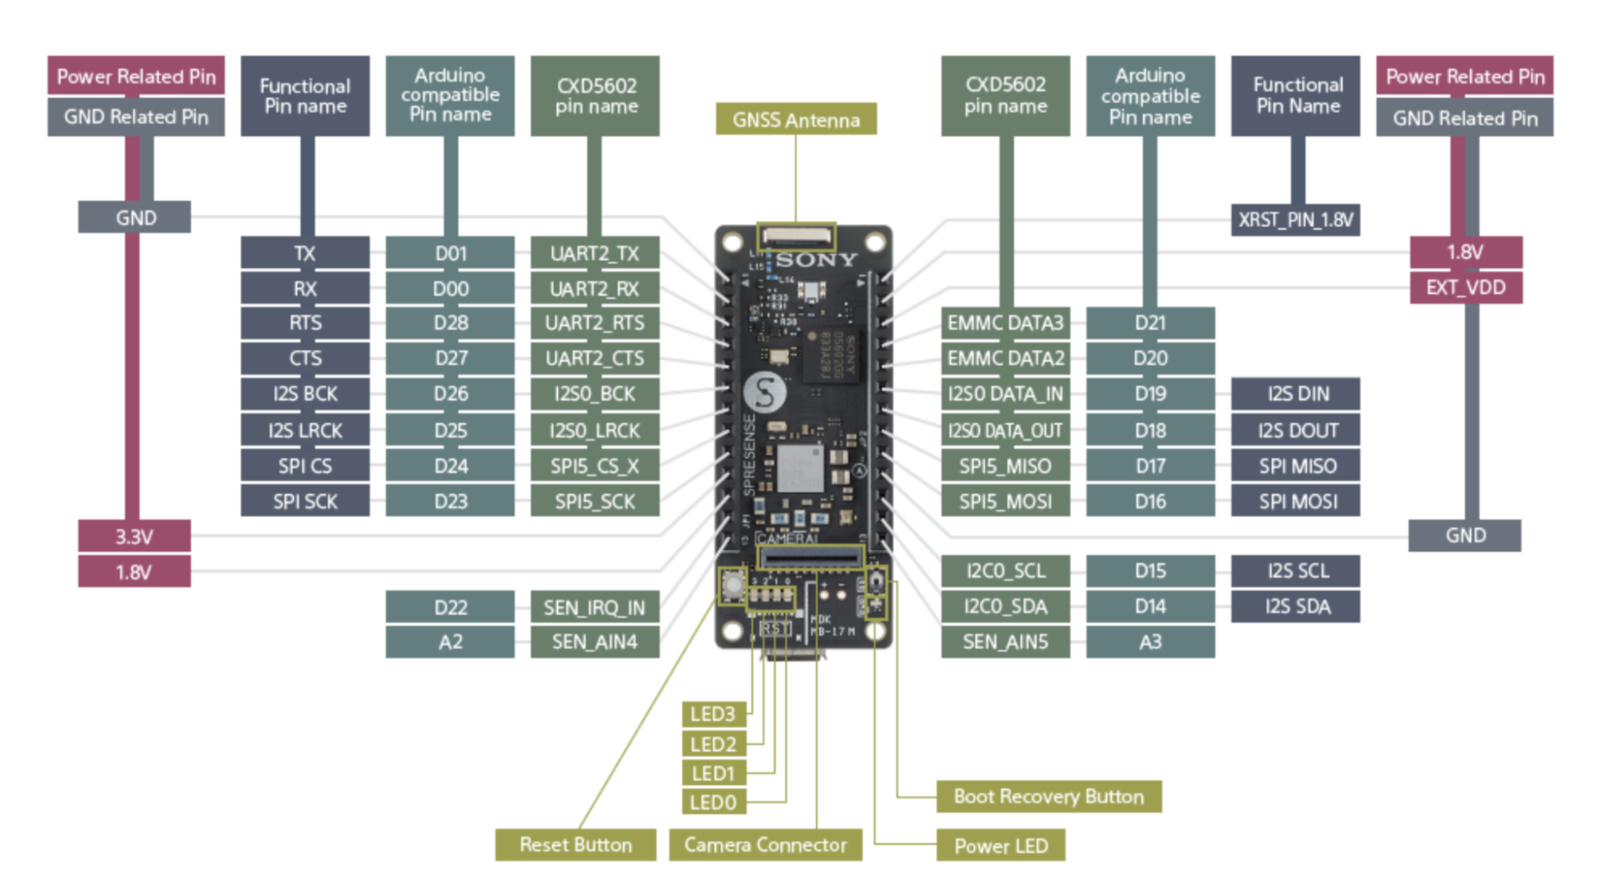


Software Setup
Setting up the Build Environment
Gnu Arm Embedded Toolchain
The first step in setting up the build environment for the Sony Spresense board equipped with the Common Sense expansion board is installing the GNU Arm Embedded Toolchain. Determine the latest version of the toolchain:Python 3.7
Next up in setting up the build environment is installing Python 3.7: Install the prerequisites for adding custom PPAs:deadsnakes/ppa to the local APT package source list:
Creating an Edge Impulse Project
To build a machine learning model that is able to detect trends in Volatile Organic Compounds levels in the air, characteristic to ink or solvent spillage in the printing industry, we will be using the Edge Impulse platform. Register a free account and then create a new project, give it a fitting name and press Create new project.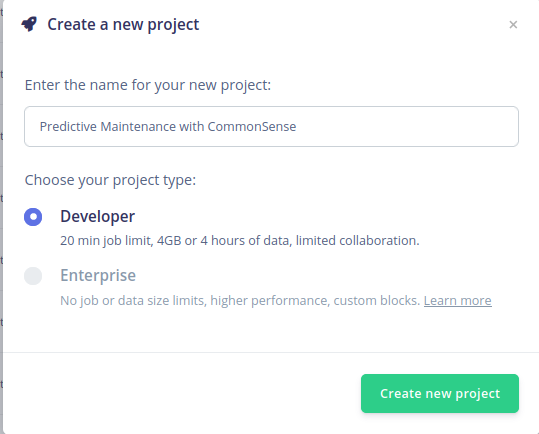
Connecting the Device
To connect the device to the edge impulse platform, you must first download the data forwarder firmware from here. Pick whatever firmware you wish, either the firmware used for measuring Volatile Organic Compounds level, or the one used to measure the vibration of the printer. Launch a terminal, navigate to the software folder and activate the build environment:make:

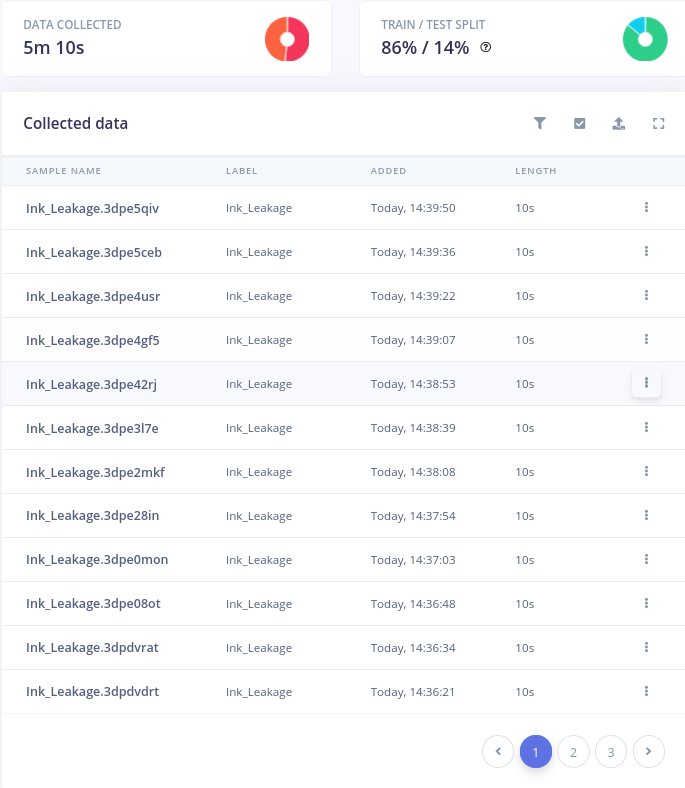
Building the Dataset
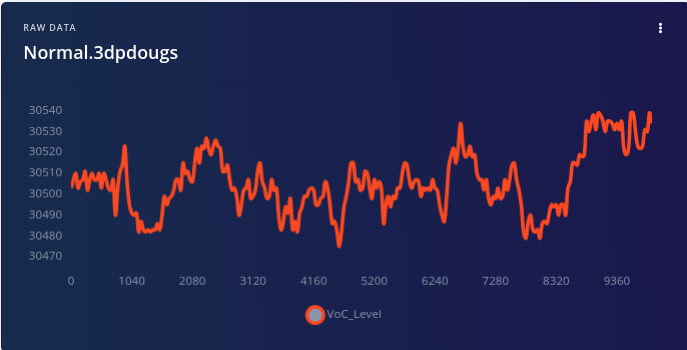
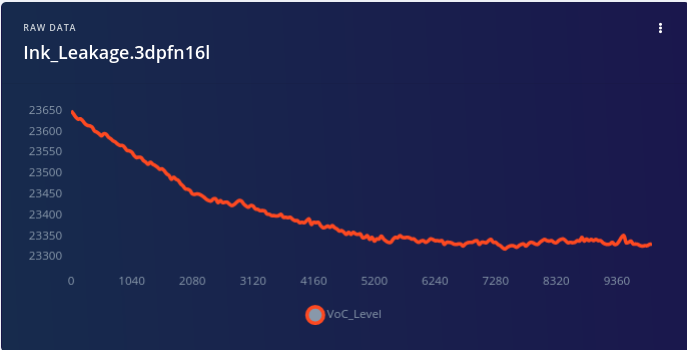
VoC
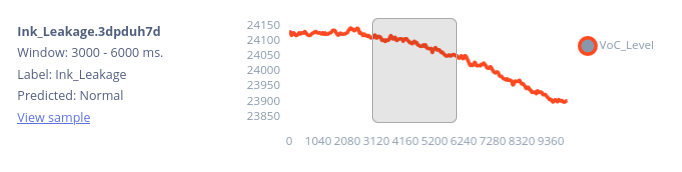
In printing industries, there are numerous volatile organic compounds that can be found in the air inside and in the near vicinity of printing presses, like Isopropanol, Benzene, Ethyl-Toluene isomers and styrene. To emulate an ink and solvent spillage, we have exposed the Common sense board to varying concentrations of Isopropanol which, being a very volatile compound, easily vaporizes and is picked up by the sensor.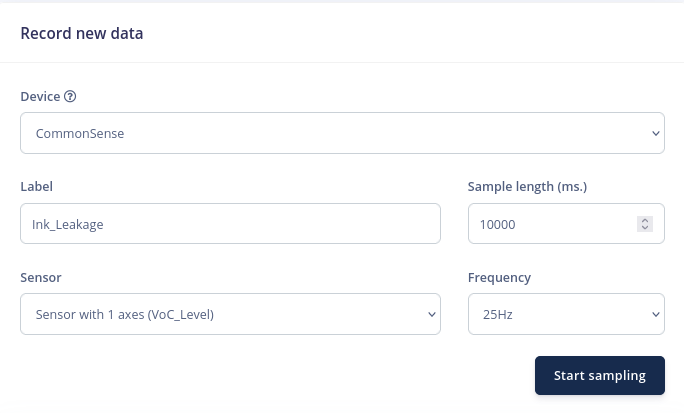
Vibration
For vibration data, we must name the 3 axes exposed by the board as X, Y and Z. Then ,when recording data, make sure the 3-axes sensor is selected. Use a Sample length of 10 seconds and leave the frequency on the default value.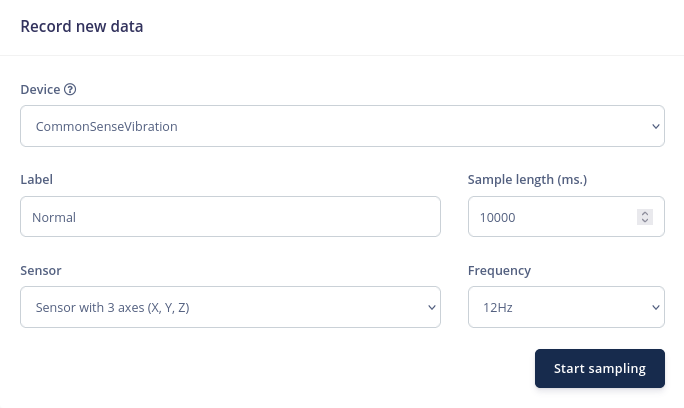
Designing the Impulse
VoC
After populating the dataset it’s time to design the Impulse. The impulse allows the user to control the defining parameters parameters of the whole process of taking raw data from the dataset, pre-processing it into manageable chunks called “windows,” extracting the relevant features from them using digital signal processing algorithms, and then feeding them into a classification neural network that puts them in one of the defined classes.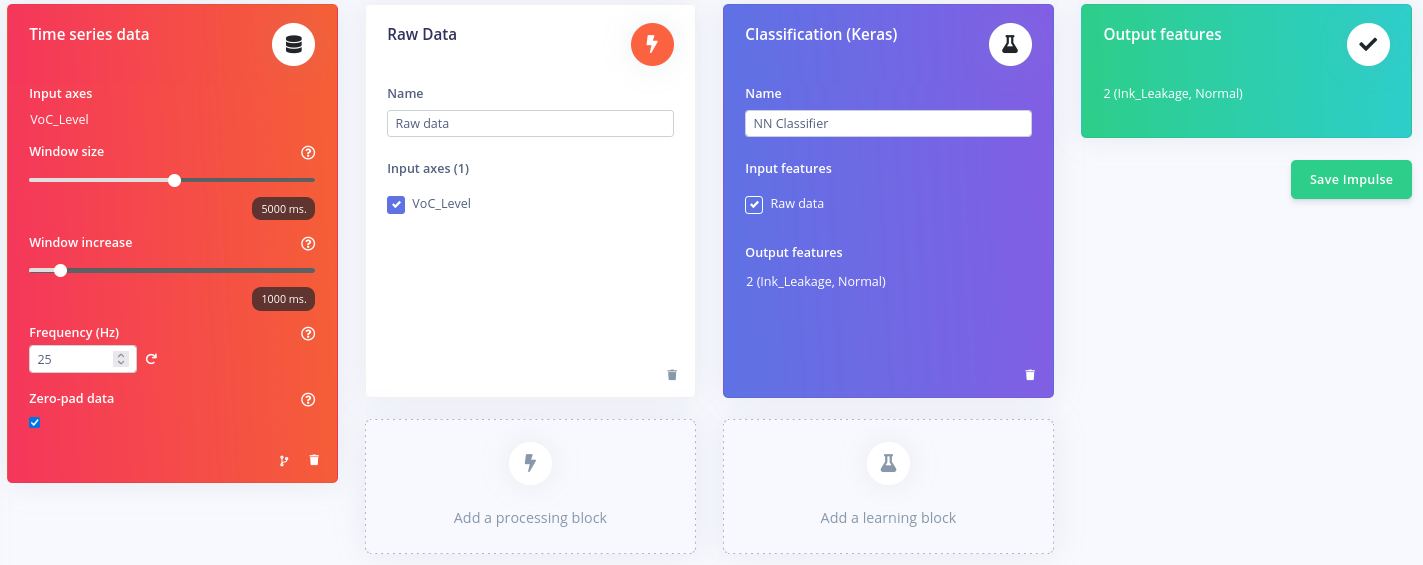
Vibration
The Impulse for the anomaly detection algorithm is rather different from the one used in the VoC case.
Configuring the Raw Data Block (VoC)
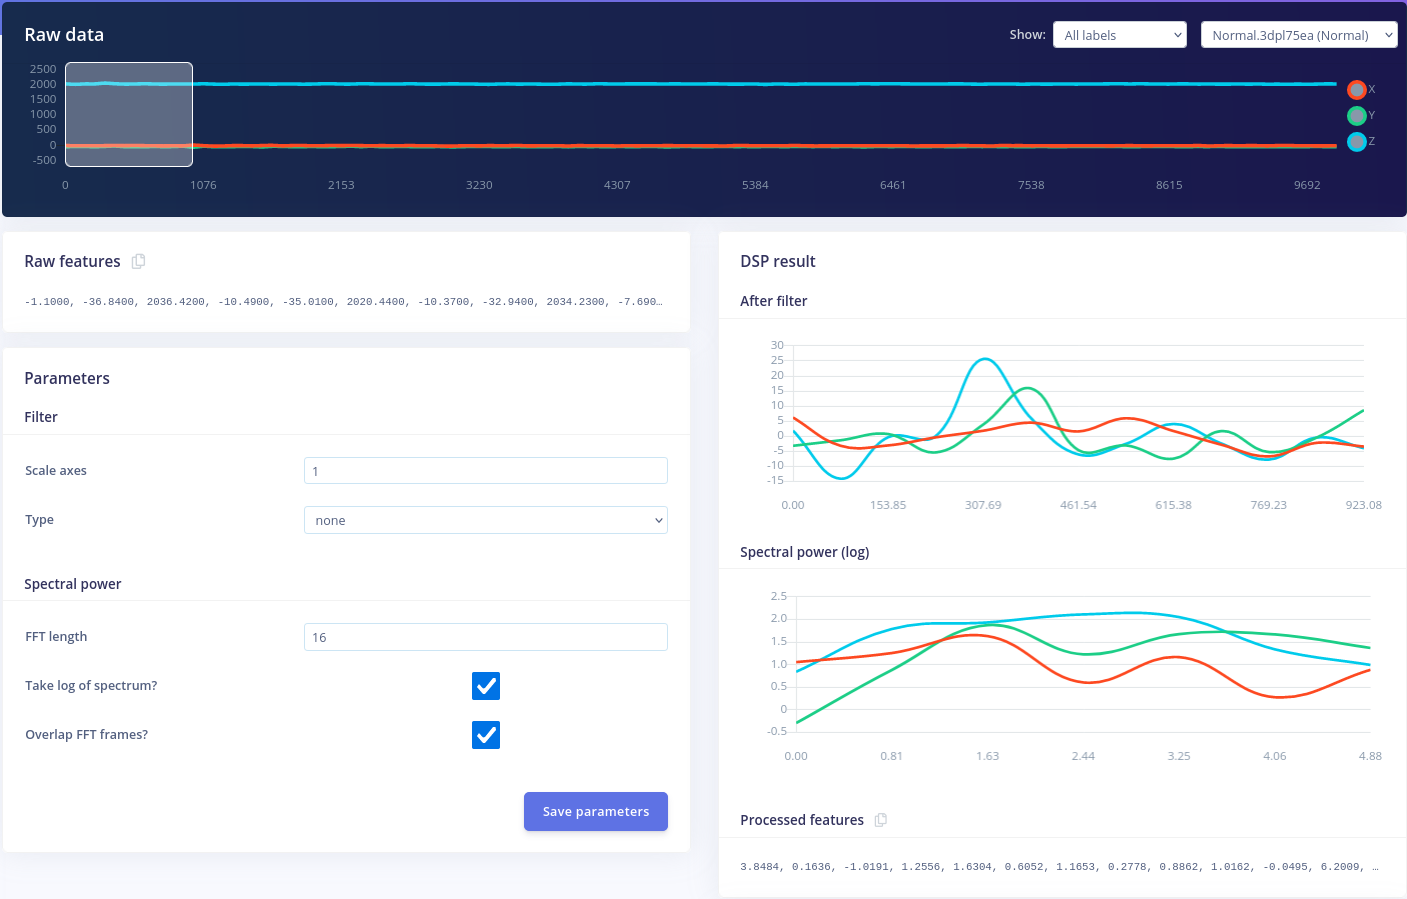
After clicking on Save Impulse, each block can be selected from the Impulse Design submenu and configured. The Raw data block could be the most straightforward of the processing blocks because it has just one adjustable option, the “Scale axis,” which we’ll set to 15. The time-domain representation of the chosen sample may be seen on the upper side of the screen.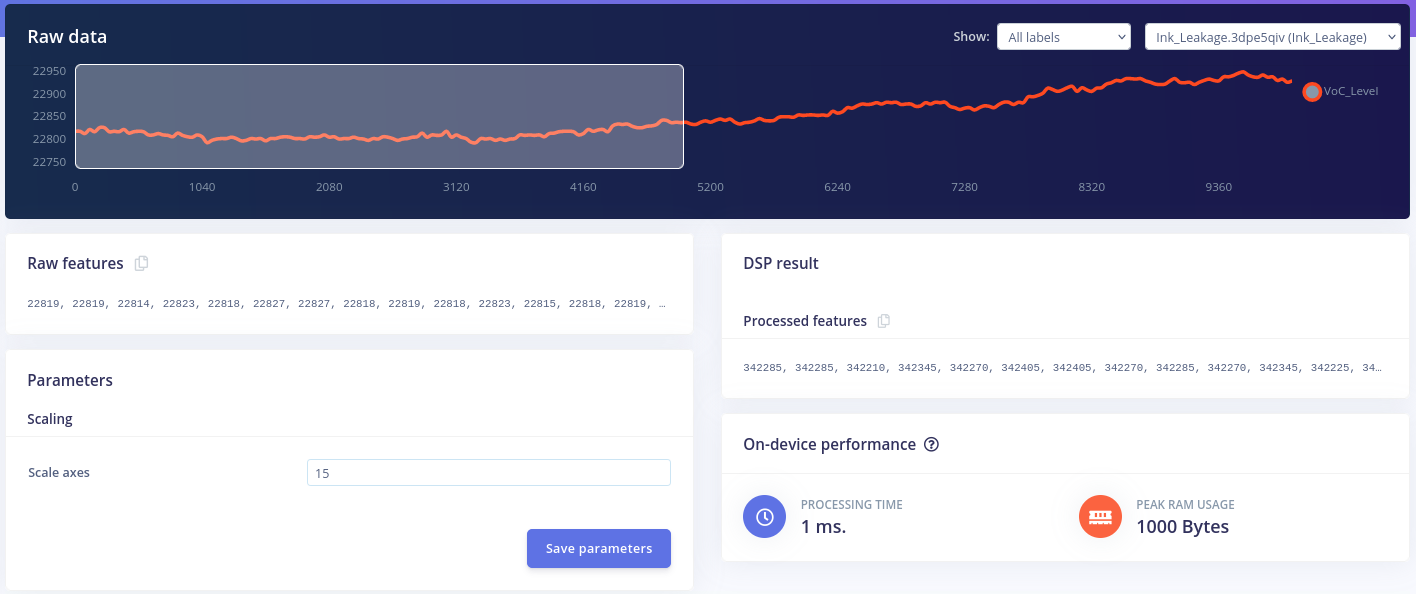
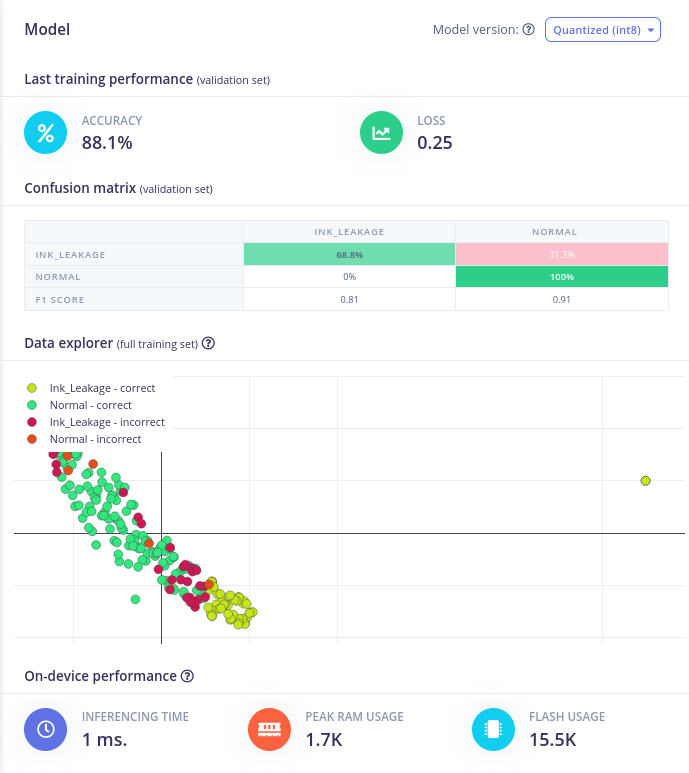
Configure the NN Classifier (VoC)
The next block in line is the NN Classifier block. Here you can control the number of training epochs, the rate at which the weights of the linkages between neurons are changed, and the percentage of training dataset samples that are used for validation. Additionally, if needed you can even change the structure of the neural network.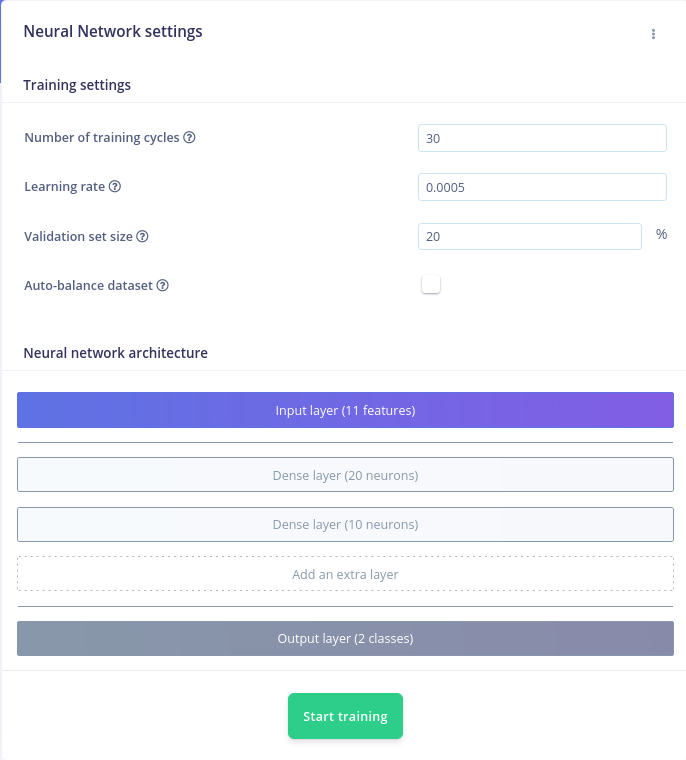
Configure the Spectral Analysis Block (Vibration)
Configure the Anomaly Detector
The Anomaly Detector block is a great way of detecting any anomalous behavior of the machinery during it’s runtime. Click on Select suggested axes to greatly increase the performance of this NN and to reduce its resource usage, as it will only take into account the features identified in the previous step.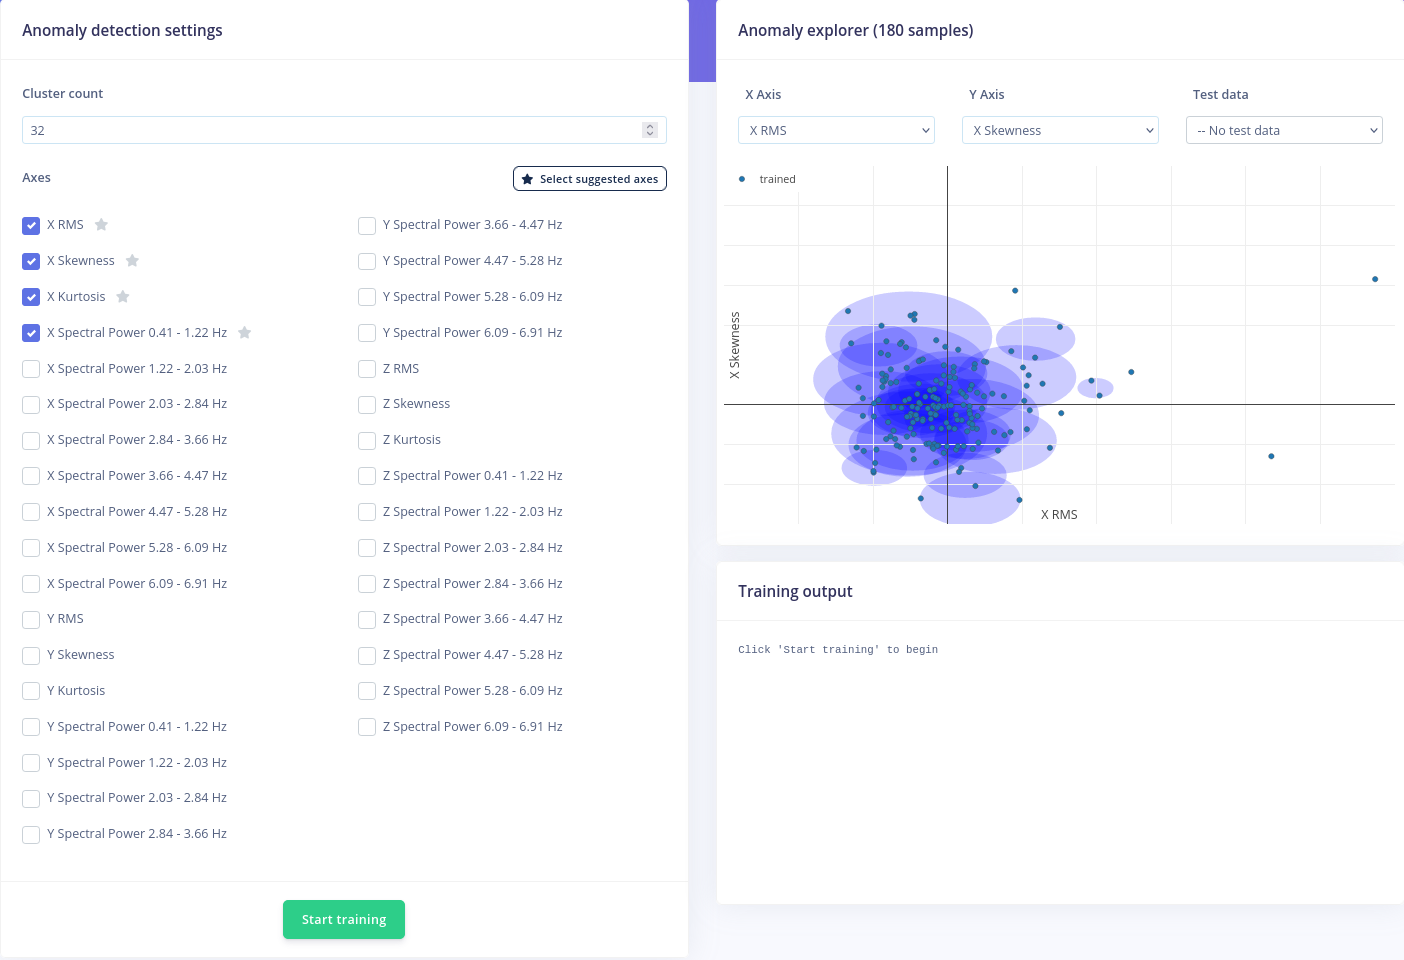
Model Testing
The user can see how the neural network performs when presented with data that it has never seen before using the Model Testing page. After clicking Classify all, Edge Impulse will then feed the neural network with all the data in the Testing data pool and display, just like during training the training process of the NN, the classification results and model performance.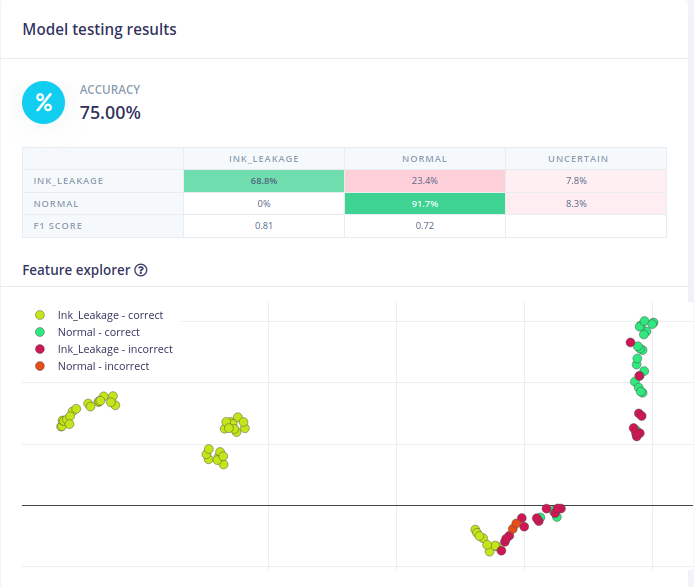
Conclusion