Introduction - Playing Poker at the Edge, Part 1 of 2
As sometimes happens to all of us, we are presented with a solution but don’t yet have a problem to solve! In this case the solution was that I got the chance to borrow a programmable robot arm for a few weeks, but as the robot was delivered much earlier than expected, I had not yet thought about a use case for it. Among other things I needed to decide about what objects to pick and place using the suction cup, and also what software to use for controlling the robot. What came to the objects to use, I decided after some quick deliberation to use playing cards as they are uniform in size and also lightweight. For the controlling software I had initially thought about only using Python (without any AI), but I quickly moved on to explore how to also use TinyML (Tiny Machine Learning) for a more rewarding experience. This project is part one of two, showing how to classify poker cards into three categories, by using Edge Impulse and a supported board, SiLabs xG24. Part two continues with using the same hardware setup for controlling the aforementioned robot arm to sort cards, but also showcases how to easily adapt the setup to sorting waste. While one might think that classifying playing cards into only three classes is a piece of cake - actually it is when using Edge Impulse - the project also serves as a base to get started using the hardware and with a low learning curve. After you’ve got used with it, you can easily step up the ladder to more advanced projects.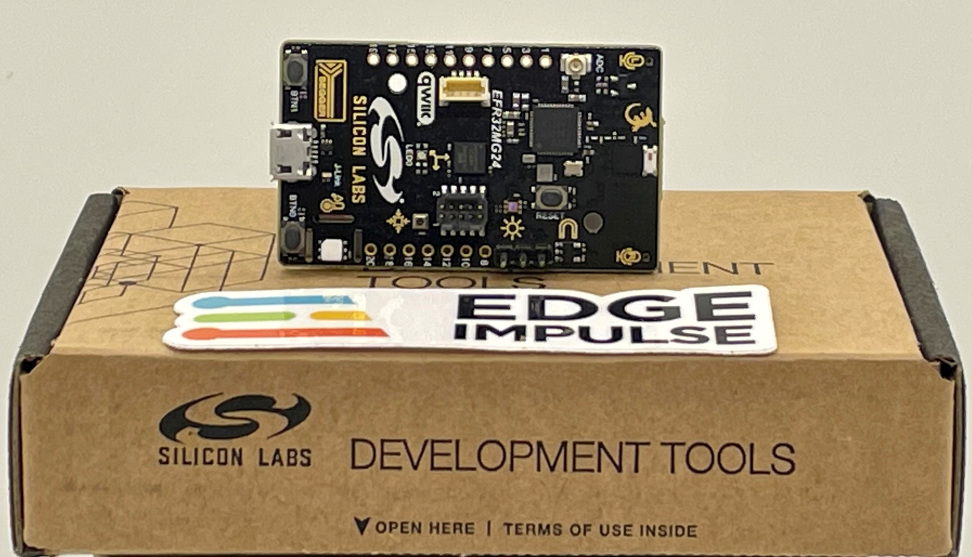
Use-Case Explanation
As earlier mentioned I chose to classify playing cards for this project. While it is possible to classify cards into different suits, I decided to start simple by using three classes or labels: red cards, black cards, and cards with back side up. In addition I added a no card label to avoid the risk of an empty table being classified as a card. While classifying cards is pretty much straightforward, the typical rules also applied in this project: more images and also different type of images —> better performing model. After initially having tested another board, I found that board to be a tad slow for my use case as the inferencing took over 1.2 seconds. Browsing through the boards Edge Impulse supports, I then decided to use the SiLabs xG24 Dev Kit together with an Arducam camera as I believed they would fit my purposes better. As it turned out, the inferencing was 3 times faster than with the other board I’d tried! The SiLabs xG24 Dev Kit is packed with sensors and features. Among the sensors are e.g. a relative humidity and temperature sensor, inertial sensor, stereo microphones, pressure sensor etc. Important features for this project was the Cortex-M33 processor, 256 kB RAM, and especially the AI/ML Hardware accelerator, and it can even be operated with a coin-cell battery! While it is not equipped with a camera, it supports e.g. the Arducam OV2640 board which I also used.Components and Hardware Configuration
Hardware Used:
- SiLabs xG24-DK2601B EFR32xG24 Dev Kit
- Arducam B0067 2MP OV2640 SPI Camera for Arduino
- Pin Header 2.54mm 1x20 Pin for soldering to the SiLabs board
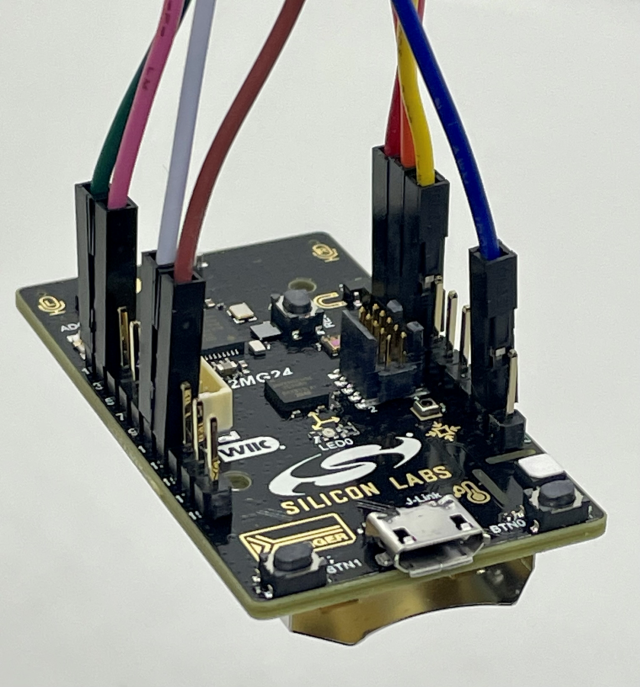
Configure the Hardware:
- Solder the header to the board
- Connect the Dupont cable (came with the Arducam) to the headers according to the camera assembly
- Before powering on, double-check and triple-check the connection
Data Collection Process
When collecting data for a machine learning (ML) application, it is generally better to use same device as will be used for inferencing. I started out with this assumption, but found it quite tedious to capture hundreds and hundreds of images with the xG24 and Arducam as it took up to 5 seconds per image. The reason for the slowness might be that the 256 kB RAM is not enough for storing one image, and instead the much slower flash memory needs to be used. Instead I moved onto using a mobile phone camera which made the data gathering process much faster, and almost fun, as I could take 3-4 images per second!Software and Hardware Used to Capture Data:
- Edge Impulse Studio & CLI (Command-Line Interface)
- SiLabs xG24 was used for ~10 % of the data
- to use this with Edge Impulse, you first need to flash the Edge Impulse firmware, detailed steps are found in the documentation
- mobile phone camera (iPhone 12) was used for ~90 % of the data
Steps to Reproduce
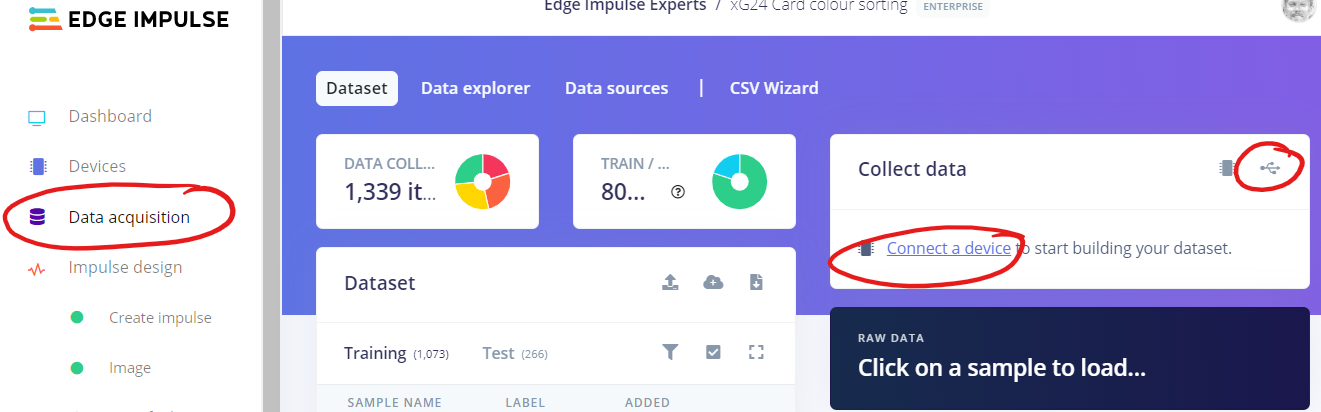
- Collecting data with Edge Impulse is extremely easy with supported devices
- You can either use the CLI (Command-Line Interface), or like I did, use Studio by choosing
Connect a devicefrom theData acquisitionmenu when using e.g. a mobile phone. - For details about how to use a mobile phone, please see the documentation.
- You can either use the CLI (Command-Line Interface), or like I did, use Studio by choosing
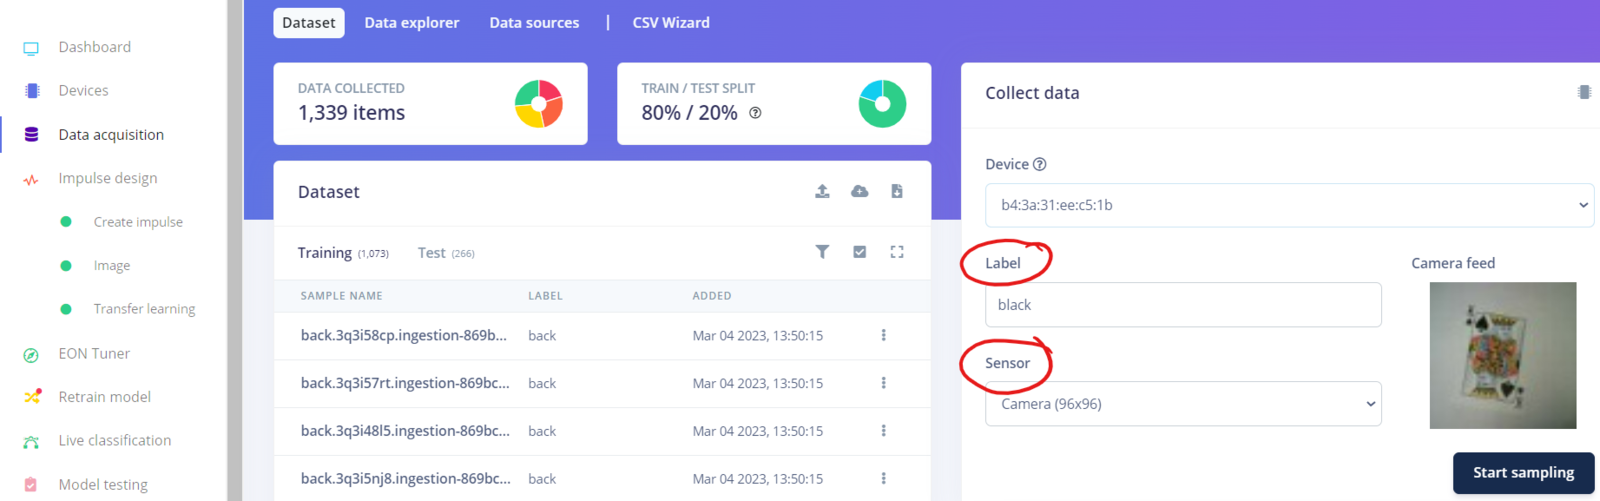
- When connecting directly to a development board, you instead choose
Connect using WebUSB. Depending on the board, you can choose different sensors, or combination of sensors. In this case, I chose to use 96x96 as image size when capturing images with the xG24 board, this to avoid the need of resampling.
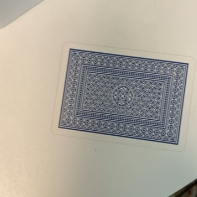
- To improve the accuracy of the model, I varied the illumination between using daylight and artificial light, and also by taking images from various angles and distances. Some of the images are even a bit blurry, but this is probably also making the model more robust. To be able to reuse the same images in part two, I deliberately also placed several cards on top of each other, sometimes with part of the underlying cards being visible.
- As mentioned, the different classes (labels) I used are red cards, black cards, and cards with back side up. In addition, I also collected background and random images without having any card in them.


Building, Training, and Testing the Model
After you’ve collected some data, you need to build and train the model. The main steps in this process are to create an impulse, extract features, and finally train the model. Again, with image classification and when using Edge Impulse, this is often pretty straightforward.Steps to reproduce
In this project I knew beforehand that the 256 kB RAM memory would put some constraints on what model configuration to use. With 512 kB RAM I’d been able to use MobileNetV2 and 96x96 image size, and with 1M or more RAM I’d even been able to use MobileNetV2 and 160x160 image size. On the other hand, even if more memory can be beneficial, larger image sizes typically leads to longer inferencing times on the same device.- Creating an impulse
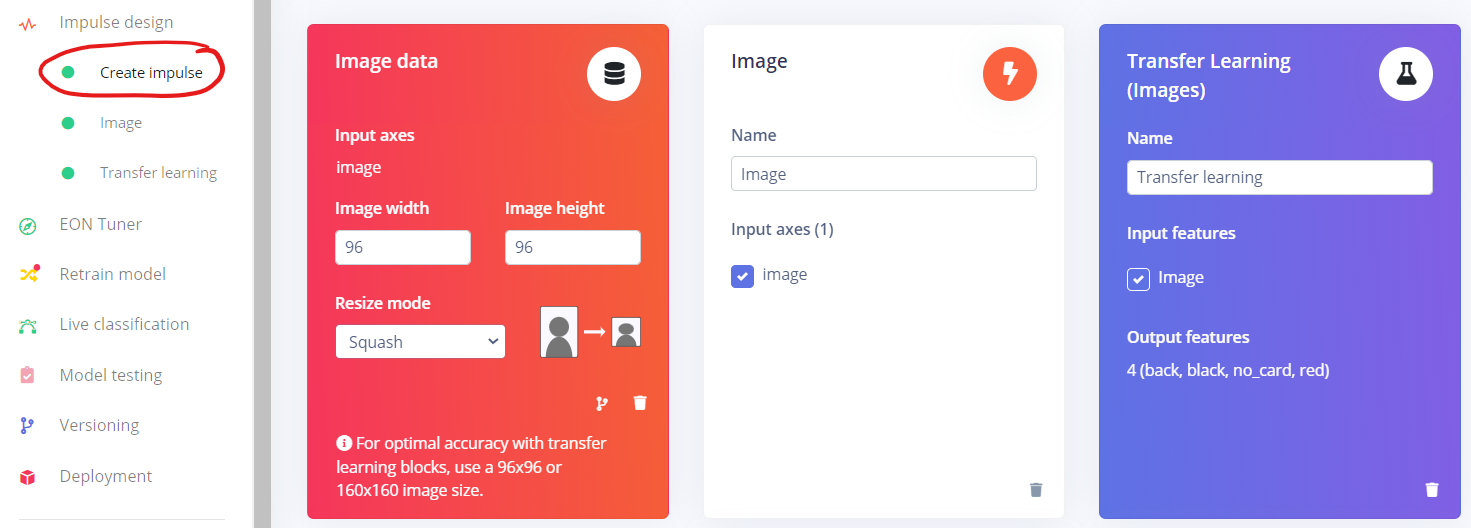
- Based on general recommendations, I chose to start with an image size of 96x96 pixels. I also chose to use
SquashasResize modeto not lose any data because of cropping. It might not actually have mattered in the end in this case, but as I used two completely different cameras (Arducam & mobile phone), having different aspect ratios, I wanted to avoid images from one camera being cropped where images from the other camera perhaps were not cropped similarly. - Unless you have specific needs, it is best to use
ÌmageasProcessing blockandTransfer Learning (Images)asLearning block. Transfer learning means that you’ll use a pre-trained image classification model on your data with only some fine-tuning. This generally leads to good performance even with relatively small image datasets.
- Based on general recommendations, I chose to start with an image size of 96x96 pixels. I also chose to use
- Next step is to extract features
- For images you can choose between color or grayscale images. Whenever possible you should aim to use grayscale images as they consume much less memory and also can be processed much faster than colour images. In this project however, I chose to use RGB (colour) images as red and black look quite similar in grayscale, and the ML model might struggle to differentiate between them.
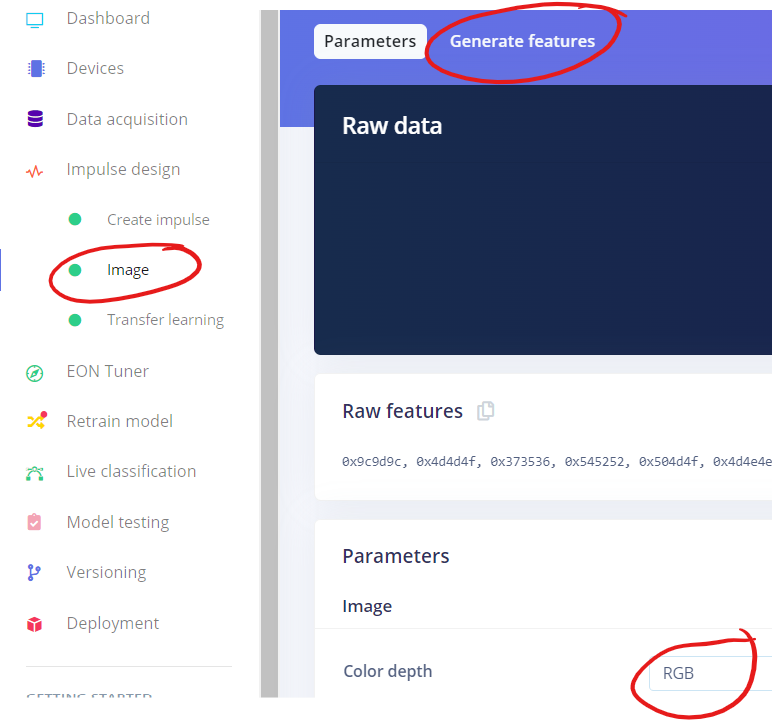
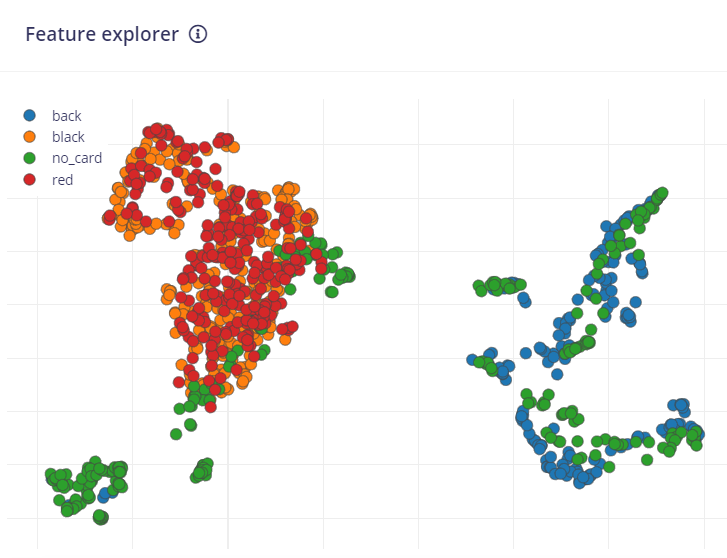
- Click on ´Generate features`, after a while you’ll see the feature explorer visualizing how similar or dissimilar the classes are.
- Next step is to train the model
- While it generally is best to start with the default settings, I needed to switch to MobileNetV1 instead of MobileNetV2 due to the memory constraints. MobileNetV2 can be used with 256 kB RAM, but then you need to reduce from 96x96 to e.g. 64x64 pixels. I’d tried this, but the results were not good.
- I discovered that changing the final layer to use 32 neurons, and the dropout rate to 0.01 worked well for this project.
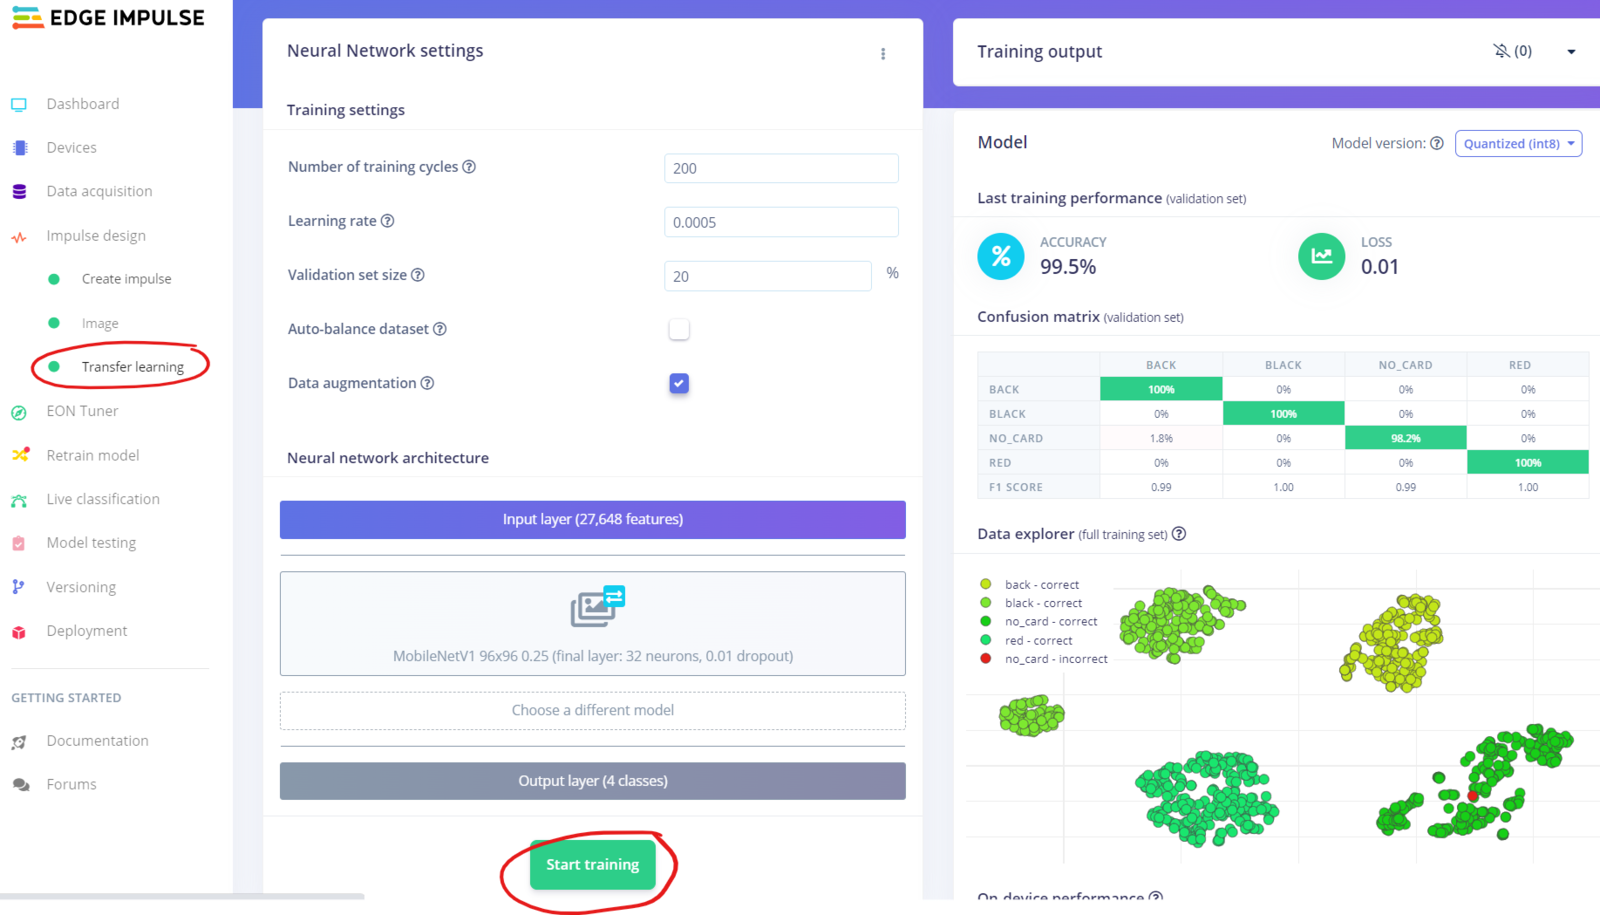
- Click on
Start trainingwhen you are ready to train the model- Depending on the number of images and training cycles, this step might take some time. Once it is ready you can see the performance in the graphs on the right.
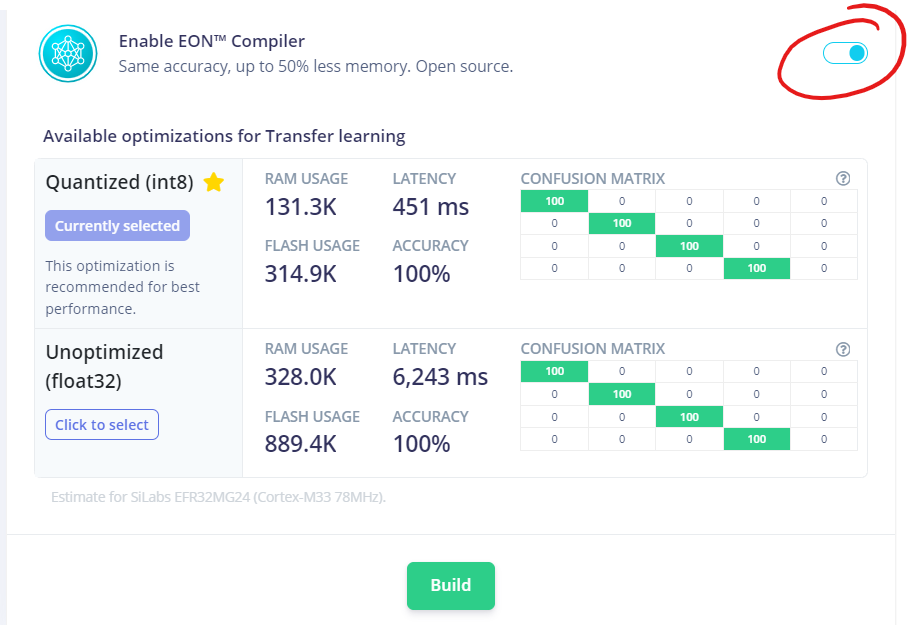
- Apart from when using “real” computers (e.g. Raspberry PI, Jetson Nano, etc.), you should only consider using quantized (int8) models as unoptimized (float32) models consumes much more memory and inferencing will be many times slower.
- In the bottom right corner you’ll see an estimation of the on-device performance. Use this to validate if the performance is acceptable for your use case, or if you need to rethink your model - or perhaps even change device - to accomplish your goals.
- To speed up the search for an optimal ML model, you should take a look at the EON Tuner as well!

Testing the Model
Before deploying the model to the device itself, you should check how well it works on data it has not seen before. This is where the 20 % test data that was put aside comes into play. If the model performs poorly on test data, you can expect real performance to be even worse. But even a 100 % accuracy on test data does not guarantee success in real life, so don’t open the champagne bottle yet :-). If the training performance is very good, but the test performance is poor, the reason might be that your model is overfitting on the training data. In that case you might need to collect more data, change the model or reduce its complexity. Now would be a good time to try the EON Tuner mentioned earlier.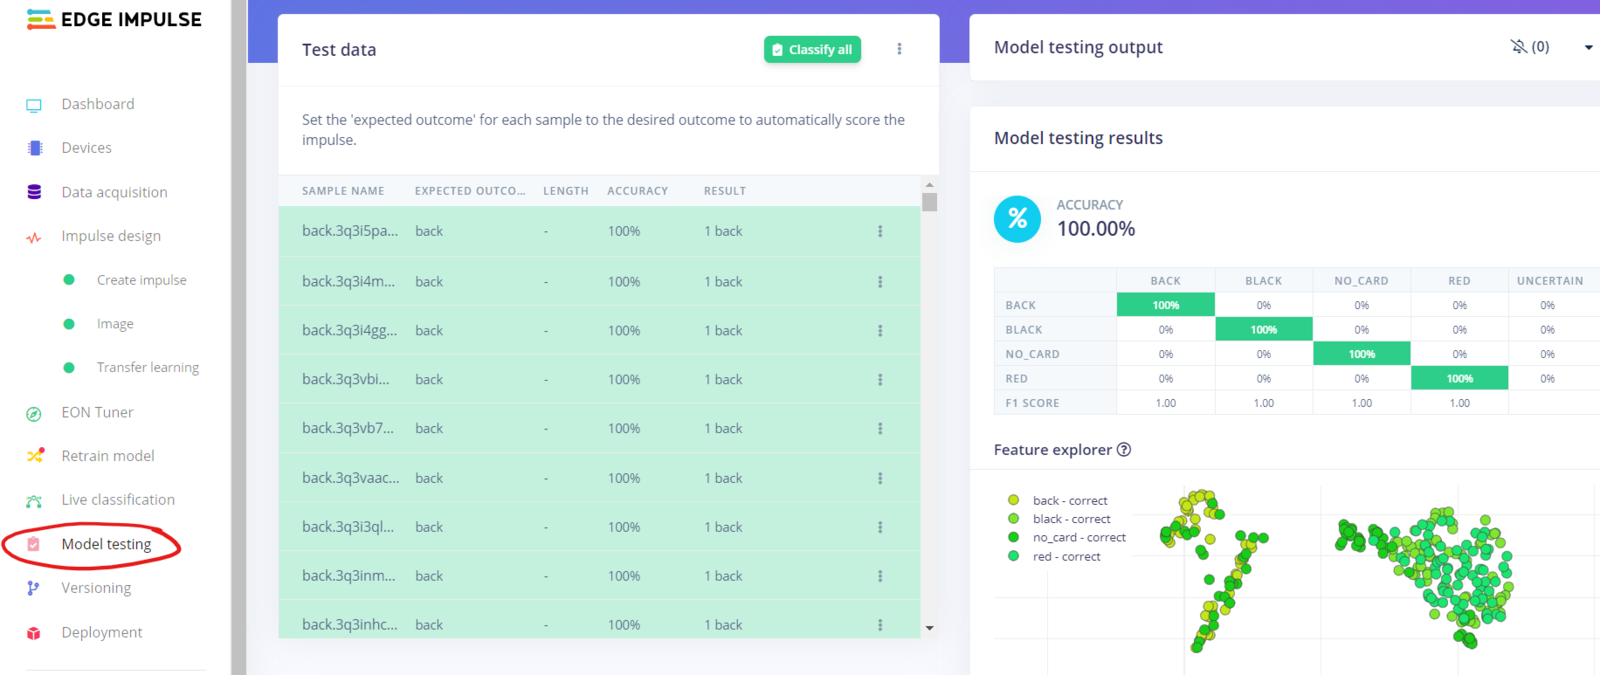

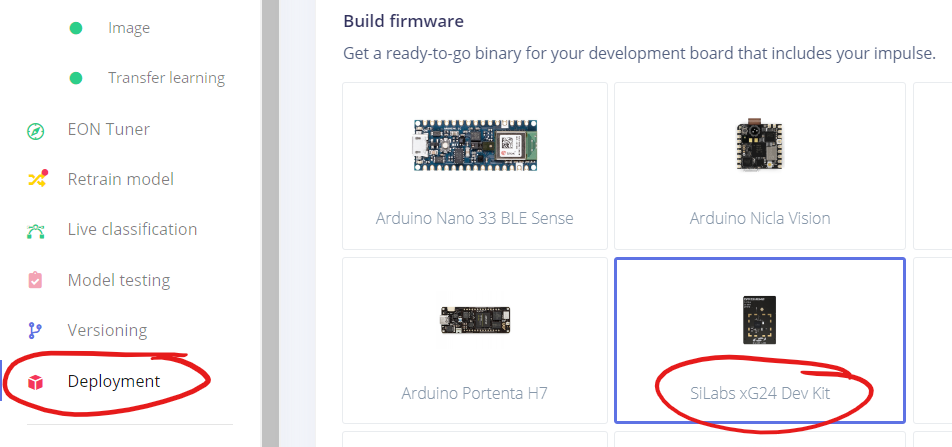
Model Deployment
When deploying the model to the xG24 device, you can choose between deploying a Simplicity Studio Component, or a firmware binary. Deploying as a Simplicity Studio Component means you’ll have to use an external tool to compile a C++ program yourself, but on the other hand it provides you with many more options and features.- In this project, I chose to deploy as a firmware binary.
- To reduce the memory footprint, it is recommended to enable the EON Compiler.
- Once ready, click on
Buildto create the files to be deployed. - After a few minutes the build process is complete, and instructions for flashing the firmware is shown. Follow the instructions to flash using the same Simplicity Commander you used earlier.
Results
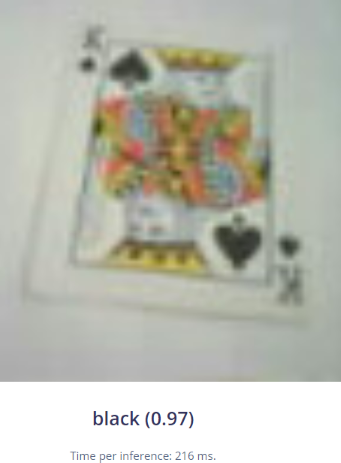
- When using the CLI for an image classification project, I recommend you use
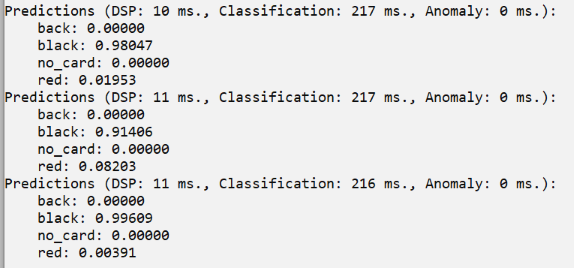
edge-impulse-run-impulse --debugas you can see a live picture and the inferencing result in a web browser. Note that this is the same picture as is used for inferencing, in this case 96x96 pixels which explains the pixelation and unsharpness. - In addition you’ll also see results as a running log