Introduction
In industrial settings, workers often find themselves unable to operate machinery manually due to concurrent tasks demanding the use of their hands. Machine Learning (ML) has emerged as a transformative solution, enabling compact devices to comprehend and respond to vocal instructions, thereby initiating or halting machines as needed. In the context of this project, we will leverage the Edge Impulse platform to train a customized ML model. Subsequently, we will deploy this model onto a Particle Photon 2 microcontroller board. The Photon 2 board will be connected to a PDA microphone and a Relay module, creating an integrated system for practical demonstration.Prerequisites
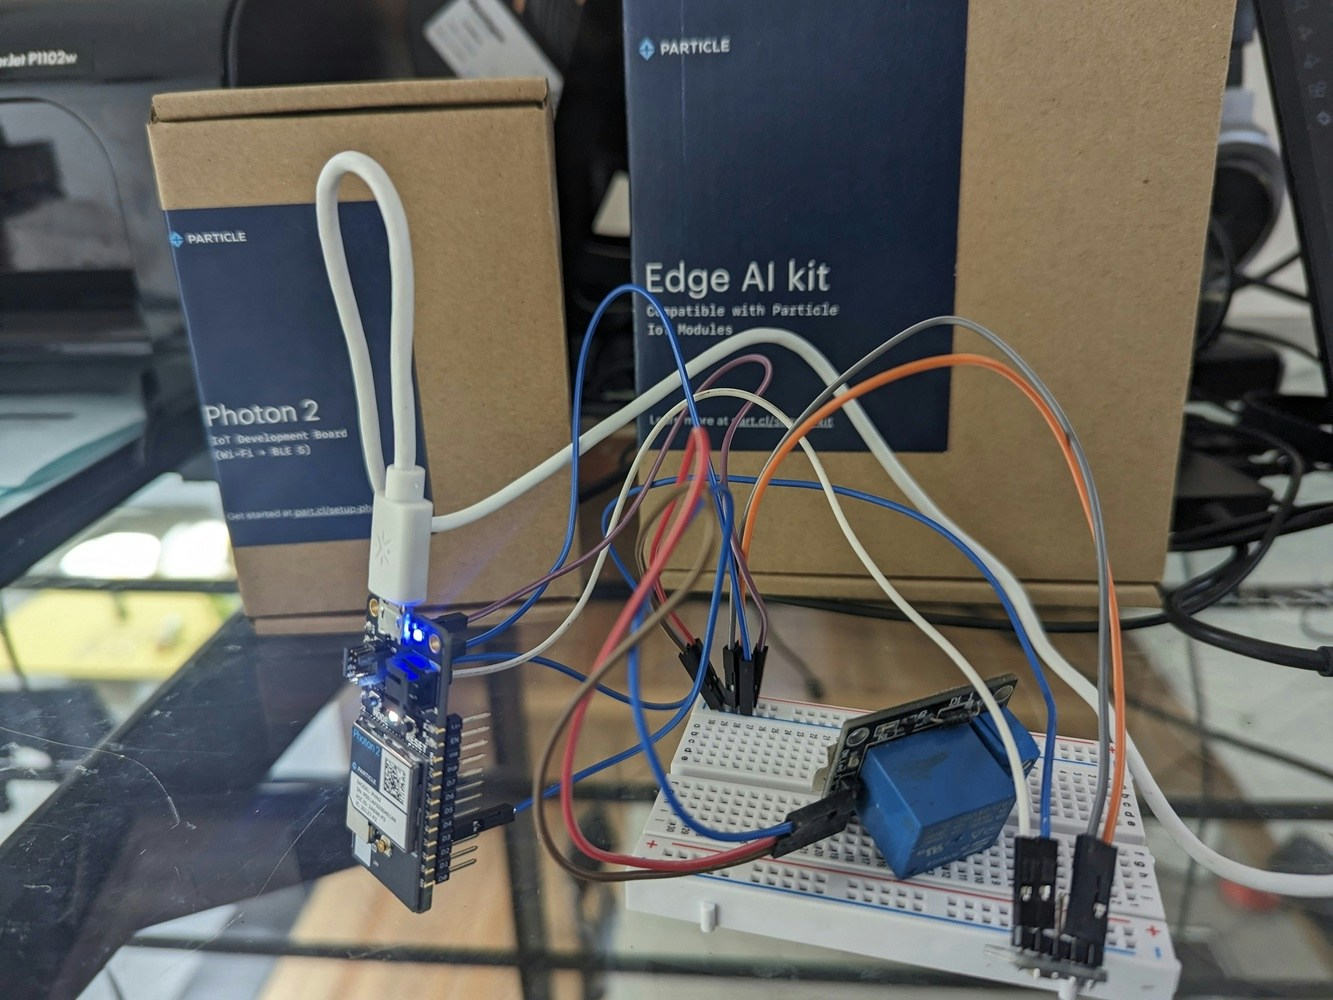
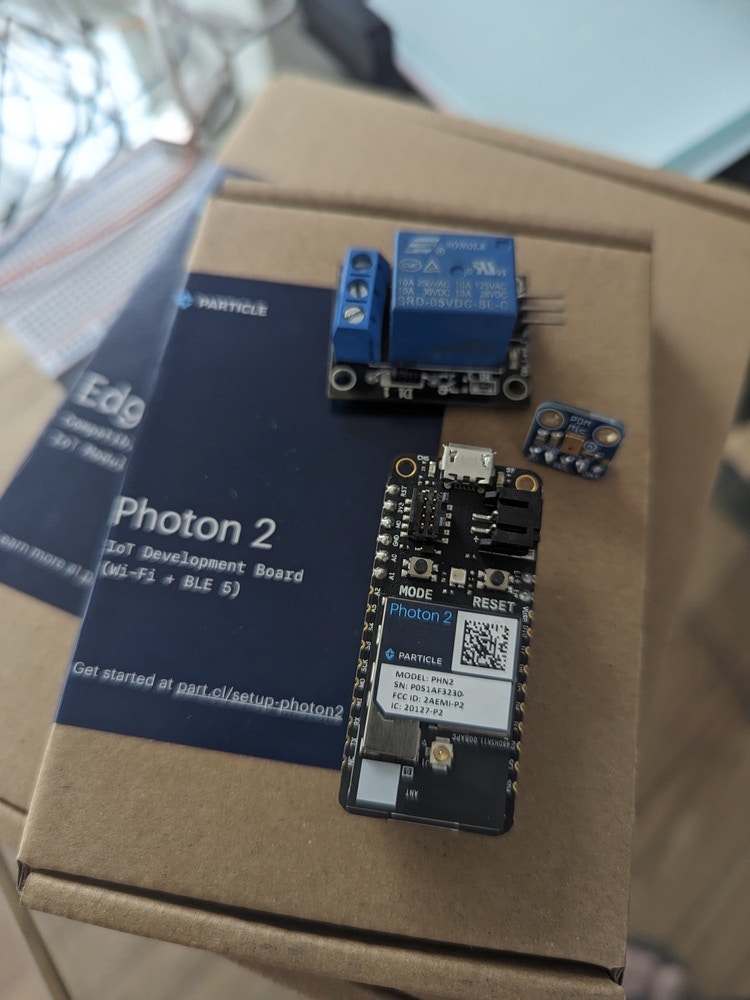
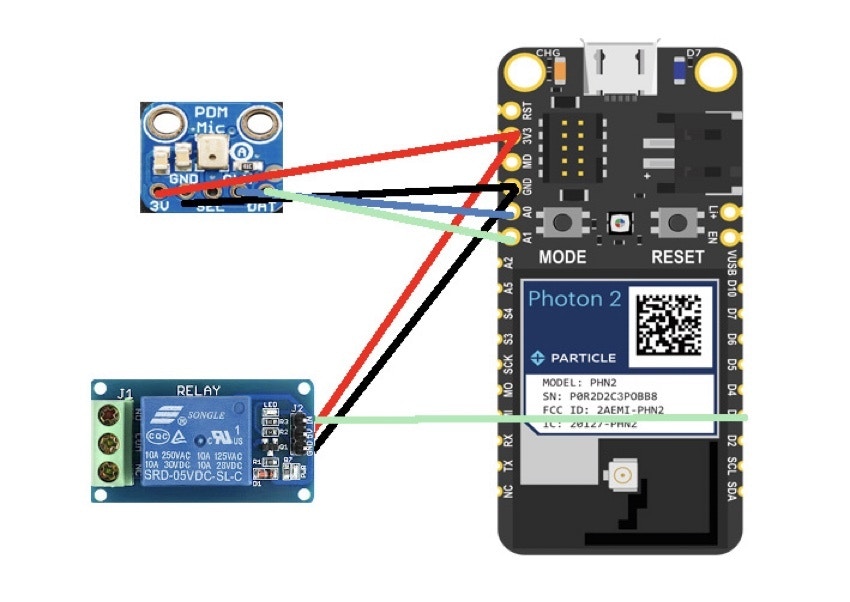
The Photon 2 is an interesting, high quality board made by Particle. It has 5 GHz WiFi and Bluetooth (BLE) 5, an ARM Cortex-M33 CPU running at 200 MHz, 2 MB of storage for user applications, 3 MB of RAM available to user applications, and a 2 MB flash file system. The board size is 1.5 x 0.78 inches (5 x 2cm) and it comes with pre-soldered, labeled male headers. It also has 2 buttons (Reset and Mode), one RGB led, a LIPO charger with a JST-PH port, and a 10-pin micro JTAG connector for SWD (Serial Wire Debug). Besides the Photon 2 board, the Edge ML Kit is required for this project, which includes a W18340-A PDA MEMs microphone by Adafruit. The Edge AI Kit also includes jumper wires, a protoboard, PIR sensor, distance sensor, LED, switches, resistors, vibration sensor, accelerometer, and loudness sensor for many other AI projects. The Relay module is not included, but it is a cheap common device that can be ordered online from many electronic stores.Circuit
The PDA MIC comes without header pins soldered, so we need to solder 5 headers and discard the sixth one (if using a 6-pin header as I’ve done here). After that we will connect the PDA mic to the board using jumper cables.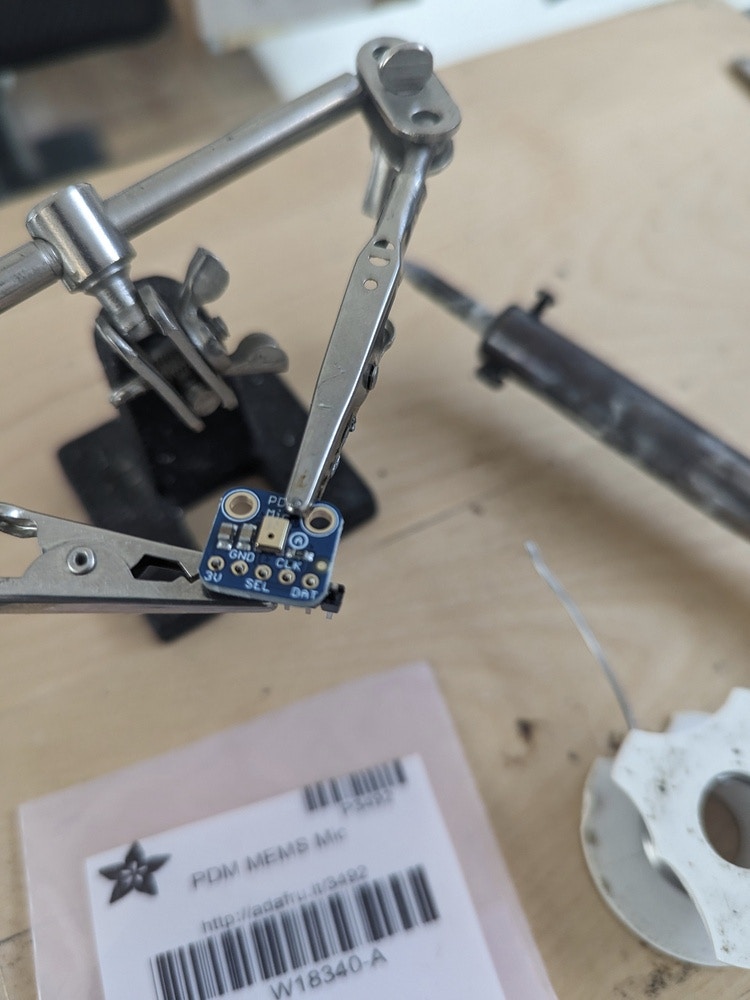
- PDA GND to Photon 2 GND
- PDA 3v to Photon 2 3v3
- PDA CLK to Photon 2 A0
- PDA DAT to Photon 2 A1
- The PDA Mic SEL pin is not used for this scenario.
- Relay GND to Photon 2 GND
- Relay VCC to Photon 2 VCC
- Relay Signal to Photon 2 D3
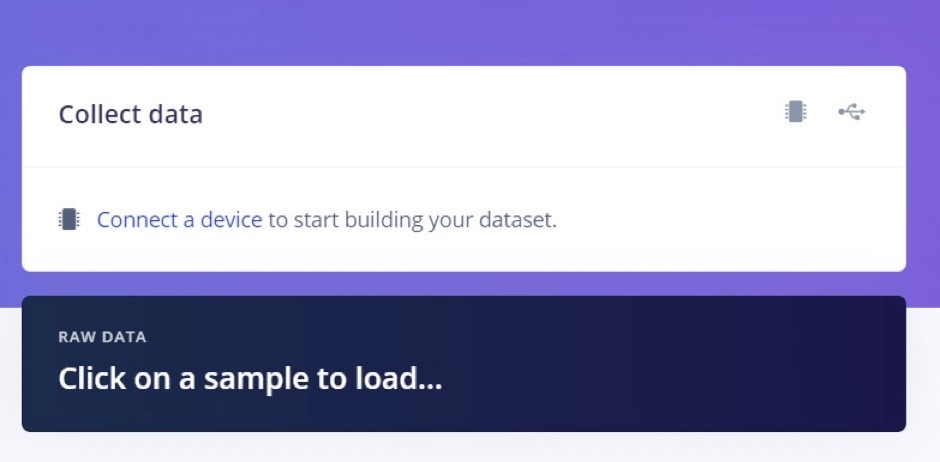
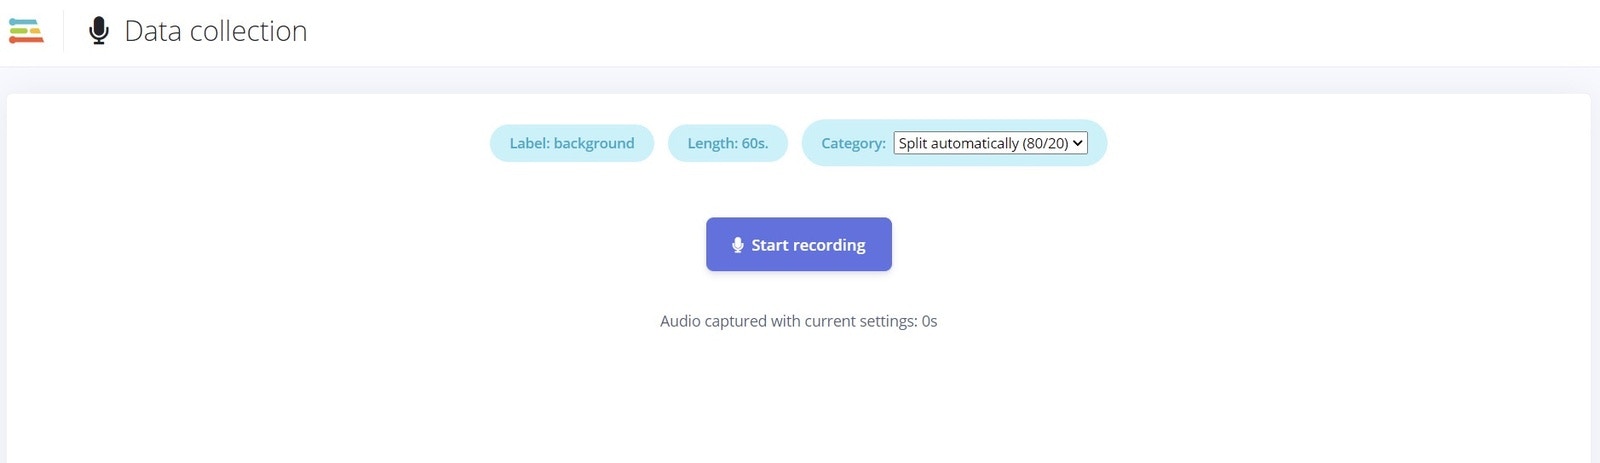
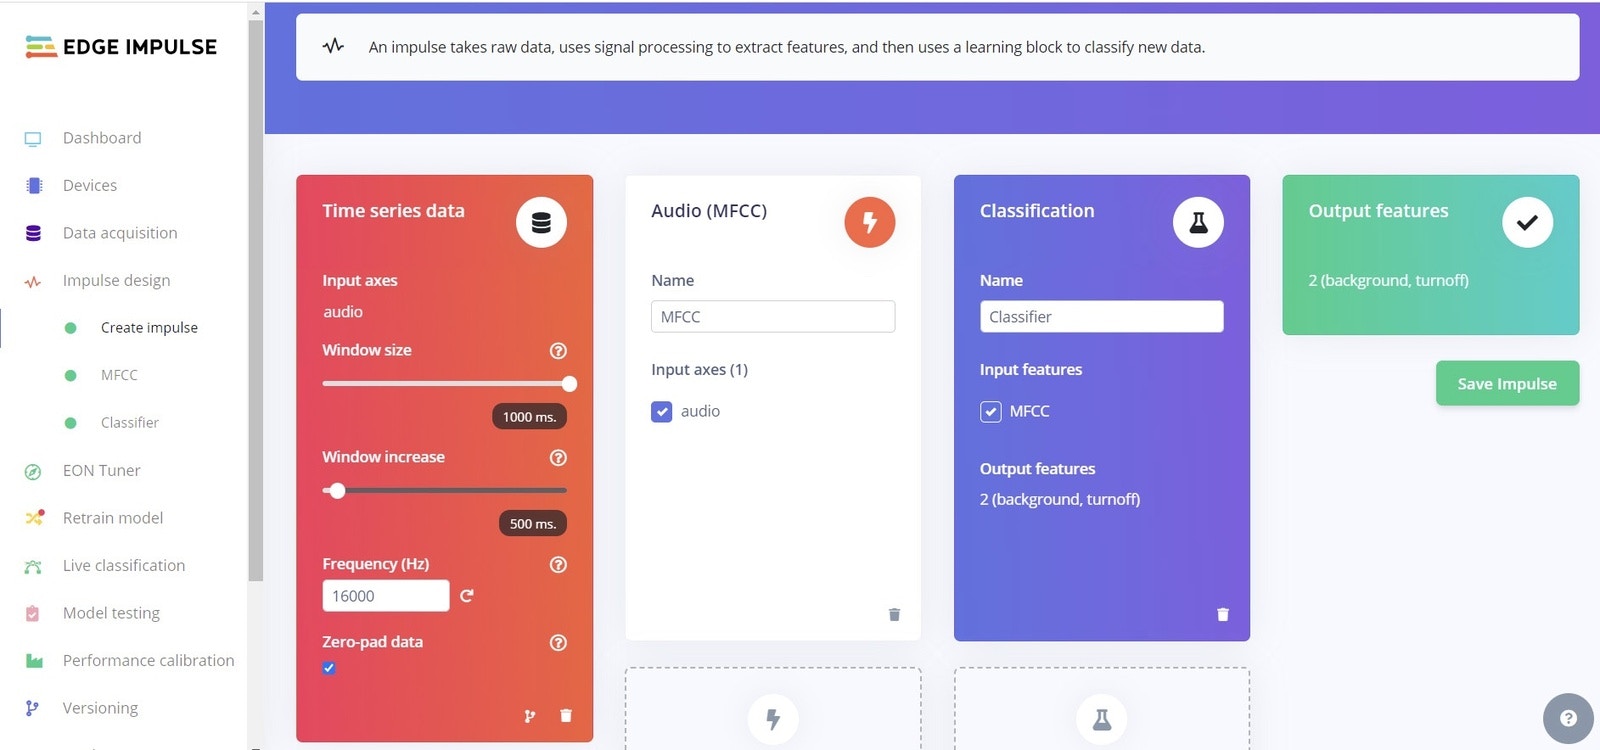
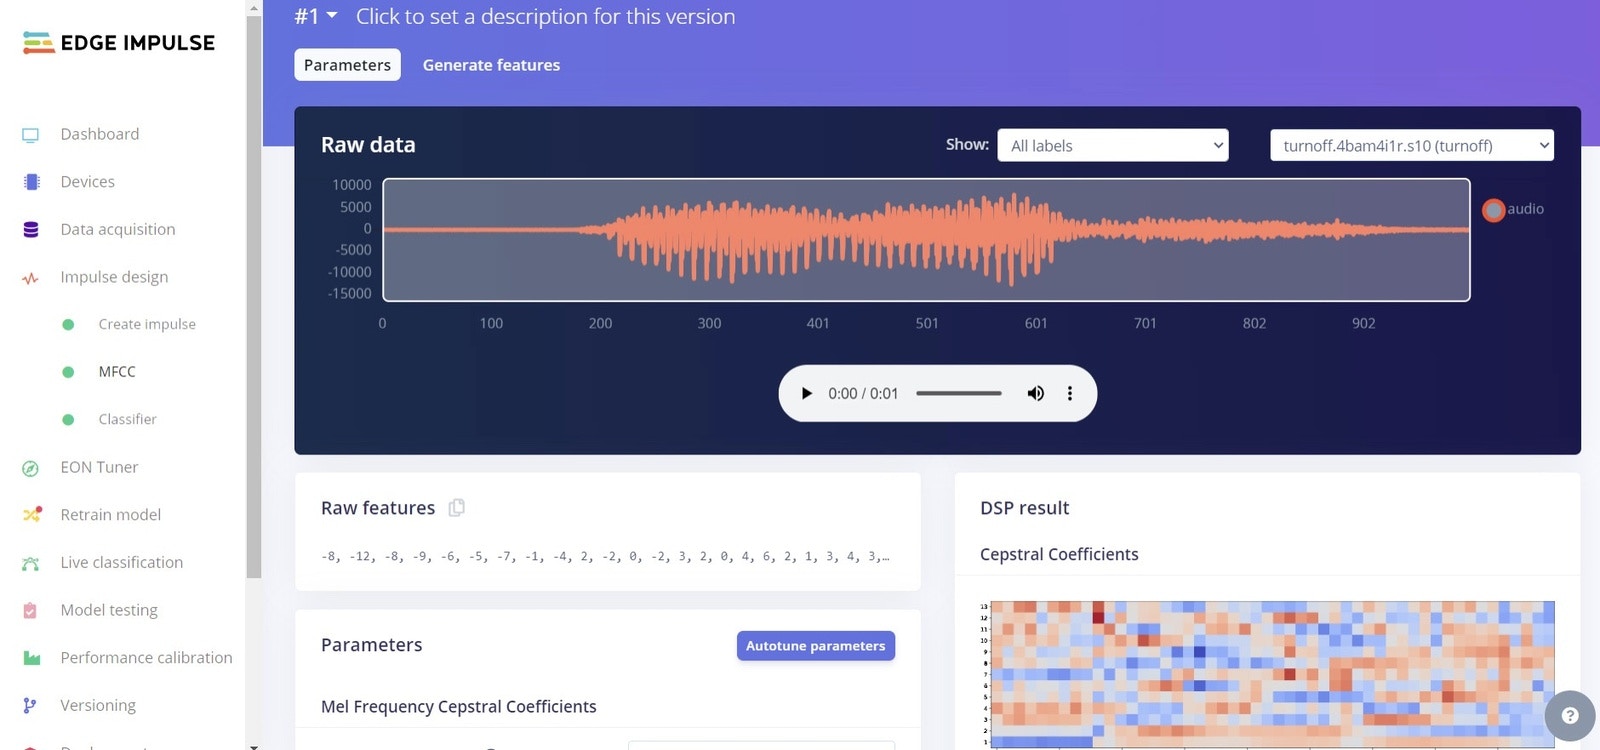
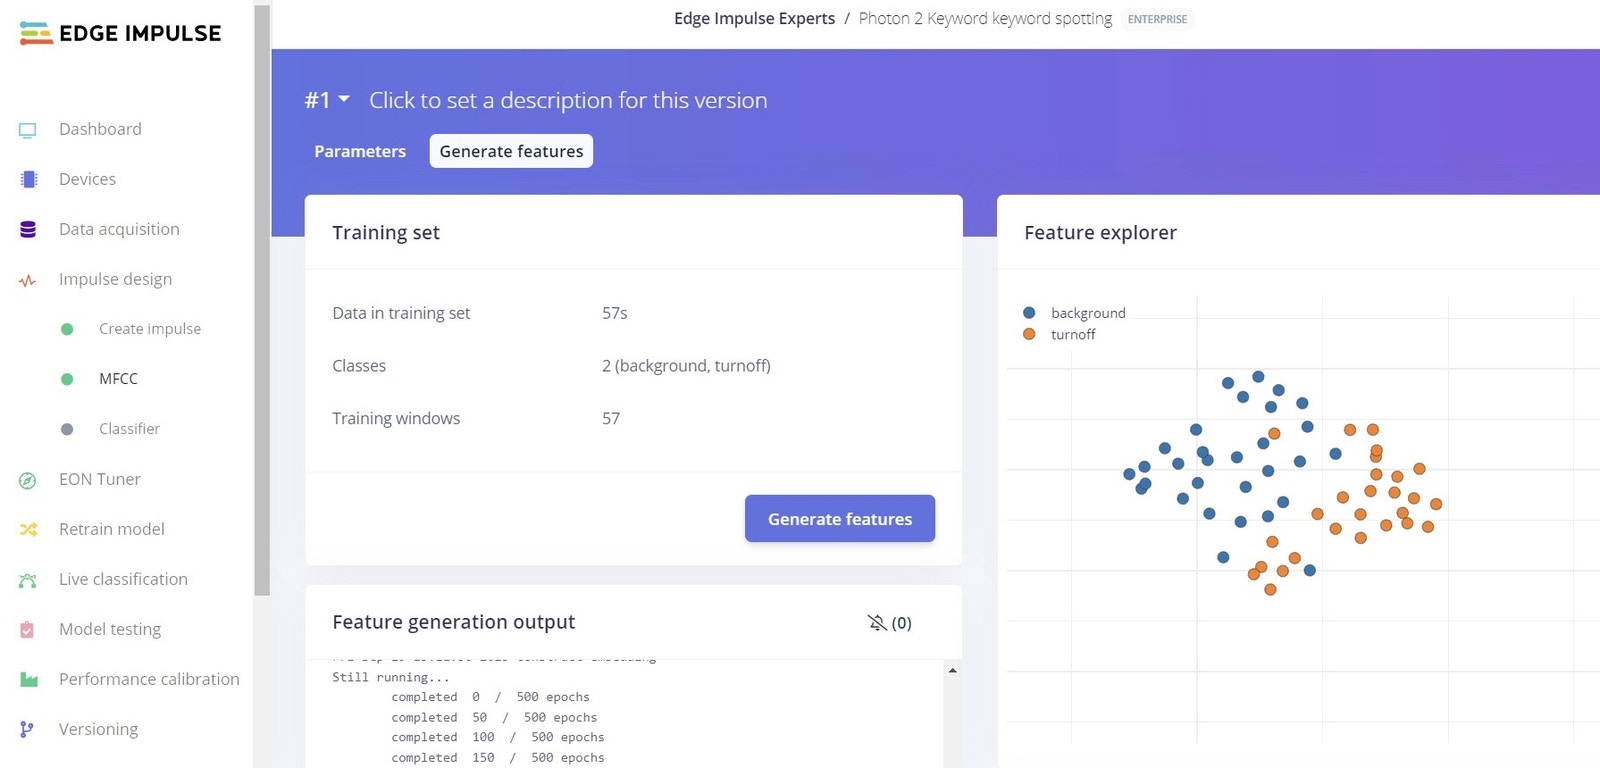
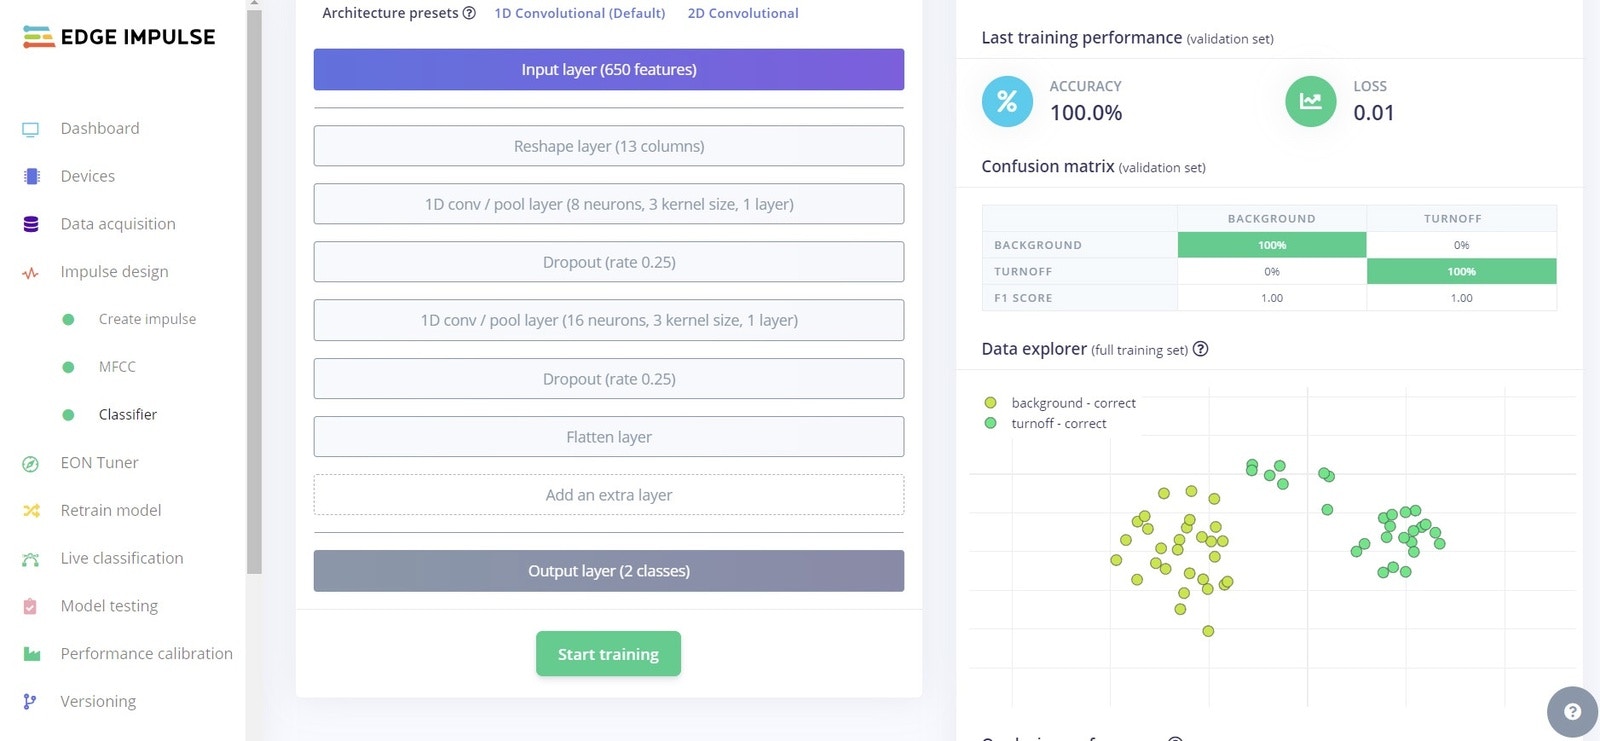
Data Acquisition and Model Training
We will create an account at Edge Impulse, then login and create a new project.
Visual Studio Code
The main difference about working with the Photon 2 is that the Arduino IDE is not used to upload the code and libraries. Instead, Microsoft Visual Studio Code is used, and there are several setup steps to carefully follow.Windows Installation
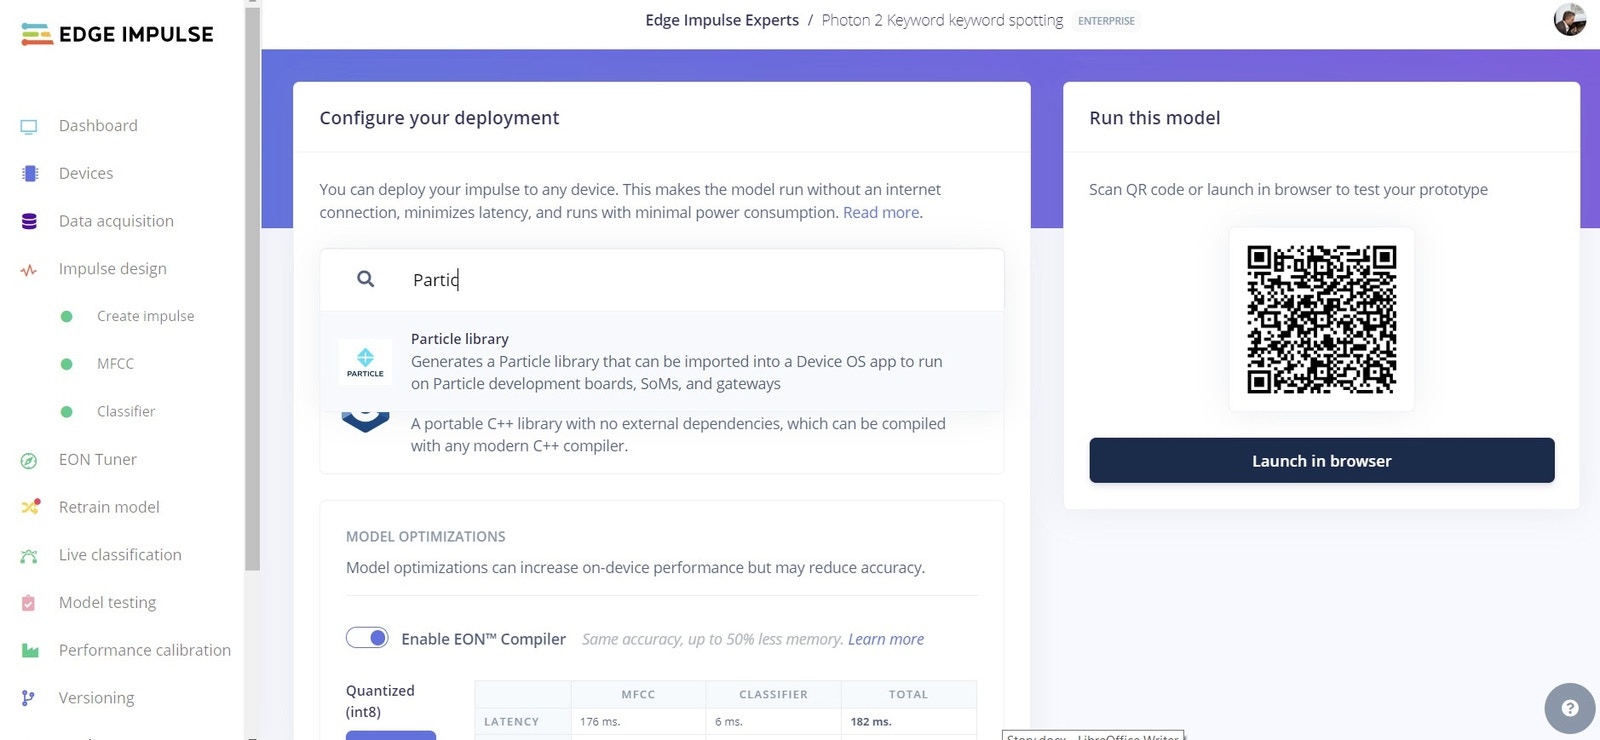
Install Microsoft Visual Studio Code, then add the Particle Workbench extension. Unzip the Particle library exported from Edge Impulse Studio. In VS Code, press Ctrl+Shift+P to bring up the Particle menu and select the “Particle: Import Project” feature to choose the library. The first time, VSCode will download dependencies.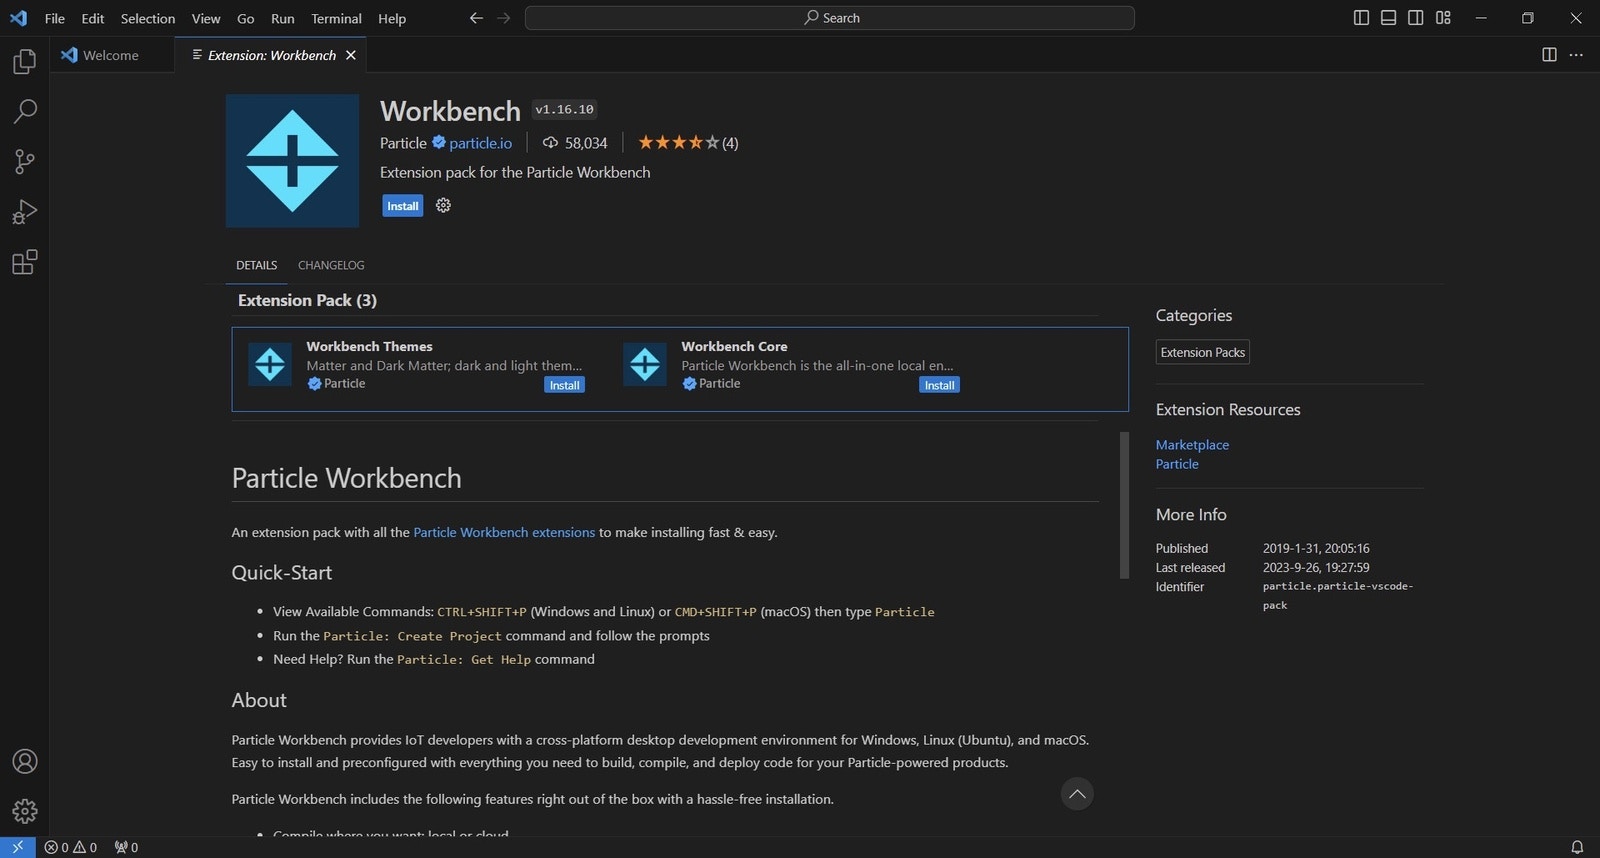
project.properties and select “Yes, I trust confirmation”.
The src/main.cpp code included in the zip file detects the trained keyword, and prints predictions over serial console. So we need to add some code to control the Relay.
We will open src/main.cpp and add the following:
Note: you can also download the main.cpp file from https://github.com/ronibandini/Photon2VoiceCommand to make sure you have everything entered correctly.
Now press Ctrl+Shift+P to bring up the Particle menu again, and this time select “Particle: Configure Project for Device”. Select deviceOS@5.5.0, board P2, and ESC for device name.
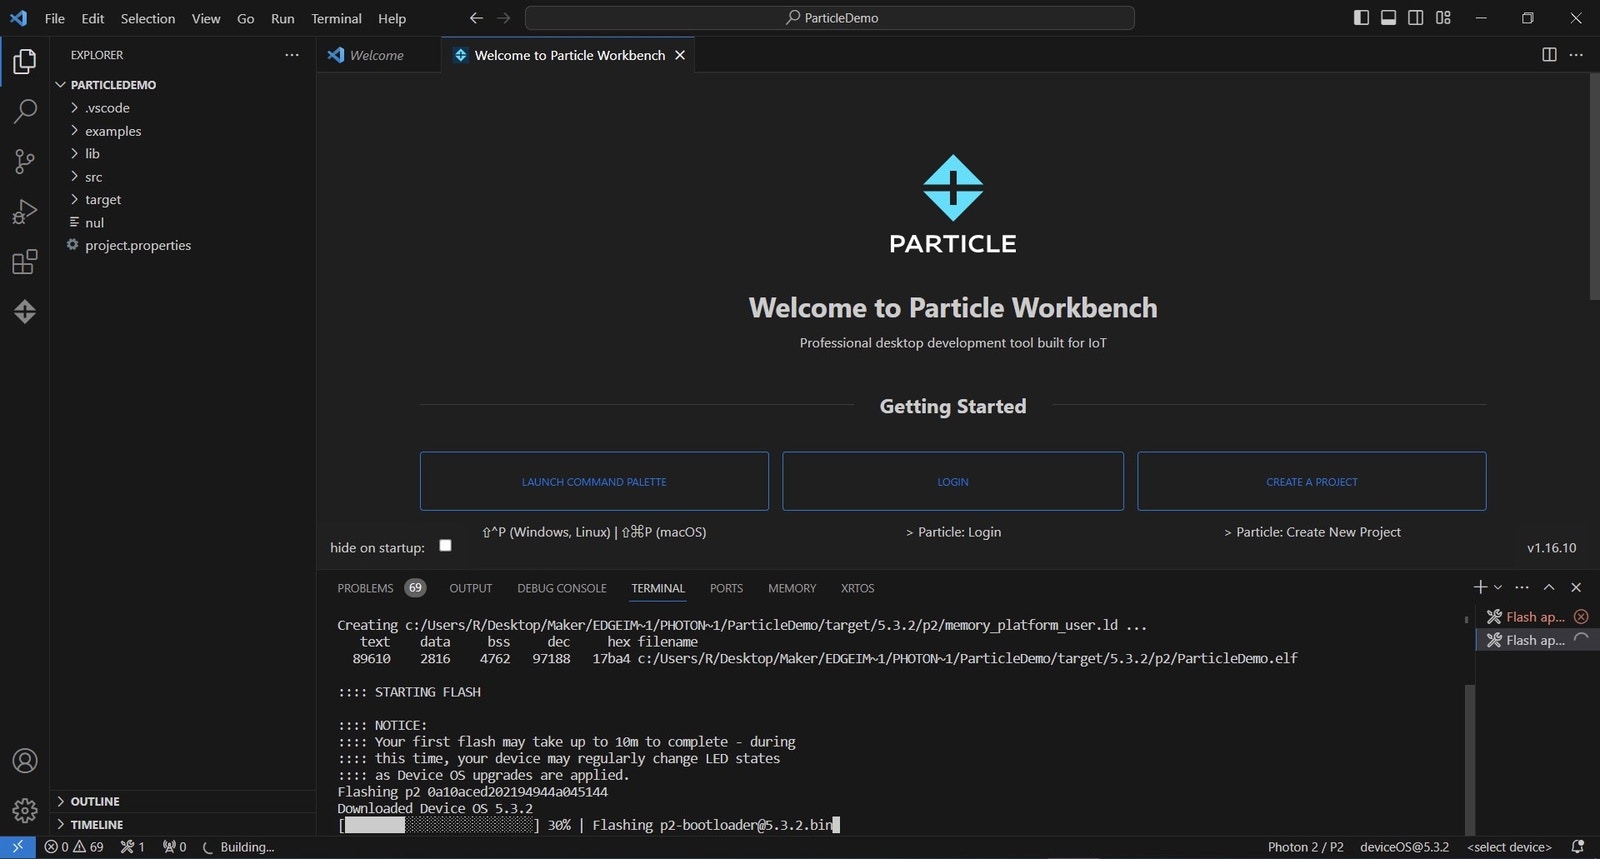
Note: if you get a Microphone library not found, press Ctrl+Shift+P, install the ‘Microphone_PDM@0.0.2’ library.Finally, bring up the Particle menu again with Ctrl+Shift+P and select “Particle: Flash application and device, local” (For Windows, it will take around 5 minutes to flash).
- https://docs.particle.io/firmware/best-practices/firmware-build-options/#using-buildpack
- https://docs.docker.com/desktop/install/windows-install/
main.cpp modifications were made following the work done by Particle for this example https://docs.particle.io/getting-started/machine-learning/youre-muted
Linux (Ubuntu) Installation
- Install a lightweight Ubuntu, such as Lubuntu
- Install VSCode
- Open a Terminal window and execute:
sudo apt-get install libarchive-zip-perl(this step is to avoid an error where crc32 tool is not found) - Click Ctrl+P: Extension Install and locate and install
particle.particle-vscode-packand press Enter. - Login with Particle credentials
- Create a Project
- Import the unzipped folder. Accept “Trust all”
- Now click Ctrl+Shift+P, choose “Particle: Configure Project for Device”, and choose deviceOS@5.3.2, board P2
- Bring up the Particle menu again with Ctrl+Shift+P and choose “Particle: Flash Application and Device, local”
Demo Video
Conclusion
Machine Learning not only facilitates the recognition of voice commands but also empowers the identification of distinct machine-generated sounds, enabling automatic shutdown in response to specific malfunction indicators. This functionality proves invaluable in enhancing operational safety and efficiency within industrial environments. Moreover, the compact form factor and cost-effectiveness of boards like the Particle Photon 2, coupled with their ability to manage external devices, render them an enticing augmentation for various industries. They offer a gateway to harnessing the potential of ML-powered automation within diverse manufacturing settings.Contact
https://www.instagram.com/ronibandini https://twitter.com/RoniBandini https://bandini.medium.com