Overview
Falls are a major health concern for older people. The number of fall-related deaths increased significantly in recent years, of which around 80% of the involved persons are age 65 or older. Falls can result in physical and psychological trauma, especially for the elderly. To improve the quality of life of our seniors this project presents the development of a fall-detection wearable device. The main aim of this project is to showcase a working demo of an edge AI device that uses a Transformer-based model.What is a Transformer Model?
A Transformer is a deep learning model that adopts the mechanism of self-attention, differentially weighting the significance of each part of the input data. Self-attention, sometimes called intra-attention is an attention mechanism relating different positions of a single sequence to compute a representation of the sequence. Like recurrent neural networks (RNNs), transformers are designed to process sequential input data with applications for tasks such as translation and text summarization. However, unlike RNNs, transformers process the entire input all at once. ChatGPT, a large language model, also uses Transformer blocks in its architecture. In this project, the Transformer model is applied to time-series data instead of natural language.Hardware Selection
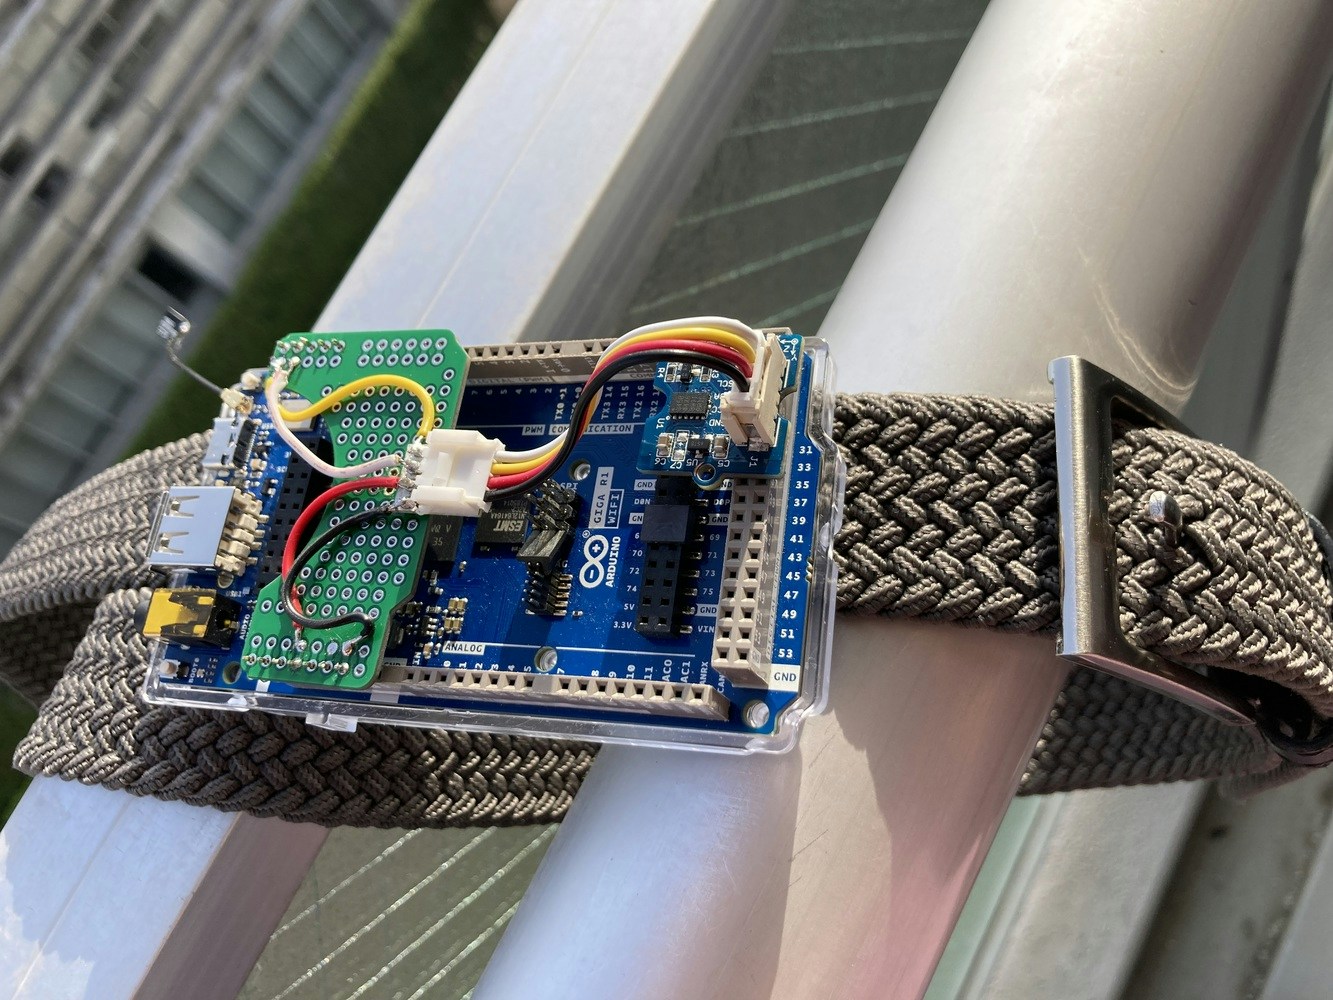
This project requires a low-powered yet capable MCU to run a Transformer model with a reasonable inferencing rate. The Arduino Giga R1 is a good fit for our purpose since it has a powerful MCU with plenty of memory. Also, we will be using the SeeedStudio Grove 3-axis accelerometer (ADXL345) and a proto-board shield to connect the accelerometer firmly to the development board.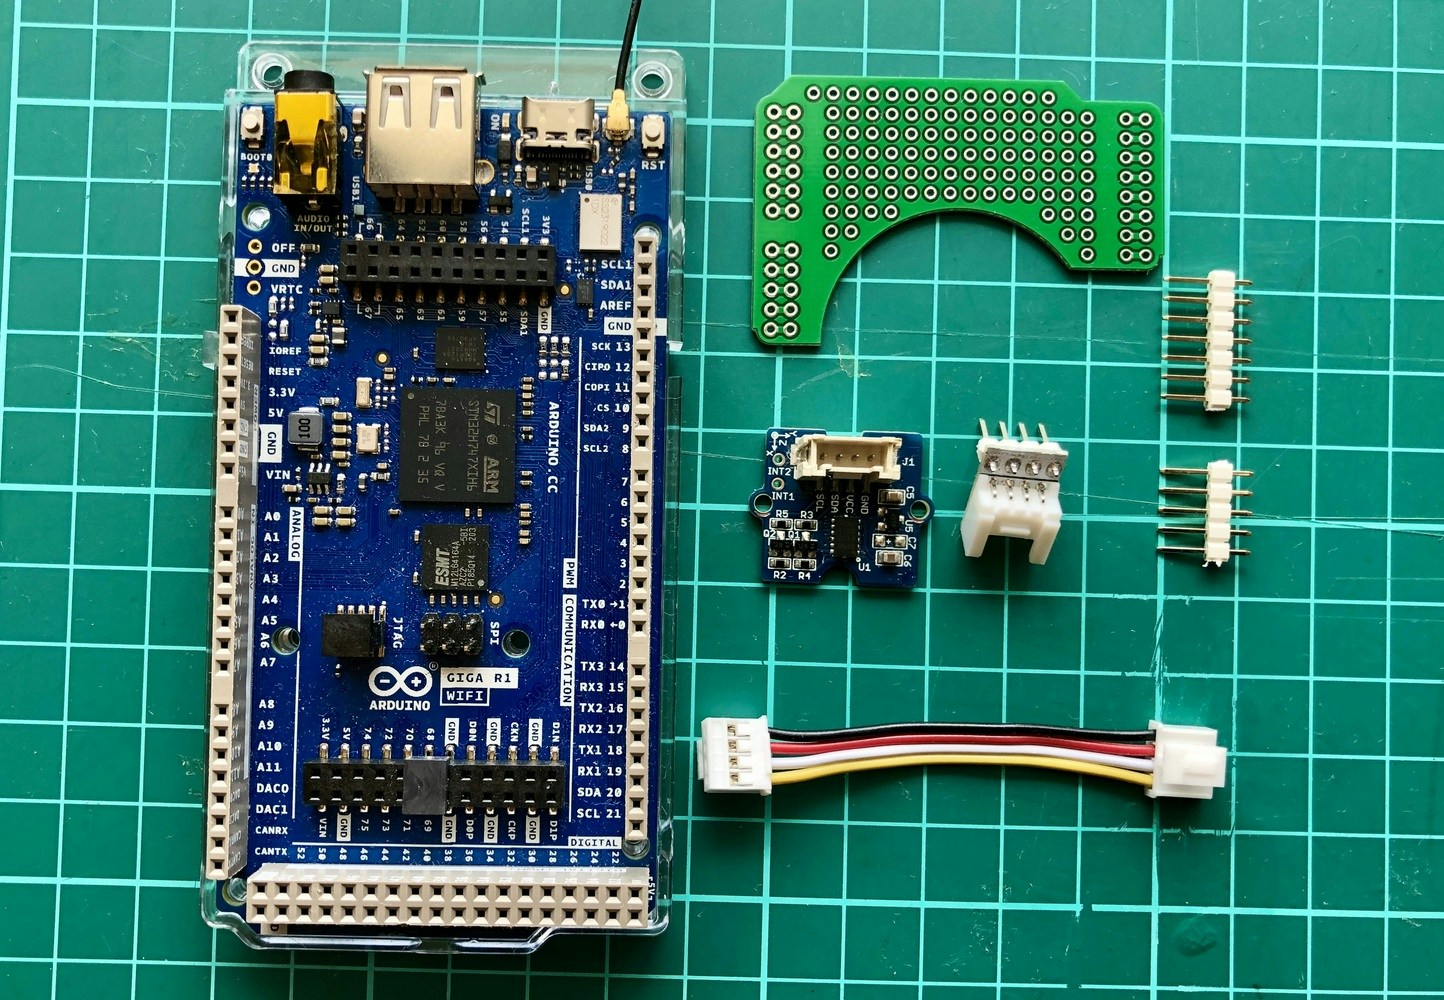
Development Environment
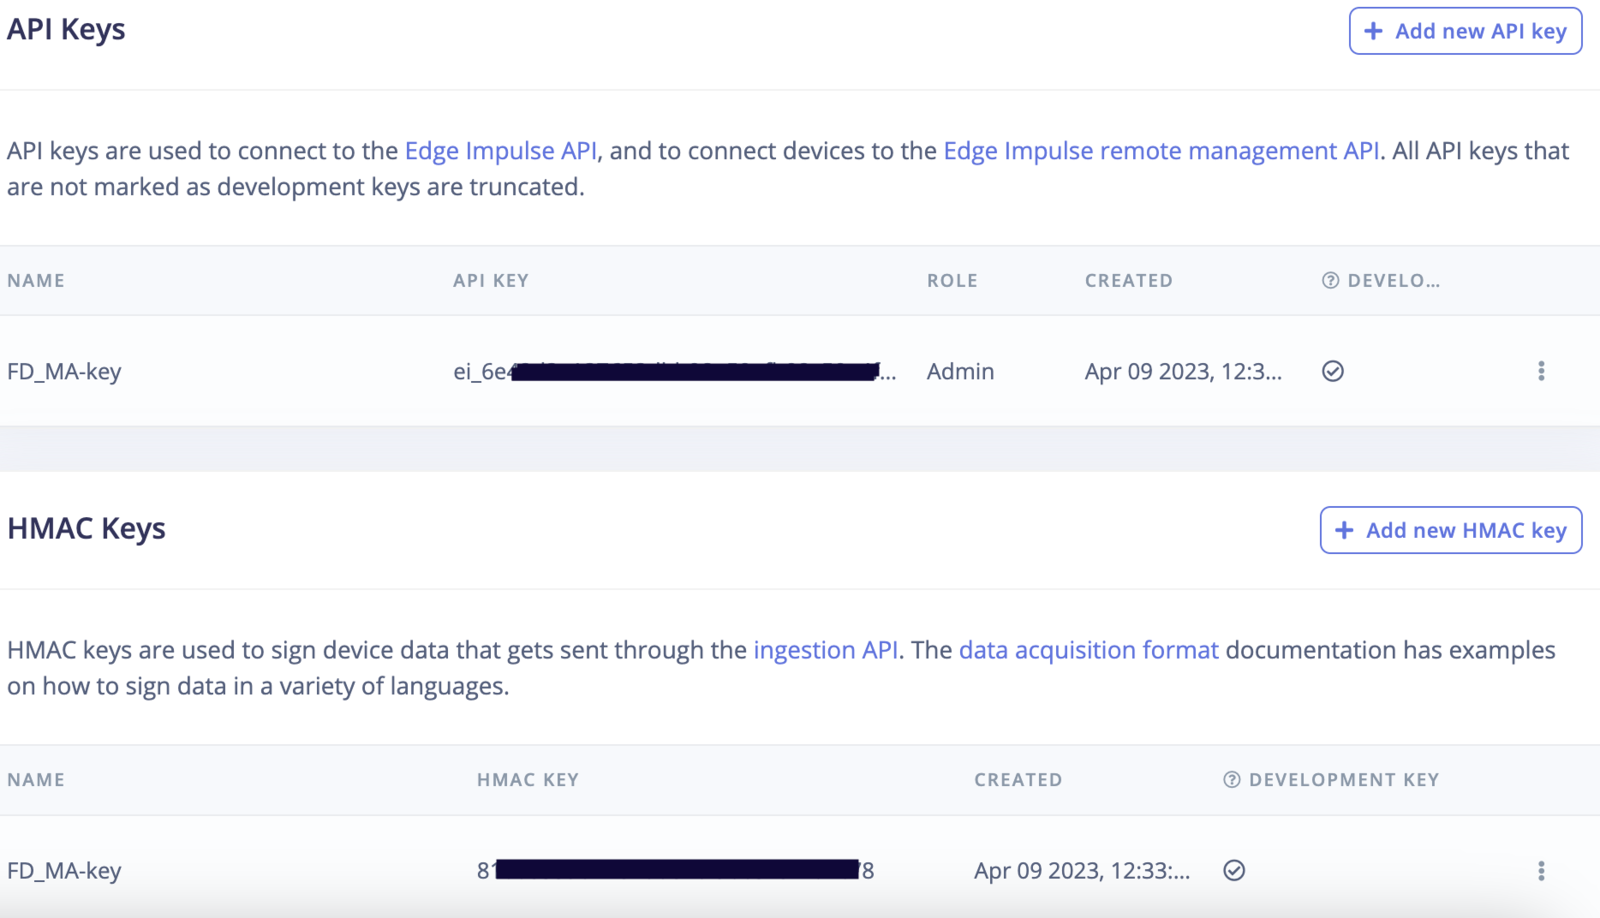
We will be using Edge Impulse Studio for model creation and training. You’ll need to sign up for a free account at https://studio.edgeimpulse.com and create a project to get started.Training Dataset
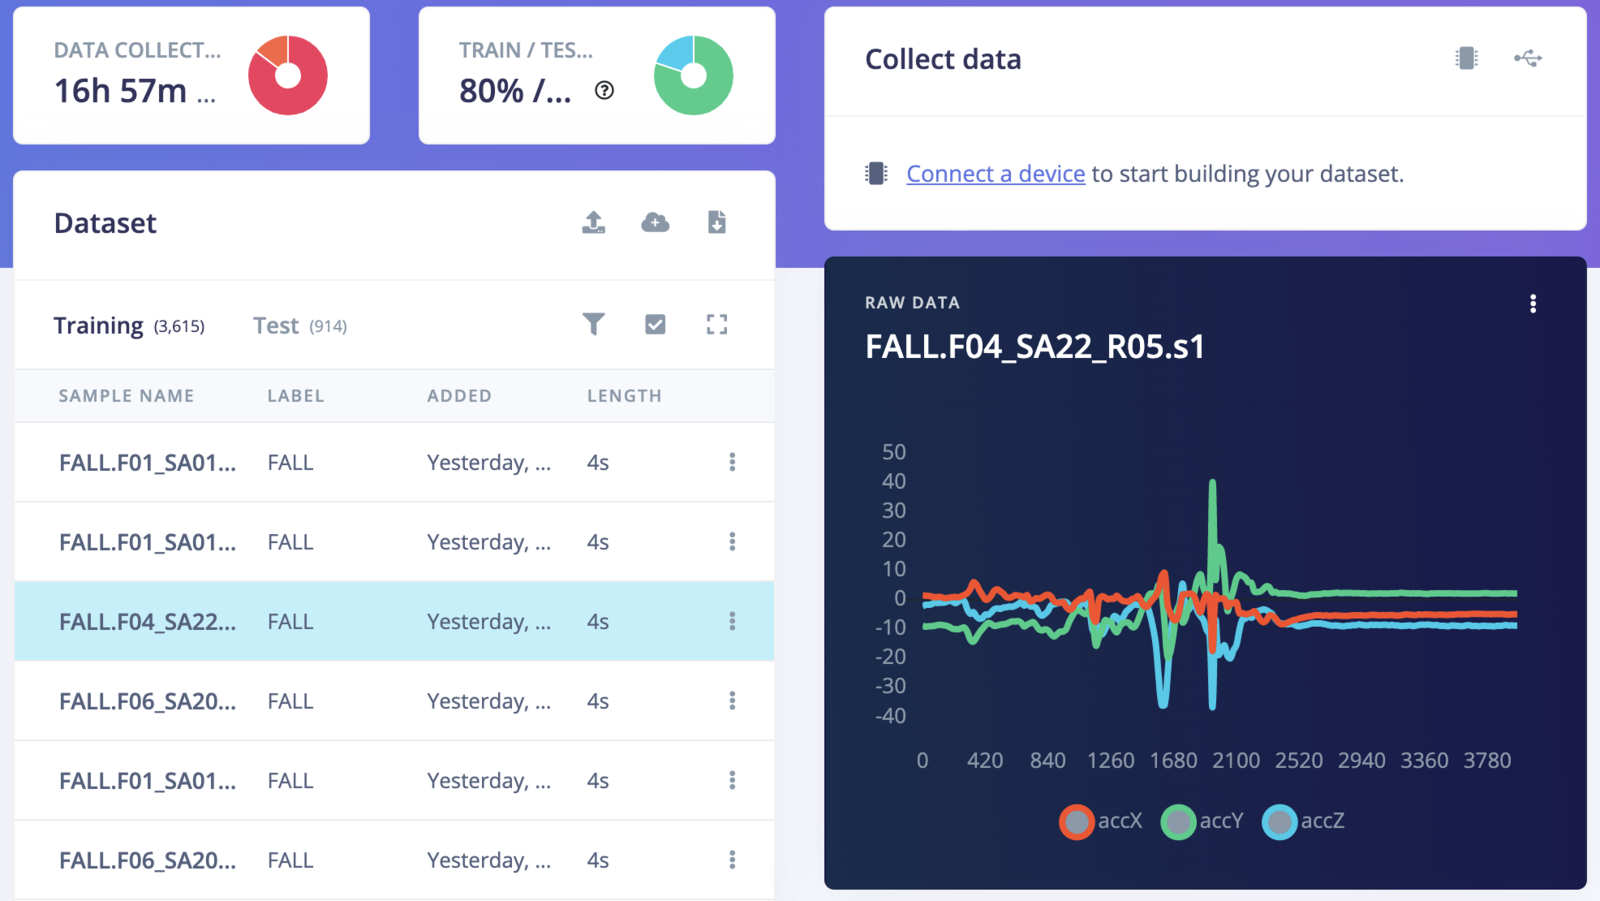
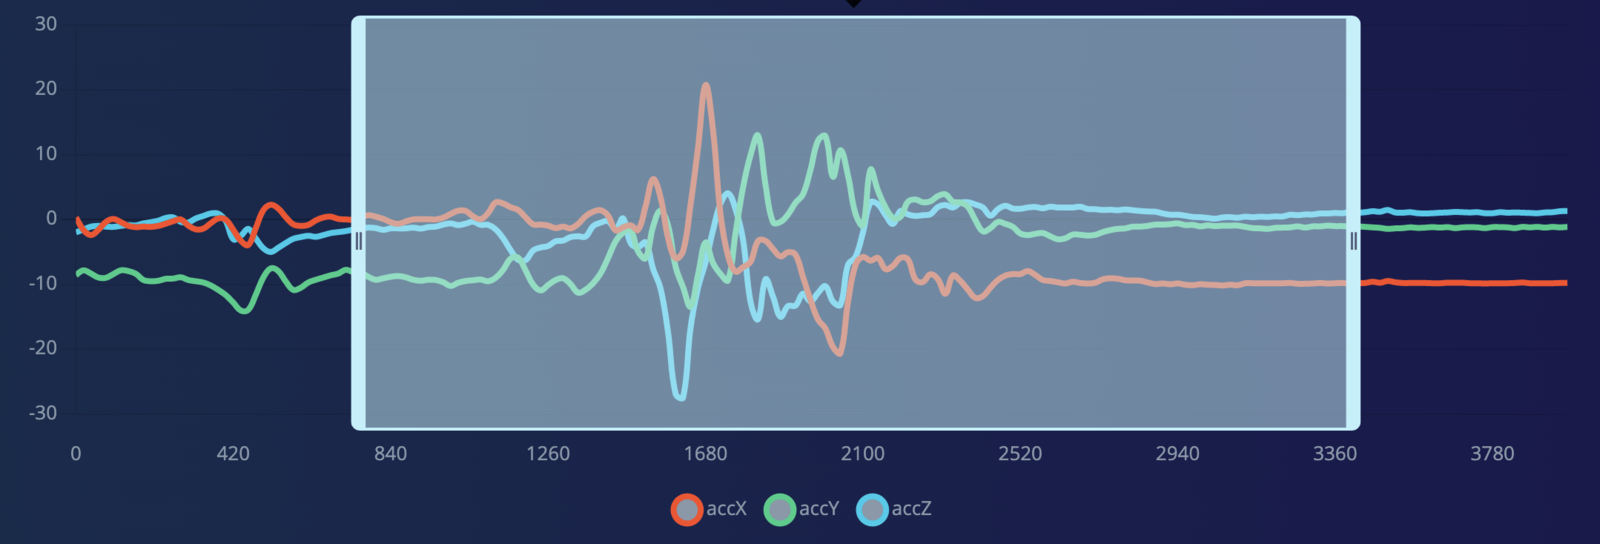
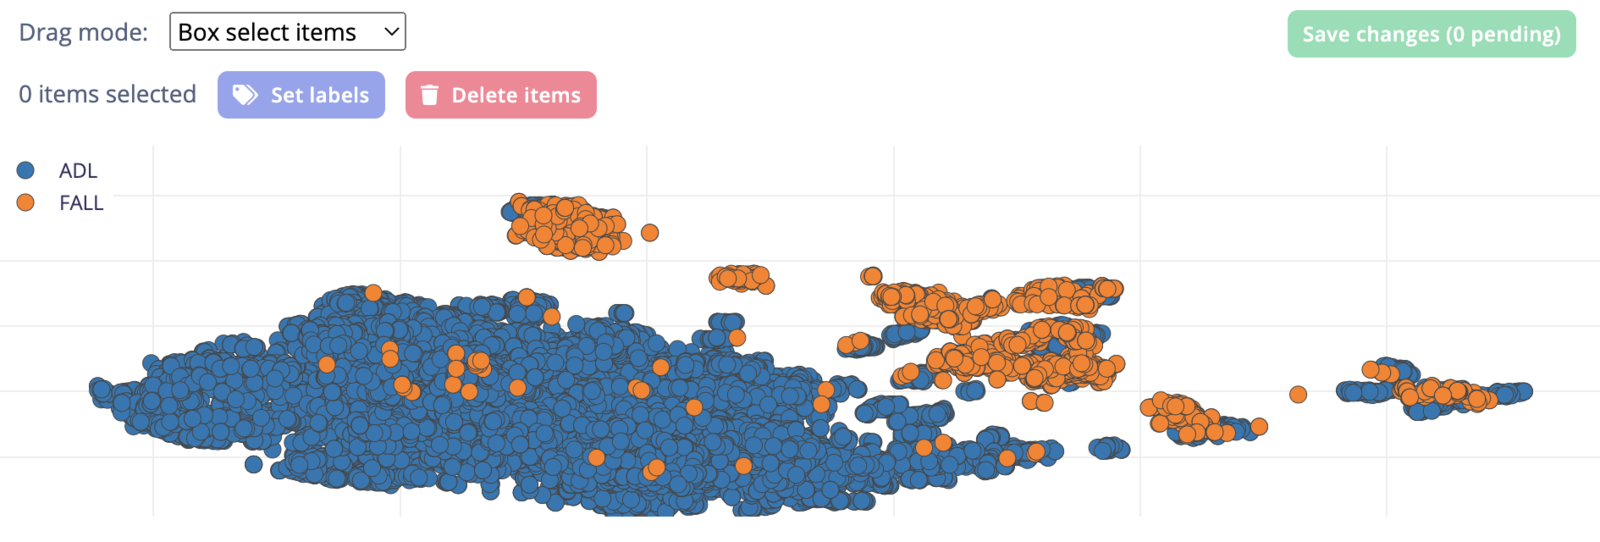
Collecting data for different kinds of activities of daily living (ADL) and falls is a time-consuming and laborious task. It needs many people from different age groups and requires a lot of man-hours to curate the datasets. Fortunately, there are many high-quality public datasets available for similar kinds of data. We have used the SisFall: A Fall and Movement Dataset, which is a dataset of falls and ADL acquired with an accelerometer. The dataset contains 19 types of ADLs and 15 types of falls. It includes acceleration and rotation data from 38 volunteers divided into two groups: 23 adults between 19 and 30 years old, and 15 elderly people between 60 and 75 years old. Data was acquired with three sensors (2 accelerometers and 1 gyroscope) at a frequency sample of 200 Hz. For this project, We are using acceleration data from one of the sensors. Also, I am using the same accelerometer (ADXL345) with the same configuration which was used for data collection. The datasets are available in the raw format and can be downloaded from the link given in the paper below. https://www.ncbi.nlm.nih.gov/pmc/articles/PMC5298771/ A sample of the data is shown below. Only the first 3 columns are used, which are 3-axis accelerometer data from the ADXL345 sensor.Uploading Data to Edge Impulse Studio
We need to create a new project to upload data to Edge Impulse Studio.
format.py and run the commands below. It is assumed that the SisFall dataset has been downloaded to the SisFall_dataset directory.
interval_ms is set to 20 (ms).
segments.py file and run the command below.
Create Impulse
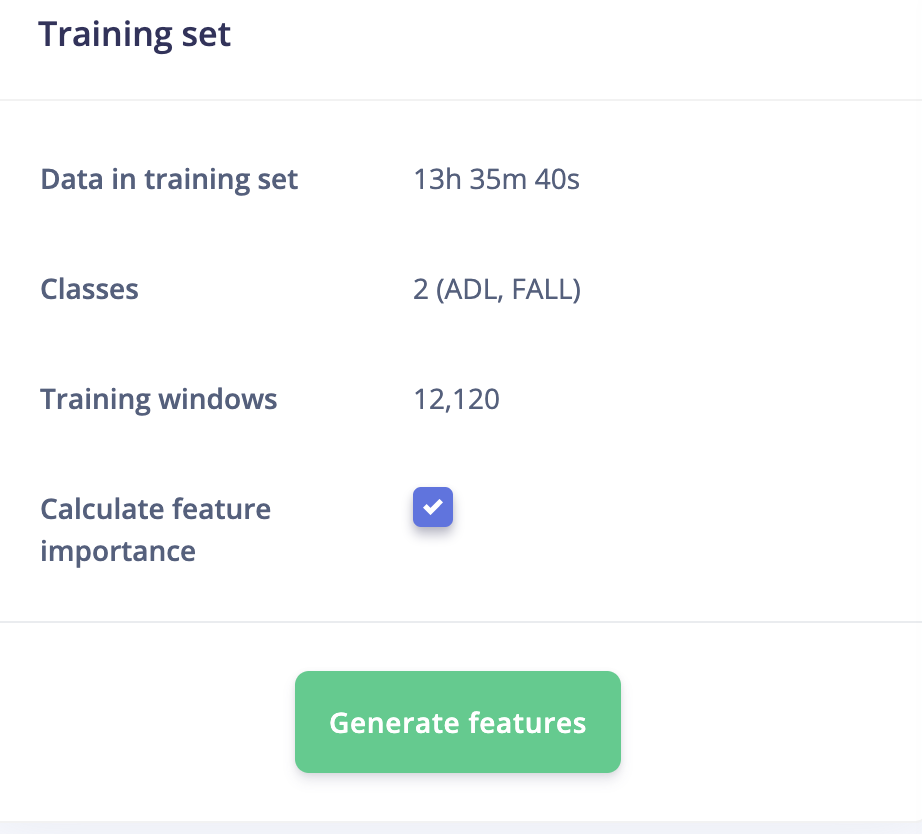
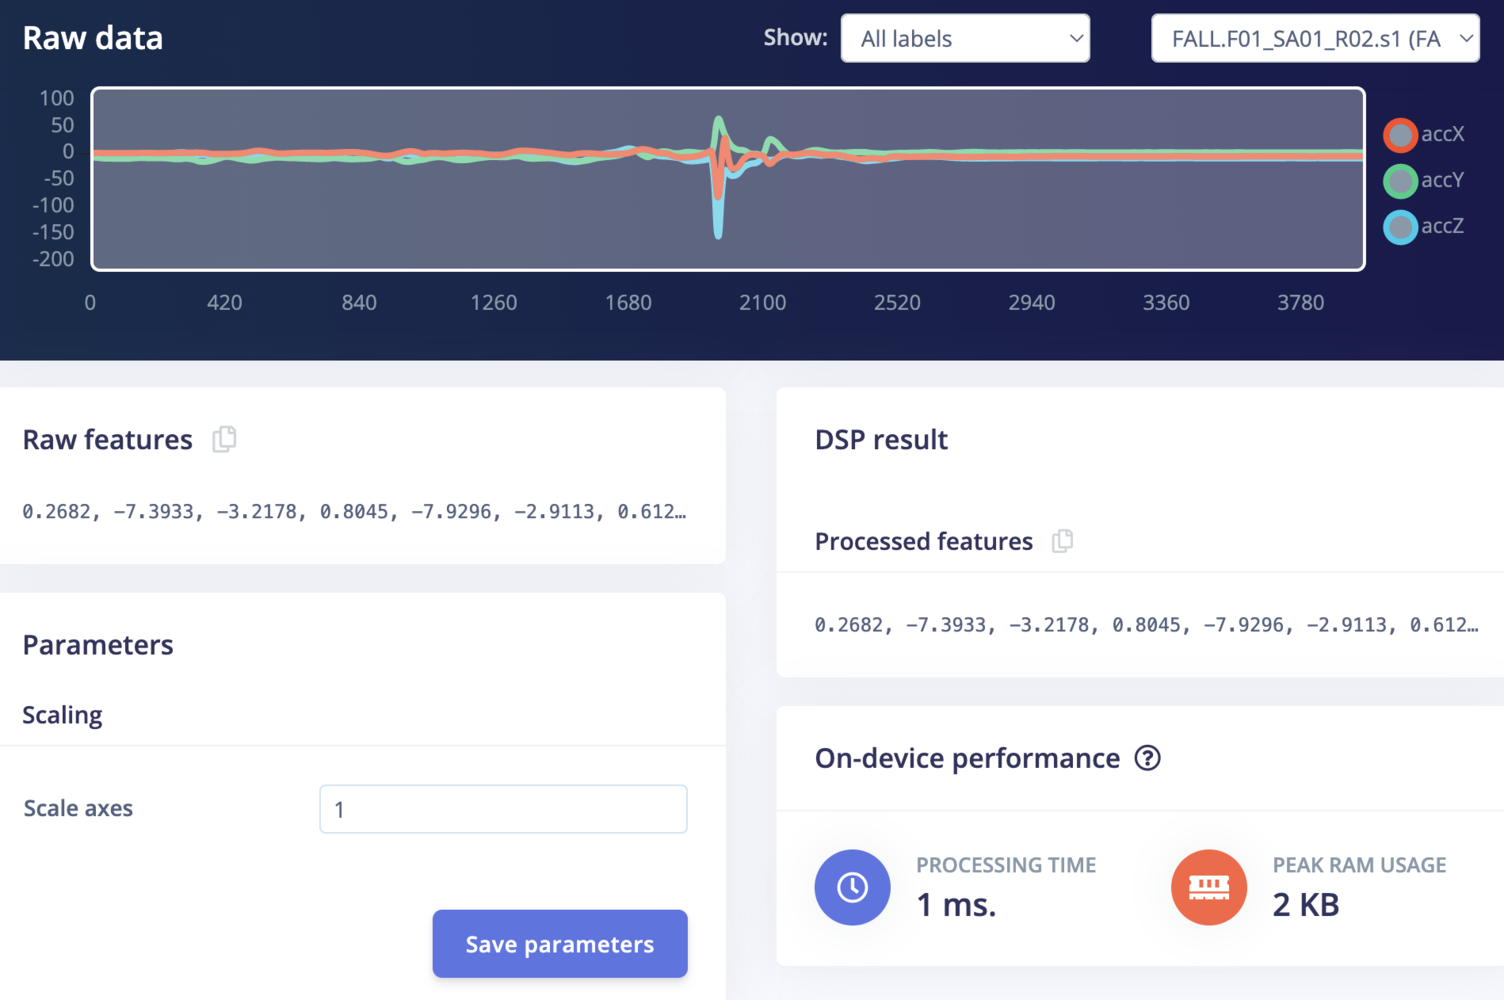
Go to the Impulse Design > Create Impulse page, click Add a processing block, and then choose Raw Data, which uses the data without pre-processing and relies on deep learning to learn features. Also, on the same page, click Add a learning block, and choose Classification, which learns patterns from data and can apply these to new data. We have chosen a 4000ms Window size and a 4000ms Window increase, which means we are using a single frame. Now click on the Save Impulse button.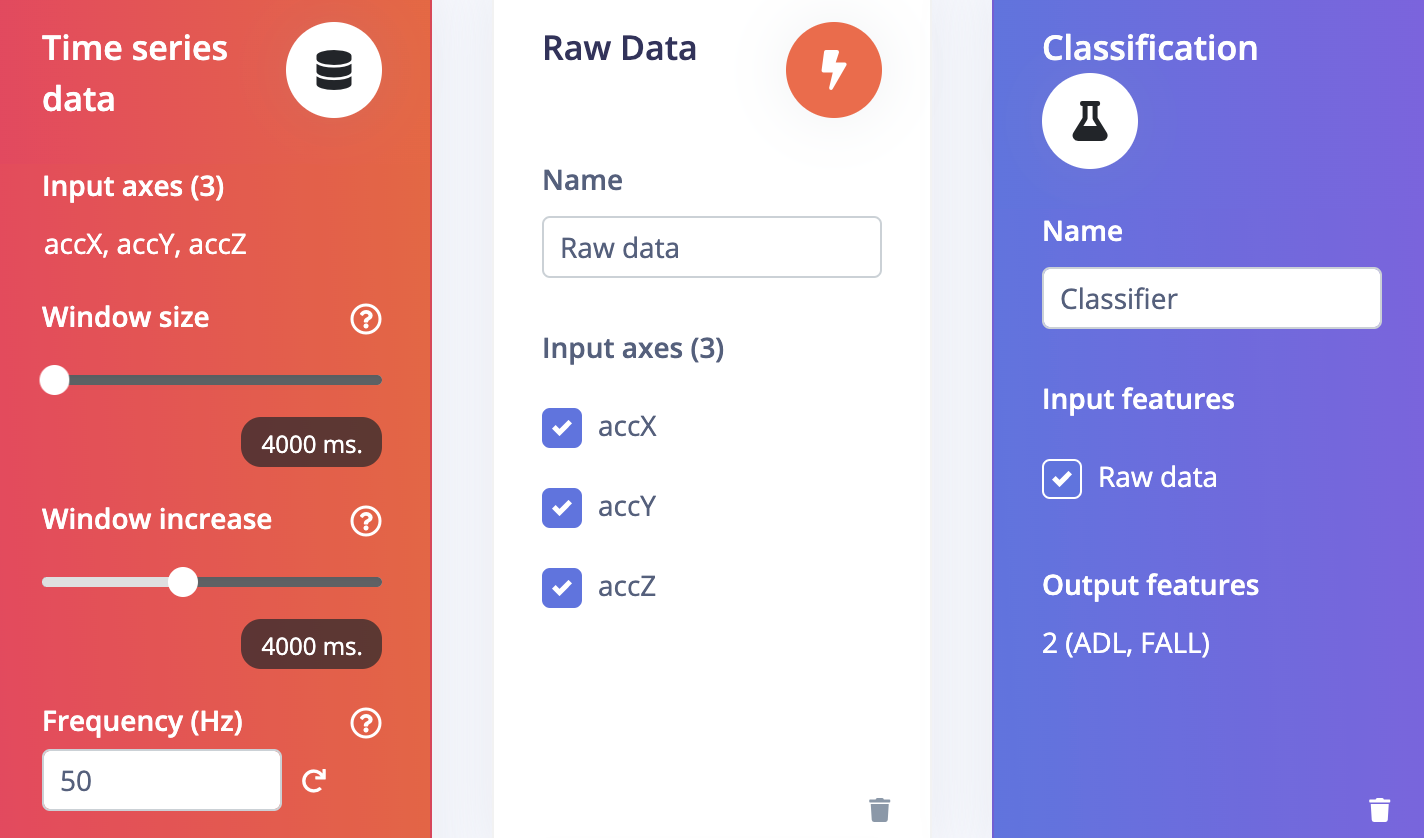

Model Creation and Training
The key building block of a Transformer model is the Keras MultiHeadAttention layer. As part of a recent release the Edge Impulse SDK now supports this layer. The Transformer based models are usually large models. The Arduino Giga R1 WiFi has 1 MB RAM divided into 2 cores (M7/M4). The main core (M7) has 512 KB RAM. To fit the model into the available memory with other overheads we needed to slim down the architecture by defining 1 transformer block with 2 attention heads (size = 64). Also, reducing the dimension (units) of the penultimate Dense layer helps in keeping the model size within the limits. The aforementioned hyperparameters have been chosen after many training trials and keeping the optimal model size, without losing much accuracy. The 4000ms of 3-axis accelerometer raw time-series data are fed into the Input layer. We have added a Normalize layer with pre-calculated mean and variance for each channel from the training datasets. The Transformer model is capable to learn features from the raw time series data while training. Below is the final model summary.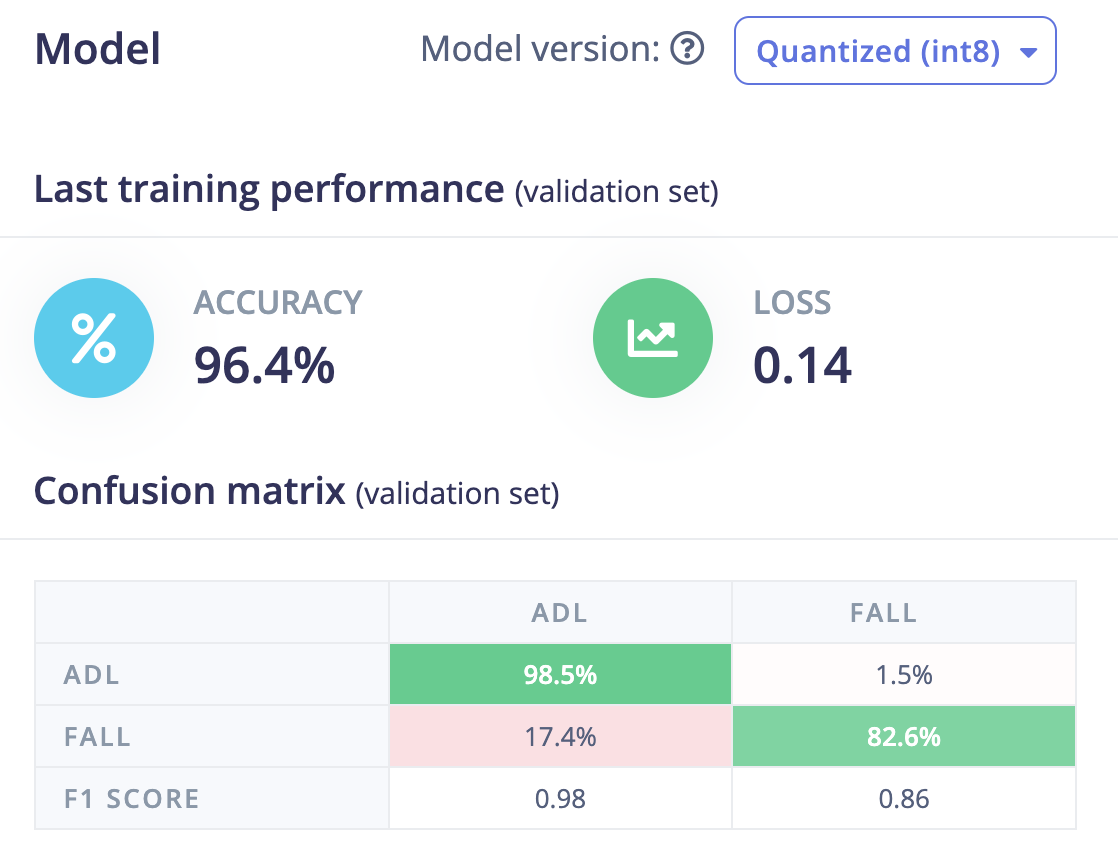
Testing
We can test the model on the test datasets by going to the Model testing page and clicking on the Classify All button. The model has 97.32% accuracy on the test datasets, so we are confident that the model should work on new data.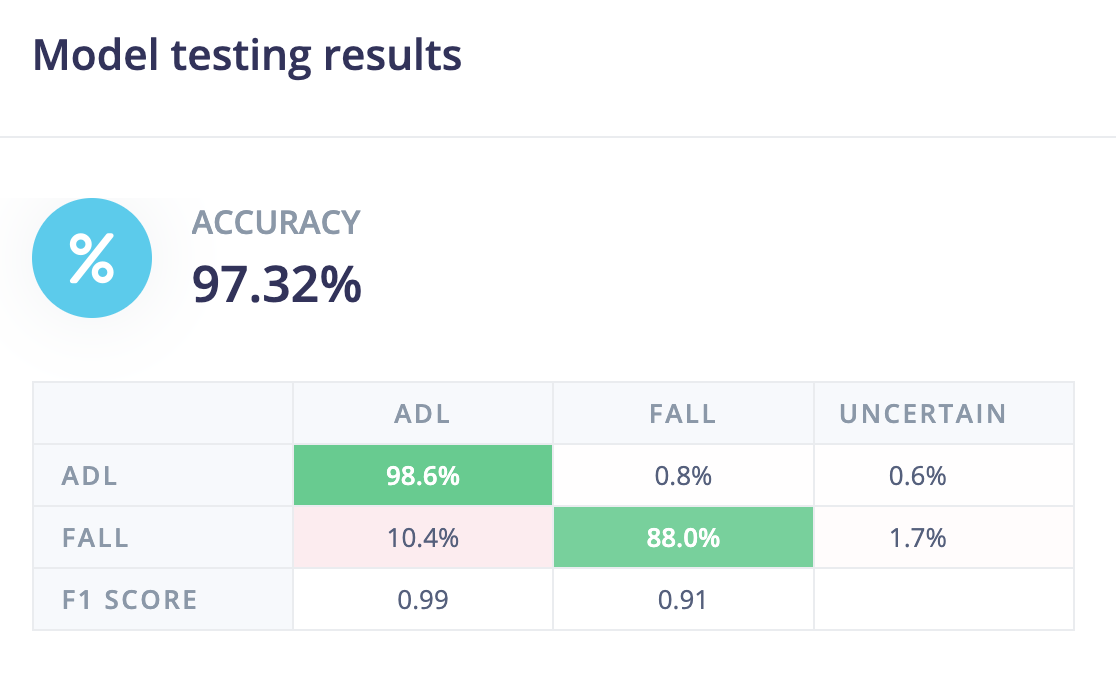
Deployment
At the Deployment page, we will choose the Create Library > Arduino library option.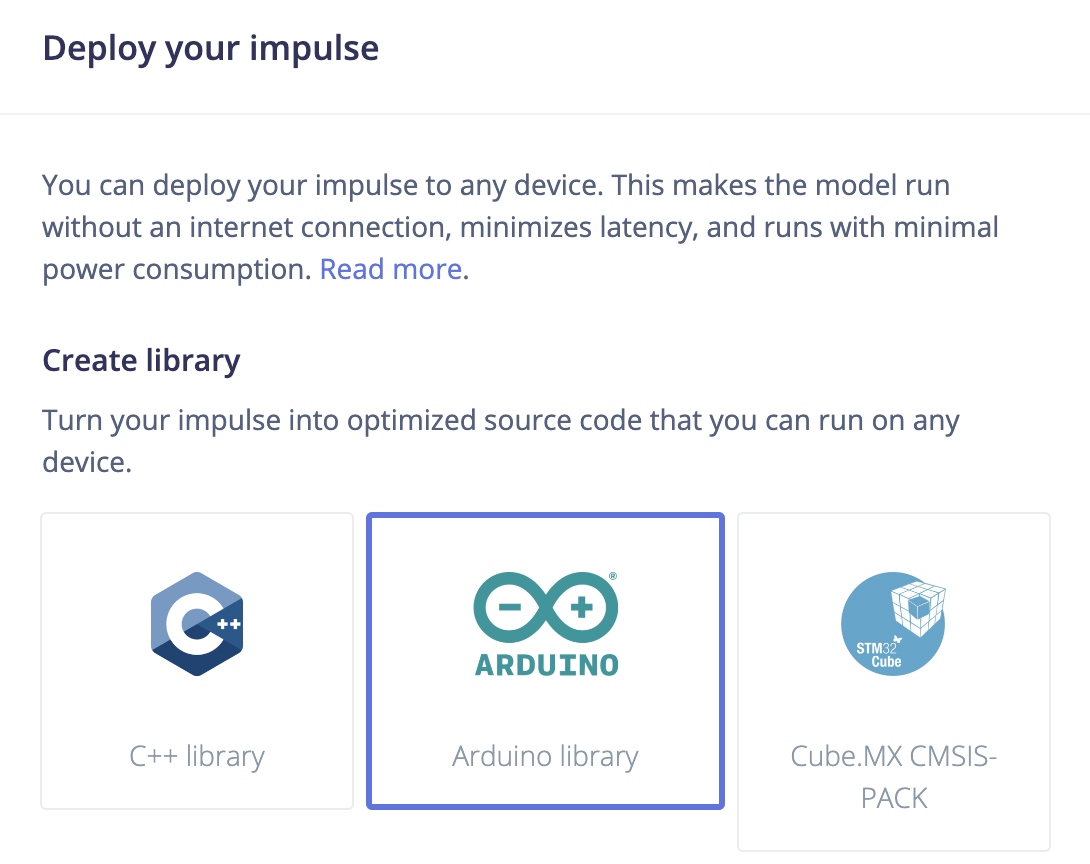

Run Inferencing
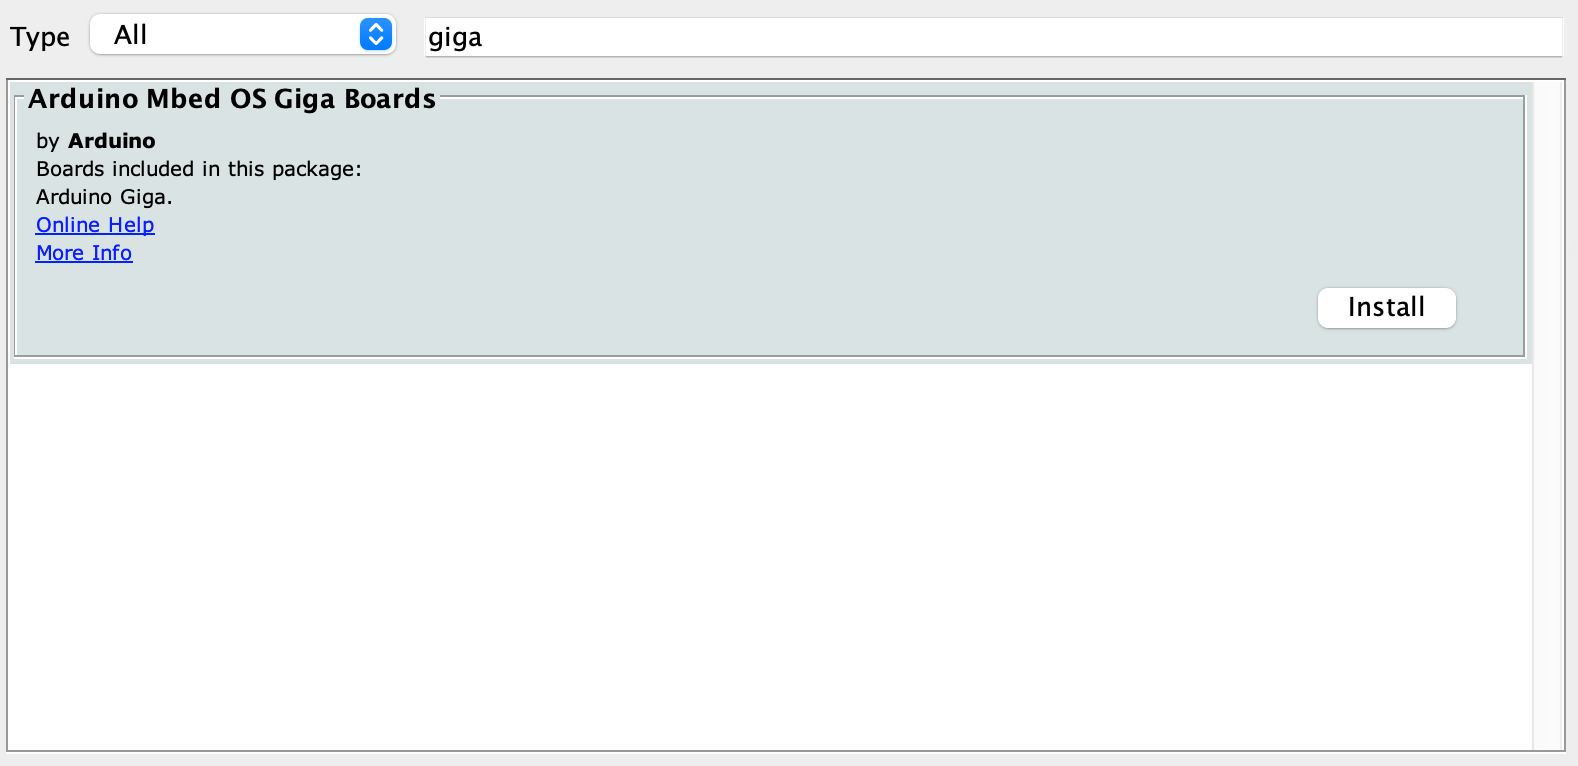
Please follow the instructions here to download and install the Arduino IDE. After installation, open the Arduino IDE and install the board package for the Arduino Giga R1 WiFi by going to Tools > Board > Boards Manager. Search the board package as shown below and install it.