import cv2
import os
import logging
import serial
import numpy as np
from edge_impulse_linux.image import ImageImpulseRunner
from picamera2 import Picamera2
from threading import Thread
from Stream import StreamingOutput, StreamingHandler, StreamingServer
def ei_runner_thread(modelfile, output, picam2, ser):
with ImageImpulseRunner(modelfile) as runner:
model_info = runner.init()
show_anomaly = False
try:
while True:
if ser.in_waiting > 0:
byte = ser.read(1)
if byte == b'0':
show_anomaly = False
logging.info("Display anomaly disabled")
if byte == b'1':
show_anomaly = True
logging.info("Display anomaly enabled")
img = picam2.capture_array()
pixels = img.flatten().tolist()
features = []
for ix in range(0, len(pixels), 3):
r = pixels[ix + 0]
g = pixels[ix + 1]
b = pixels[ix + 2]
features.append((r << 16) + (g << 8) + b)
try:
res = runner.classify(features)
except Exception as e:
print("Unhandled exception: restarting the runner")
runner.stop()
model_info = runner.init()
continue
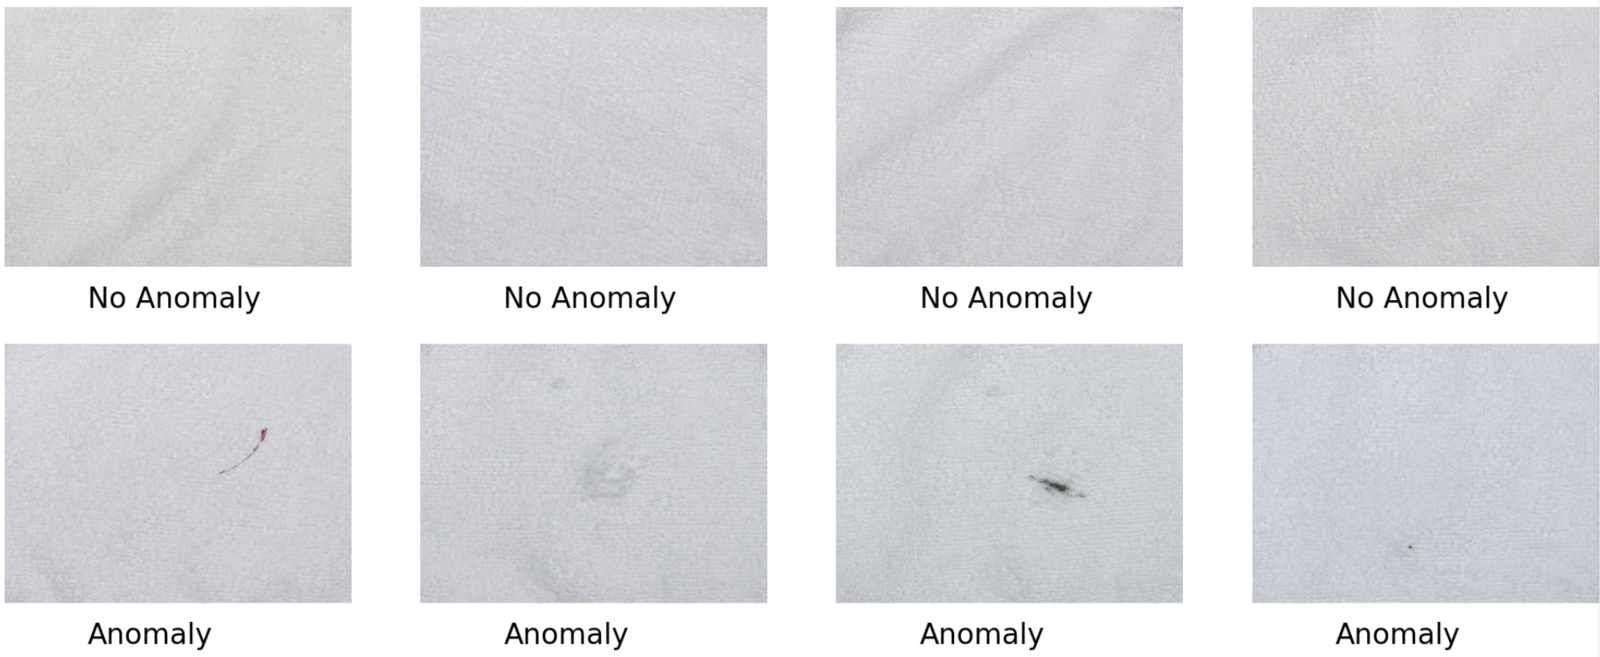
if "visual_anomaly_grid" in res["result"].keys():
if show_anomaly:
for grid_cell in res["result"]["visual_anomaly_grid"]:
start_point = (int(grid_cell['x']), int(grid_cell['y']))
end_point = (int(grid_cell['x'] + grid_cell['width']), int(grid_cell['y'] + grid_cell['height']))
img = cv2.rectangle(img, start_point, end_point, (0, 0, 255), 2)
_, buf = cv2.imencode('.jpg', img)
output.write(buf)
finally:
if runner:
runner.stop()
if __name__ == "__main__":
logging.basicConfig(format='%(asctime)s: %(message)s', level=logging.INFO, datefmt='%H:%M:%S')
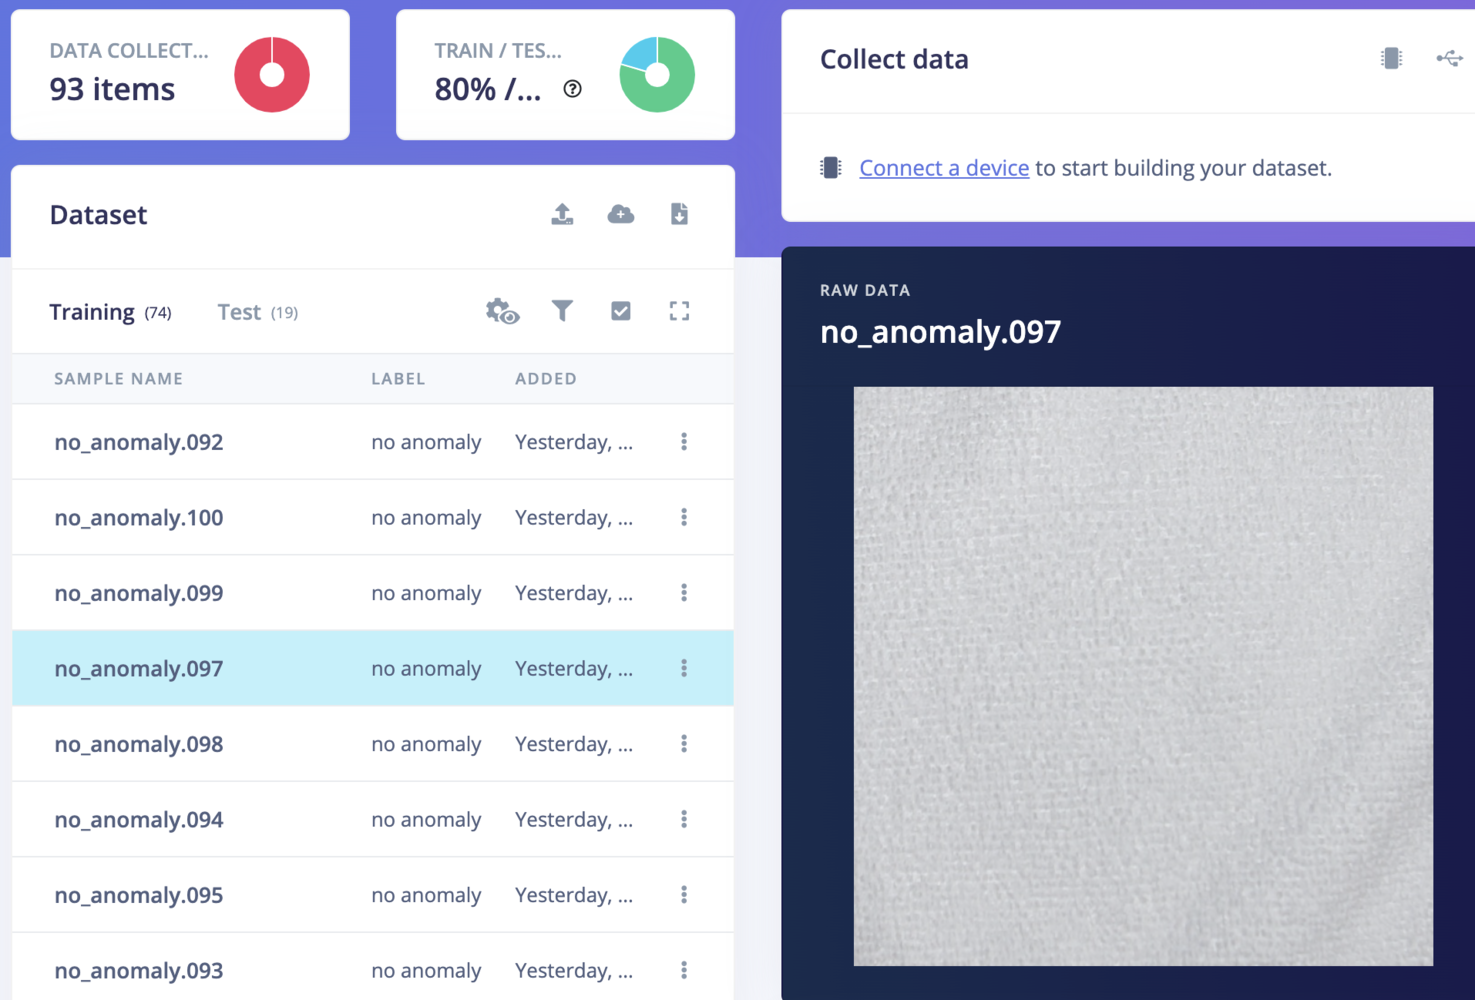
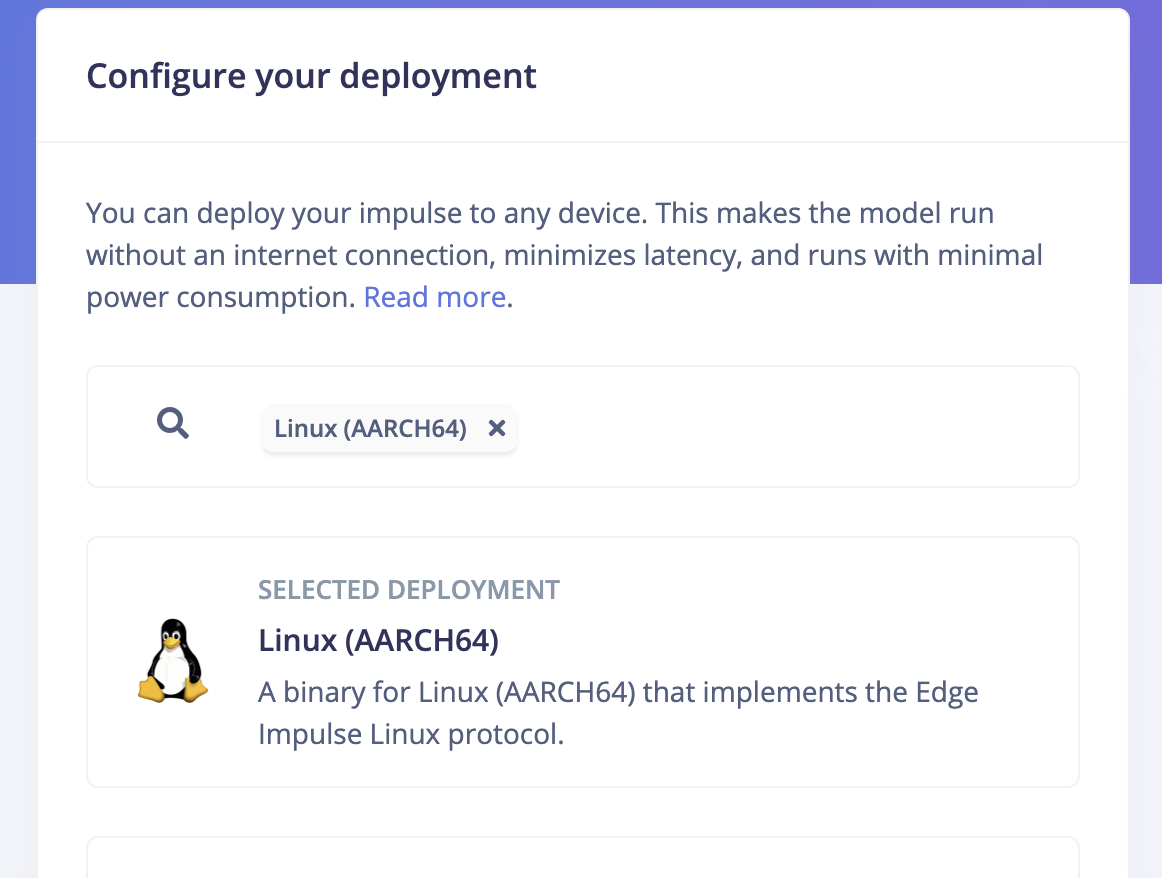
model = "ad-c-linux-aarch64-v8.eim"
dir_path = os.path.dirname(os.path.realpath(__file__))
modelfile = os.path.join(dir_path, model)
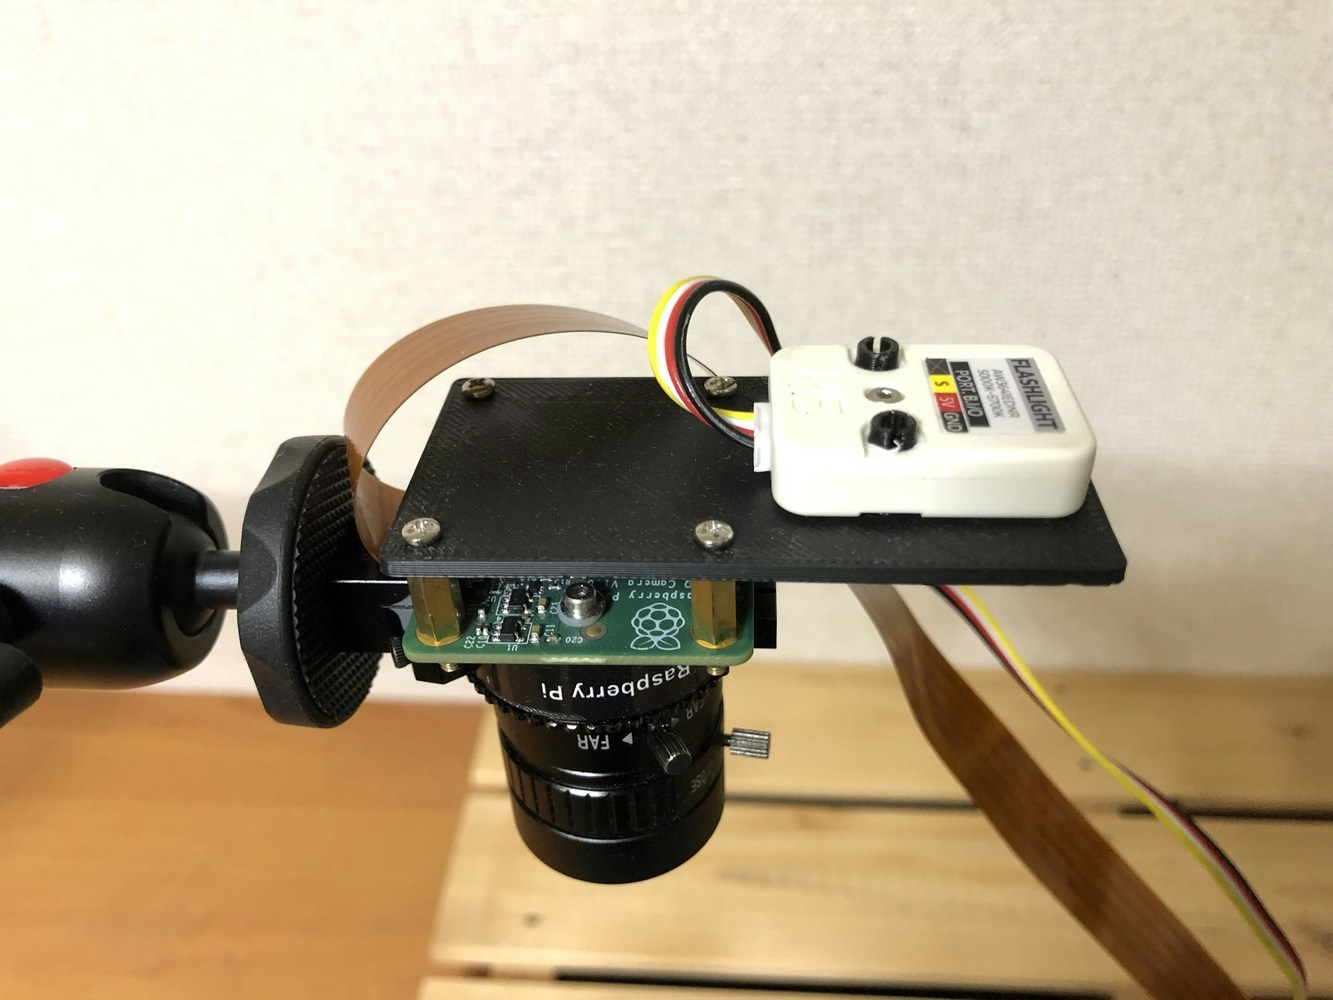
picam2 = Picamera2()
crop_w, crop_h = 1920, 1920
full_res = 4056, 3040
picam2.preview_configuration.main.size = (640, 640)
picam2.preview_configuration.main.format = "RGB888"
picam2.preview_configuration.controls.ScalerCrop = (int((full_res[0]-crop_w)/2), int((full_res[1]-crop_h)/2), crop_w, crop_h)
picam2.preview_configuration.align()
picam2.configure("preview")
picam2.start()
output = StreamingOutput()
StreamingHandler.set_stream_output(output)
StreamingHandler.set_page('FOMO-AD Inferencing', 640, 640)
server = StreamingServer(('', 8000), StreamingHandler)
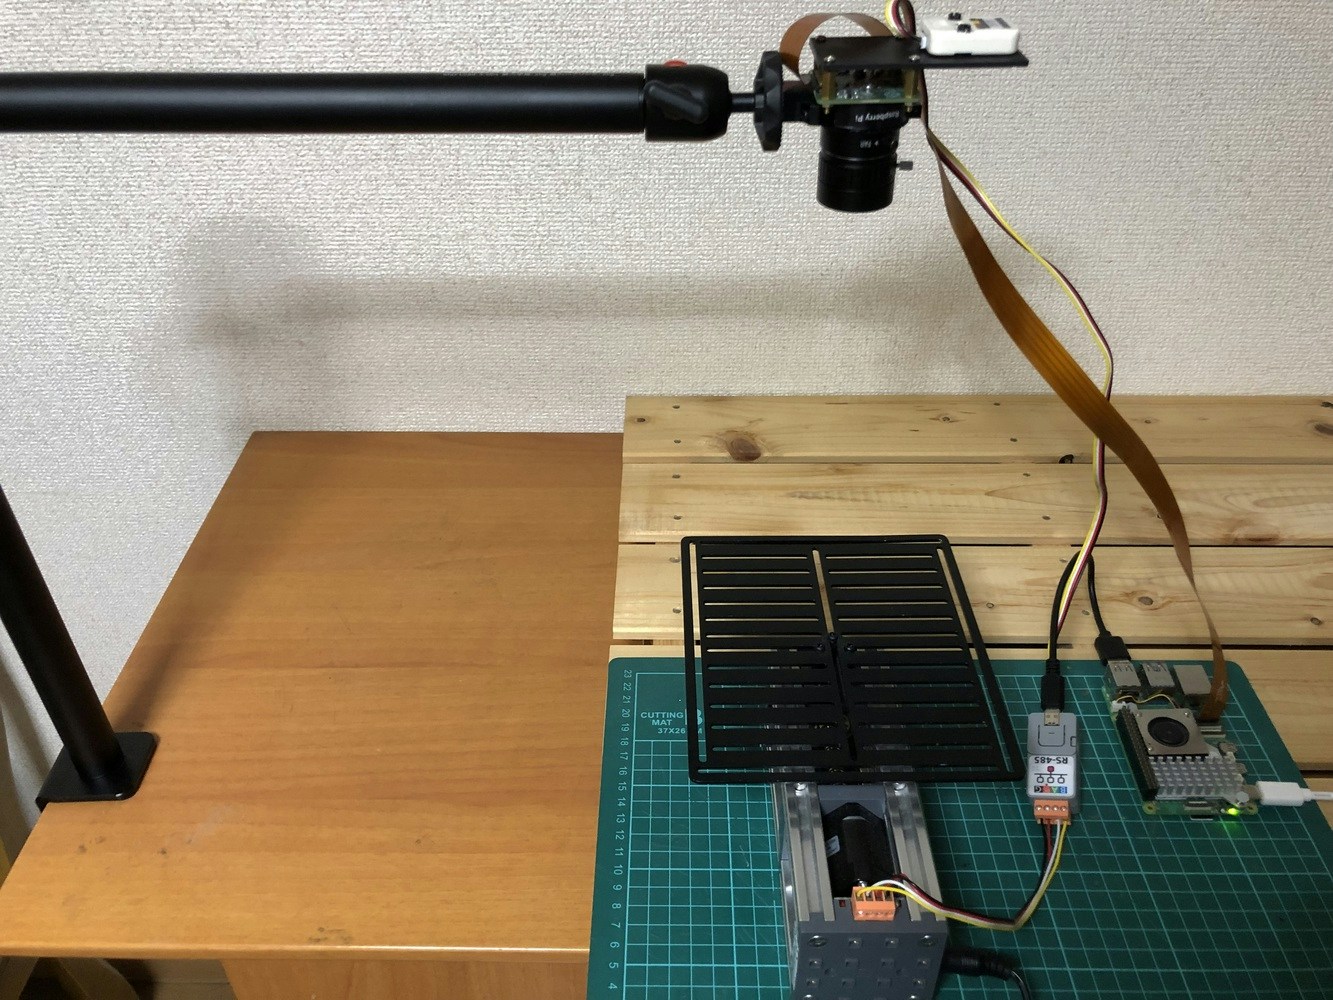
ser = serial.Serial('/dev/ttyUSB0', 115200)
th = Thread(target=ei_runner_thread, args=(modelfile, output, picam2, ser))
th.start()
logging.info("Server started at 0.0.0.0:8000")
try:
server.serve_forever()
except KeyboardInterrupt:
logging.info("Capture stopped")
finally:
if picam2:
picam2.stop()
if ser:
ser.close()