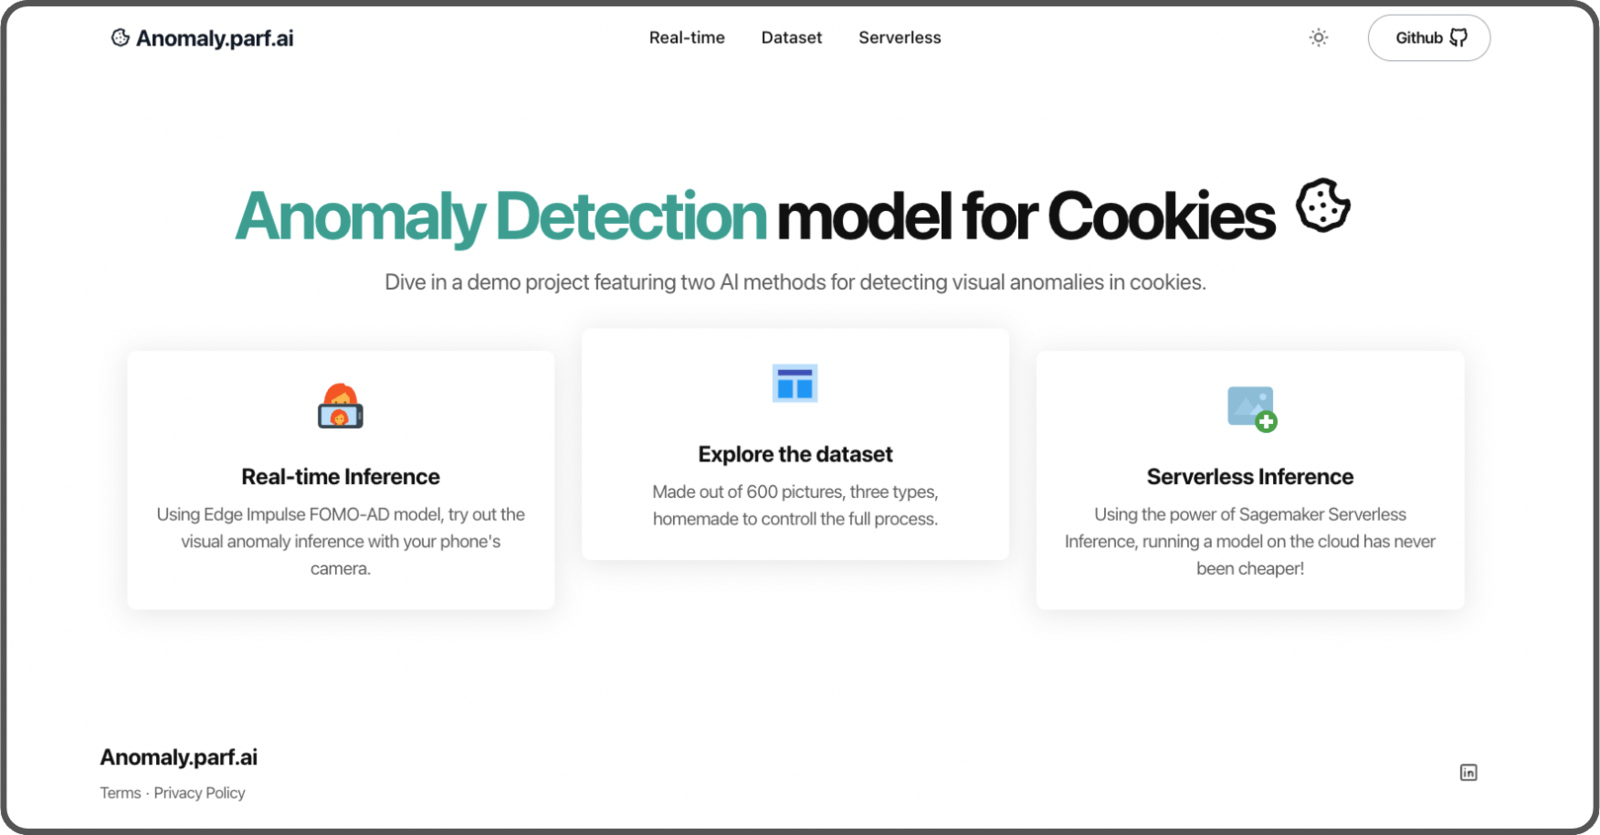
Introduction
Let’s explore the development and optimization of a cloud-based visual anomaly detection model designed for edge deployments, featuring real-time and serverless inference. We will cover the following topics:- Datasets: Creation of our own datasets.
- Models: Development of three different models:
- A baseline model + usage of BYOM (Bring Your Own Model on Edge Impulse),
- Efficient AD model,
- FOMO AD model by Edge Impulse (automated).
- Web App:
- Setting up a real-time and serverless inference endpoint,
- Dataset explorer,
- Automating deployments with GitHub Actions and Terraform on AWS.
Software used
- Edge Impulse Studio
- Edge Impulse Mobile client
- Visual Studio Code
- Amazon Web Services
- Terraform
- MLFlow
- Astro
Context
Imagine we are a commercial baking company that produces cookies. Our goal is to sort cookies to identify those with and without defects (anomalies), so that any broken cookies do not get packaged and sent to retailers. We are developing a cloud-based proof-of-concept to understand the feasibility of this technique, before deploying it on edge devices. Although this is only a hypothetical example and demonstration, this quality inspection process and computer vision workflow could absolutely be leveraged by large-scale food service providers, commercial kitchens that make packaged retail food items, or any many other mass-produced retail products even beyond the food industry.Step 1: Create the Datasets
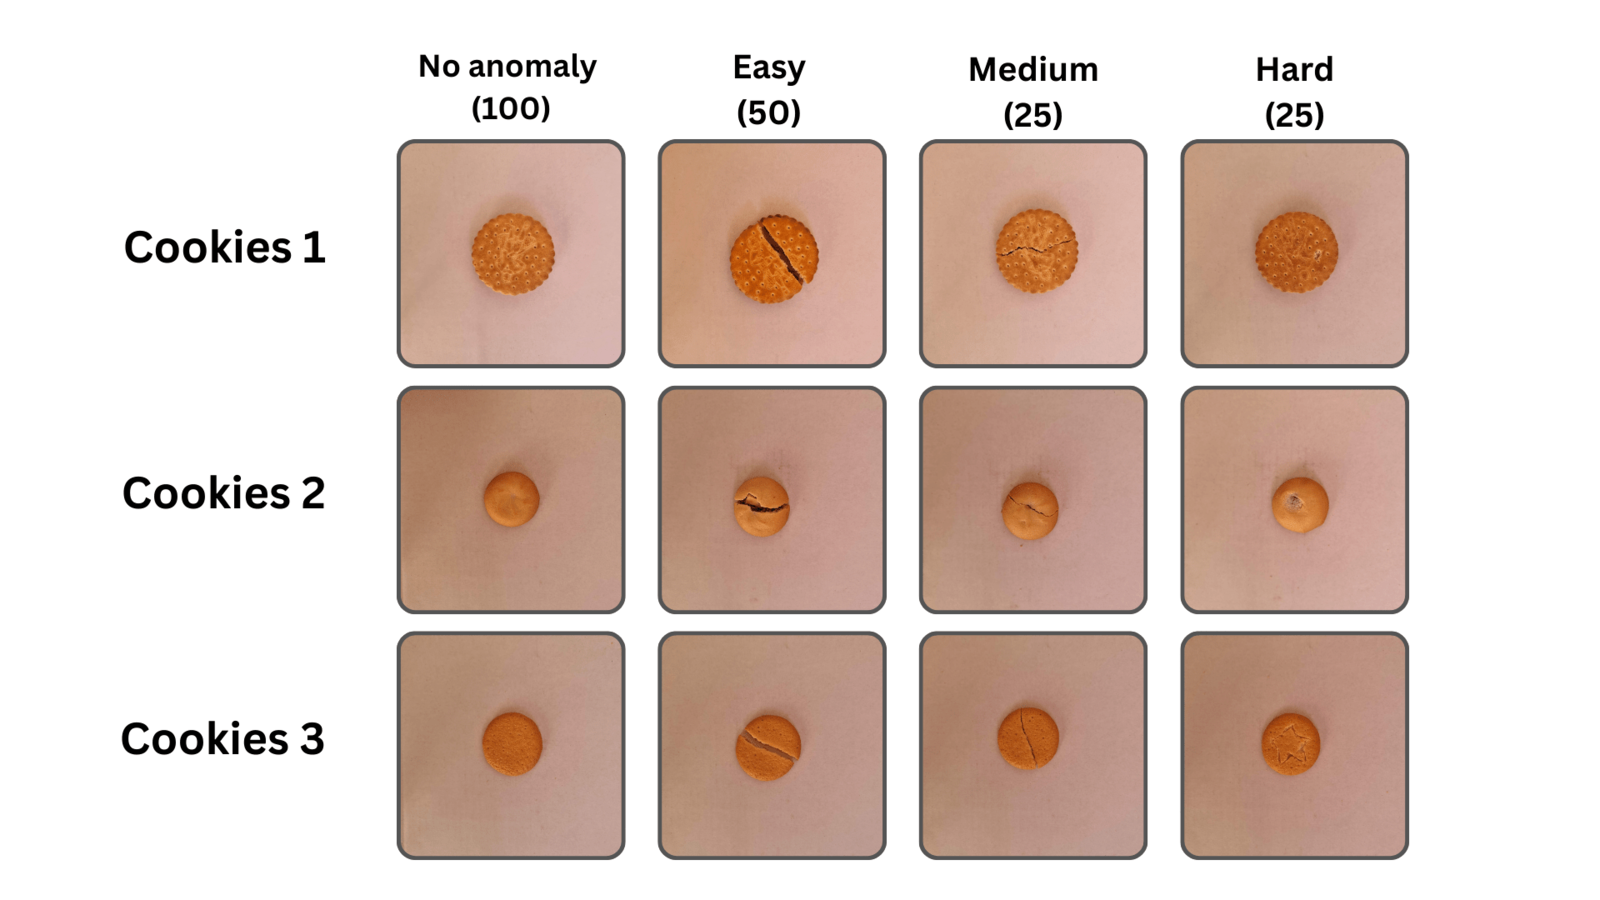
We assume we don’t have access to Omniverse Replicator to create a synthetic dataset. Instead, we manually create our own. The first step is to carefully review which cookies to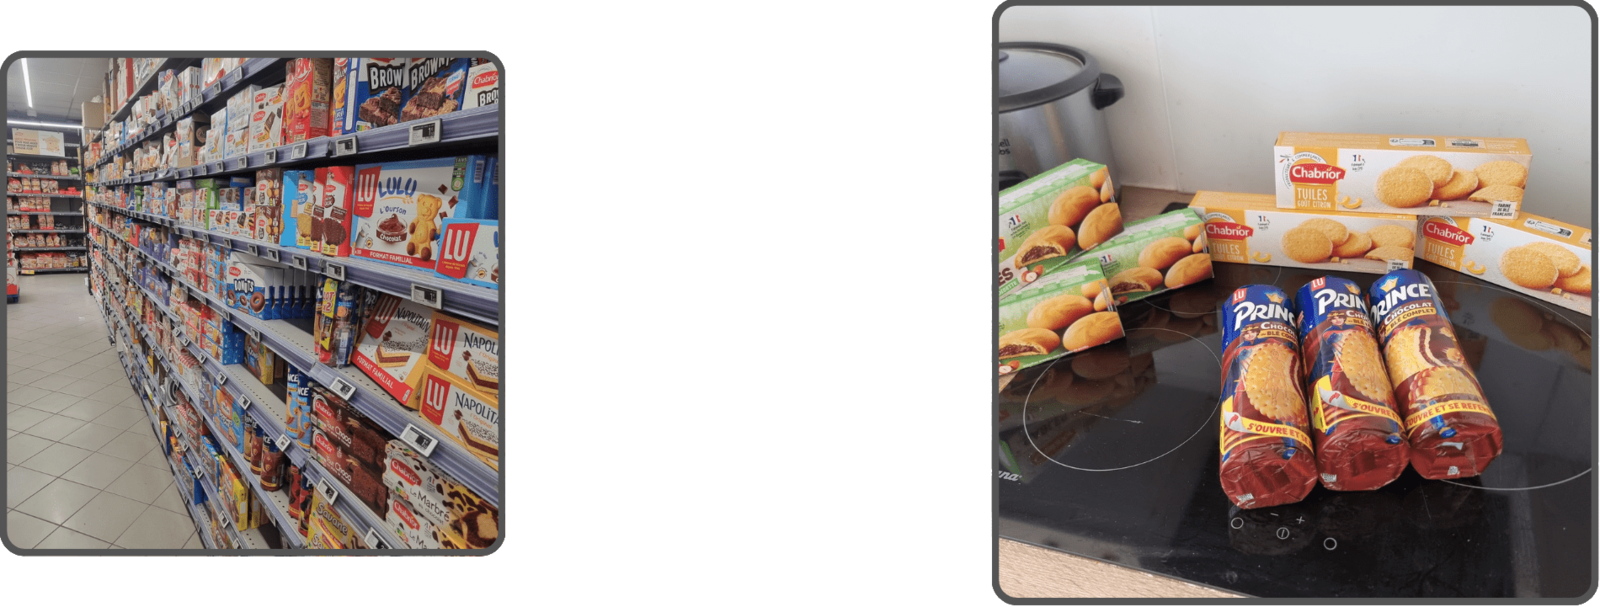
- One with texture,
- One thicker cookie,
- One plain cookie.
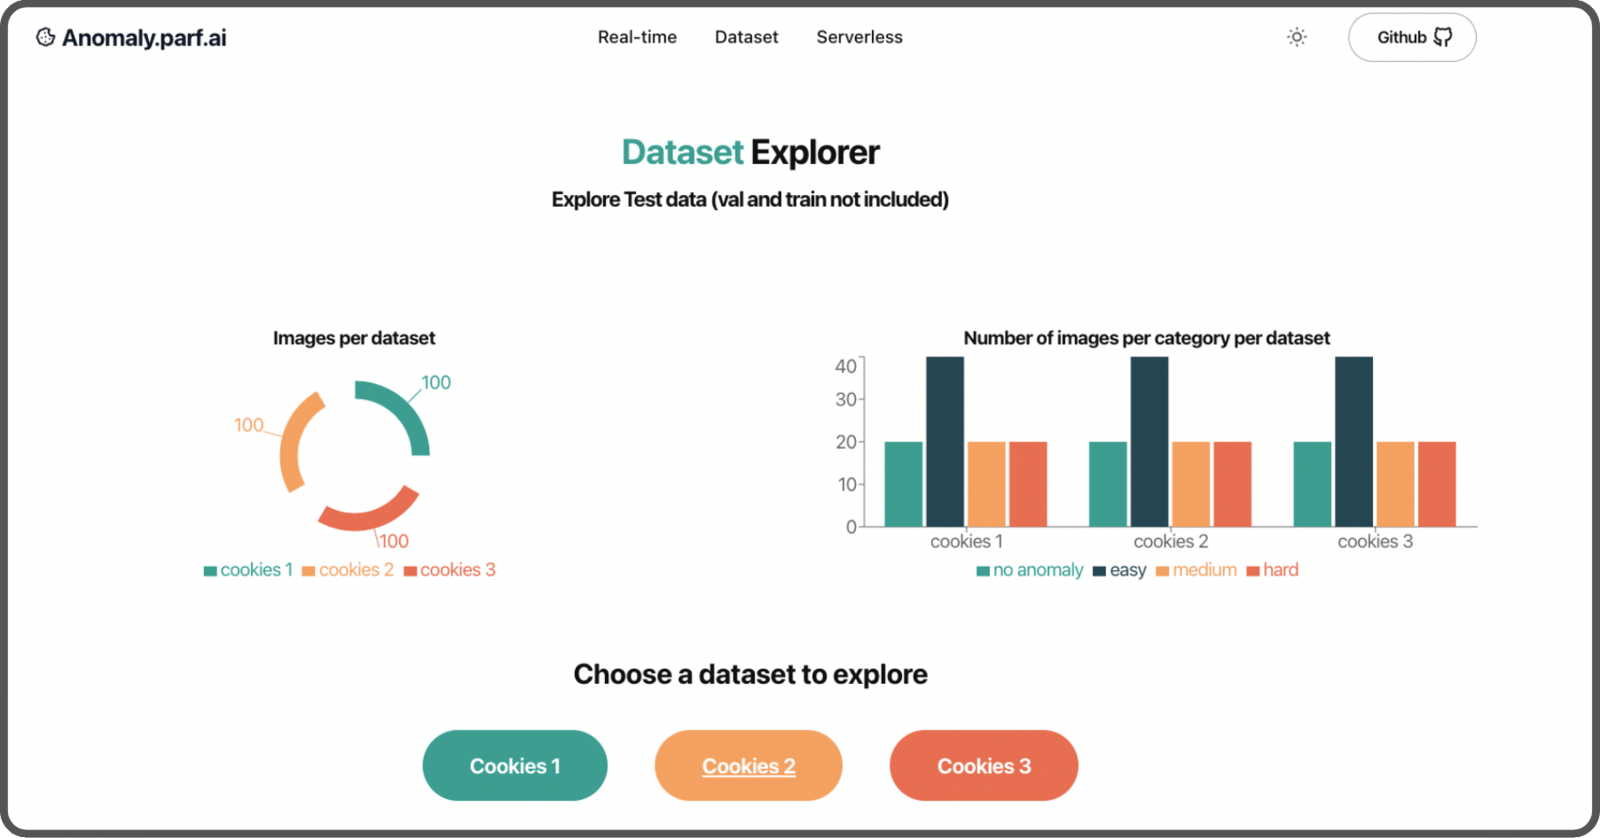
- 100 without any anomalies
- 100 with anomalies
- 50 easy to recognize with a clear, strong separation down the middle,
- 25 medium difficulty with a separation that has no gap,
- 25 hard to detect, with small defects and knife marks.
1:1 ratio with an original size of 2992 x 2992 pixels, is resized to 1024 x 1024 pixels using mogrify command from ImageMagick. It saves computing resources for both the training process and the inference endpoint:
Step 2: Create the models
Baseline model
The first model we will develop will be our baseline, serving as our starting point. It consists of a categorical image classification using a pre-trained MobileNet. This is Categorical (rather than binary) classification to allow for the addition of more categories of anomalies in the future. Have a look at the training in this notebook- Training: 144 images (72%)
- Validation: 16 images (8%)
- Test: 40 images (20%)
Convert Baseline with BYOM
With Edge Impulse’s Bring Your Own Model feature, you can easily upload your own model and use all their features. In our case, let’s use a Jupyter notebook that converts the Baseline model to a MacOS version using the Edge Impulse API. (You can do it for a specific edge device, linux, web assembly, etc). It can save you quite some time compared to doing it yourself. You can find detailed steps in this notebook (scroll down to the section titledEdge Impulse conversion)
First, start by importing the Edge Impulse Python SDK. Then load your project’s API KEY.
chmod +x baseline.eim. And you’re all set! Create an inference function to use it with this model:
EfficientAD
Let’s use another method called EfficientAD (detailed in a study from arXiv.org). EfficientAD employs an autoencoder paired with a student-teacher approach to quickly and effectively identify anomalies in images. Take a look at their video presentation for a brief overview. The network, named PDN (Patch Description Network), includes a design with 4 convolutional layers and 2 pooling layers. It examines each segment of the 33 x 33 pixel image and produces a feature vector of 384 values.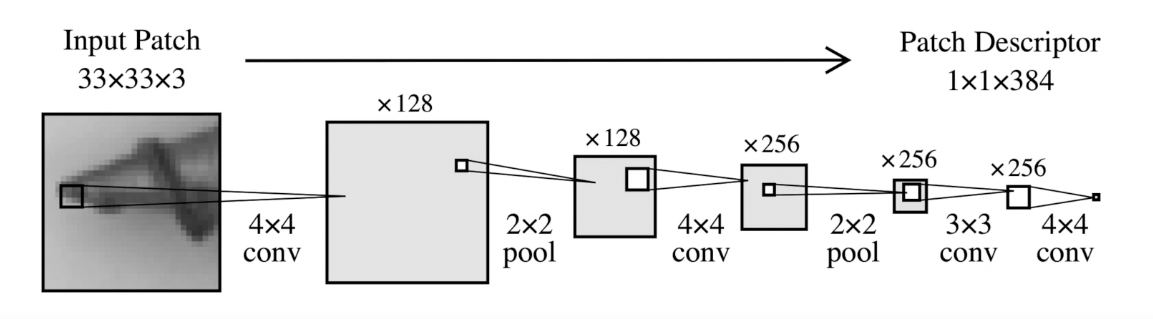
student and teacher are trained on the same data. The teacher model guides the student model by providing a loss function which helps the student to improve their performance in detecting anomalies.
Anomaly detection during testing is measurable when the student model fails to predict the characteristics of an image. EfficientAD introduces an autoencoder that gives a broader view of the image, improving the overall performance of the detection in addition to the Student-Teacher method.
We’re going to reuse some of the code from nelson1425/EfficientAD and update it to suit our needs. You can find the updated code here.
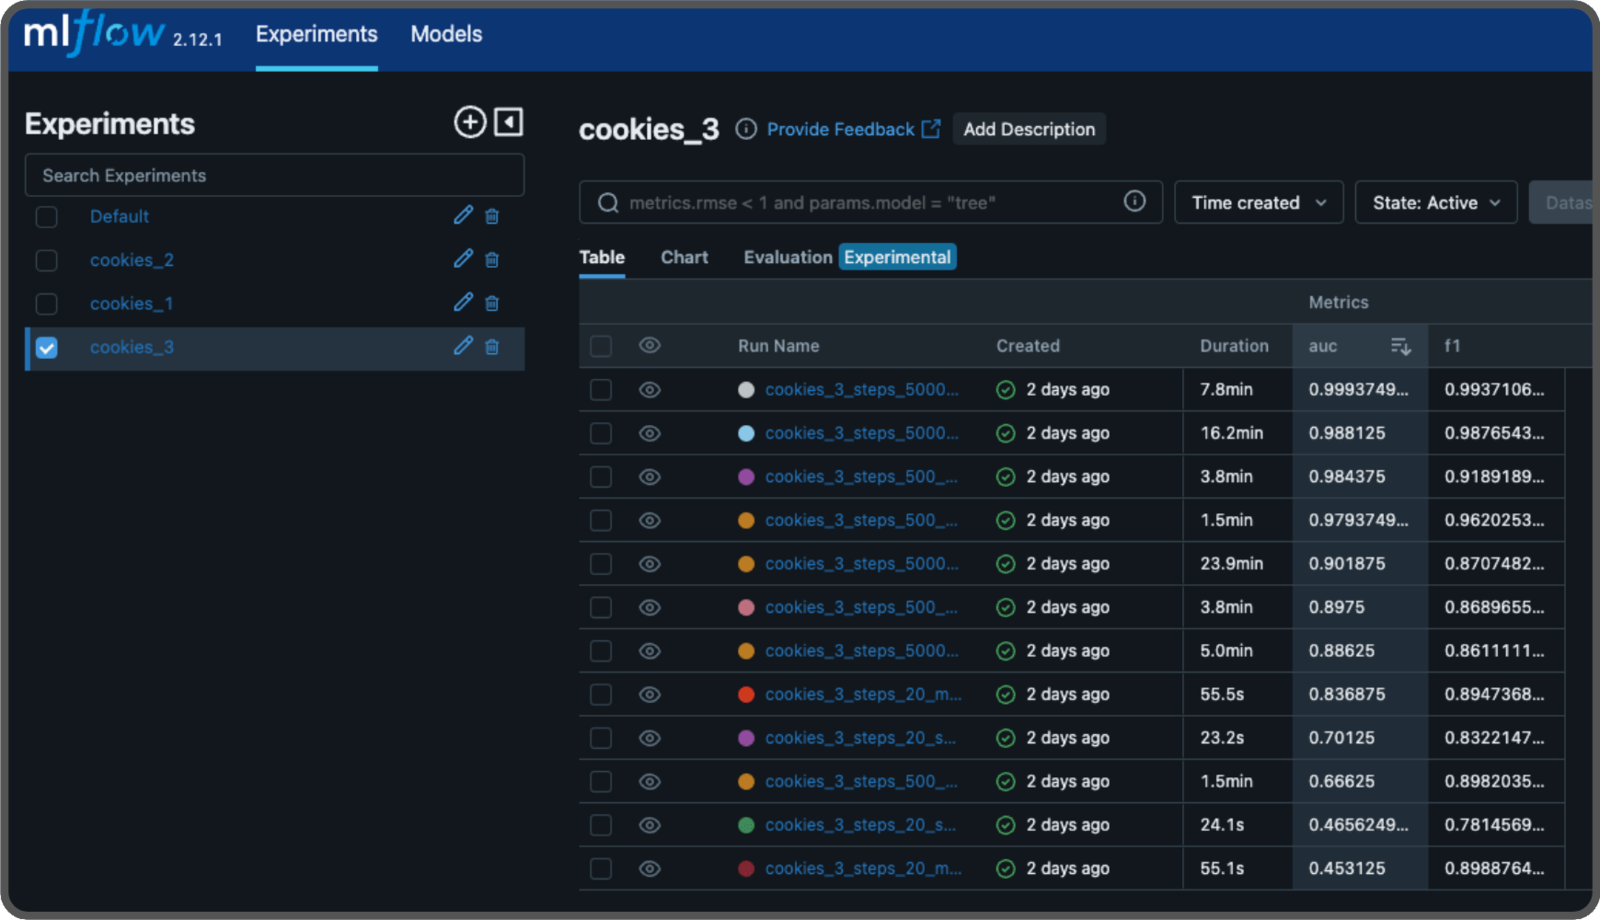
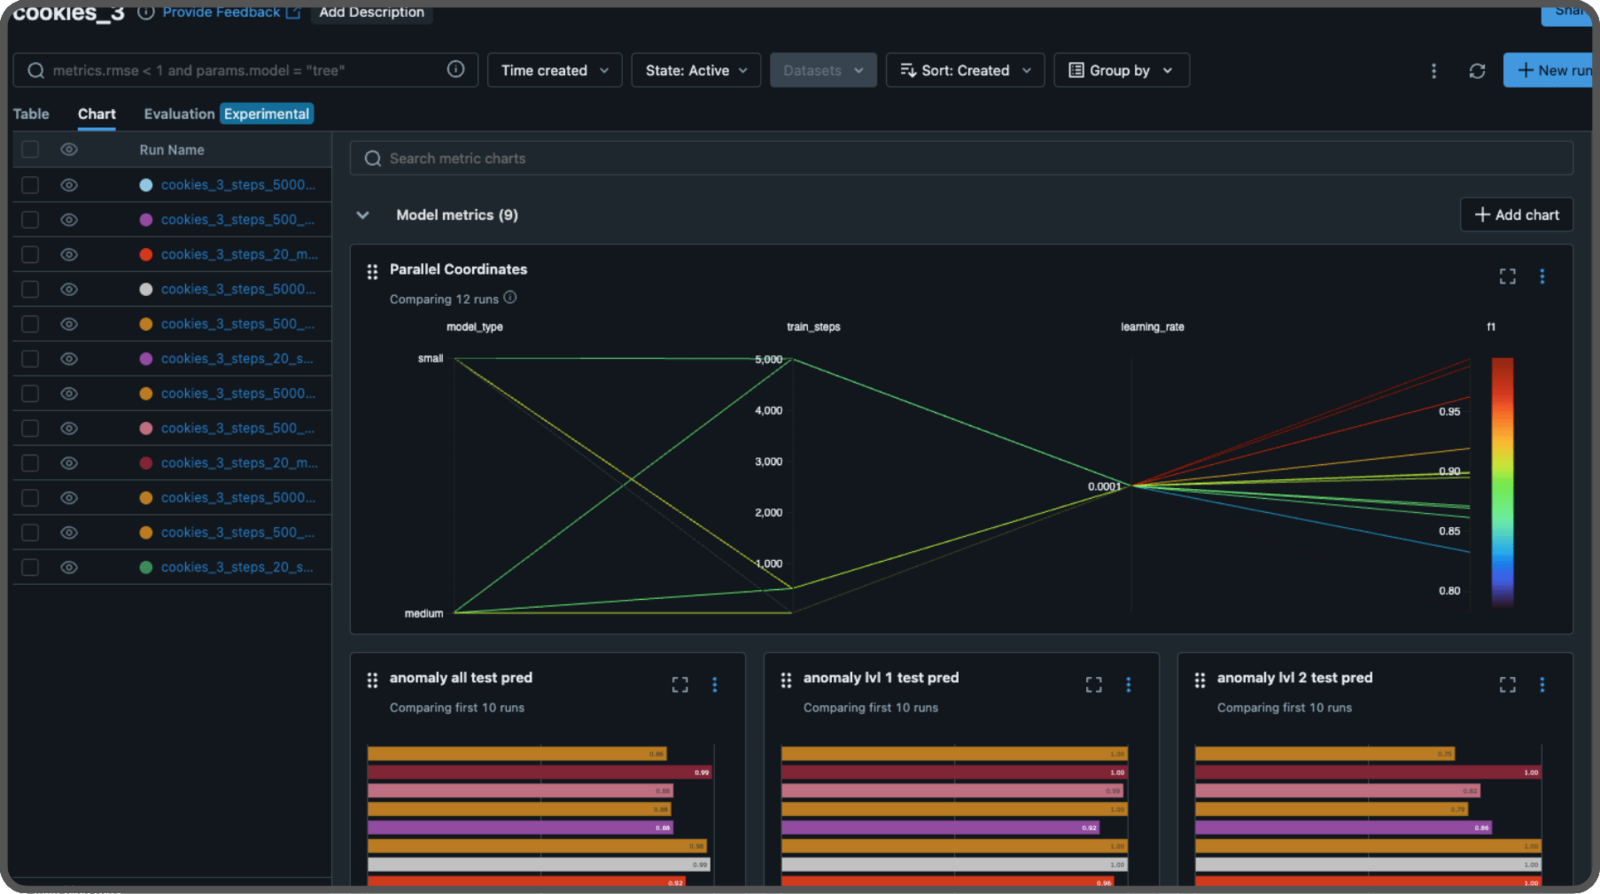
Experimenting with MLFLow
We will test different parameters to build a model that performs well. In the study, they used 70,000 iterations (steps) and pretrained weights from WideResNet-101. We will experiment different numbers of steps, enabling or disabling the pretrained weights and using the small or medium size of the patch description network (the medium size includes another layer and twice as many features). Each test is called an experiment, and we will use MLFlow to log the parameters and store their results, including the scores and the models. To run a MLFlow server, either locally or remotely, use the following command:--artifacts-destination argument to specify where to store our models. You can omit this argument if you’re not using a S3 bucket on AWS, and it will default to storing the models on the disk.
In your code, you define an experiment like this:
Training in the cloud
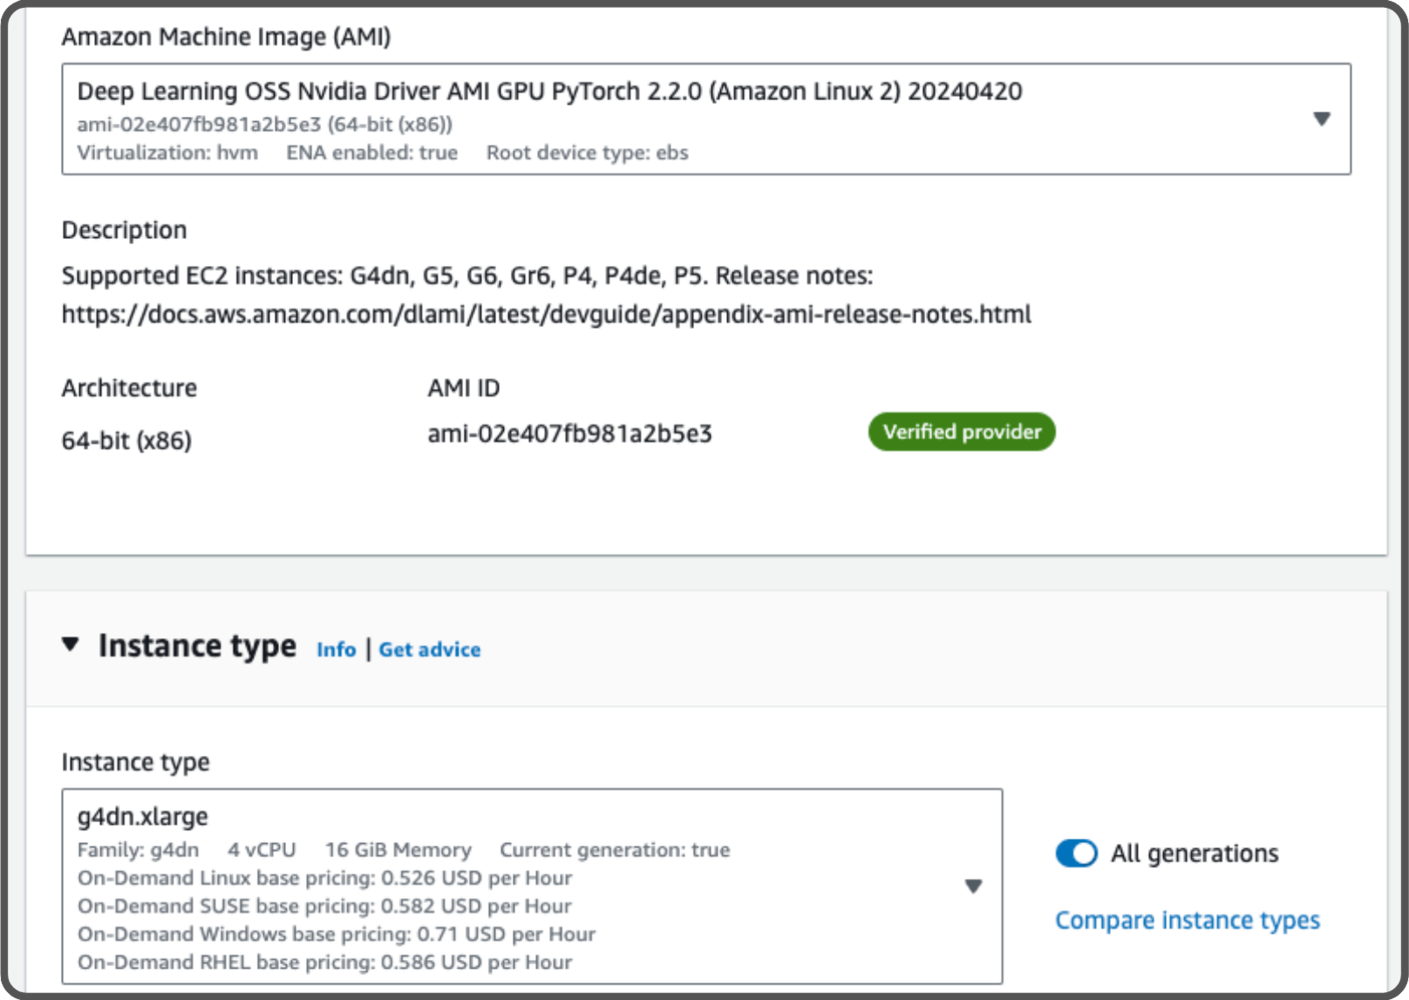
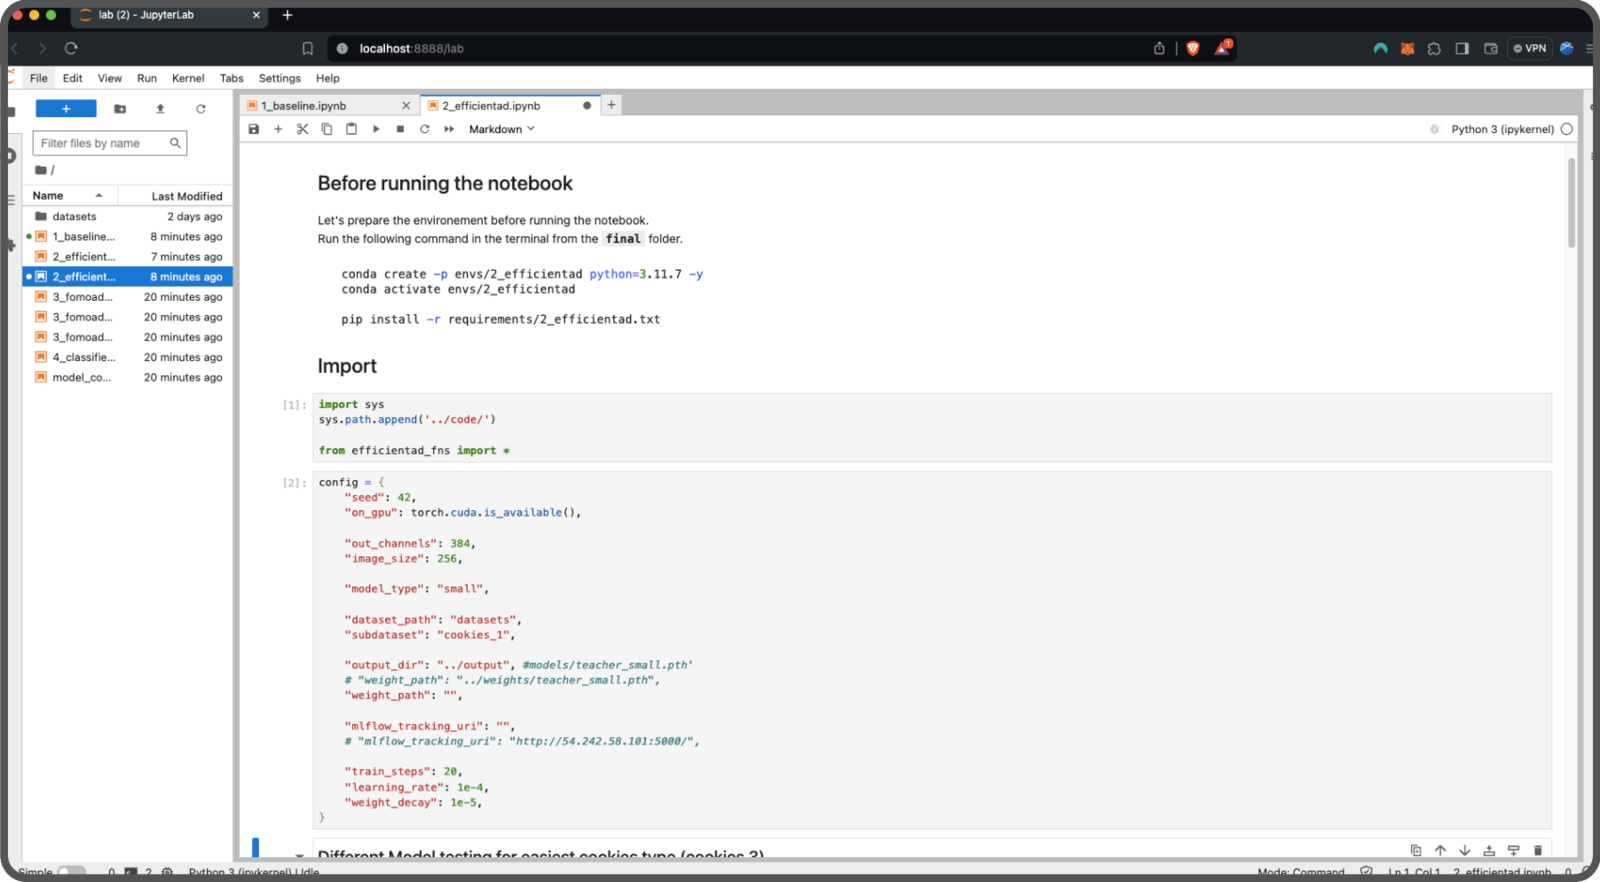
Let’s train our models in the cloud using our notebook. We are using a Jupyter notebook, or you could also use a Python script. There are many different cloud providers that allow you to train a model. We will use an AWS instance that includes an Nvidia Tesla 4 GPU. The specific instance type we use isg4dn.xlarge. To get access to this instance, you need to create a support ticket requesting access to the type G instance type in your region. It will cost us 0.526 USD per hour and we plan to use it for approximately 3h.
For our setup, we’ll use a pre-configured AMI with PyTorch named Deep Learning OSS Nvidia Driver AMI GPU PyTorch 2.2.0.
- Training
- No anomaly: 72 images (36%)
- Validation
- No Anomaly: 8 images (4%)
- Anomaly: 20 images (10%)
- Testing
- No Anomaly: 20 images (10%)
- Anomaly: 80 images (40%)
early stopping based on the F1 score from the evaluation dataset. Modify this for your needs.
We use the same config for training datasets one and two.
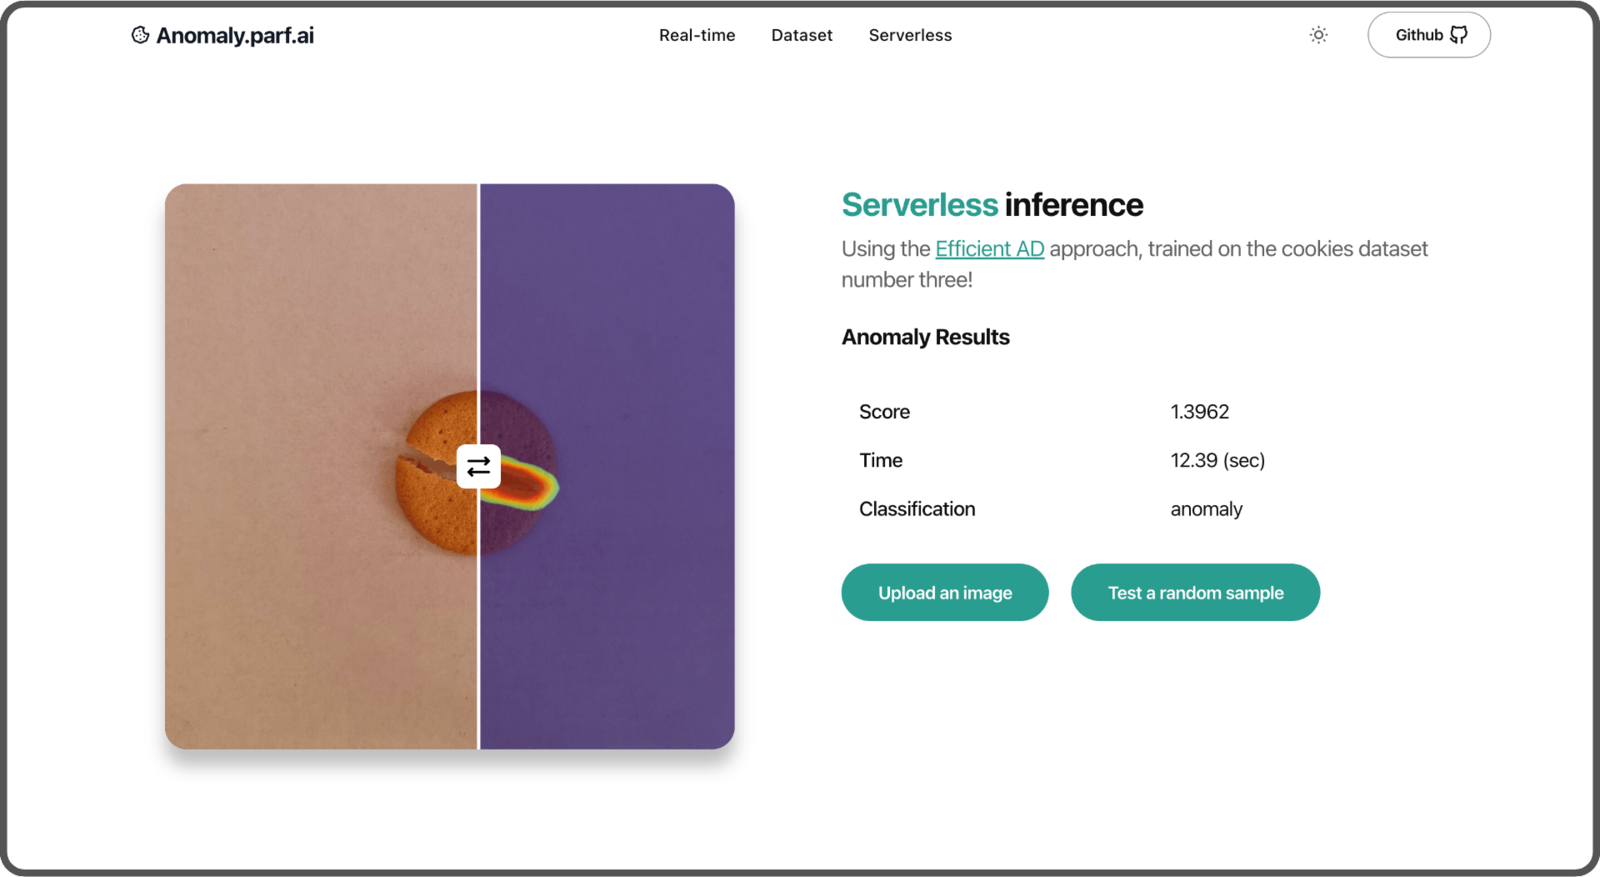
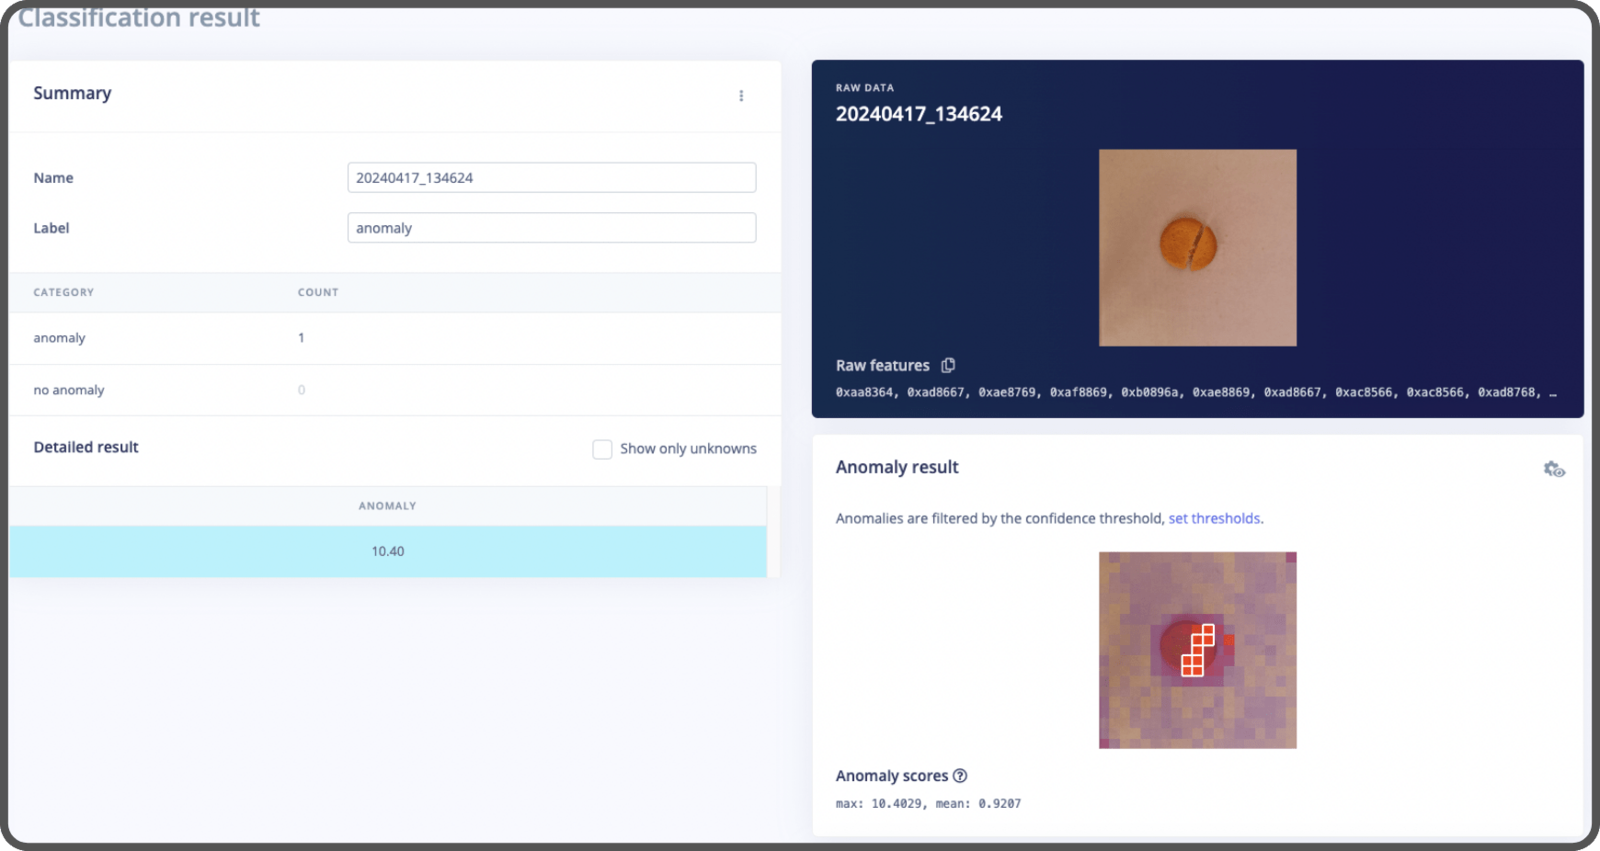
Here’s an example of the inference results with EfficientAD. It localizes the anomaly within the image through a heatmap.

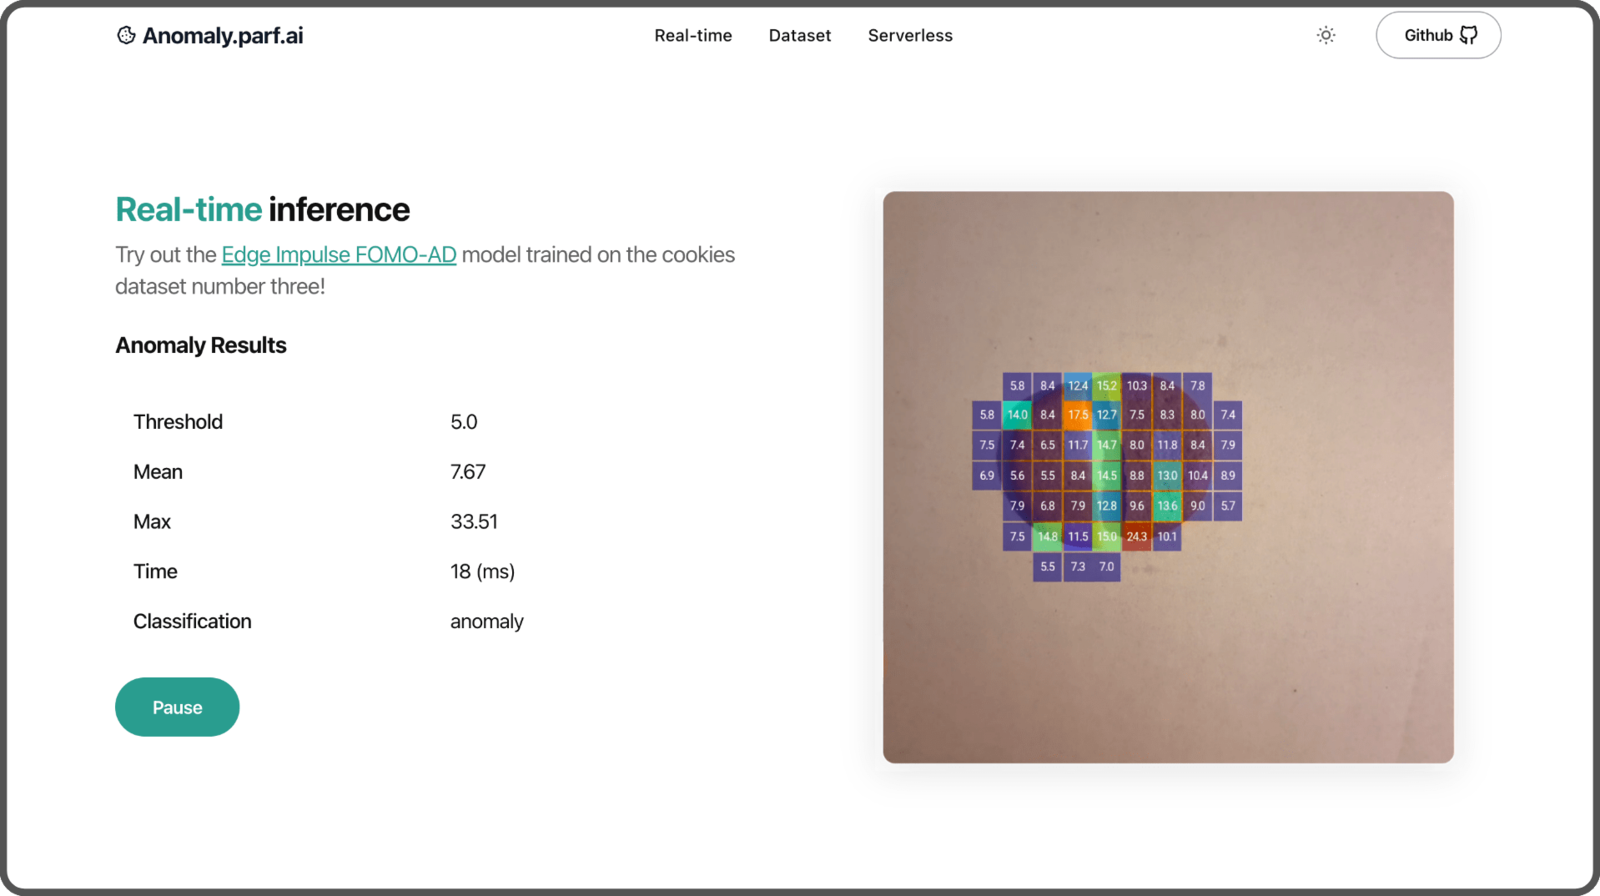
FOMO-AD model (automated)
The last model we will build is called FOMO-AD, a visual anomaly detection learning block developed by Edge Impulse. It’s based on the FOMO architecture, specifically designed for constrained devices.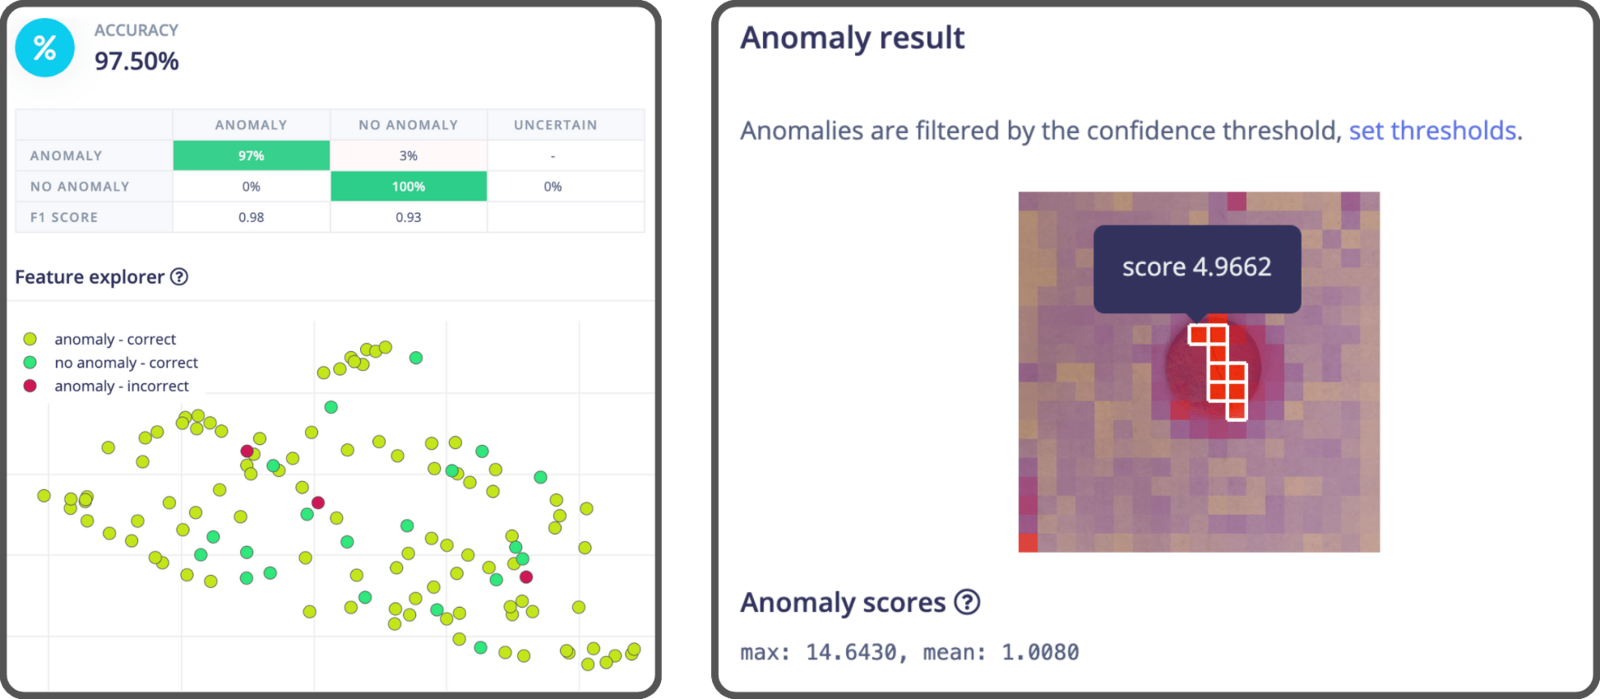
- Import the dataset,
- Create an impulse,
- Generate features,
- Train the model,
- Export the model.
- Training set
- No Anomaly: 80 images (40%)
- Testing set
- No Anomaly: 20 images (10%)
- Anomaly: 100 images (50%)
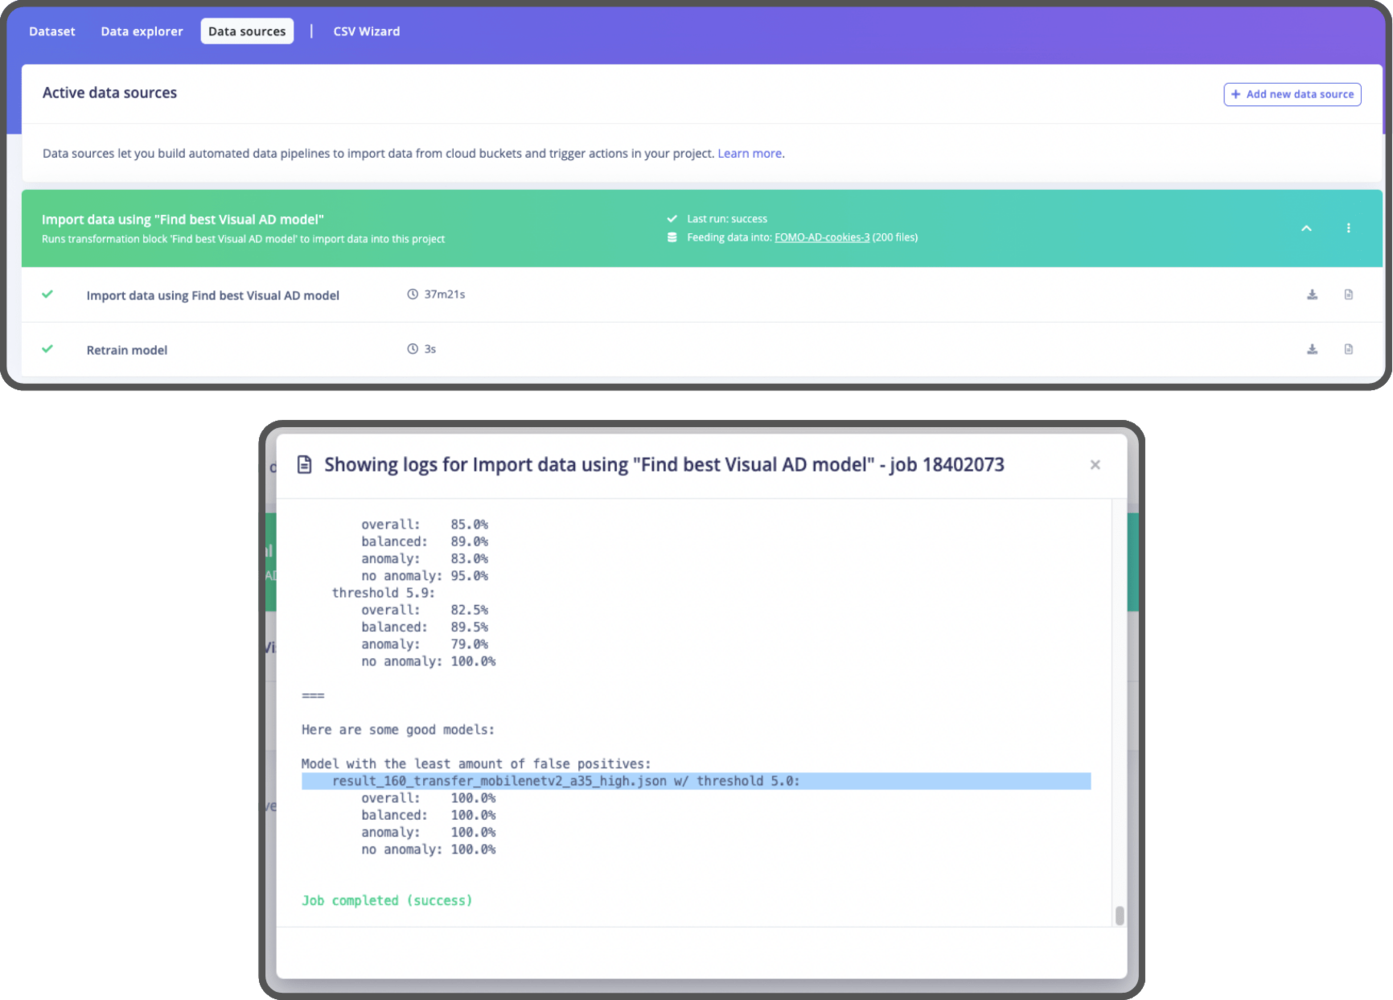
Find the best Visual AD Model using our dataset. All you need to do is provide the dataset and run the pipeline. After that, you’ll have the optimal model set up in your project, and you can find the best threshold to use in the logs (Refer to the Option 2 section in the notebook for more details).
Step 3: Benchmarking
Now that we’ve trained all the models, it’s time to evaluate how well they perform using the F1 Score. (The F1 Score is a way to measure a model’s accuracy, taking into account both precision and recall). Take a look at this notebook where all the benchmarking is done. Since each model was trained on different sets of data, we will use the test dataset from EfficientAD model for comparison. Here are the results, tested on a Macbook:
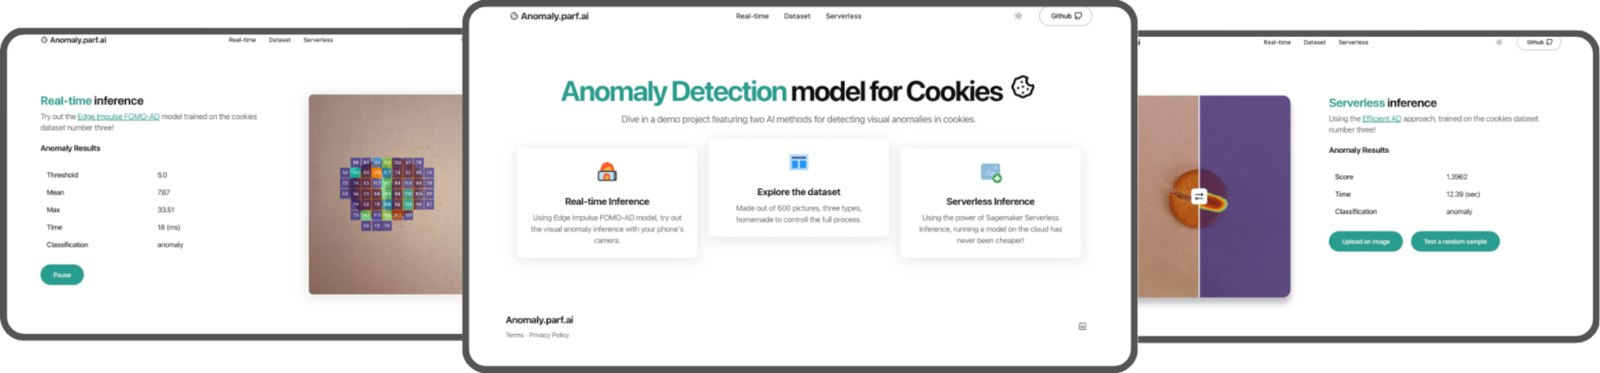
Step 4: API & Web App
The models are trained and ready to be used, so let’s build an app to showcase our proof of concept. We’ll include two features:- A serverless endpoint using SageMaker Serverless Inference with EfficientAD,
- A real-time inference using a compact version of the Edge Impulse mobile client with FOMO-AD.
- The API Code,
- The Automated Infrastructure Code (using Terraform),
- The Website Code.
SageMaker Serverless Inference
This is the infrastructure of our serverless inference endpoint: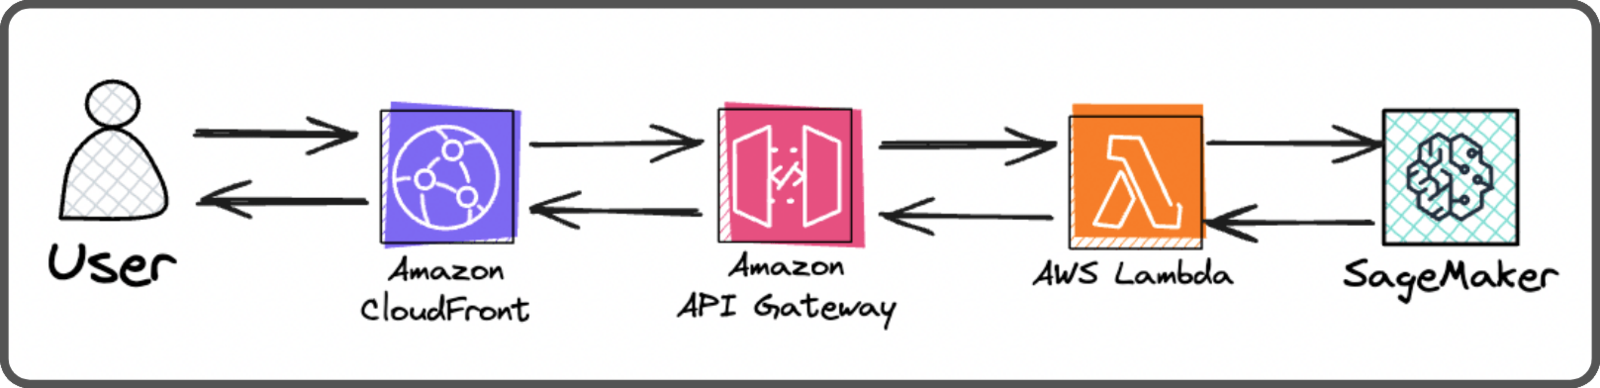
- Cloudfront (which is also used by the front end. Users are redirected to the API Gateway when the request path matches
/api*), - An API Gateway (to communicate with Lambda and allows for future API expansions),
- A Lambda that communicate to the SageMaker endpoint securely,
- A Serverless SageMaker endpoint (executes the inference using a Docker container).
Real-time inference
If you’ve previously played with Edge Impulse, you might be familiar with theLaunch in browser feature that lets you test your model in real-time.
- We’ll no longer use the API KEY.
- We’ll include the web assembly zip file directly in the website’s assets. (you can download this file manually from Edge Impulse, or it can be downloaded automatically using the API when building the website assets),
- We’ll keep only the essential code and update what’s needed to make it work the new way,
- We’ll add a colormap function for fun to show the model’s confidence.
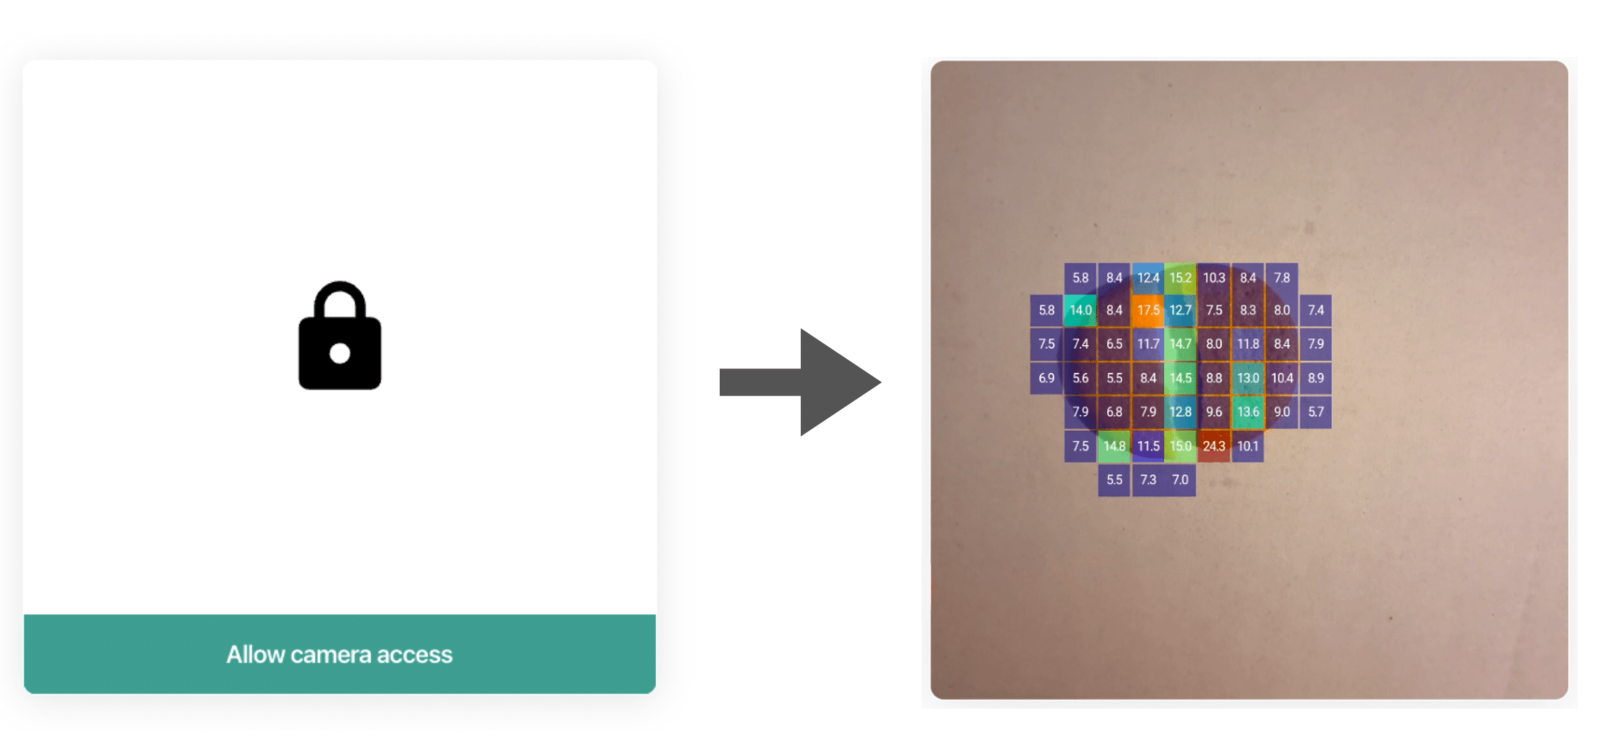
Mobile Client compressed version detail section.
Website
For the website, we’re using Astro with React based on the AstroWind template. To automatically deploy the website, we use this github action. It triggers a deployment whenever the commit message includesdeploy:website.
The website is hosted on AWS within an S3 bucket and is behind a Cloudfront distribution.