Intro
Occupancy is an important issue in Building Management Systems because based on sensory data you can automatically control lights or temperature or ventilation systems and you can save energy and optimize usage by providing availability of rooms in real-time without the hassle of having each room checked by a person. An interesting fact is that lighting use constitutes about 20% of the total energy consumption in commercial buildings. Heating or cooling, depending on the season, can also be automated based on usage and human presence. There are quite a few sensor-based solutions to detect human presence in a room and while the most simple, a video camera, would come to mind they are probably the least used in the actual real environment due to their extra privacy issues (avoiding recording video is a must) and added complexity. Usually, the sensors used in this application are infrared, ultrasonic, microwave, or other technology to decide if people are present in a room. Another challenge in managing a commercial building is scheduling rooms based on availability. People are already accustomed to Calendly and other similar tools to set up availability for one’s preferred time to meet but adding a real floorplan in the mix could save the trouble of mailing back and forth to confirm a location.Our Solution
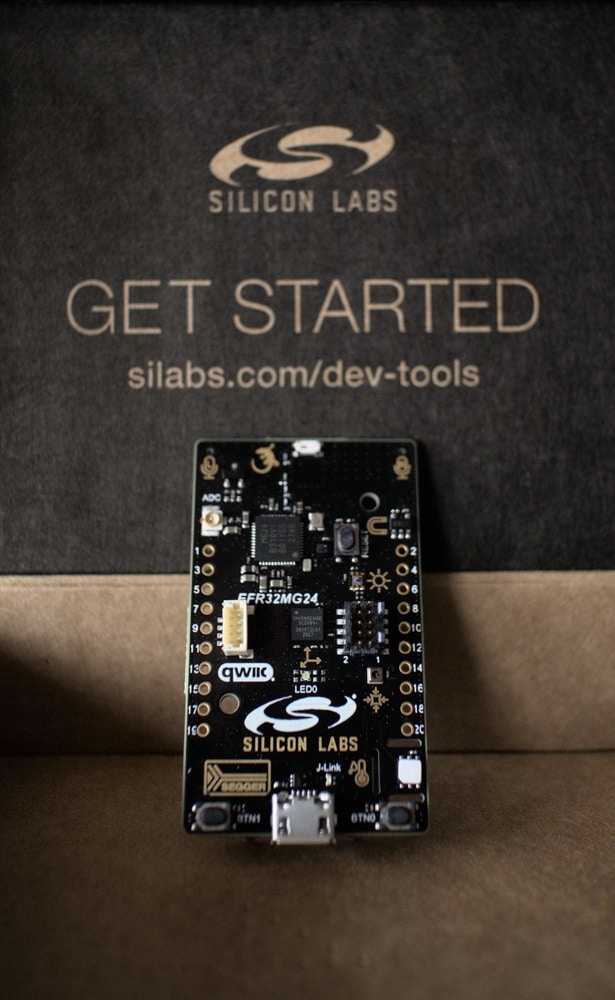
SiLabs have launched the new EFR32MG24 Wireless SoCs and they are full of interesting sensors and features making them a very good one-stop-shop for an all-around development board for mesh IoT wireless connectivity using Matter, OpenThread, and Zigbee protocols for smart home, lighting, and building automation products or any other use case you see fit to this combination of sensors and connectivity. The sensors present on board are an accelerometer, a microphone, environmental sensors comprising temperature, humidity, and air pressure, a Hall sensor, an inertial and an interactional sensor. So we have quite an array of possibilities to choose from.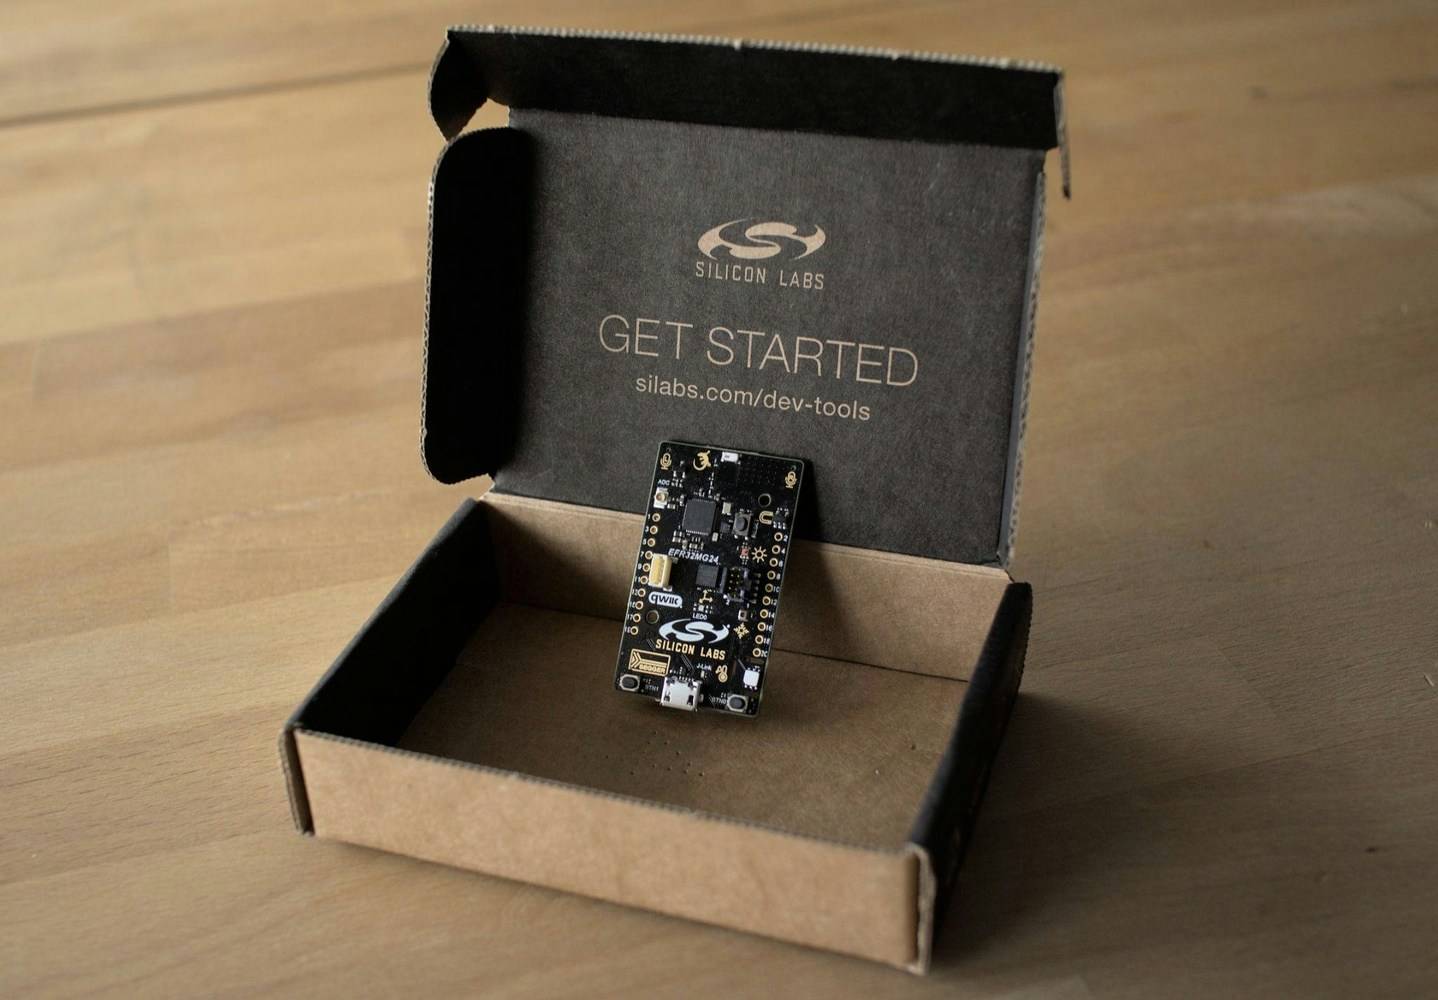
Hardware requirements
- EFR32MG24 Dev kit (USB cable included)
- A CR2030 Battery
- A 3D printed enclosure (optional)
Software requirements
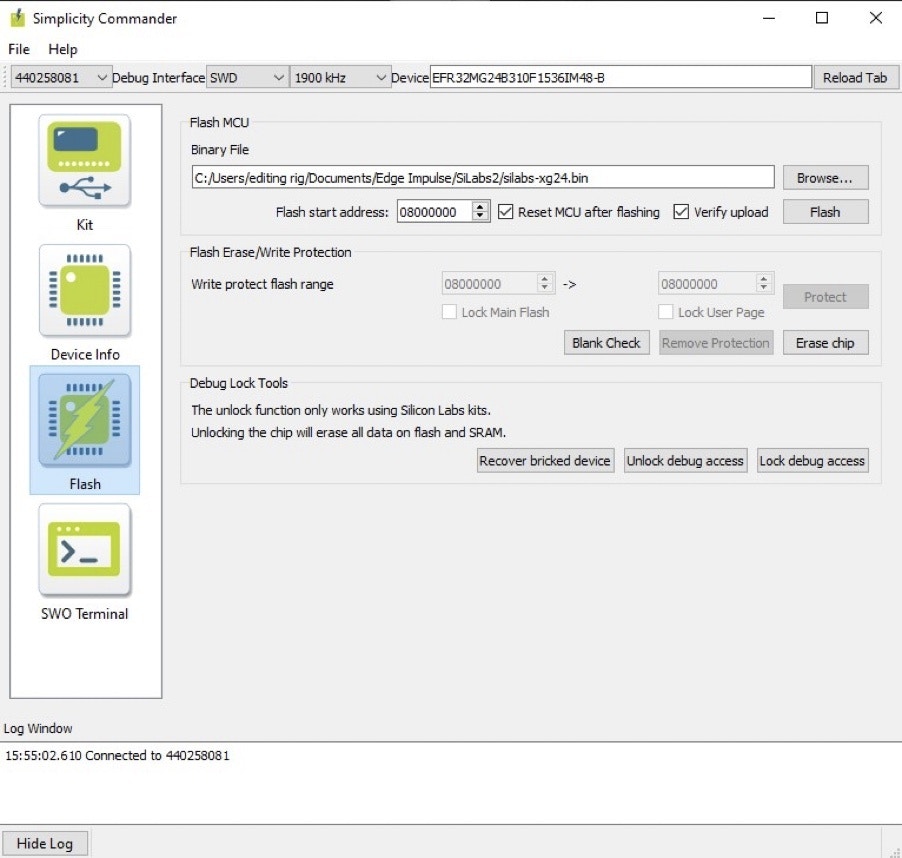
- Simplicity Commander - a utility that provides command line and GUI access to the debug features of EFM32 devices. It enables us to flash the firmware on the device.
- The Edge Impulse CLI - A suite of tools that will enable you to control the xG24 Kit without being connected to the internet and ultimately, collect raw data and trigger in-system inferences
- The base firmware image provided by Edge Impulse - enables you to connect your SiLabs kit to your project and do data acquisition straight from the online platform.
Hardware Setup
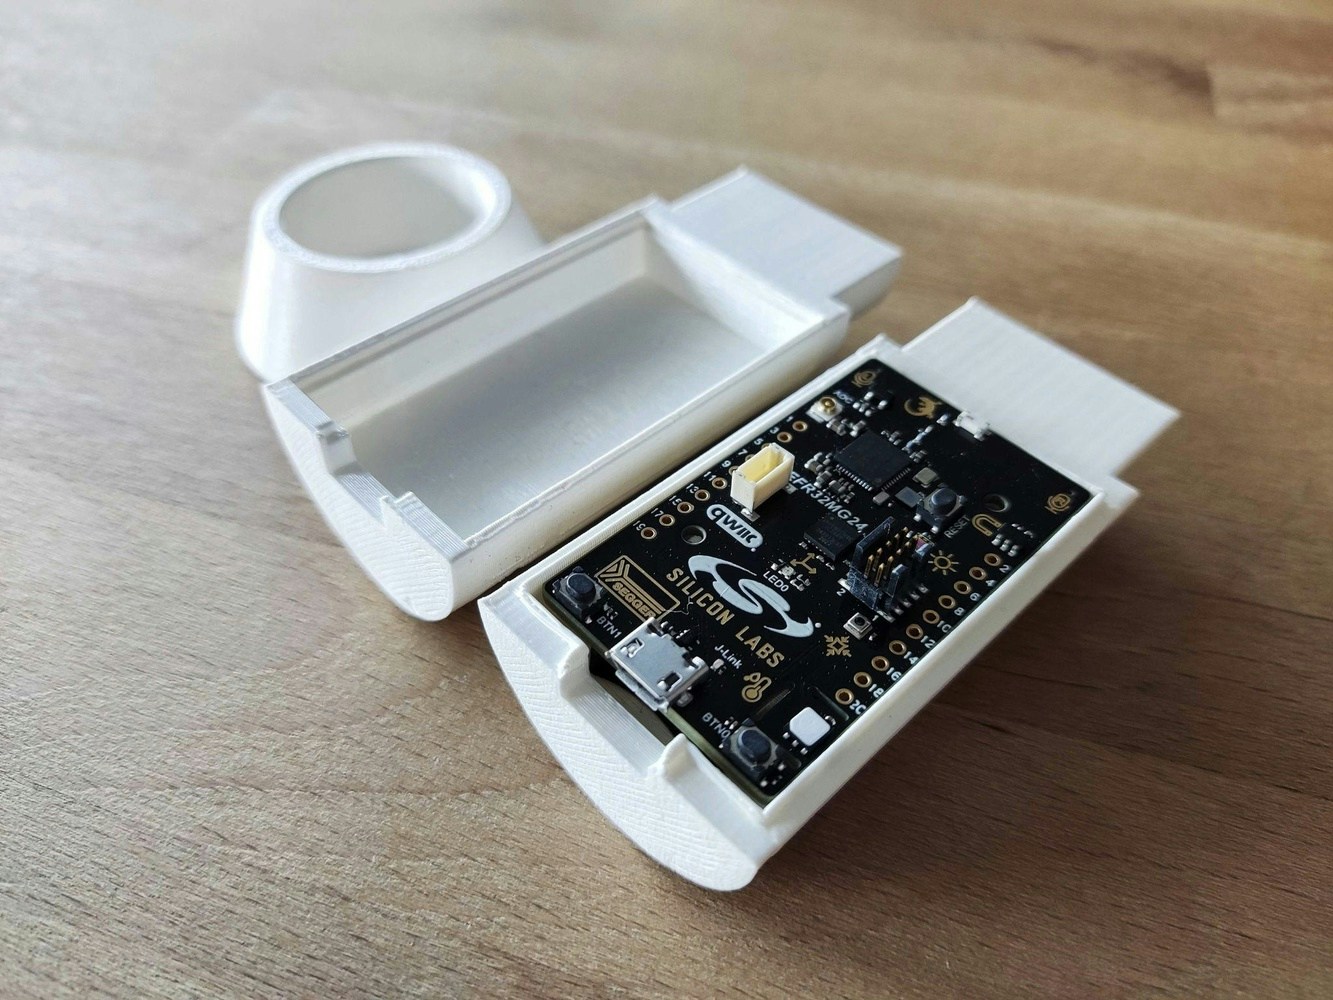
Since all sensors are present on the development board there is not that much to do on the hardware side, you will use the USB cable to program the board, and afterward, to test it you can use a CR2030 battery to supply its power. Mileage will vary based on the use case and how often you read the sensors and you send data to the cloud. Since it will be mounted in a room where you want to detect the presence of persons we decided to create a 3D enclosure so it protects the development board and keeps it nice and tidy. While the whole action takes place indoors, there are still some accidents that happen on a conference table, like liquid spillage, that might damage the board. In this case, the 3D printed case offers an extra level of protection by elevating the board above the table-top level.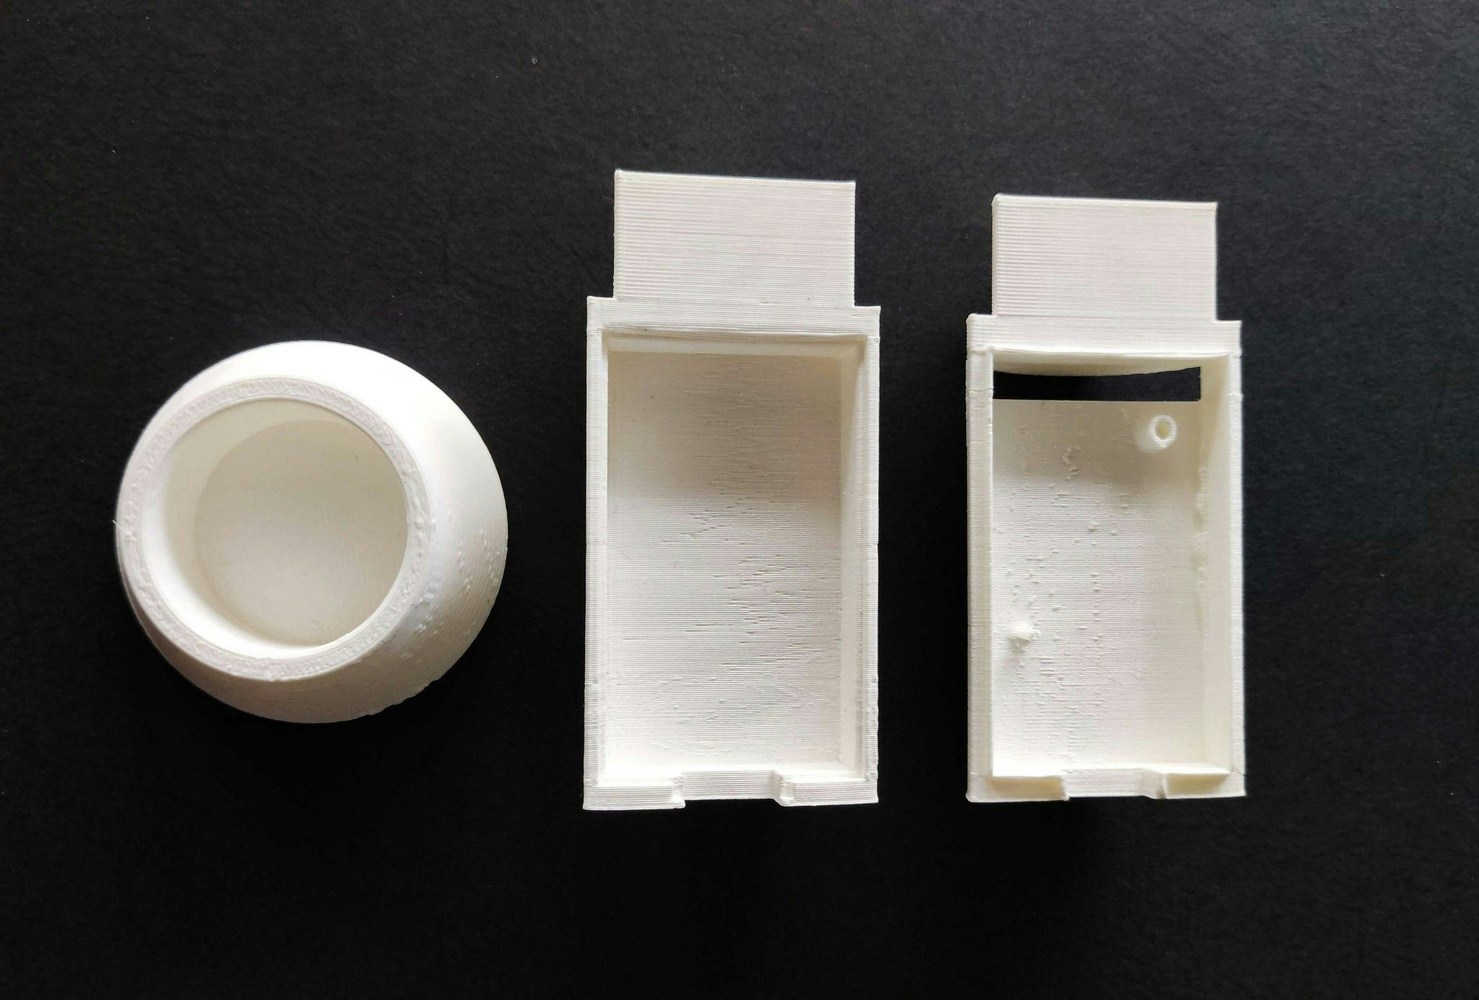
Software Setup
Updating the firmware
- First of all install both Simplicity Commander and the Edge Impulse CLI depending on your OS, by following the official documentation.
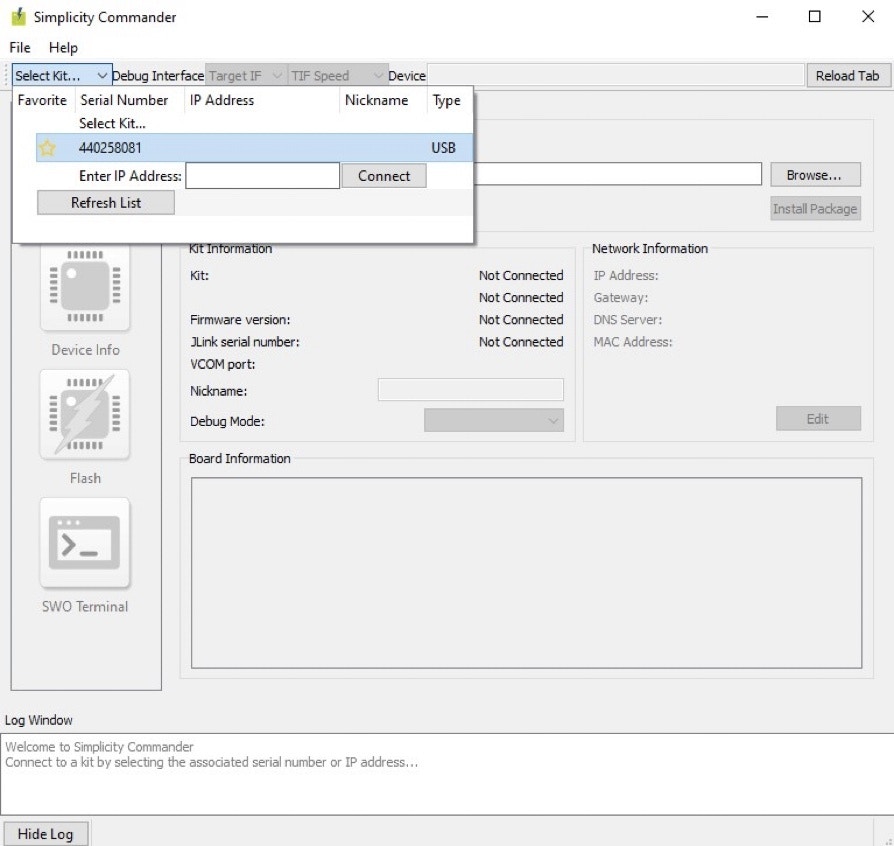
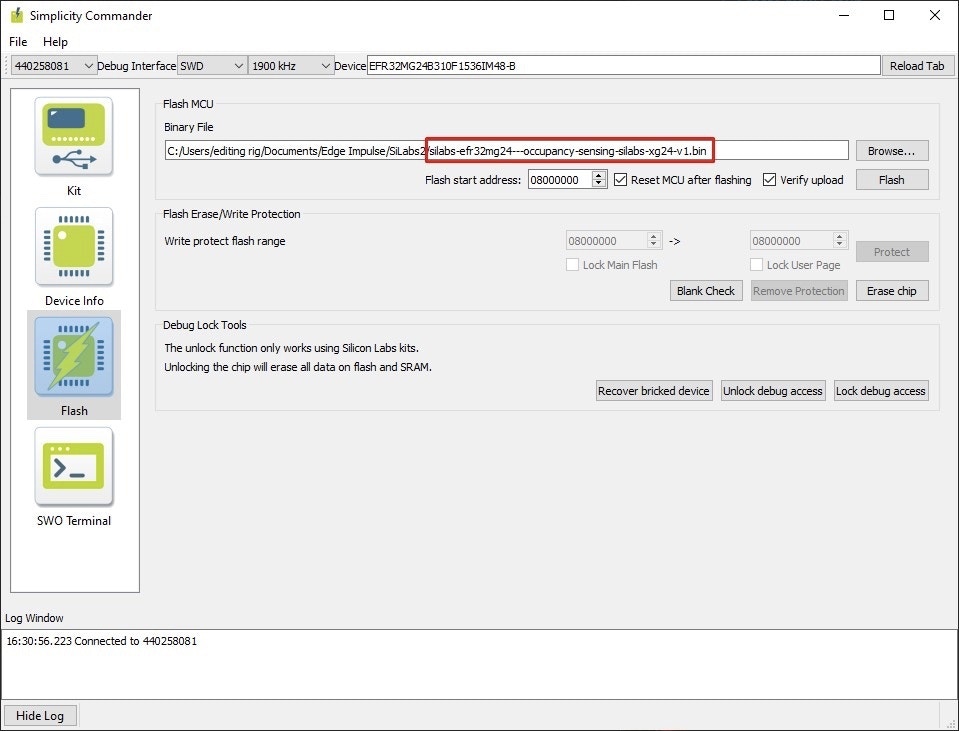
- Use a micro-USB cable to connect the development board to your PC and launch Simplicity Commander. You will be met with a screen containing various information regarding your development board like Chip Type, Flash Size, and more.
Creating an Edge Impulse Project
First up, let’s create an Edge Impulse project. Log in to your free account, click on Create new project, give it a recognizable name and click on Create New Project.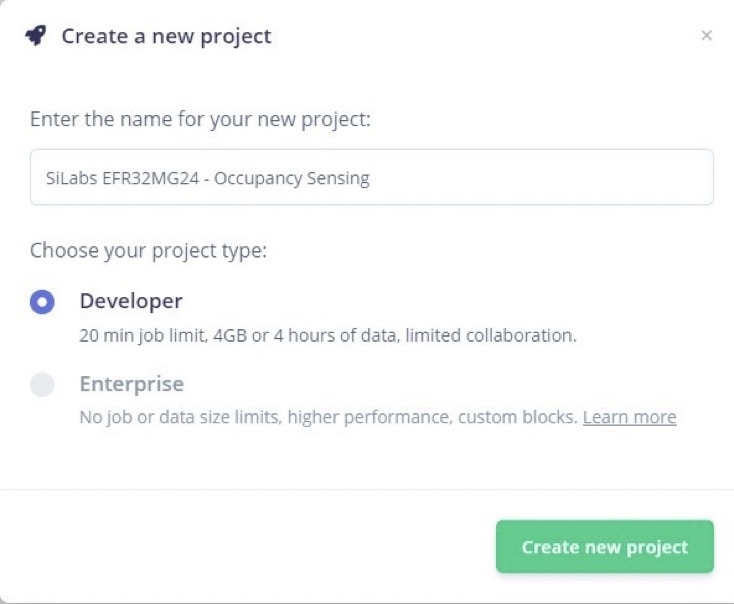
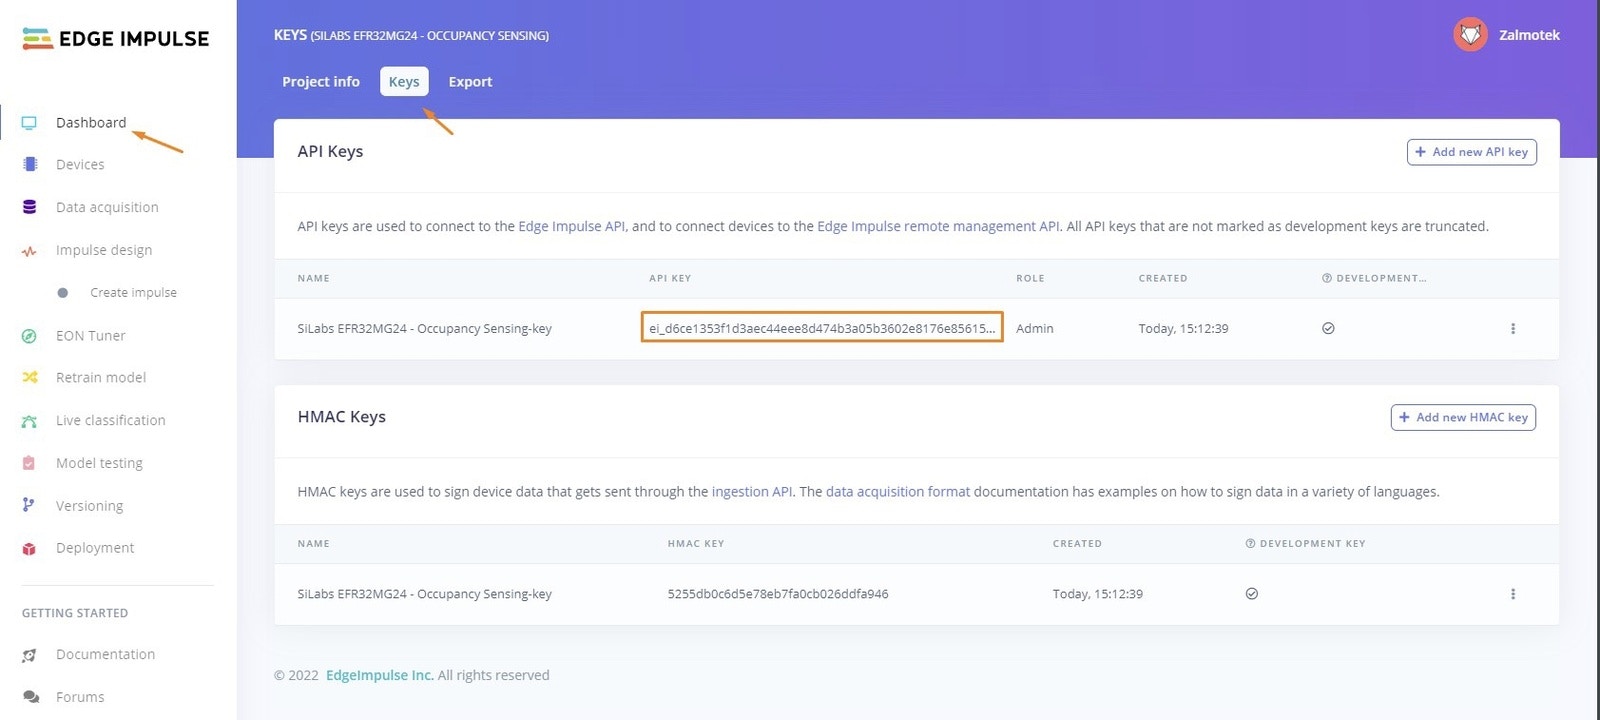
edge-impulse-daemon --api-key <my project api key>
In the future, if you wish to change the project that your development boards connect, run the same command with a different api-key:

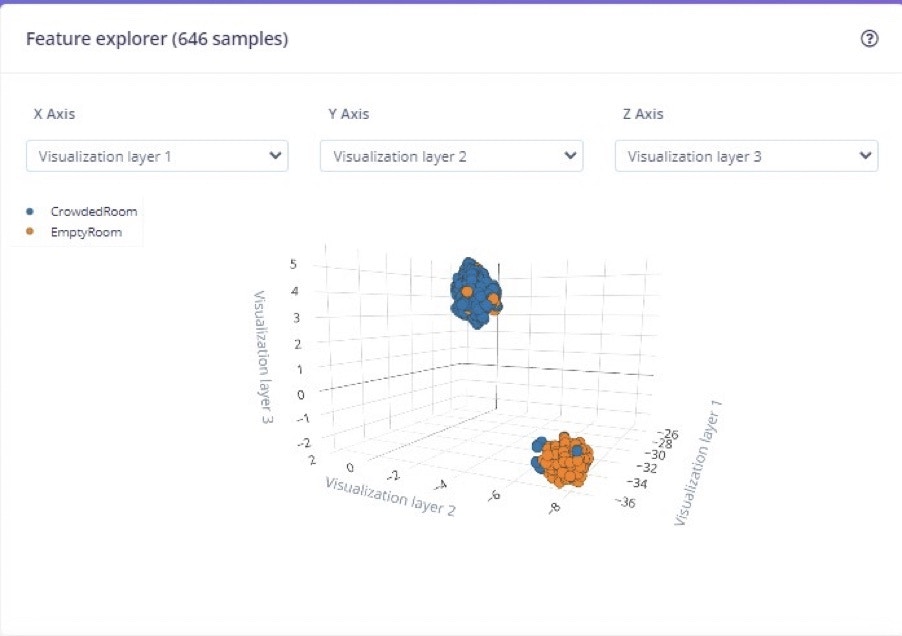
Acquiring training data
Once the device is properly attributed to the Edge Impulse project, it’s time to navigate to the Data Acquisition tab.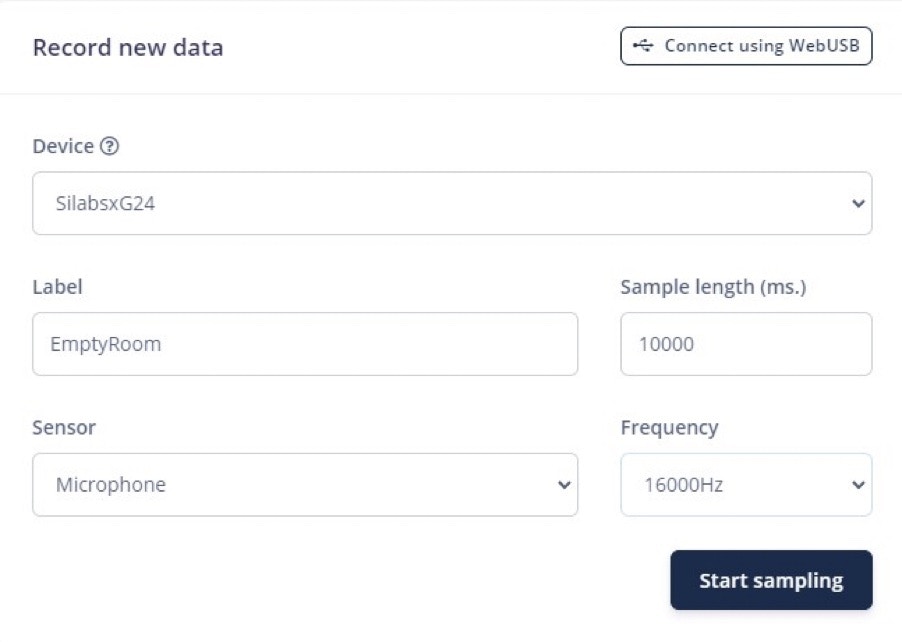
Designing an impulse
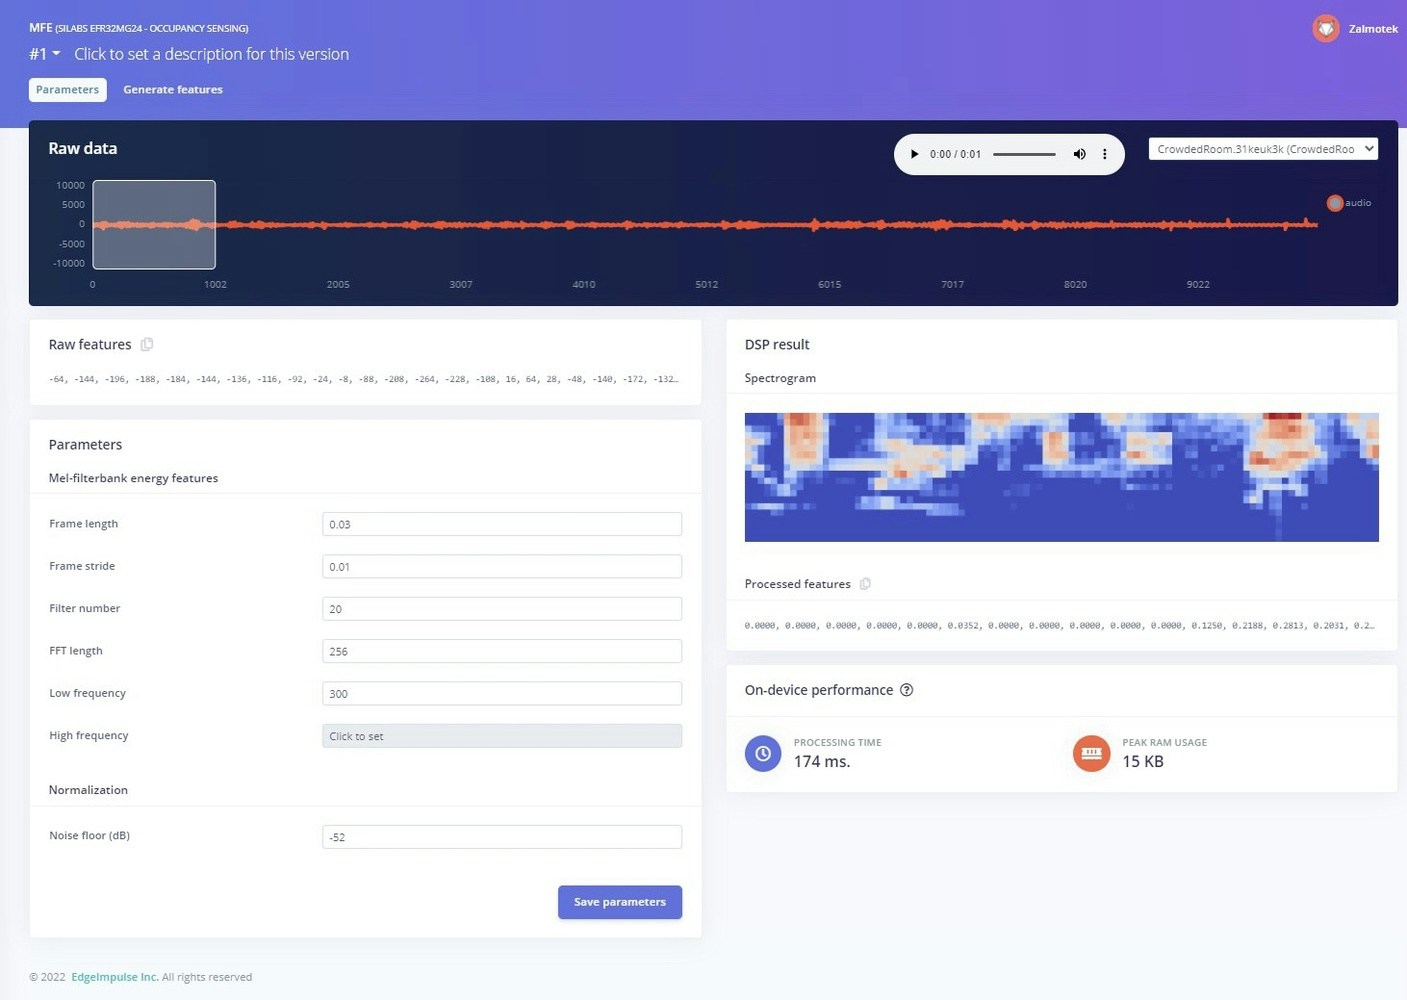
With the data in place, let’s start building our Impulse. You could look at an Impulse like the functional Block of the Edge Impulse ecosystem, and it represents an ensemble of blocks through which data flows. An impulse is made out of 4 levels: The input level, the signal processing level, the Learning level, and the output level. At the Input level of an impulse, you can define the window size, or to put it simply, the size of data you wish to perform signal processing and classification on. Make sure the Frequency matches the recording frequency used in the Data Acquisition phase and that Zero-pad data is checked. The Signal processing level is made out of one or more processing blocks that enable you to extract meaningful features from your data. Due to the fact that the model we are training is supposed to run on the edge, we must identify the most relevant features and use them in the training process. There are many processing blocks available that allow you to extract frequency and power characteristics of a signal, extract spectrograms from audio signals using Mel-filterbank energy features or flatten an axis into a single value and more, depending on your specific use case. If needs be, Edge Impulse also allows its users to create their own custom processing blocks. The Learning level is where the magic happens. This is the point where the model training takes place. Edge impulse provides various predefined learning blocks like Classification (Keras), Anomaly Detection (K-Means), Object Detection (FOMO) and many others. In the Output level, you can see the 2 features your Impulse will return after running the data through the previous levels.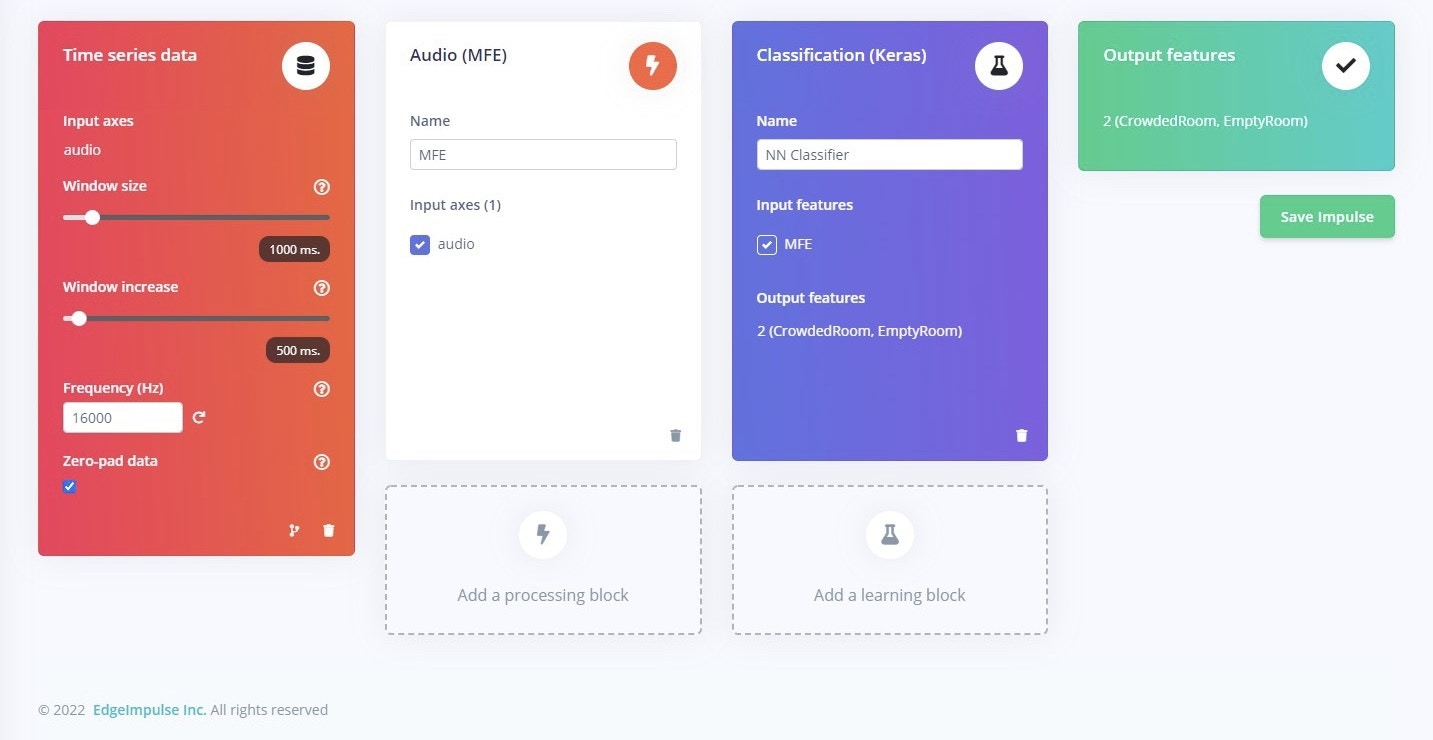
Configure the NN Classifier
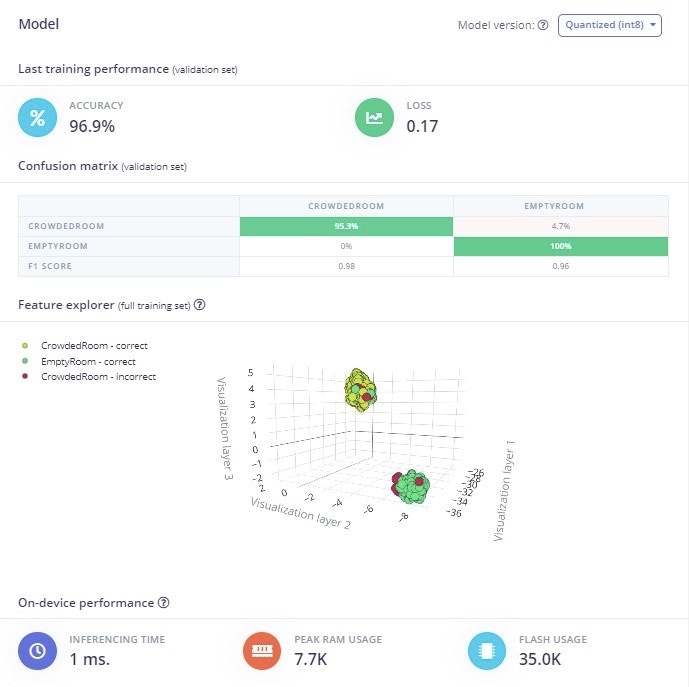
In the NN Classifier tab, under the Impulse Design menu, allows us to configure various parameters that influence the training process of the neural network. For the moment, it suffices to leave the Training setting on the default value. You can notice in the Audio training options menu that a Data Augmentation option may be checked. Fundamentally, what Data Augmentation does is artificially increase the amount of training data, to improve the classifier’s accuracy, avoid overfitting and reduce the number of training cycles required. Check it, leave the settings as they come and click on Start Training.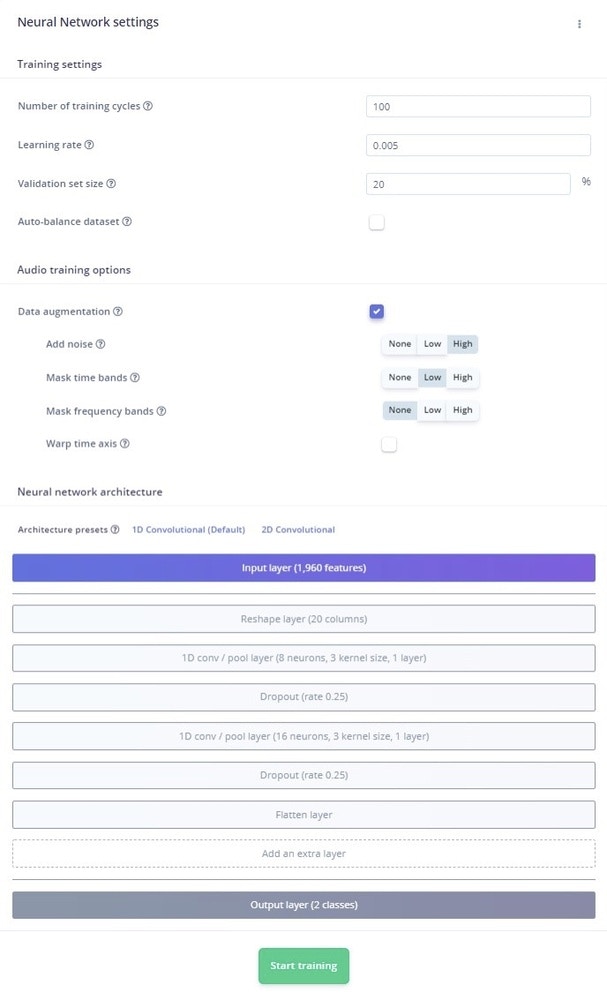
Test out the model
The best way to test out our model is to navigate to the Live Classification tab and start gathering some new samples. Make sure the sampling Frequency is the same as the one used in the Data Acquisition phase and click on Start Sampling.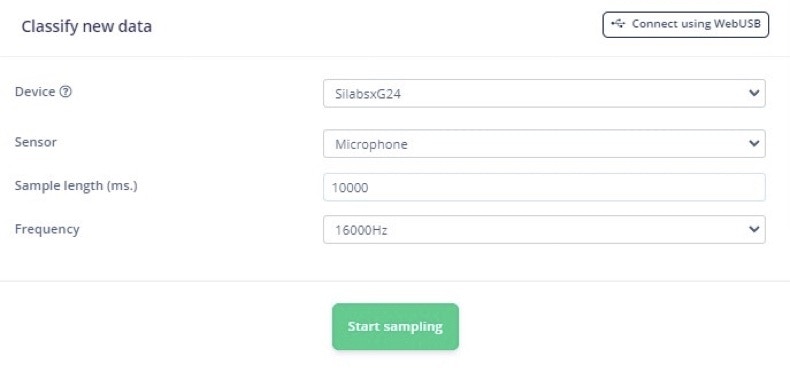
Deploying the model on the edge
In this last step, we will be taking the trained and optimized model and deploying it back on the device used for data acquisition. What we will achieve by this is decreased latency and power consumption, while also being able to perform the inference without an internet connection:Option 1: Deploying a pre-built binary
The SiLabs xG24 Dev Kit is fully supported by Edge Impulse. What this means is that, if you navigate to the Deployment tab, you will notice that in the “Build Firmware” section you can select the board and click Build.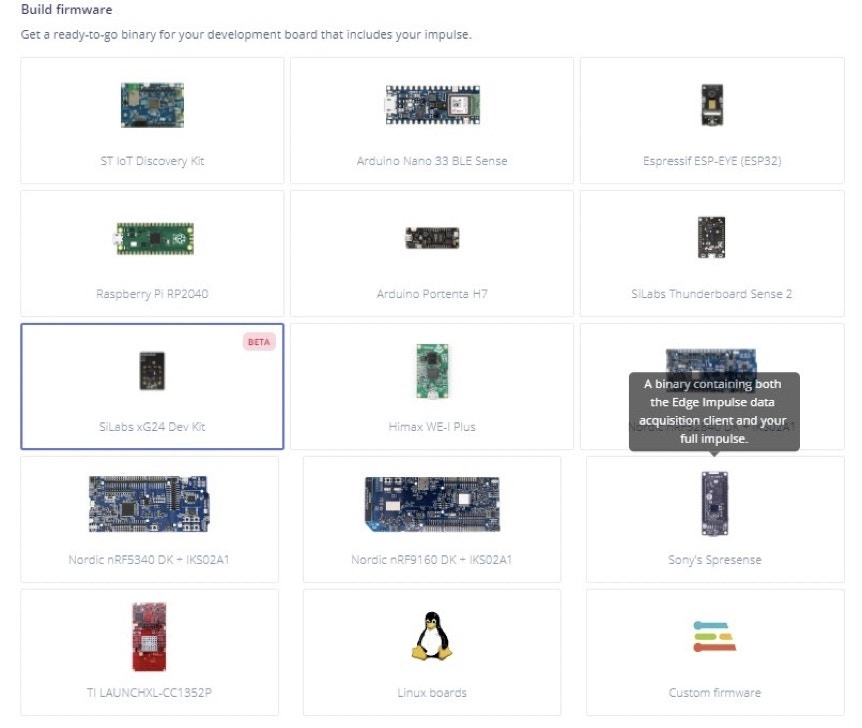

edge-impulse-run-impulse
If everything went smoothly, you should see something like this, confirming the fact that you have deployed the model correctly and that the inference is running smoothly.
Option 2: Exporting the Impulse as a C++ library with SLCC (Simplicity Studio Component file) and building the binary locally
Edge Impulse offers its users the possibility to export the model as a C++ library that contains all the signal processing blocks, learning blocks, configurations, and SDK needed to integrate the model in your own custom application. Moreover, in the case of the xG24 devkit, it also provides the Simplicity Studio Component file.Conclusion
By understanding occupancy patterns, building managers can make informed decisions that will improve the comfort, safety, and efficiency of their buildings.