Introduction
Industries, stores, workshops and many other professional environments have to manage an inventory. Whether of products or tools, this need is normally addressed with a limited digital or manual solution. This project aims to contribute to the cited need with a smart approach that will let you know the products/tools quantity and their exact location in the rack, box or drawer.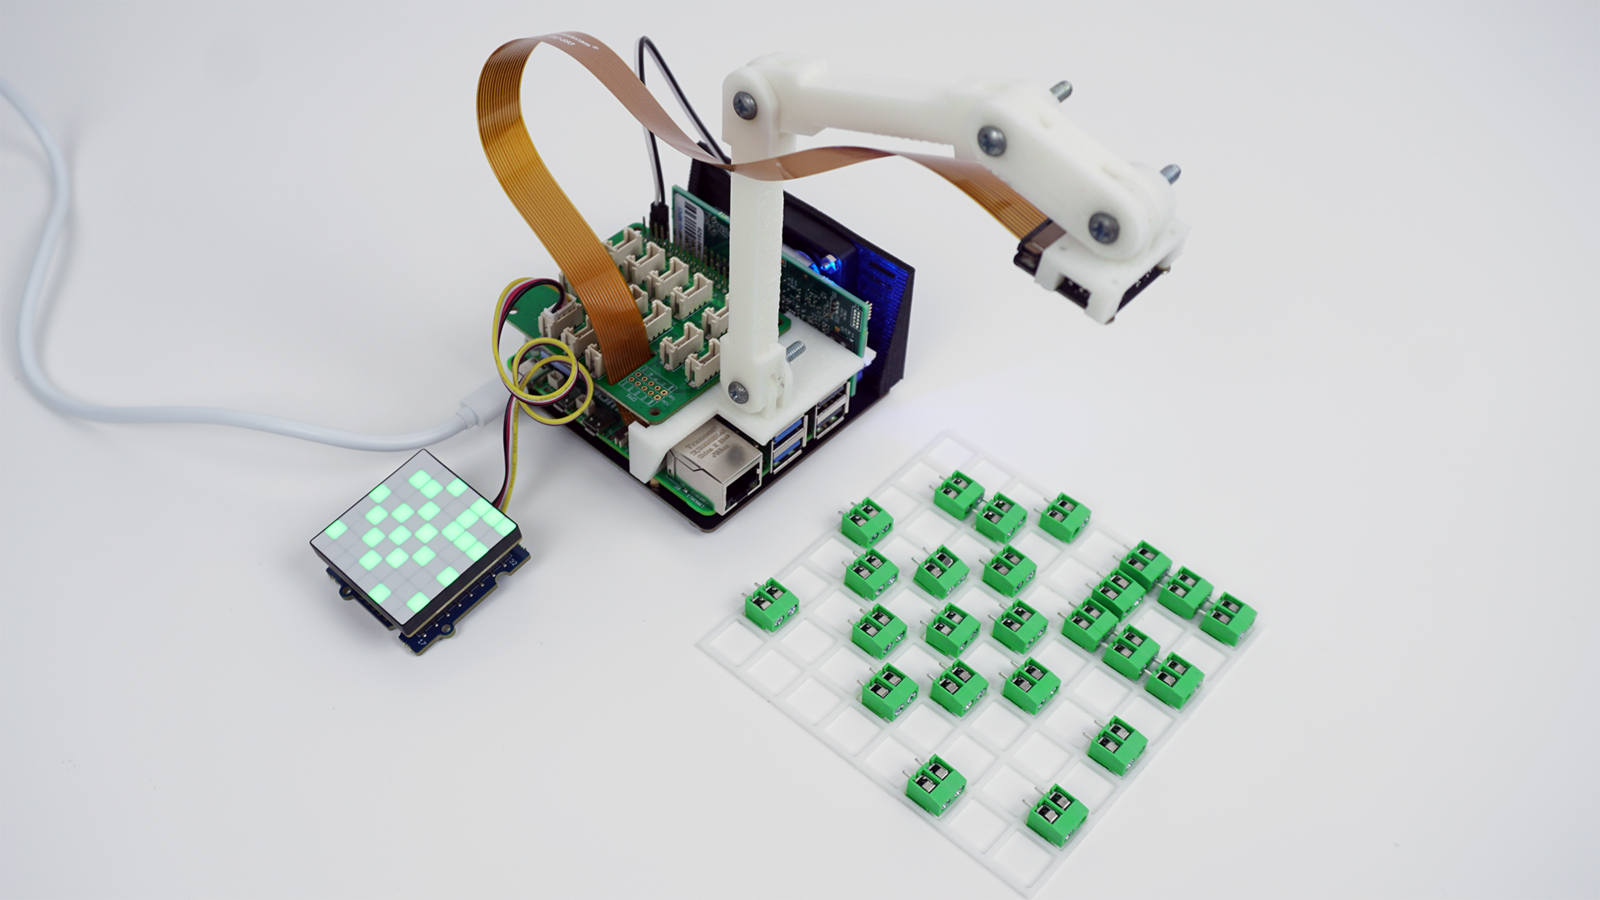
Hardware and Software Requirements
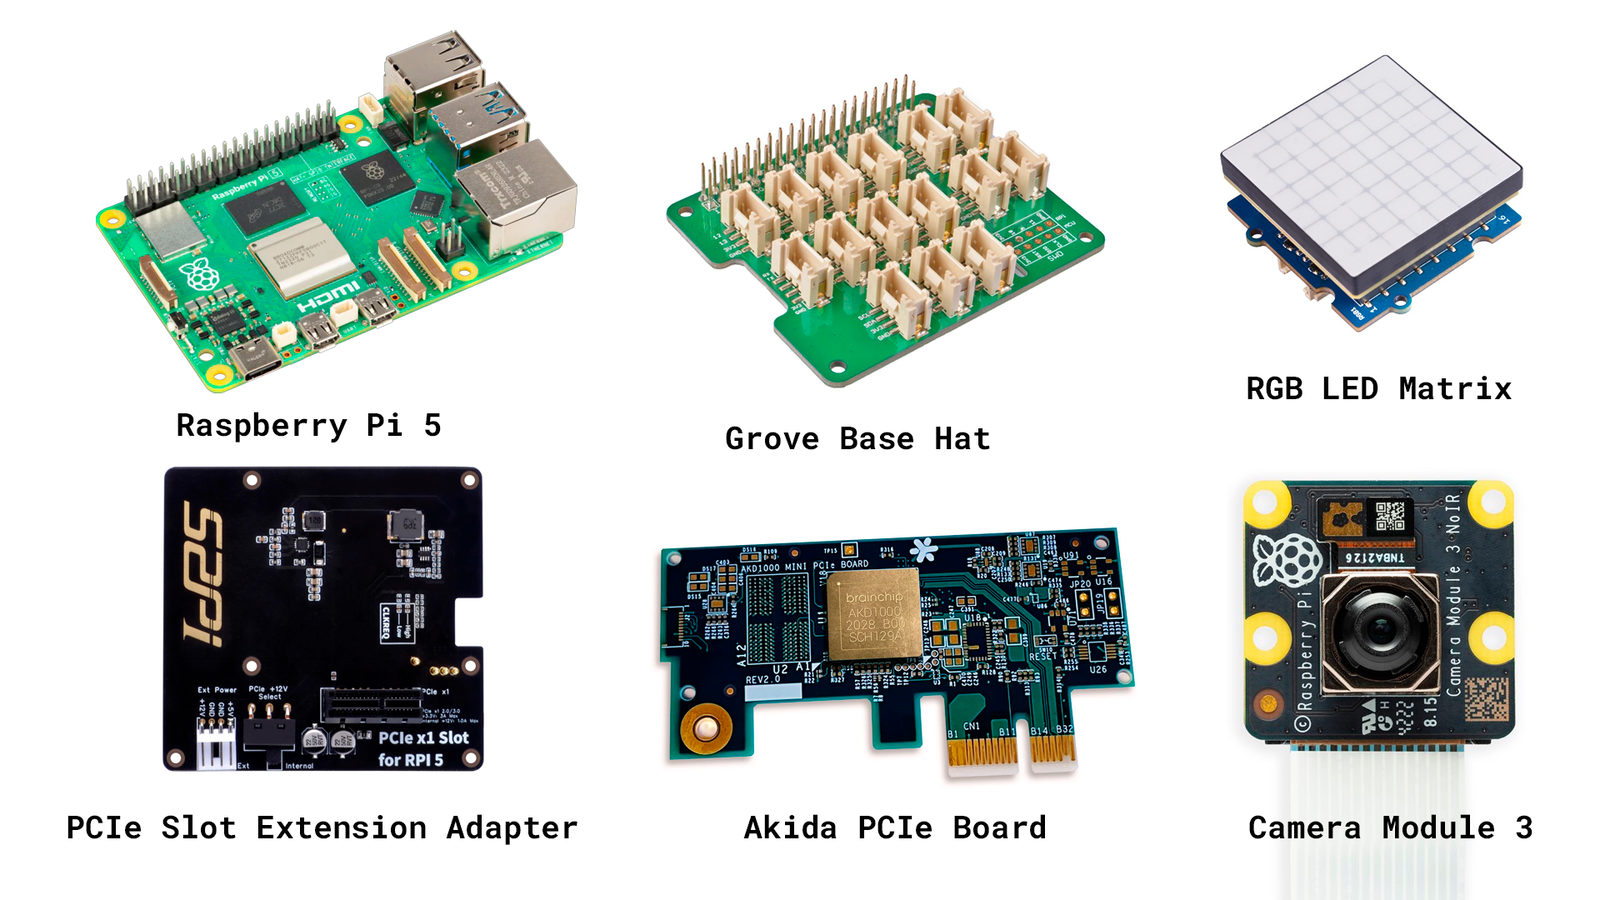
To develop this project we will use the following hardware:- Akida™ PCIe Board
- PCIe Slot For Raspberry Pi 5 Extension Adapter Board
- Raspberry Pi 5
- Camera Module 3 - IMX708
- RGB LED Matrix
- Grove Base Hat for Raspberry Pi (Optional)
- Custom 3D parts
Akida™ PCIe Board
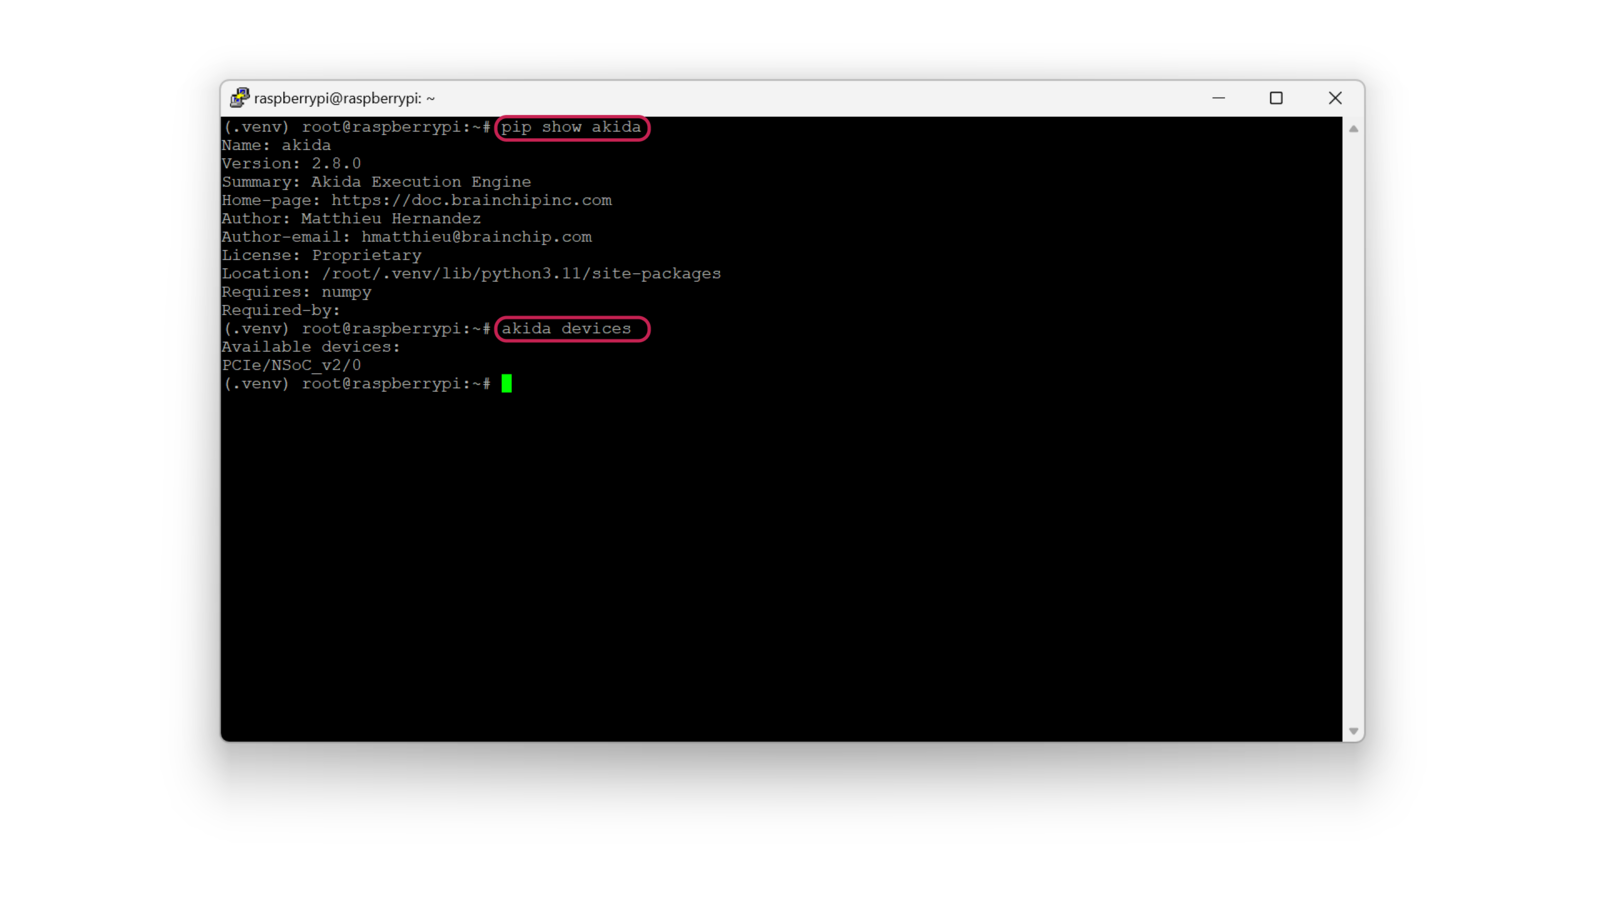
It should be noted that the AKD1000 Neuromorphic Hardware Accelerator is the main component of this project thanks to some interesting characteristics that make it ideal for this use case. Considering that our project will end up being deployed in industrial and commercial environments, it’s crucial that it can do its job efficiently and with very low energy consumption. This is where BrainChip’s technology makes sense. Akida™ neuromorphic processor mimics the human brain to analyze only essential sensor inputs at the point of acquisition - processing data with unparalleled performance, precision, and economy of energy.Software
To develop the project model we are going to use:Hardware Setup
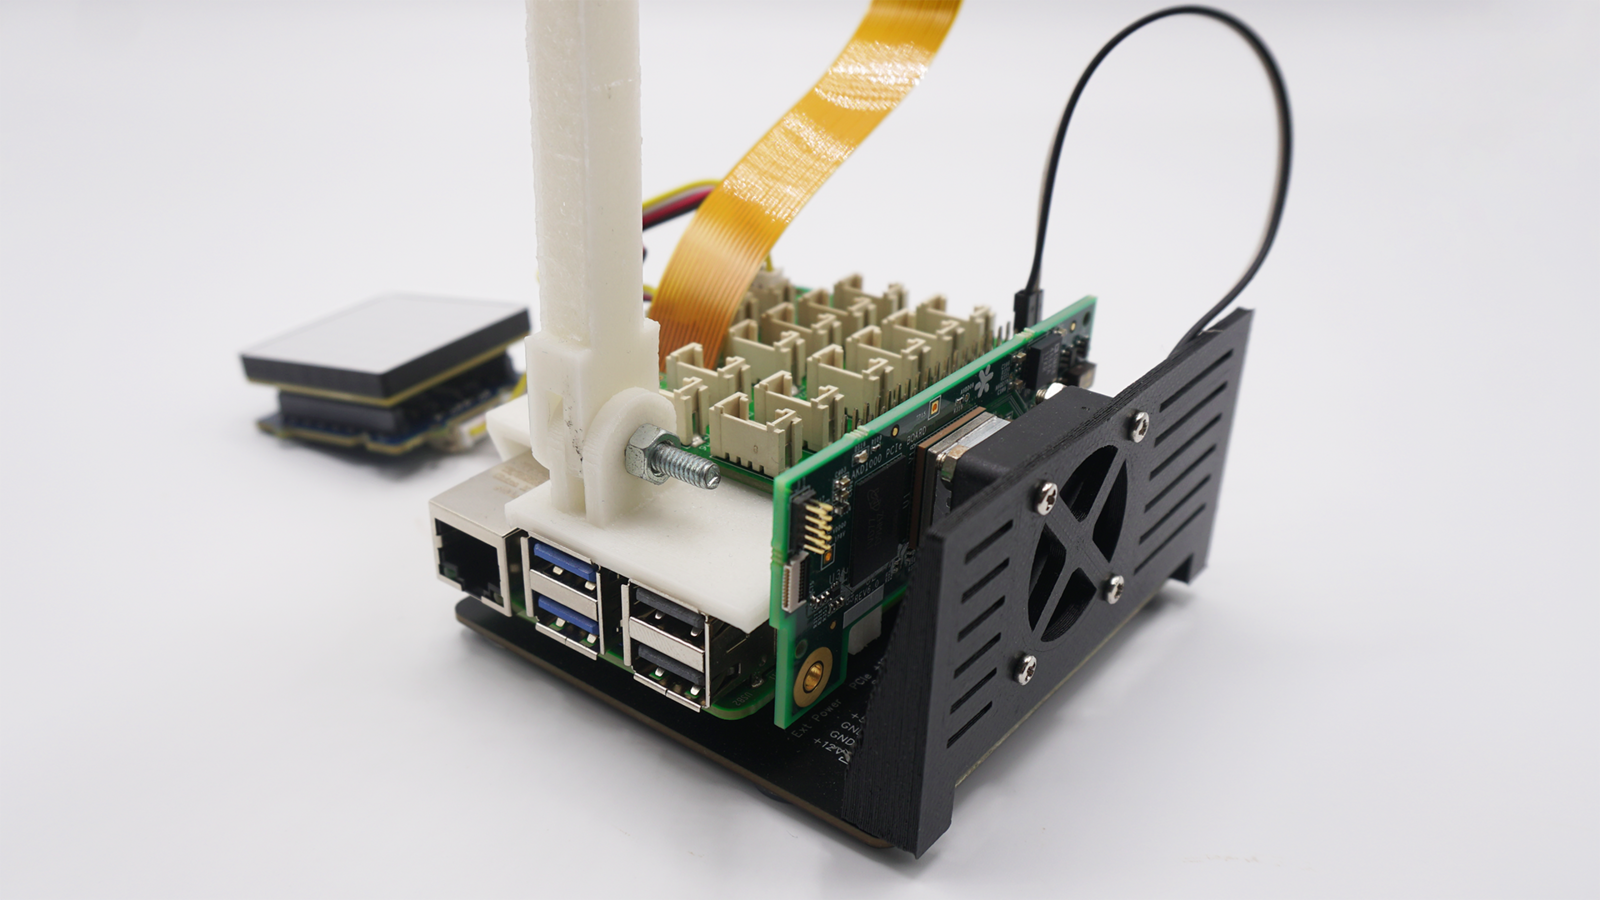
To fully assemble the project:- Stack the PCIe Slot Extension Adapter Board under the Raspberry Pi and connect the flat cable accordingly (dedicated instructions).
- Screw the 3D-printed arm to the Raspberry Pi using the available spacers thread.
- Screw the MIPI camera to the 3D-printed arm and connect the flat cable from the camera to the CAM0 slot on the Raspberry Pi.
- Stack the Grove Base Hat on the Raspberry Pi 40 pins header.
- Connect the Grove cable from the LED Matrix to an I2C connector on the Grove Base Hat.
- Screw the cooling fan holder in the PCIe Slot Extension Adapter Board and connect it to +5V and GND on the 40 pins header (Optional).
Raspberry Pi 5 Setup
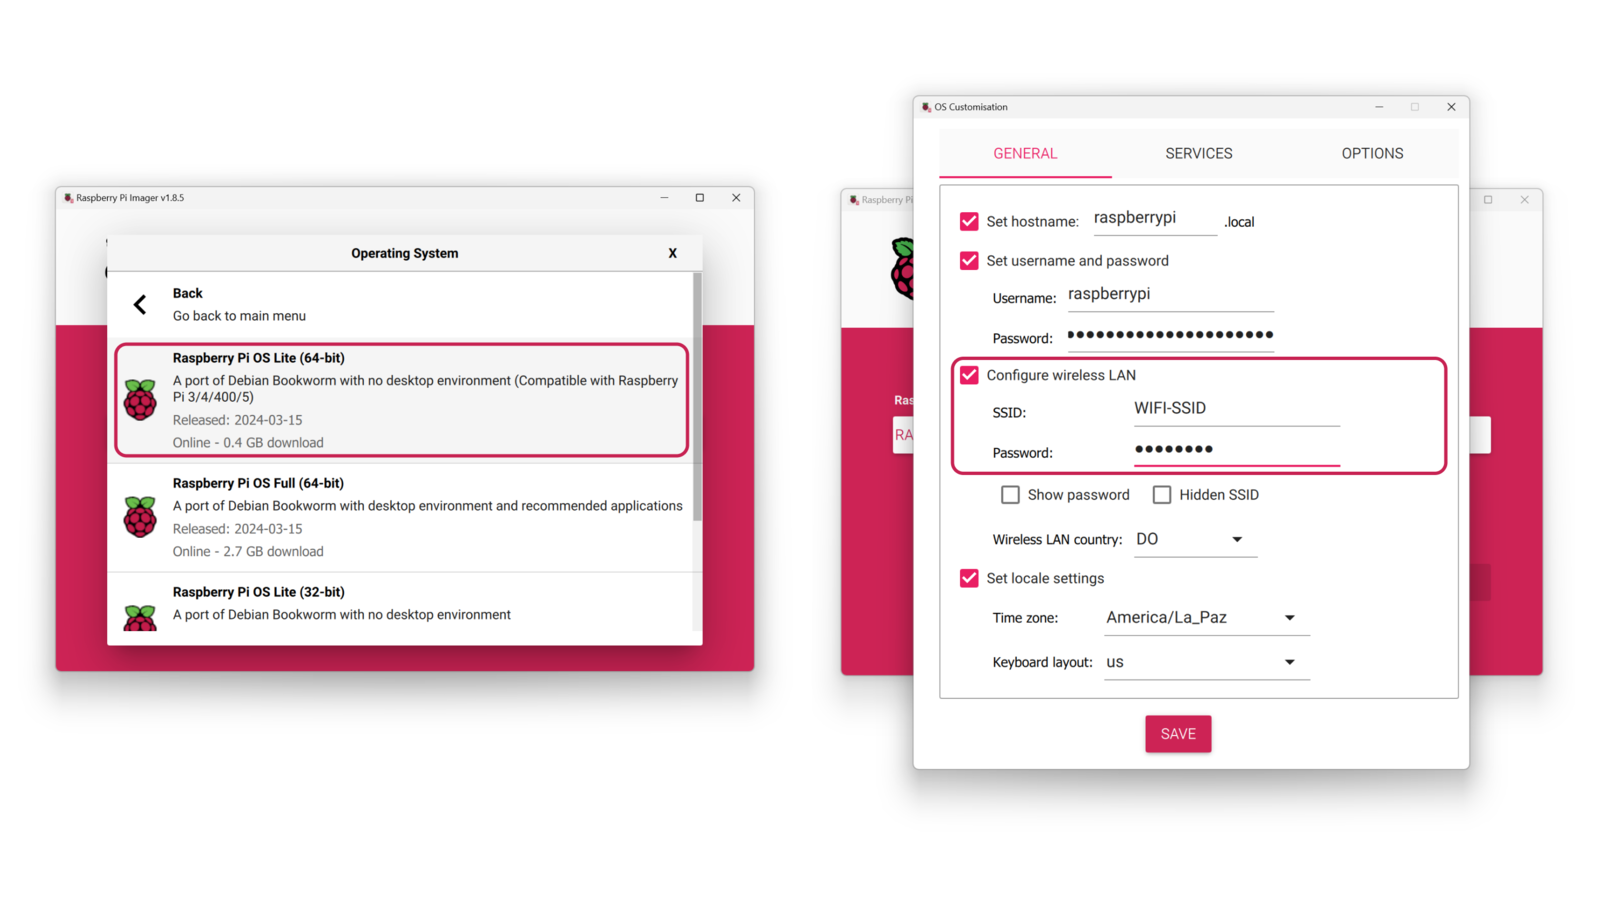
With the Raspberry Pi Imager, flash a micro-SD card with the Raspberry Pi OS Lite (64-bit), enter the OS Customisation menu by typingCtrl + Shift + X and add your login credentials, enable the wireless LAN by adding your WiFi credentials and verify that the SSH connection is enabled in the Services settings.
Setting up the Development Environment
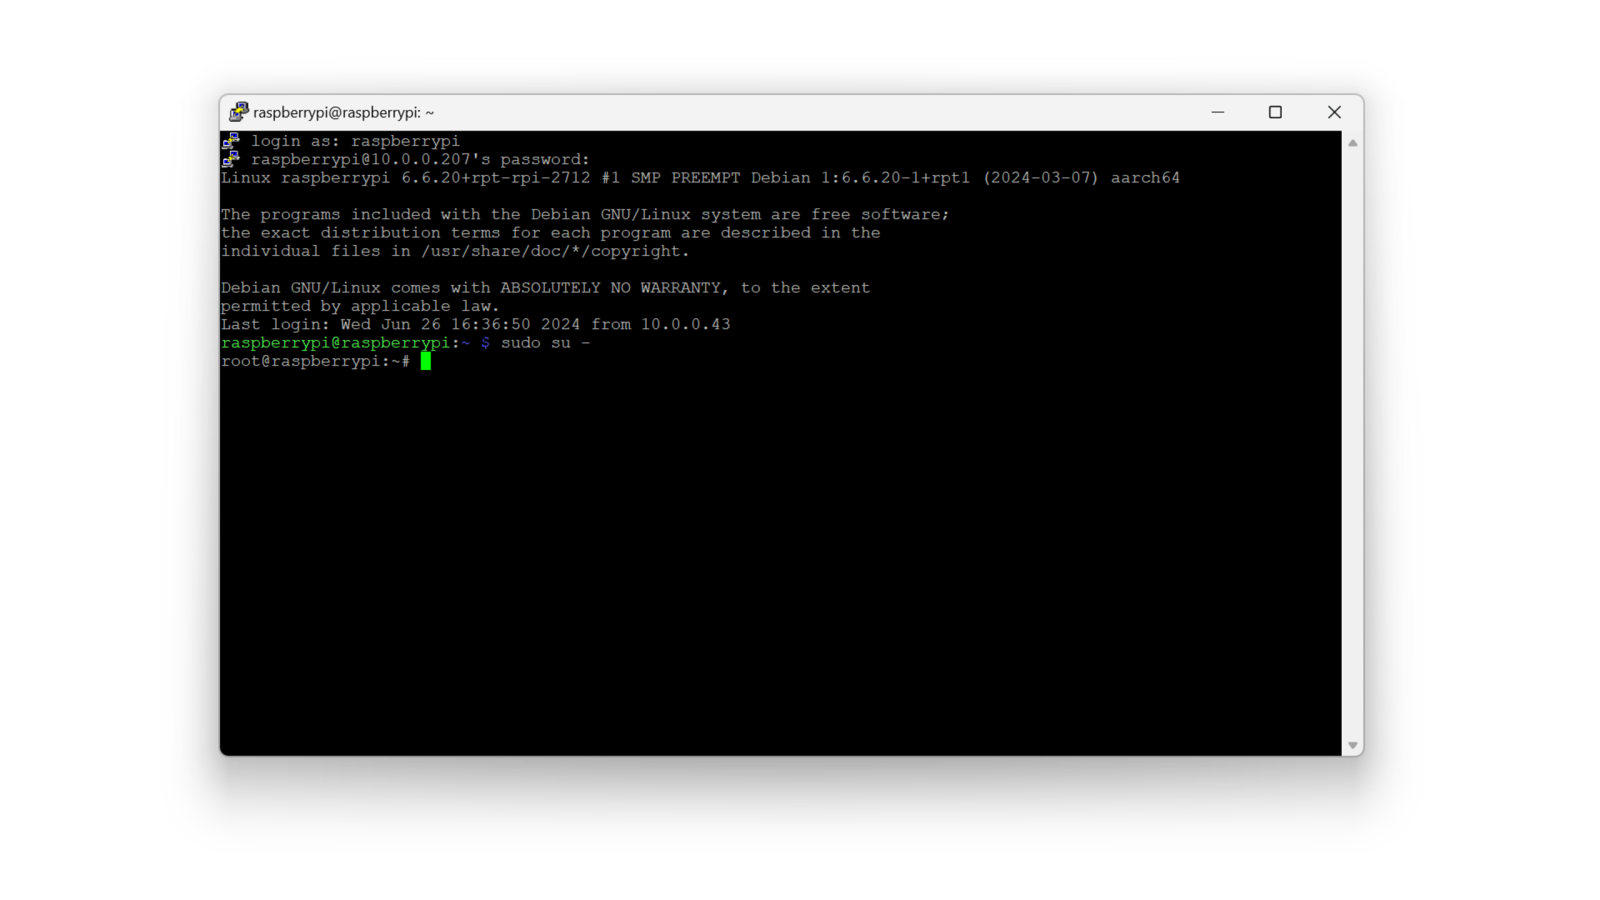
Once the system is powered up and connected to the internet (I used WiFi), you can access it by an SSH connection: you will need to know the device’s local IP address, in my case, I got it from the list of connected devices of my router.
You can clone the public Edge Impulse project if you’d like, from this link.
Data Collection
First, we need to create an Edge Impulse Studio account if we haven’t yet, and create a new project: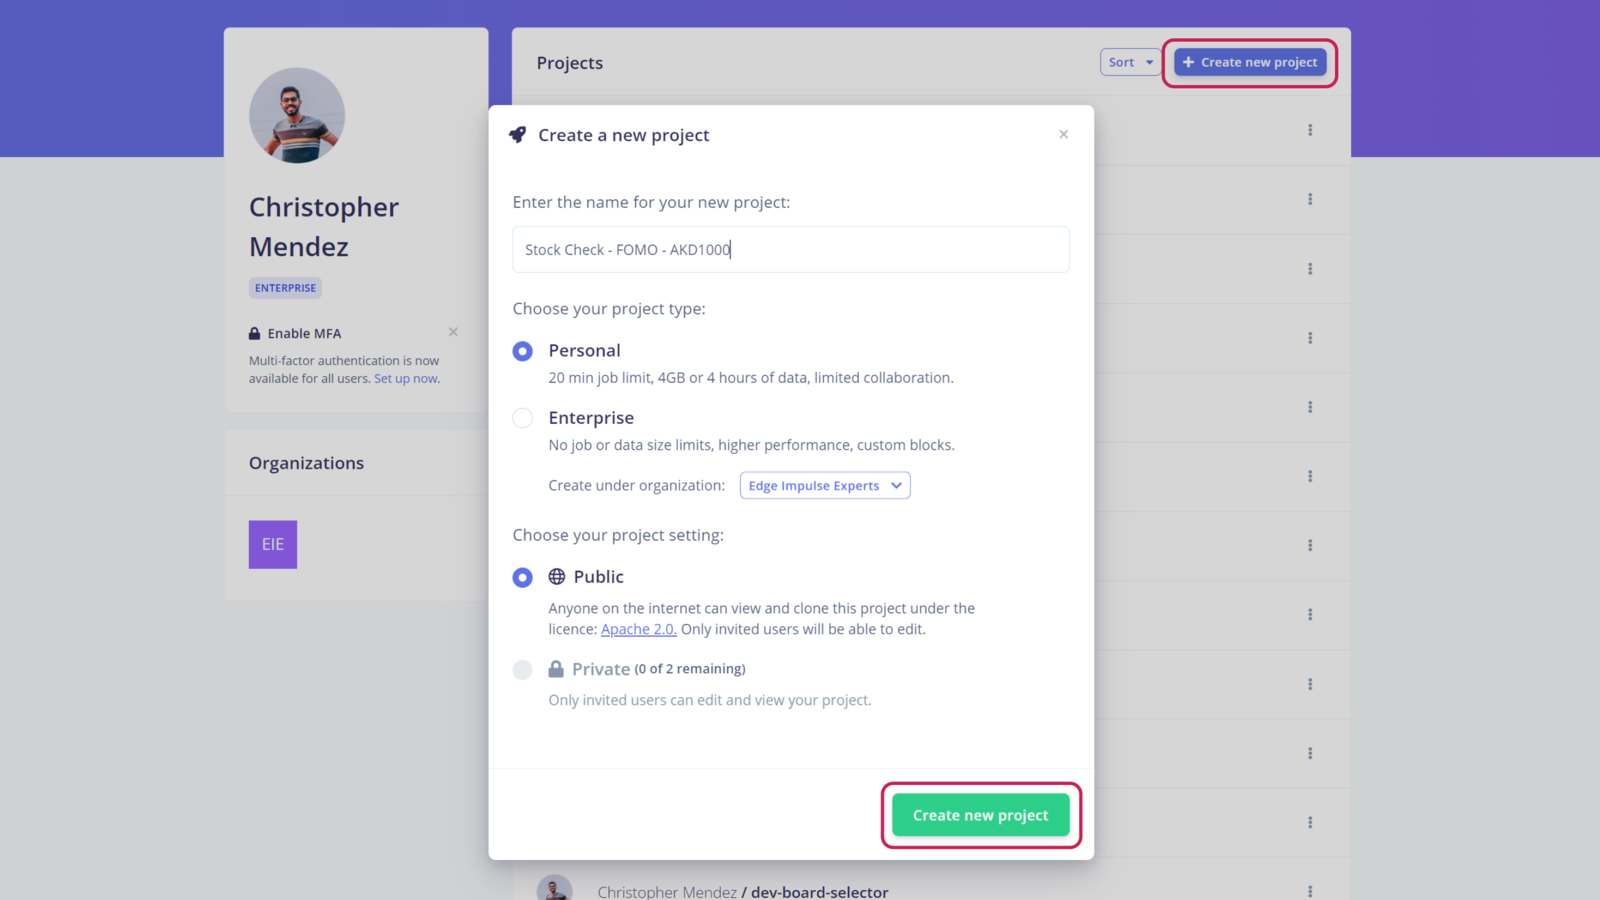
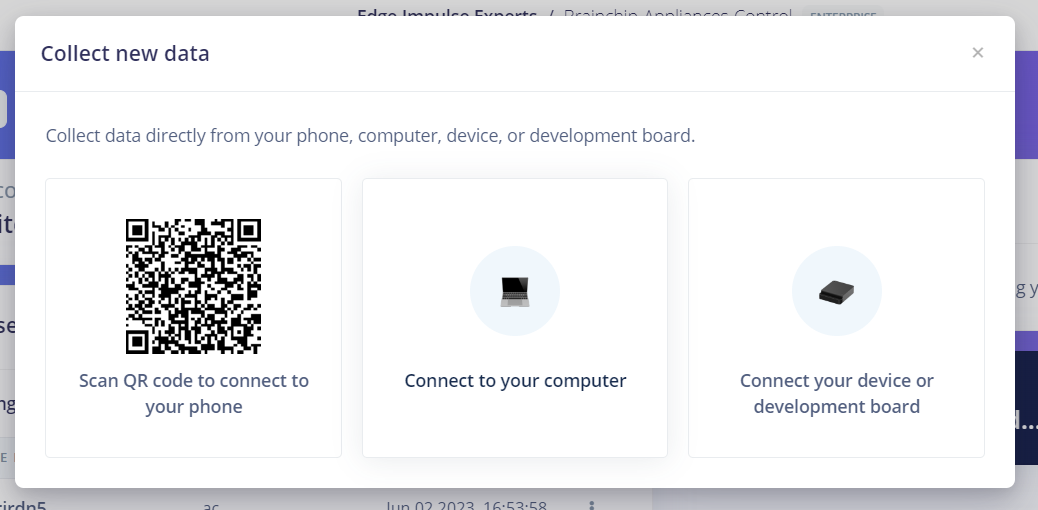
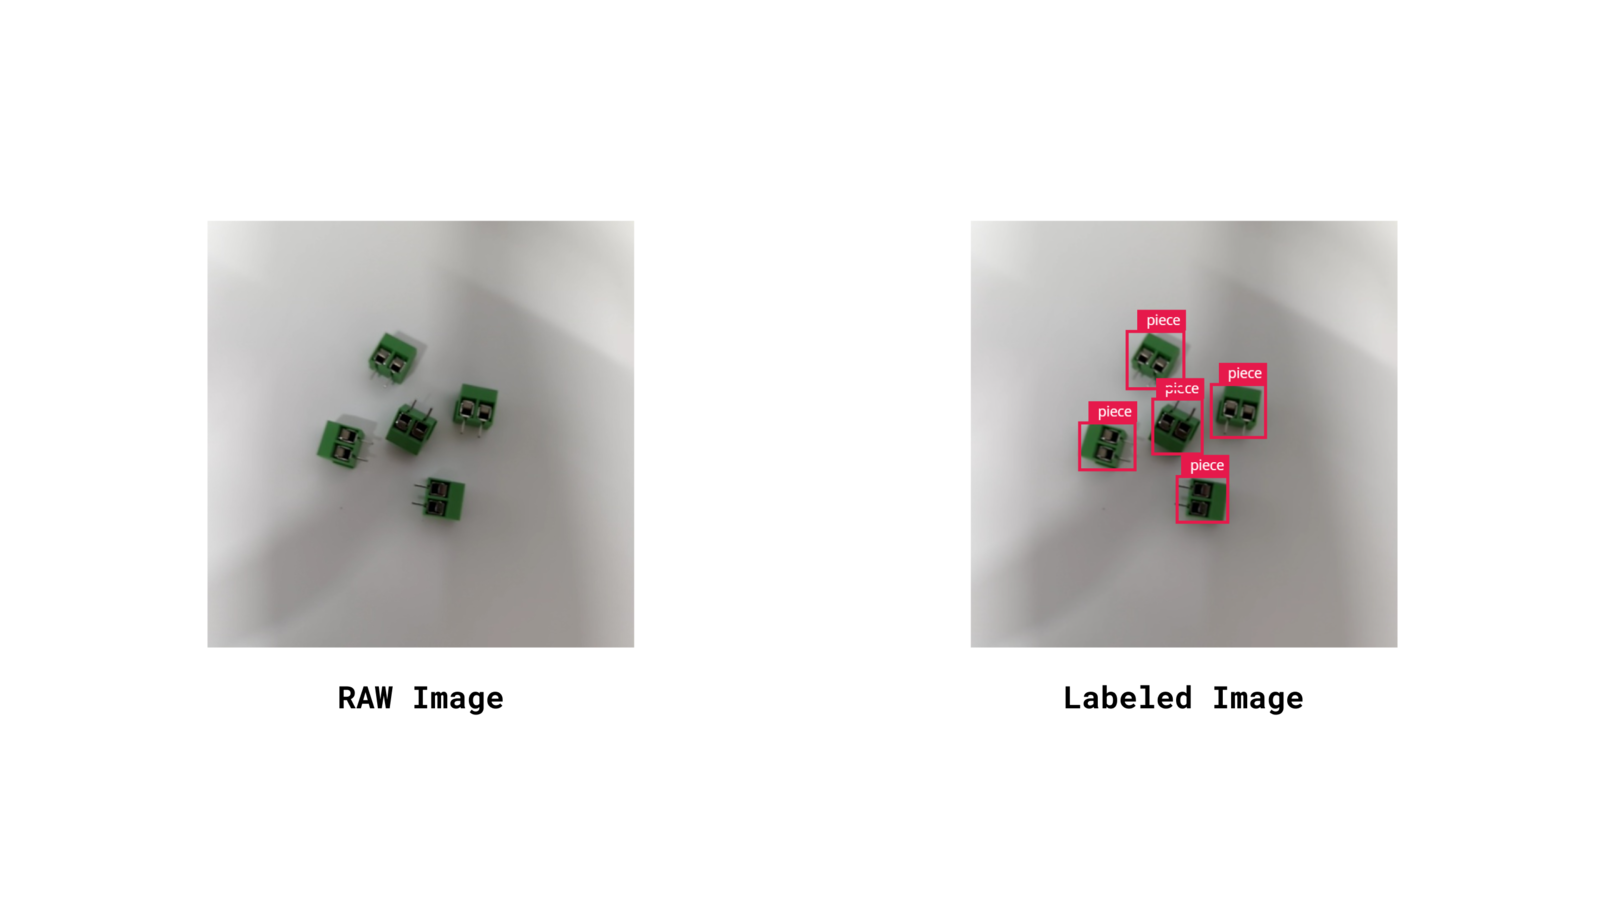
Taking at least +95 pictures of the piece class will let you create a robust enough model
Impulse Design
After having the dataset ready, it is time to define the structure of the model. In the left side menu, we navigate to Impulse design > Create impulse and define the following settings for each block, respectively:Input block (Image data):
- Image width: 224
- Image height: 224
- Resize mode: Fit shortest axis
Processing block (Image):
Add an Image processing block since this project will work with images as inputs.Learning block (BrainChip Akida)
We are going to use an Object Detection learning block developed for Brainchip Akida hardware. Finally, we save the Impulse design, it should end up looking like this: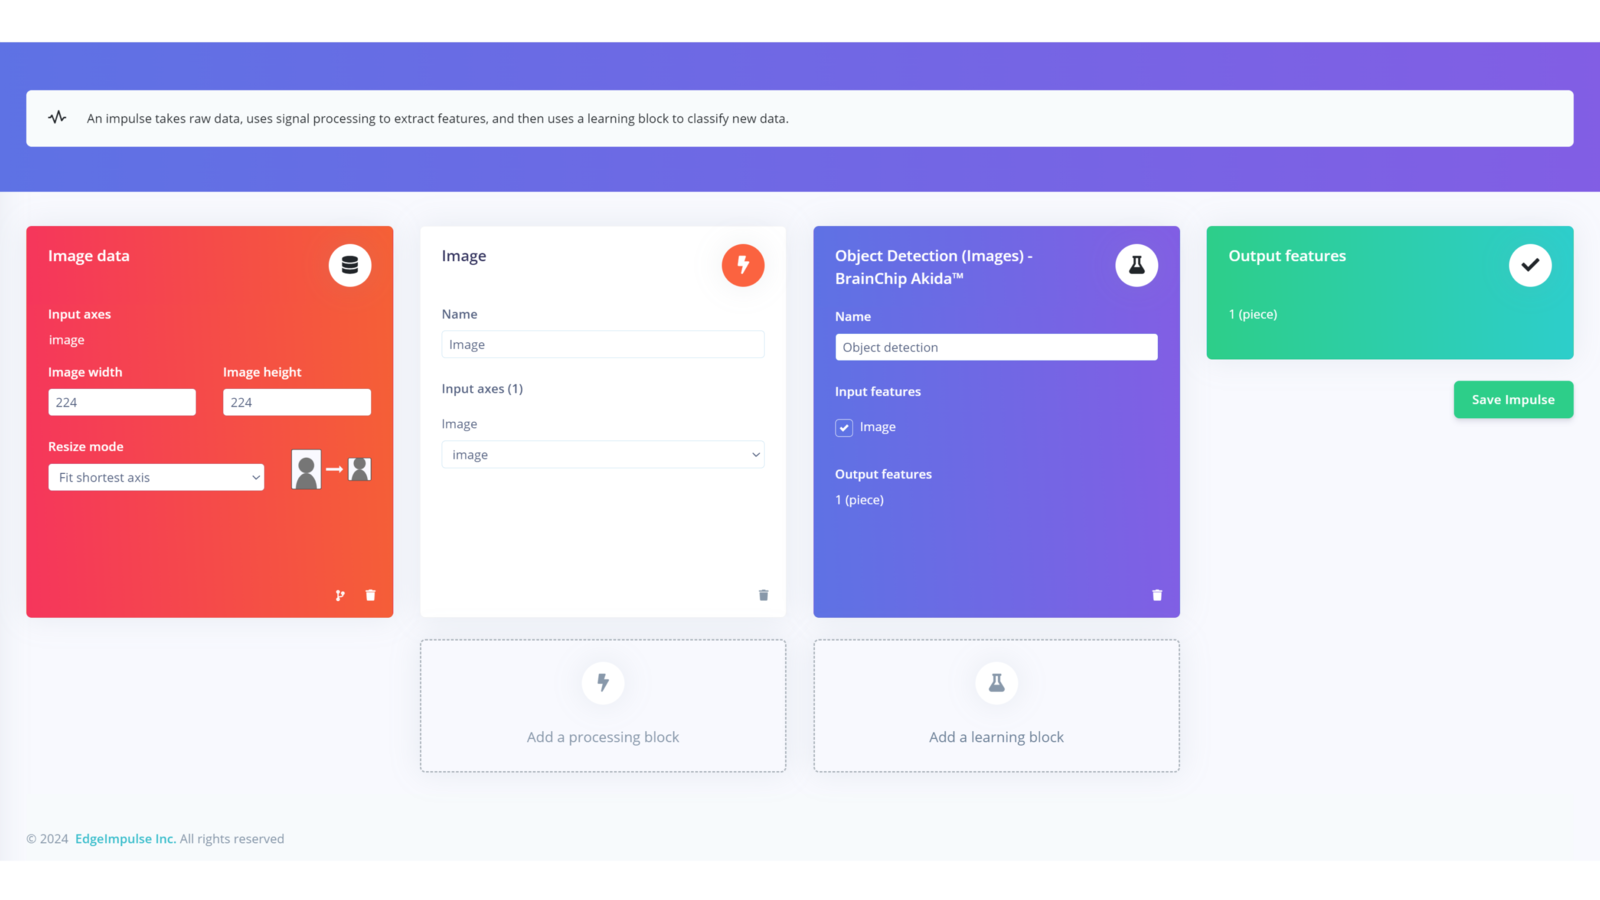
Model Training
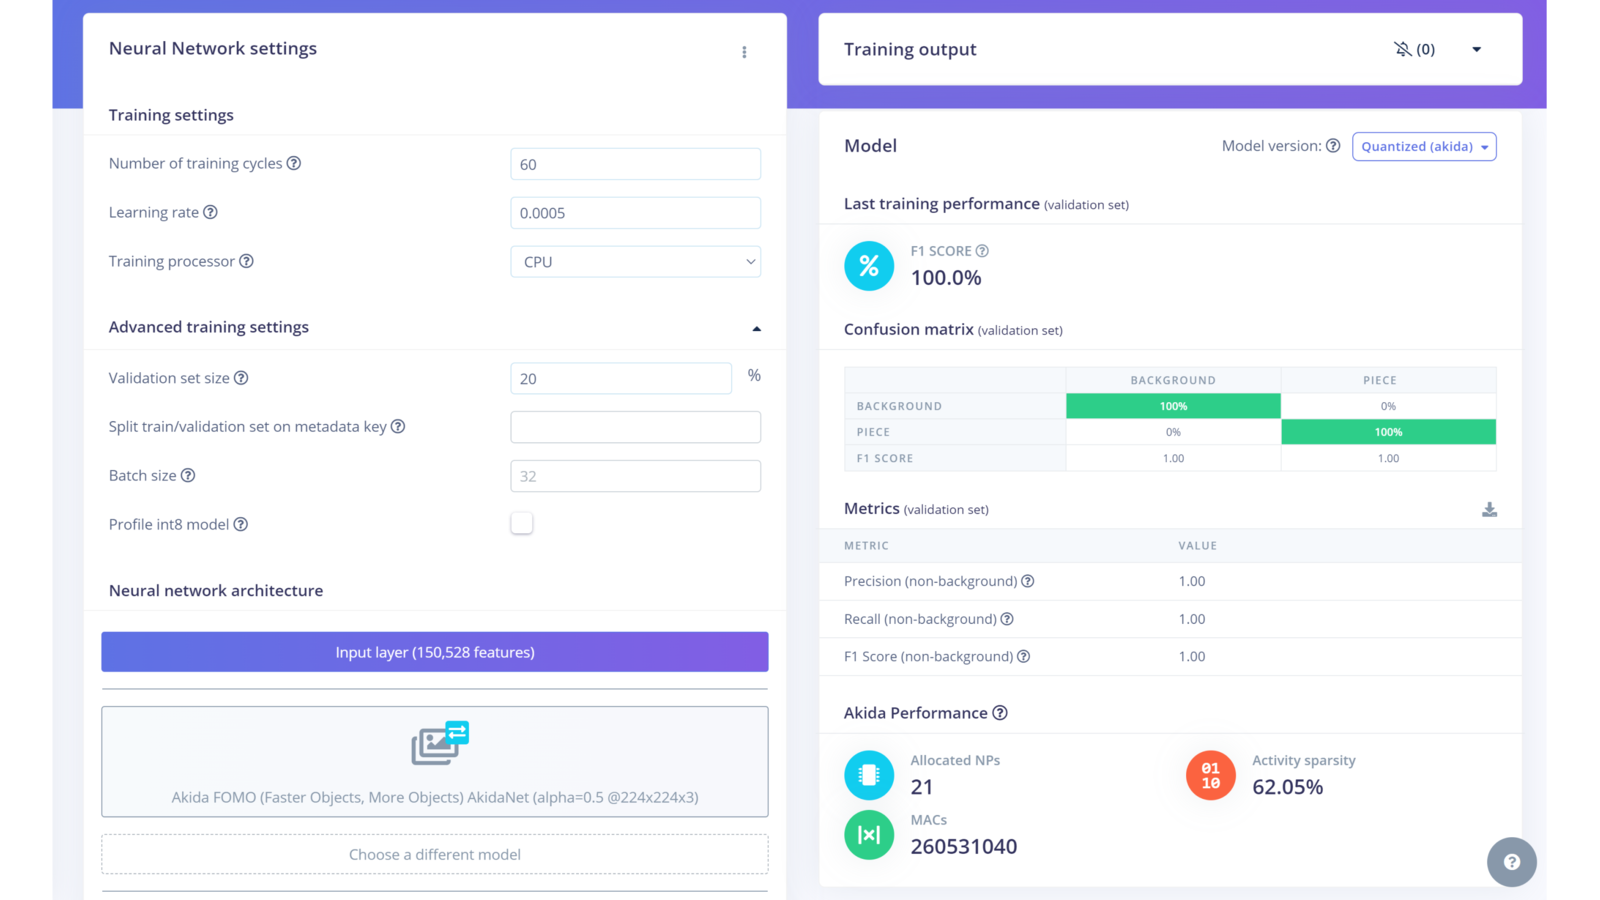
After having designed the impulse, it’s time to set the processing and learning blocks. In the Image processing block, we set the “Color depth” parameter to RGB, click on Save parameters and then Generate features. In the Object Detection learning block, define the following settings:- Number of training cycles: 60
- Learning rate: 0.0005
Confusion Matrix
Project Setup
To be able to run the project, we need to go back to our SSH connection with the device and clone the project from the Github repository, for this, use the following command:It is recommended that you install Edge Impulse for Linux following this link or the steps below:
Deployment
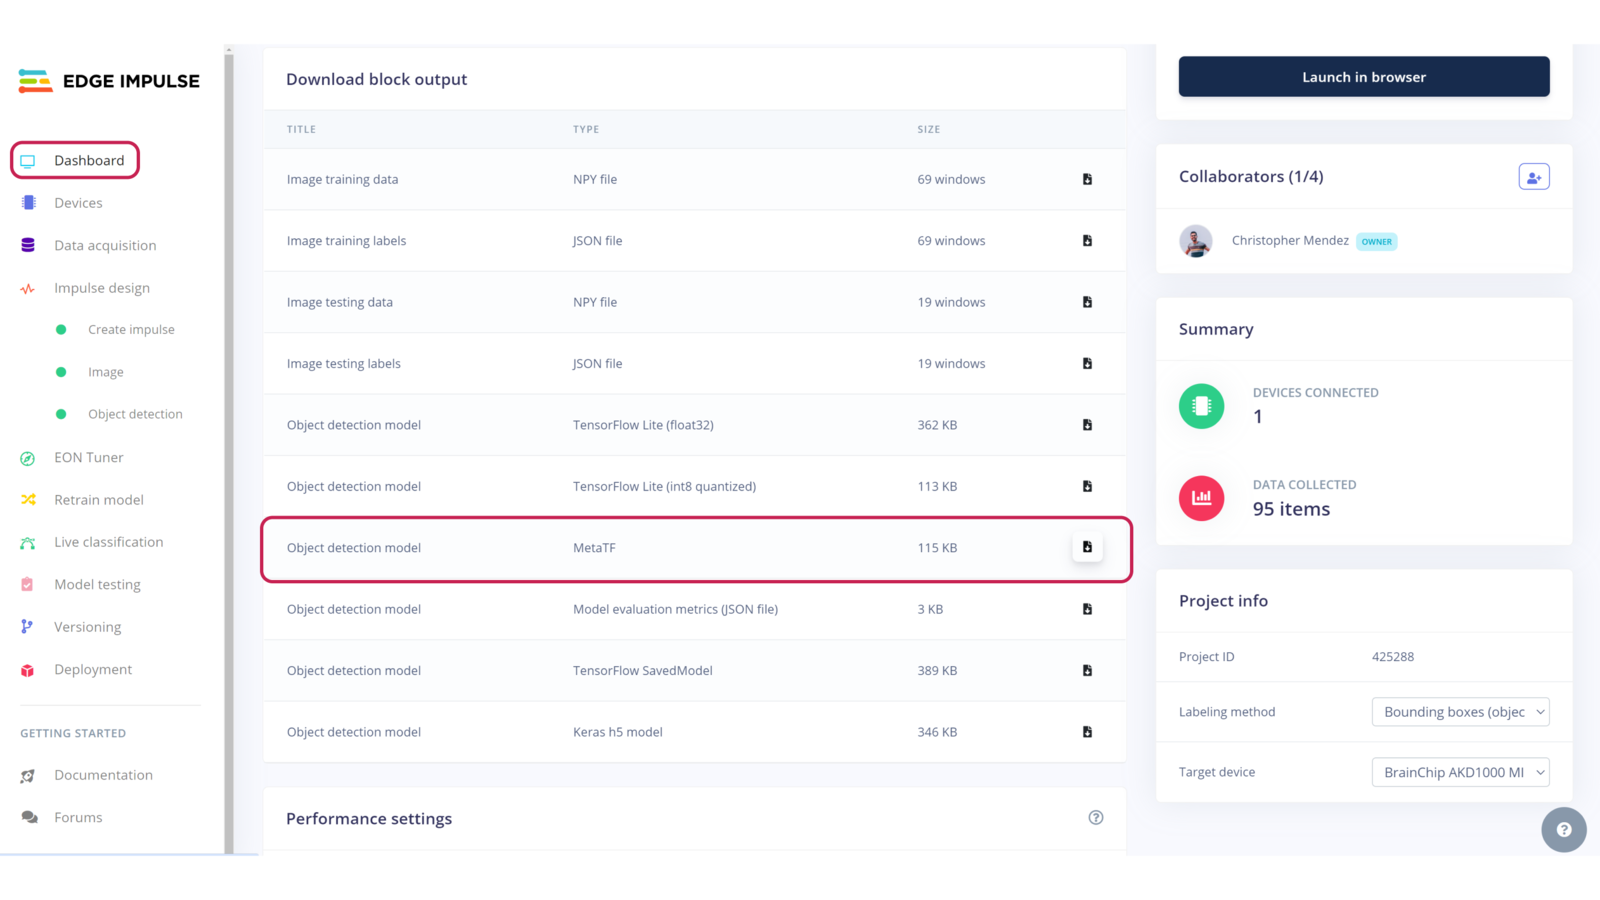
If you want to test the model as it is without any modification, jump to the Run Inferencing section.Once the project is cloned locally on the Raspberry Pi, you can download the project model from Edge Impulse Studio by navigating to the Dashboard section and downloading the MetaTF
.fbz file.
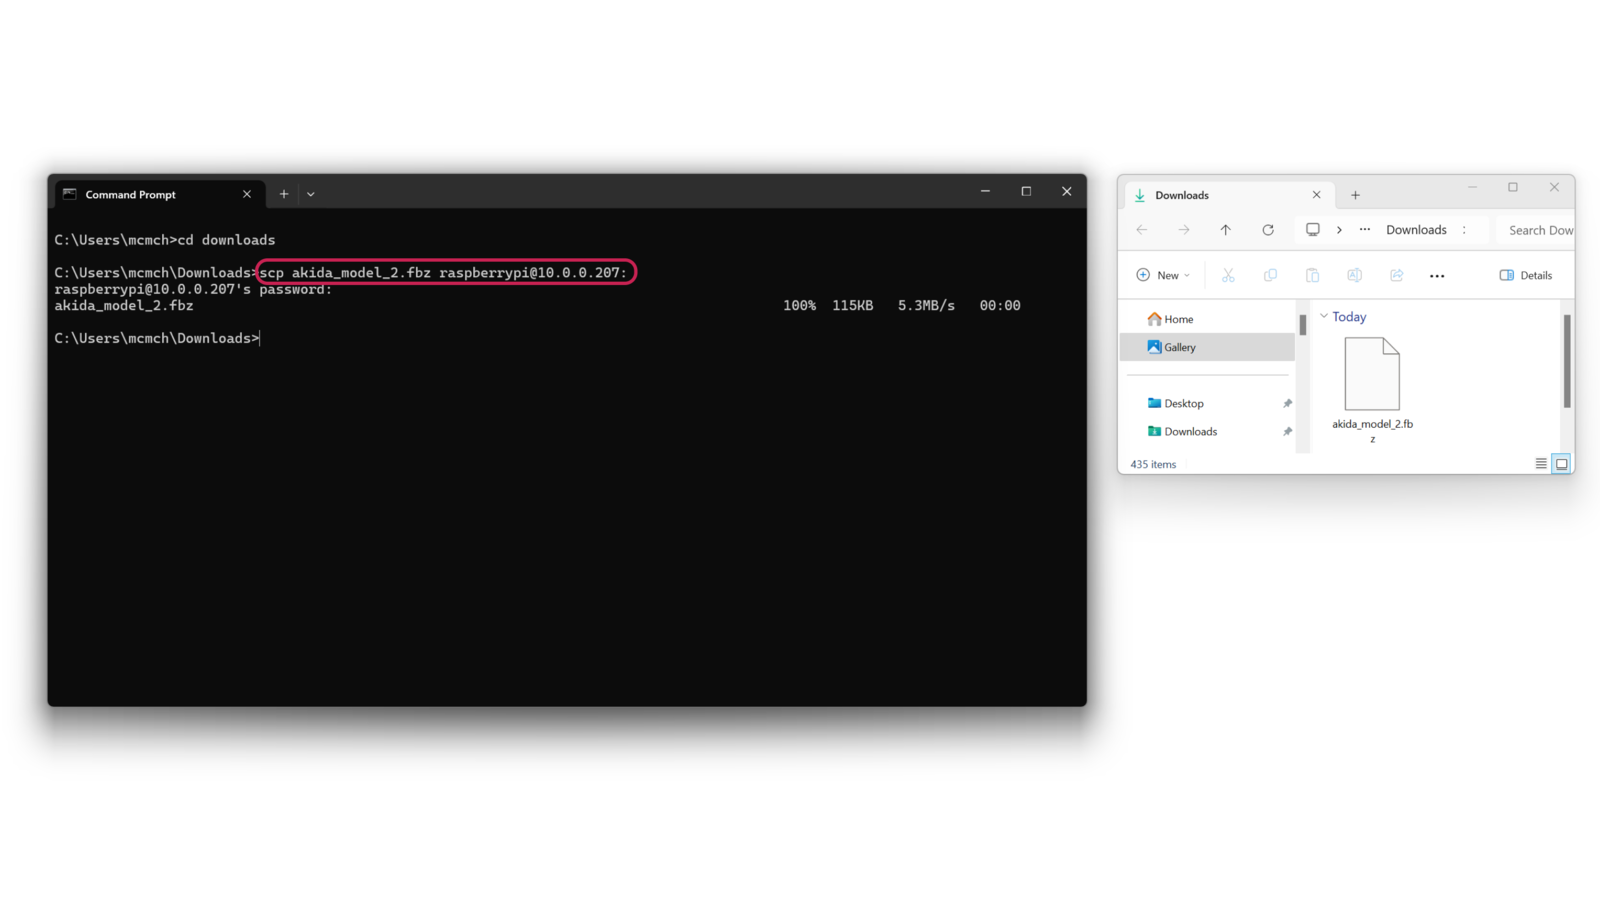
scp command as follows:
You will be asked for your Raspberry Pi login password.
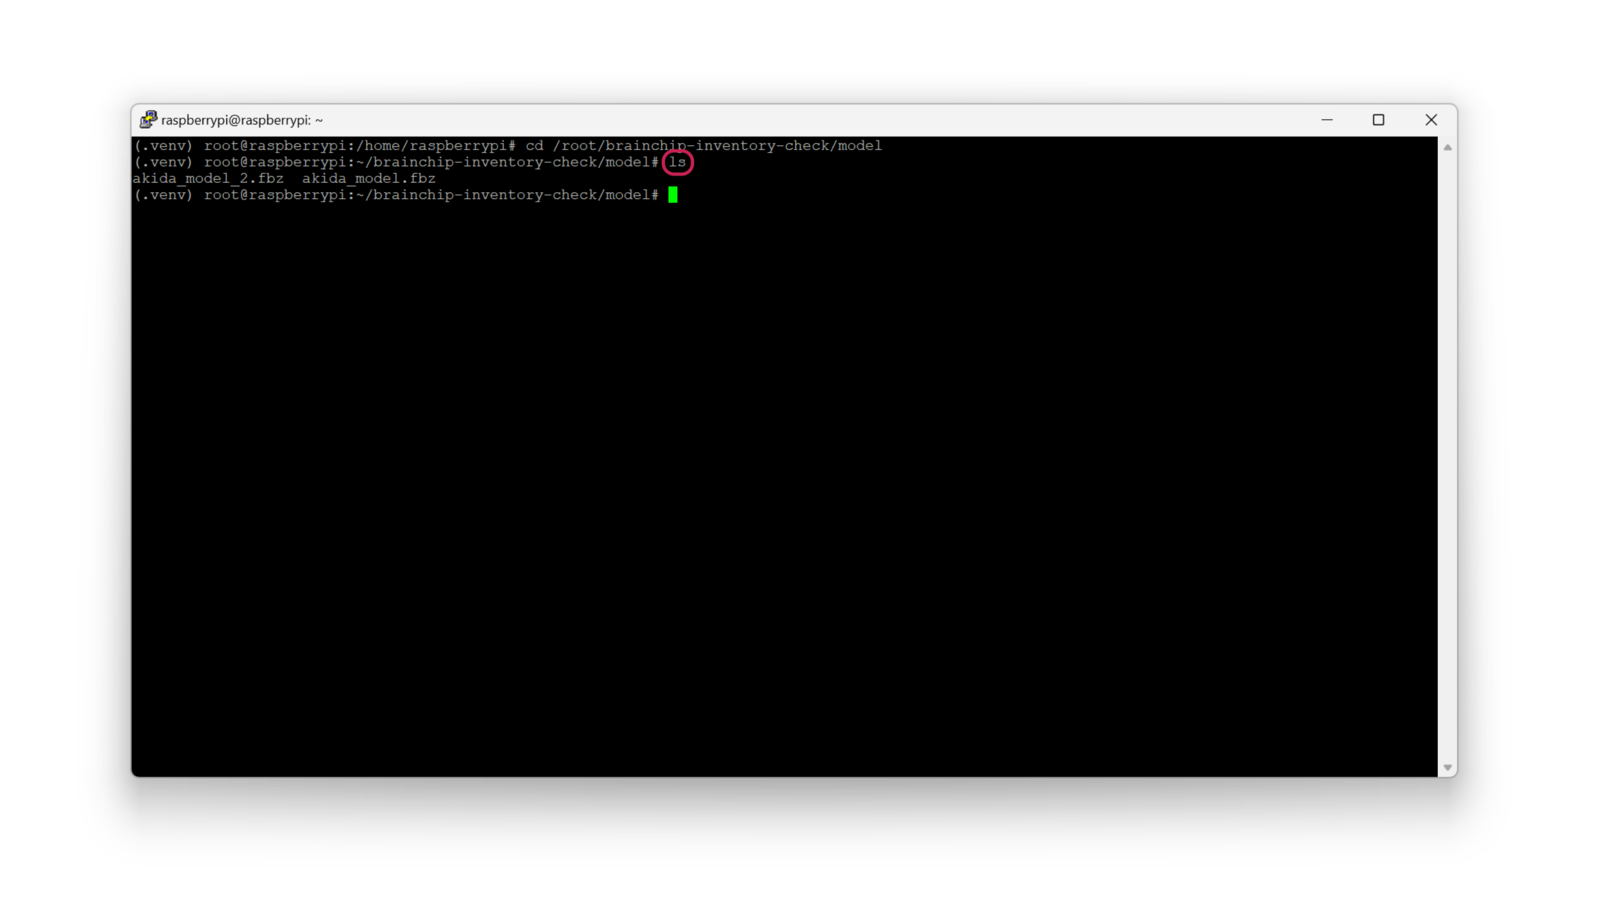
(/home/raspberrypi), and you can verify it by listing the directory content using ls.
Move the model to the project directory with the following command (from /home/raspberrypi):
Run Inferencing
In the project directory, there are several script options with the following characteristics:inventory.py: is the original program, it uses a MIPI camera feed to run the inference.stock.py: is an optimized version of the original program, also uses a MIPI camera but the object markers are bigger.low-power.py: is a lower-power program with half of energy consumption, and also uses a MIPI camera.usb-inference.py: is a version that uses a USB camera instead of a MIPI camera (no Matrix control).
mipi_inference.py: this program runs the FOMO model without controlling the LED Matrix.matrix_test.py: this program tests the LED matrix displaying colors and patterns.
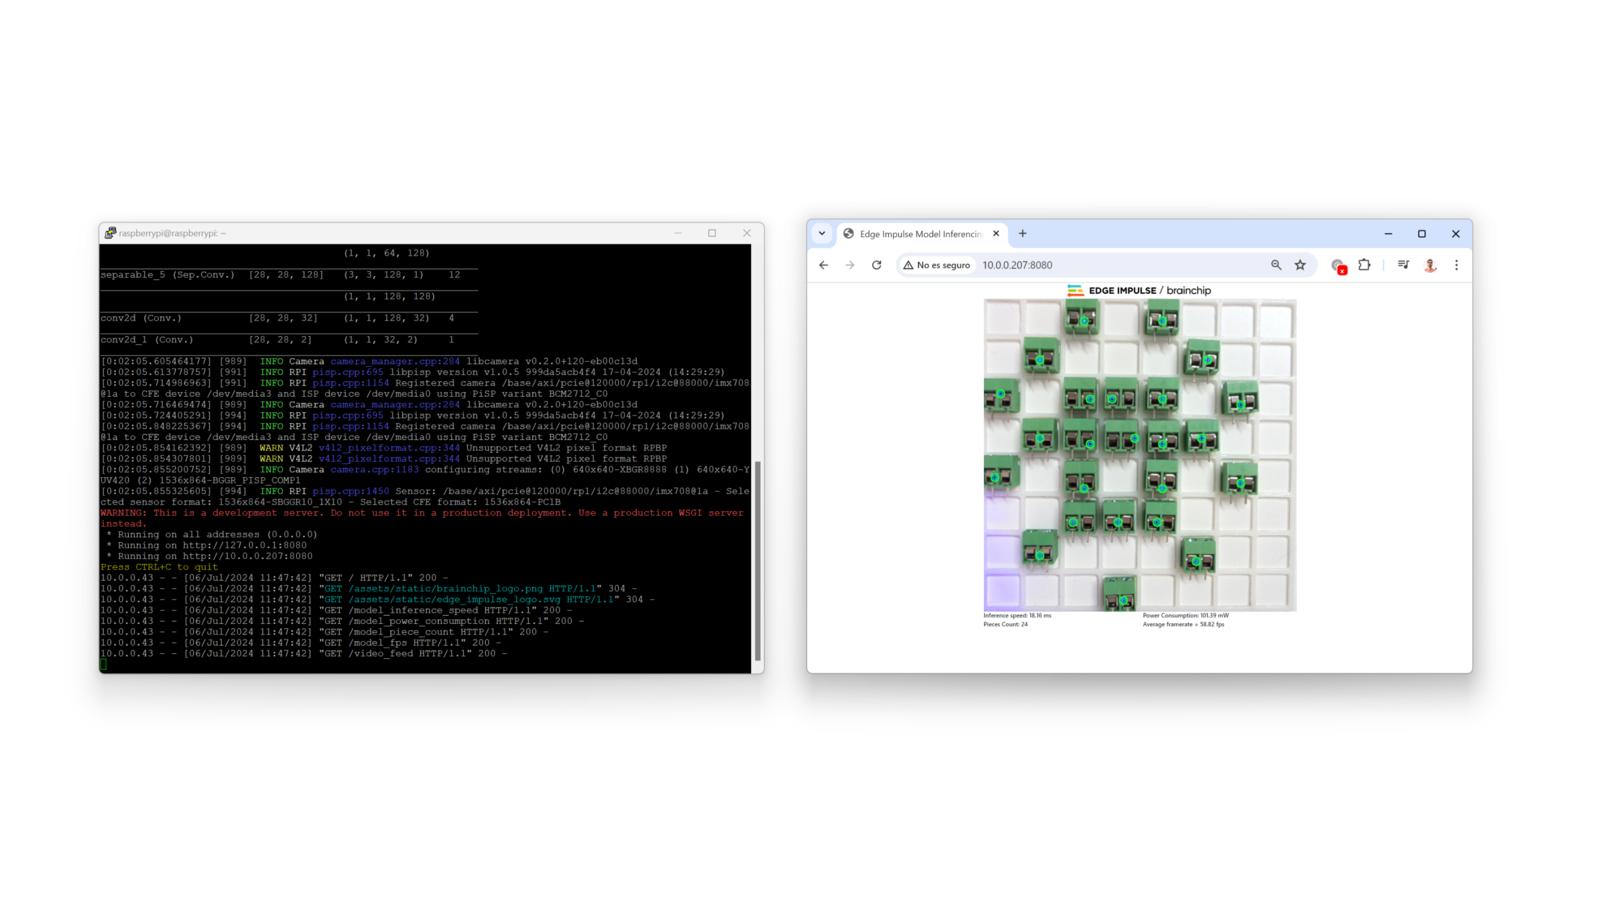
The .fbz model is hard coded in the script, so if you want to use the custom one you downloaded, update the “model_file” variable in the python script.The project will start running and streaming a live view of the camera feed plus showing you in the LED matrix the location of detected objects alongside the FOMO inference results, object count, frames per second and energy consumption. To watch a preview of the camera feed, open your favorite browser and enter
http://<Raspberry Pi IP>:8080.