Introduction
Toll plazas serve as critical points for traffic management and revenue collection. However, manual counting and tracking of vehicles can lead to errors and inefficiencies. An automated system can improve accuracy, reduce human error, and streamline operations. Needs for the project:- Accuracy: Manual counting is prone to errors, especially during peak hours. An automated system ensures accurate vehicle counts.
- Efficiency: Automating the process reduces the need for human intervention, speeds up toll collection, and reduces congestion.
- Data Acquisition: Accurate data about vehicle flow is crucial for effective traffic management, urban planning, and infrastructure development.
- Security: Tracking vehicles enhances security by identifying suspicious activities and ensuring compliance with toll payments.
- Cost-Effective: Reducing the requirement for manual labor can lead to decreased operational costs in the long term.
Hardware Selection
For this project, we will use the latest Raspberry Pi 5 and the Raspberry Pi Camera Module 3 Wide. We opted for a wide lens because it can capture a larger area, allowing the camera to monitor multiple lanes simultaneously.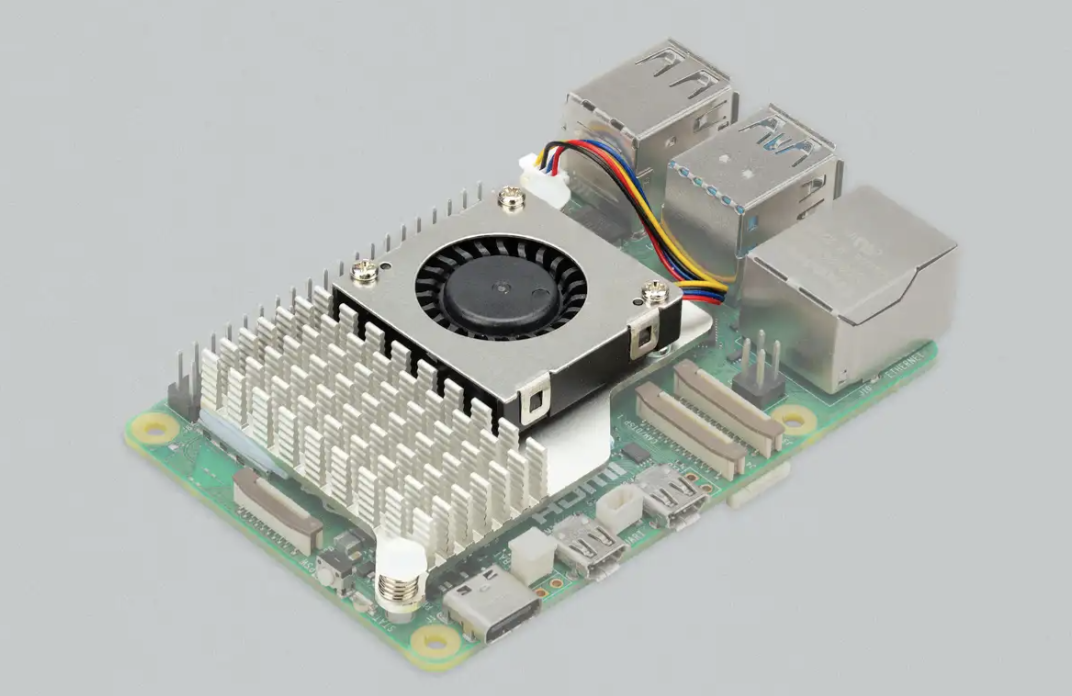
Raspberry Pi 5
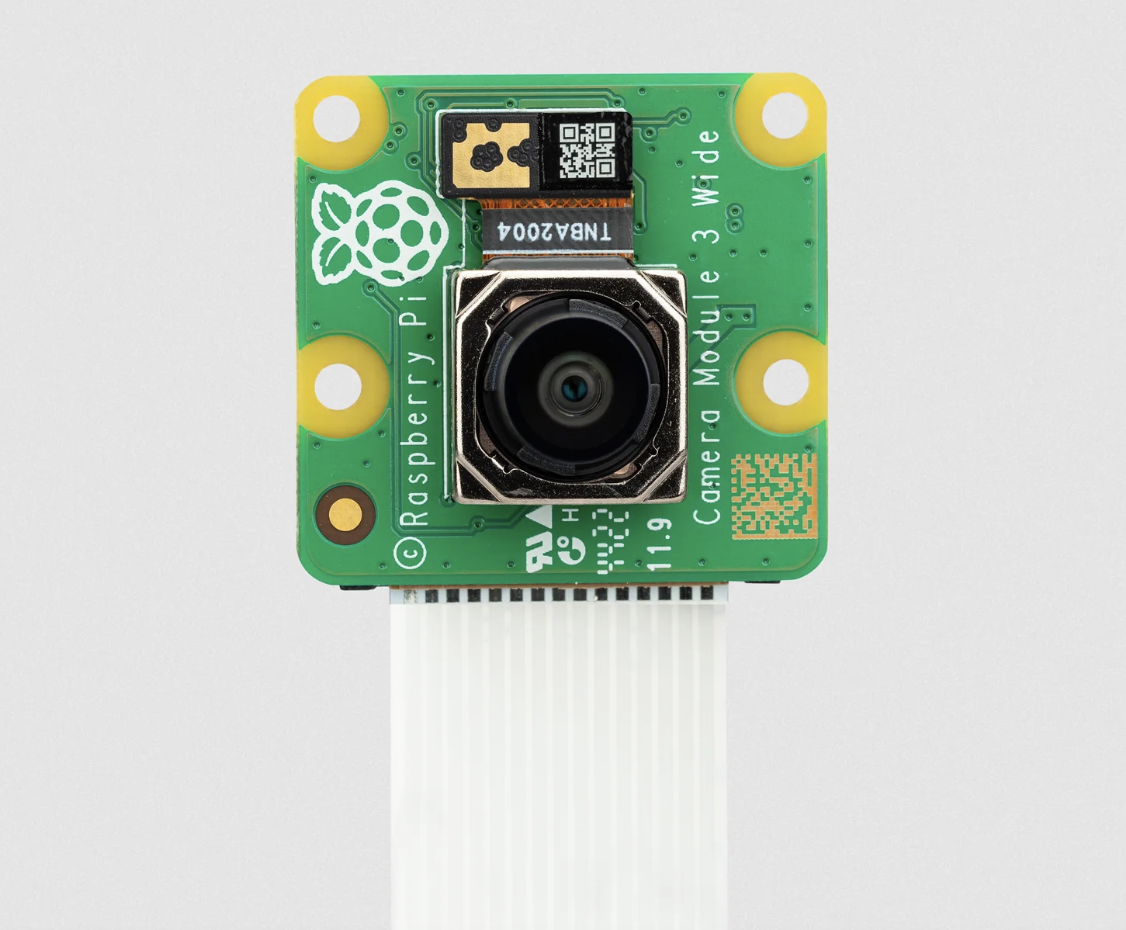
Raspberry Pi Camera 3
Raspberry Pi AI Kit
Data Collection
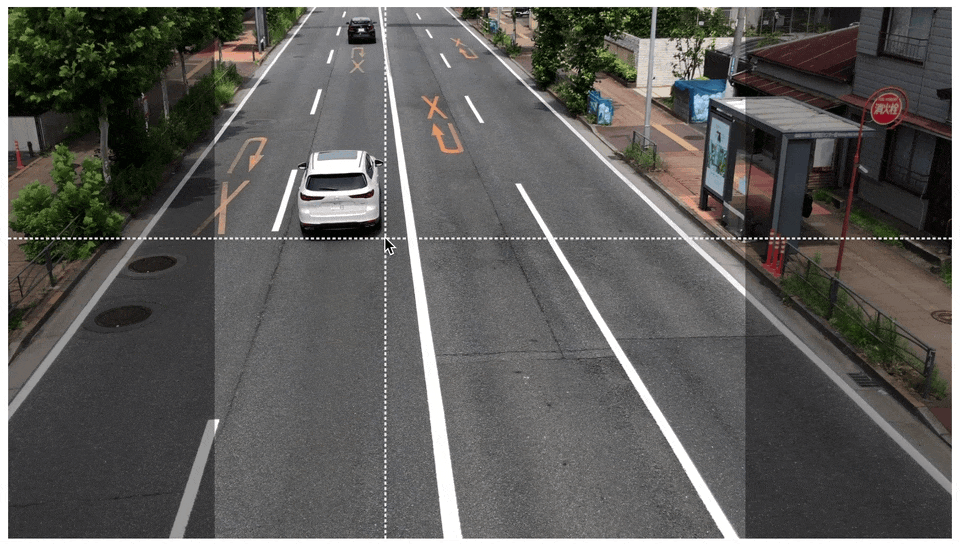
A few video clips of the vehicle traffic were recorded from a pedestrian bridge using an iPhone camera. We used the following Python script to extract every 20th frame from the video clips to eliminate redundant frames.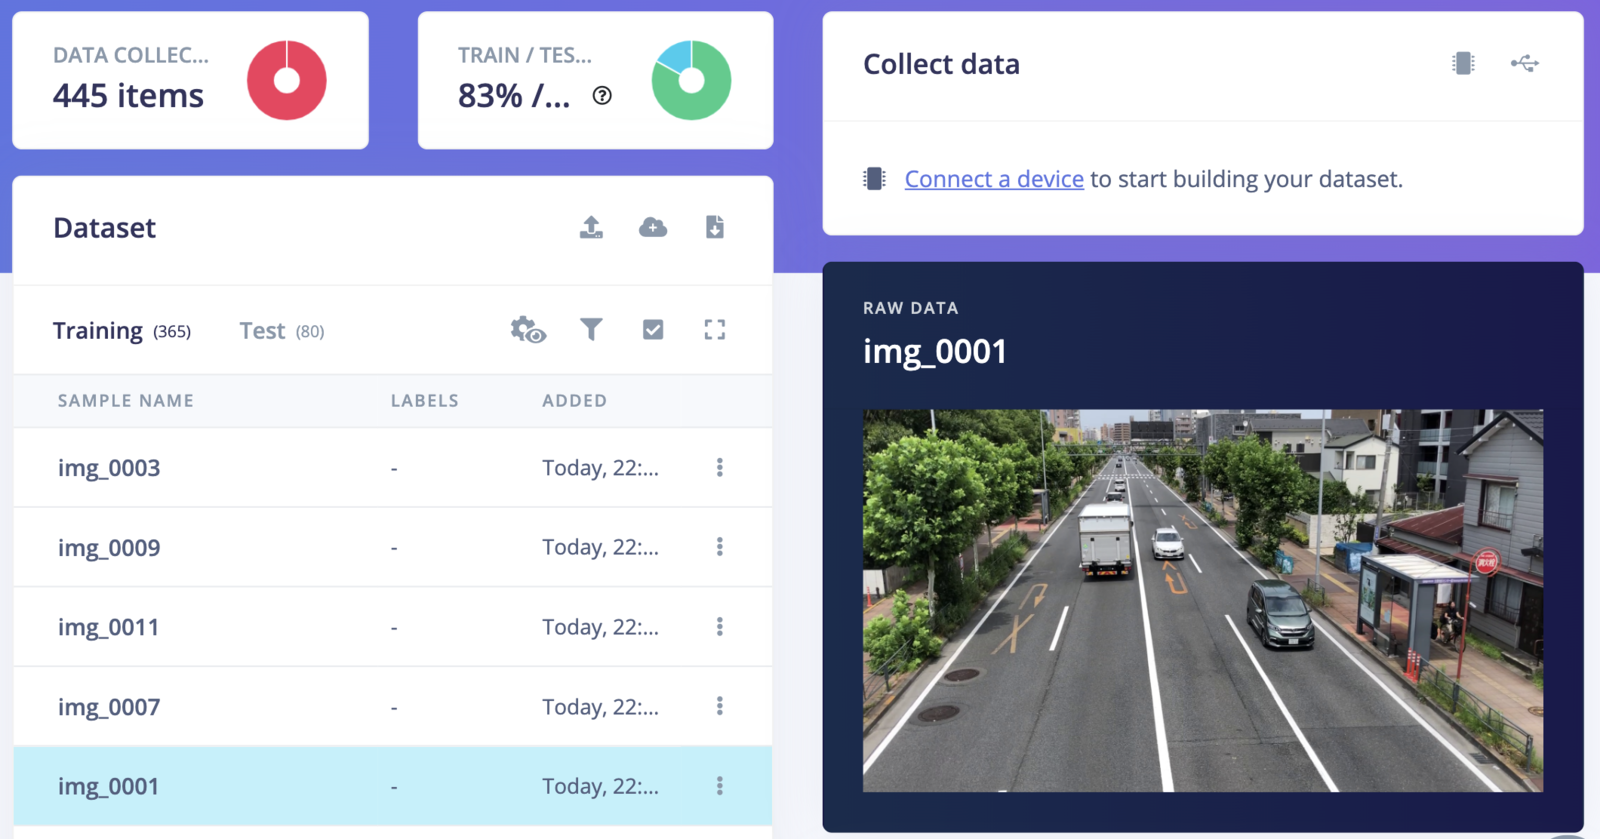
Model Training
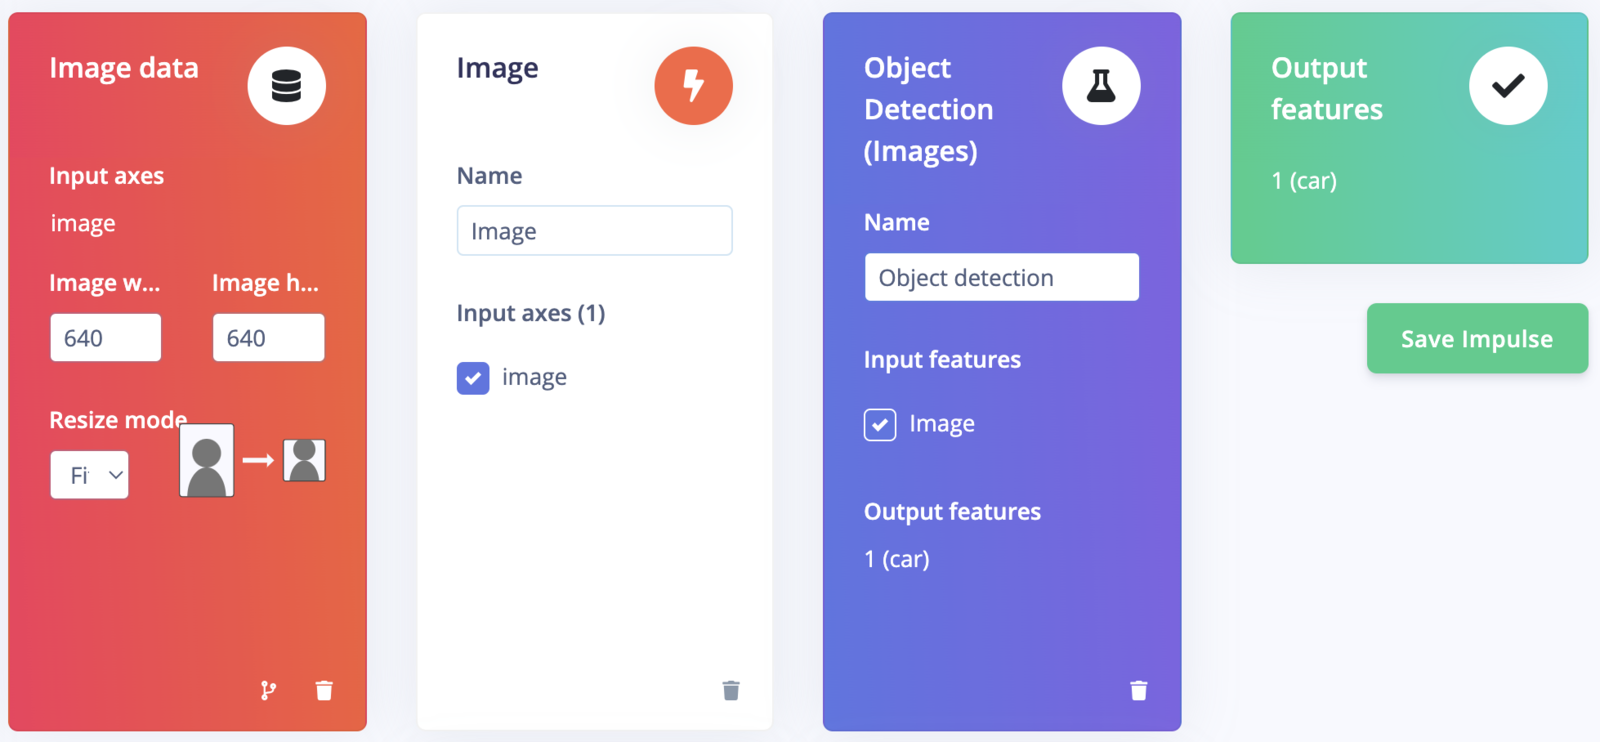
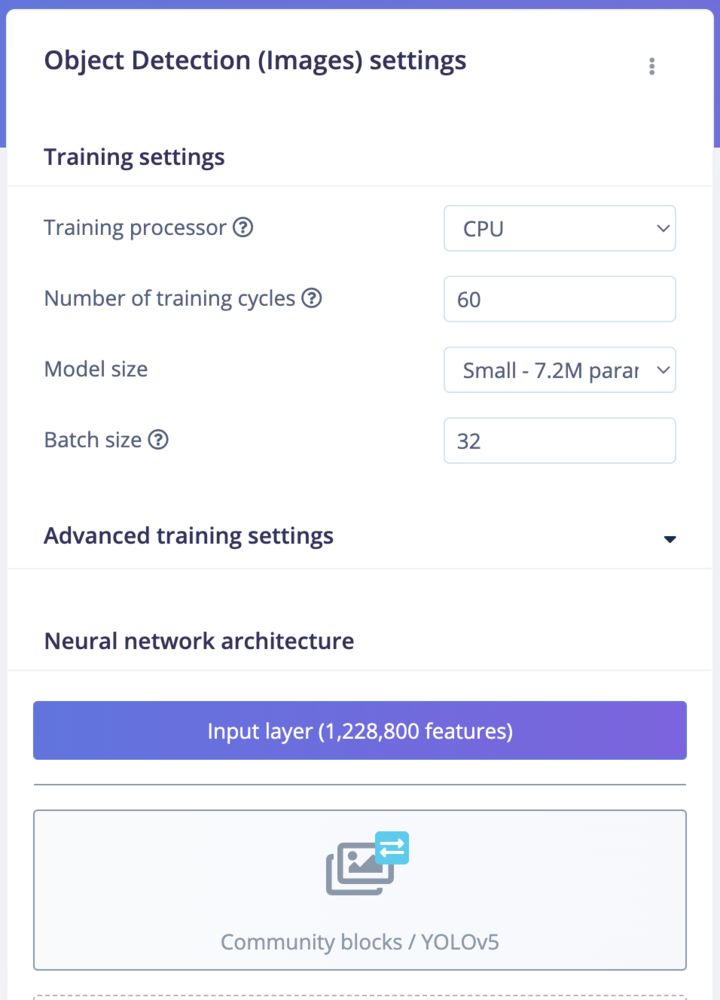
To create an Impulse, follow these steps:- Go to the Impulse Design section, then select the Create Impulse page. Since the Hailo AI accelerator enables us to select high-resolution images while still maintaining a high FPS, we have opted for a 640x640 pixel image size in the “Image Data” form fields to achieve better accuracy.
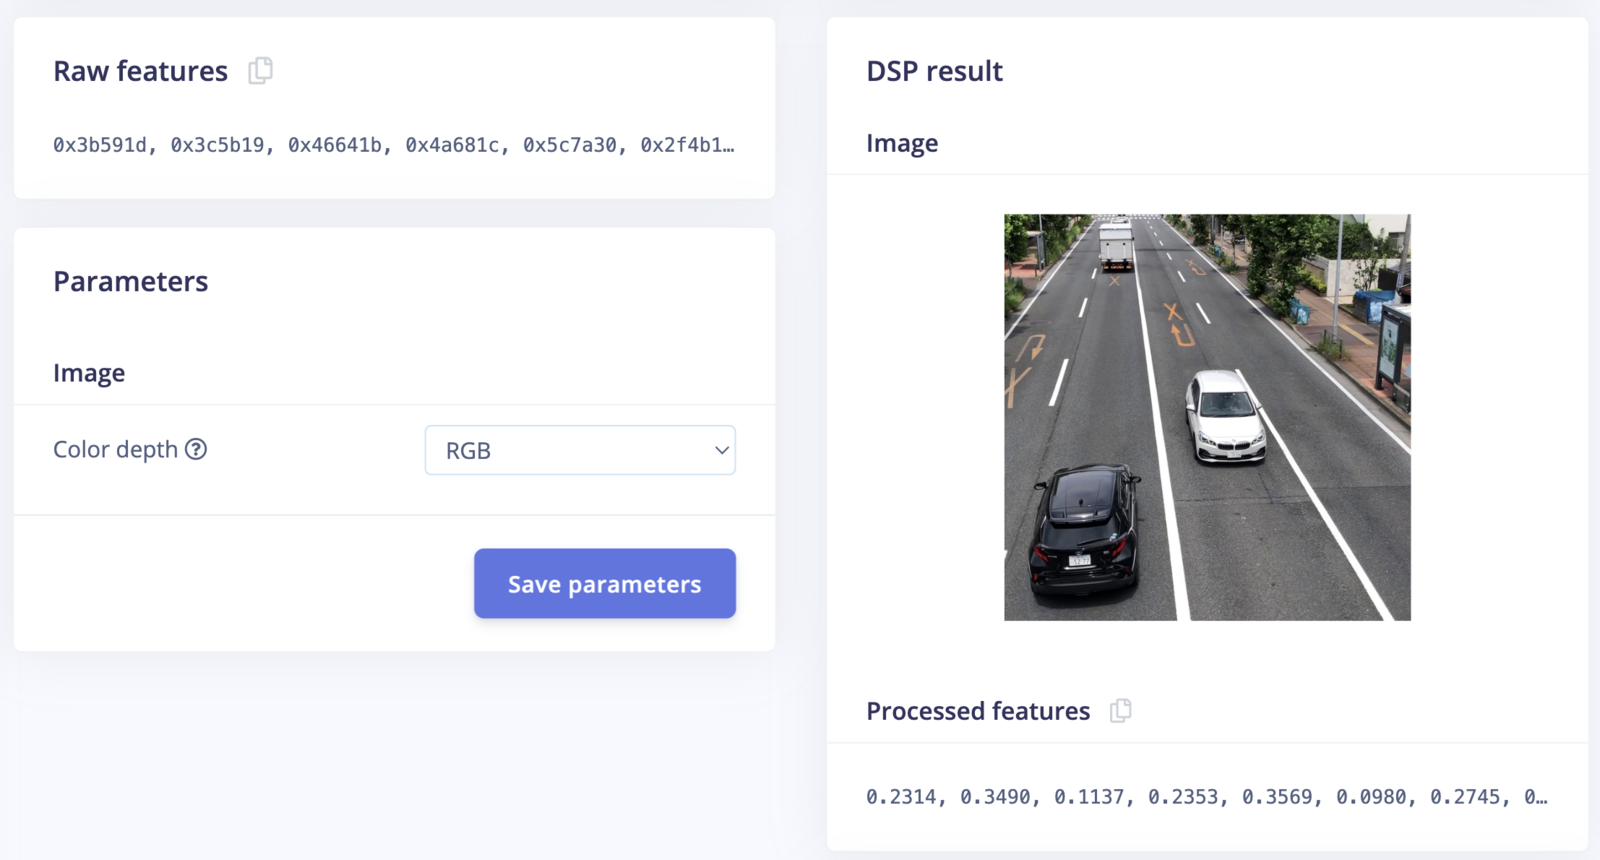
- Click on “Add a processing block” and choose “Image”. This step will pre-process and normalize the image data while also giving us the option to choose the color depth.
- Click on “Add a learning block” and choose “Object Detection (Images)”.
- Finally, click on the “Save Impulse” button to complete the process.
Raw Features
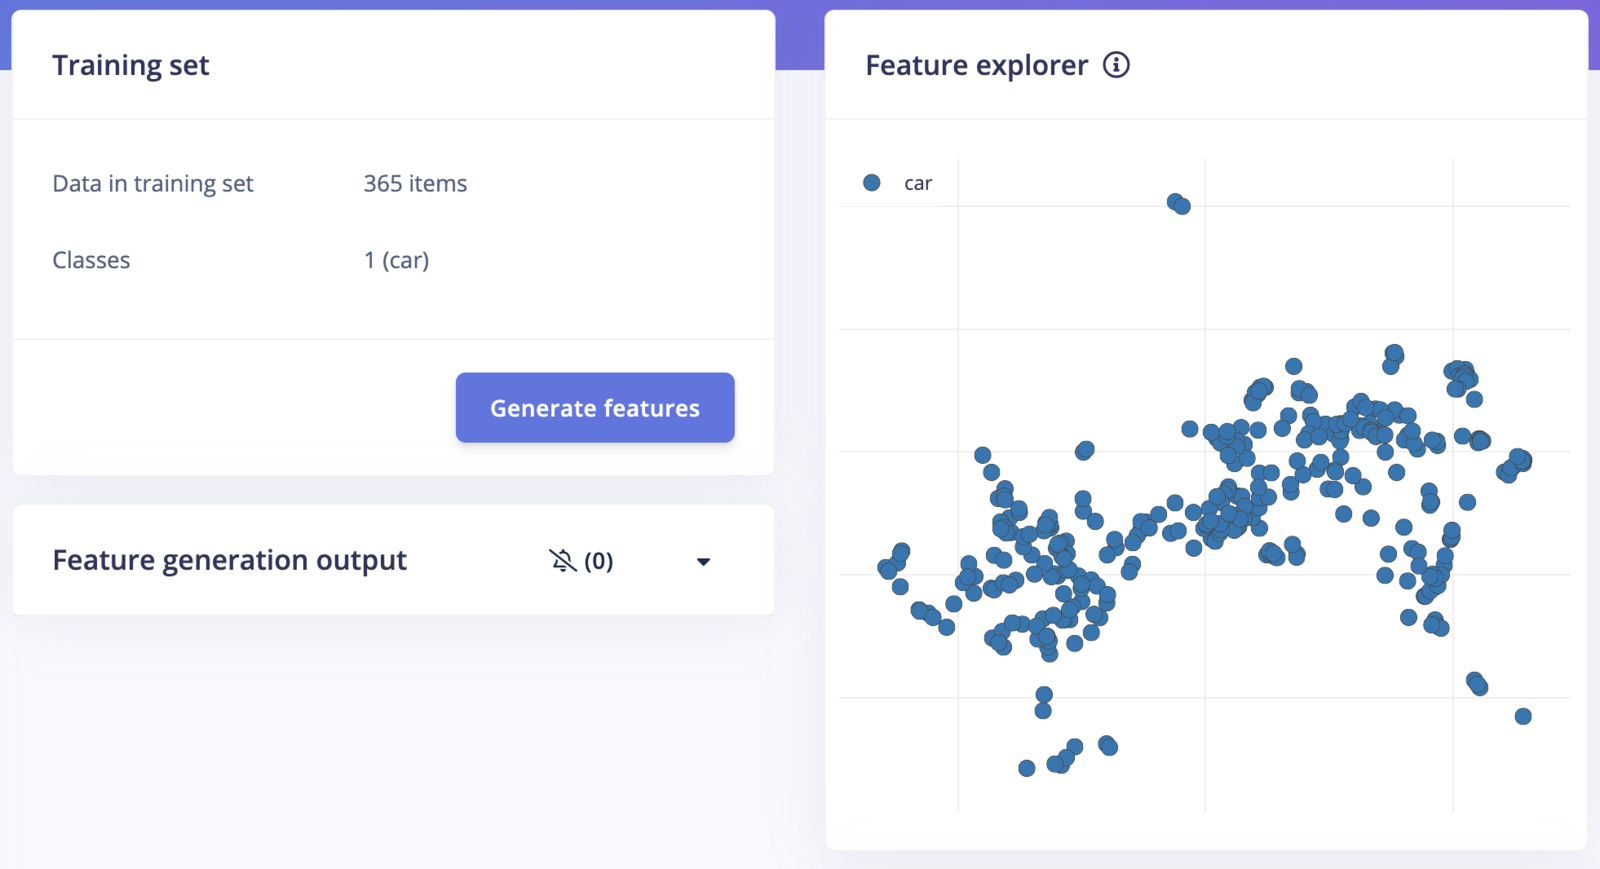
Generate Features
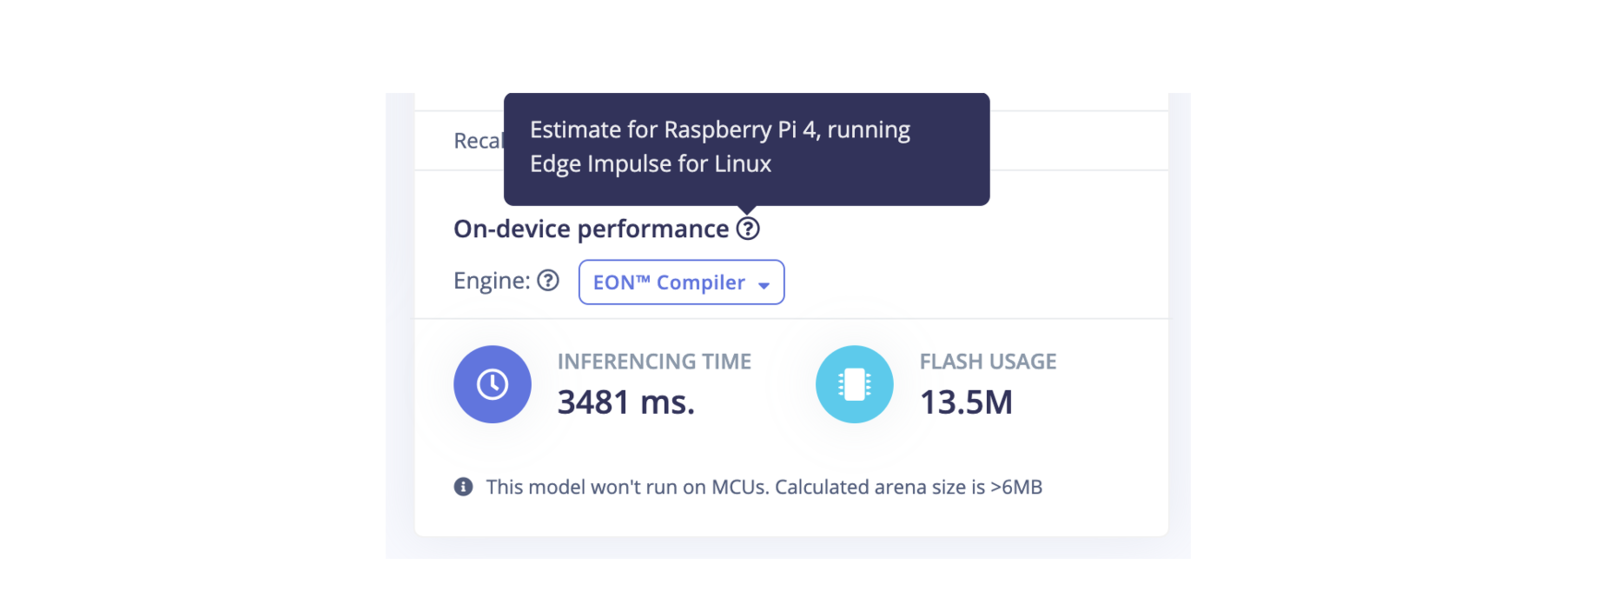
Estimates
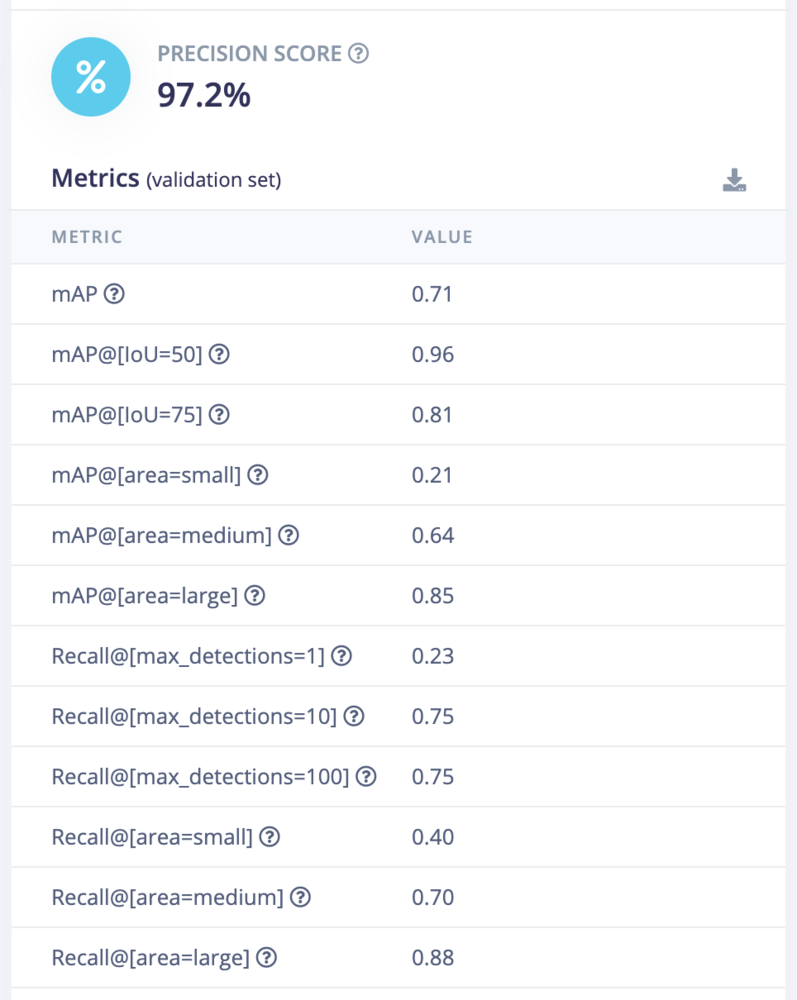
Model Testing
On the Model testing page, click on the “Classify All” button which will initiate model testing with the trained float32 model. The testing accuracy is 97.5%.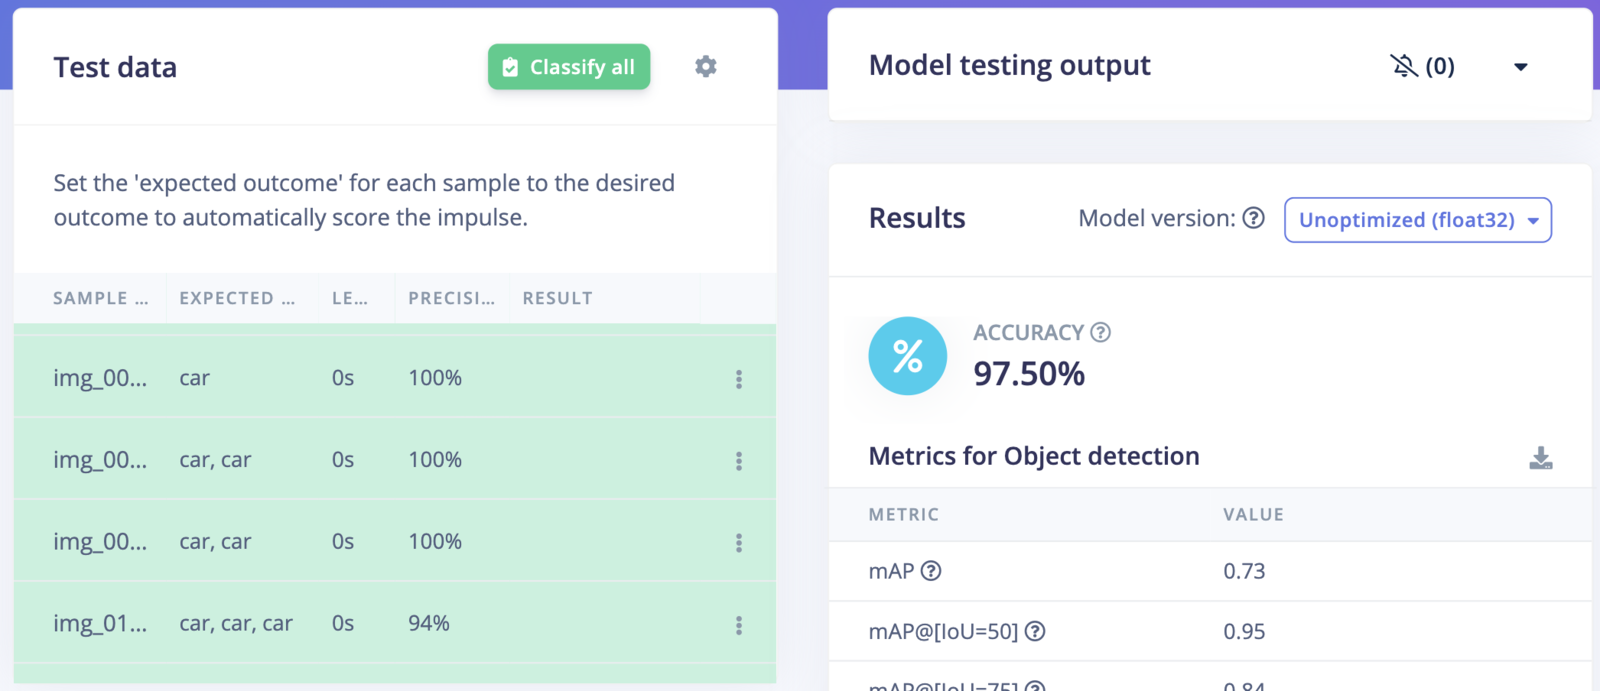
Testing
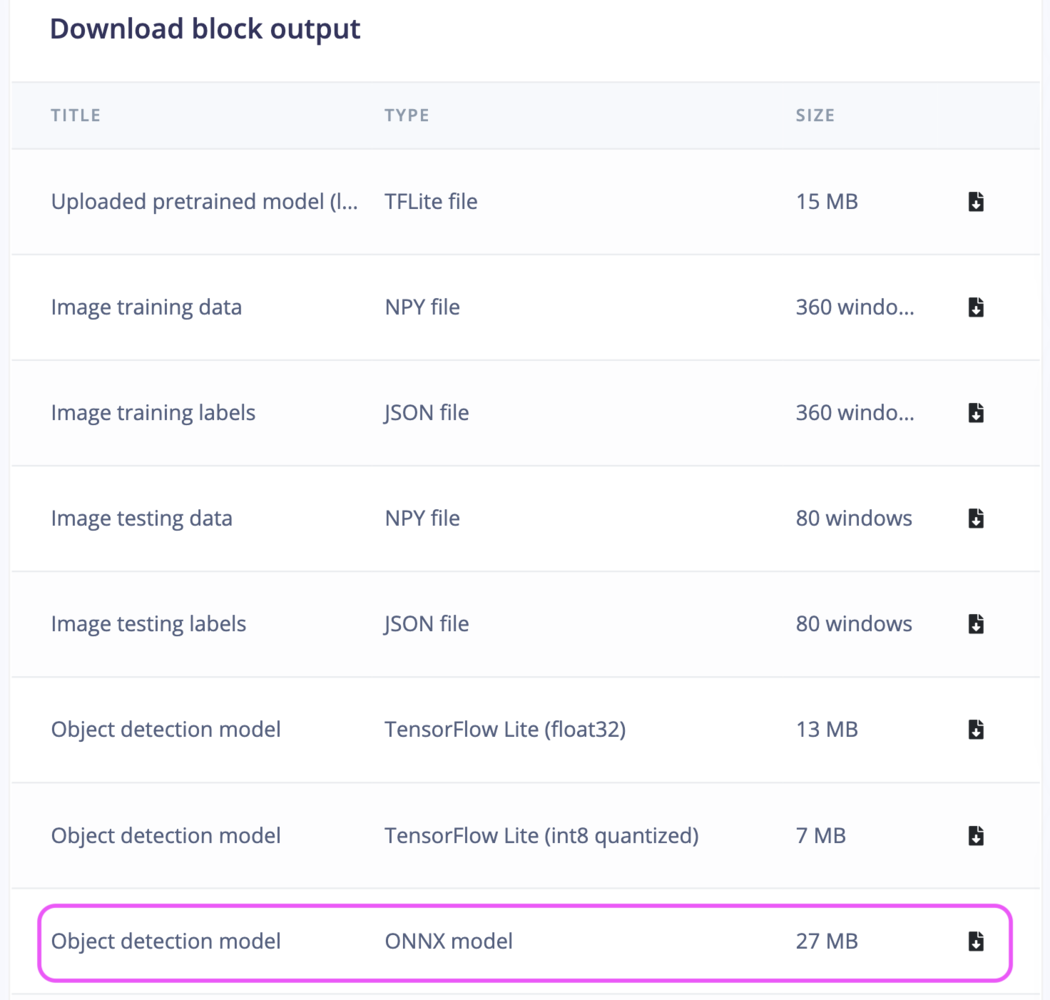
Model Conversion to HEF
We need to convert the model to a Hailo Executable Format (HEF) to run inferencing. First download the ONNX model (highlighted by a rectangular in the image below) from the Edge Impulse Studio Dashboard. After downloading, copy the the ONNX model (ei-car-yolov5s.onnx in this example) to an x86 Linux machine, which is required for the model conversion toolkit provided by Hailo.
Block Output
Dataflow Compiler
1. Make Calibration Dataset
The following Python script saves the calibration datasets in the NumPy-specific binary format (*.npy).2. Model Parsing
The following script parses the ONNX model into Hailo’s internal representation and generates the Hailo Archive (HAR) file.3. Model Optimization
The following script is used to optimize the model, convert it from full precision into integer representation, and generate a quantized Hailo Archive (HAR) file. This script includes the model input normalization and the non-maximum suppression (NMS) on the model output.4. Model Compilation
The following script compiles the quantized Hailo Archive (HAR) and generates the Hailo Executable Format (HEF) file.ei-car-yolov5s.hef in this example) to the Raspberry Pi with the Hailo Accelerator installed. We can assess on-device performance by using the following command, which demonstrates around 63 FPS, a very impressive result.
Application
We have already installed the Raspberry Pi OS (64-bit) Bookworm on the Raspberry Pi 5. Execute the following command to update the OS and firmware./boot/firmware/config.txt:
sudo reboot for these settings to take effect. To install the dependencies required to use the AI Kit. Run the following command from a terminal:
sudo reboot for these settings to take effect.
To ensure everything is running correctly, run the following command:
hailo-rpi5-example/resources directory.
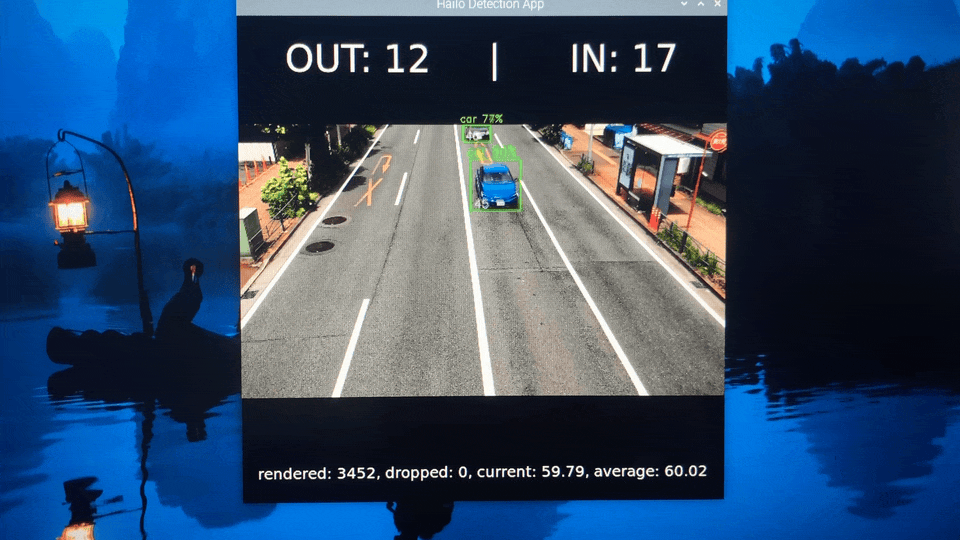
hailo-rpi5-example/resources directory. We will use the detection.py example script from the hailo-rpi5-examples/basic_pipelines directory as a starting point for the application. We modified the Gstreamer pipeline to include the HailoTracker element for tracking cars after detection. We are using Roboflow’s Supervision library to count the number of cars entering and exiting. The complete modified code is provided below.