

- A public Hugging Face Space you can use interactively or call as an API (great for robotic-arm capture rigs).
- An Edge Impulse custom synthetic data block that normalizes images already in your project to a single, consistent angle. The source is public at github.com/edgeimpulse/AngleNorm.
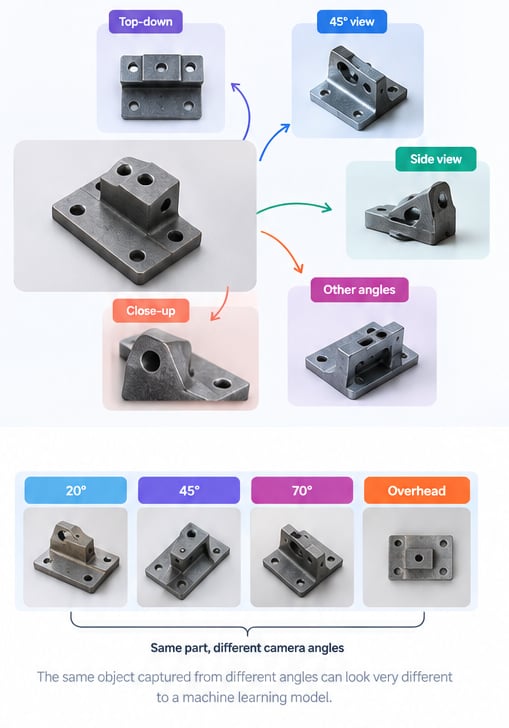
AngleNorm generates consistent views of the same object
Why normalize camera angles?
When you collect training images by hand with phones, webcams, a robotic-arm camera, or different operators, the same object shows up at wildly different viewpoints. That variation is often noise, not signal: for a fixed inspection station you really want every sample from the same canonical angle so the model learns the object (for example, cube faces), not the camera pose. AngleNorm uses Qwen Image Edit to re-photograph each object from a chosen viewpoint. You can:- Normalize an existing dataset to one consistent angle (the Edge Impulse block).
- Expand one capture into many viewpoints to bootstrap perception before you have real data (the Space’s
grab_viewpointsAPI).
From Hugging Face to edge devices
AngleNorm is one part of an edge AI workflow. You can use a Hugging Face model to generate or transform data, prepare and train your model in Edge Impulse, then deploy it to the target device.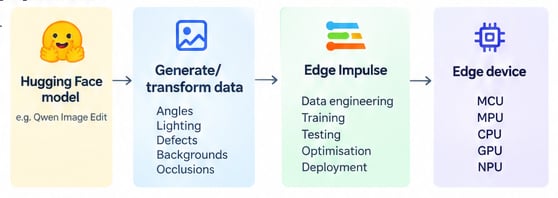
From Hugging Face models to edge deployment
AngleNorm runs the real Qwen Image Edit model on Hugging Face ZeroGPU, so neither the Space nor the Edge Impulse block needs a local GPU. The model stack is
Qwen/Qwen-Image-Edit-2509 with the linoyts/Qwen-Image-Edit-Rapid-AIO transformer and the dx8152/Qwen-Edit-2509-Multiple-angles LoRA.standalone mode. For every image already in your project it lists the sample, downloads it, sends it to the AngleNorm Space for the target angle, and uploads the re-rendered copy back through the Ingestion API so it previews on the Synthetic data tab.
Your original samples are never modified. Normalized copies are added with a generated_by=anglenorm metadata tag and a label.angle_<angle>.<id>.png filename, so they are easy to find or remove later.
Prerequisites
- An Edge Impulse account. Custom synthetic data blocks are an Enterprise feature. Start a free trial if needed.
- A project with some images already uploaded (the block normalizes what is there. See Object detection or Image classification to get started).
- The Edge Impulse CLI installed (
edge-impulse-blocks). - Docker installed if you want to test the block locally.
- Optional: a Hugging Face account and token. It is only needed if you duplicate the Space and make your copy private.
Part 1: Try AngleNorm in the Space
Before wiring it into Edge Impulse, get a feel for the model in the Space.Quick cubes example
If you are following the same setup as the blog post, use a conveyor-belt cubes workflow:- Capture a handful of cube photos from mixed viewpoints.
- In AngleNorm, choose a 45° target (for example
rotate_left_45) to match your robotic-arm camera. - Generate normalized views and confirm the cube orientation is consistent.
- Upload to Edge Impulse and train with the cleaner 45°-normalized set.
- Grab viewpoints (UI)
- Build dataset (UI)
- Robotic-arm API
- Open the 🤖 Grab viewpoints tab.
- Upload one source image.
- Pick one or more angles (top-down, bird’s-eye, rotations, close-up, …).
- Click Grab viewpoints and review the gallery.
Part 2: Add the synthetic data block to Edge Impulse
1. Get the block source
2. Review the parameters
The block exposes these options on the Synthetic data tab (fromparameters.json):
Edge Impulse automatically passes
--synthetic-data-job-id to the block. transform.py forwards it as the x-synthetic-data-job-id header on every upload, which is what makes the generated samples preview live on the Synthetic data tab.3. (Optional) Test the block locally
Synthetic data blocks are not supported byedge-impulse-blocks runner, so build and run the container directly. Use a project that already has a few images and pass the values Edge Impulse would normally inject:
4. Push the block to Edge Impulse
From the repository folder, initialize and push:The Hugging Face token is exposed as a
secret parameter and can be left blank for the public Space.5. Run it from the Synthetic data tab
- Open your project and go to Data acquisition → Synthetic data.
- Select the AngleNorm block.
- Choose your Angle preset (for example,
rotate_left_45to match a downward-angled robotic arm), the Source and Upload categories, and optionally a label filter or Max images while you test. - Click Generate data and watch the previews appear.
Screenshot placeholder: add a capture of an active Synthetic data run (with live previews).
6. Verify the normalized data
Go to Data acquisition and filter for the new samples (their filenames start withlabel.angle_<angle>.). Confirm the angle is consistent and the labels carried over, then retrain your impulse on the cleaner, consistent dataset.
Screenshot placeholder: add a capture of the normalized samples in Data acquisition.
Tips and best practices
- Start small. Use Max images and a label filter to validate the look on a handful of samples before running the whole dataset.
- Keep originals as a fallback. The block never edits your source samples, so you can compare models trained on raw and normalized data.
- Pick one canonical angle per project. Match the production camera geometry first. If your arm camera sits at ~45° over a conveyor belt, normalize to
rotate_left_45/rotate_right_45; usetop_downwhen the real camera is truly overhead. - Validate against reality. Synthetic viewpoints are a great bootstrap, but confirm with real captures from your device’s own camera before deploying.
- Mind the licenses. AngleNorm is
CC BY 4.0; verify your use of the underlying Qwen models complies with their licenses.
Troubleshooting
“This endpoint requires a project API Key” The Studio read endpoints reject organization keys. The block usesEI_PROJECT_API_KEY for both reading and ingestion. Make sure a project key is set.
No images processed
Check that the Source category actually contains images, and that your label filter matches existing labels. The block only sees image data.
Space is slow or busy
ZeroGPU is shared. Re-run, lower the Output image size, or duplicate the Space onto your own hardware and point the AngleNorm Space parameter at your copy.
Private Space copy
If you duplicated the Space and made it private, paste a Hugging Face token into the block’s Hugging Face token secret so it can authenticate.
Next steps
With a consistent dataset, build and deploy a model:- Image classification
- Detect objects with bounding boxes
- Detect objects with centroids (FOMO)
- Custom synthetic data blocks: build your own generator
Additional resources
- AngleNorm block source
- AngleNorm Hugging Face Space
- Edge Impulse on Hugging Face
- Synthetic data
- Ingestion API
Explore more on Hugging Face
Explore the Edge Impulse organization on Hugging Face for more examples, models, datasets, and Spaces.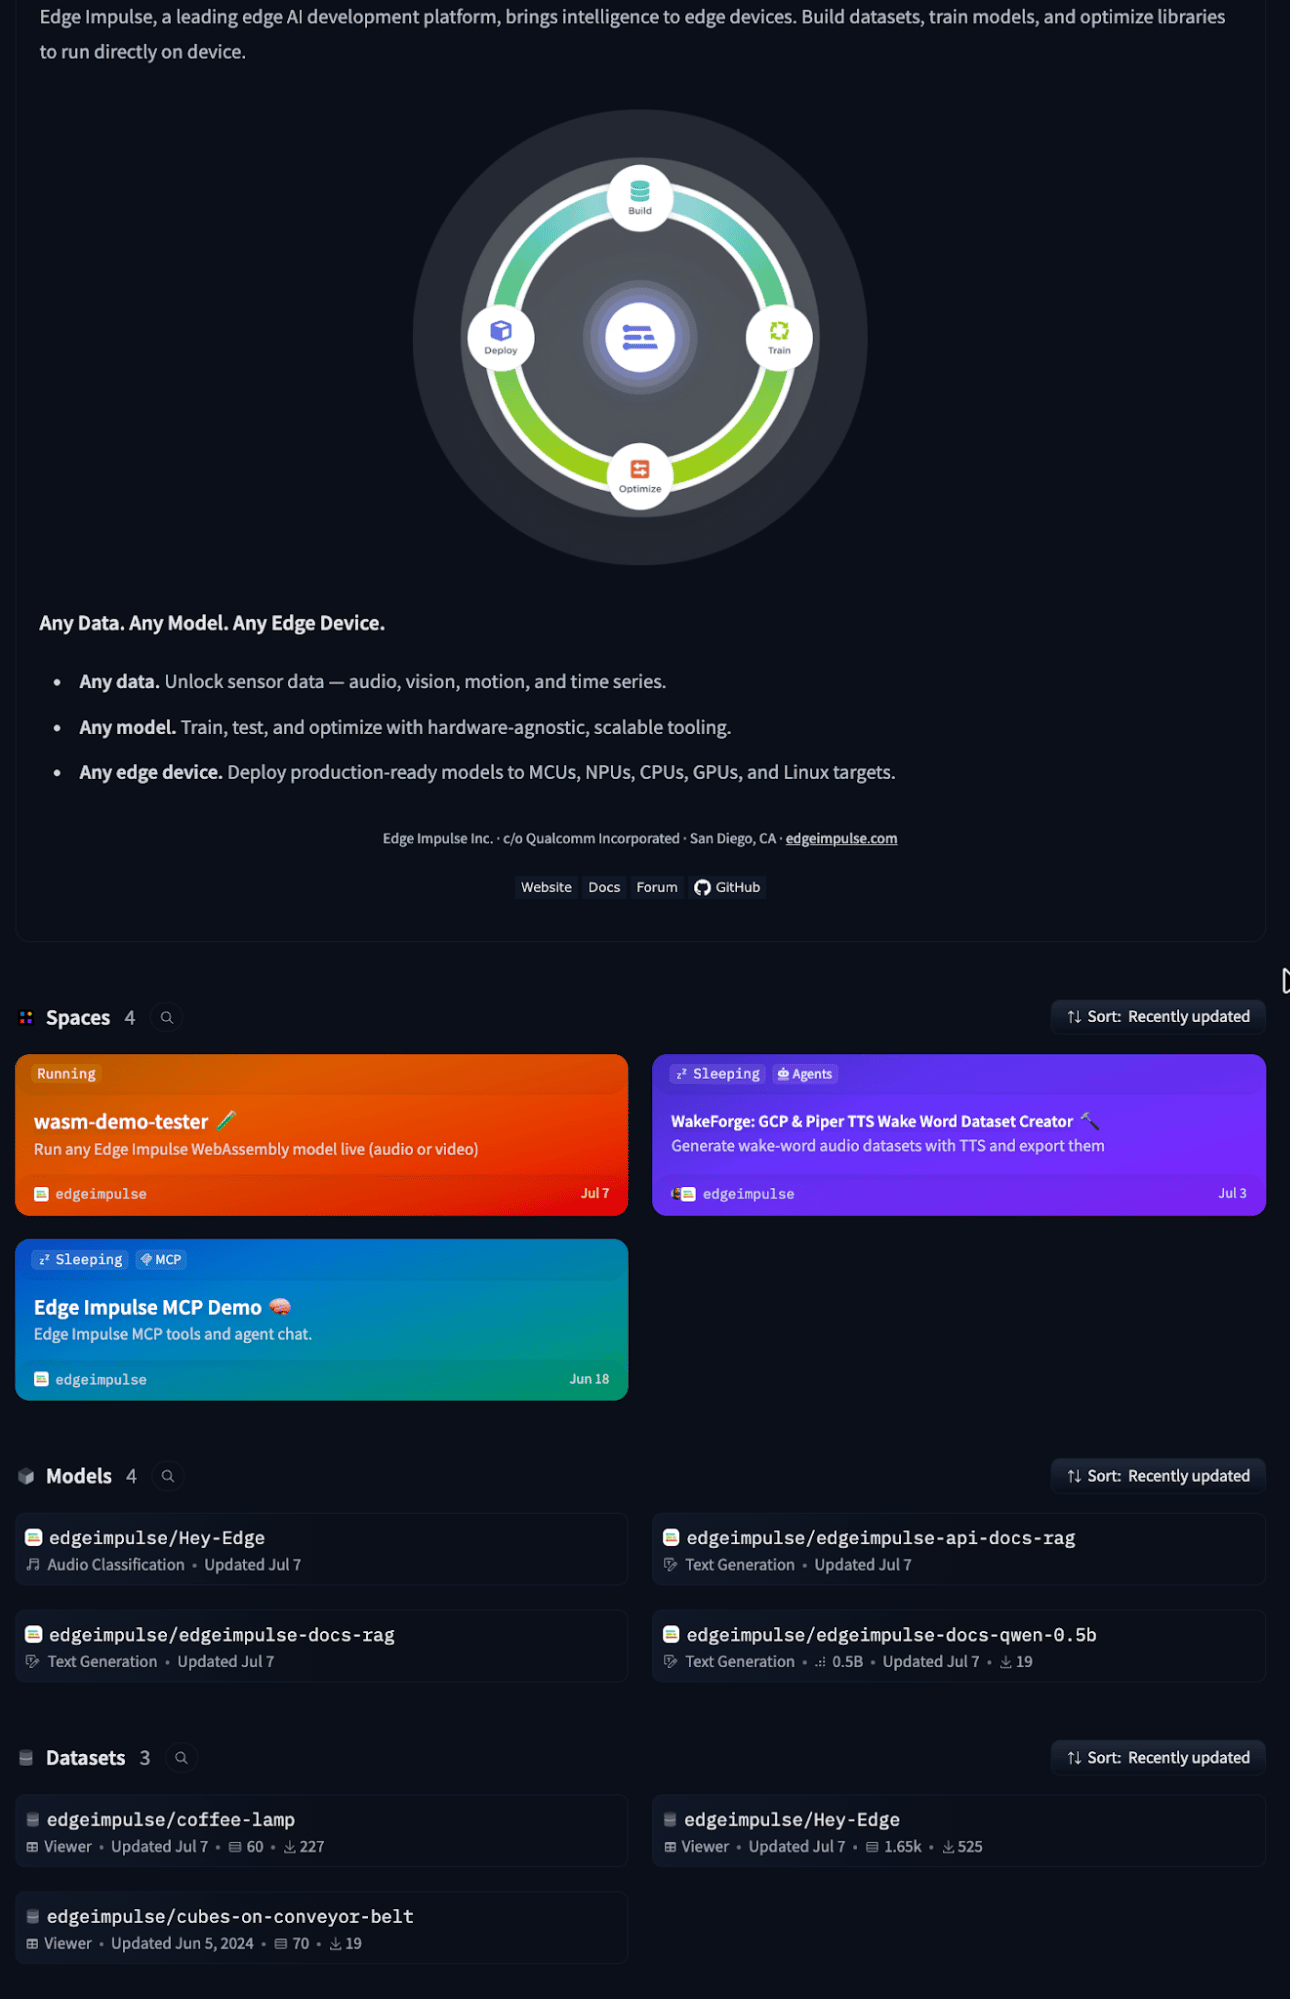
Edge Impulse on Hugging Face