1. Prerequisites
For this tutorial, you’ll need a supported device. If you don’t have any of these devices, you can also upload an existing dataset through the Uploader - including annotations. After this tutorial you can then deploy your trained machine learning model as a C++ library and run it on your device.2. Building a dataset
In this tutorial we’ll build a model that can distinguish between two objects on your desk - we’ve used a lamp and a coffee cup, but feel free to pick two other objects. To make your machine learning model see it’s important that you capture a lot of example images of these objects. When training the model these example images are used to let the model distinguish between them. Capturing data Capture the following amount of data - make sure you capture a wide variety of angles and zoom level. It’s fine if both images are in the same frame. We’ll be cropping the images later to be square so make sure the objects are in the frame.- 30 images of a lamp.
- 30 images of a coffee cup.
- Collecting image data from the Studio - for the Raspberry Pi 4 and the Jetson Nano.
- Collecting image data with your mobile phone
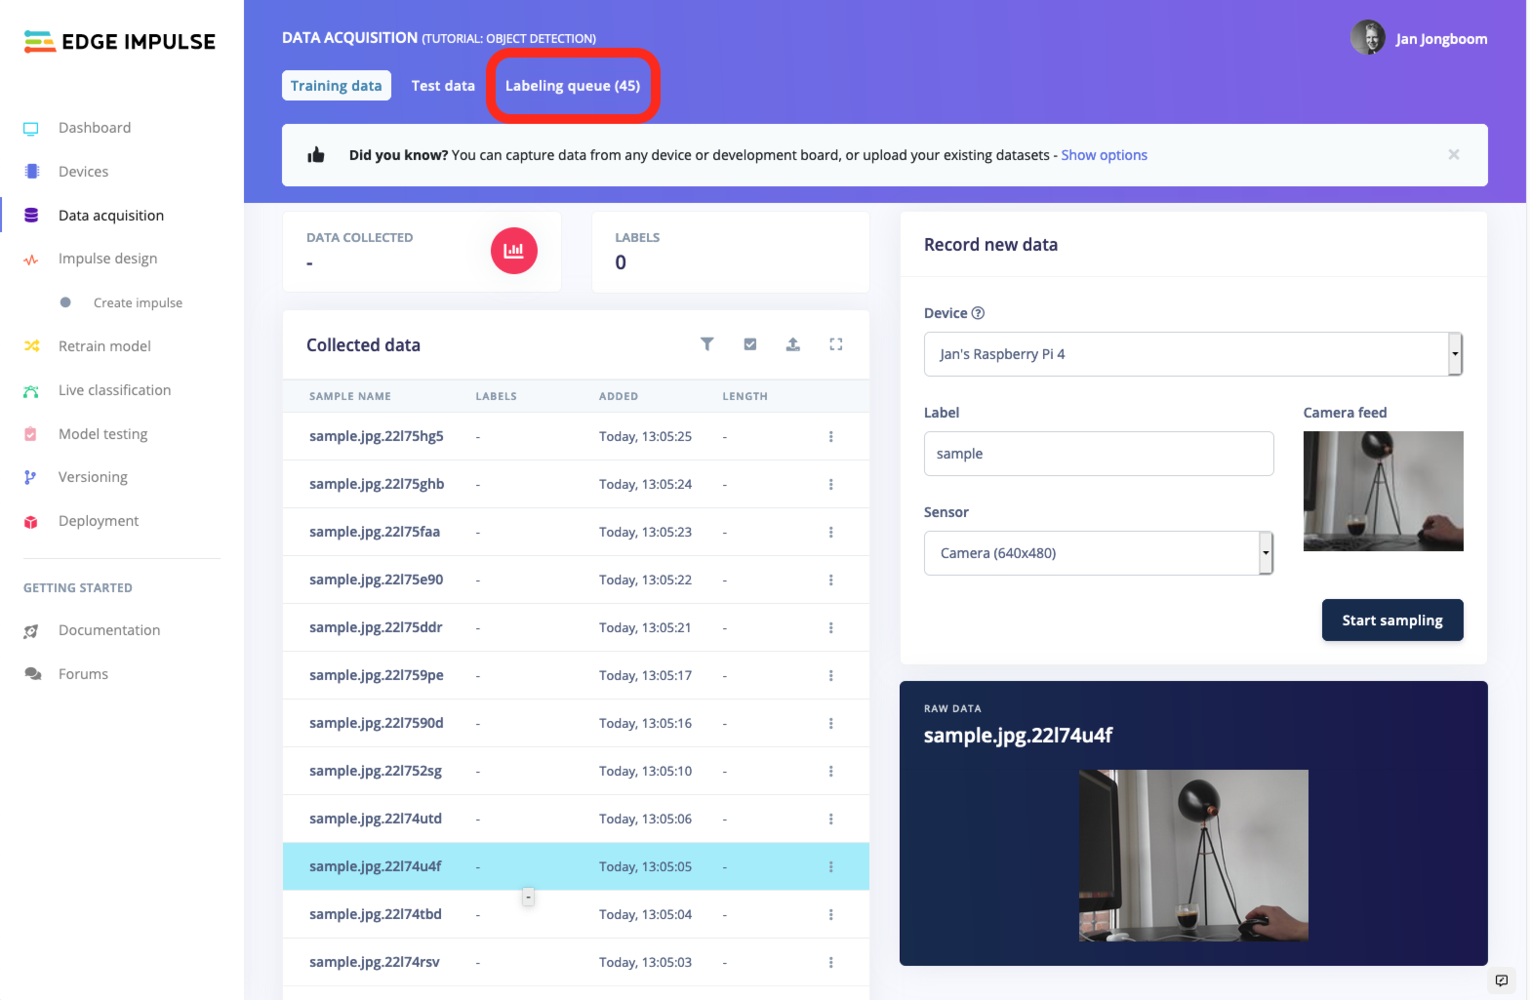
Collected data, now let's label the data with the labeling queue.
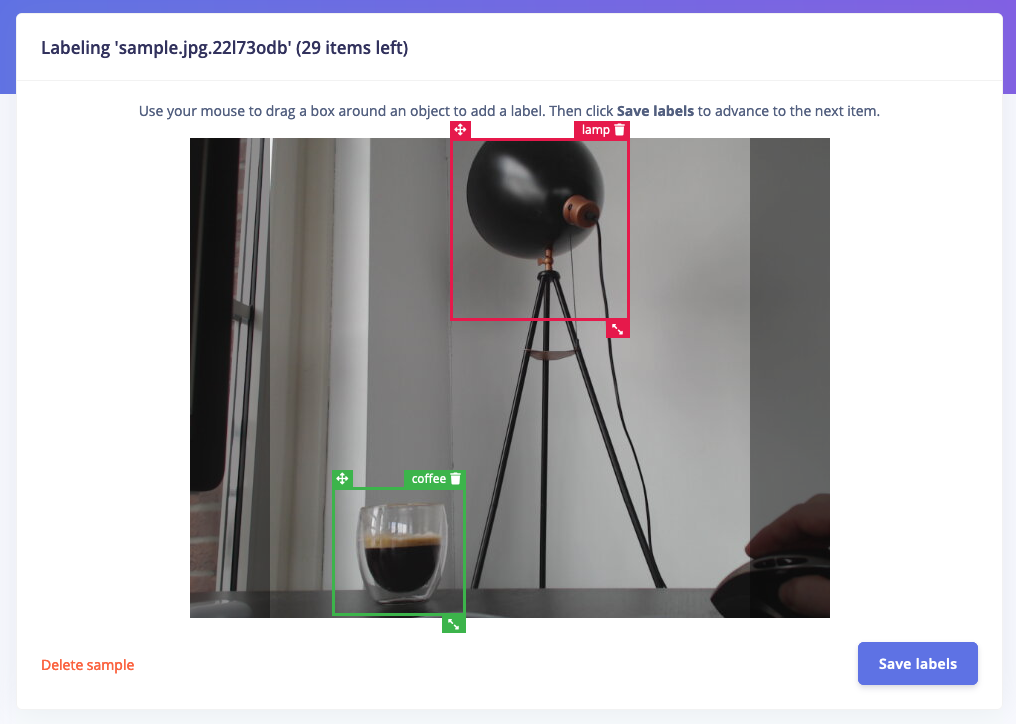
Labeling multiple objects with the labeling queue. Note the dark borders on both sides of the image, these will be cut off during training, so you don't have to label objects that are located there.
3. Designing an impulse
With the training set in place you can design an impulse. An impulse takes the raw data, adjusts the image size, uses a preprocessing block to manipulate the image, and then uses a learning block to classify new data. Preprocessing blocks always return the same values for the same input (e.g. convert a color image into a grayscale one), while learning blocks learn from past experiences. For this tutorial we’ll use the ‘Images’ preprocessing block. This block takes in the color image, optionally makes the image grayscale, and then turns the data into a features array. If you want to do more interesting preprocessing steps - like finding faces in a photo before feeding the image into the network -, see the Building custom processing blocks tutorial. Then we’ll use a ‘Transfer Learning’ learning block, which takes all the images in and learns to distinguish between the two (‘coffee’, ‘lamp’) classes. In the studio go to Create impulse, set the image width and image height to320, the ‘resize mode’ to Fit shortest axis and add the ‘Images’ and ‘Object Detection (Images)’ blocks. Then click Save impulse.

Designing an impulse
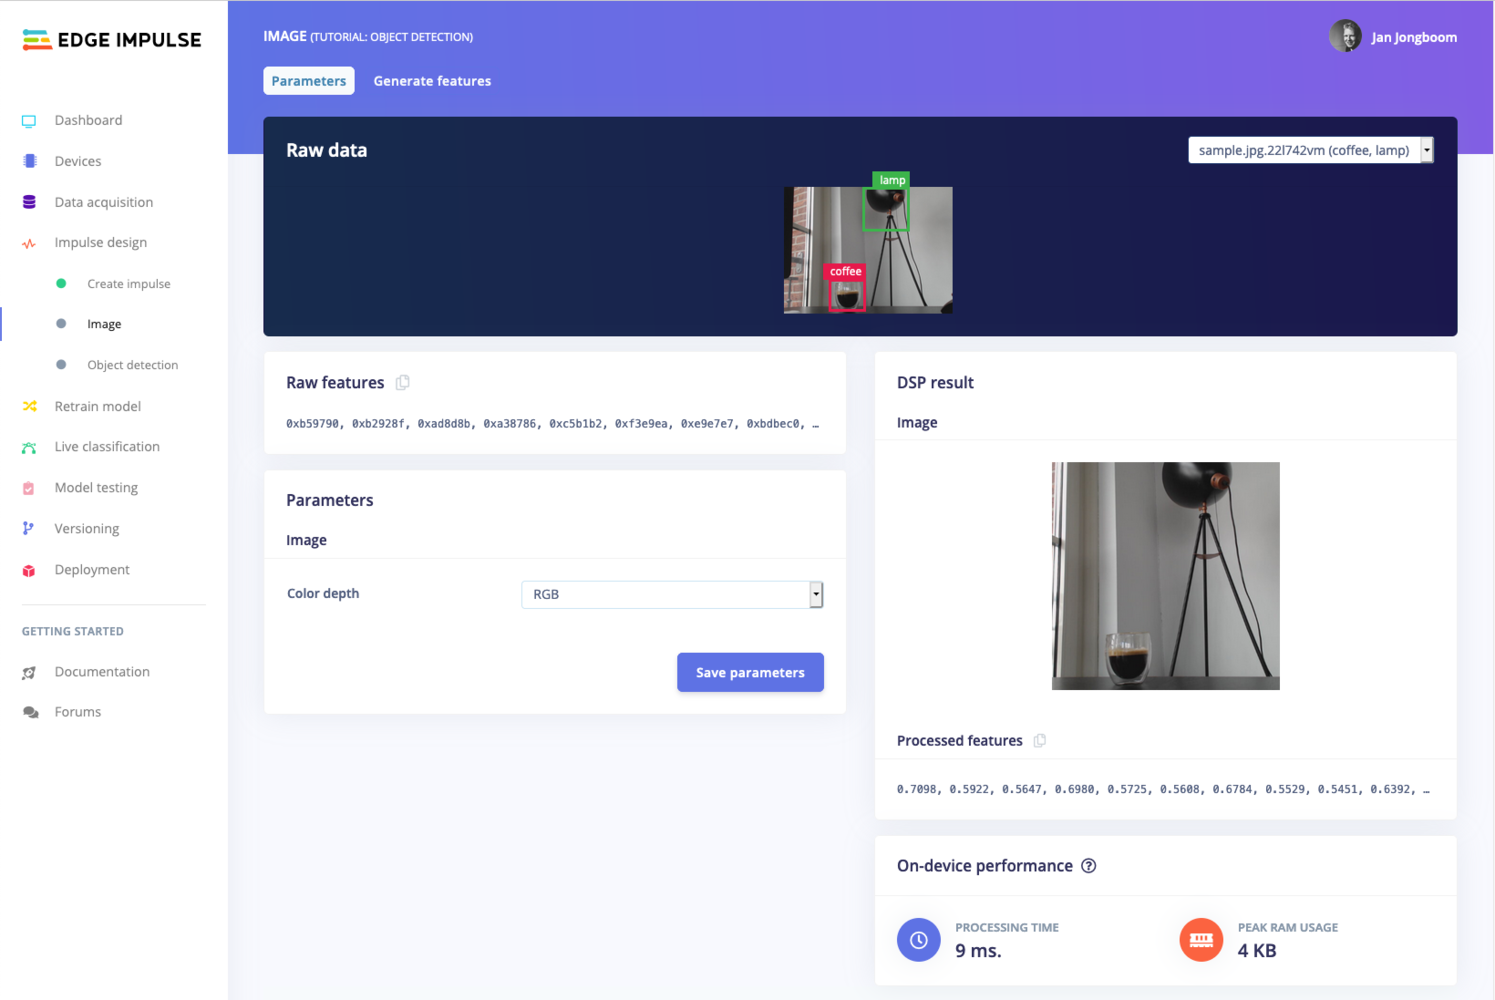
Configuring the processing block.
- Resize all the data.
- Apply the processing block on all this data.
- Create a 3D visualization of your complete dataset.

The feature explorer visualizing the data in the dataset. Clusters that separate well in the feature explorer will be easier to learn for the machine learning model.
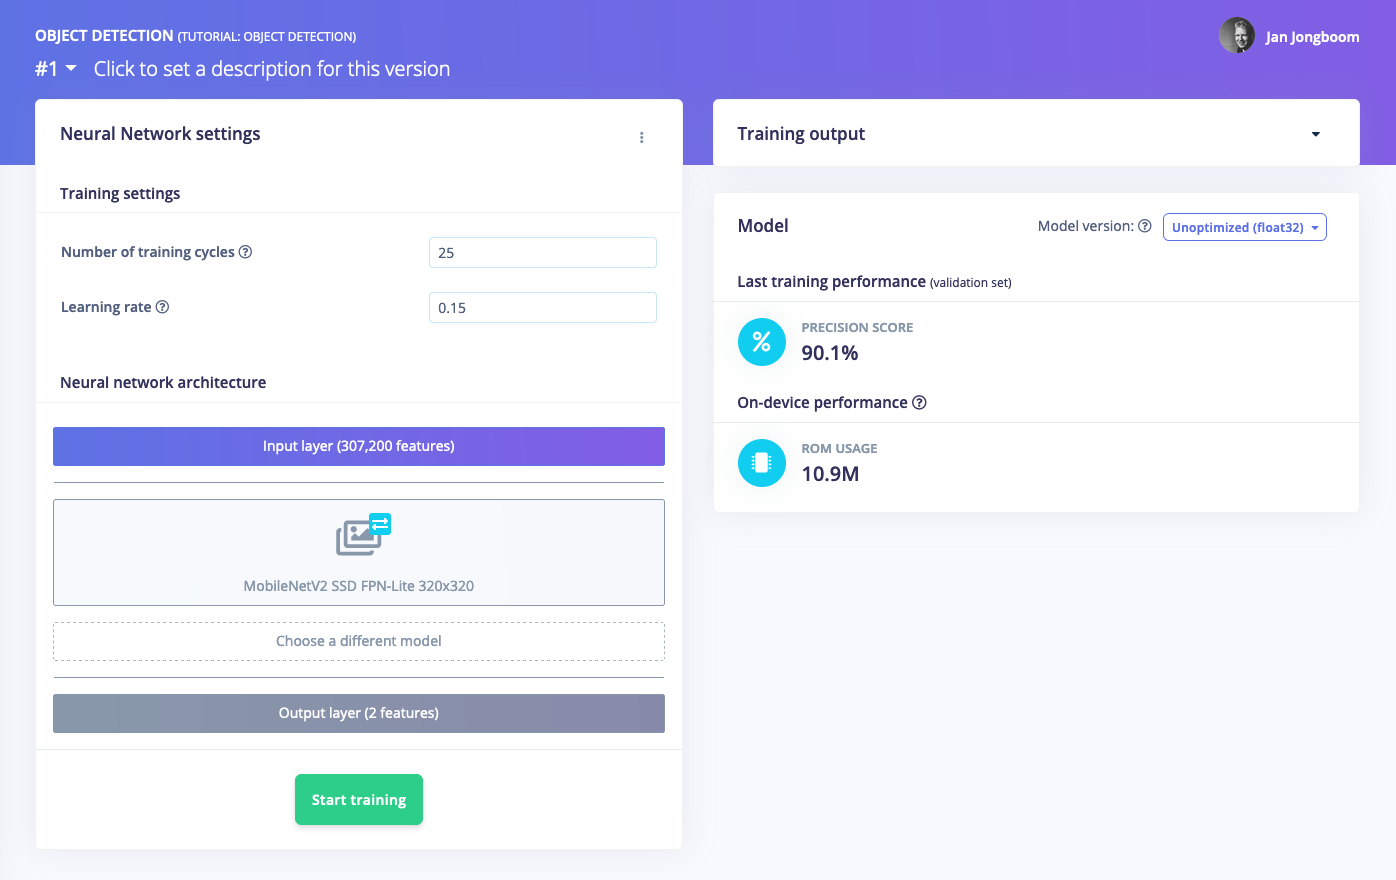
A trained model showing the precision score. This is the COCO mean average precision score, which evaluates how well the predicted labels match your earlier labels.
4. Validating your model
With the model trained let’s try it out on some test data. When collecting the data we split the data up between a training and a testing dataset. The model was trained only on the training data, and thus we can use the data in the testing dataset to validate how well the model will work in the real world. This will help us ensure the model has not learned to overfit the training data, which is a common occurrence. To validate your model, go to Model testing and select Classify all. Here we hit 92.31% precision, which is great for a model with so little data.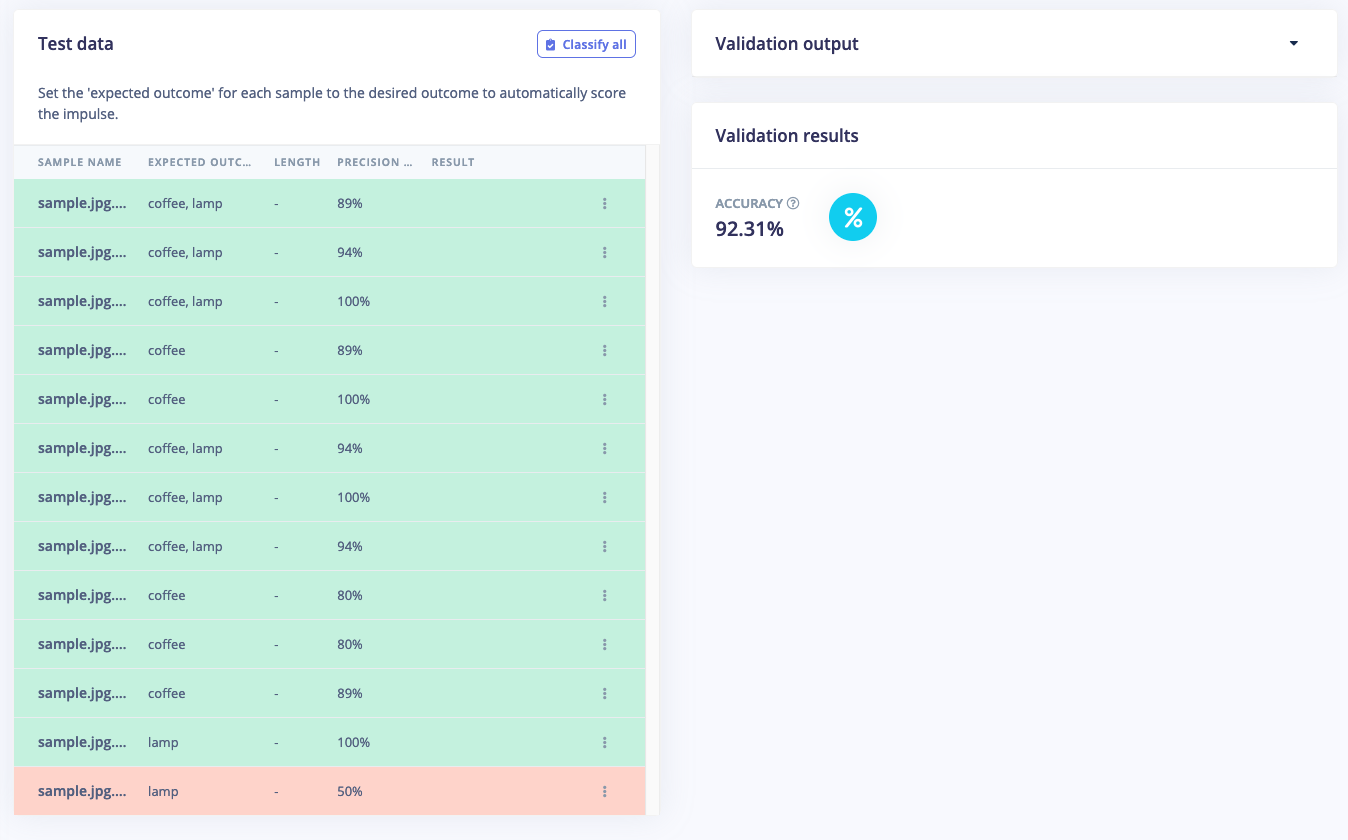
Live Classification Result
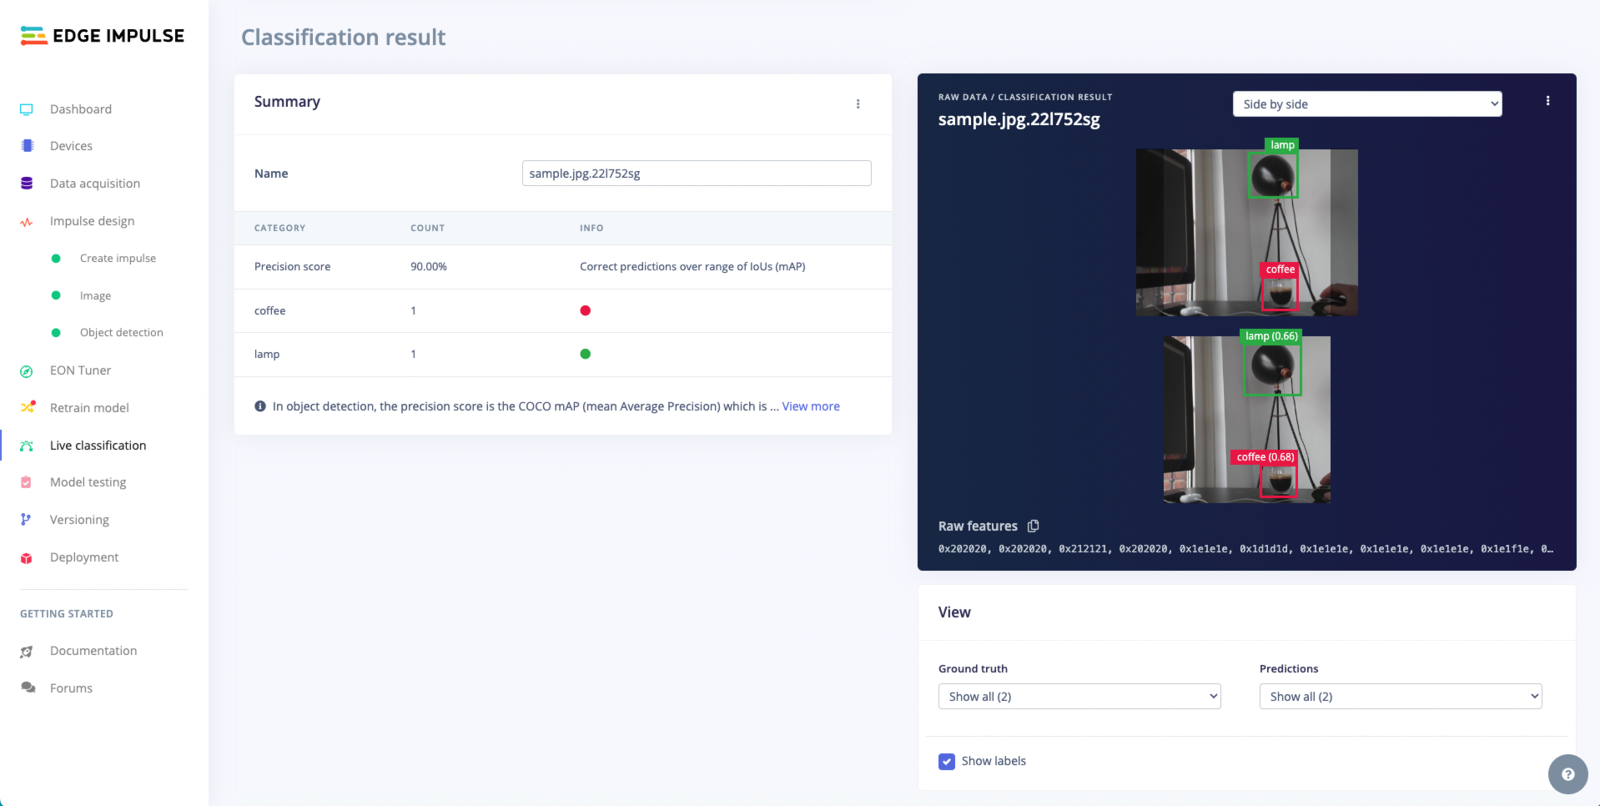
Live classification helps you determine how well your model works, showing the objects detected and the confidence score side by side.
Overlay Mode for the Live Classification Result
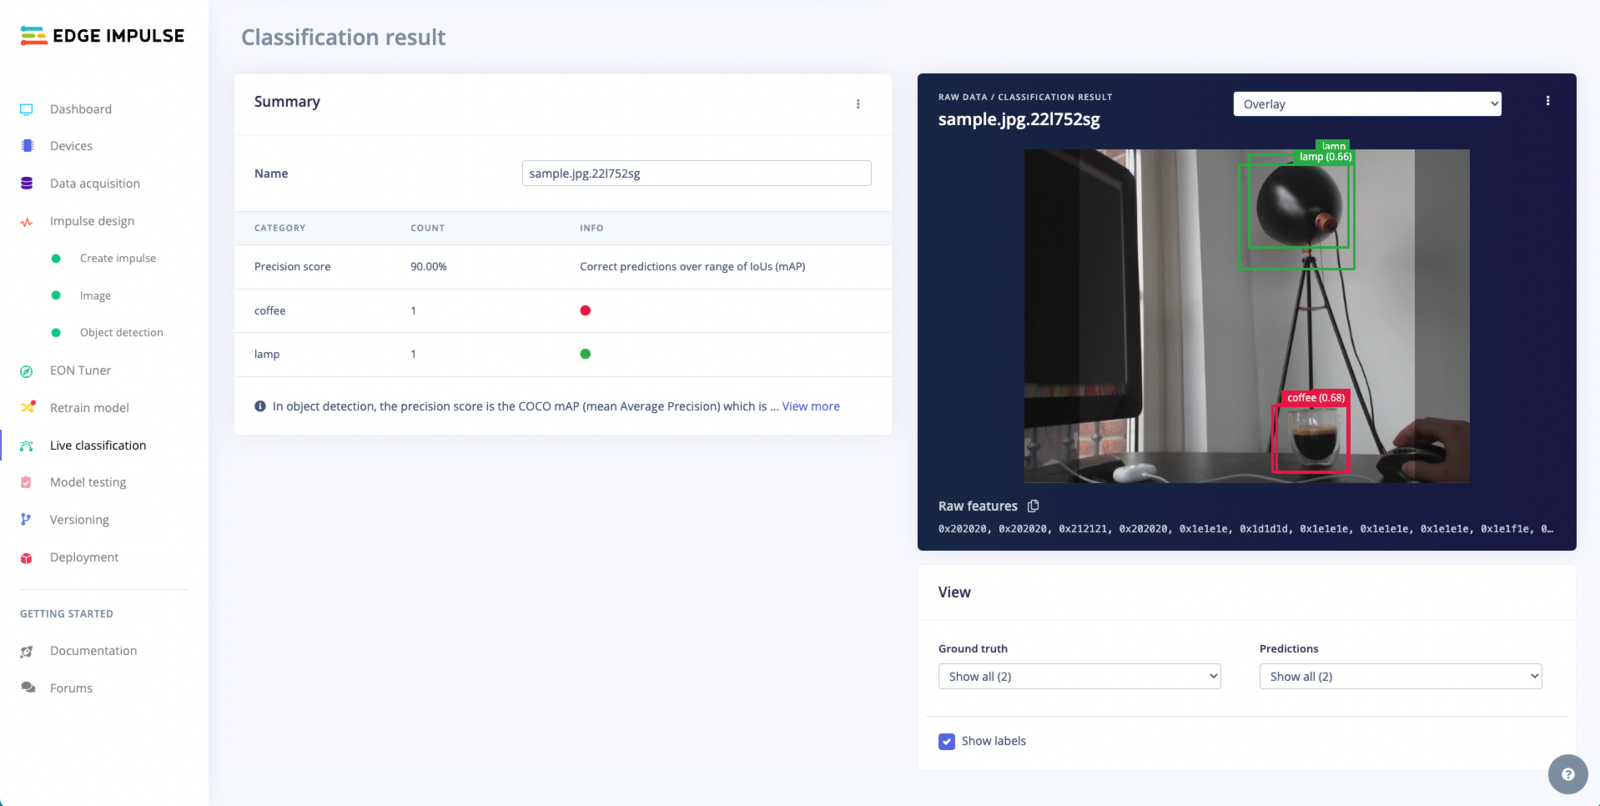
Changing to overlay mode provides a more integrated view by superimposing the model's detections directly onto the original image
Summary Table
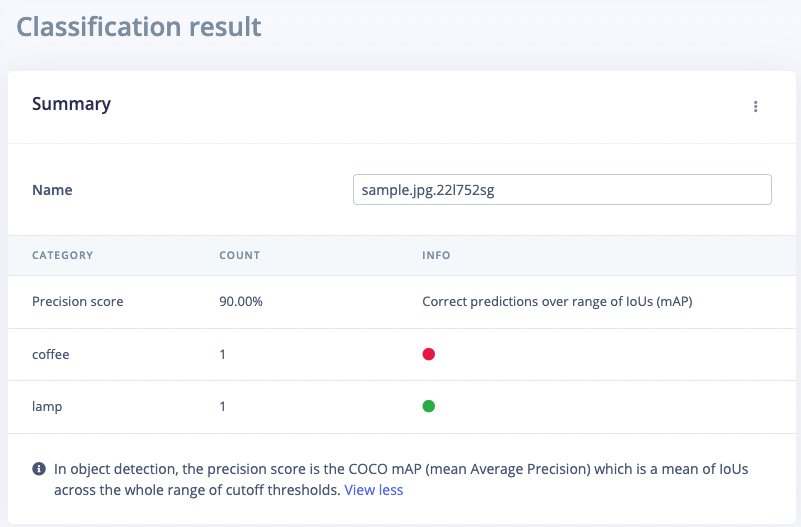
This table provides a concise summary of the performance metrics for an object detection model, using a specific sample file. The layout and contents are as follows.
5. Running the model on your device
With the impulse designed, trained and verified you can deploy this model back to your device. This makes the model run without an internet connection, minimizes latency, and runs with minimum power consumption. Edge Impulse can package up the complete impulse - including the preprocessing steps, neural network weights, and classification code - in a single C++ library or model file that you can include in your embedded software. Running the impulse on your Raspberry Pi 4 or Jetson Nano From the terminal just runedge-impulse-linux-runner. This will build and download your model, and then run it on your development board. If you’re on the same network you can get a view of the camera, and the classification results directly from your dev board. You’ll see a line like:
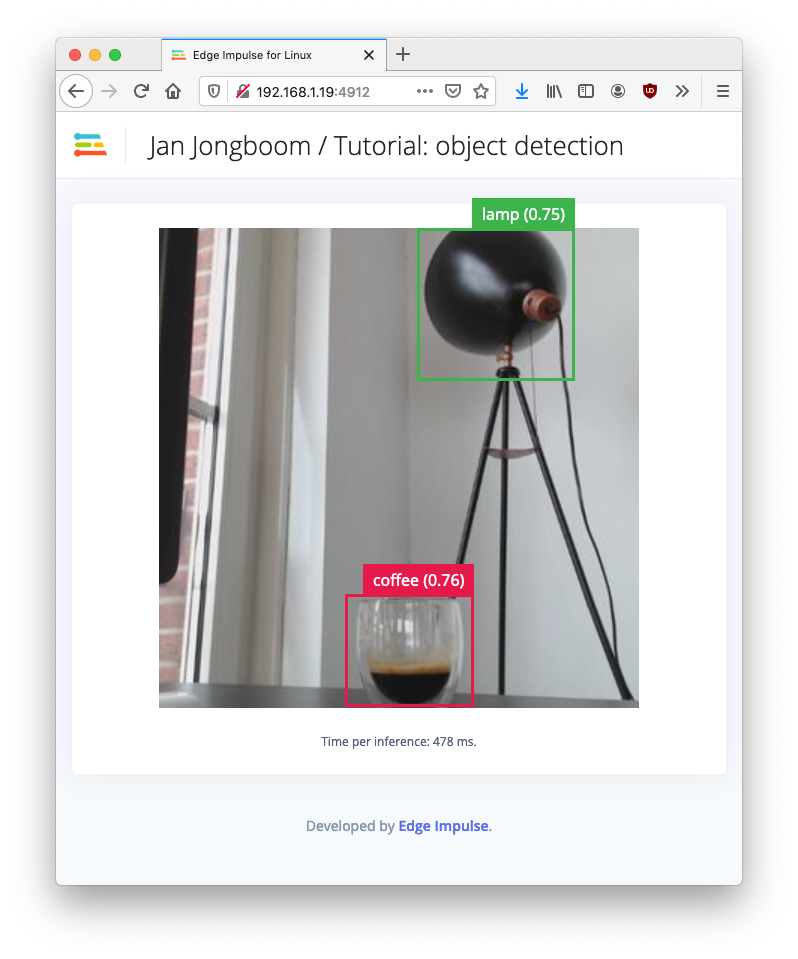
Object detection model running on a Raspberry Pi 4