

PaddleOCR models in Edge Impulse, and see how to integrate this into your own Python applications using the Edge Impulse Linux SDK.
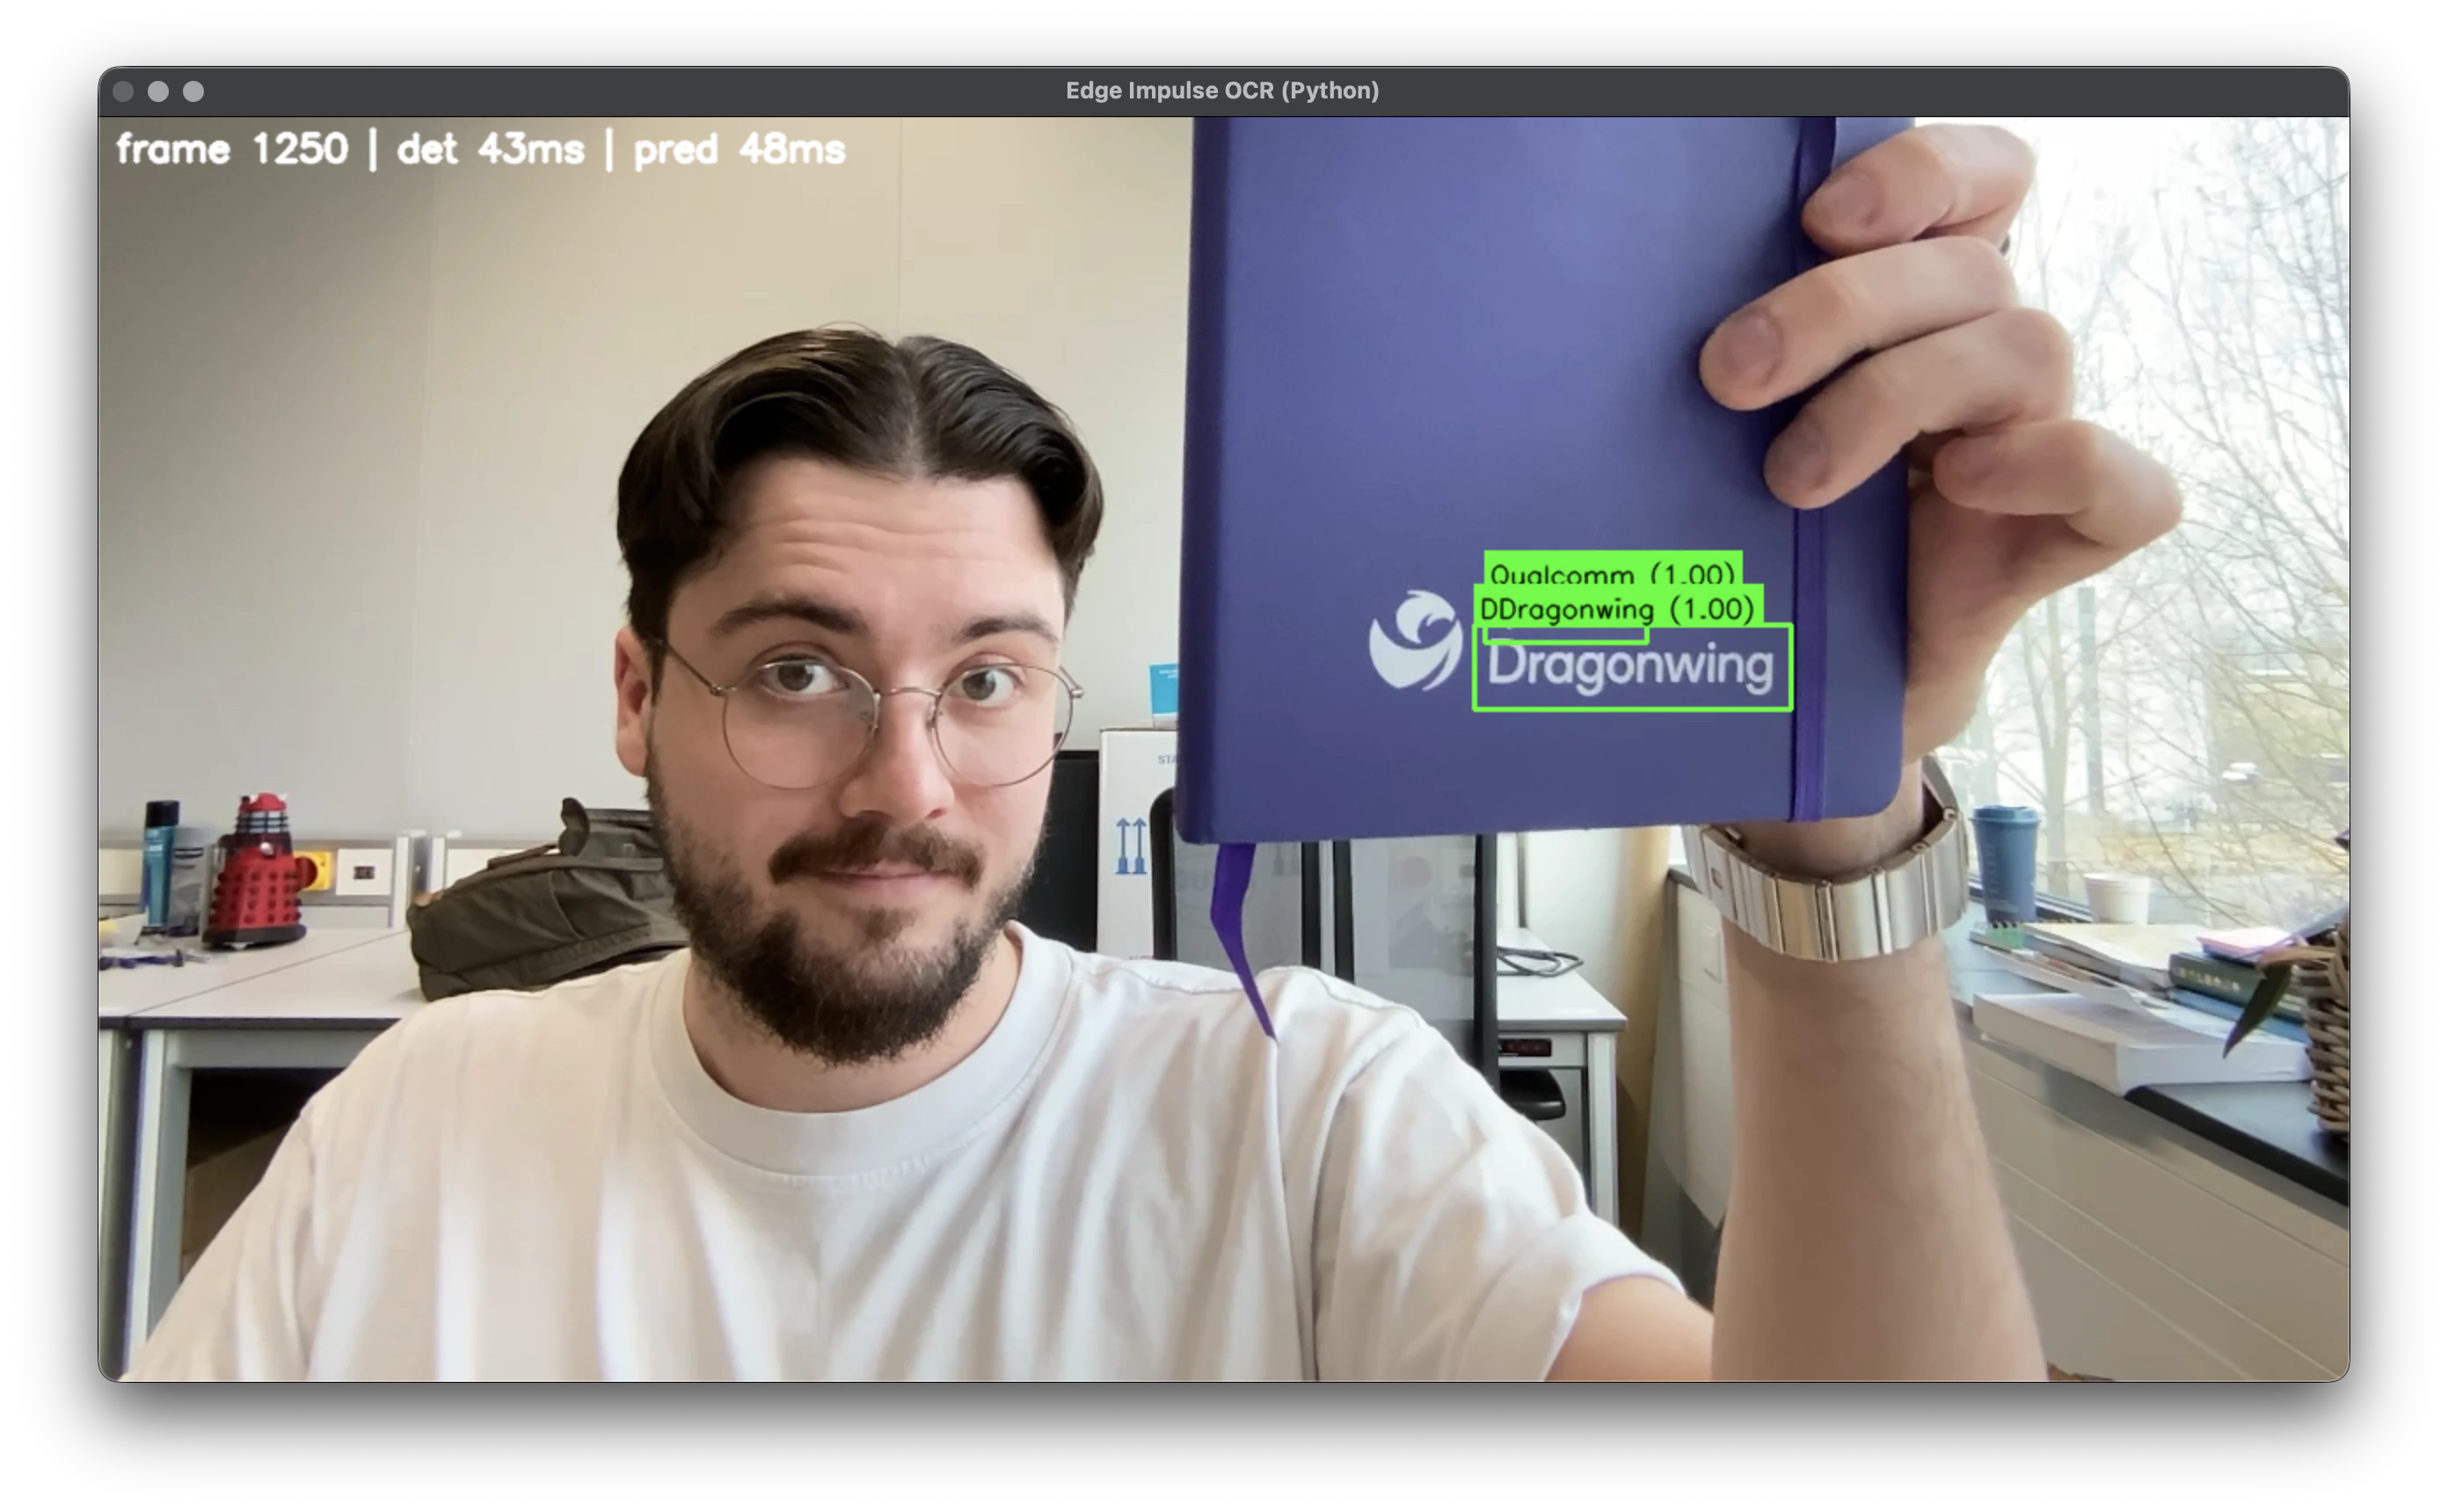
Testing the OCR tutorial
Prerequisites
For this tutorial, you will need:- A Linux-based device supported by Edge Impulse (e.g. UNO Q, Rubik Pi, RB3 Gen 2, or any aarch64 Linux board with a camera).
- A webcam or CSI camera connected to your device.
- Python 3.8+ installed.
- Edge Impulse account (free tier is sufficient).
- Edge Impulse Linux CLI: Install via
npm install -g edge-impulse-clior follow Edge Impulse CLI docs.
Building your models in Edge Impulse
This OCR pipeline uses two imported models via Bring Your Own Model (BYOM):- Text Detector (object detection, single-class): Locates text bounding boxes using the pretrained PaddleOCR detector.
- Text Recognizer (freeform output): Reads text from cropped regions. Must be the pretrained PaddleOCR recognizer.
Upload the Text Detector model
- Download the PaddleOCR detector ONNX from Hugging Face: monkt/paddleocr-onnx (
det.onnx). - Create a new Edge Impulse project (e.g., “PaddleOCR Detector - Pretrained”).
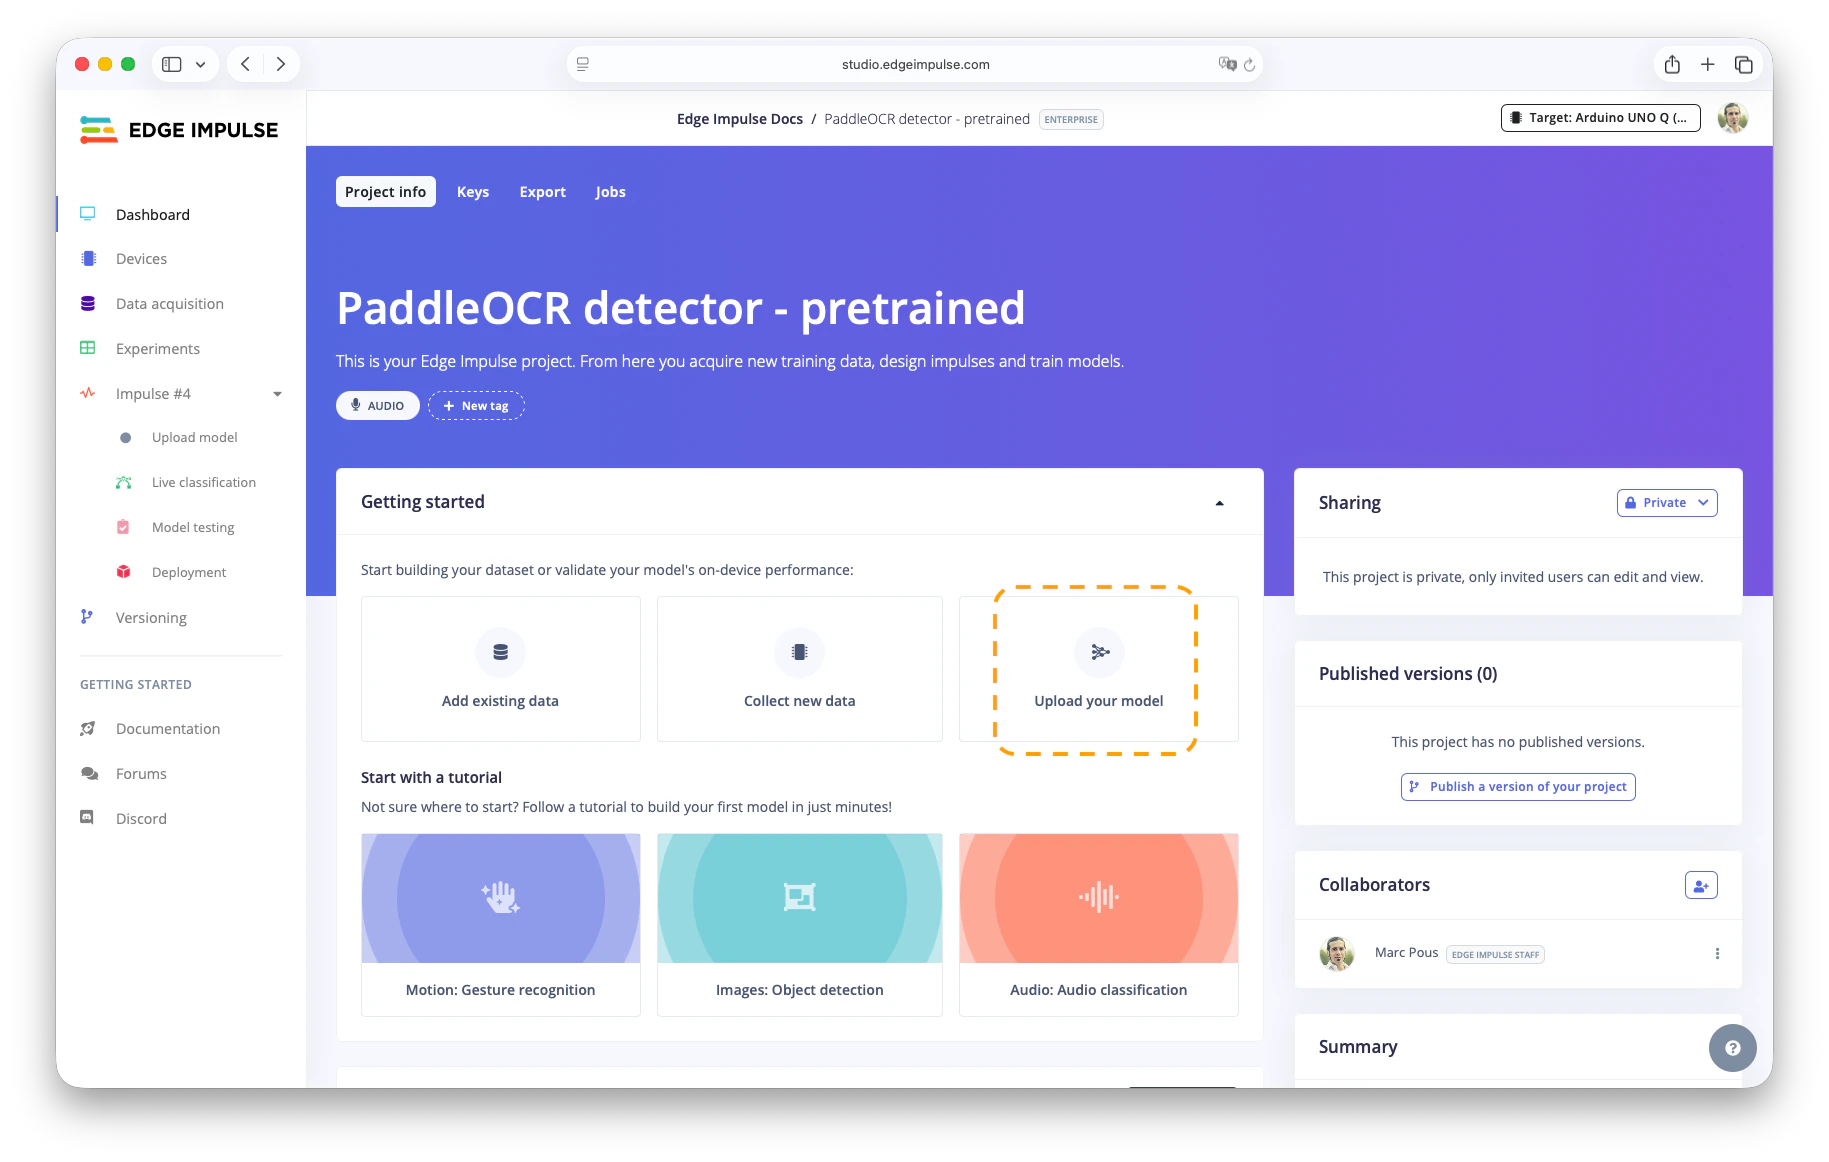
Bring your own model to Edge Impulse
- Go to Dashboard > Upload your model.
- Upload
det.onnx. - Set input shape:
1, 3, 480, 640(adjust resolution if needed). - Optional: Quantize by uploading a representative dataset (e.g.,
source_models/repr_dataset_480_640.npyfrom the repo).
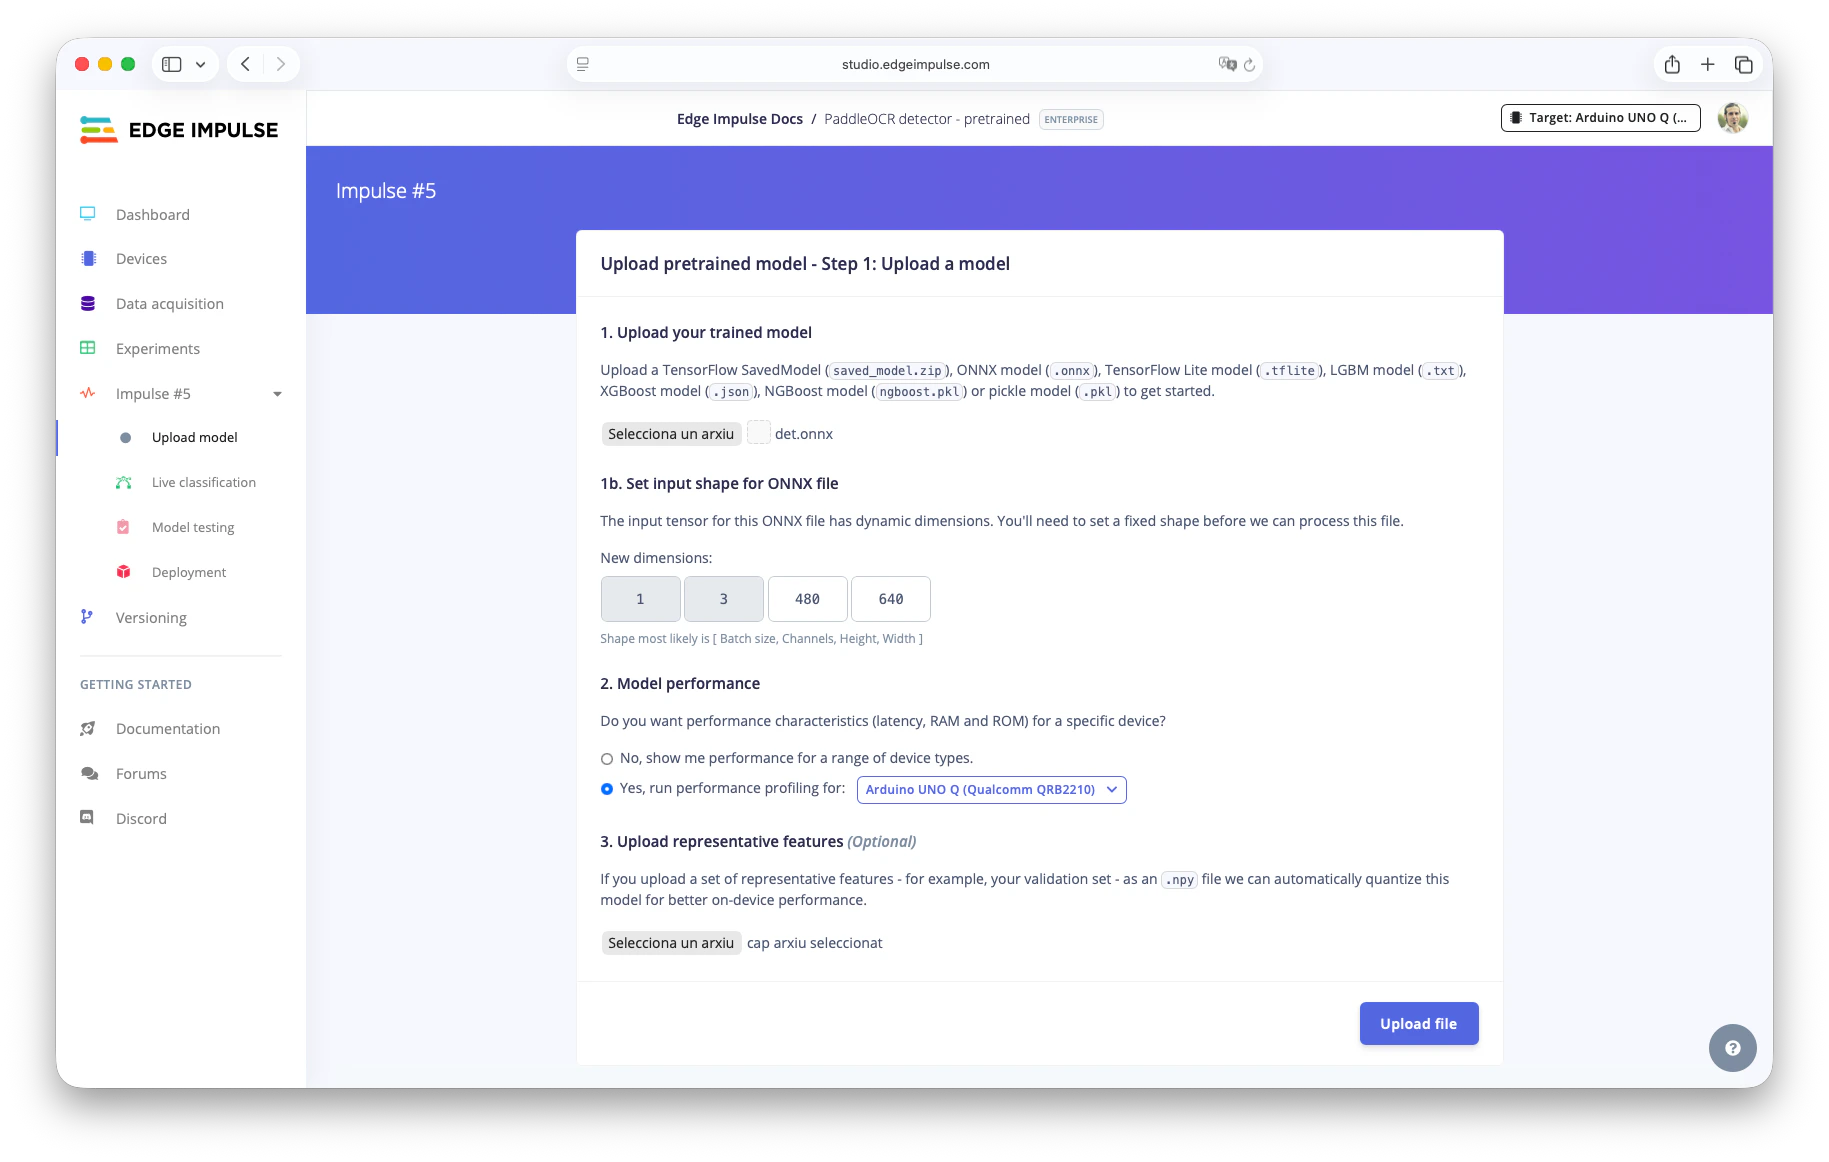
Upload Pretrained Model
- In Step 2:
- Model input: Image.
- Scaling: Pixels range -1..1 (not normalized).
- Output: Object detection.
- Output layer: PaddleOCR detector.
- Test with an image and tune thresholds if needed.
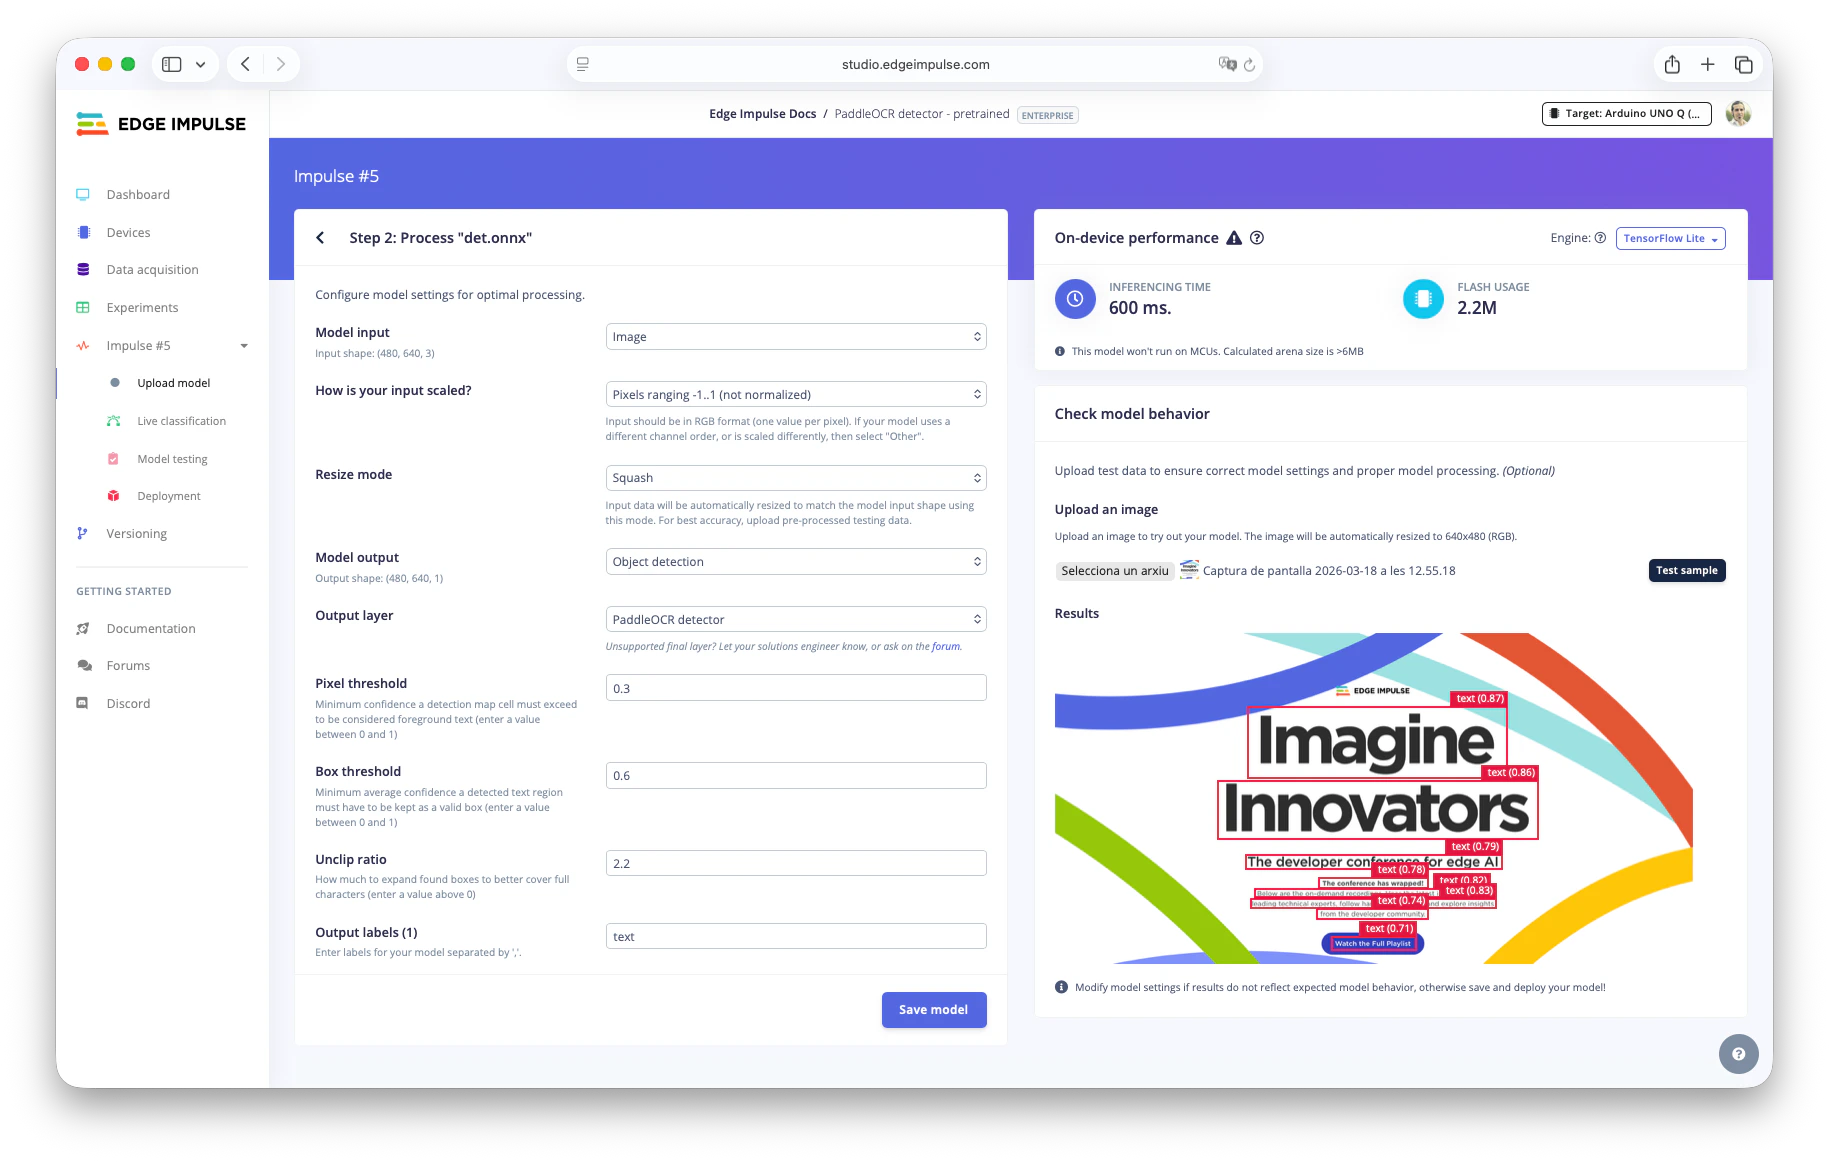
Process the BYOM and test it
- Save the model.
- Deploy as
.eim: Go to the Deployment section, select your target (e.g.,Linux aarch64orArduino UNO Q), and download bothfloat32andint8variants.
Uploading the Text Recognizer model
- Download a PaddleOCR recognizer model (English) (
rec.onnx) in ONNX format (other languages available on HF: monkt/paddleocr-onnx). For other languages, grab the matchingdict.txt. - Create another Edge Impulse Studio project (e.g., “PaddleOCR Recognizer - Pretrained”).
- Upload
rec.onnxwith input shape1, 3, 48, 320. - Optional: Quantize with representative dataset.
- If you want to use another resolution, you’ll need to create a new representative dataset. Run from this repository:
Create a new venv, and install dependencies in
source_models/requirements.txt
- If you want to use another resolution, you’ll need to create a new representative dataset. Run from this repository:
Create a new venv, and install dependencies in
- In Step 2:
- Model input: Image.
- Scaling: -1..1.
- Resize mode: Squash.
- Output: Freeform.
- Save and deploy
.eimfiles as above.
Downloading models to your device
On your target device (ensure hardware-specific optimizations):- Install Edge Impulse CLI if not already.
- Download detector:
- (Log in and select your detector project; repeat for int8 variant if quantized.)
- Download recognizer similarly.
- Place files in your project folder (e.g.,
models/arduino-uno-q/ormodels/linux-aarch64/).
Running the OCR Python application
Clone the repo:http://<your-device-ip>:5000 in a browser, select your camera (e.g., /dev/video2), and start inference. You will see live detection bounding boxes and recognized text overlaid!
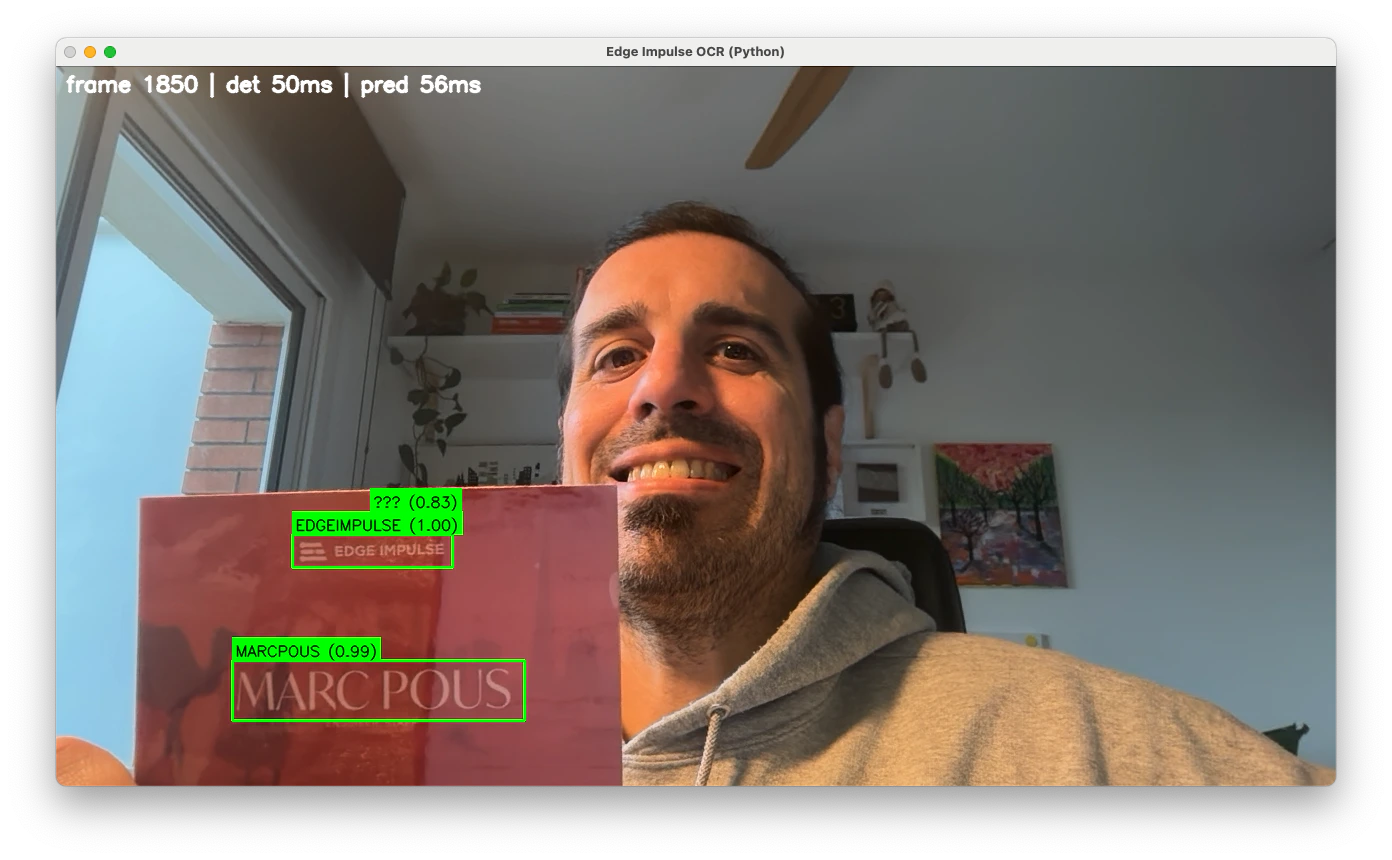
Testing the OCR application
--camera <index> to select input.
Understanding model cascading
The app runs inference with the detector model. Only when text is found (above the confidence threshold) does it crop the region and run the recognizer model. This cascading saves resources, which is critical on edge devices like the UNO Q or others. Find here another example of Model Cascading between an object detection model and a VLM.Troubleshooting
No common issues have been identified thus far. If you encounter an issue, please reach out on the forum, or, if you are on the Enterprise plan, through your support channels.
Camera not detected
Camera not detected
If you don’t see the camera connected when testing the application first checkCheck if you have any camera connected. If the issue persist and you don’t see your camera send us the logs in the Edge Impulse forum.
Slow inference
Slow inference
The recommendation here if you have slow inference is to try
int8 models or lower resolution.