normal looks like providing clean and undamaged examples. Once the model is deployed, it will detect anything that deviates from the normal baseline, such as anomalies, missing parts, or unusual patterns in images showing damages without having seen these defects before.
By the end of this tutorial, you will be able to have a working Visual Anomaly Detection model running on your device, using only images from anything in good condition.
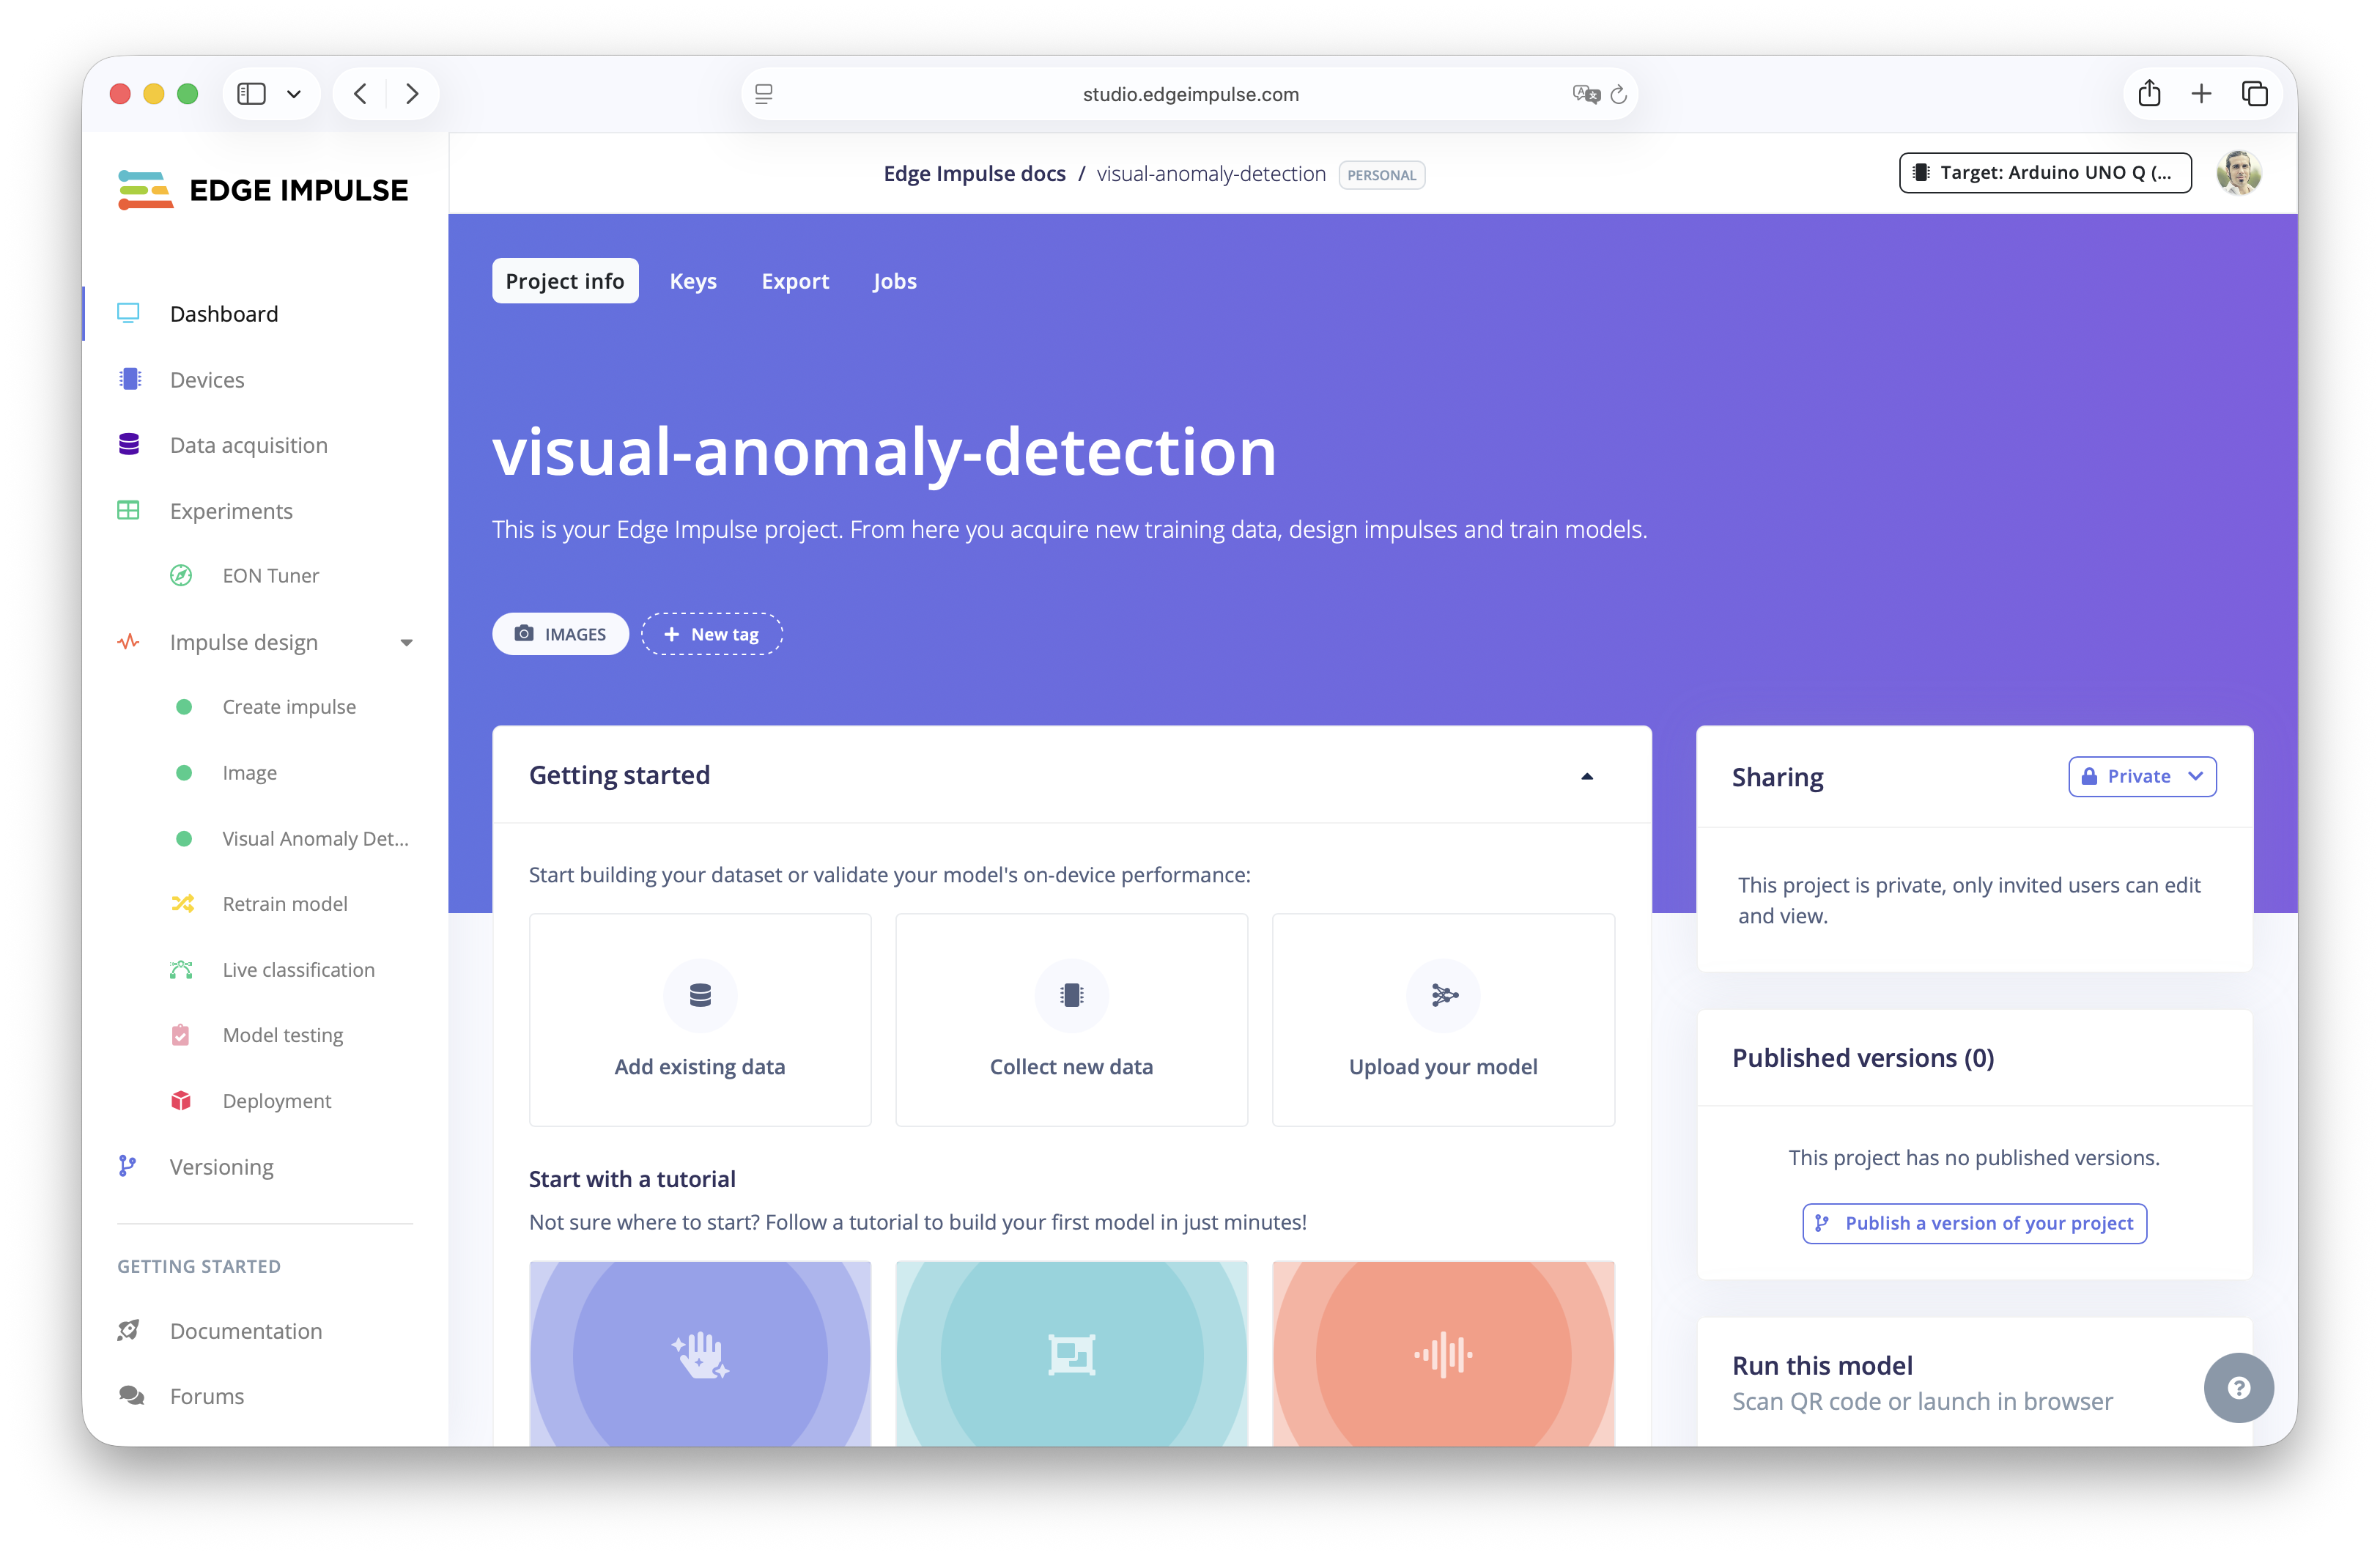
Get started in Edge Impulse Studio
Create a free Edge Impulse account and follow along with this tutorial.
What You’ll Need
- A free Edge Impulse account. (Sign up here)
- For this tutorial, we used a smartphone camera to capture images directly into the project. This is one of the fastest and easiest ways to get started, specially if you are prototyping or exploring how anomaly detection works.
-
In case that you are a more advanced user, you can collect data using:
- A USB or CSI camera connected to a single-computer like Arduino® UNO™ Q, Raspberry Pi 4, Arduino Nicla Vision and others.
- The Edge Impulse ingestion API to stream images from connected cameras.
- Or simply upload a folder of images you already have in your computer.
Building the project pipeline
Create a new project
Log in to Edge Impulse Studio and clickCreate a new Project.
Create a new Edge Impulse project
Collect new data or go to Devices in the menu and click Create a new connection.
Capture data
From here, you can use your mobile phone, scan the QR code, and it will automatically connect to your Edge Impulse Studio project.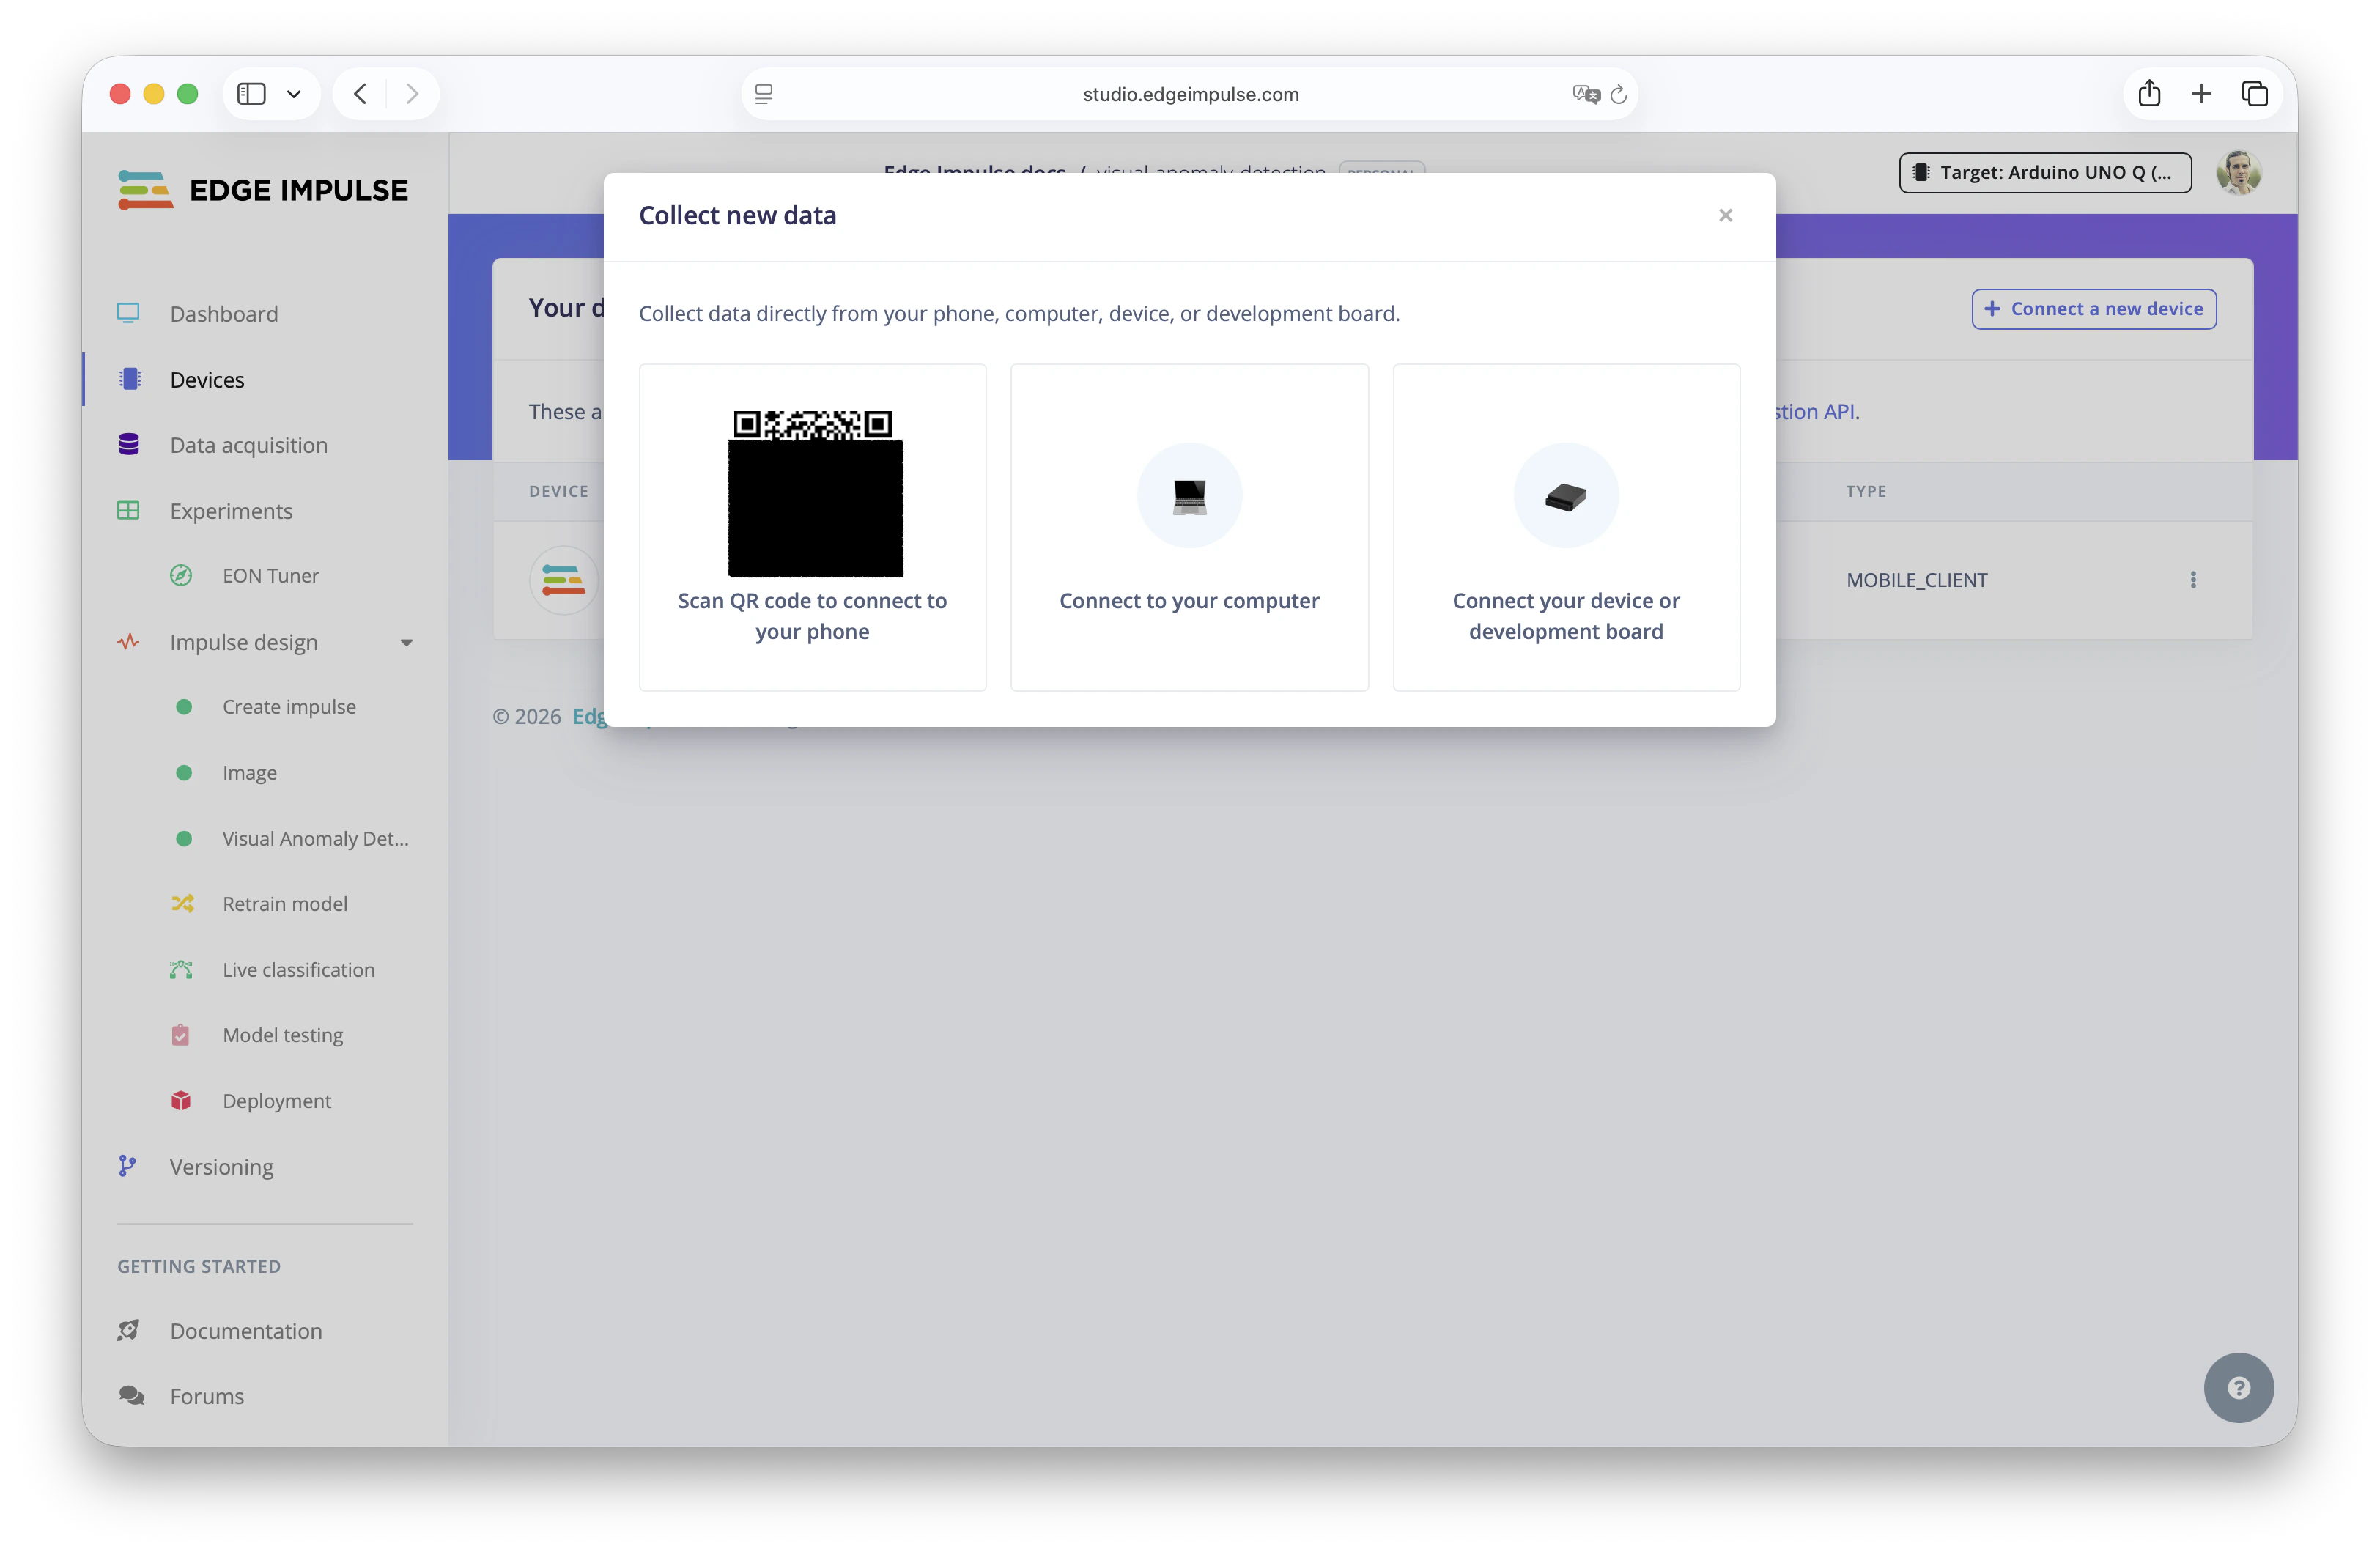
Collect new data to detect anomalies

Training dataset ready to detect anomalies
Test dataset.
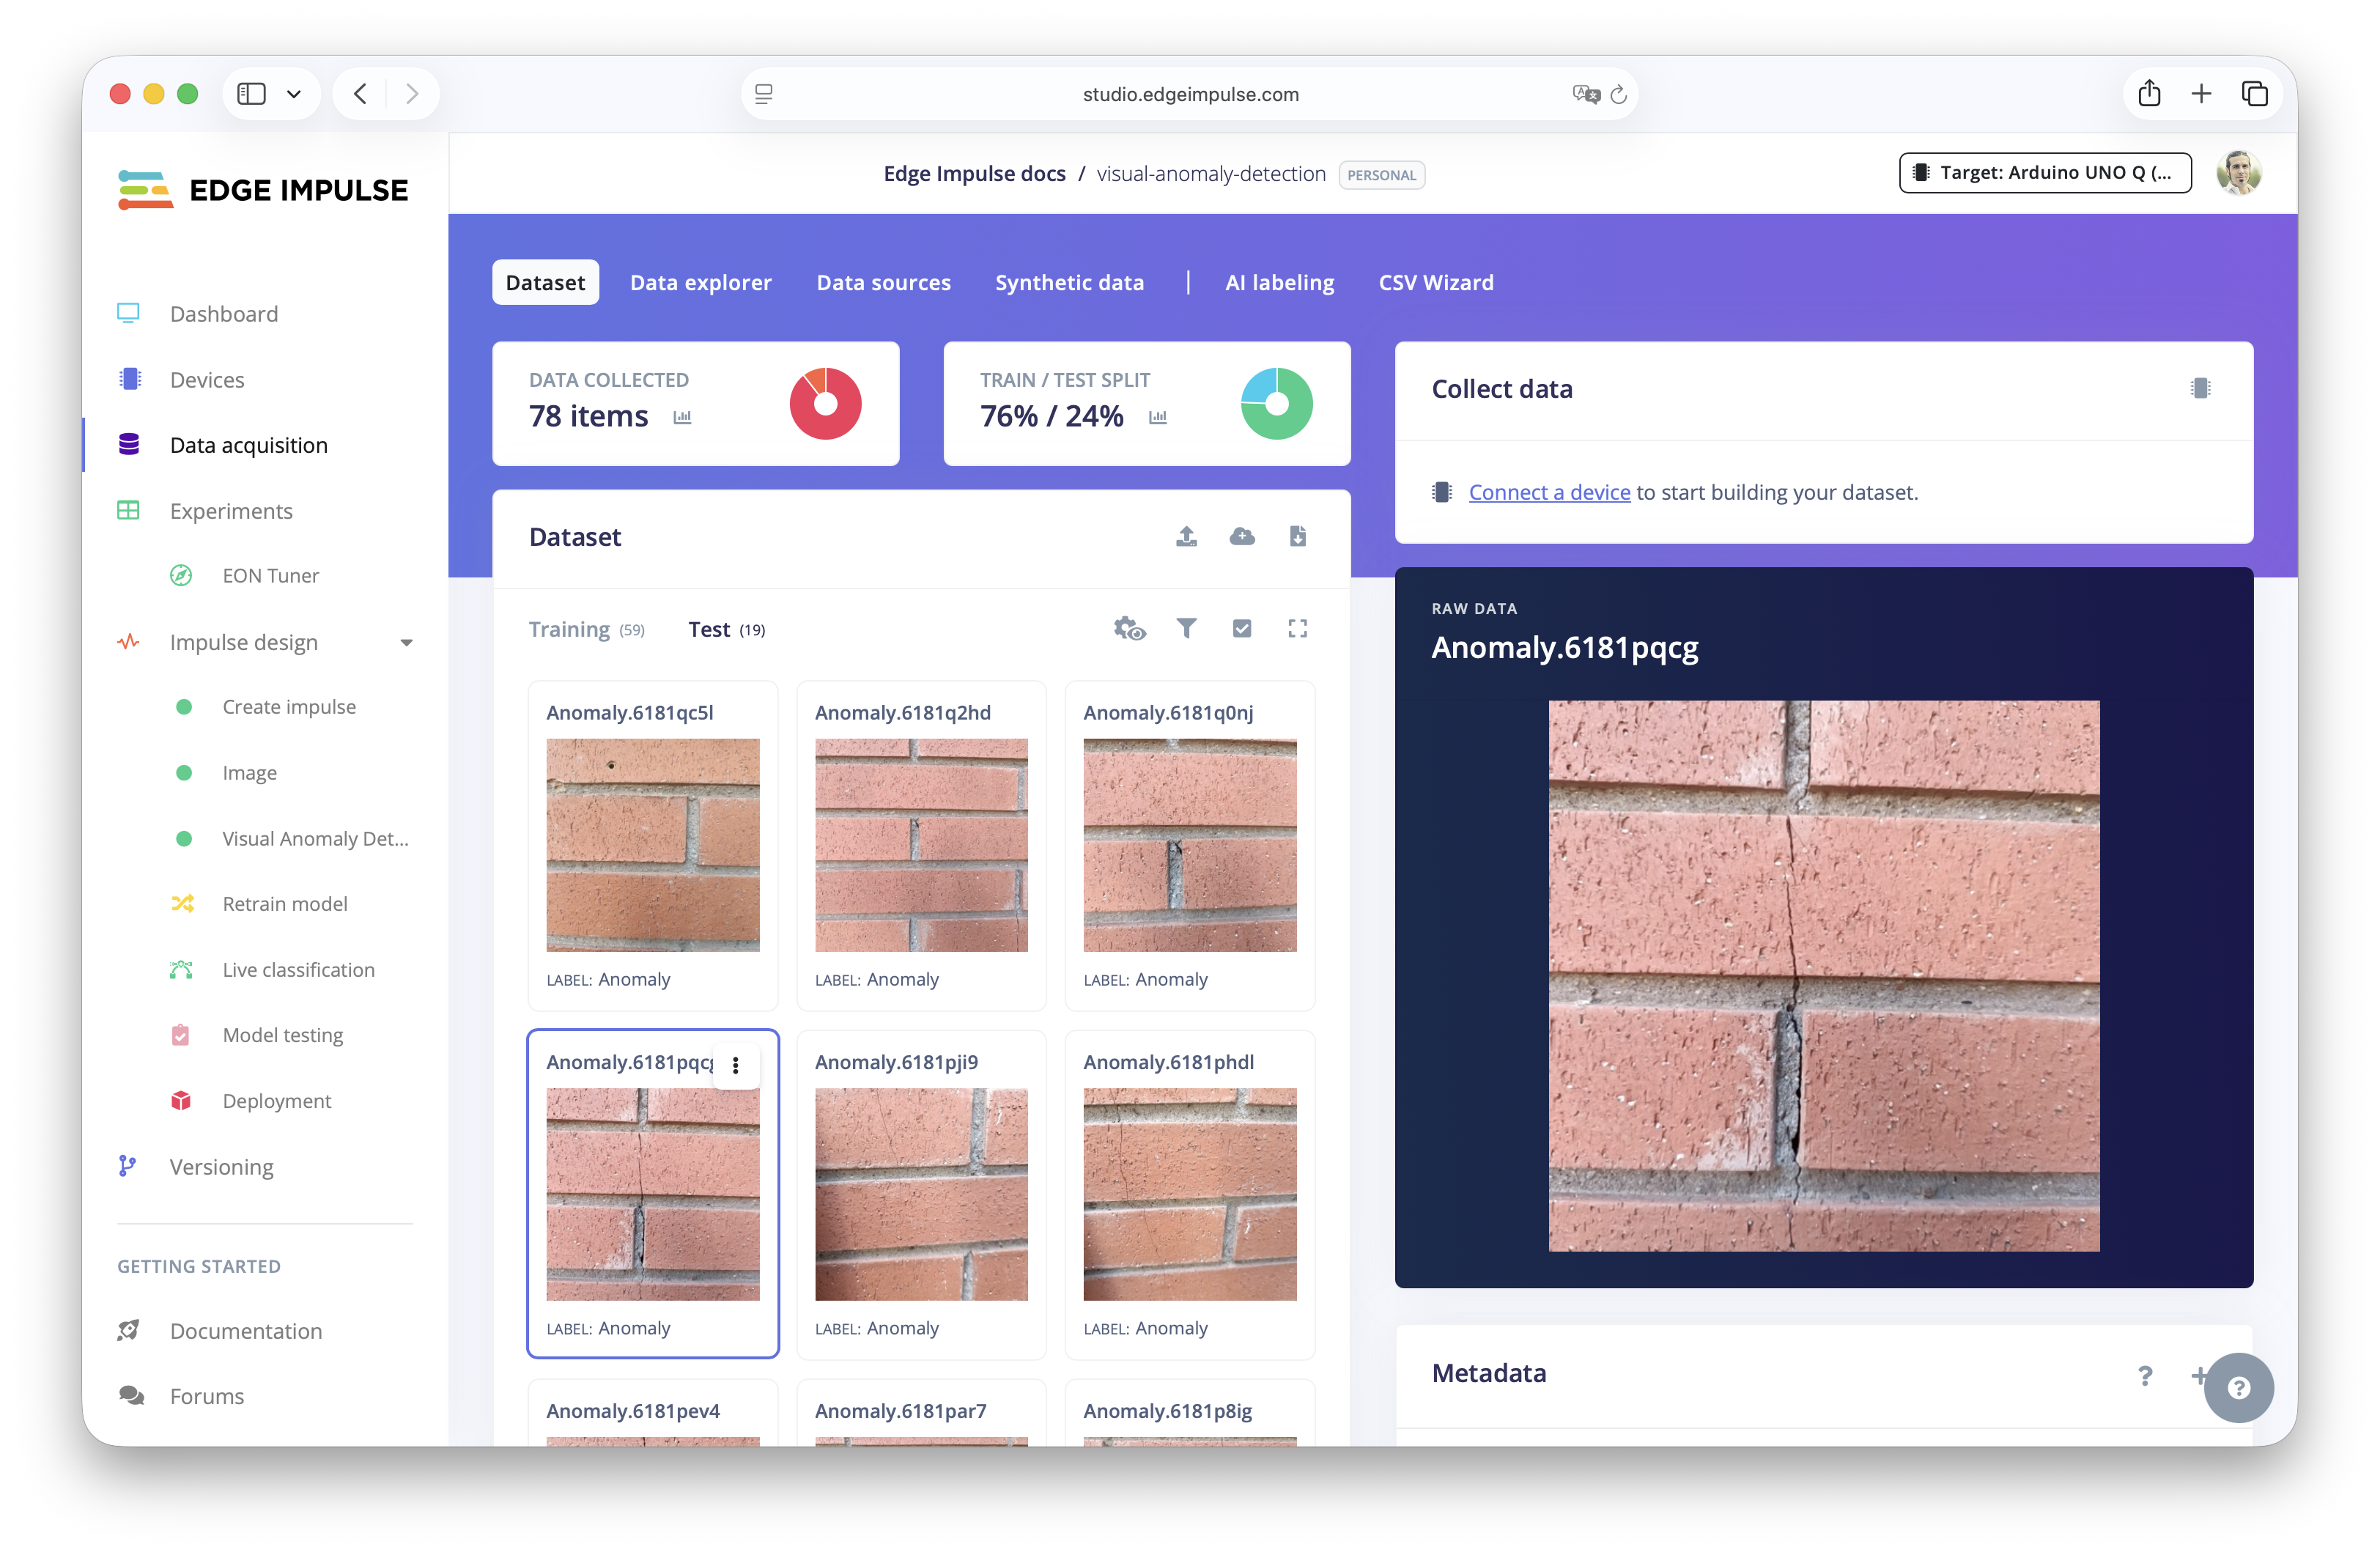
Testing dataset with anomalies
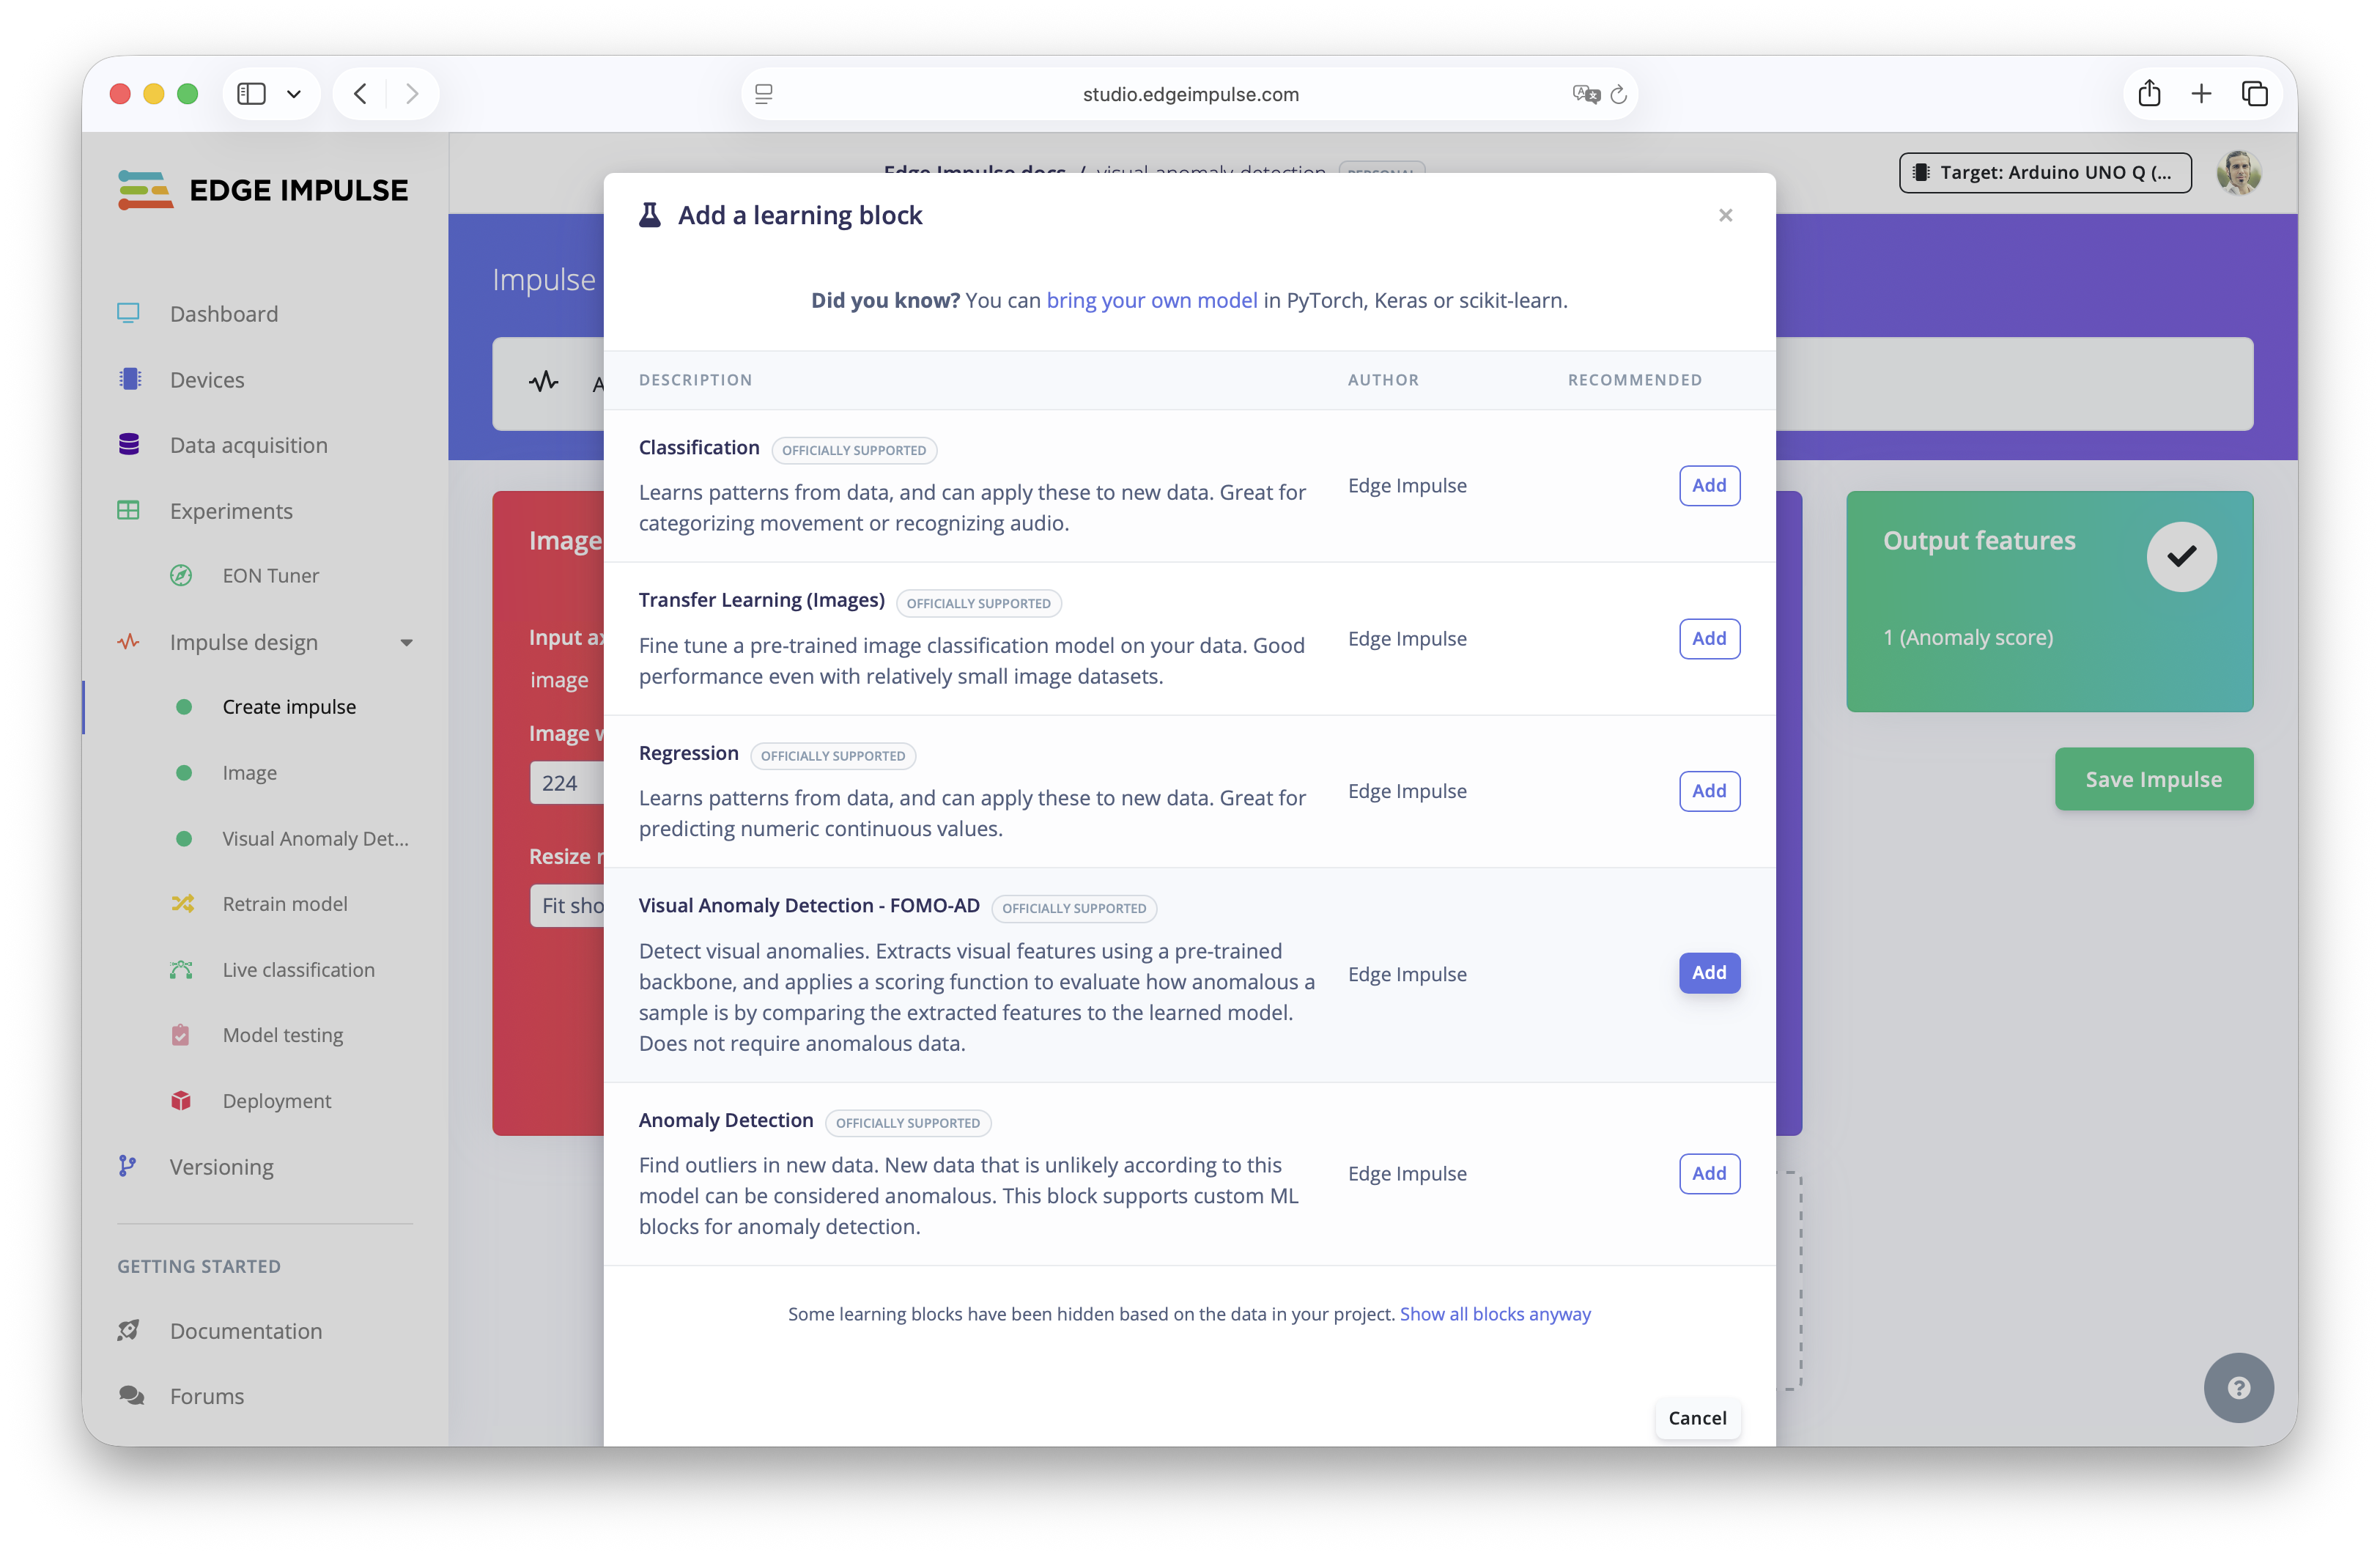
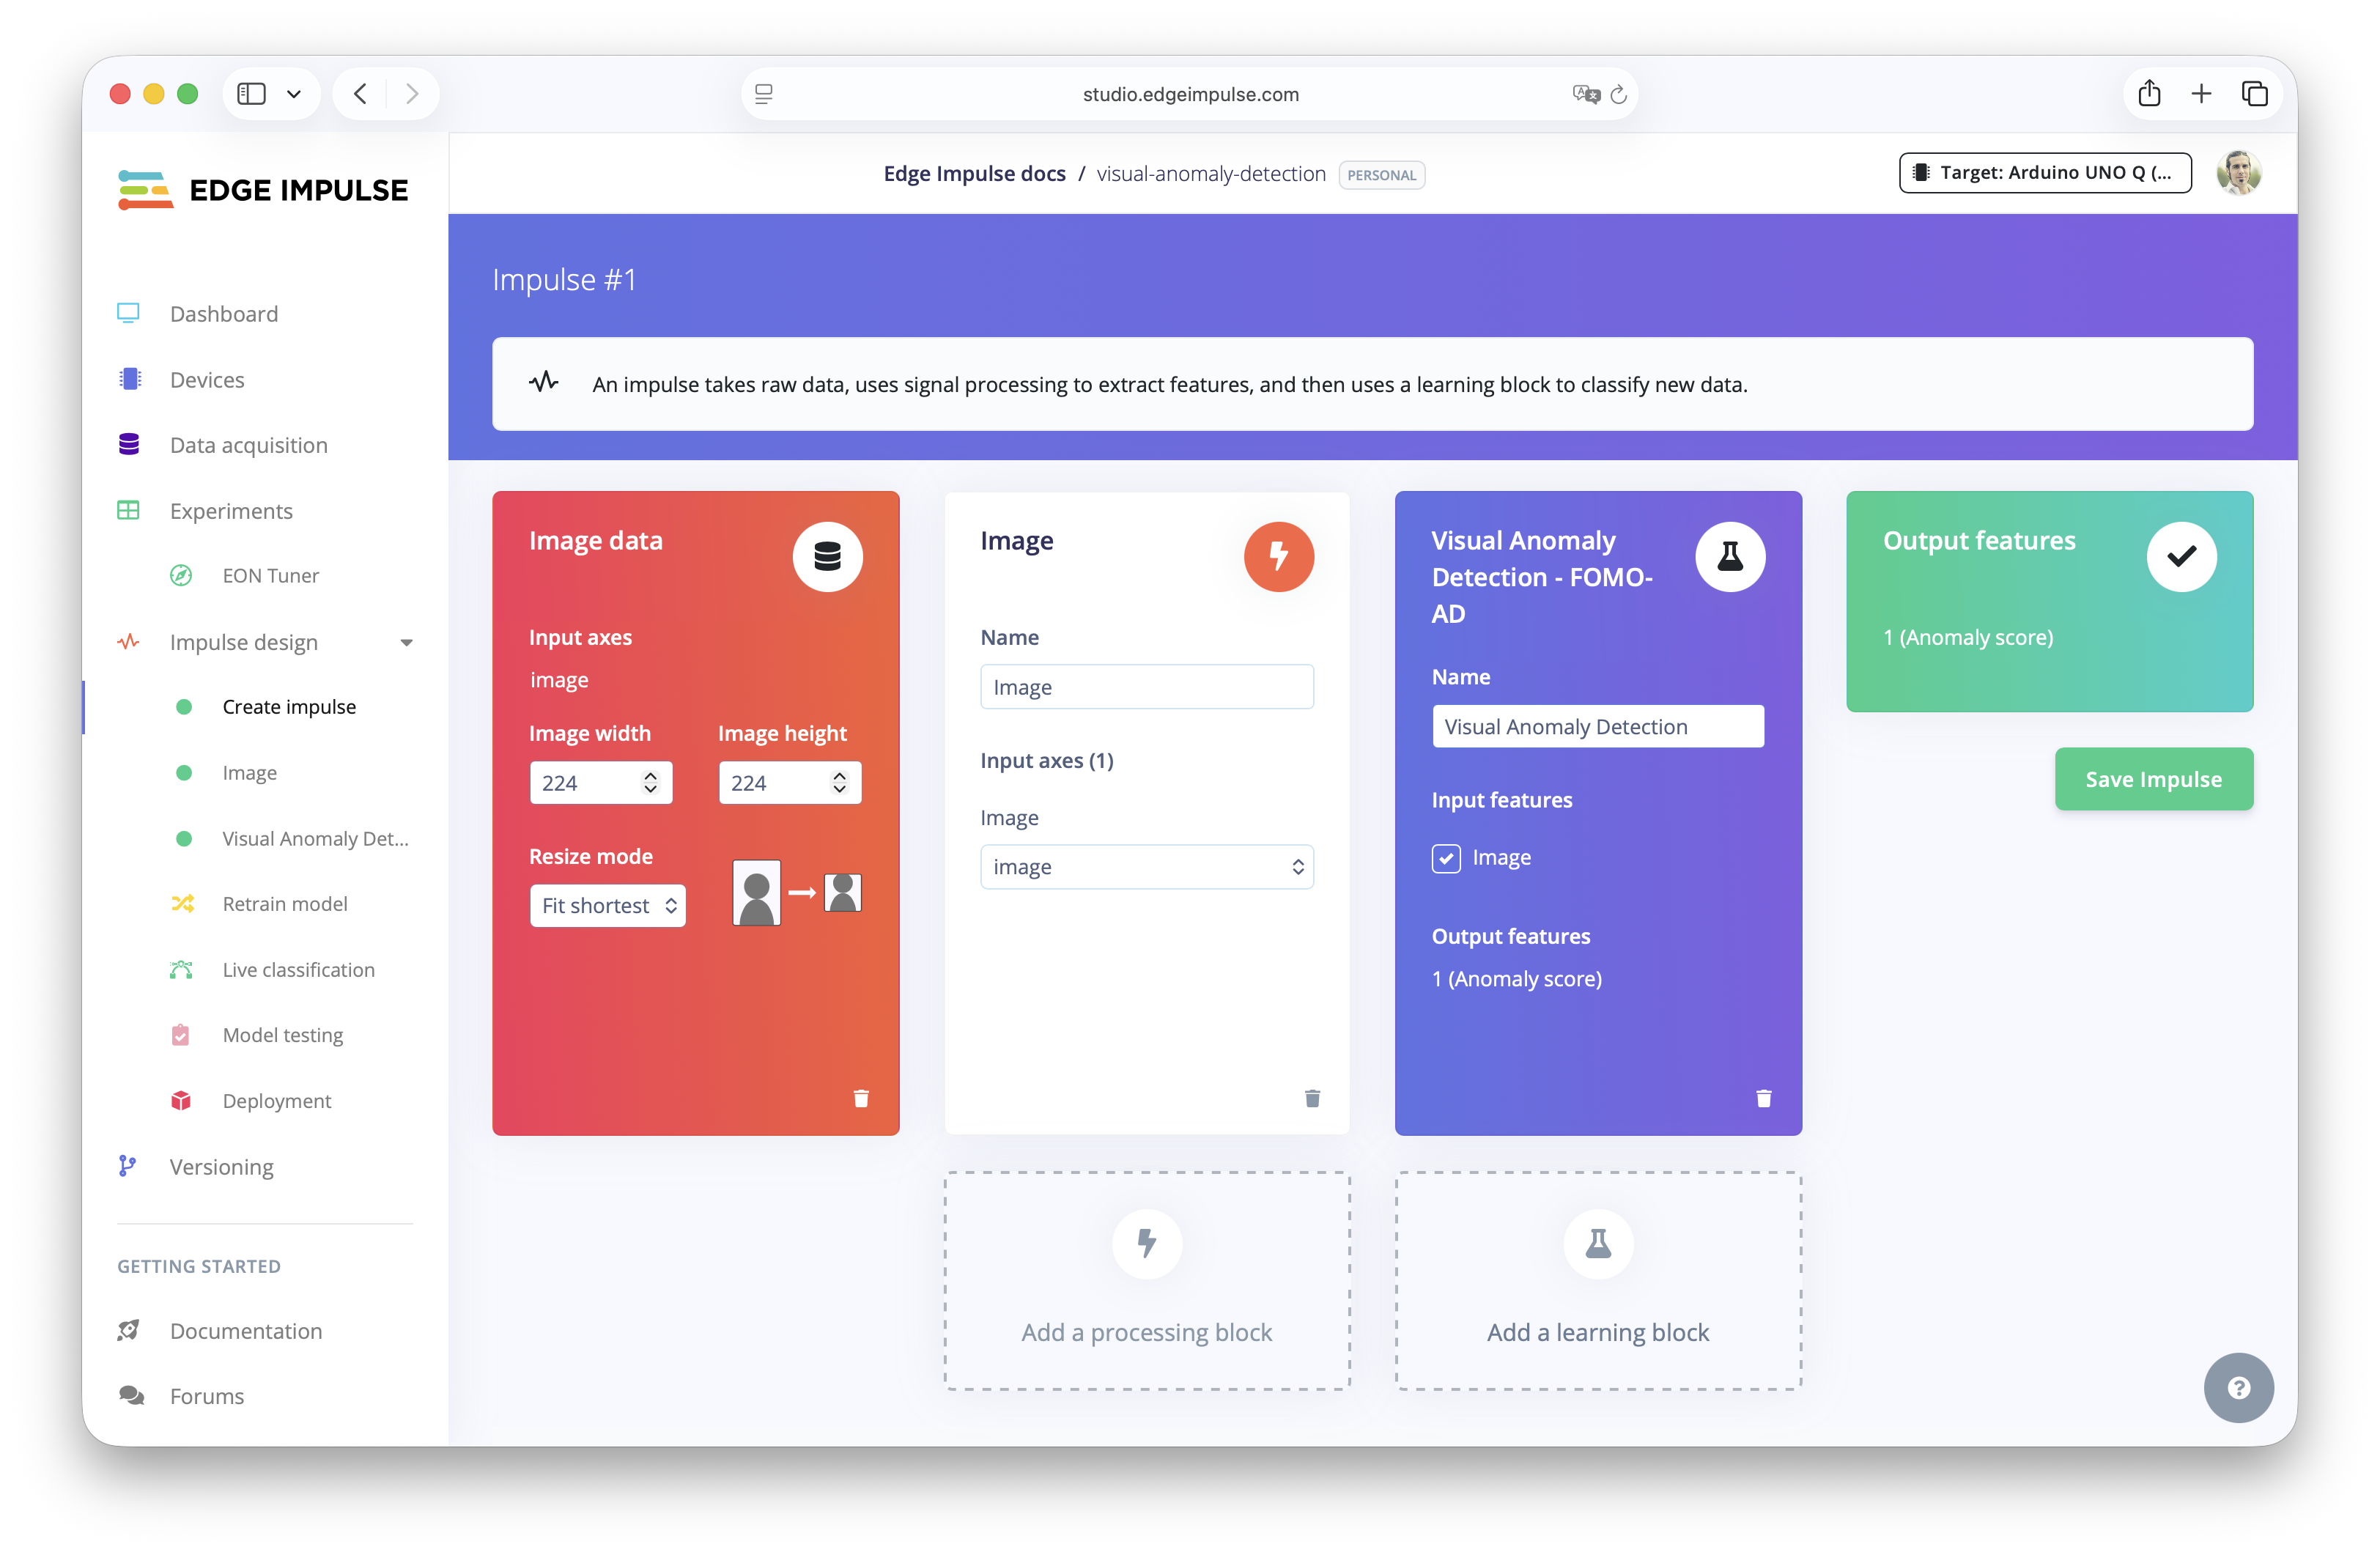
Create the impulse
Next, go to theCreate Impulse section in the menu and add an Image Processing Block.
This block will resize your images and convert them into a format that the model will understand. The default resolution is 96x96 or in this case 224x224, which offers a good balance between inference speed and performance.
Collect new data to detect anomalies
Learning Block and select Visual Anomaly Detection - FOMO AD.
This tells Edge Impulse to train a model that learns what “normal” looks like, rather than requiring labeled classes. This is why the Training dataset must be only good data.
Collect new data to detect anomalies
Save Impulse. This finalizes your pipeline setup and prepares the project for training.
Training the Model
Now that the Impulse is defined, it’s time to train the Visual Anomaly Detection model. This process trains to the neural network what “normal” looks like, based on the Training images you have provided.Image parameters and features
Before training, Edge Impulse will automatically extract visual features from the Training dataset images. Things like color distribution, edges or shapes.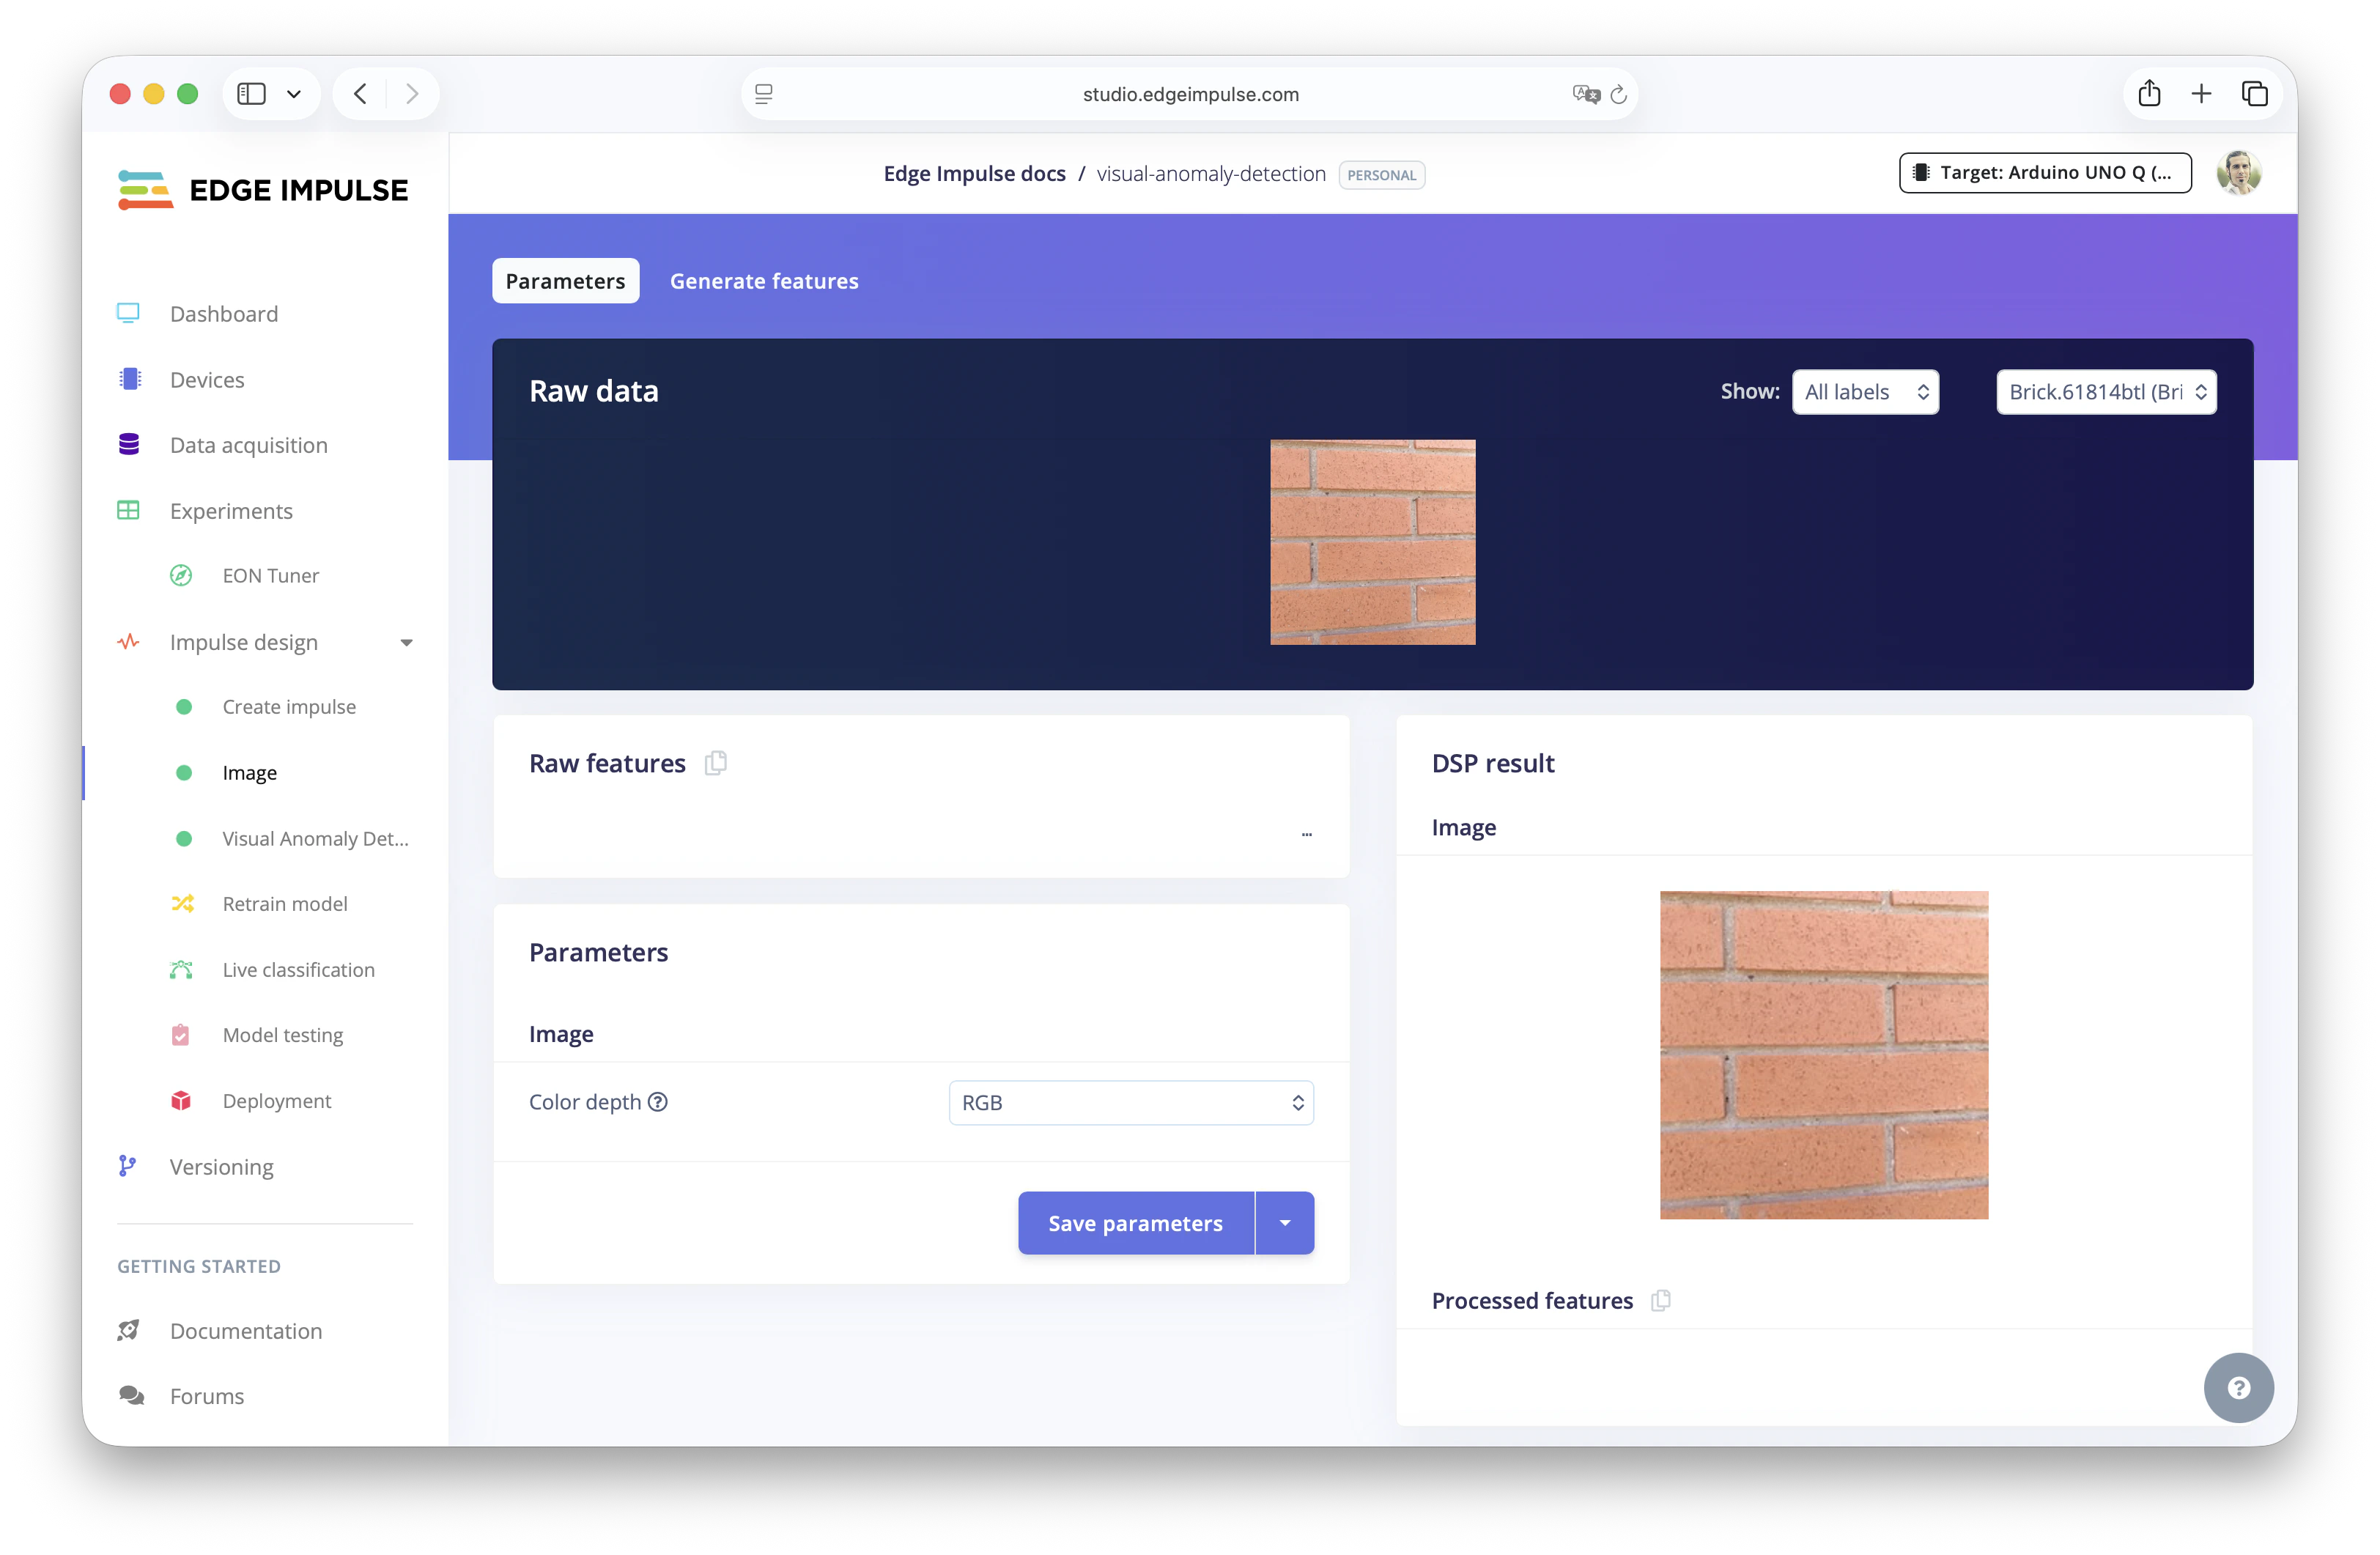
Extract visual features with the parameters
Generate features.
Click the Generate Features button and Edge Impulse will extract numerical representations (the features) from the images. These features represent the essence of your image data and are what the model uses to learn patterns. In this step is when consistency during Data acquisition is key to produce reliable features.
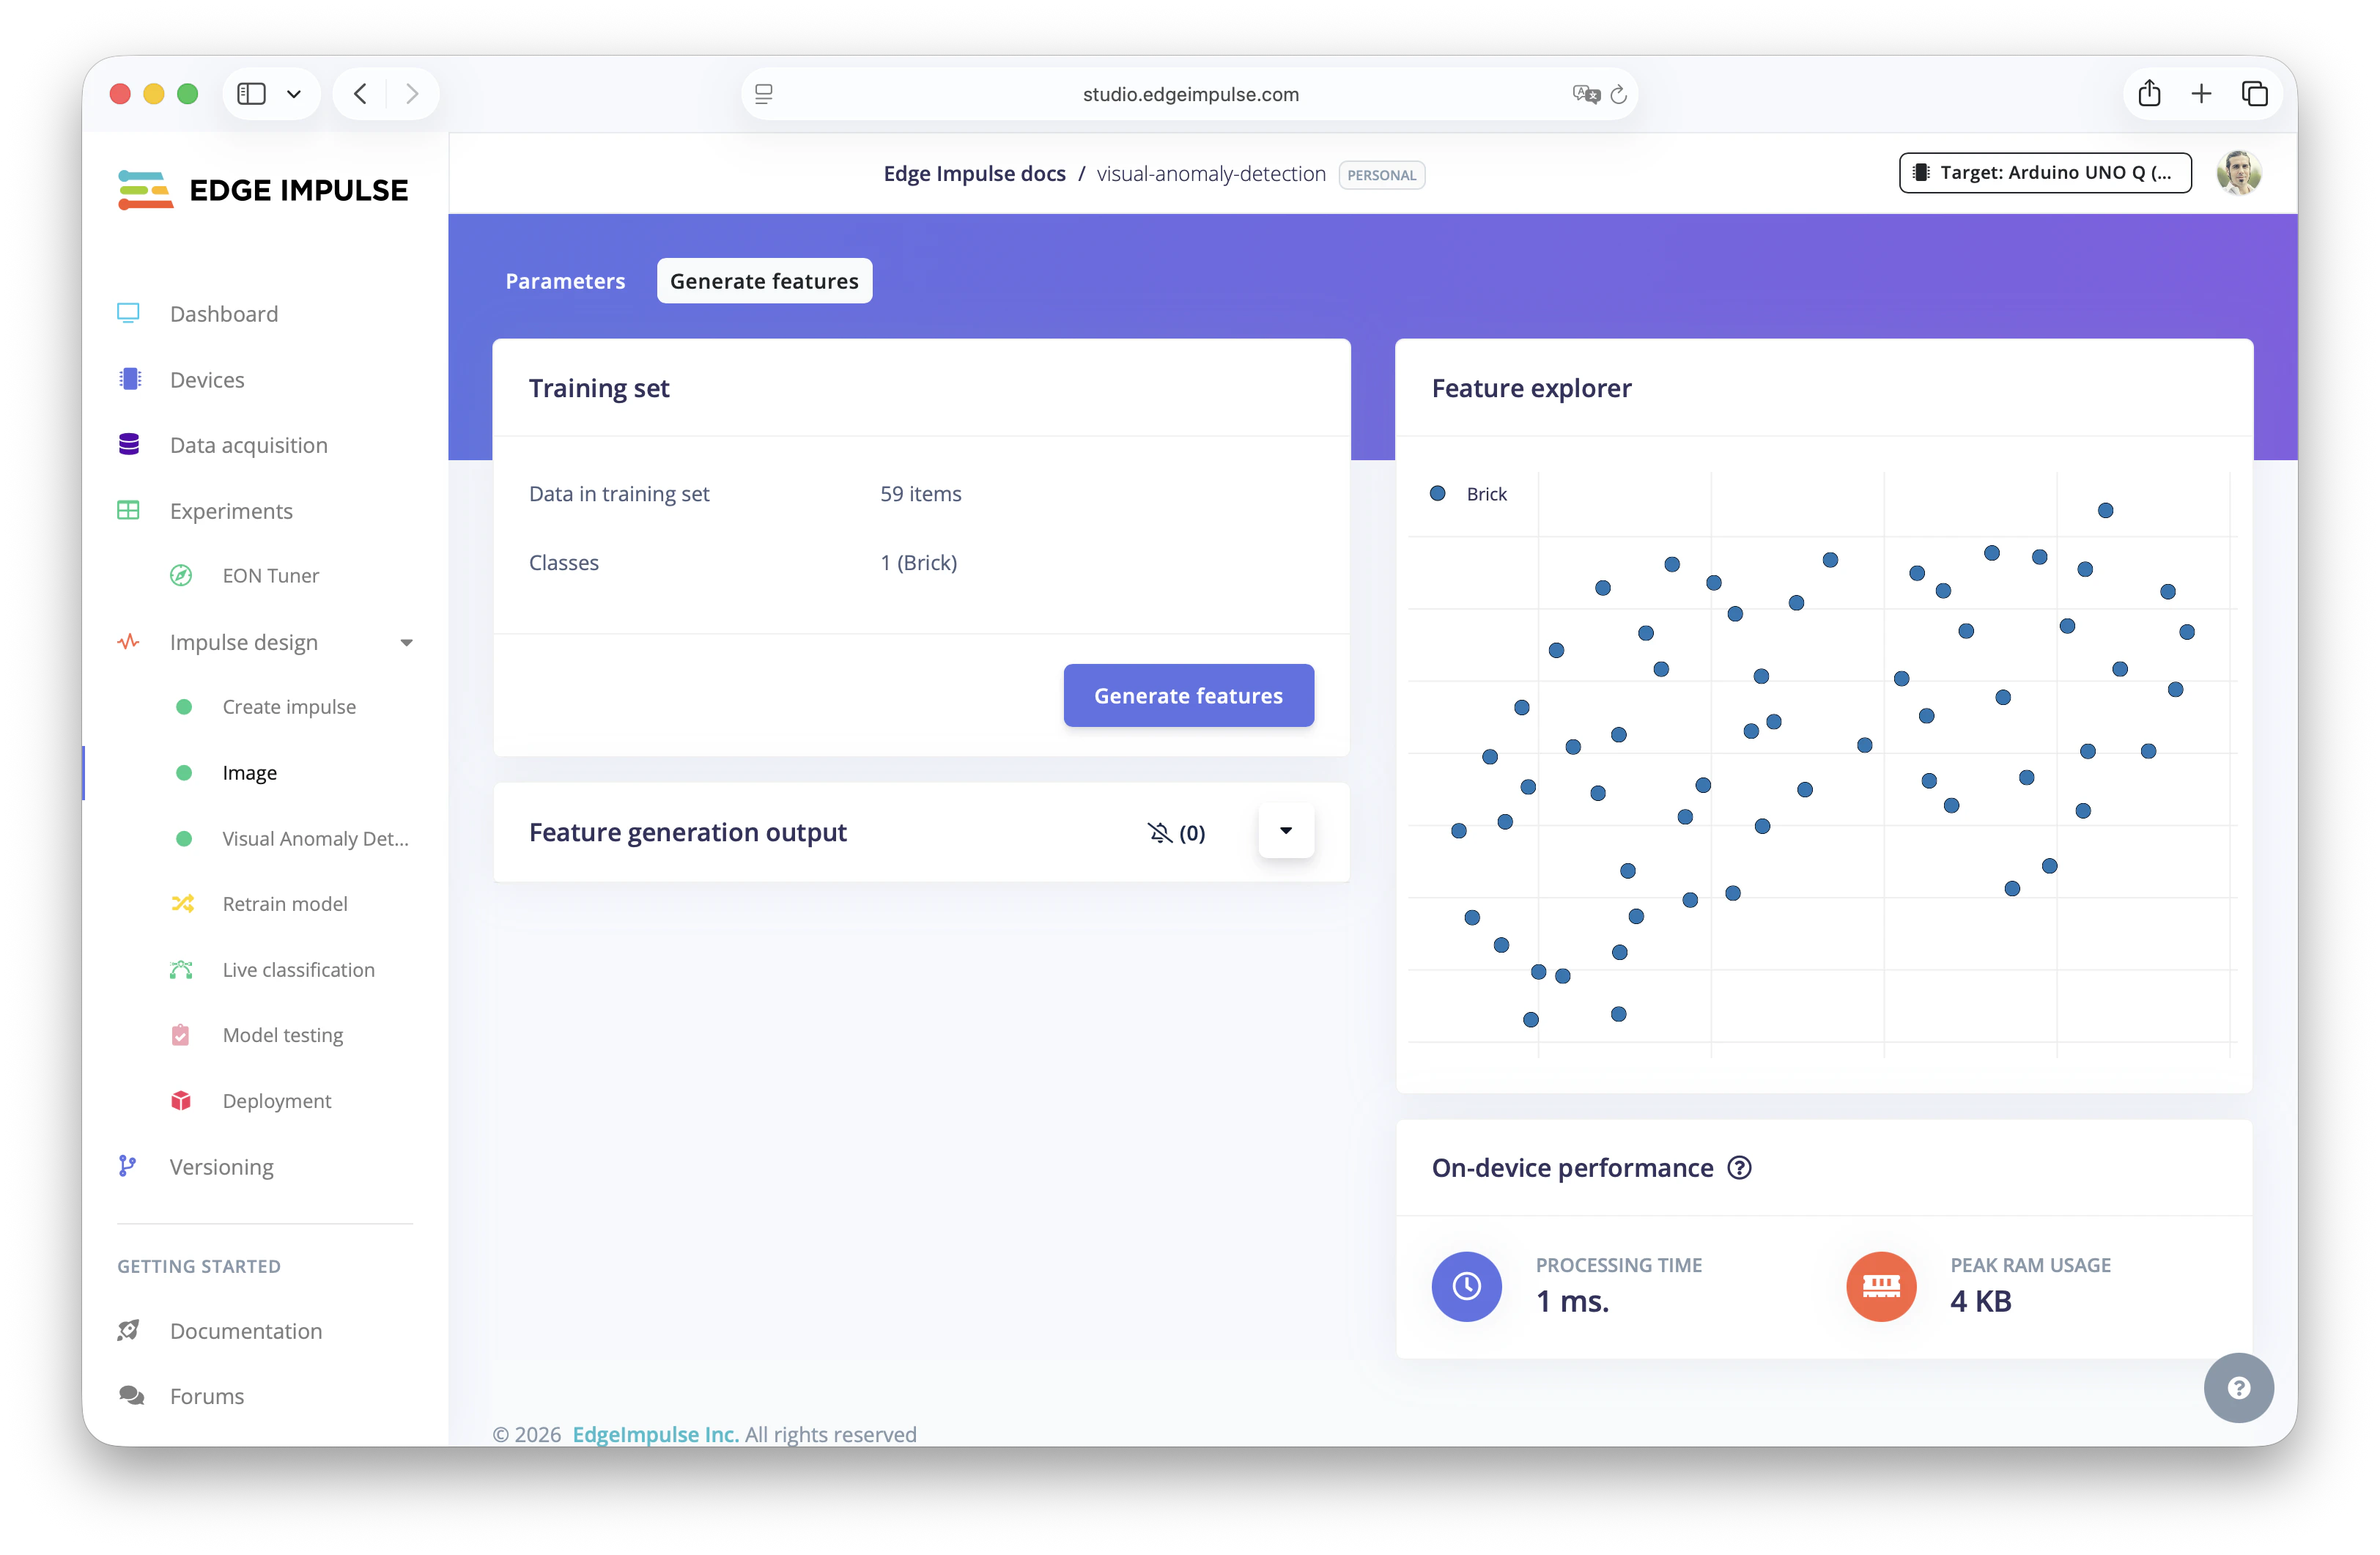
Generate features to extract numerical representations of the images
Start Training
After the features have been generated, go to theVisual Anomaly Detection section and you can start training the machine learning model.
To understand the Anomaly Detection settings selected, Edge Impulse uses a technique called PatchCore which is an unsupervised learning method for detecting anomalies in images by focusing on small regions in the images, called patches, and it works great for visual anomaly detection.
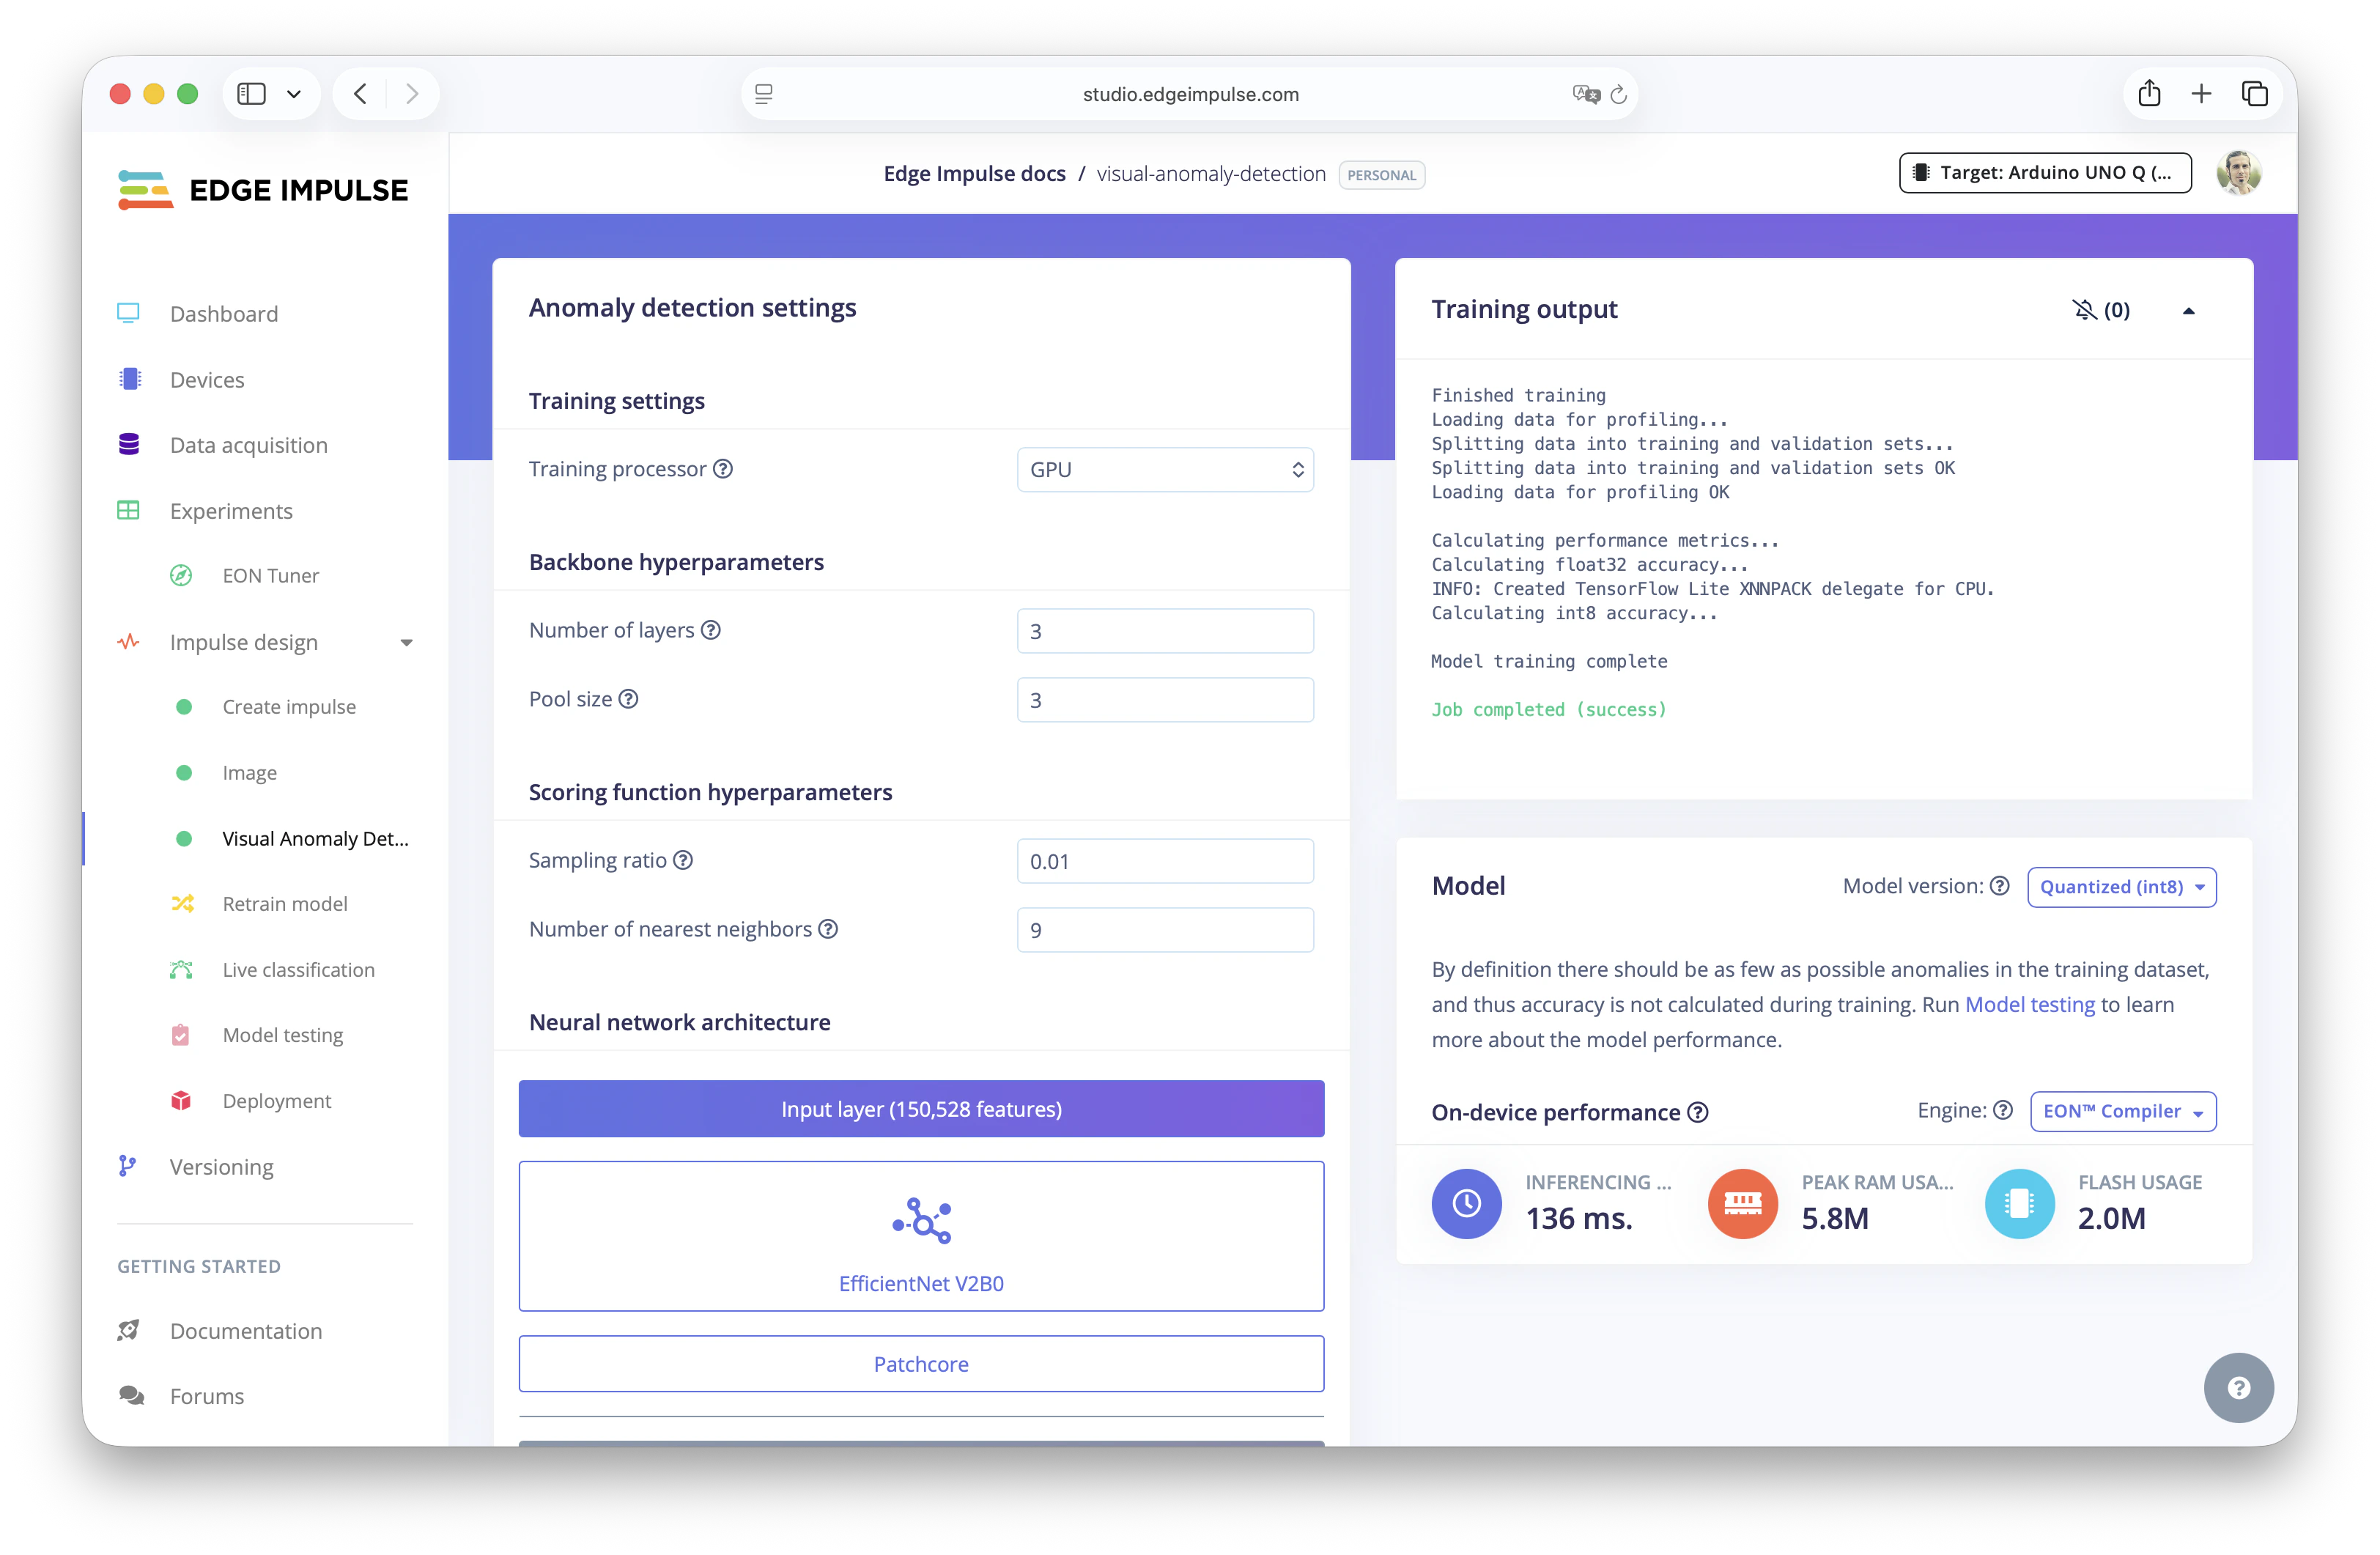
Start training your visual anomaly detection machine learning model
Testing the Model
Now that your model is trained, it’s time to evaluate how well it can detect anomalies. This step helps you understand if the model can correctly detect images that are different from the “normal” ones.Live Classification
Go toLive classification in Edge Impulse Studio.
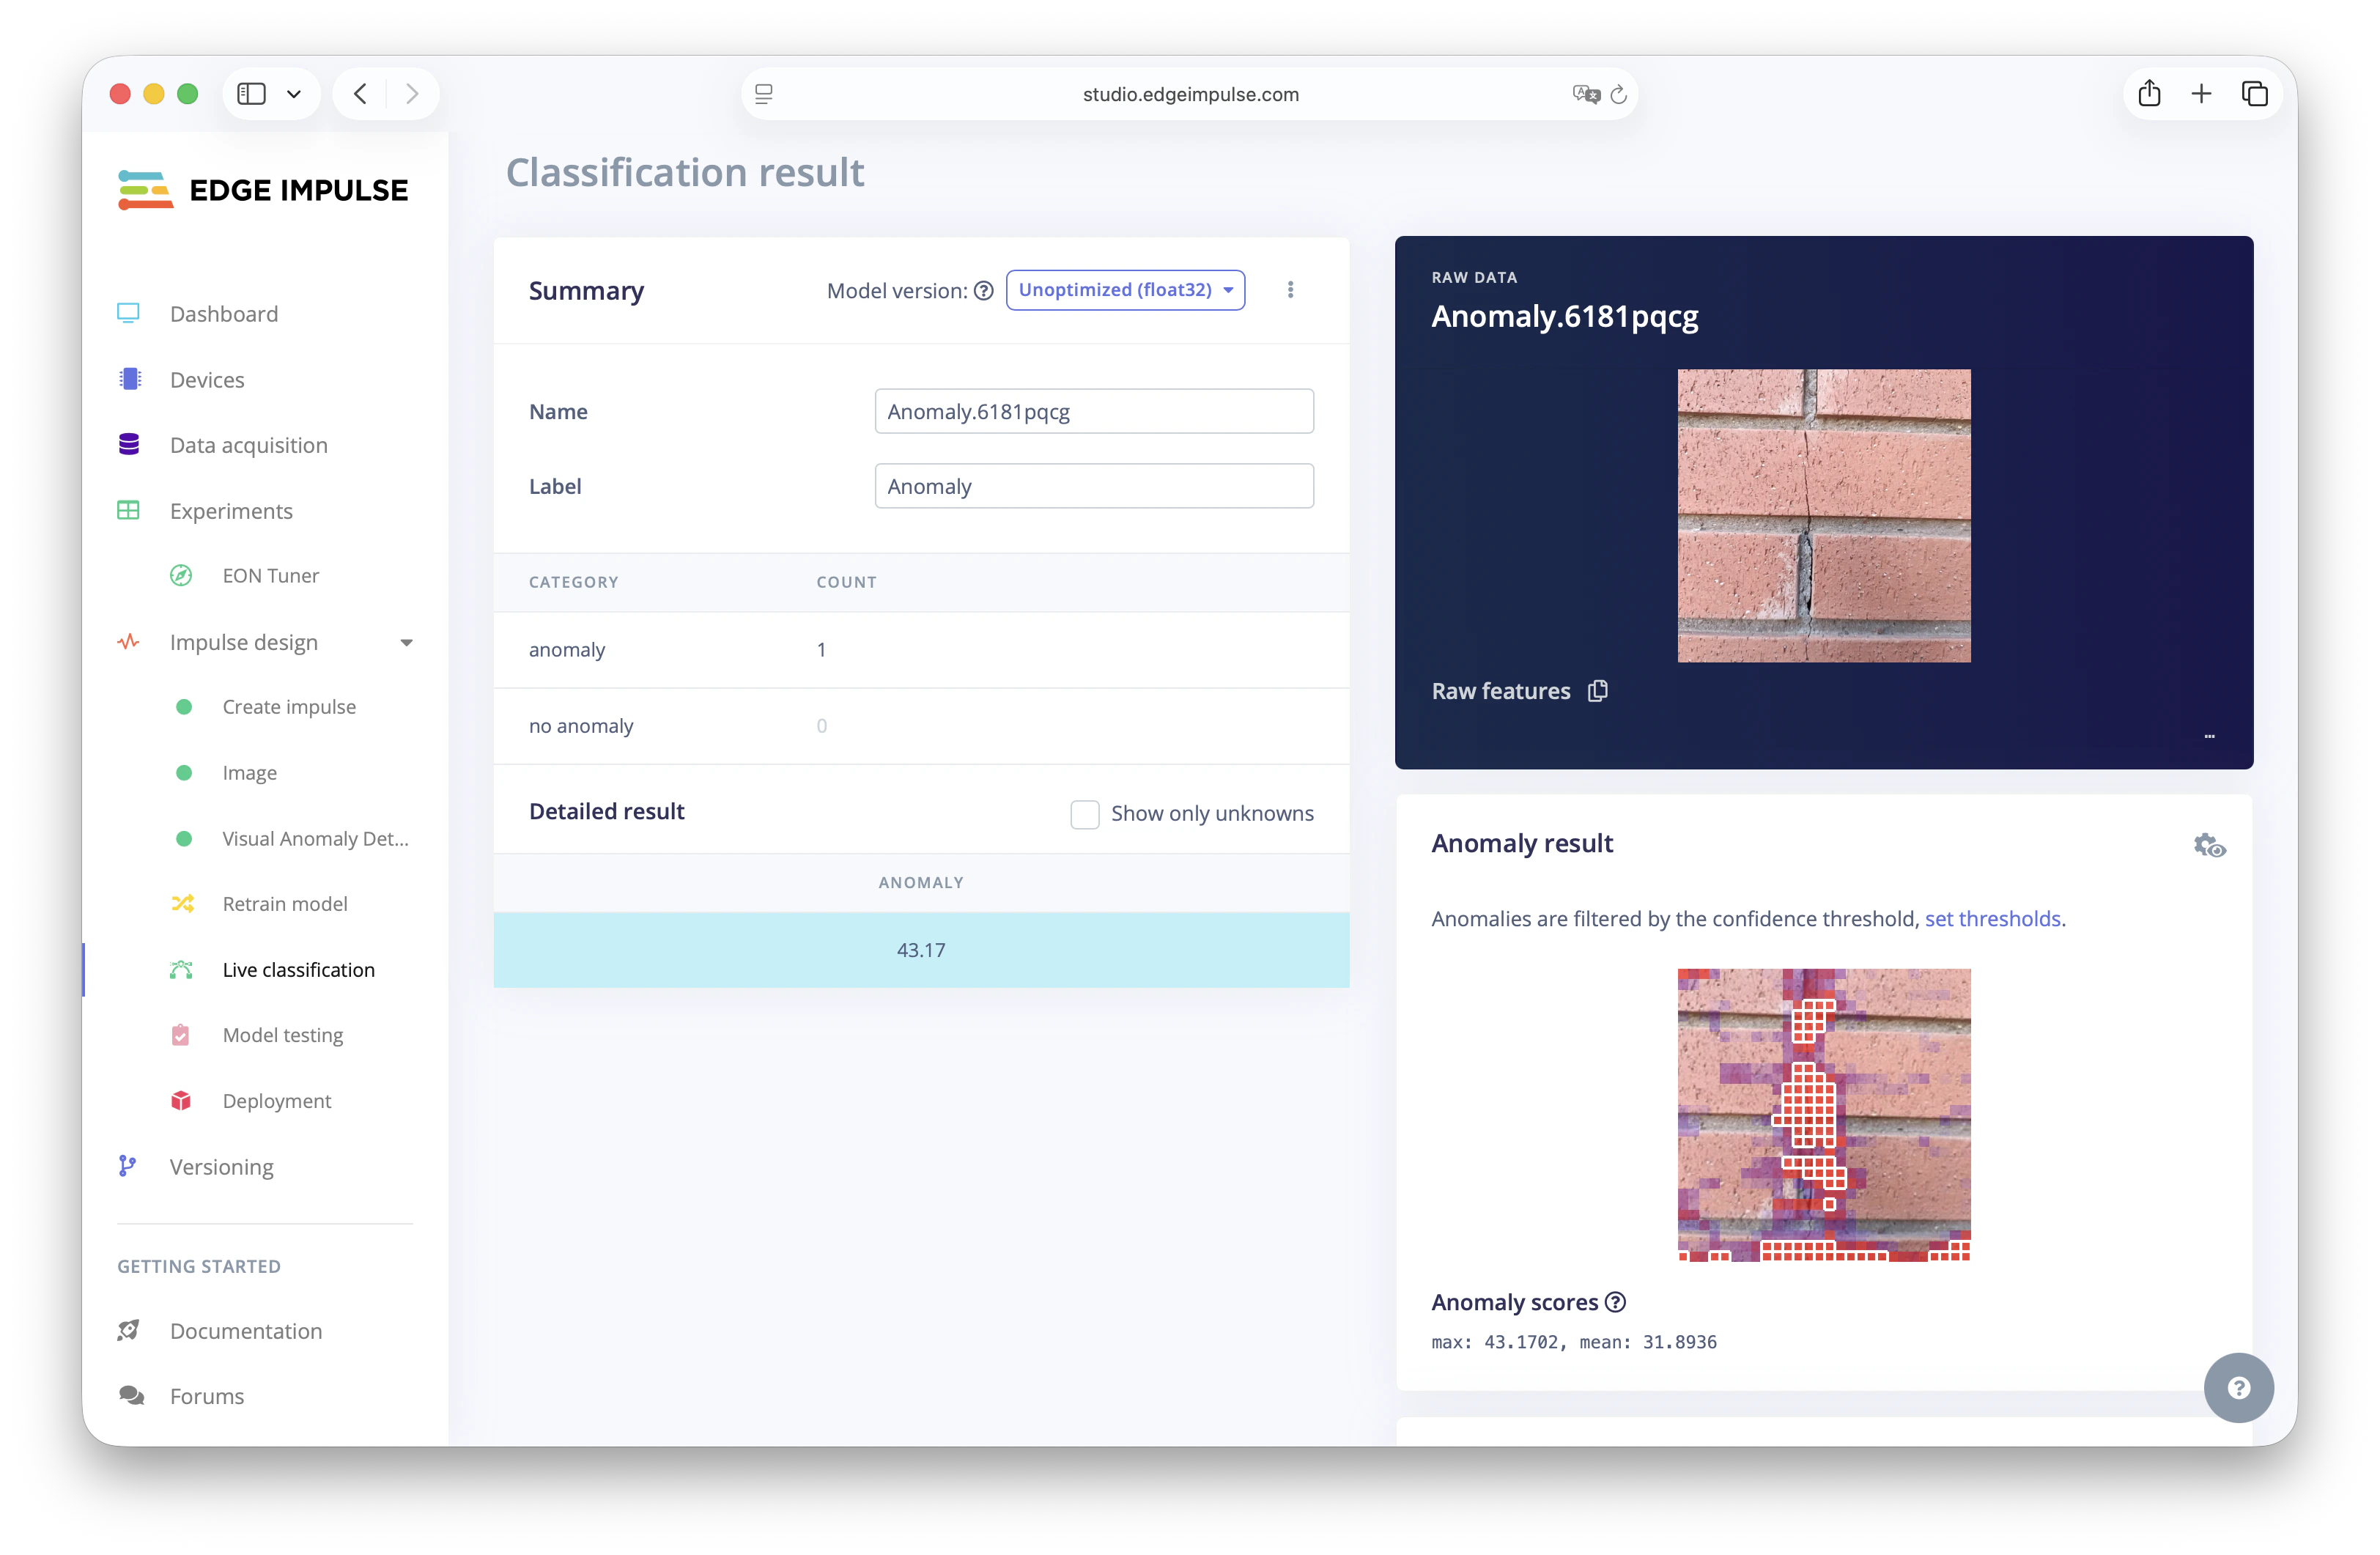
Test the model with Live classification
Model Testing
You also can go to Model Testing to classify all the captured Test Data images and see the classification of the data with the Visual Anomaly Detection.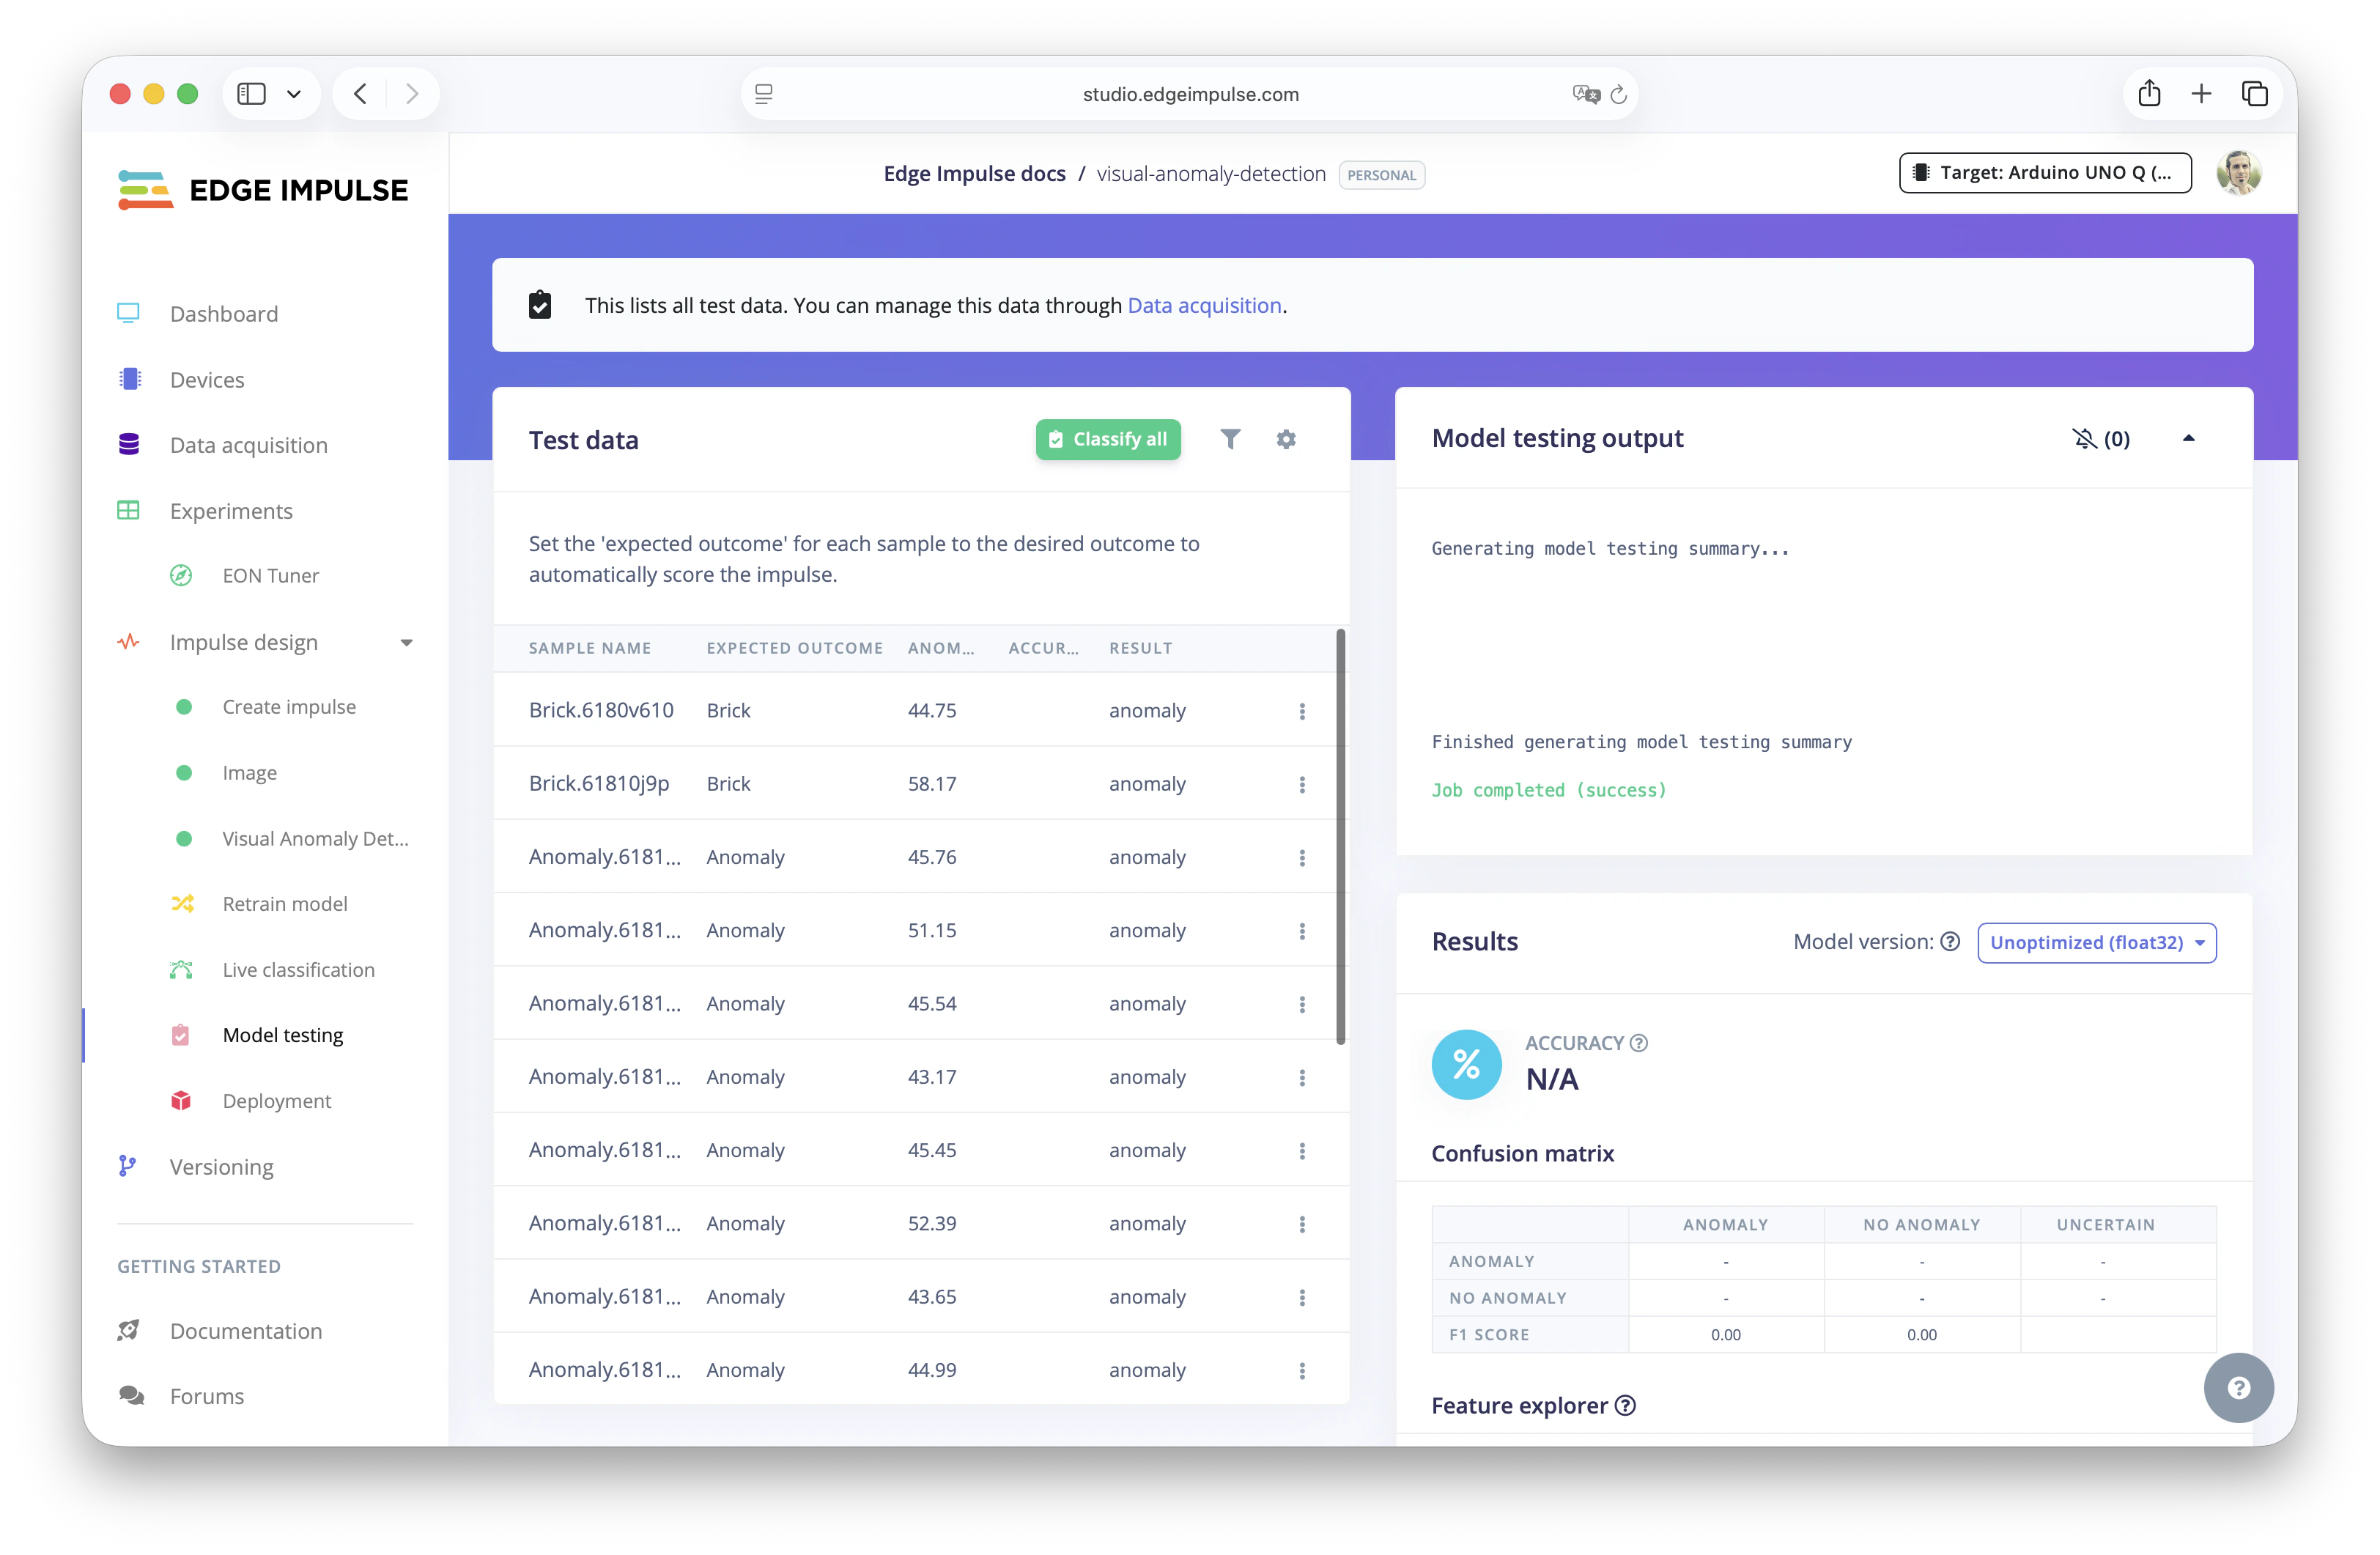
Test the model with Model Testing
Using the Model in the Real World
Once your model is trained and tested, you are ready to bring the machine learning model to production in a real device. Edge Impulse Studio reduces the friction to deploy ML models into all kinds of embedded hardware. Find here the list of supported hardware for your edge AI projects.Understanding Visual Anomaly detection
In this tutorial, you have learned how to build and deploy a Visual Anomaly Detection machine learning model using Edge Impulse Studio. Find here what we have done:- Created an Edge Impulse project and captured image data of normal (non-defective) objects using a mobile phone camera.
- Built a ML pipeline by using an Anomaly Detection (FOMO-AD) Learning block and using PatchCore to train the machine learning model.
- Trained the model to learn what “normal” looks like. No labeled defective data is required as we were using unsupervised learning technique.
- Tested the model using existing test samples and real-time image capture.
- Deployed the model to a Linux device (e.g. Arduino® UNO™ Q) to enable real-time anomaly detection in the edge.