- Set up a Zephyr project with the Edge Impulse SDK as a Zephyr module.
- Deploy your trained Edge Impulse model as a Zephyr library.
- Use custom West commands for streamlined Edge Impulse workflows.
Prerequisites
Make sure you’ve followed one of the tutorials and have a trained impulse. For the purpose of this tutorial, we’ll assume you trained a Continuous motion recognition model. Also install the following software:- Edge Impulse CLI.
- Choose and set up your Zephyr-compatible hardware. You can find a list of supported boards in the Zephyr documentation.
- Install Zephyr or Nordic (for nRF based devices) NCS and its dependencies:
- Zephyr SDK: Follow the Zephyr getting started guide to install the Zephyr SDK and set up your environment. We also recommend following their Blinky tutorial to verify your setup.
- Nordic NCS : Depending on your target hardware, you may need to install additional toolchains. For Nordic Semiconductor boards, follow the Nordic NCS installation guide.
- West : West is the meta-tool used to manage Zephyr projects and their dependencies. Install it using pip:
pip install -U west
Quick Start (5-10 minutes)
This guide is quite long, so here is a quick summary of the steps to get started with the Edge Impulse Zephyr module and command extensions.Command Extension Architecture
Recommended versions
Used versions for the development of the example project are as follows:- ZEPHYR_SDK_VERSION =0.17.4
- west version = “1.5.0”
- zephyr main repo: v3.7.1
Zephyr Modules
Zephyr applications can import additional functionality through modules, which are managed by the
The Edge Impulse SDK is distributed as a Zephyr module so it can be seamlessly pulled into your project.
west tool.The Edge Impulse SDK is distributed as a Zephyr module so it can be seamlessly pulled into your project.
- Automatic updates: Easily update to the latest SDK version with
west update. - Cleaner integration: No need to manage third-party source code directly.
- Native Zephyr build support: The SDK is recognized as a standard module within the Zephyr ecosystem.
Edge Impulse Zephyr Module
Whether starting from scratch or adding Edge Impulse to an existing Zephyr app, you can get up and running in minutes.Deploy your impulse as a Zephyr library
Manual Deployment via Studio
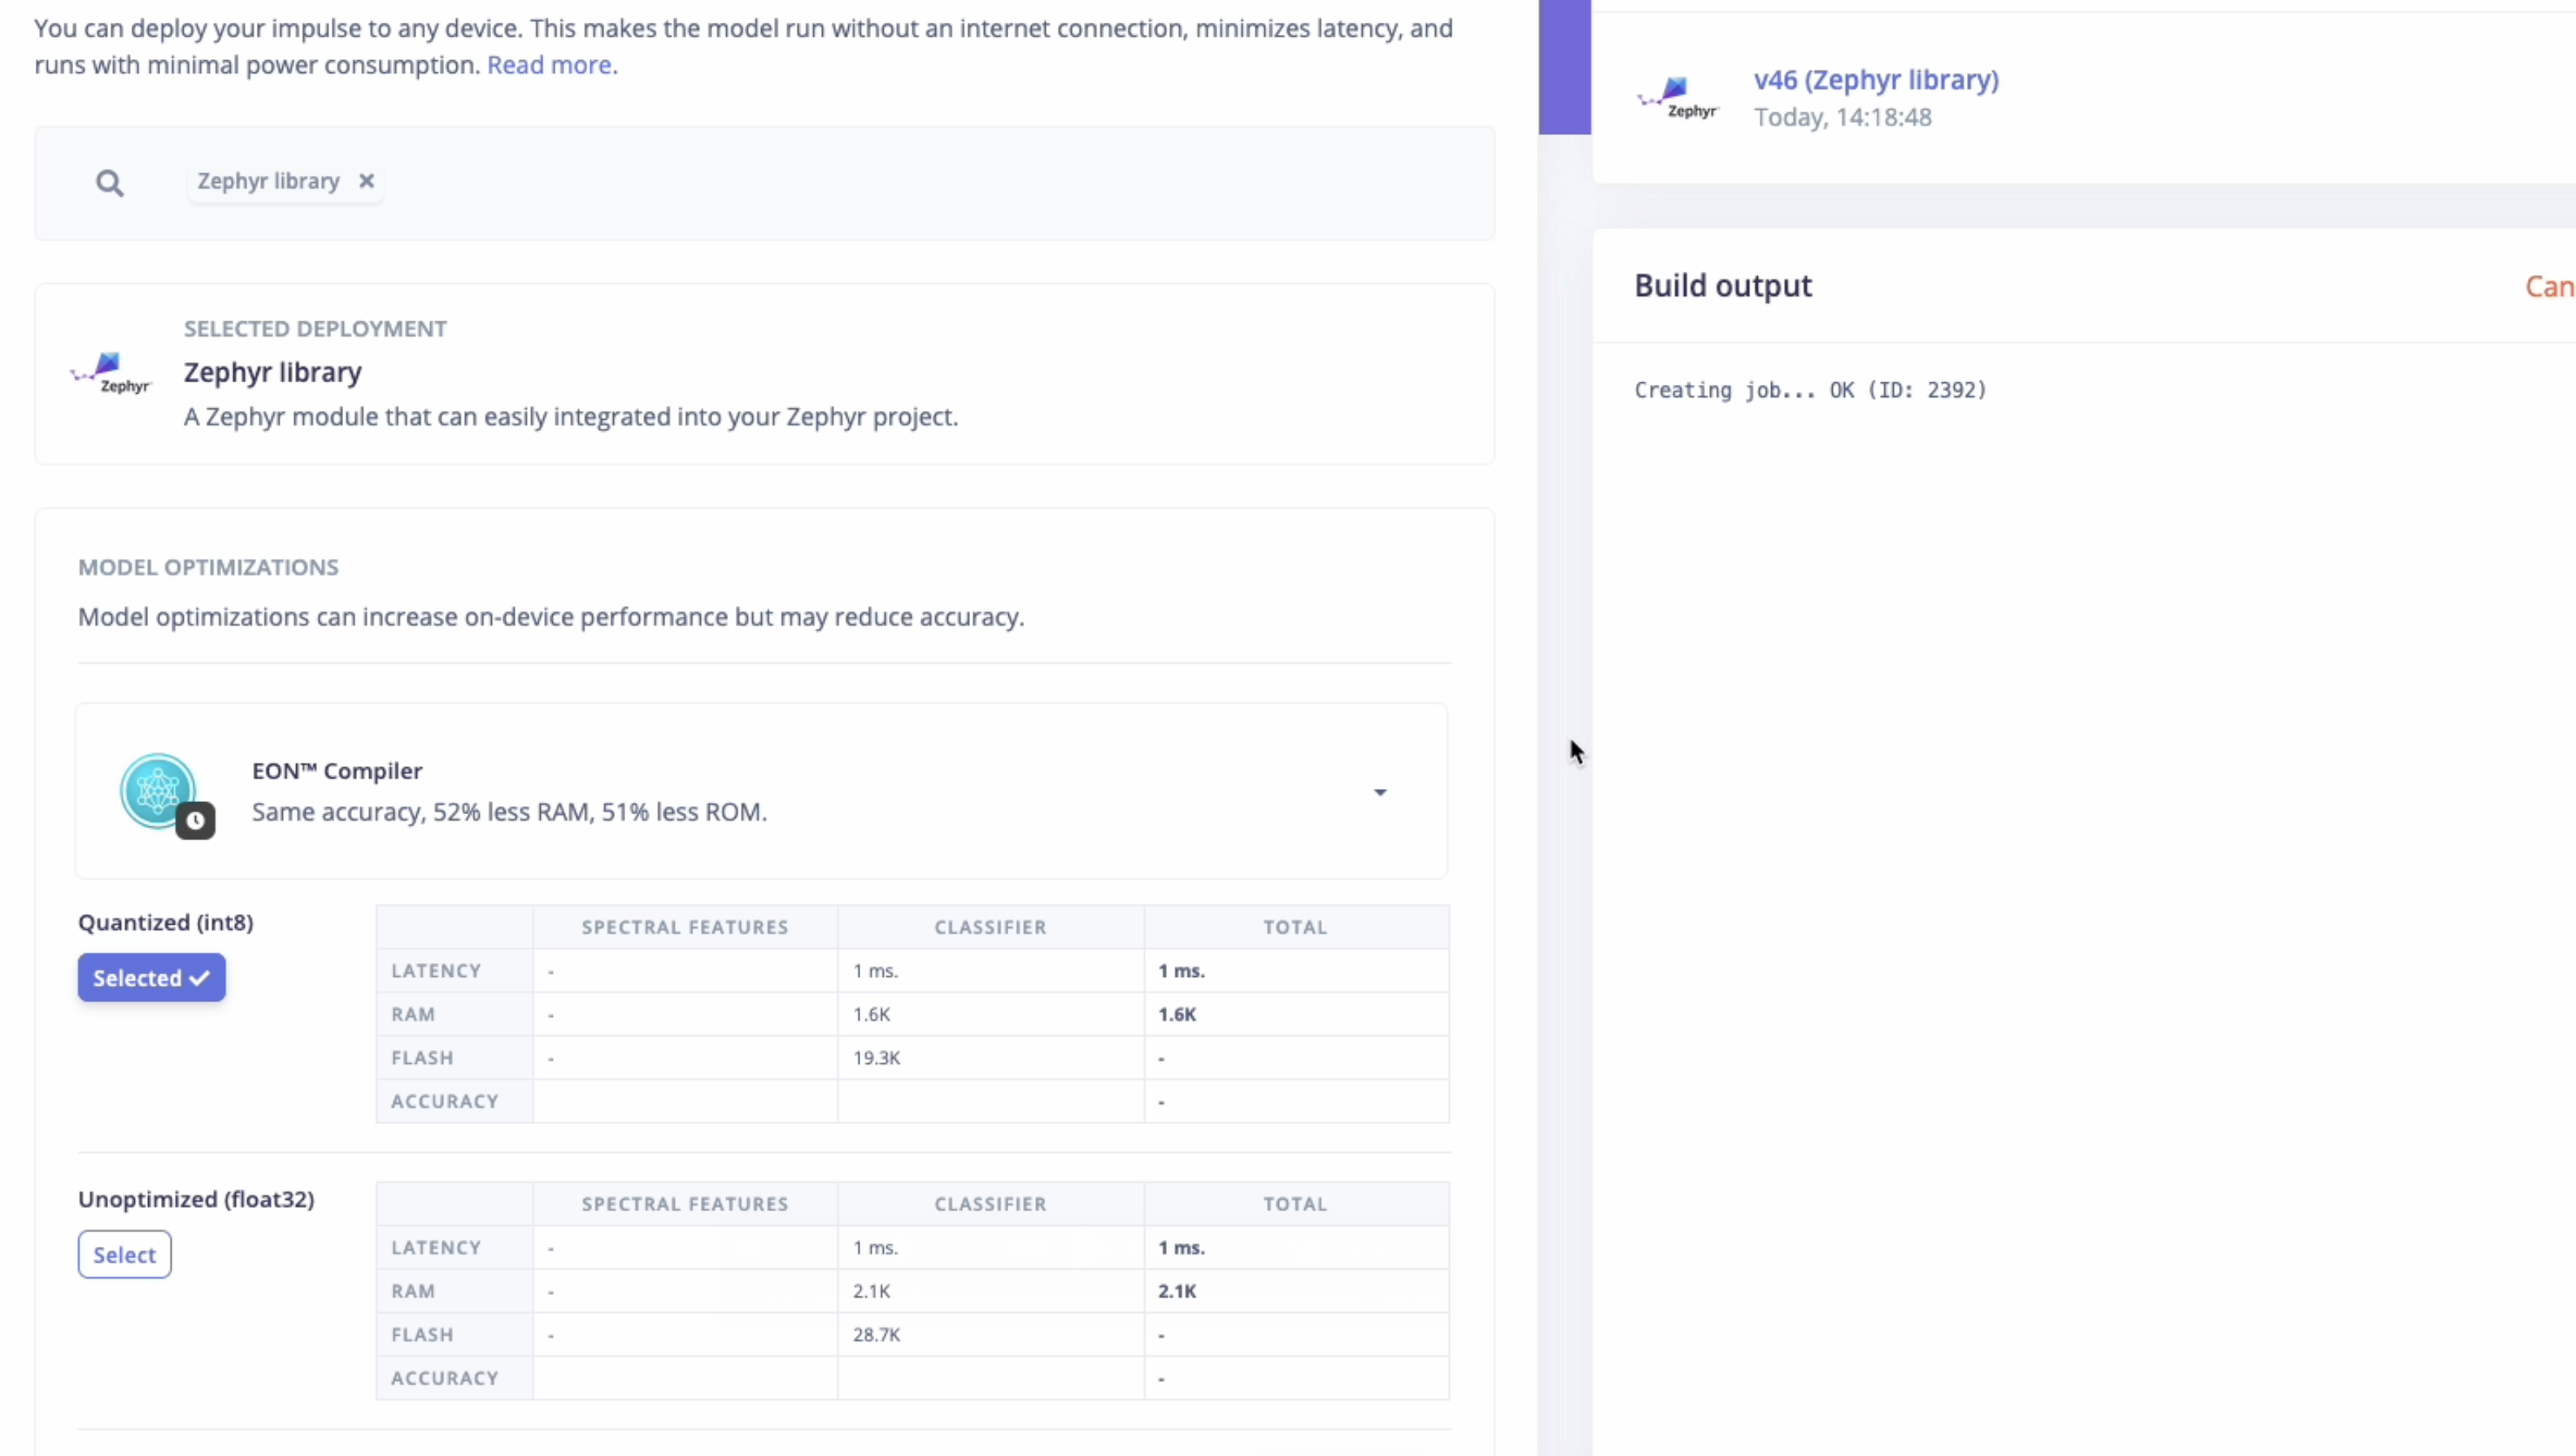
Head over to your Edge Impulse project:- Go to the Deployment tab.
- Select Zephyr Module as the target.
- Click Build to generate the library.
Automated Deployment with West Commands (Early Access Preview)
The Edge Impulse Zephyr module includes custom West extension commands that integrate directly with Edge Impulse Studio APIs for streamlined model deployment workflows.
west ei-build - Build your model in Studio
Use west ei-build to trigger a new build of your Edge Impulse model deployment in Studio:
-k, --api-key- Your Edge Impulse API key-p, --project- Your Edge Impulse project ID (integer)
-i, --impulseid- Specific impulse ID to build (default: 1)-e, --engine- Build engine:tfliteortflite-eon(default:tflite-eon)-t, --modeltype- Model type:int8orfloat32(default:int8)
- Calls the Edge Impulse Build On-Device Model API
- Triggers a fresh build of your Zephyr library deployment in Studio
- Waits for the build to complete
- Useful when you’ve made changes to your impulse configuration
This command builds your model in Edge Impulse Studio, not locally. It’s equivalent to clicking “Build” in the Deployment tab.
west ei-deploy - Download deployment artifacts
Use west ei-deploy to download your pre-built Edge Impulse model deployment:
-k, --api-key- Your Edge Impulse API key-p, --project- Your Edge Impulse project ID (integer)
-i, --impulseid- Specific impulse ID to download (default: 1)-e, --engine- Build engine:tfliteortflite-eon(default:tflite-eon)-t, --modeltype- Model type:int8orfloat32(default:int8)
- Calls the Edge Impulse Download Deployment API
- Downloads the latest Zephyr library deployment as
ei_model.zip - You must manually extract it to the
model/directory
You can find your API key in Edge Impulse Studio → Dashboard → Keys.
Your project ID is visible in the URL:
Your project ID is visible in the URL:
studio.edgeimpulse.com/studio/12345Complete workflow example
Here’s a typical development workflow using the extension commands:Updating your model
Option A: Use existing Studio build If you already built your model in Studio (via Deployment tab):Build vs Deploy - When to use which?
Advanced: Using environment variables
West extension commands don’t support environment variables directly, but you can create shell aliases:However, if you’d like to see complete reference Zephyr examples with full sensor integrations, check out our official Nordic Semiconductor firmware repositories:
Using the Edge Impulse Zephyr module
As we have already deployed our model as a Zephyr library (either manually or usingwest ei-deploy), we can now use it in our example project or integrate it into our own Zephyr project.
To use the Edge Impulse SDK in your own Zephyr project, you need to add it as a module dependency. There are two ways to do this - see “Integrate into Existing Project” below:
- Standalone Example Project
- Integrate into existing Zephyr Project
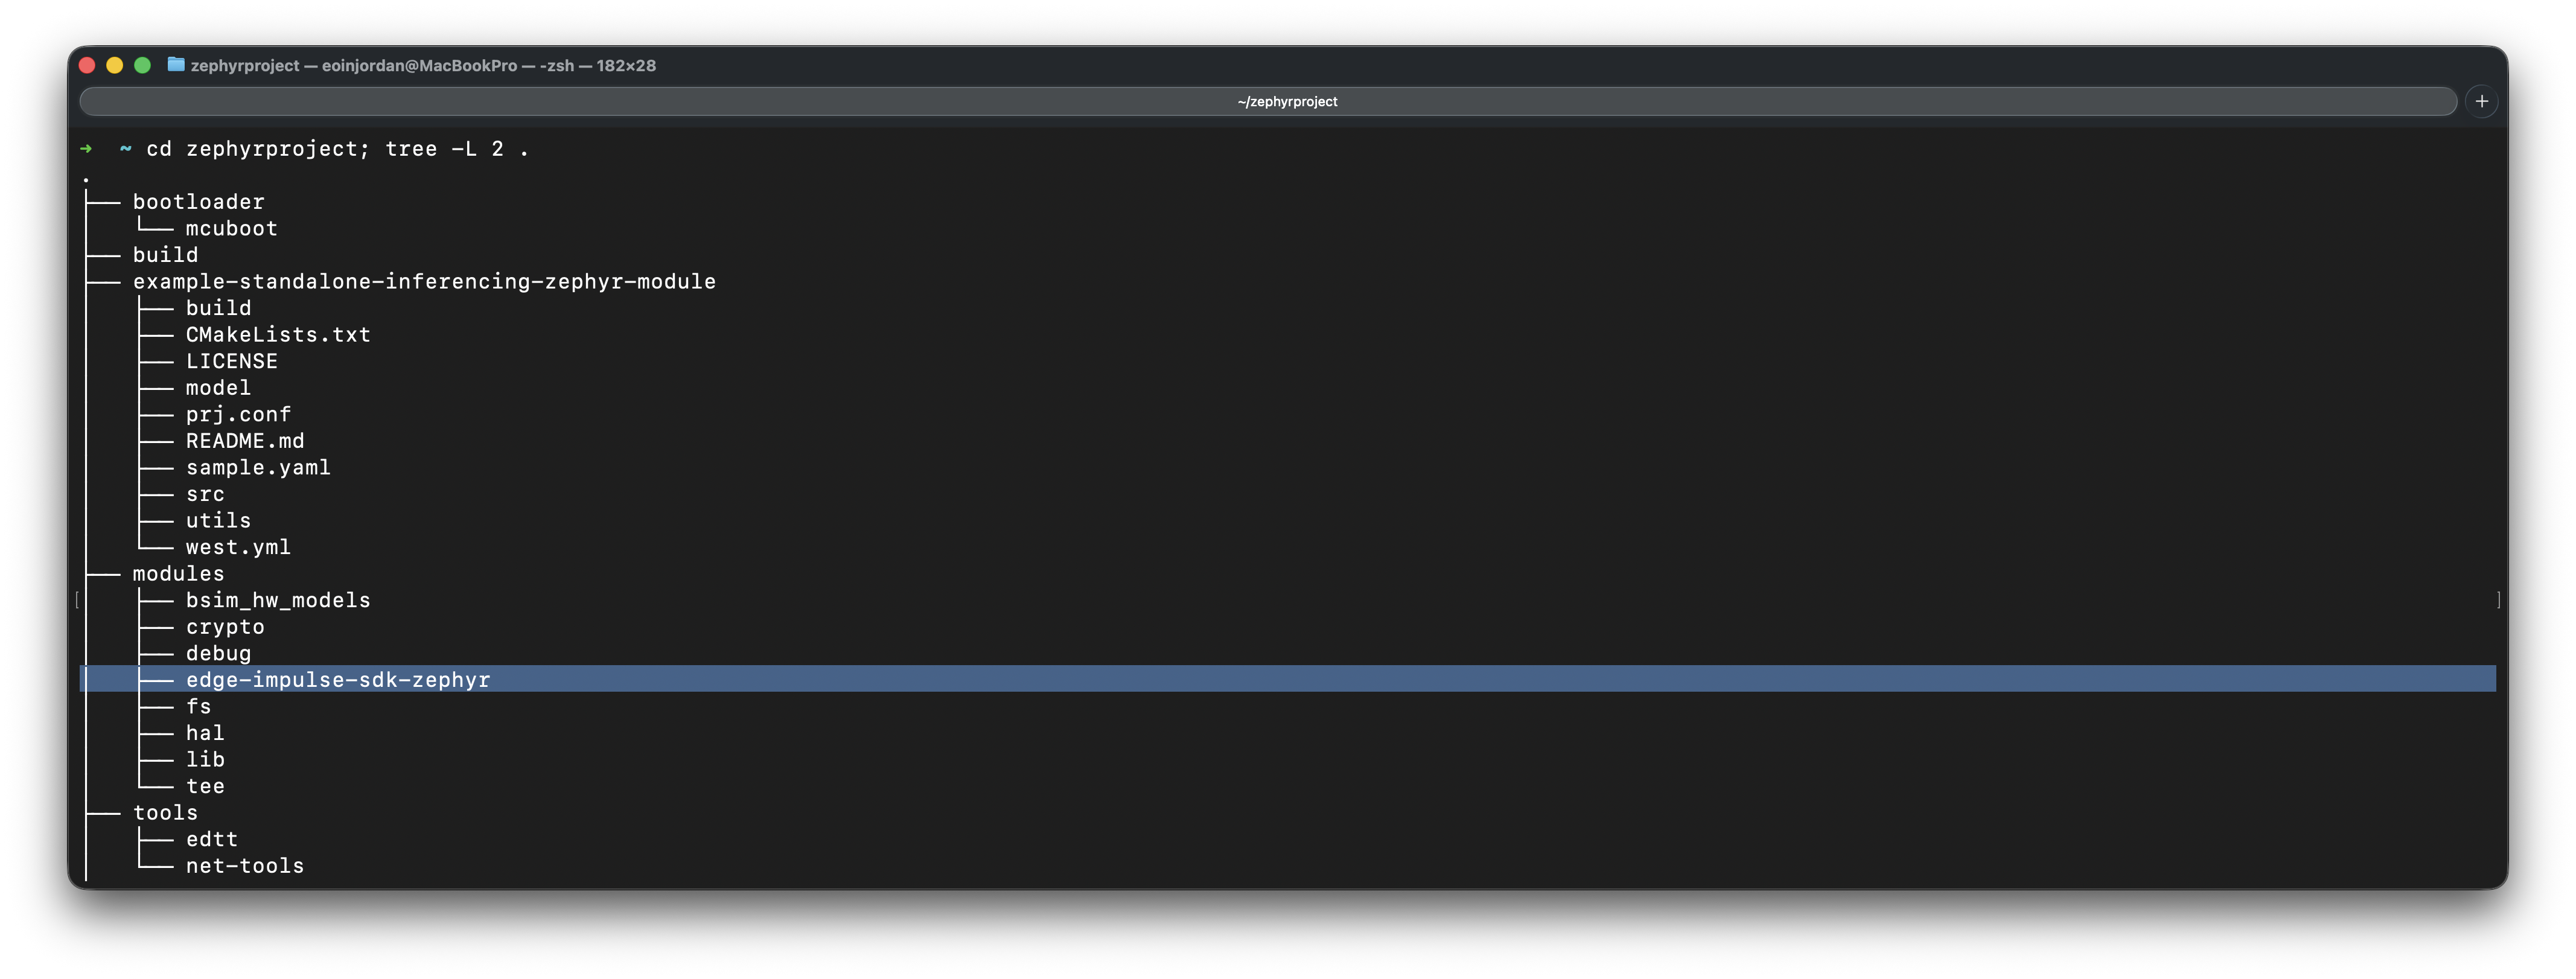
We are going to explain how you can integrate your model with the Edge Impulse SDK Zephyr module in a standalone example project.Navigate to your Zephyr workspace and clone the example project:To set up the project and fetch all required modules, run:Your project structure should now look like this: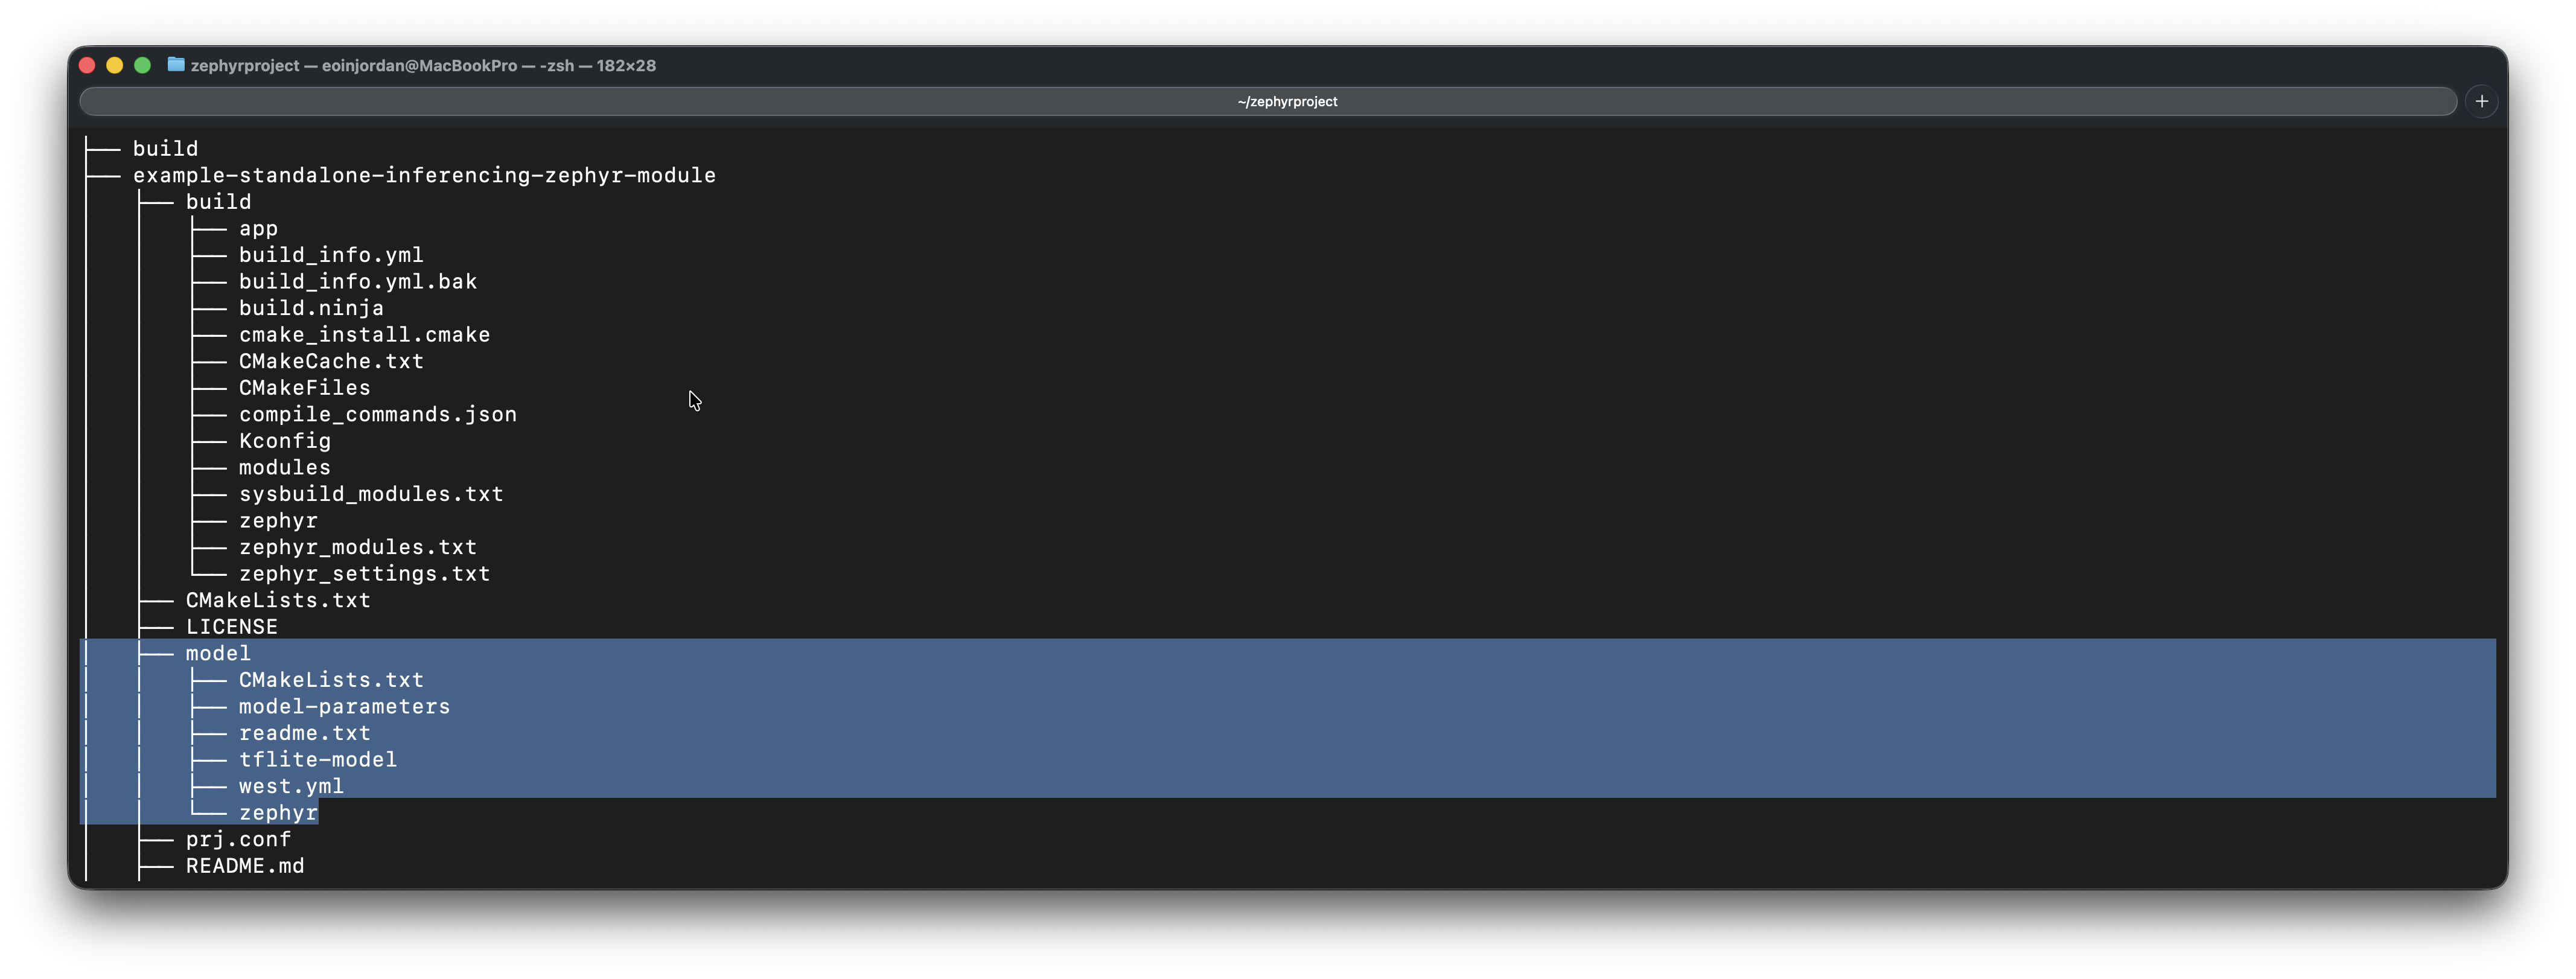
Add the model to your project
- Using west ei-deploy (Recommended)
- Manual Deployment
Deploy your model directly from the command line:The model will be extracted to the
model/ directory.Test with sample features from the Live classification page
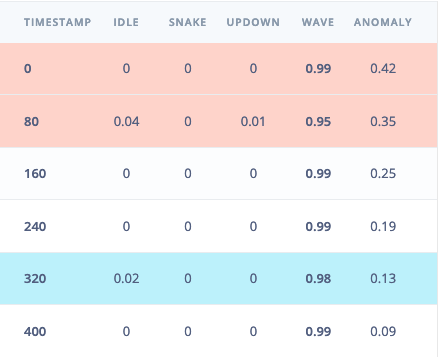
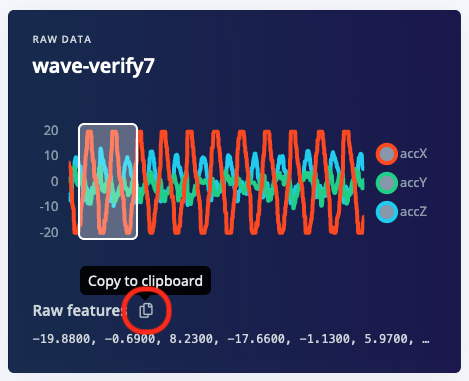
To do this, first head back to the studio and click on the Live classification tab. Then load a validation sample, and click on a row under ‘Detailed result’.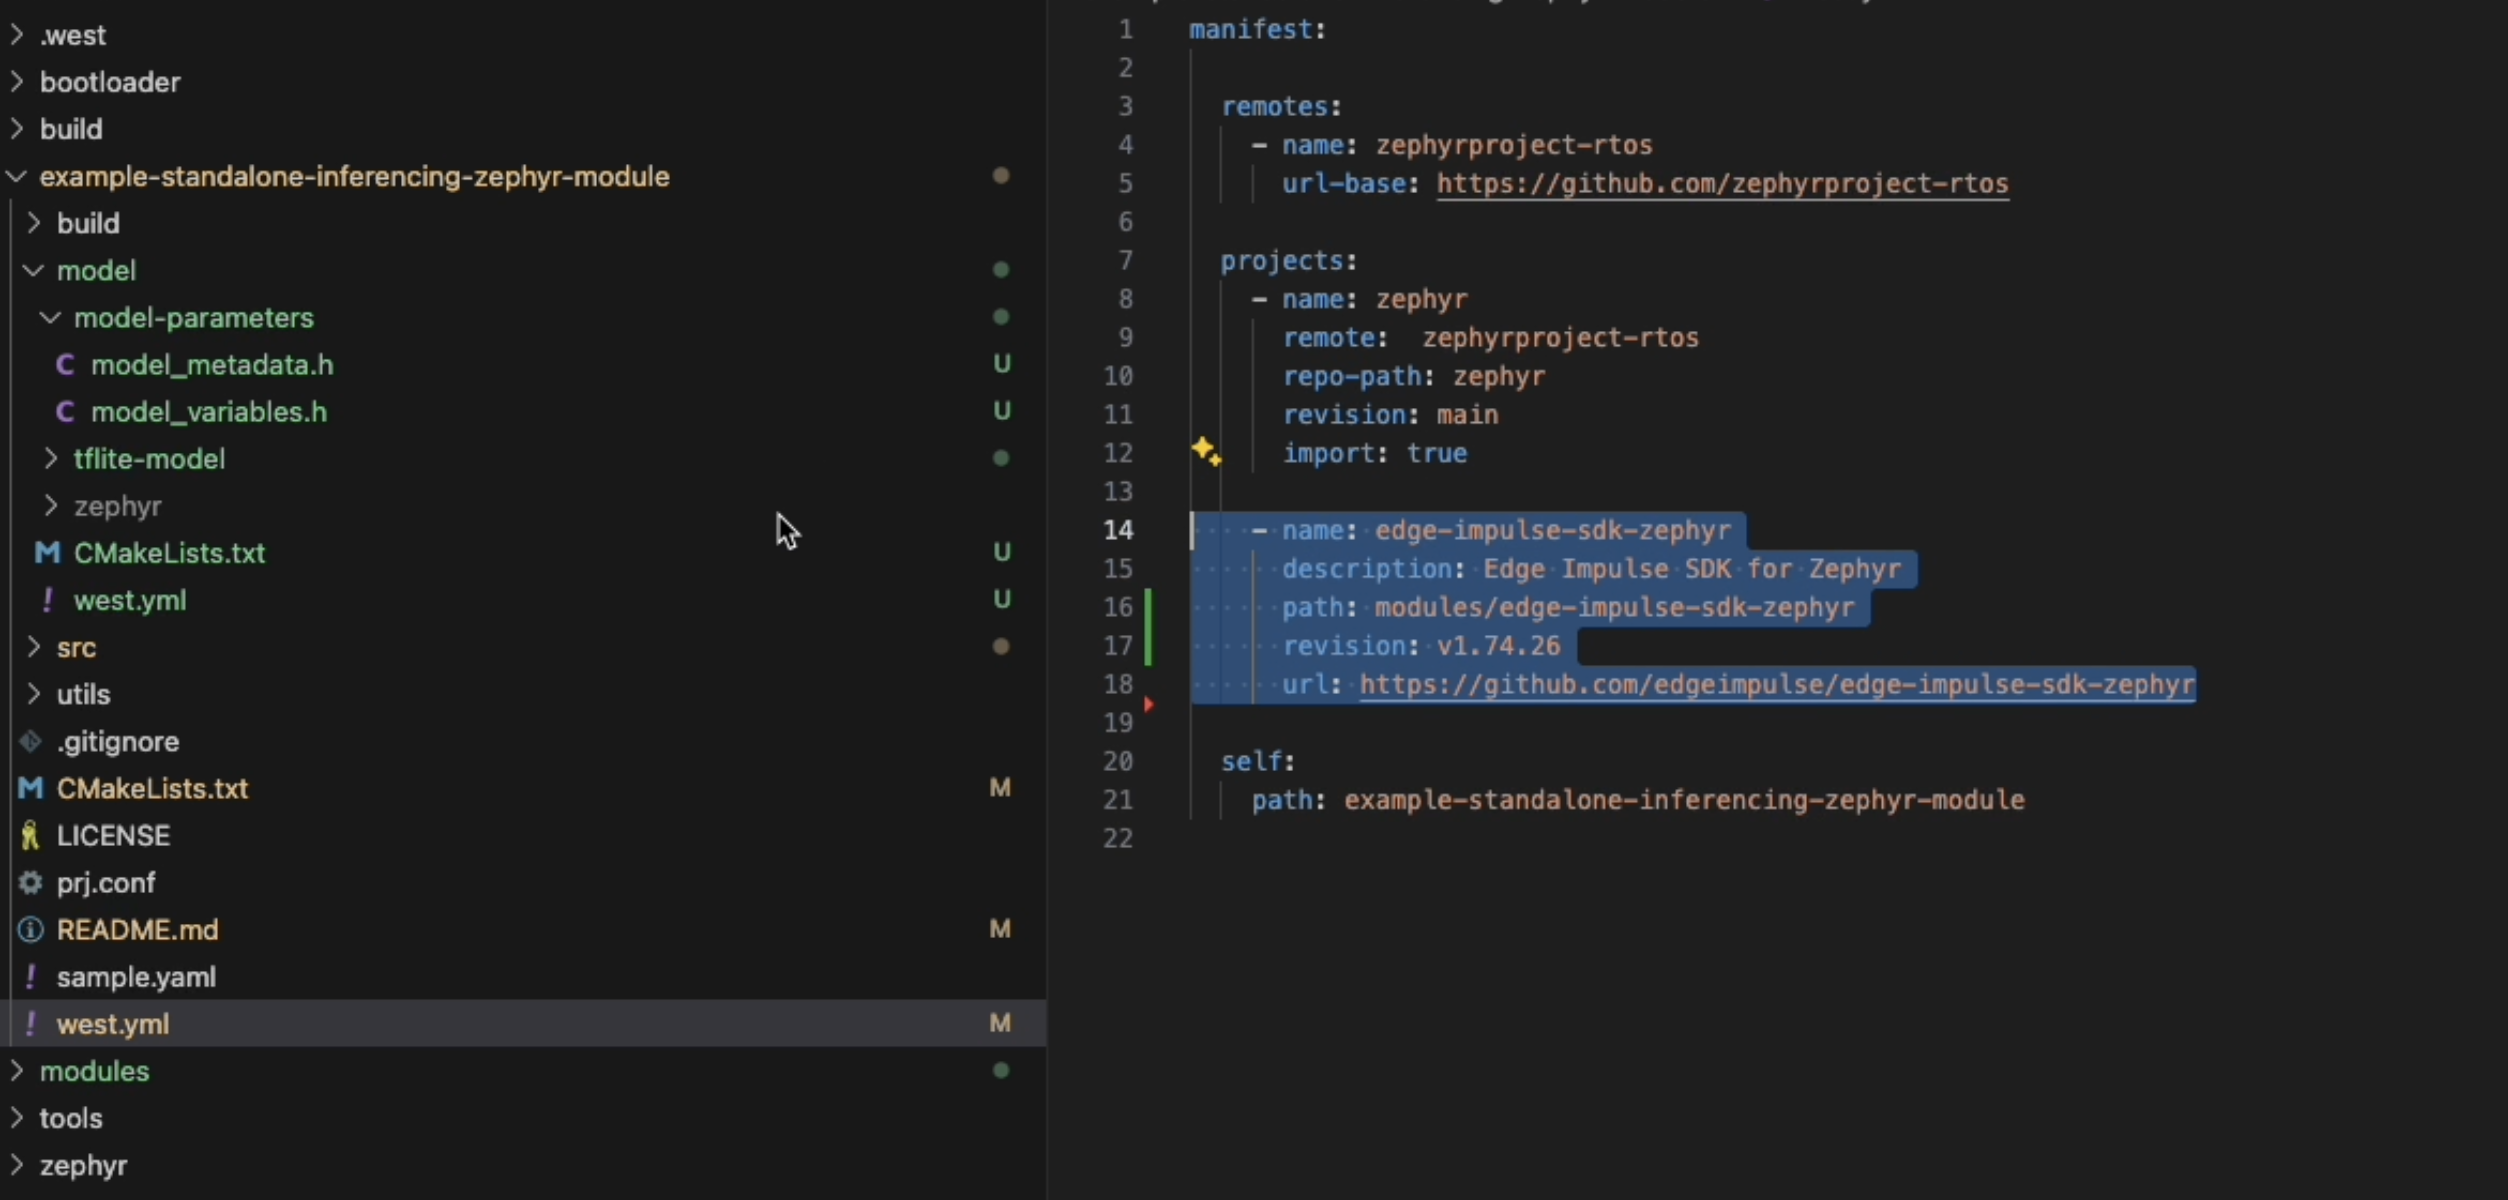
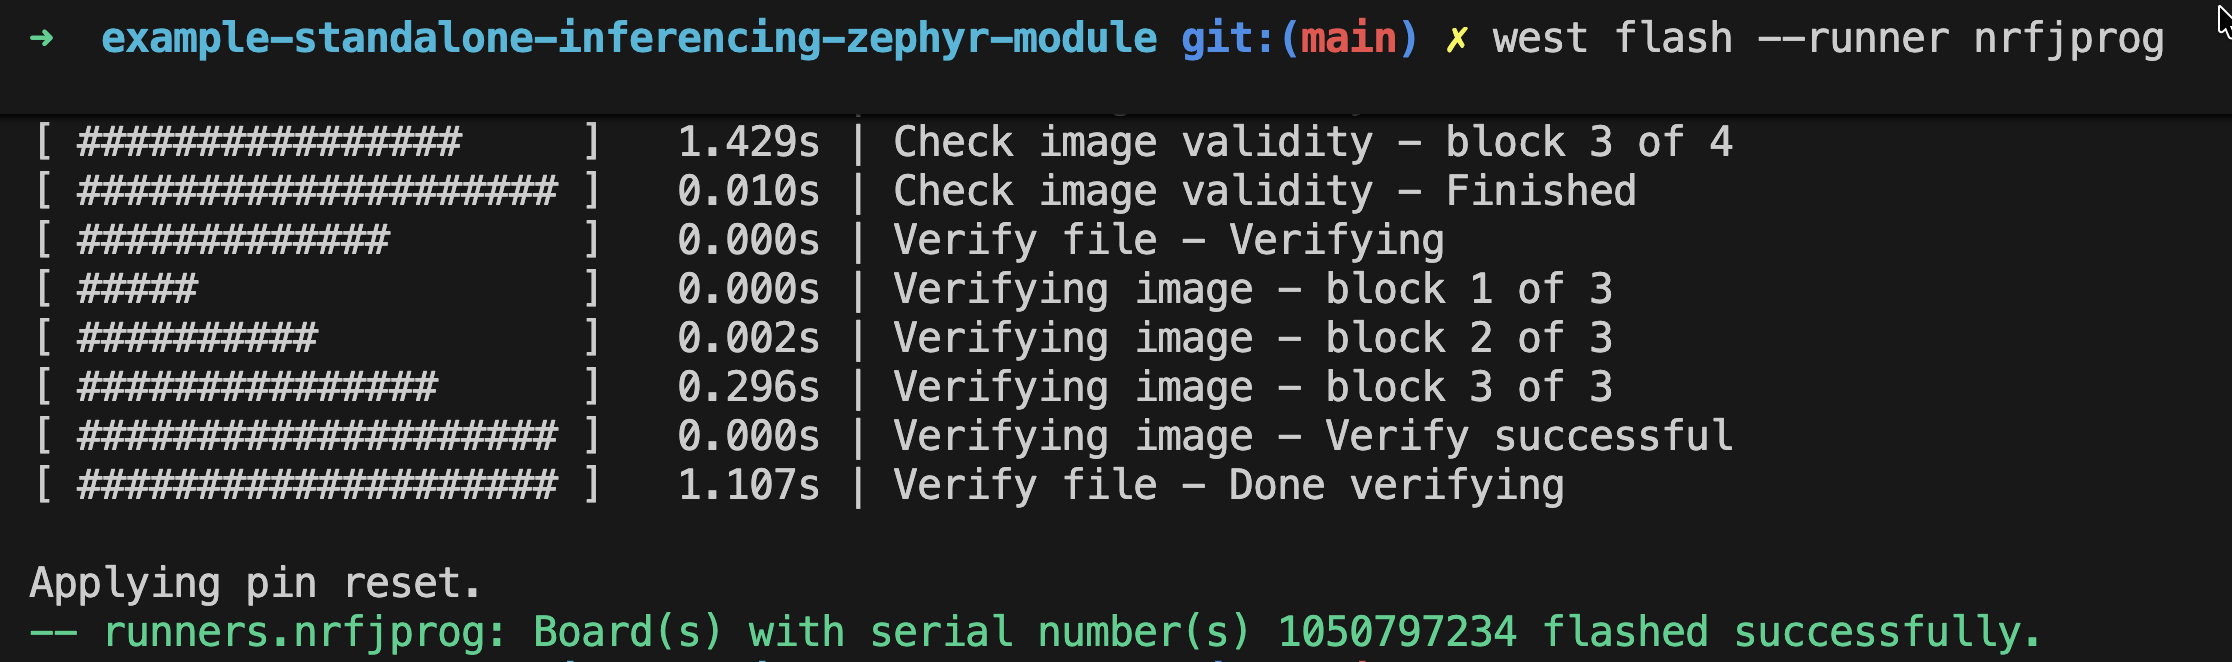
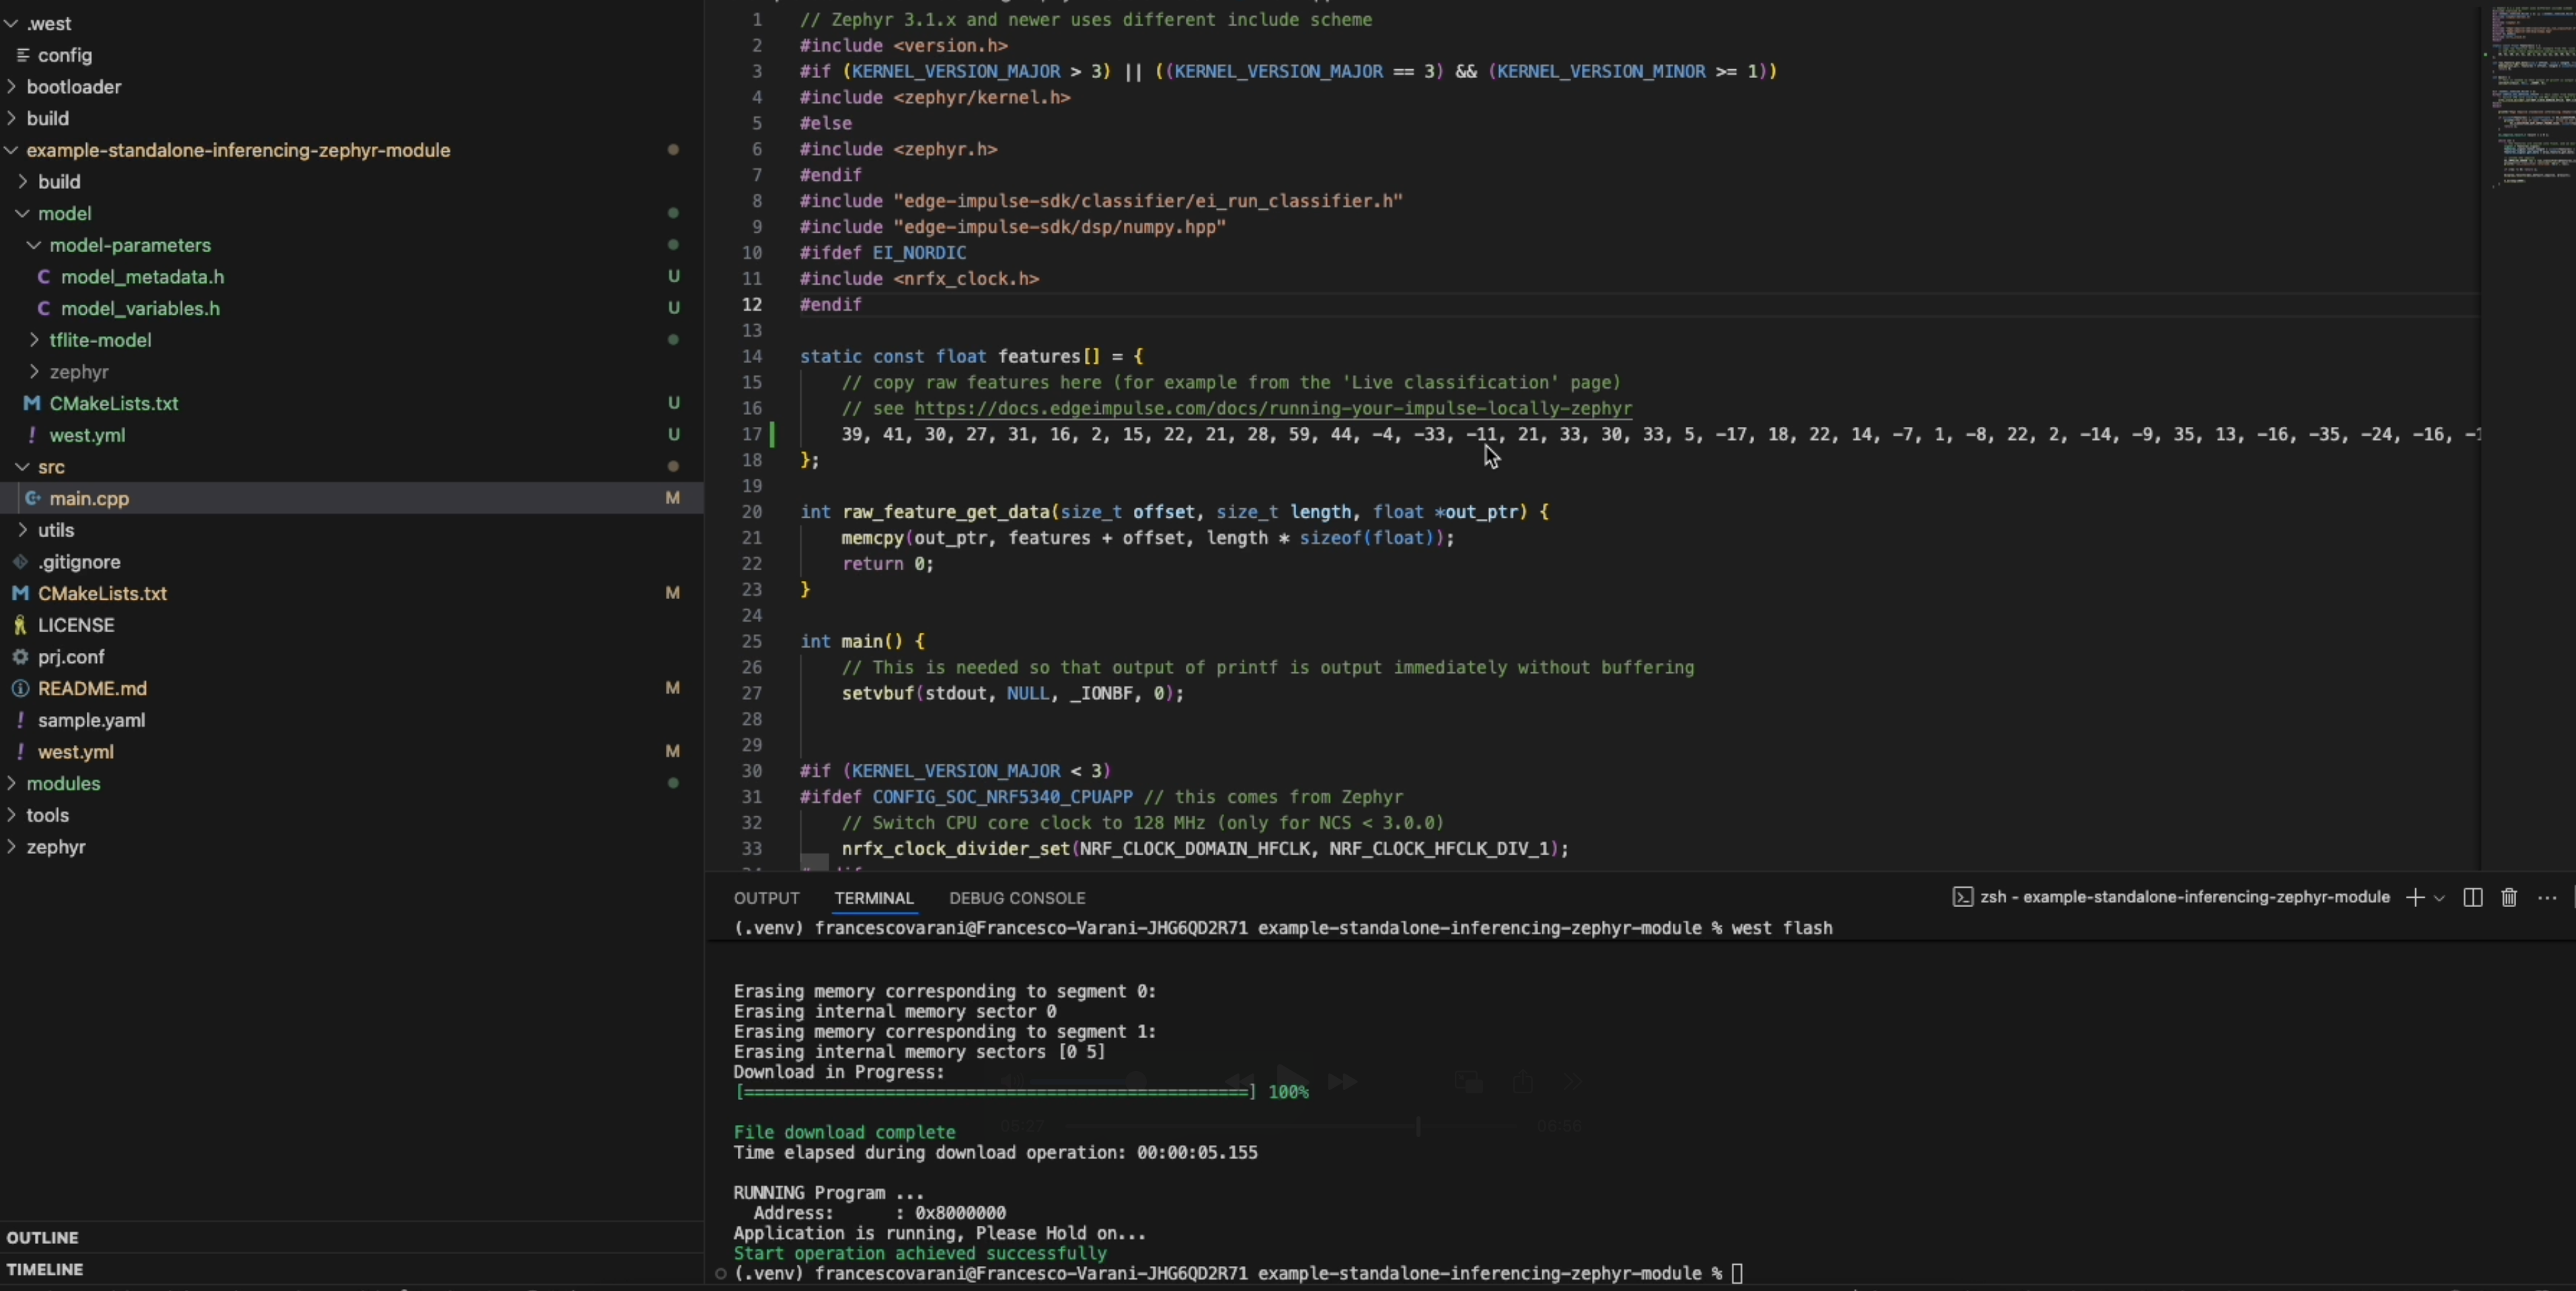
Compile and flash
Run the following commands to compile and flash your application: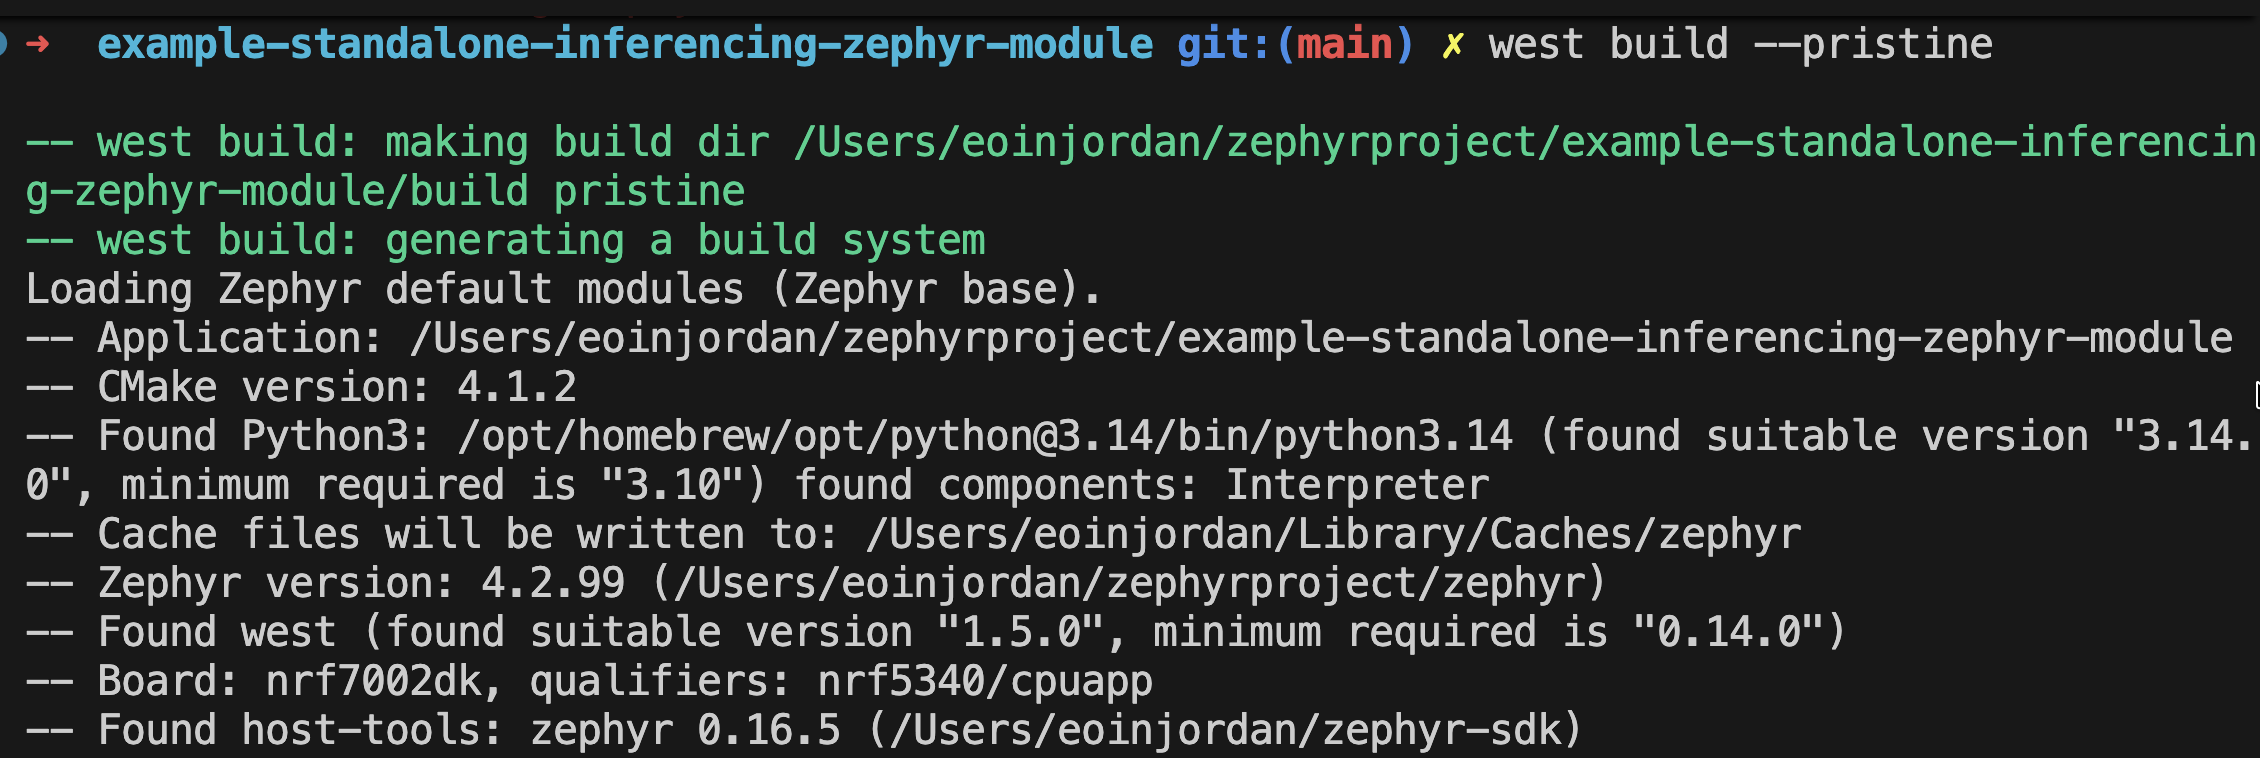
Build the project
Here you can specify the board you want to test by modifying.west/config or by building with west:
Specify the board
.west/config.
Add your board name under the [build] section:
nrfjprog:
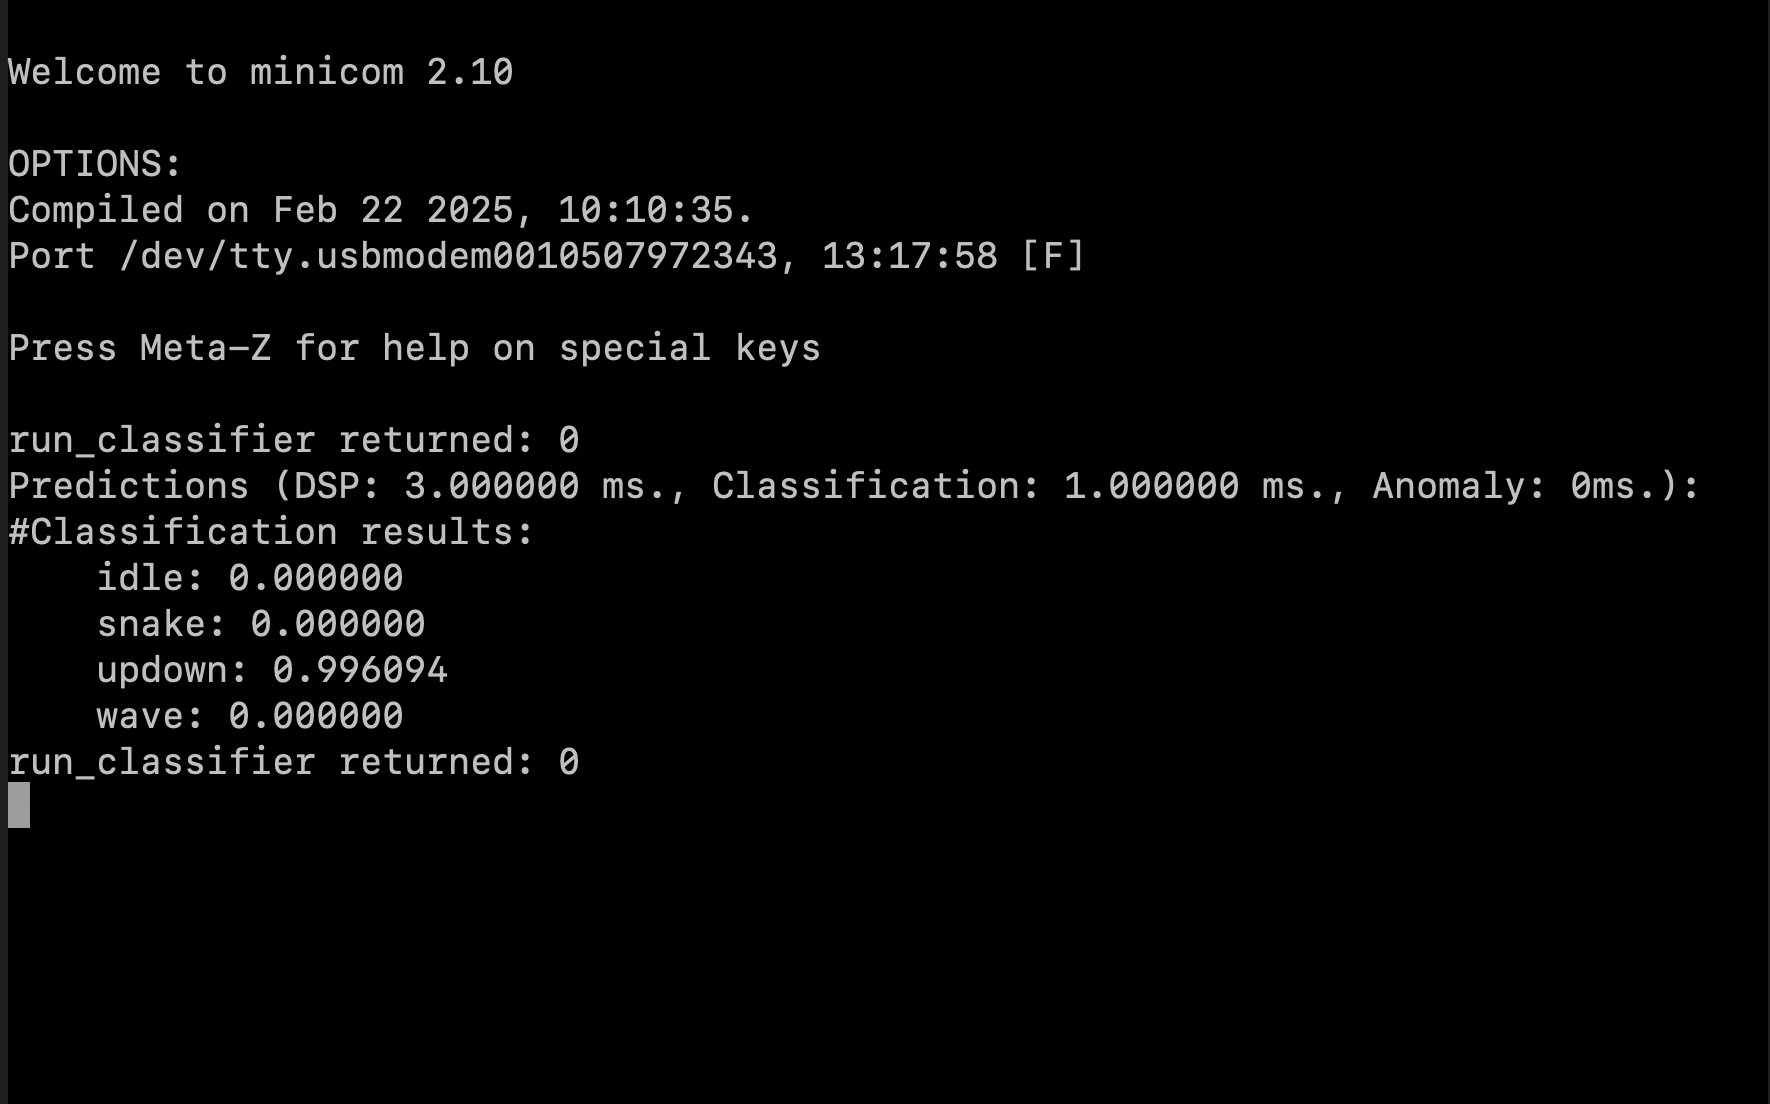
View inference results
Troubleshooting
If you encounter issues with west or Zephyr, ensure you have the required dependencies installed. You can install them using pip:Common Issues
west ei-build command not found
west ei-build command not found
Symptoms:Solutions:
- Run from the manifest repository directory:
- Enable extension commands:
- Verify your
west.ymlincludes west-commands registration:
- Update workspace:
west ei-build fails with authentication error
west ei-build fails with authentication error
Cause: Invalid API key or project IDSolution:
- Verify your API key in Edge Impulse Studio → Dashboard → Keys
- Ensure your project ID matches the URL:
studio.edgeimpulse.com/studio/YOUR_ID - Check API key has deployment permissions
- Use correct flags:
-kfor API key,-pfor project ID
west ei-build times out
west ei-build times out
Cause: Studio build is taking longer than expectedSolution:
- Large models may take several minutes to build
- Check build status in Edge Impulse Studio → Deployment tab
- The command will wait for build completion
west ei-deploy downloads wrong model version
west ei-deploy downloads wrong model version
Cause: Studio has a cached buildSolution:
Model deployment is missing files
Model deployment is missing files
Cause: Forgot to extract ei_model.zipSolution:
Next Steps
Zephyr Series
Explore the Zephyr module series for Edge Impulse integration
Zephyr Documentation
Official Zephyr Project documentation
Edge Impulse Forum
Get help from the community
Summary
By packaging the Edge Impulse SDK and your model as a Zephyr module, you gain native integration within Zephyr’s build system. The custom West extension commands (west ei-build and west ei-deploy) further streamline your development workflow, making it easier to iterate on your machine learning models directly from the command line.
This modular approach makes your firmware easier to maintain, update, and scale across 850+ supported boards.
By packaging the Edge Impulse SDK and your model as a Zephyr module, you gain native integration within Zephyr’s build system.This modular approach makes your firmware easier to maintain, update, and scale across supported boards.