

- Bike Fall Detection: https://studio.edgeimpulse.com/public/1029020/live
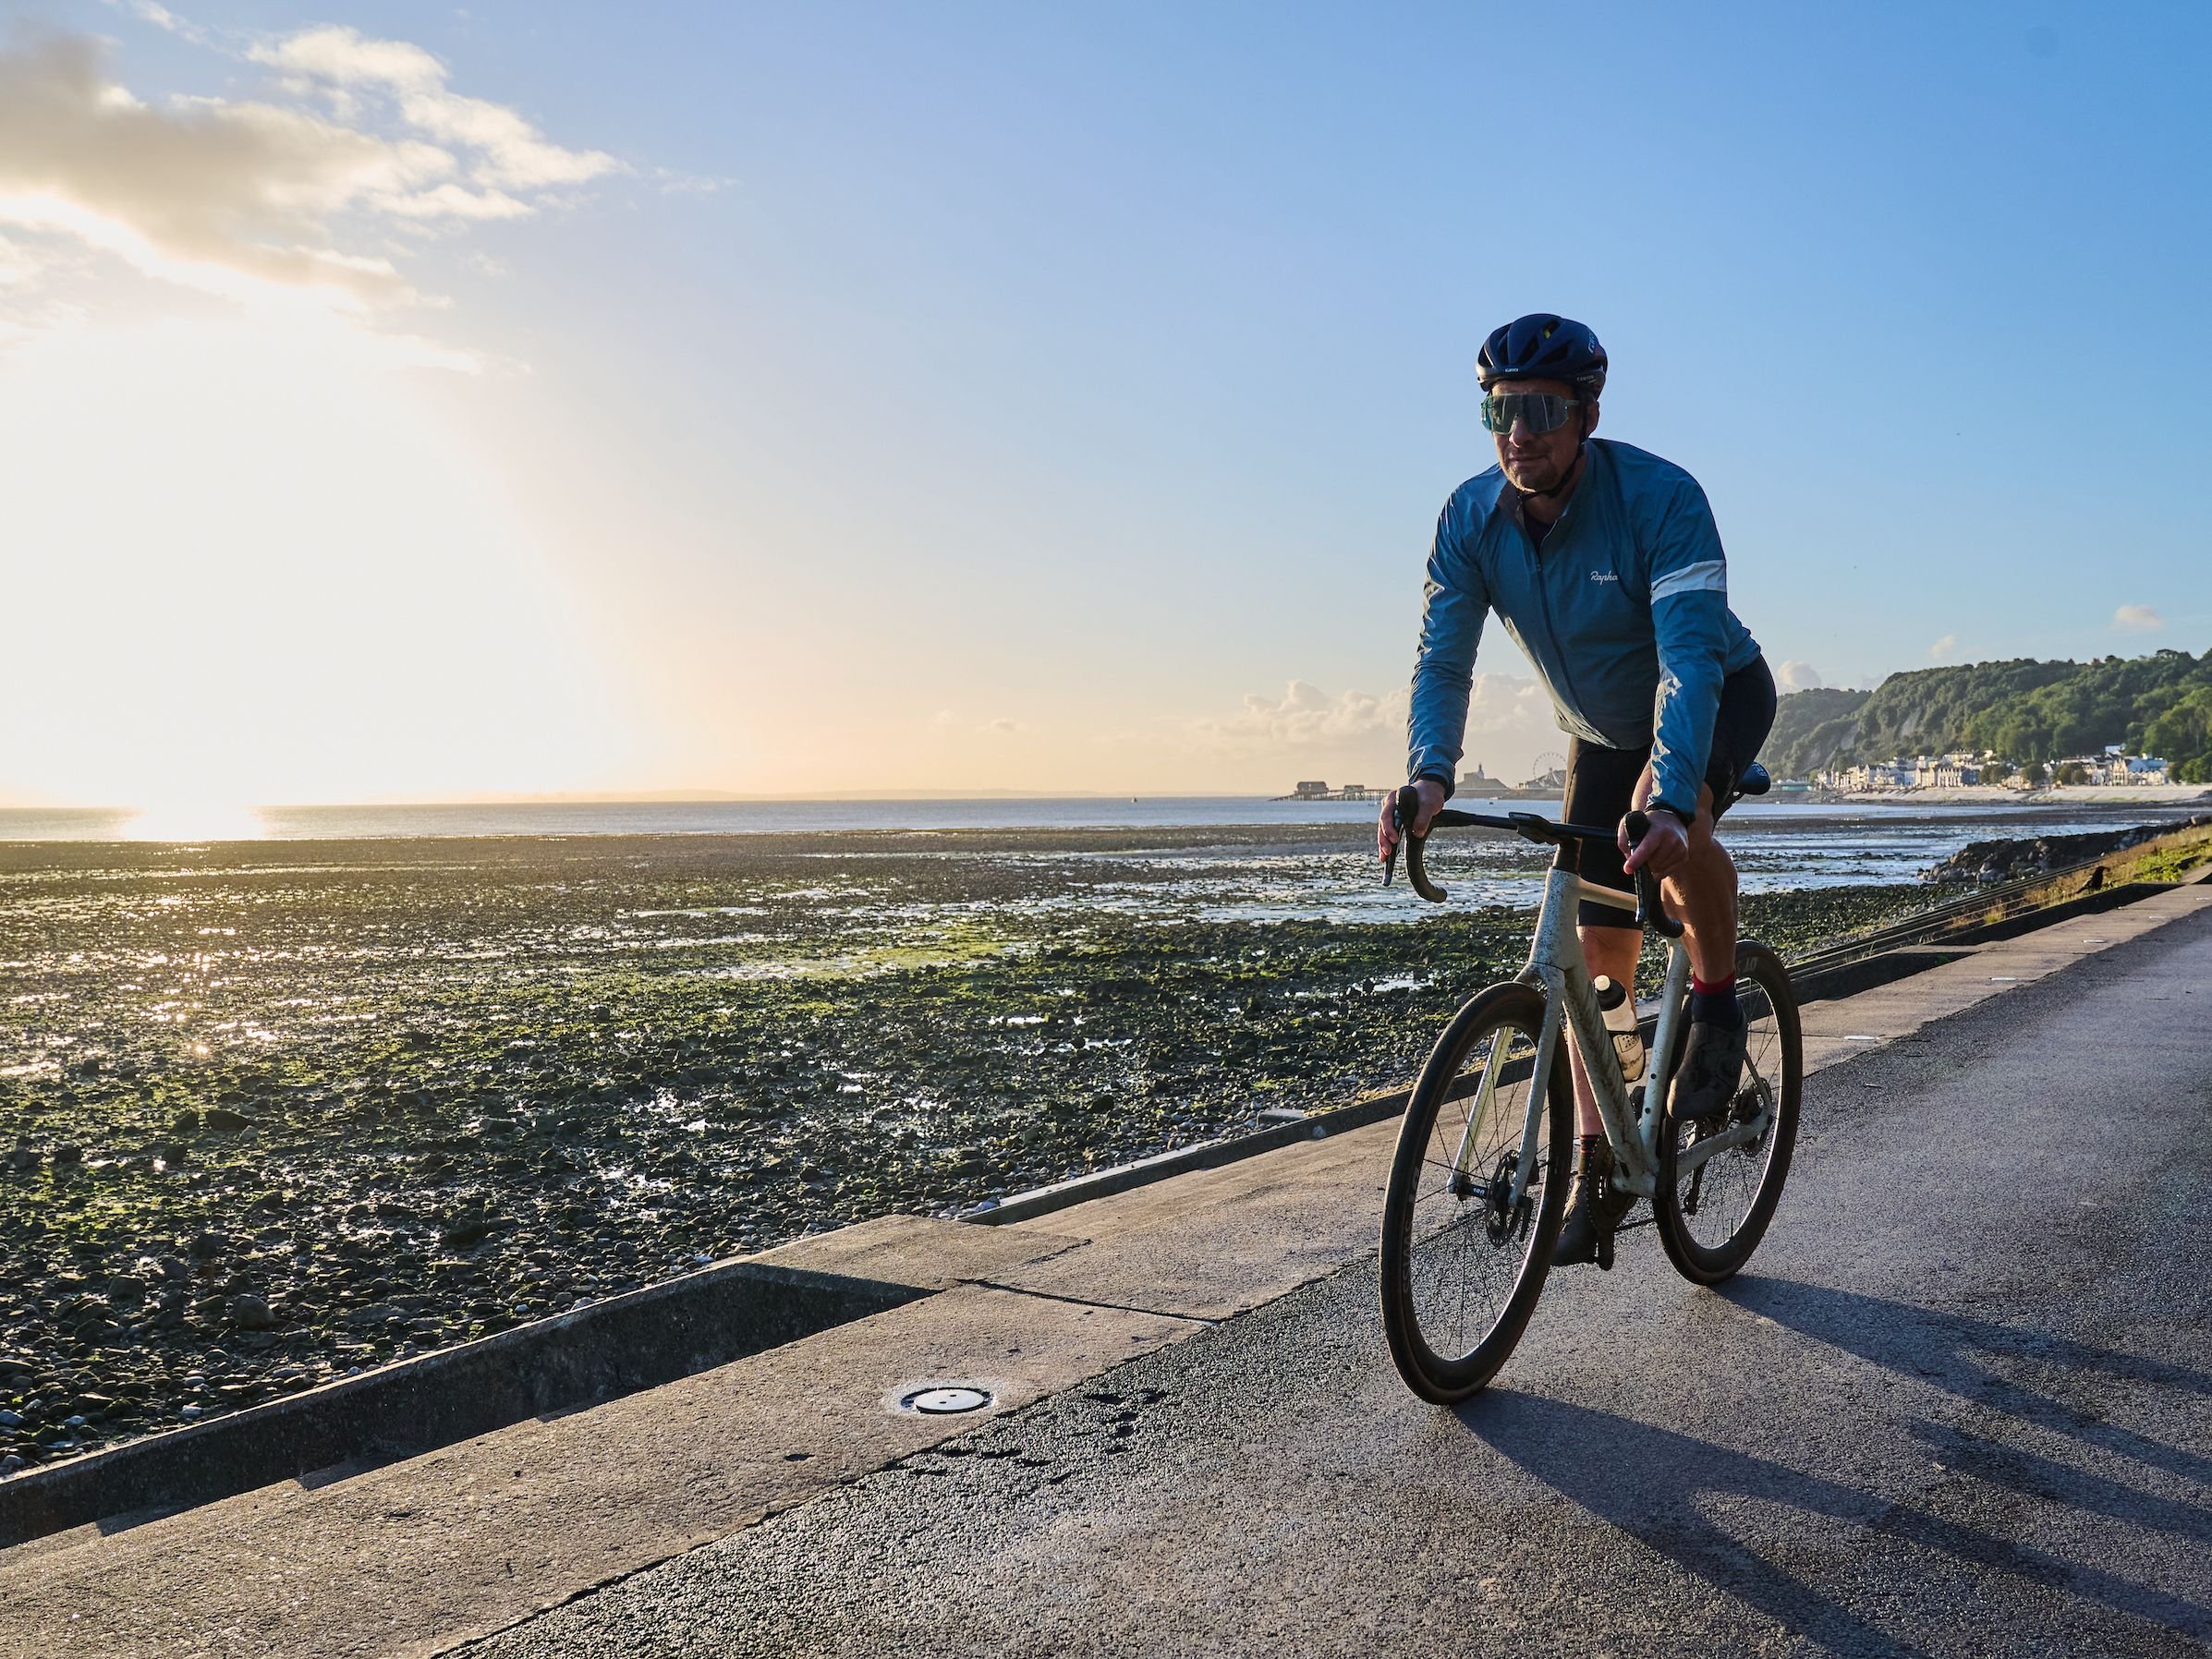
The Bike That Calls for Help When You Crash
Introduction
Did you know that a US bicyclist gets killed in traffic about every eight hours? That was the pace in 2025, when 1,148 riders died in crashes, up 4% from the year before, near a forty-year high. The gear hasn’t caught up. Helmets, gloves, lights, and mirrors are all passive. Nothing on a typical bike knows when the rider is on the ground. Some high-end GPS units and smartwatches have crash detection, but that gear costs $400 and up, and most riders don’t own it. That’s the gap this build fills. An Arduino Nesso N1 mounts on the top tube, reads its onboard BMI270 IMU at 100 Hz, and runs an Edge Impulse model that sorts motion into two states:normal riding and a fall. When it flags a fall, the board pings a paired phone over Bluetooth Low Energy 5.3, and the phone fires off an SMS to a contact you’ve set up in advance.
By the end of this piece, you’ll collect motion data, train a fall detection model in Edge Impulse, deploy it to the Arduino Nesso N1, and connect it to a BLE-powered SMS alert system.
The problem with cyclist safety today
Bikes have gotten fast over the years. A road bike on a steep descent can hit 35 mph or more, no motor required. Gravel and mountain routes put you in places with no cell signal and nobody around. Even a routine evening commute puts you on roads shared with cars, where a fall could be very dangerous. And most crashes don’t involve a car at all. In an Australian study of cyclists hospitalized after on-road crashes, more than half went down on their own, with no other vehicle involved. Most of those were simply the rider losing control. Those crashes often happen when nobody else is around. If you go down on a quiet road and nobody sees it, help doesn’t come until someone finds you. The usual answer is to press the SOS button on your watch, but a bad crash is exactly when you may not be able to. There’s room here for something better. Something that lives on the bike, runs the whole ride, recognizes a crash from the motion pattern, and gets the alert out without the rider having to do anything after the impact.Why edge AI is the right approach
The obvious way to add intelligence to a small device is to let the cloud think. You could stream raw Inertial Measurement Unit (IMU) data from a phone up to a server, run the model there, and send the result back. It works for plenty of applications. For a fall detector on a bike, it’s the wrong choice. Here’s why:- Latency: A round-trip to a server adds anywhere from 200 to 800 ms of network time, and that’s before the model does any actual work. A fall happens in a fraction of a second. You want the alert armed the moment the IMU detects the impact, not a second later after the data has traveled to a data center and back.
- Connectivity: Half the routes a recreational rider cares about are exactly where there’s no cell signal. Forest trails, mountain switchbacks, gravel back roads. A detector that only works with a connection doesn’t work where it’s most needed.
- Power: The Nesso N1 runs on a small 250 mAh battery. Keeping a WiFi or LTE radio streaming nonstop is one of the most draining things you can ask a board like this to do. And on a battery that size, it won’t last long. Run the model on the chip instead, and the radio can stay asleep for the whole ride, waking up only when there’s a fall to report.
- Privacy: Your ride data is surprisingly revealing. It shows where you stop, how you take corners, and whether you’re riding alone. Running inference on the board keeps all of that on the device. Nothing gets sent anywhere unless a real fall triggers an alert.
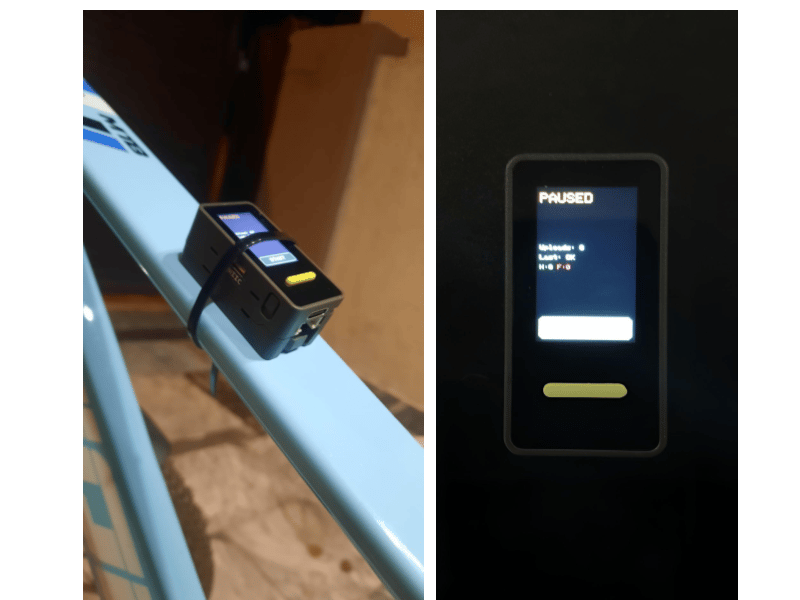
(Left) The Nesso N1 attached to the bicycle frame for data collection. (Right) The display showing the Uploads and PAUSED status. Pressing the START button (not visible here) begins data collection.
Hardware overview
The Arduino Nesso N1
The Nesso N1 is a joint Arduino and M5Stack board built around an ESP32-C6. It’s small, runs on its own battery, and already has everything the fall detector needs on board. Here’s what we actually use.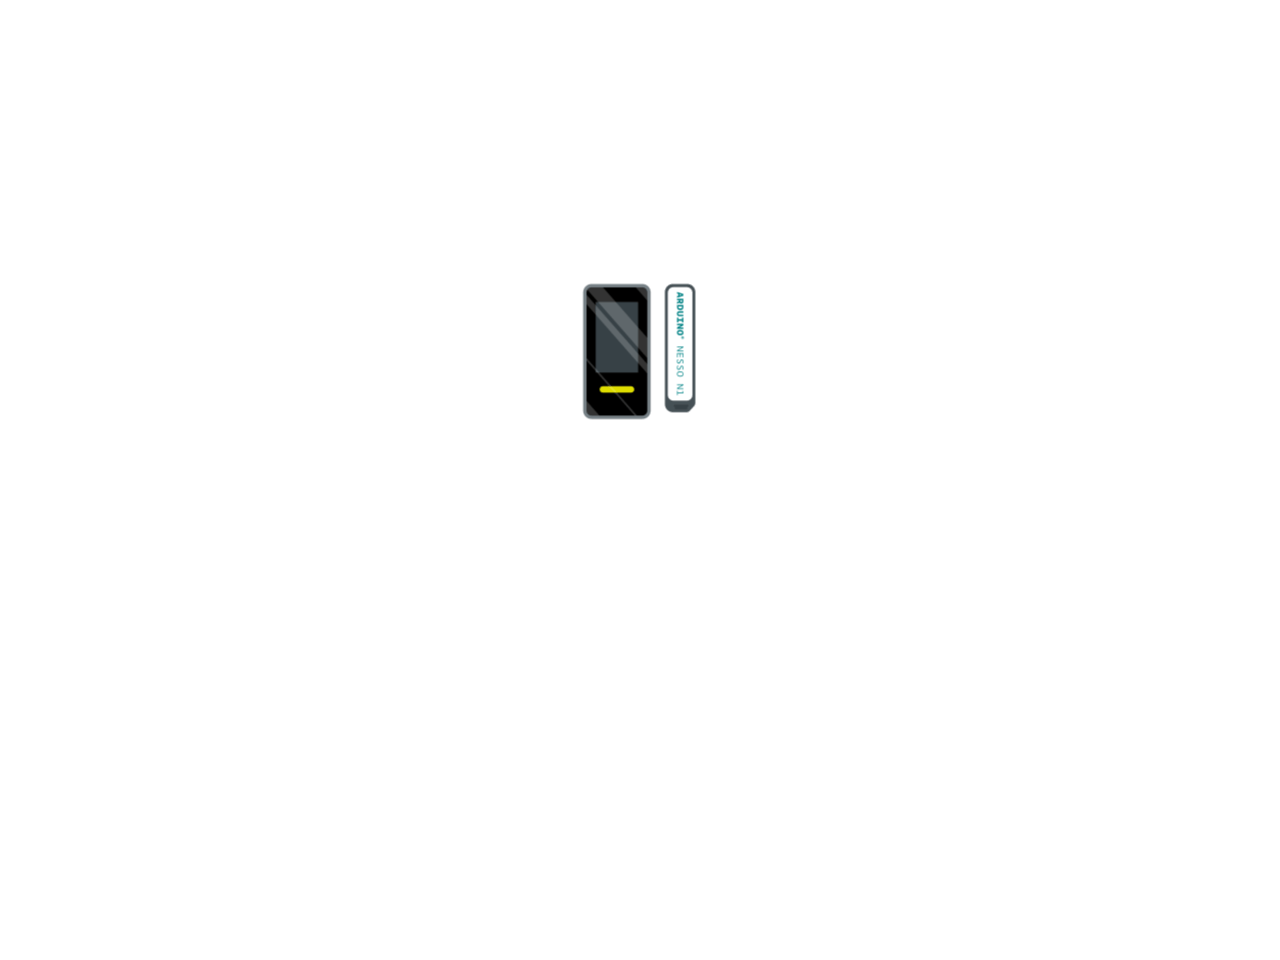
Arduino Nesso N1 development board
- Sensor: The BMI270 is a 6-axis IMU, a 3-axis accelerometer and a 3-axis gyroscope. That’s the only sensor fall detection needs, and it’s already wired to the chip. We sample it at 100 Hz, fast enough to catch the sharp shape of an impact, still light on the battery.
- Compute: The board runs on an ESP32-C6, its main processor, clocked at 160 MHz, with 512 KB of RAM. Small, but a two-class model like this one leaves plenty of headroom. Inference runs on the chip with room to spare.
- WiFi: The board has 2.4 GHz WiFi 6, which we use only during data collection. You record over your phone’s hotspot, so there’s no USB cable tethering the bike to a laptop while you ride.
- Buttons: Two programmable buttons sit next to the screen, so you can label events one-handed as you ride. One button marks a fall, and everything else is just left as normal. The onboard buzzer beeps to confirm the press, so you don’t have to look down to know it registered.
- Battery: A 250 mAh LiPo runs the whole thing untethered, which is enough for a couple of hours of recording. No external power module to bolt on.
Collecting motion data with Edge Impulse
Before any model can learn, it needs examples to learn from. For a fall detector, that means recording what the IMU sees during normal rides and during crashes. This is a two-class problem:normal_riding and fall.
Everything that isn’t a crash goes in the normal_riding bucket. Pedaling, coasting, cruising, gentle turns, stop-and-go in traffic, and hard braking all count as normal. That last one matters. A hard brake produces a big deceleration spike that, for a split second, looks a lot like the start of a fall. Instead of giving braking its own class, we just record plenty of it as normal riding. The model learns that a spike followed by the bike staying upright is nothing to worry about, and only a spike followed by a tumble is a fall.
Setup: IDE, libraries, account
Four things to install before the board can record anything:- Arduino IDE
- The M5Stack board package. Into Arduino IDE go to
File→Preferences→Additional boards manager URLsand paste the following:
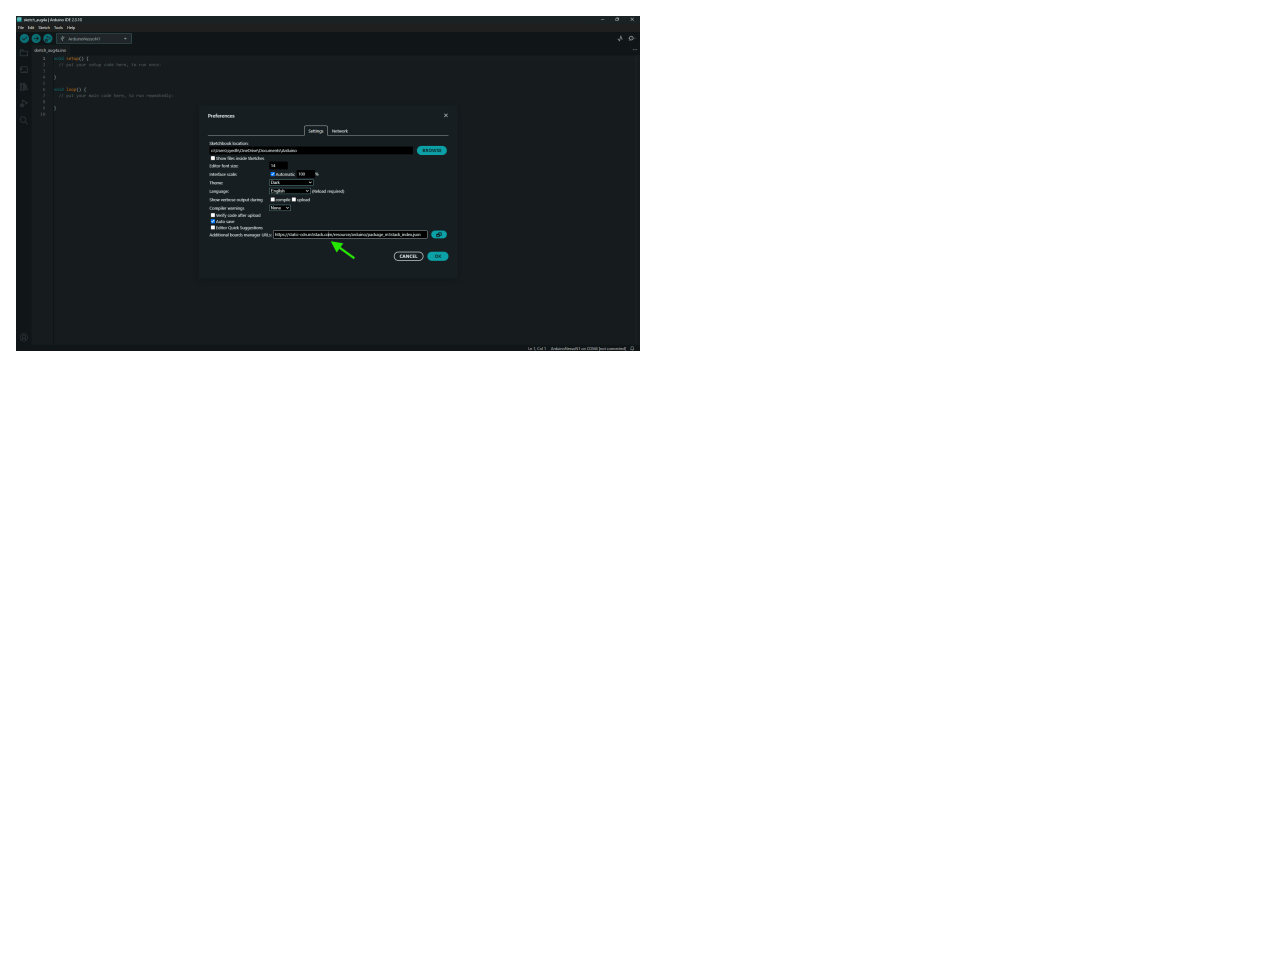
Installing the M5Stack Board Package
- Then open Board Manager, search M5Stack, install it, and select
Tools→Board→M5Stack→ArduinoNessoN1. - The M5Unified library, through the Library Manager. It pulls in M5GFX on its own. M5Unified is the library that lets your code talk to the board’s hardware.
- An Edge Impulse account and project. Create a project (something like
bike-fall-detection) and copy the API key from Dashboard → Keys. The board needs that key to push data in.
Reading the BMI270 at 100 Hz
The read loop is short. M5Unified brings the chip up in one call and hands you the readings as floats:M5.begin() powers up the IMU, display, buttons, and buzzer together. M5.Imu.init() starts the BMI270 over the internal I²C bus. Each pass gives you one reading of [ax, ay, az, gx, gy, gz], accelerometer in m/s² and gyroscope in deg/s. The delay(10) is what holds the loop at 100 Hz.
That 100 Hz stays the same everywhere. It’s the record rate, the interval_ms in the upload, and the rate Edge Impulse sees when it builds features later.
Streaming to Edge Impulse
Instead of saving to flash (onboard storage) and offloading after the ride, the board streams straight to Edge Impulse over your phone’s hotspot: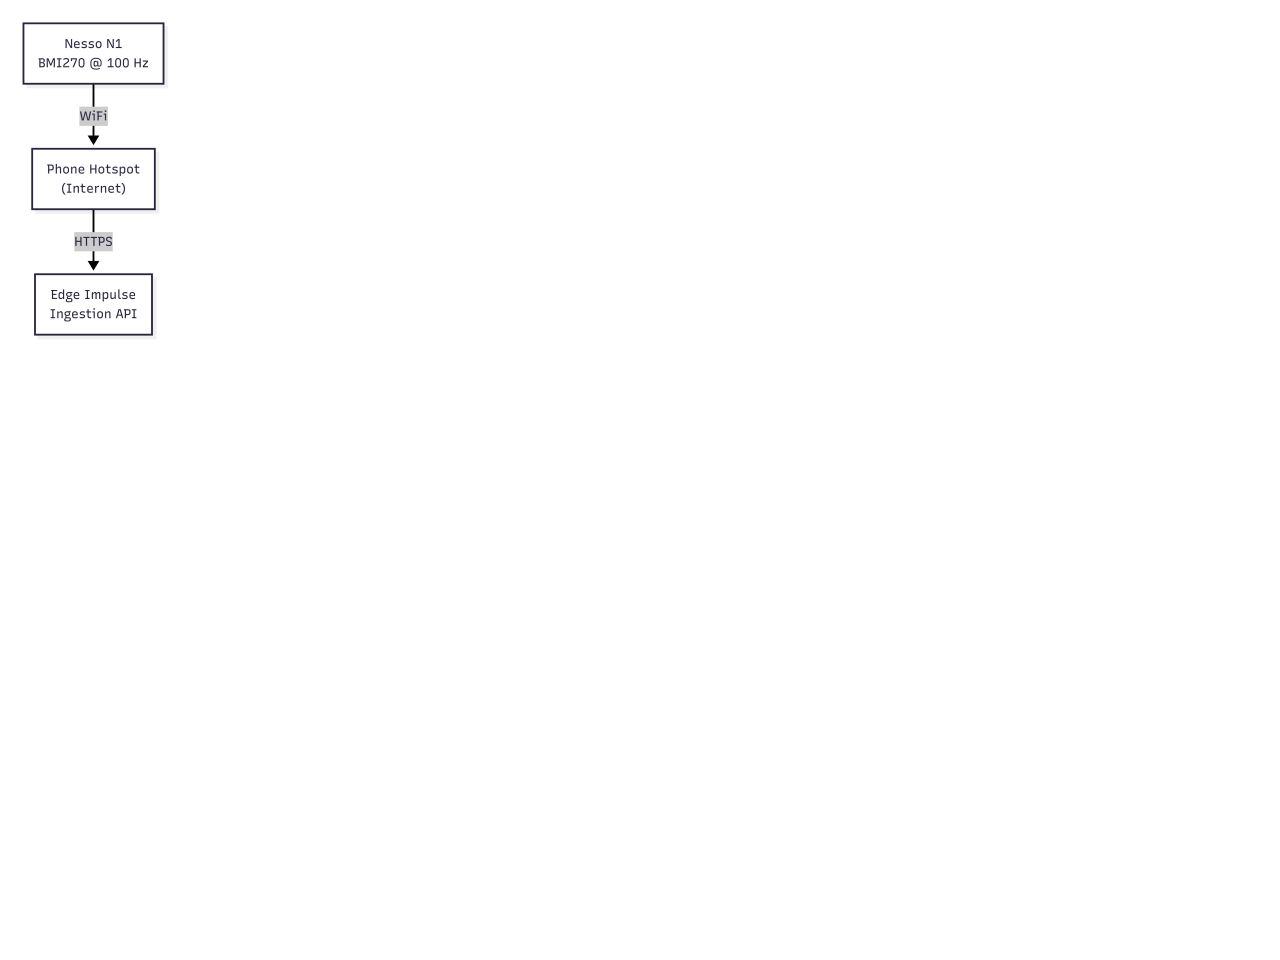
The data collection path: the Nesso N1 samples the BMI270 at 100 Hz and streams two-second batches over WiFi through the rider's phone to the Edge Impulse ingestion API.
interval_ms: 10 to match the sample rate, plus the 200 readings from the current batch. Each batch lands in your training data under whatever label was active when it was sent.
One nice detail worth knowing is that uploads run on a background task on the second core, using two buffers. While one buffer is being sent, the other keeps filling with fresh samples. Sampling and the buttons never stall waiting on the network.
Labeling as you ride
You label events with the buttons on the board. Button A is the only labeling button, and it does one thing: mark afall. Press it, and the label flips to fall, the screen turns red, and the buzzer beeps so you know it registered without looking down. After two seconds, the label drops back to normal_riding on its own. That two-second auto-revert is the same length as the upload batch, so every sample that goes up is cleanly one label instead of smeared across both.
This code below is the labeling logic. Press button A and it beeps, flags the current window as fall, and starts a timer. After 2 seconds, it flips back to normal_riding on its own, so one press tags only that fall window and everything else stays normal.
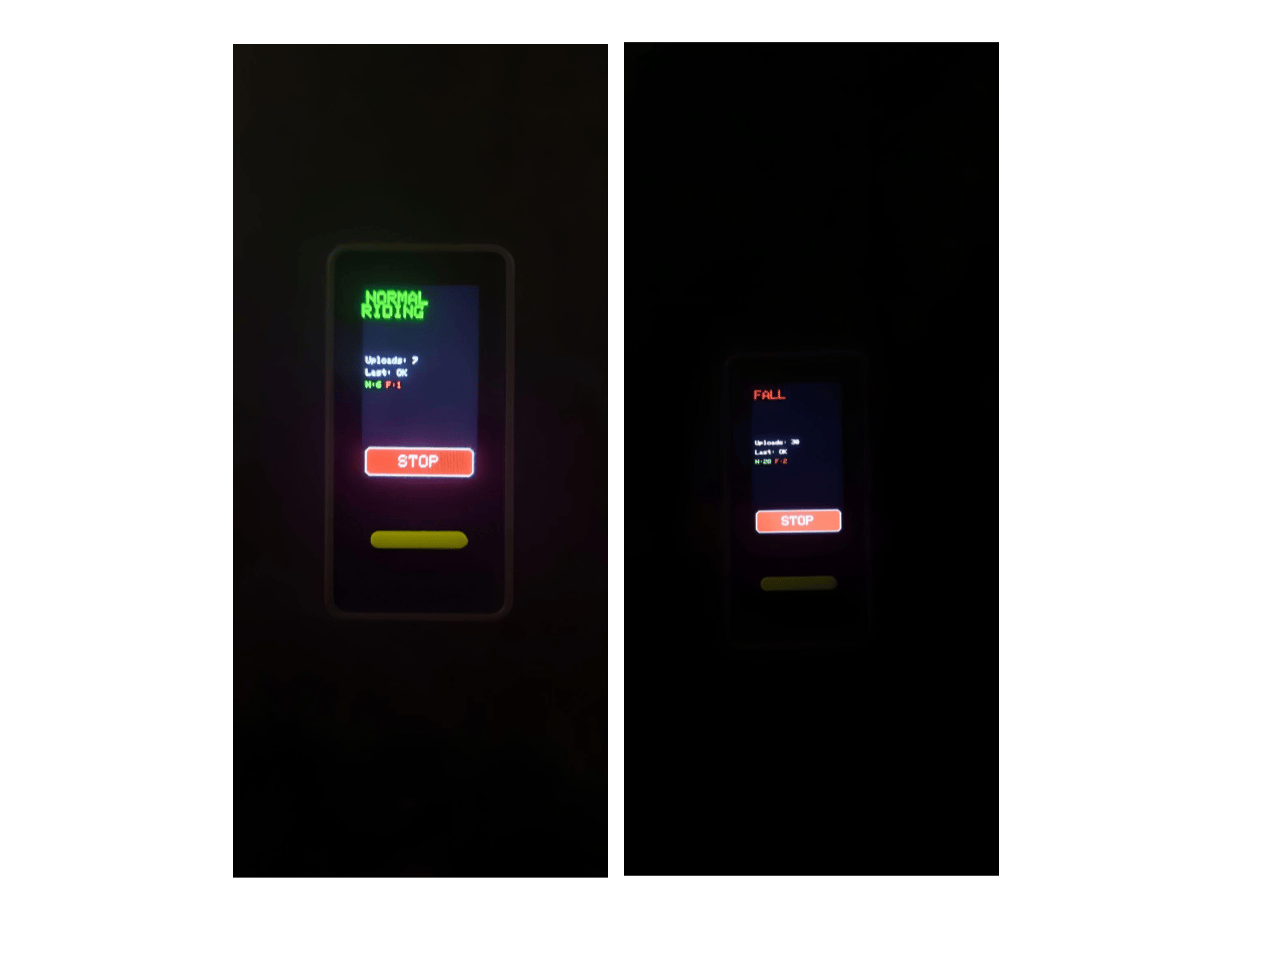
(Left) the board defaults to the normal_riding label at startup. (Right) pressing the button marks the window as a fall.
Reviewing the data in Studio
Everything the board sent lands in the Data acquisition section in Edge Impulse Studio. This is where you confirm the collection actually worked and where you spend time before training.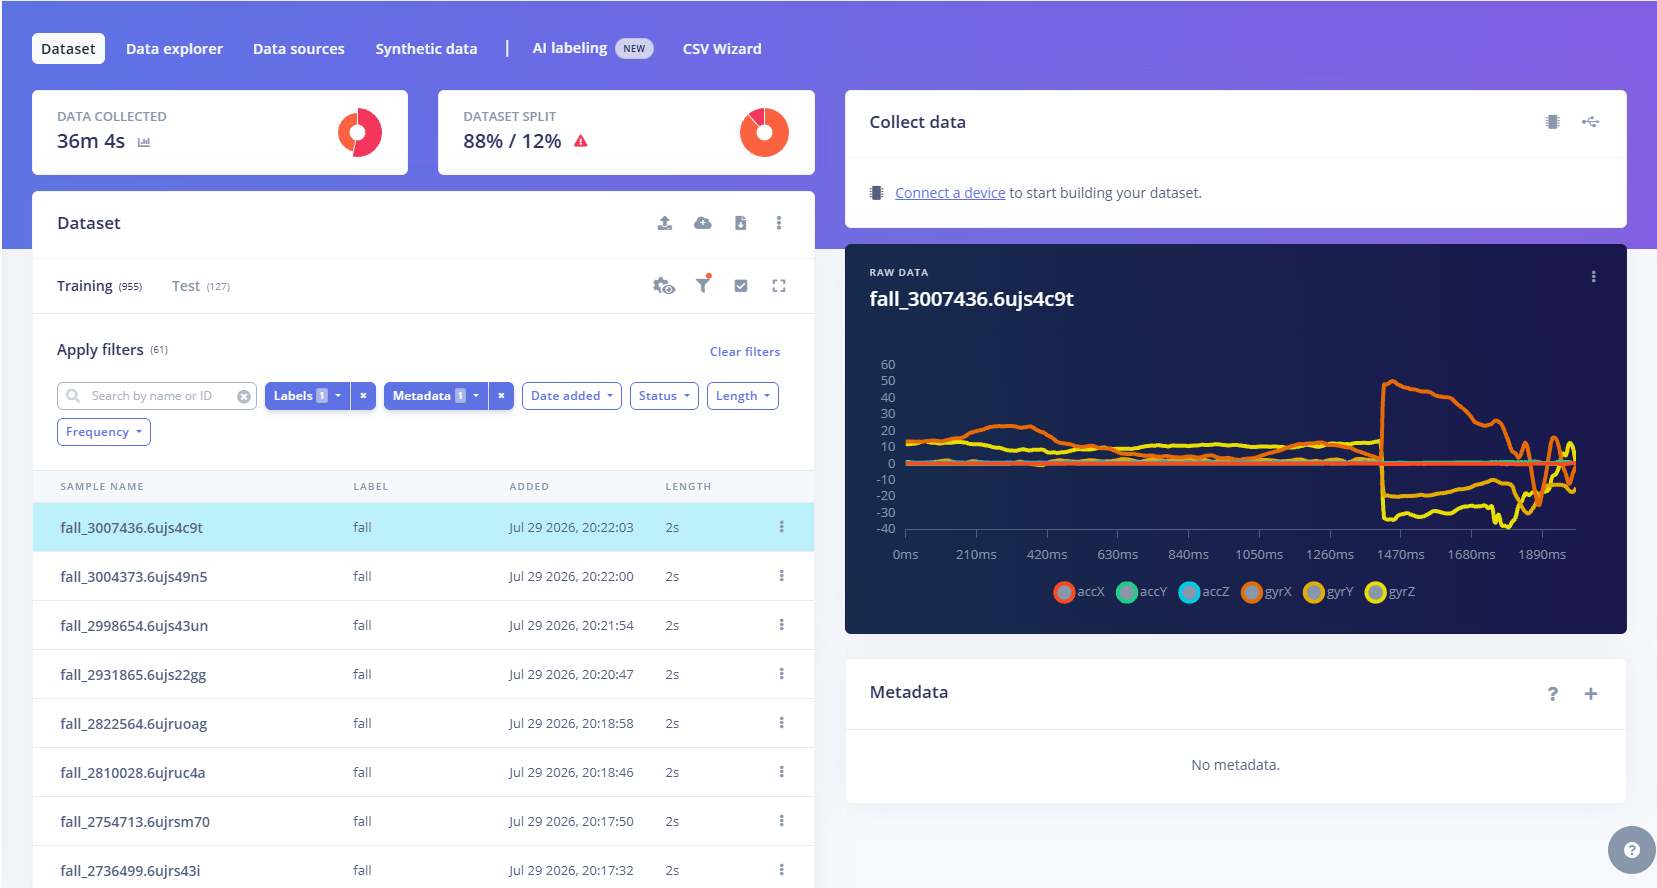
Data Acquisition Tab in the Edge Impulse Studio with a fall sample. The gyroscope ramps as the bike rotates over, then the accelerometer spikes at impact.
normal_riding: 555 samples recorded (about 18 minutes)fall: 77 samples recorded (about 2.5 minutes)
Not enough falls, so we made more
Look at that table again. 555 riding samples against 77 falls. That gap is the central problem with this dataset, and it is the kind of gap you cannot close by riding more. You will not crash a bike a few hundred times to fill a class, and even if you did, it would be dangerous and slow. Falls are rare by nature. That is the whole point of detecting them, and it is also why they are hard to collect. So we generated more fall samples synthetically, from the real ones we already had. The method is a transplant, not random noise. A real fall has a clear, repeatable signature. The gyroscope ramps up as the bike rotates over, then the accelerometer spikes at impact. We took the fall event from each real crash and pasted it onto a real normal-riding window. We uploaded these the same way the board does, a POST to the ingestion API with the fall label, so they land right in the Data acquisition tab next to the real samples. We added 450 of them, which brings the fall class from 77 to 527 and roughly levels it with normal riding.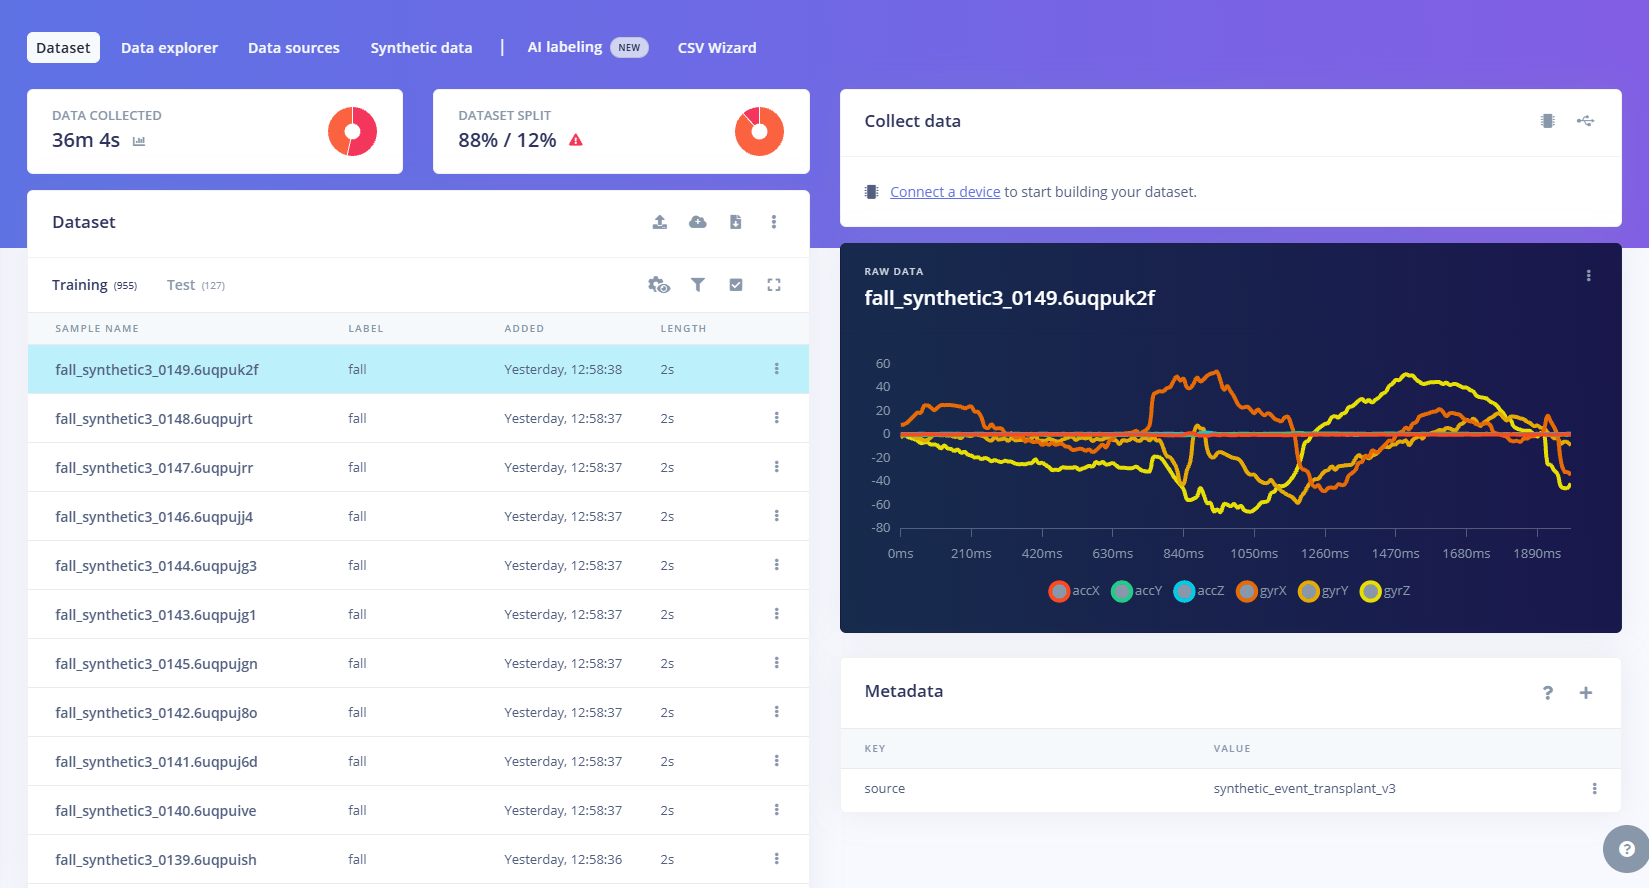
The synthetic fall samples in the Data acquisition tab, tagged and sitting alongside the real recordings.
Why quality and balance beat quantity
The synthetic step was restoring balance using the signal we already had from real falls. That distinction is the whole lesson of this stage. Three things matter more than raw sample count:-
Balance: A model trained on 555 riding samples and 77 falls learns that guessing
normal_ridingis almost always safe. It can score 88% by never predicting a fall at all, which is useless for a fall detector. This is exactly what the synthetic falls buy, and it is why we grew the rare class instead of the easy one. - Clean labels: One fall sample that is really a curb bump does more damage than ten good samples do. The model cannot tell a wrong label from a hard example. It simply learns from both. That’s why we labeled live and reviewed the traces in Studio. It’s also why the synthetic falls are built only from confirmed real falls, so we’re amplifying clean signal, not noise.
- Consistent capture: The board has to be mounted the same way every time, rigid to the frame. If it flops around, the IMU records the mount slipping instead of the bike moving, and the same event looks different from one ride to the next. A rigid, repeatable mount is worth more than a looser setup with twice the samples.
Training the fall detection model in Edge Impulse
With the data in place, training is three blocks in sequence. A processing block turns raw motion into features. A learning block classifies those features. Then you run the training. Edge Impulse calls the whole chain an impulse.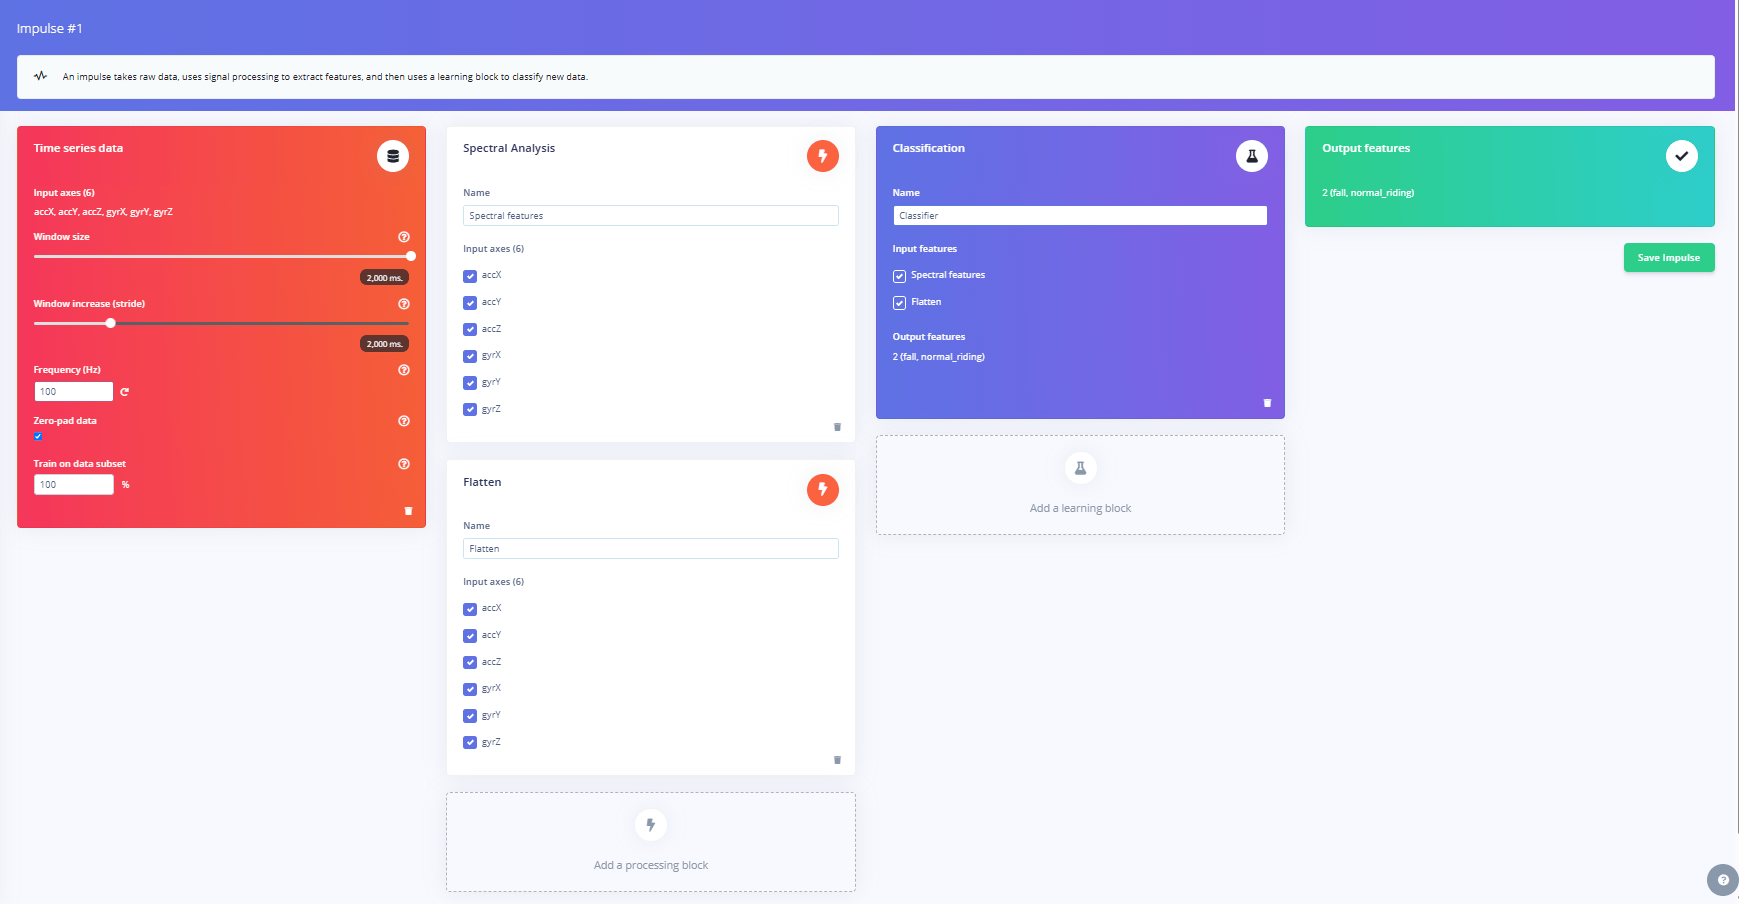
The impulse. Time series input, Spectral Analysis plus Flatten, into Classification.
The Impulse
The input is the window from the last section: 2 seconds, 100 Hz, six axes, zero-padded if a sample runs short. From there, the flow is short. The processing blocks compute features. The learning block trains on them. You generate features once, then train. That is the loop. Before training, split the data 80/20, stratified by label, so each class keeps its proportion. Every result below comes from that held-out test set, which the model never sees during training.Choosing the processing block for IMU data
Spectral Analysis is the default for motion data, and it earns it. It pulls the frequency and power content out of each axis, which is what separates steady riding from the tumble of a crash. Studio’s autotune sets the parameters: a high-pass filter at 7.6 Hz, FFT length 256, log spectrum. The high-pass filter is the key one. It removes the constant pull of gravity, so the block sees the actual motion rather than a fixed baseline. But a fall is not only a frequency pattern. It is also a hard, one-off impact. Frequency features smear that spike across bins and dull it. So we ran a Flatten block alongside it, which computes basic statistics per axis. The max value captures the single hardest spike in the impact, and the RMS captures the overall strength of the shaking over the entire window. (RMS, root mean square, is basically a measure of average intensity, so a violent crash scores high and smooth cruising scores low.) The classifier sees both blocks together, Spectral Analysis and Flatten, so it reads both the shape of the motion and the size of the impact at the same time.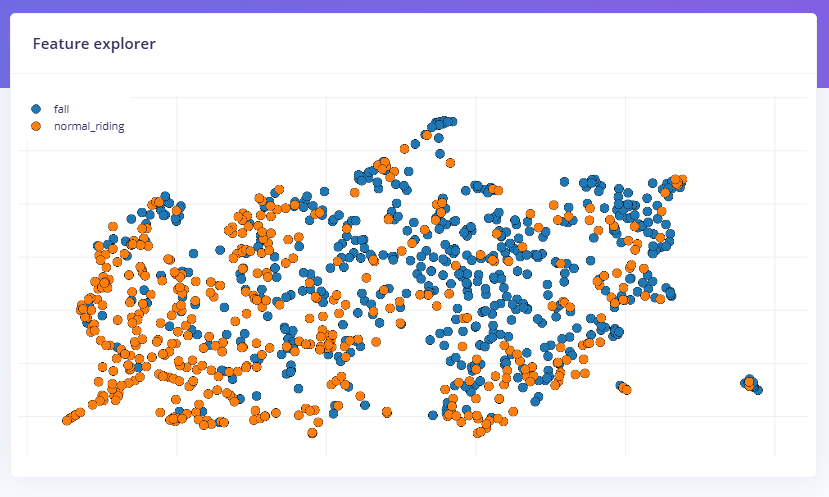
Feature explorer. Fall separates from the bulk of riding, with overlap where a hard bump briefly looks like an impact.
Training and reading the results
The classifier is deliberately small: Dense 32, Dropout 0.1, Dense 16. 150 cycles, learning rate 0.0007, class weights on to keep the model honest about the rarer class, int8 output for the board.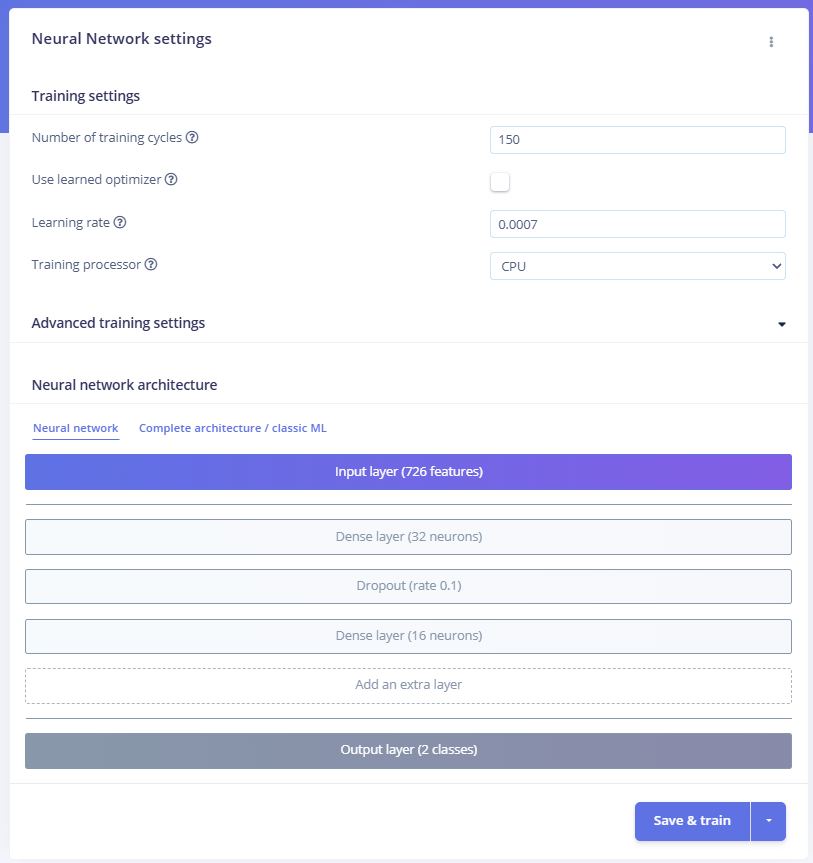
Small network, class weighting on, int8 output.
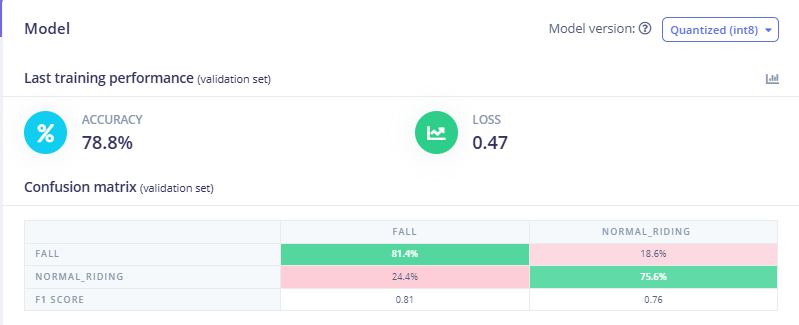
Classify all on the held-out test set. Full matrix, no cherry-picking.
Deploying the ML model to the Arduino Nesso N1
Training in the browser is the easy part. Now the model has to leave the cloud and run on the board itself, where it will do inference on live IMU data with no internet in the loop. Edge Impulse packages the whole thing, signal processing and classifier both, into an Arduino library you drop straight into a sketch.Deploy as an Arduino library
Go to the Deployment tab and pickArduino library. Select int8 quantization with the EON Compiler, which cuts RAM and flash for the same model. Then build to get a .zip.
The classifier block needs about 2 KB of RAM and 37 KB of flash. On a board with 512 KB of SRAM and 16 MB of flash, that leaves almost all of it free for the BLE stack and your own logic.
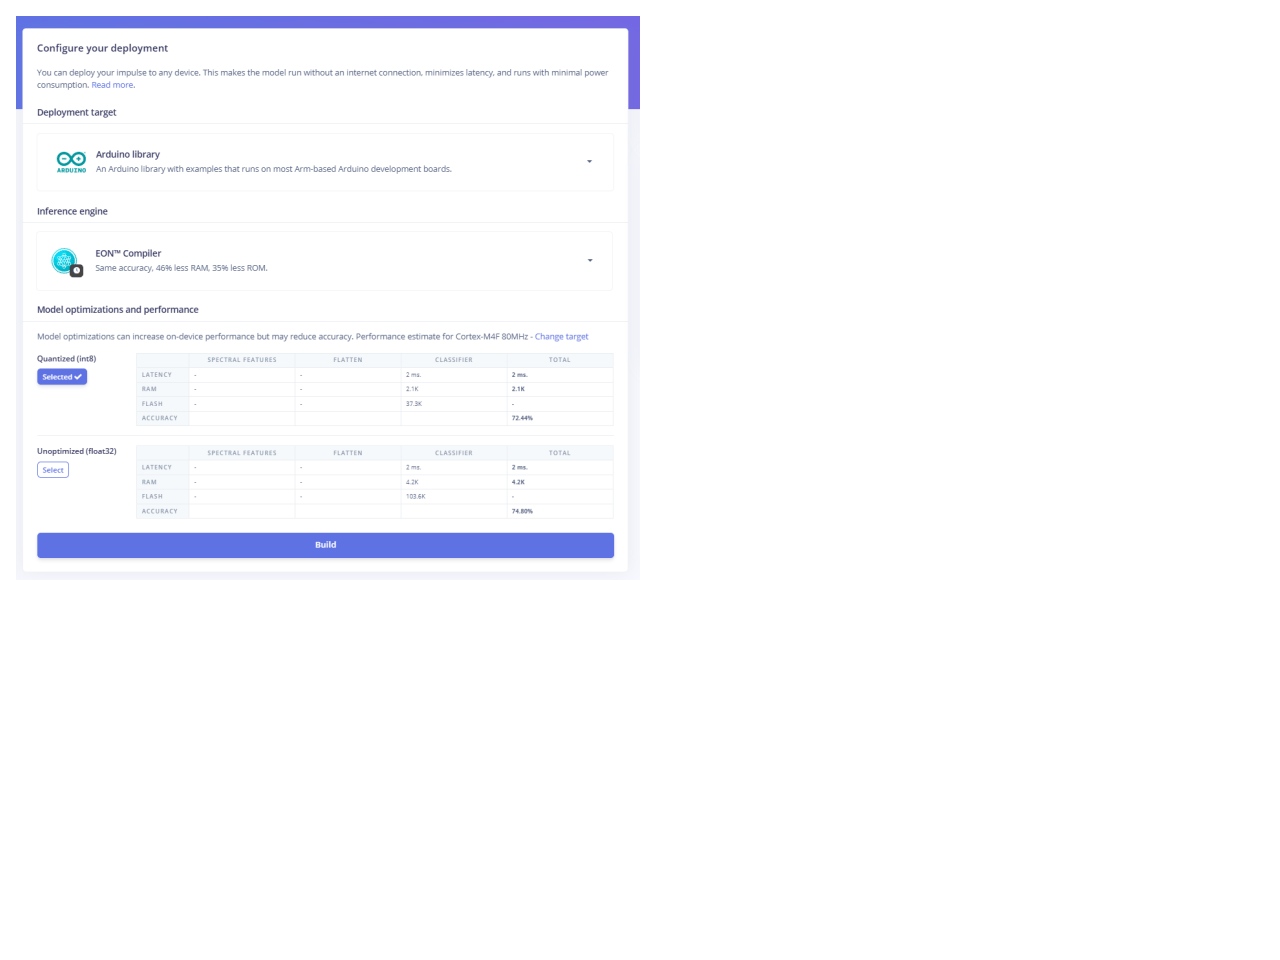
Deployment. Arduino library, int8, EON Compiler, ready to build.
bike-fall-detection, which makes the include bike-fall-detection_inferencing.h. Swap in whatever you named yours.
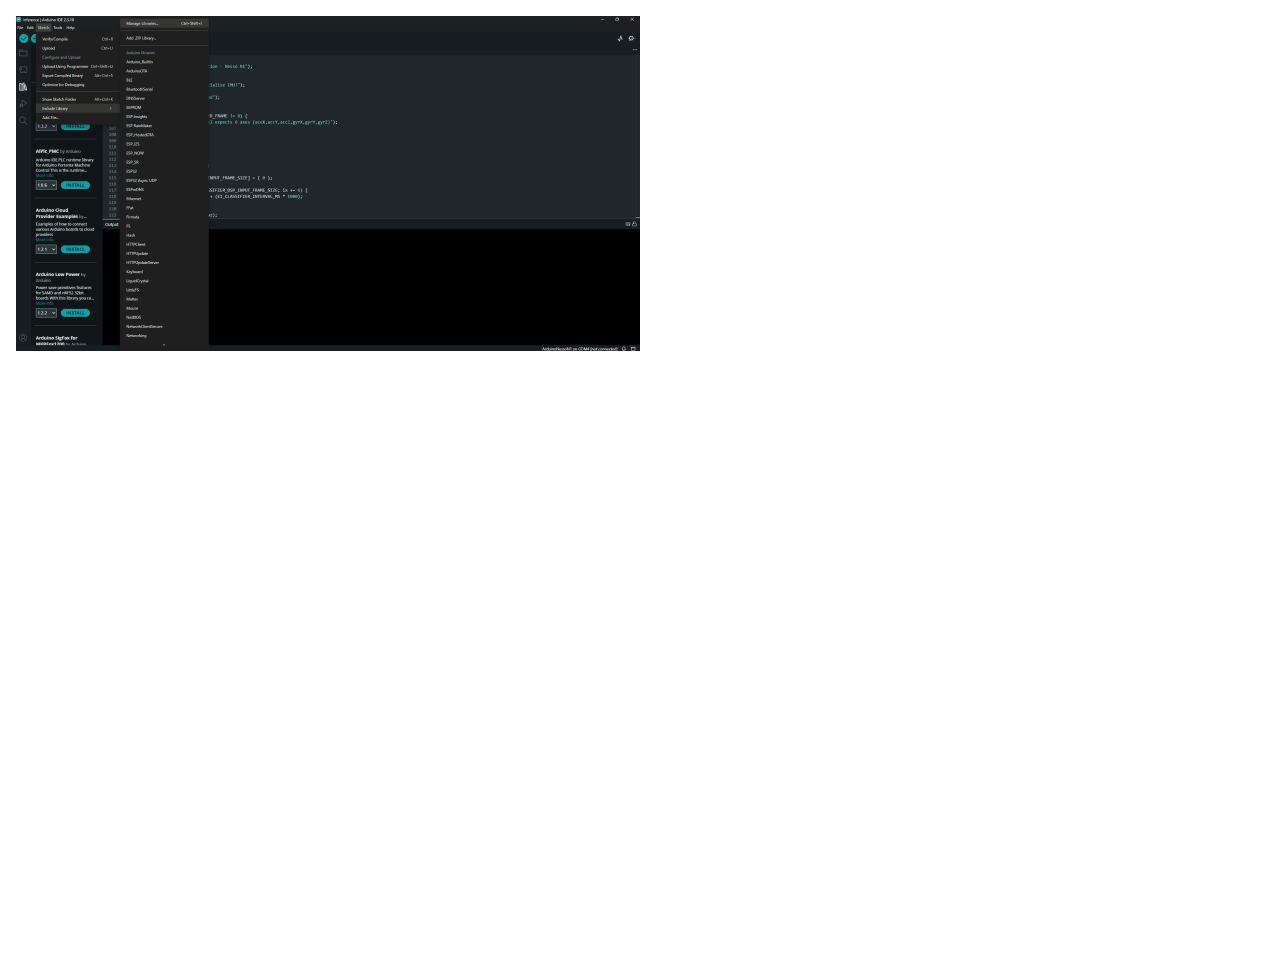
To add the library, go to Sketch → Include Library → Add .ZIP Library, then select the .zip you downloaded from Edge Impulse.
Flash the Arduino and verify
The sketch reads the BMI270, buffers one 2-second window, and callsrun_classifier on it. One unit detail decides whether it works at all. Match the inference input to how the data was collected. The accelerometer was recorded in raw G, so it goes into the buffer as raw G, with no unit conversion. The gyroscope was recorded in deg/s and passes through the same way.
Test across each motion class
Mount the board and ride. normal_riding should hold through cruising, corners, and bumps. Then stage a fall to the side and watch the fall score jump. Test the conditions you will actually meet. This includes smooth road, rough road, hard braking, curbs, and real tip-overs. The bumps and curbs are the ones to scrutinize, since a sharp jolt is what most resembles an impact.Tune the confidence threshold
The sketch fires onfall_score > 0.5. You can raise that to cut false positives, at the cost of missing marginal falls. But the threshold alone is blunt here, because single-window precision is low. The real false-positive control is debounce, which is the next section.
Triggering the SMS alert via a paired smartphone
Inference on the board only helps if it reaches a person. The Nesso N1 has no cell radio, so it hands off to a paired phone over BLE, and the phone sends the SMS.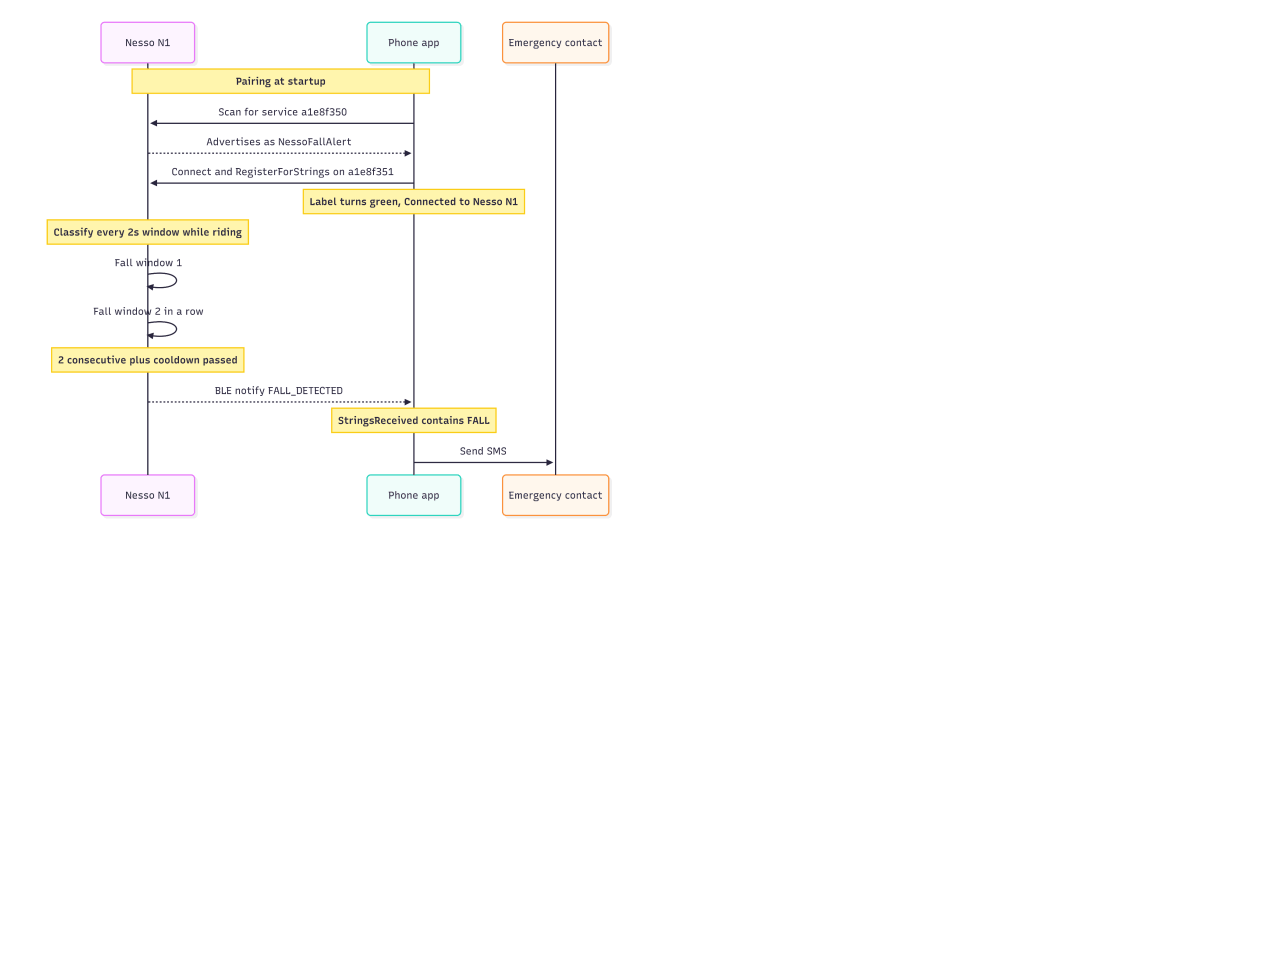
Triggering the SMS alert after a fall detection
The alert flow
The board confirms a fall, sets a BLE characteristic toFALL_DETECTED, and notifies. The paired phone, subscribed to that characteristic, receives the string, checks that it contains FALL, and texts the emergency contact. The companion app is a small MIT App Inventor project using the BluetoothLE extension. About six blocks do the whole job.
BLE setup
The board is the GATT server. It advertises asNessoFallAlert with one service and one notify characteristic:
RegisterForStrings on the characteristic. When the board notifies, StringsReceived fires.
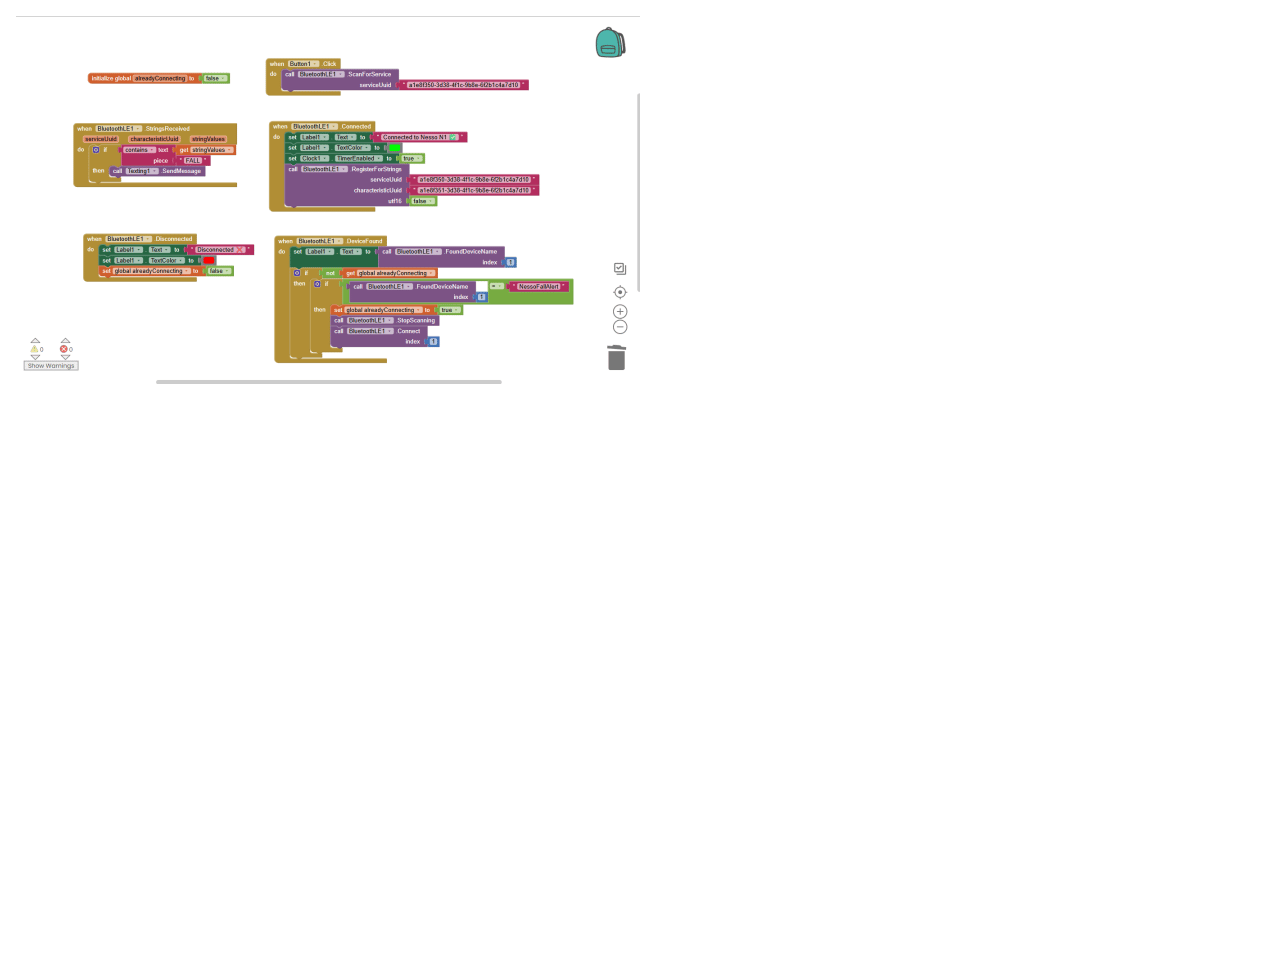
The complete App Inventor block logic for the companion app. It scans for the Nesso N1, connects, listens for the fall alert over BLE, and sends the SMS the moment a message containing FALL arrives.
SMS, kept lightweight
The phone sends the message with App Inventor’s Texting component, a single SendMessage block. No server, no cloud, no internet in the path. The phone already in the rider’s pocket does the delivery, which keeps the safety-critical link off the network. The app matches FALL as a substring, and the board sendsFALL_DETECTED, so the trigger holds even if you extend the message text later.
Debounce, so alerts fire only when they should
This is where the low single-window precision gets handled. Three guards, all on the board:- Two consecutive fall windows: One window at around 40% precision is close to a coin flip. Two in a row are far more reliable, and a real fall easily spans two 2-second windows.
- A 30-second cooldown after an alert, so one crash does not trigger a burst of texts.
- A 0.5 confidence threshold before a window counts at all.