

Introduction
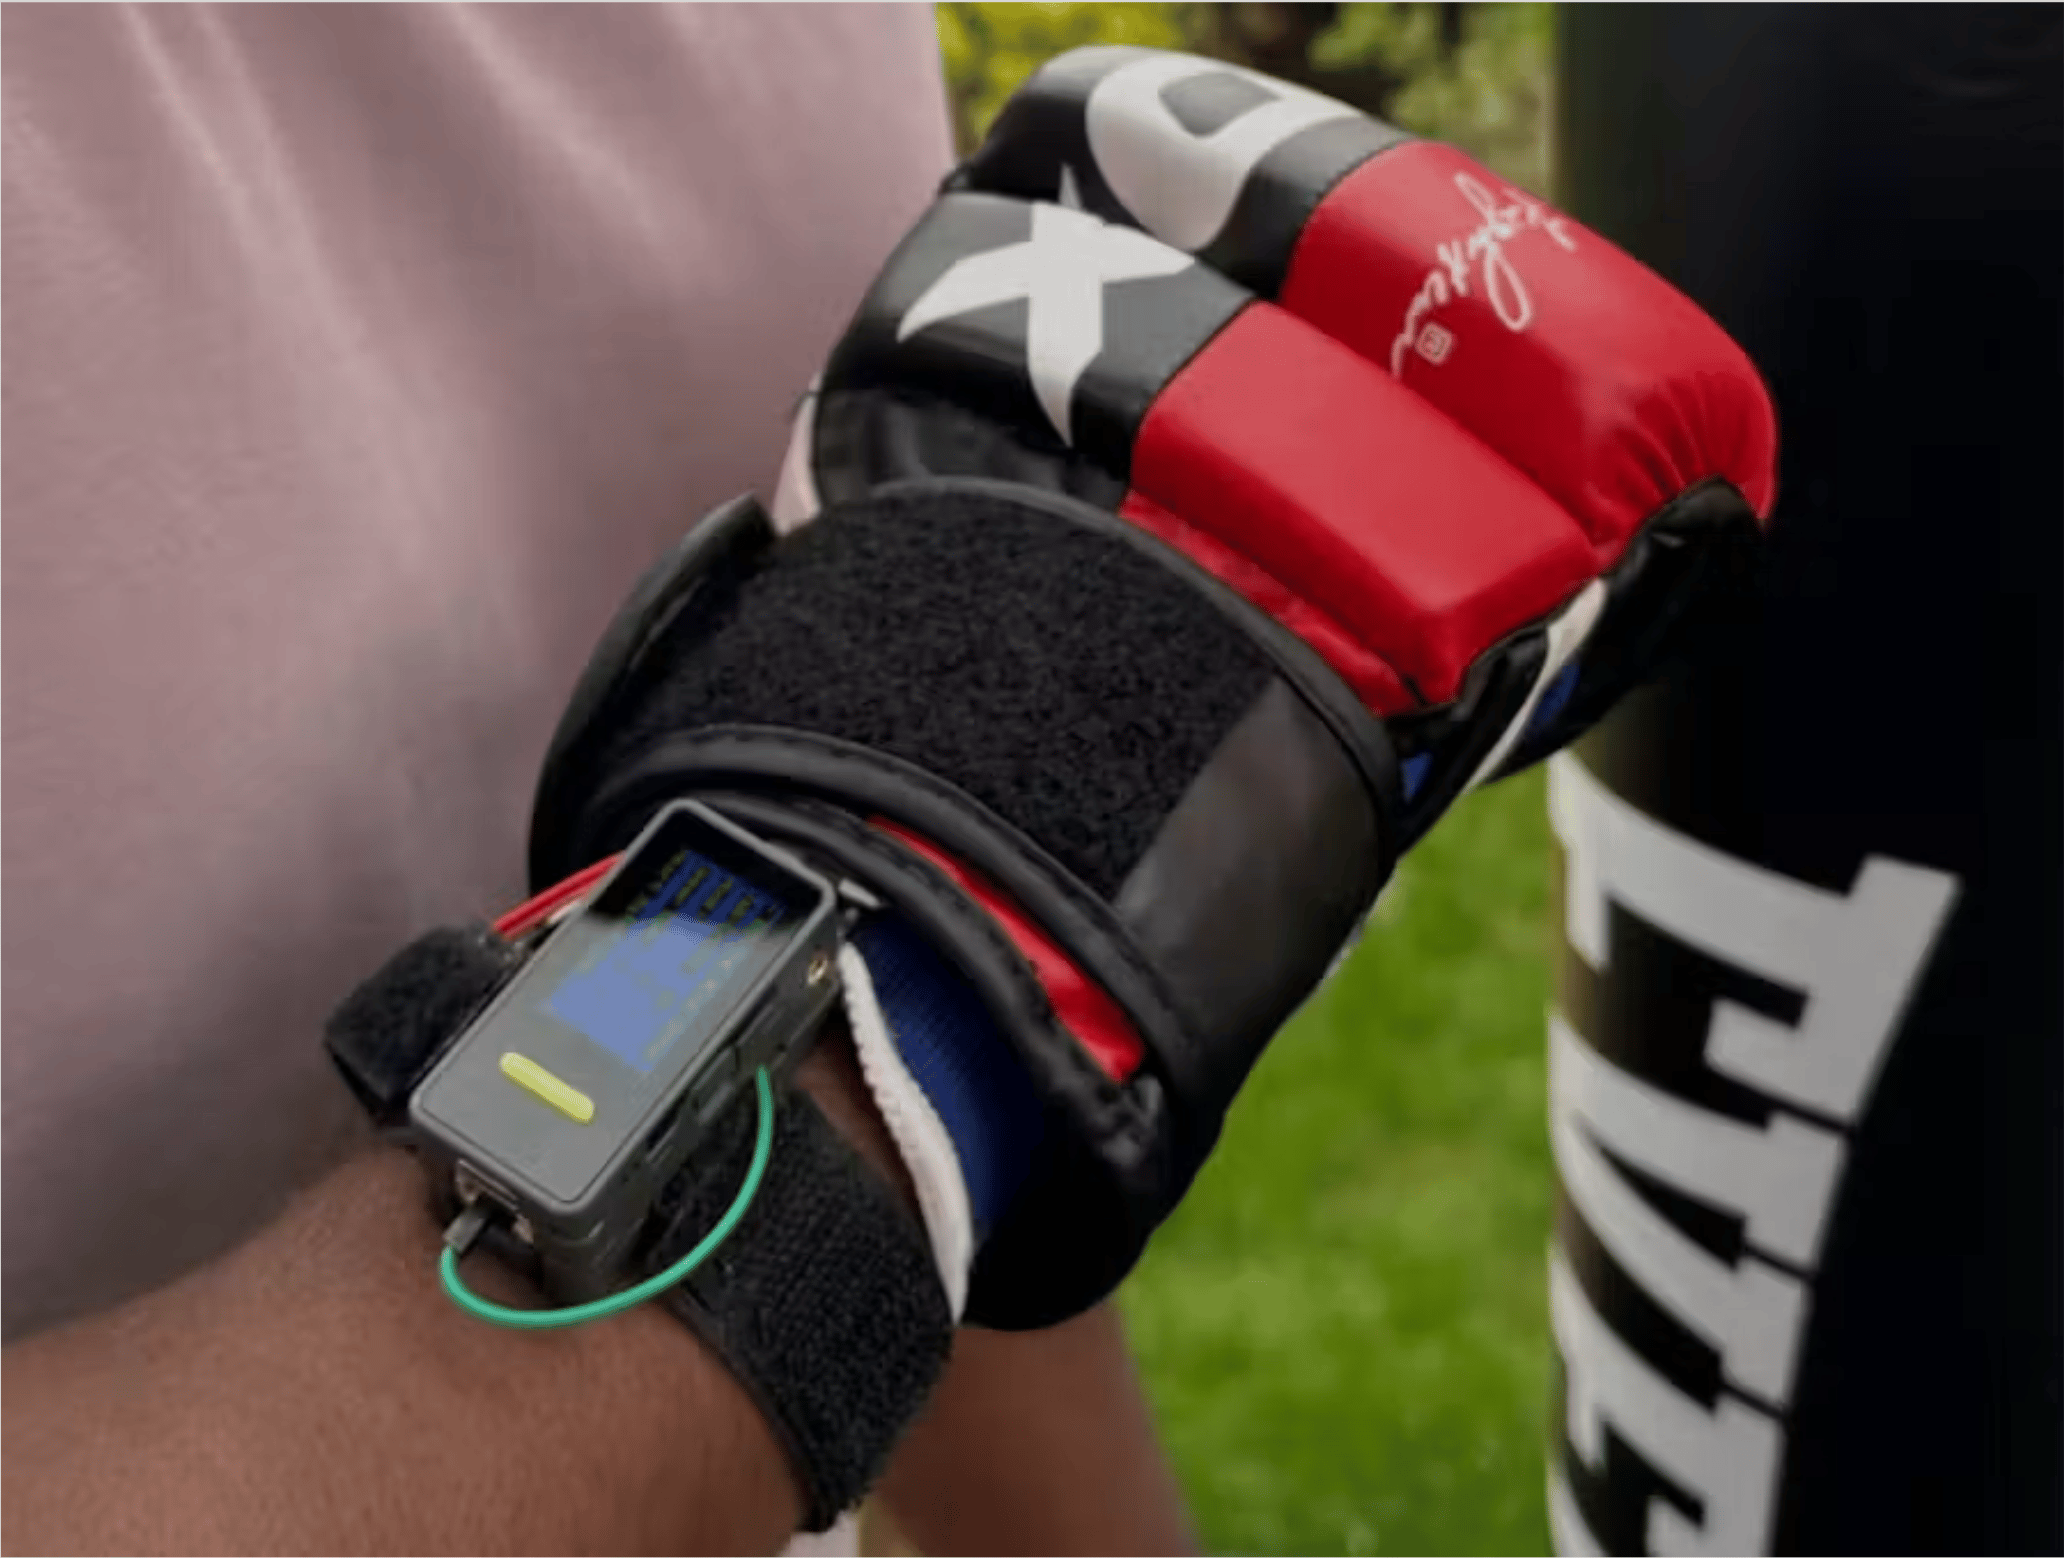
Boxers and fitness enthusiasts rarely have objective training metrics during practice. Coaches typically rely on visual observation to judge a session, which makes it difficult to quantify punch frequency, movement patterns, and overall workout intensity. Subjective feedback has real limits. By the time a coach calls out a technical correction, the moment has passed. And most athletes have no way to answer basic questions about their own training. e.g. how many combinations did I throw last round? Is my pace dropping in round three? Which punch am I actually dropping? For athletes building their own training tech, this smart boxing band gives you a DIY edge. It sits lightly on your wrist, tracks every punch you throw, and turns raw motion into live analytics you can actually use. The band’s display shifts color with your heartbeat, so you can see your intensity level without breaking rhythm. It’s a compact, athlete‑friendly tool that helps you understand your technique, pace your rounds, and push harder with real‑time feedback—perfect for anyone who wants to blend hands‑on making with serious boxing performance. This project addresses that gap by combining edge AI with wearable sensing to deliver training analytics directly on the athlete’s wrist. The wearable classifies boxing punches in real time from onboard IMU data, with the model trained and deployed entirely through Edge Impulse in the Arduino Nesso N1. Everything runs on the device, and there is no dashboard dependency, and no internet connection required. You get feedback while you are still in the ring.How it works
Motion data is read from the onboard 6-axis IMU (inertial measurement unit) at a fixed sample rate, segmented into short windows, and uploaded to Edge Impulse for training. The trained model is then deployed back to the Nesso N1 as an Arduino library, so inference runs on the microcontroller in real-time, based on a ESP32-C6 processor.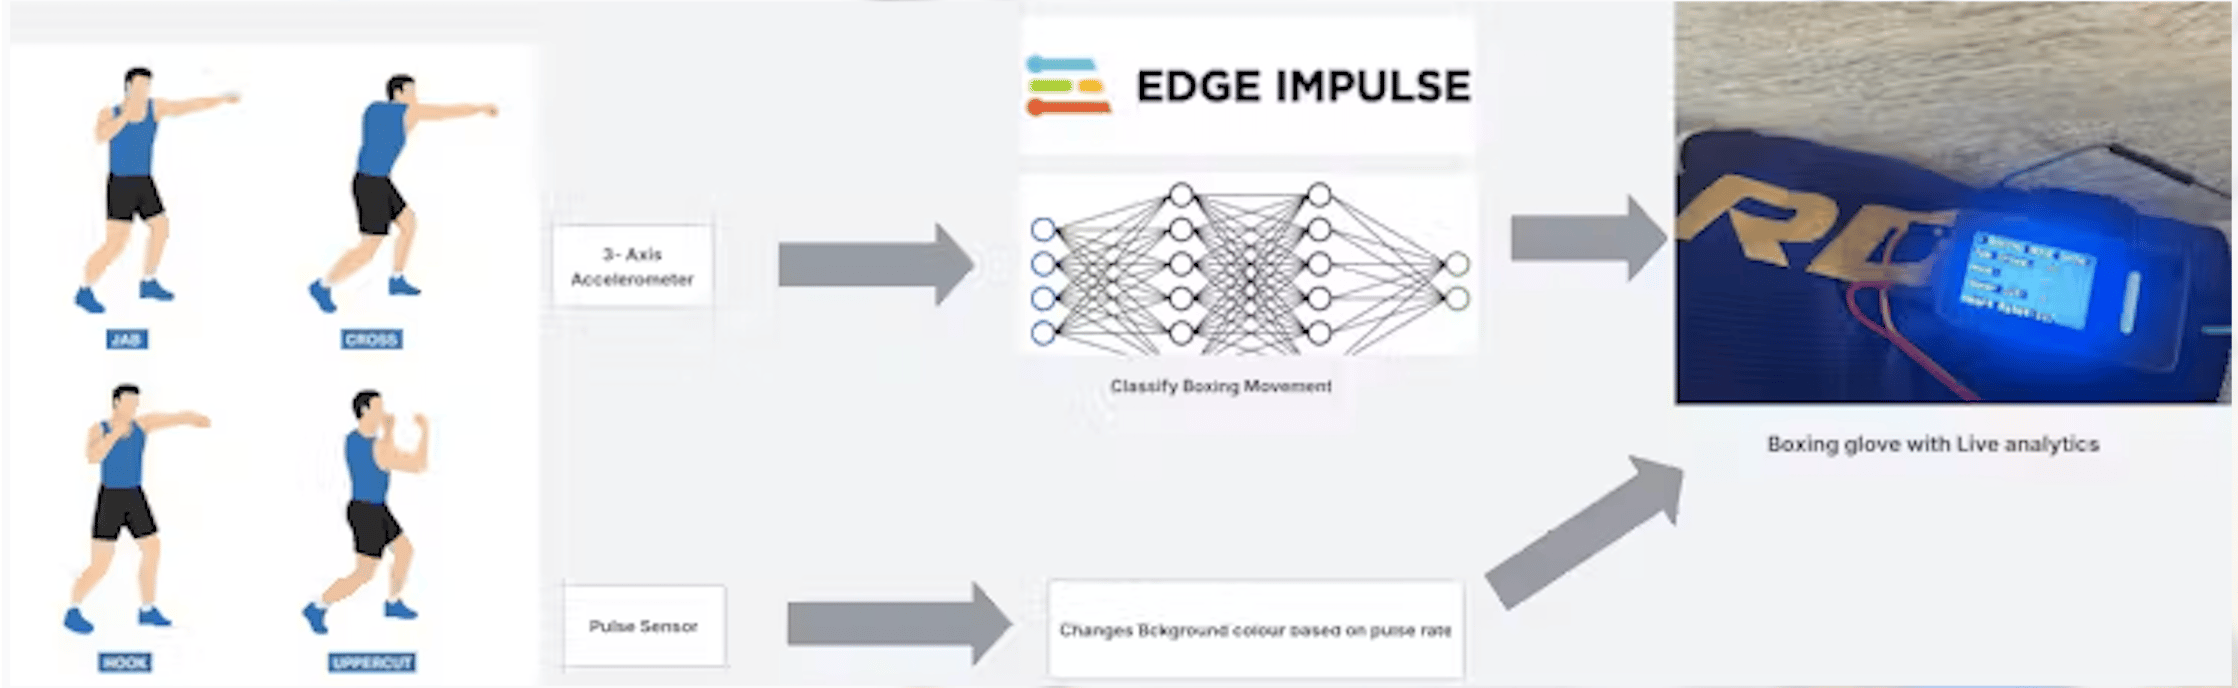
What it does
- Real-time punch classification: identifies punch types as you throw them (
Idle,JabCross,Hook,UpperCut) - On-device TinyML inference: no network dependency, no latency from a server round trip
- Punch counting and analytics: frequency, technique trends, and session summaries
- Heart-rate monitoring: continuous, with intensity shown visually on the display
- Visual training intensity feedback: colour-coded intensity, readable at a glance mid-round
- Fully offline operation: works in a gym, a ring, or anywhere without connectivity
Build the project
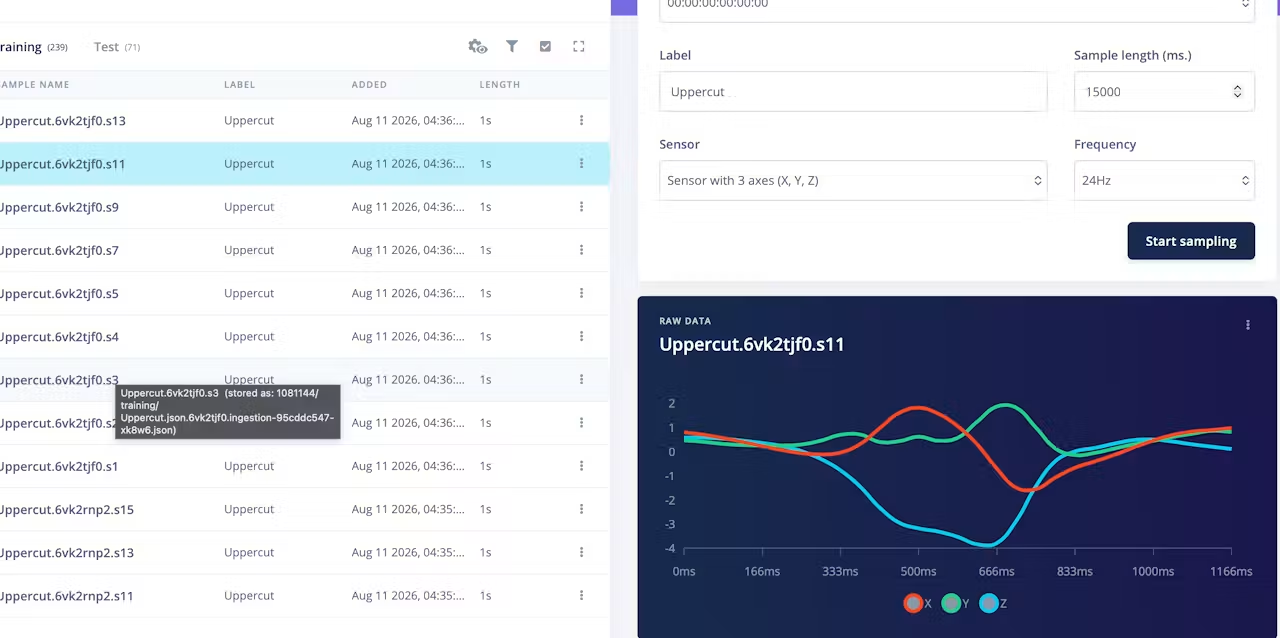
To build this project from scratch, follow these steps:Collect boxing‑movement data using the Arduino Nesso
For this project, I selected the Arduino Nesso because its built‑in battery makes it ideal for fully portable operation, and its compact form factor allows it to be worn comfortably as a band. The integrated touchscreen also provides a convenient way to display punch counts and other real‑time boxing analytics directly on the device. In addition to these advantages, the Arduino Nesso N1 offers the following specifications:- ESP32-C6 microcontroller Dual 32-bit RISC-V processors with up to 160 MHz HP core and 20 MHz LP core
- Wireless connectivity Wi-Fi® 6 (2.4 GHz), Bluetooth® 5.3, Thread® 1.4, LoRa® (850–960 MHz via SX1262), and Zigbee 3.0
- Integrated display 1.14” touch screen for direct interaction and feedback
- Onboard controls Two programmable buttons plus a power / reset / boot button
- Built-in sensors and outputs 6-axis IMU, IR transmitter, RGB LED, and passive buzzer
- Memory 16 MB NOR flash and 512 KB SRAM
- Expandable I/O Grove and Qwiic connectors compatible with Arduino Modulino nodes and M5Stack sensor-hat ecosystem
- Battery powered Built-in lithium polymer battery with nominal 5V input
- USB connectivity USB-C connector for power and programming
- Software support Compatible with Arduino IDE, MicroPython, UIFlow, and Arduino Cloud
- Ready-to-use hardware Pre-assembled device with display and enclosure for immediate prototyping
- Compact size 18 mm × 45 mm
Idle, Hook, Jab-Cross, UppeCut.
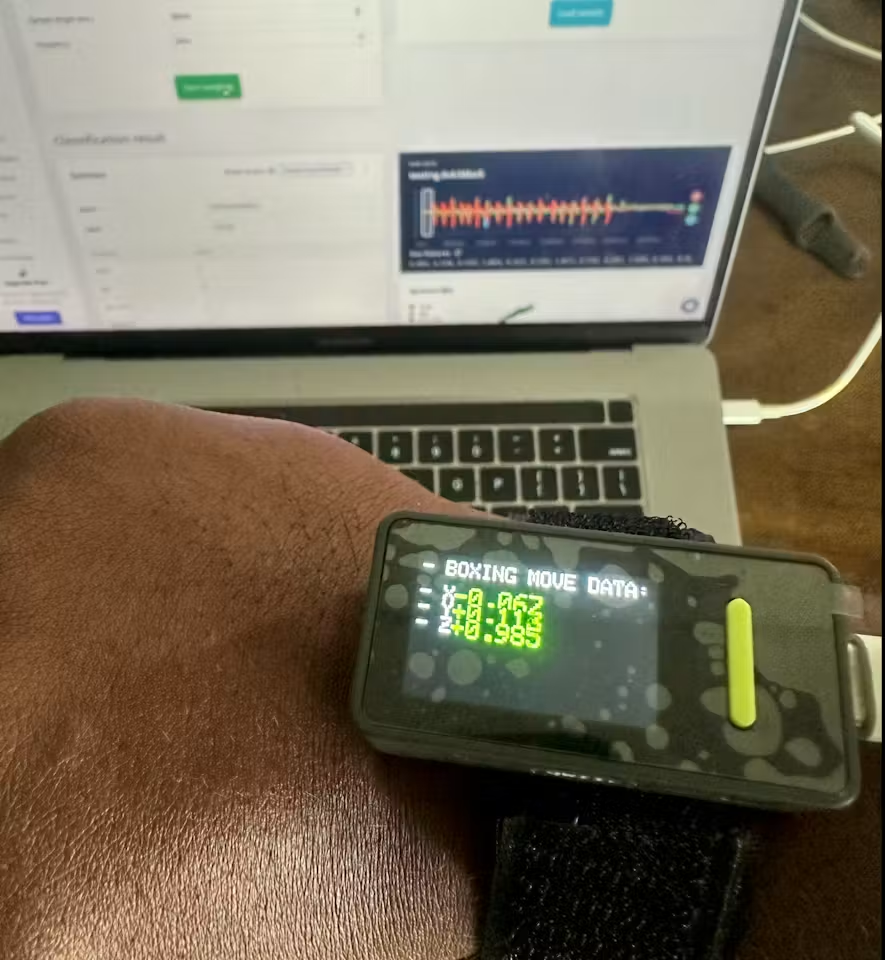
To acquire high‑quality datasets for various boxing movements, the Arduino Nesso N1 must stream raw sensor data continuously. Flash the Nesso_IMU.ino firmware onto the Nesso N1 to initialize the IMU, configure the sampling pipeline, and transmit 3‑axis accelerometer readings over the serial interface. These serialized motion frames are then ingested by Edge Impulse’s data forwarder, enabling precise capture, segmentation, and labeling of boxing‑move signals for subsequent model training.
Once the Arduino code is flashed then we need to connect the board to the Edge Impulse account. To connect the Arduino Nesso board to the EI account, please follow the steps mentioned below.
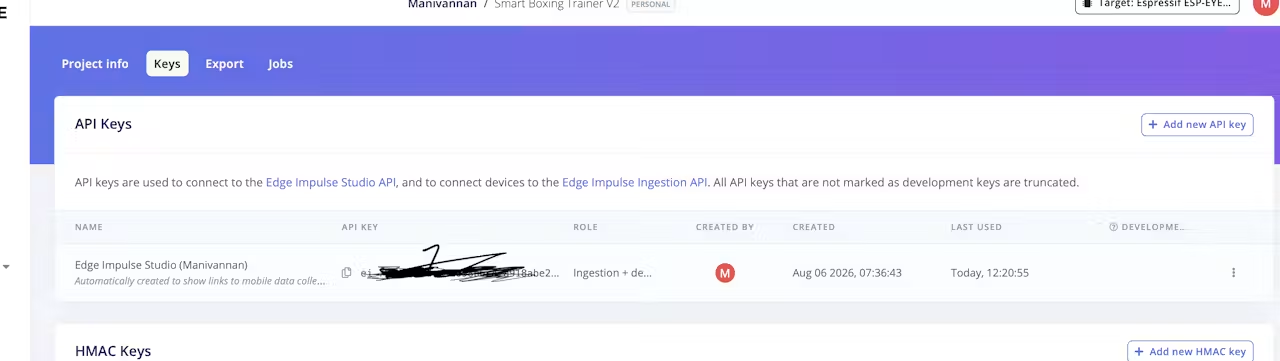
- Go to your Edge Impulse account, and find the API key for your account.
- After getting the right API key, open the command window/Terminal (MacOs) and type the following command (Replace the YOUR_API_KEY with the API key from Edge Impulse account):
Train a machine learning model in Edge Impulse
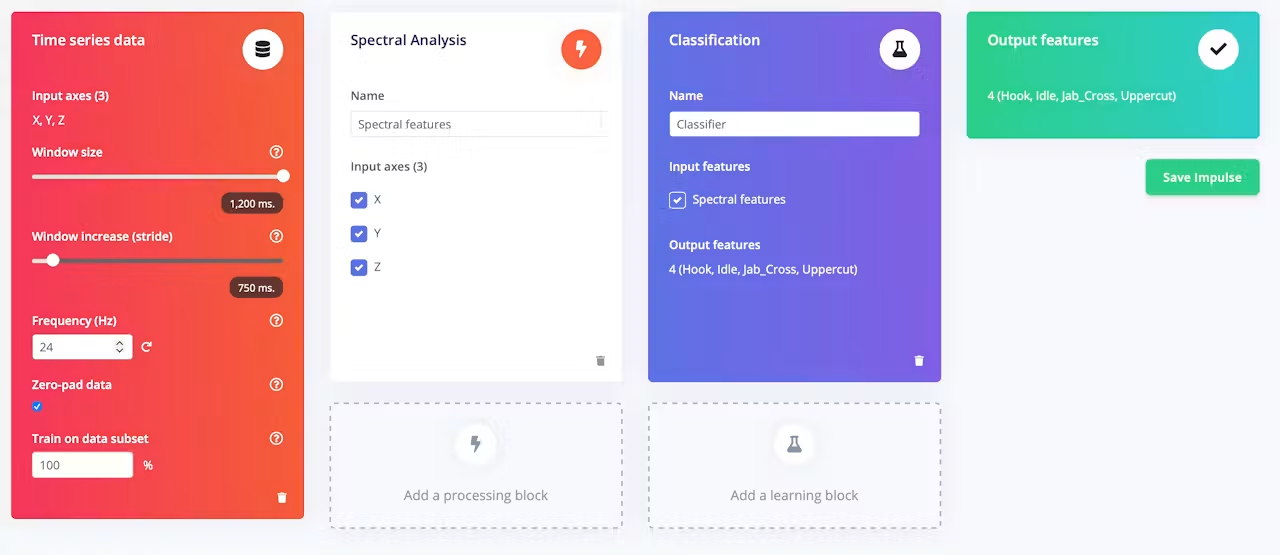
Time series data. I have selected the window size as 1200ms and stride as 750ms. Set the Preprocessing block as Spectral analysis and select Classification as the learning block.
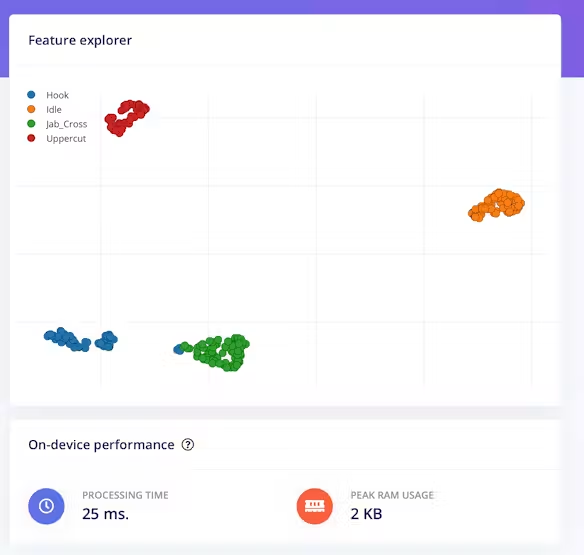
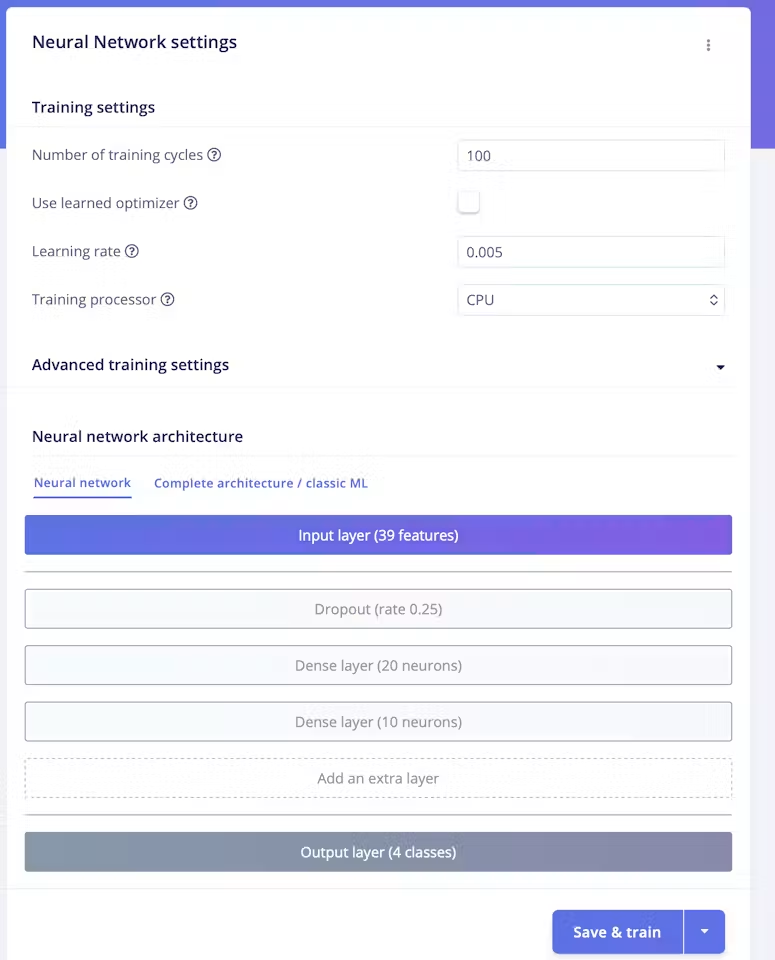
Deploy the trained model onto the Arduino Nesso N1
Once the model achieves a satisfactory performance level, we proceed to deploy it to the Arduino Nesso N1 using the generated Arduino library, enabling real‑time inference directly on the device. However, we won’t be deploying it directly to the Arduino Nesso N1 just yet, as we need to add more logic on top of the machine learning prediction.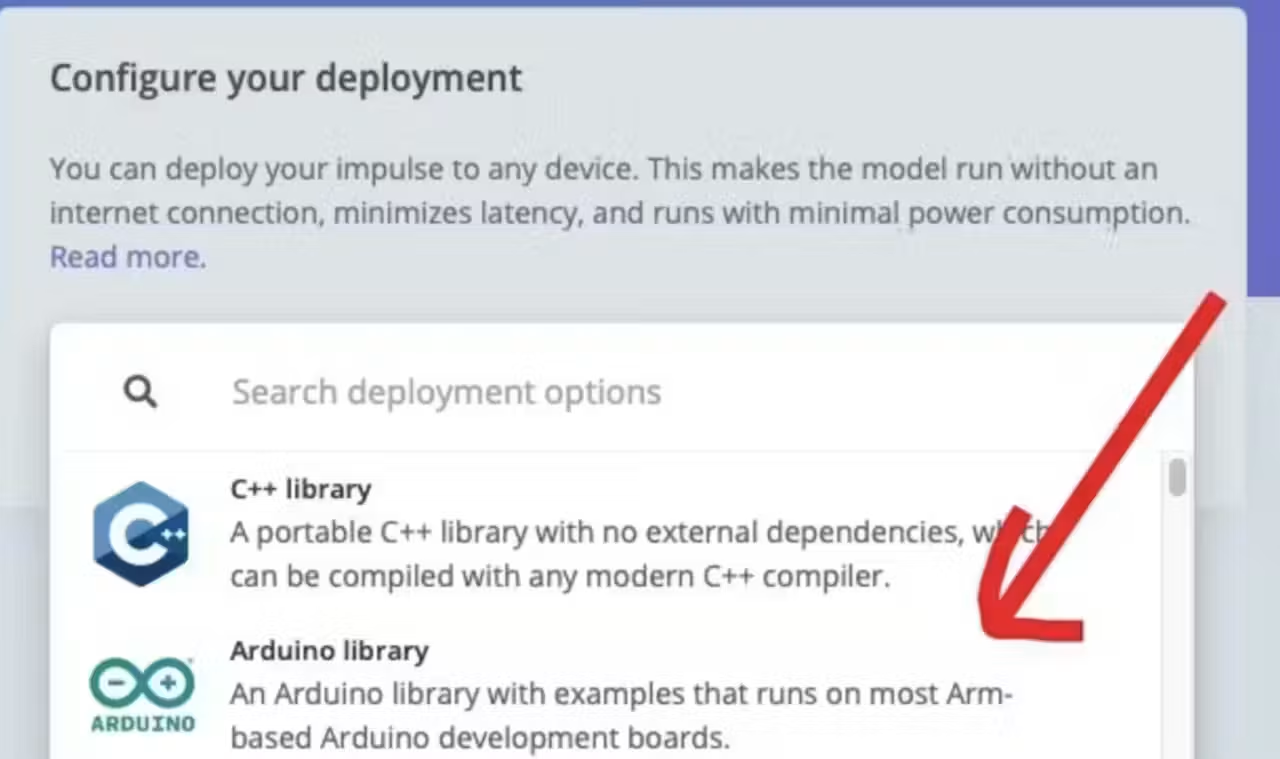
Importing library in Arduino IDE
Open your Arduino IDE, go to Sketch > Add File, and select the downloaded file.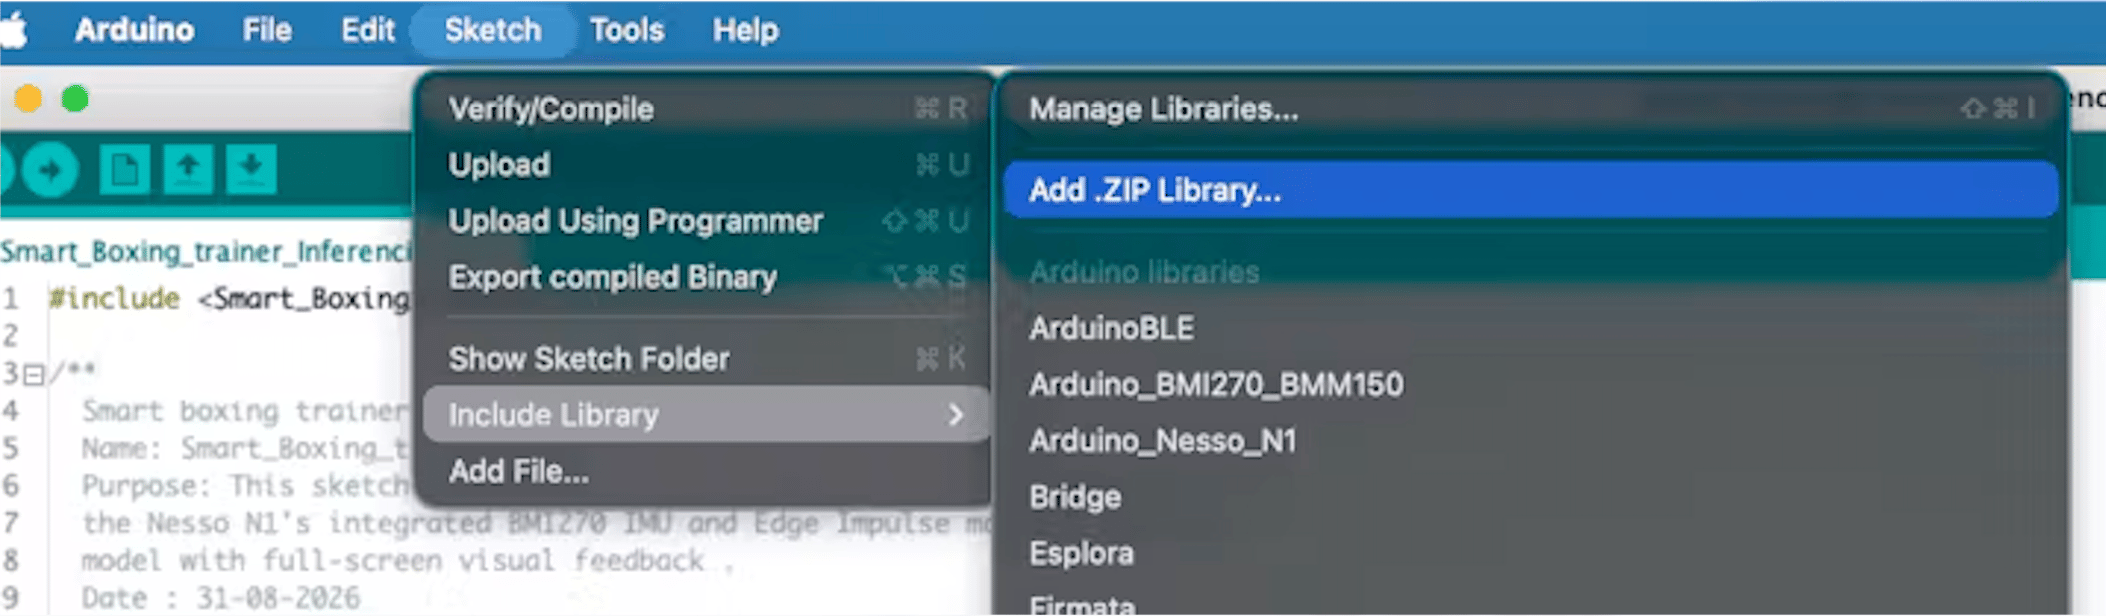
Integrate the pulse sensor with the inference output
To interface the Pulse Sensor with Arduino Nesso N1, ensure that the correspondingPulseSensor Playground library is installed in the Arduino IDE before proceeding with integration.
I have connected the Pulse sensor to the Arduino Nesso N1 as per this connection diagram.
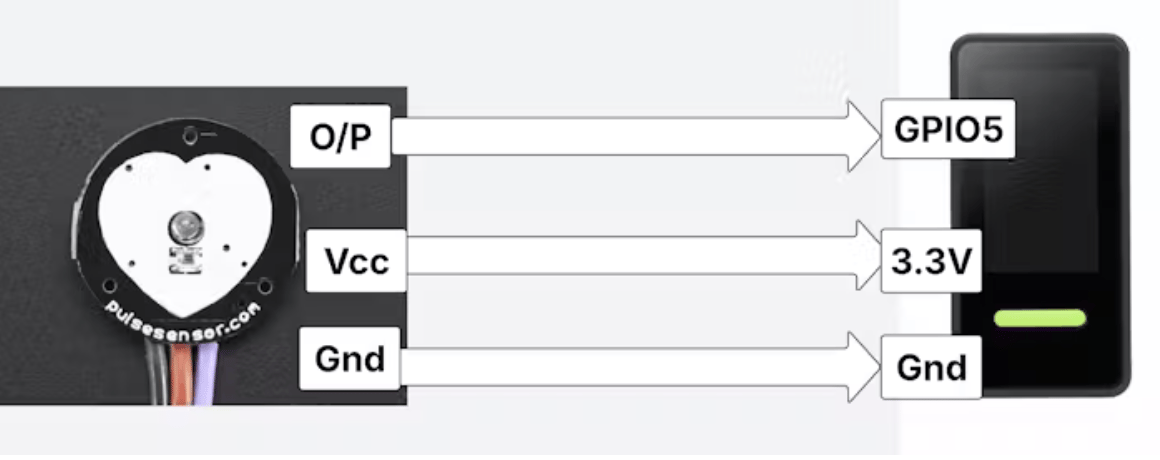
InputPin = 7; to InputPin = 5; so the library uses the correct ADC pin on the Arduino Nesso N1.
To capture accurate pulse readings, the sensor must be positioned on the tip of the forefinger. I used a Hook‑and‑Loop strap to secure the sensor firmly in place on the finger.
Run the application
The final step is to integrate the Pulse Sensor with the machine‑learning inference output. I’ve already combined the required logic into this .ino file, and you can proceed to flash it onto the Arduino Nesso N1. Now, let me walk you through the architectural flow of how this integrated code operates: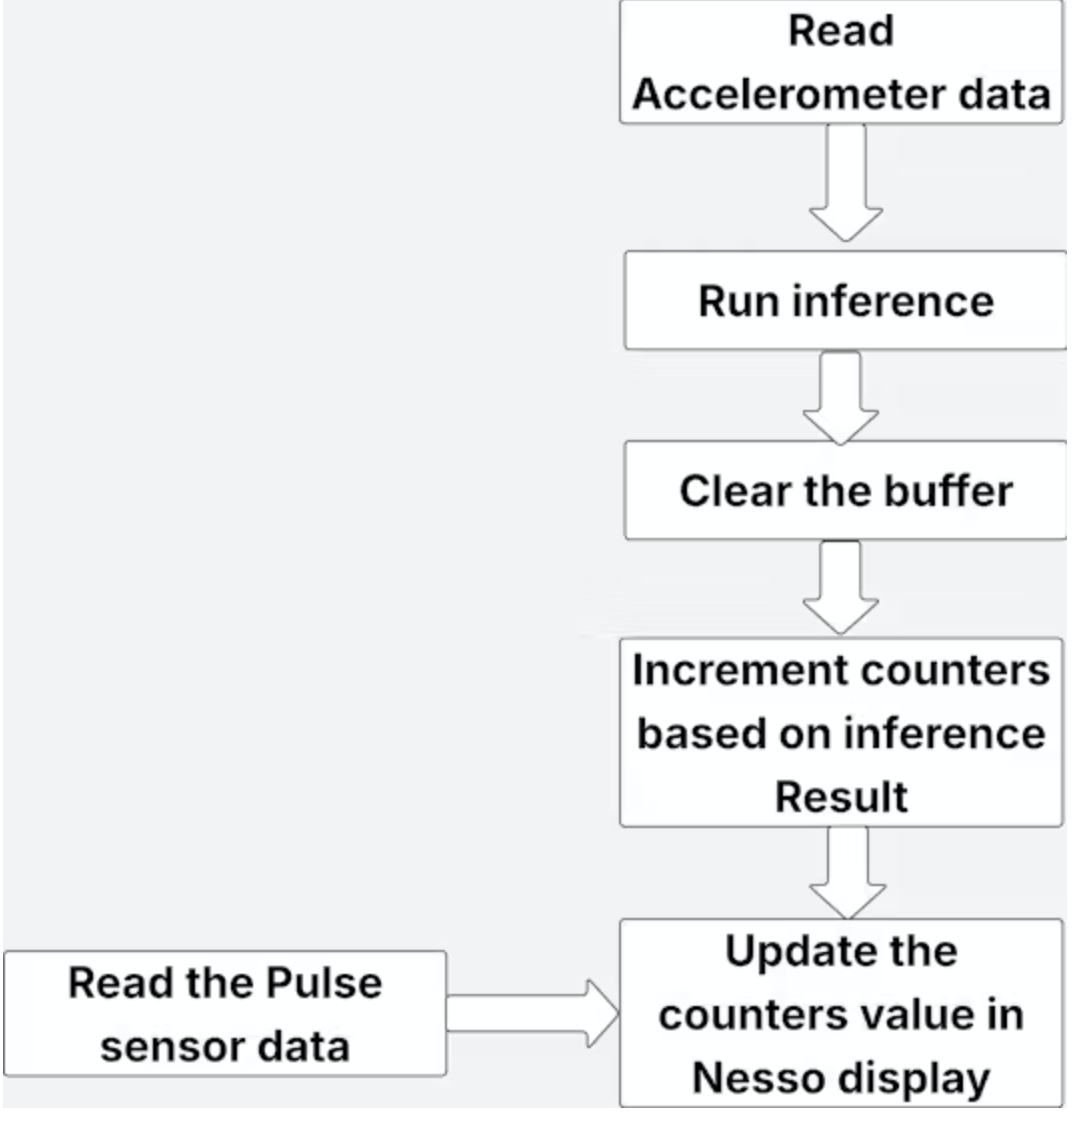
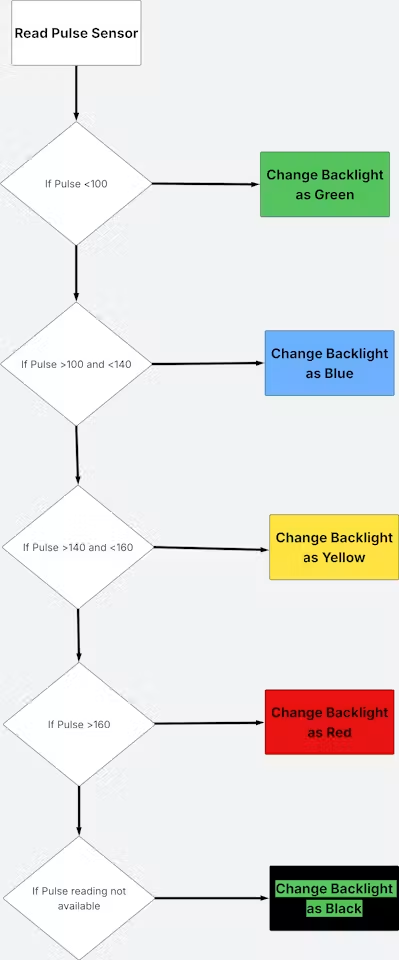
- Pulse Reading The system begins by sampling the analog pulse value from the sensor. If a valid reading is available, the value is passed through a series of conditional checks.
- Green Zone — Pulse < 100 Indicates a resting or low‑intensity state. The backlight turns Green to show normal heart‑rate activity.Blue Zone — Pulse between 100 and 140 Represents moderate activity. The backlight switches to Blue, signaling increased exertion.Yellow Zone — Pulse between 140 and 160 Indicates high‑intensity movement. The backlight changes to Yellow, warning the user that they are entering a more demanding heart‑rate range.Red Zone — Pulse > 160 Shows very high exertion. The backlight turns Red, alerting the user to peak intensity levels.
- Fallback Condition — No pulse reading available If the sensor fails to provide a valid reading, the system defaults the backlight to Black, indicating a sensor error or improper placement.