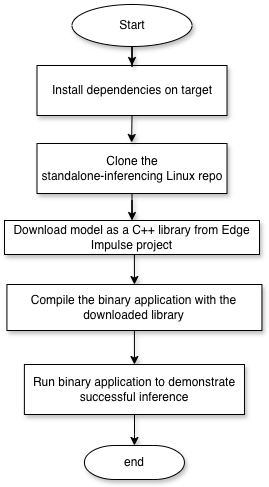
SDK C++ Inferencing Process Overview
0. Prerequisites
- The Linux Python SDK assumes that cameras and microphones are discoverable in the /dev/ directory
- The device should have internet connectivity at the moment of dependency installation for package manager access.
- For cross-compilation you will need a cross-compilation toolchain installed on your host (e.g. gcc-aarch64-linux-gnu)
- For on-device compilation you will need GNU Make and a recent C++ compiler
- Access to target from host via SSH to copy build artifacts.
1. Clone or download the Example Standalone Inferencing Linux Repository
Clone this repository via git:2. Install Linux dependencies on target
The dependencies install support for audio and camera input examples--build-only flag will build and install the libraries and binaries in <path-to-script>/opencv/build_opencv/install/. Copy the contents of install/ directory to the target (ideally somewhere discoverable by your PATH).
Qualcomm SoCs with Hexagon NPU
Qualcomm SoCs with Hexagon NPU
For Qualcomm targets that have the Hexagon NPU (e.g. Dragonwing QCS6490 SoC, RB3 Gen 2 Dev Kit, Thundercomm RUBIK Pi 3, etc.) you can build the application with TFLite QNN delegate support.
Install the AI Engine Direct SDK - Ubuntu
If you’re on a Dragonwing development board running Ubuntu 24; open a terminal (on your development board) and run:Install the AI Engine Direct SDK - another OS:
- Download the AI Engine Direct SDK
- Extract it and export the path to the SDK root, for example:
- export QNN_SDK_ROOT=/home/user/qairt/2.36.0.250627/
3. Download model as a C++ library from Edge Impulse
Go to the Deployment page of the Edge Impulse project that you will be testing with and select C++ Library (Linux).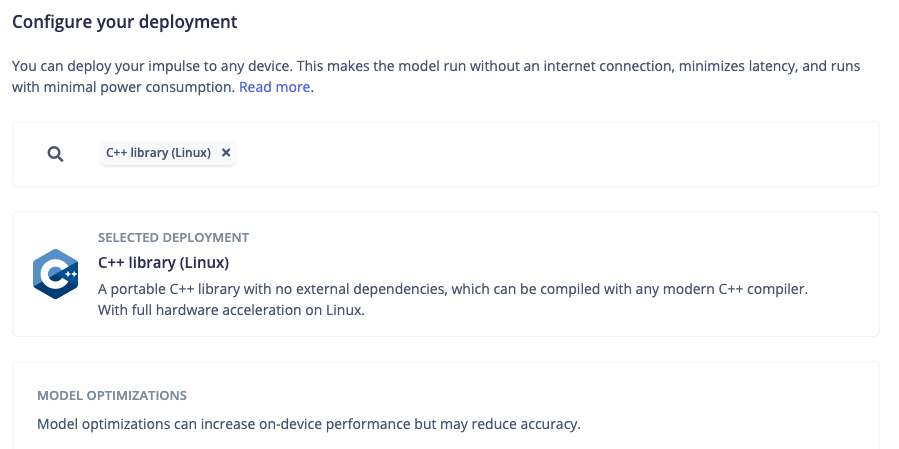
C++ Library Deployment Option
- edge-impulse-sdk
- model-parameters
- tflite-model
example-standalone-inferencing-linux repository that you cloned above.
4. Compile the binary and run inference on target
This repository comes with three classification examples:- custom - classify custom sensor data (APP_CUSTOM=1).
- audio - realtime audio classification (APP_AUDIO=1).
- camera - realtime image classification (APP_CAMERA=1).
APP_CUSTOM with an appropriate flag in the steps below based on the example you are building
To build an application:
If your target architecture is either ARMV7, AARCH64 or X86, build application via:
ARCHITECTURE is one of either ARMV7, AARCH64 or X86.
If you are building for a SoC with Qualcomm Hexagon NPU:
In other cases:
APP_CUSTOM=1 with the application you want to build. See ‘Hardware acceleration’ below for the hardware specific flags.
The compiled application will be placed in the build directory:
debug.bmp, showing the detected objects with bounding boxes.