Knowledge requiredThis tutorial assumes that you’re familiar with building applications using Alif development tools and drivers, as well as Makefile based projects. You will need
make set up in your environment. If you’re unfamiliar with these tools you can build binaries directly for your development board from the Deployment page in the studio.Prerequisites
- Make sure you followed the getting started guide, and have a trained impulse from one of the listed tutorials.
- Clone the example-standalone-inferencing-alif repository to your working directory.
Deploying your impulse
Head over to your Edge Impulse project, and go to Deployment. From here you can create the full library which contains the impulse and all external required libraries. Select Ethos u55 Library and click Build to create the library. Then download and extract the.zip file.
To add the impulse to your firmware project, paste the edge-impulse-sdk/, model-parameters and tflite-model directories from the downloaded ‘.zip’ file into the source/ directory of the example-standalone-inferencing-alif repository. Make sure to overwrite any existing files in the source/ directory.
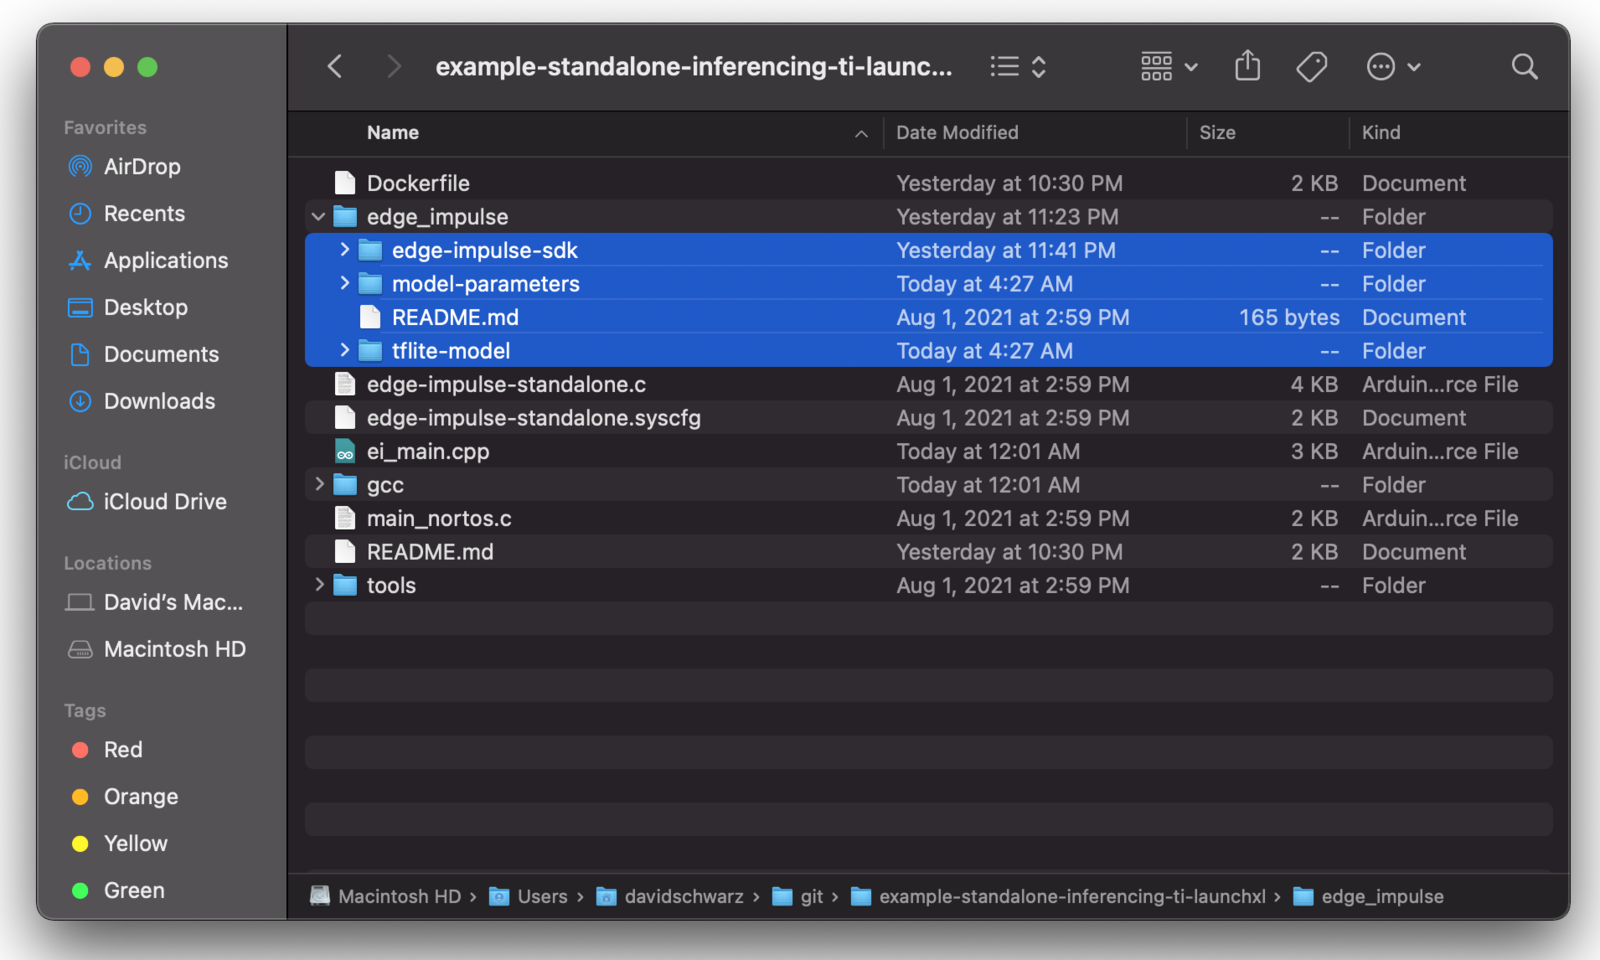
Edge Impulse libraries copied into standalone example directory
ei_main.cpp. In this minimal code example, inference is run from a static buffer of input feature data. To verify that our embedded model achieves the exact same results as the model trained in Studio, we want to copy the same input features from Studio into the static buffer in ei_main.cpp.
To do this, first head back to the studio and click on the Live classification tab. Then load a validation sample, and click on a row under ‘Detailed result’.
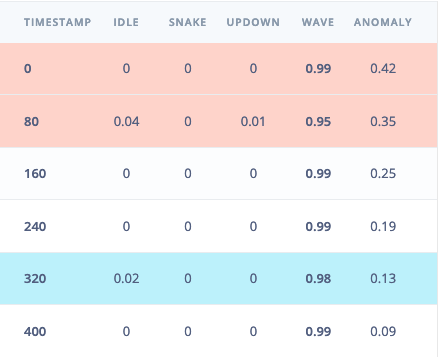
Selecting the row with timestamp '320' under 'Detailed result'.
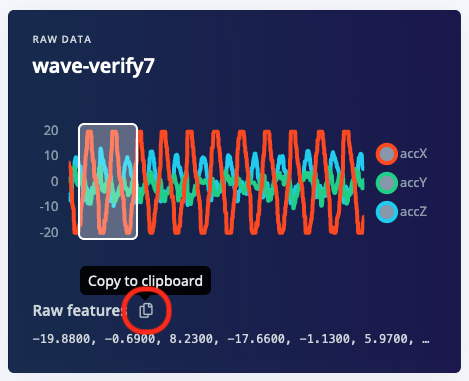
Copying the raw features.
ei_main.cpp paste the raw features inside the static const float features[] definition, for example:
ei_main.cpp to run classification on live data.
Building the project
There are three ways to build the project. The first uses the included Docker environment, pre-configured with the ARM GCC toolchain. The other options are to build the project locally with either GCC or ARMCLANG. When building projects for the Ensemble kit, you have the option to deploy to the ‘high efficiency’ or ‘high performance’ cores. For all build options, the core is selected via the-DTARGET_SUBSYSTEM parameter when building. The commands below all default to the high performance core, but you can easily switch cores by swapping any -DTARGET_SUBSYSTEM=HP parameter to -DTARGET_SUBSYSTEM=HE
Building with Docker
If you are building with Docker, you will need to have Docker Desktop installed.- Run the Docker Desktop executable, or start the docker daemon from a terminal as shown below:
- From the example-standalone-inferencing-alif directory, build the Docker image:
- Build the application by copying the following command to build inside the container:
app.axf will now be available in the build/bin directory.
- If you see errors when building, read through the Troubleshooting and optimization section
- Connect the board to your computer. Refer back to the getting started guide for how to do this.
- Flash the board
Building with ARMCLANG
If you are developing your application inARM Development Studio or Keil MDK5, you may have an ARMCLANG license and wish to develop in that environment. To build this makefile project with ARMCLANG, first make sure you have followed ARM instructions to enable and authenticate your compiler With the ARMCLANG compiler set up, you can build the project via:app.axf will now be available in the build/bin directory, and you can flash the board
If you see errors when building, first check that your ARMCLANG compiler is properly set up and authenticated, and then read through the Troubleshooting and optimization section below.
Building with GCC
To build locally with GCC, first download the ARM GNU toolchain, version 10.2 (2020 q4) or later. Follow the installation instructions and make sure this is the primary arm-gcc compiler in your path. With the GCC set up, you can build the project via:app.axf will now be available in build/bin, and you can flash the board
Flash the board
- Grab the
app.axffrom thebuild/bindirectory, and note whether you built the application for the high performance or high efficiency core - Connect your flash programmer to your debugger of choice, and configure it to select
- For ARM Development Studio or Keil MDK5, see Alif instructions in AUGD0002.
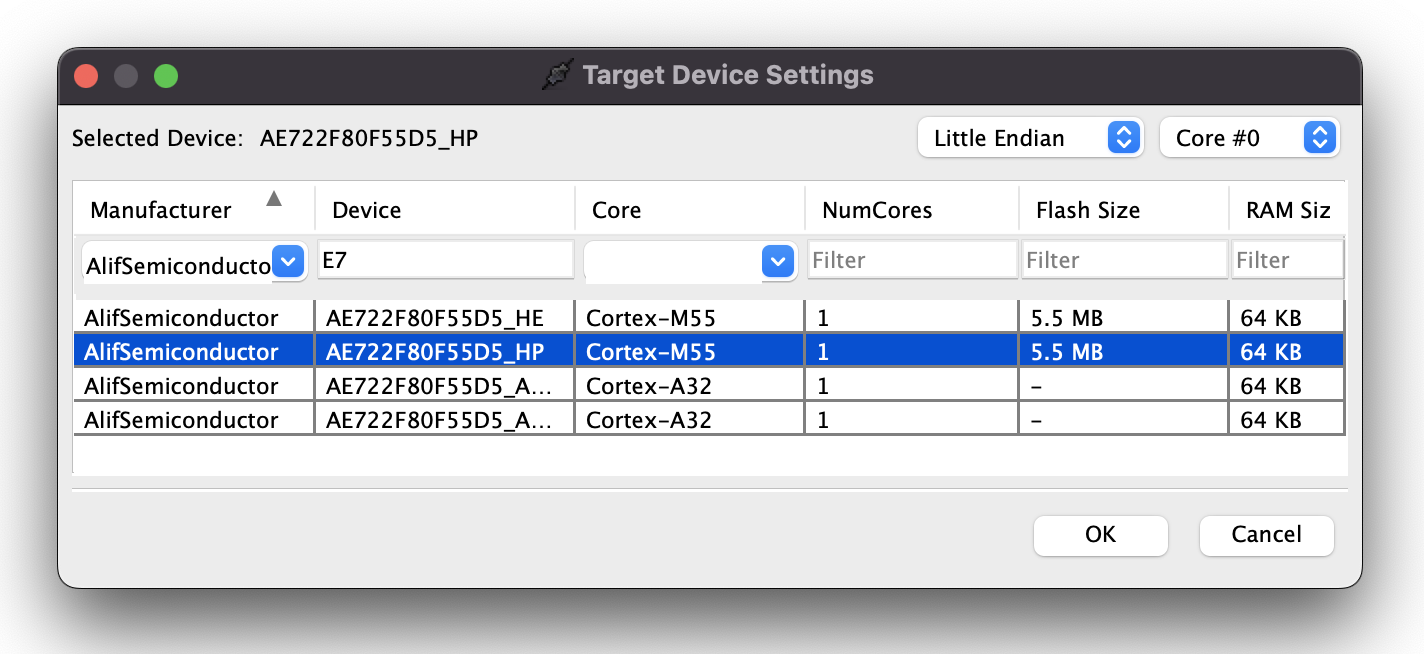
- For OZONE, create a new project with the following device settings. Make sure to choose the correct core based on your build settings:
- Flash and run
app.axf
Secure Enclave to manage secure firmware storage and bootup in production environments. Alif provides documentation on converting .axf files for use with their secure enclave, and then programming the resulting binary regions to the secure enclave in AUGD0002.
View the output
To see the output of the impulse over UART2, connect to the development board over a serial port on baud rate 115,200 and reset the board. You can do this with your favourite serial monitor or with the Edge Impulse CLI:Troubleshooting and optimization
Timing
Timing calculations are performed in ei_classifier_porting.cpp and make use of an interrupt attached to SysTick.- An RTOS may take over this interrupt handler, in which case you should re-implement
ei_read_timer_usand_ms. - The default calculation is based on the default clock rates of the Alif dev kit (400 MHz for HP core, 160 MHz for HE core). If you change this, redefine
EI_CORE_CLOCK_HZ.
Memory placement
Alif M55 processors have a private fast DTCM, and also access to a larger, but slower, chip global SRAM.- For
armclangthe linker file attempts to place as much as possible in DTCM, and overflows into SRAM if needed. - For
gcc, the linker is unable to auto place based on size. If you get an error during link, see ensemble.ld and un-comment the line that places the model in SRAM (instead of DTCM). This will only slow down DSP, as the U55 has to use the SRAM bus to access the model regardless of placement.
Known issues
With debugger attached, my device boots up directly into Bus_Fault (or possibly another fault). This can especially happen when you entered Hard Fault before your last reset.- Power cycle your board and reload your program