Knowledge requiredThis tutorial assumes that you’re familiar with compiling applications with Simplicity Studio. If you’re unfamiliar with this you can build binaries directly for your development board from the Deployment page in the studio.
Prerequisites
Make sure you followed the [Continuous motion recognition] (tutorials/continuous-motion-recognition.md) tutorial, and have a trained impulse. Also install the following software:- Simplicity Studio 5.
- Python 3.6.8 or higher.
- Java 64 bit JVM 11 or higher: - available at Amazon Corretto or releases page.
Cloning the base repository
We created an example repository which contains a small Simplicity Studio application, which takes the raw features as an argument, and prints out the final classification. You can either download the application or import this repository using Git:Deploying your impulse
Head over to your Edge Impulse project, and go to Deployment. From here you can create the full library which contains the impulse and all external required libraries. Select C++ library and click Build to create the library. Download the.zip file and place the contents in the ‘example-standalone-inferencing-silabs-tb-sense-2/ei-workspace/edgeimpulse’ folder (which you downloaded above).
Importing the workspace into Simplicity Studio
With the model downloaded you can import the project into Simplicity Studio.- Generate the Simplicity Studio project by opening a command prompt or terminal, navigating to the
'example-standalone-inferencing-silabs-tb-sense-2folder and running:
- Open Simplicity IDE and install the Gecko SDK 3.2.x.
- Create a new project via File > New > Silicon Labs Project Wizard…
- In the New Project Wizard select Simplicity Studio > Silicon Labs MCU Project and click Next
- Under ‘board’ select Thunderboard Sense 2.
- Select the correct SDK you installed in #1 and click Next.
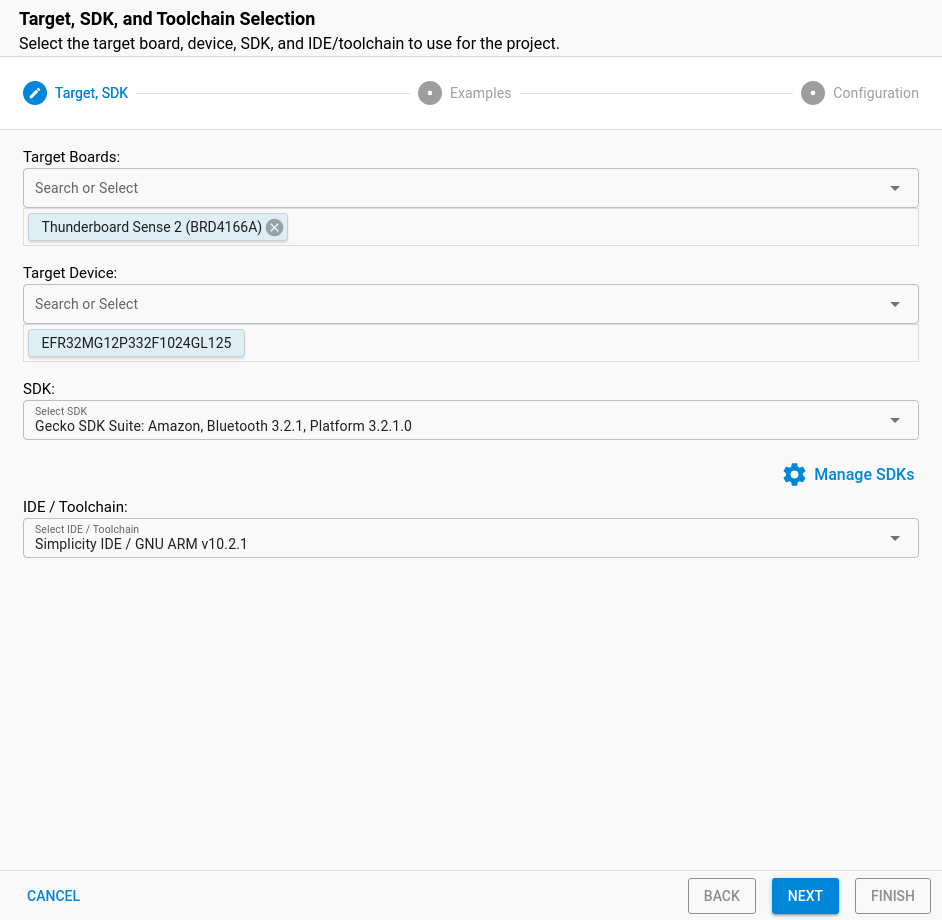
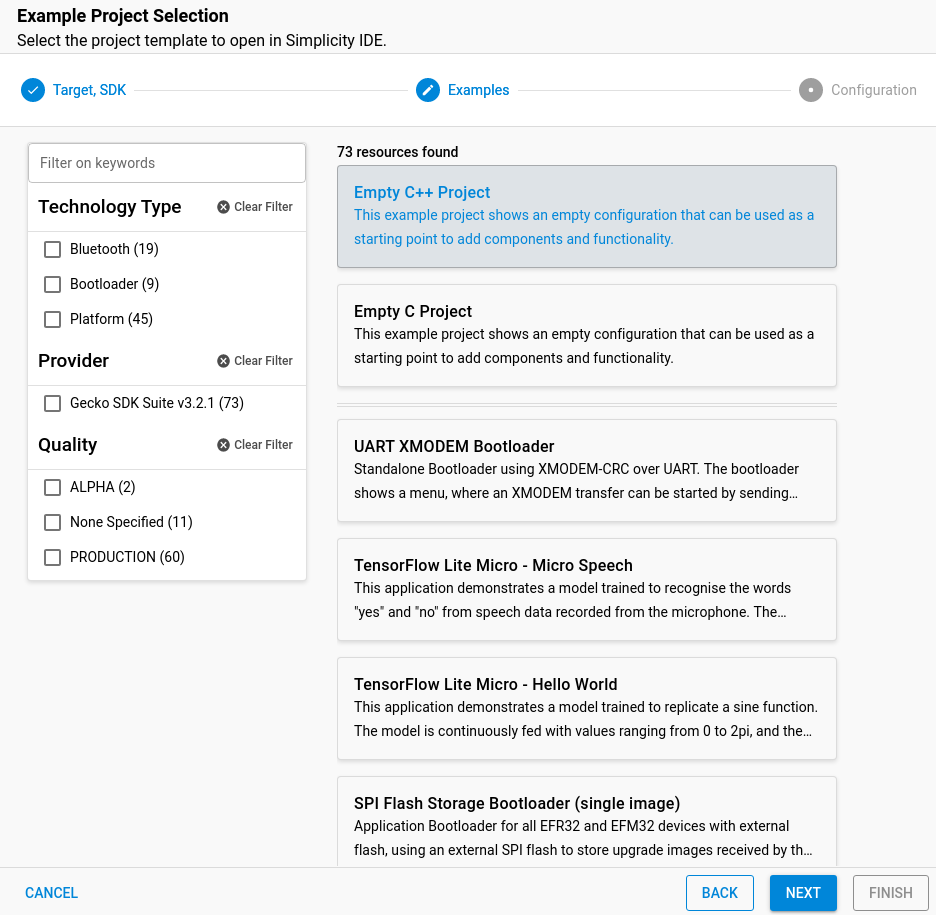
- Select Empty C++ Program and click Next.
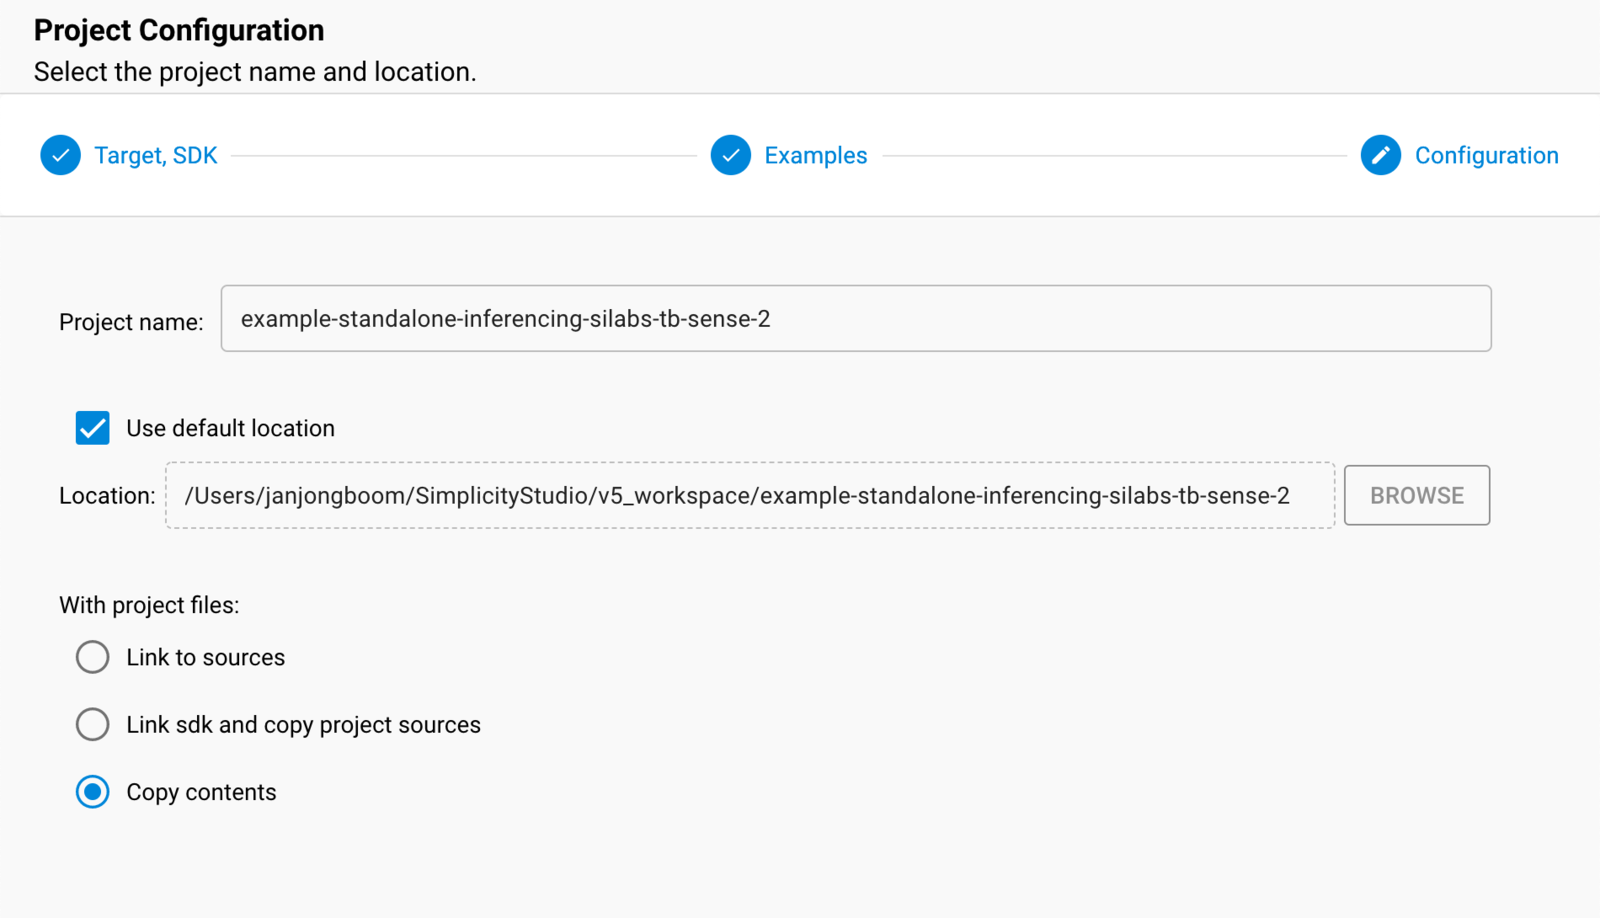
- Name the project
example-standalone-inferencing-silabs-tb-sense-2(exactly this) and make sure Copy contents is selected before clicking Finish.
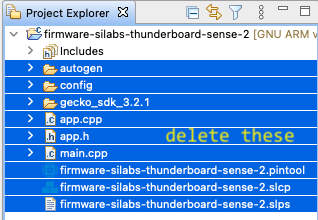
- Under ‘Project Explorer’ select all files, except for Includes and delete them:
- Then, navigate to the
example-standalone-inferencing-silabs-tb-sense-2/ei-workspacefolder (in this repository), and drag all files and folders into the ‘Project explorer’ window in Simplicity Studio. When prompted select Copy files and folders for this operation. - Then close, and reopen the project via: Project > Close Project, then Project > Open Project.
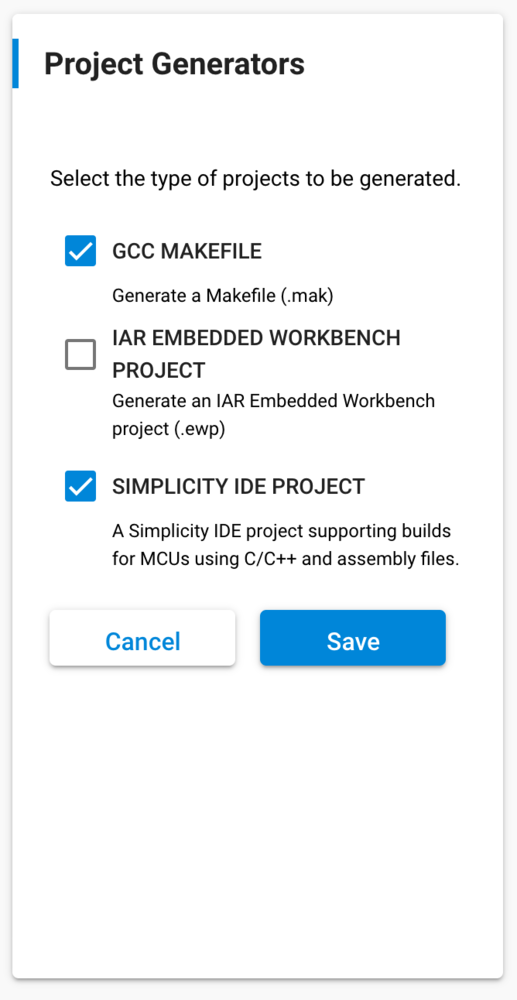
- Double-click on
example-standalone-inferencing-silabs-tb-sense-2.slcpto show the Simplicity Configurator. - Edit ‘Project Generators’ and disable ‘IAR EMBEDDED WORKBENCH PROJECT’ (if it’s listed):
- Click Force Generation to regenerate all links and include paths.
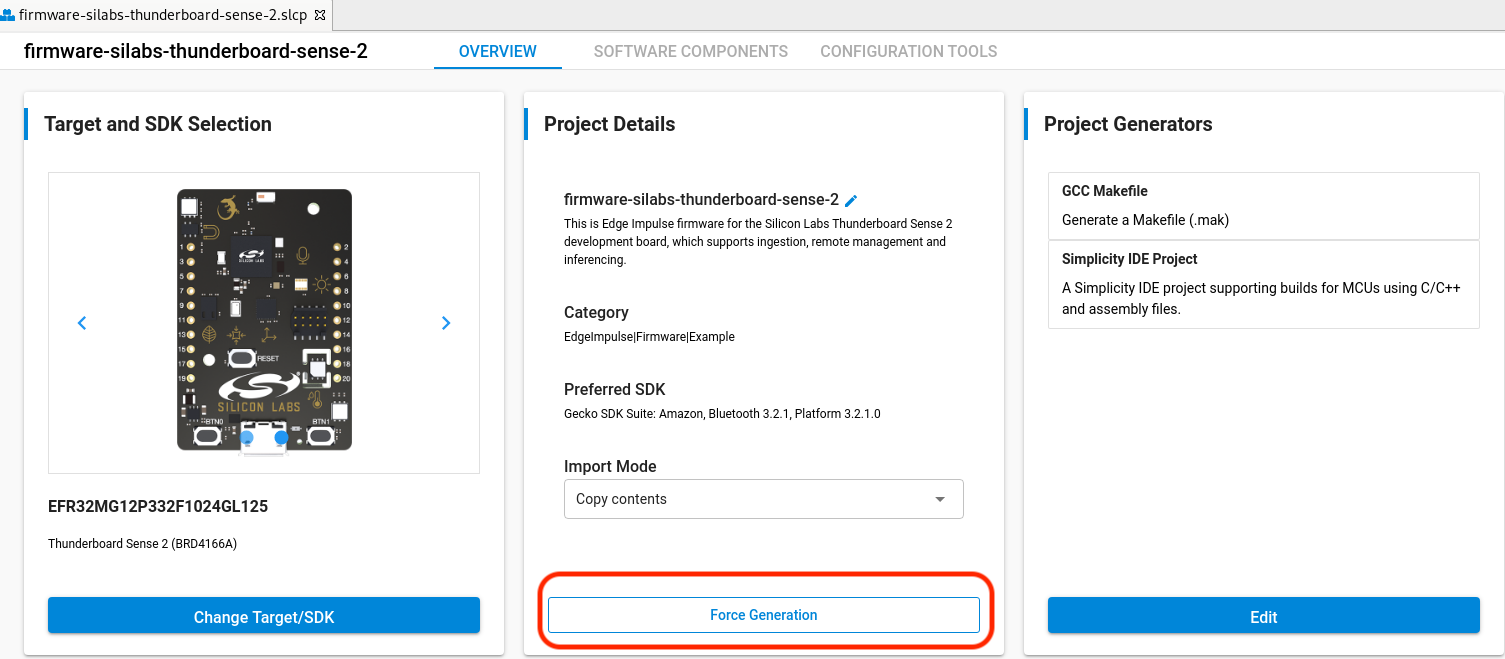
- The project is now imported!
Running the impulse
With the project ready it’s time to verify that the application works. Head back to the studio and click on Live classification. Then load a validation sample, and click on a row under ‘Detailed result’.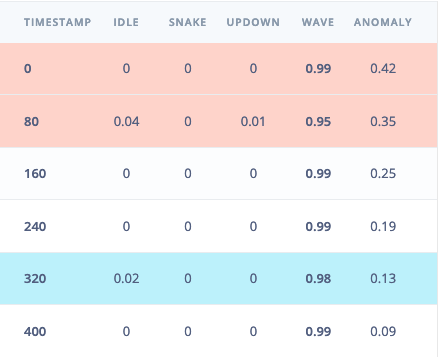
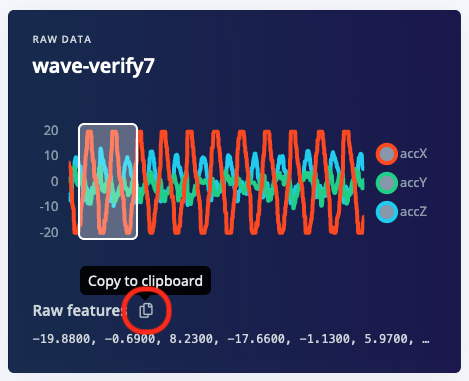
main.cpp and paste the raw features inside the static const float features[] definition, for example:
Building and flashing the application
- In Simplicity Studio v5, select Project > Build Project to build the firmware.
- Then, right click on the development board in the Debug adapters section of Simplicity Studio and select Upload application.
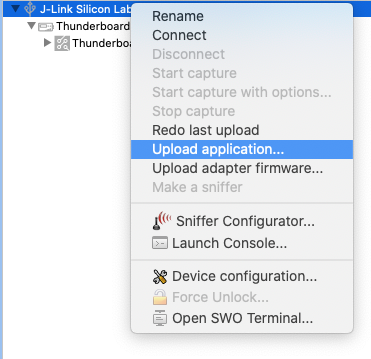
- Under Application image path select the
GNU ARM v10.2.1 - Default/example-standalone-inferencing-silabs-tb-sense-2.binfile and click OK to flash.
GNU ARM v10.2.1 - Default/example-standalone-inferencing-silabs-tb-sense-2.bin file onto the TB004 mass-storage device to flash the binary.