Target-driven Default Settings
Accessing the configuration panel
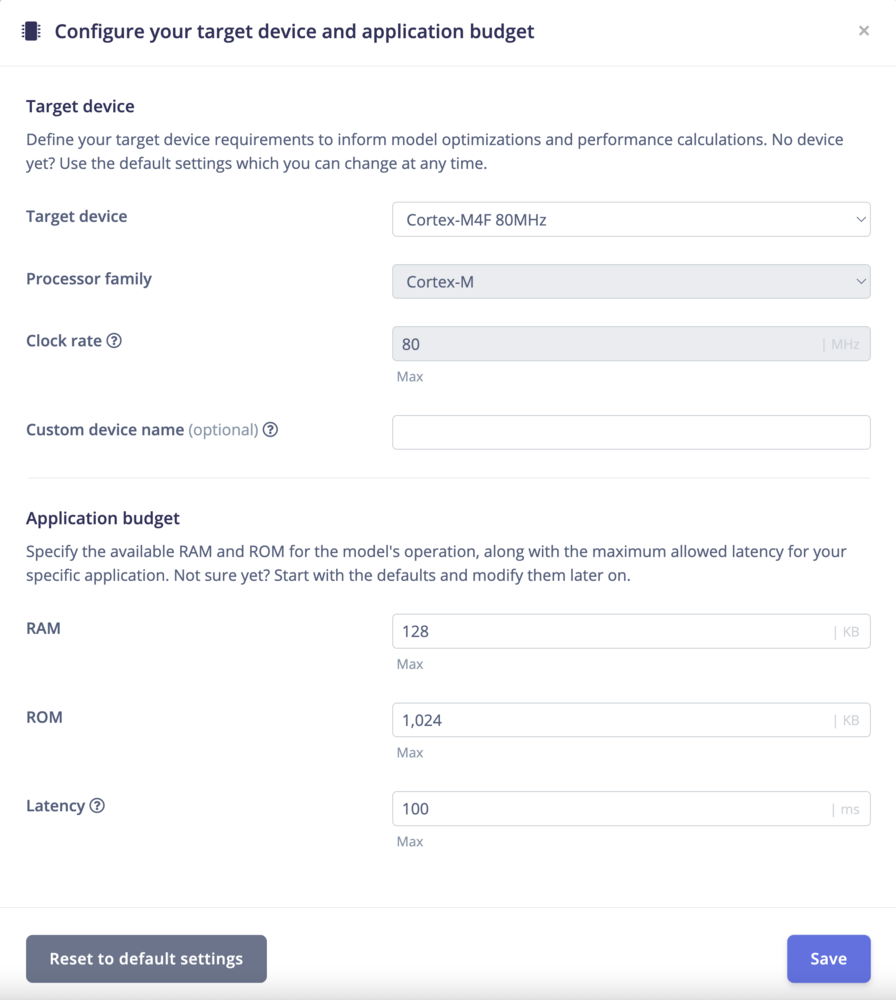
By default, the form shows ‘Cortex-M4F 80MHz’ as the target device. You can change this by clicking on Change Target device. You can select from a range of processor types, architectures, and clock rates. For a custom device, you could for example select Low-end MCU and specify the clock rate, RAM, ROM, and maximum allowed latency for your application.- Navigate to the top-level menu in Edge Impulse Studio.
- Click on Change Target Device to open the configuration panel.
Configure your target device and application budget
Lets walk you through some of the current options for configuring your device and application budget:- Target Device: Select the type of target device you are configuring from options like “Custom” or specific development boards.
- Processor Type Selection: Selecting a processor type dynamically adjusts available architecture options and fields to suit your hardware:
- For Low-end MCU: This option allows you to specify clock rate, RAM, and ROM, suitable for ‘Cortex-M’ architectures.
- For AI Accelerators: Selecting this disables the clock rate field, reflecting the unique requirements of AI accelerator devices.
- Custom Device Configuration: Choosing to configure a custom device opens fields to precisely define its capabilities, ensuring your project setup is accurately tailored to your hardware.
Special options for Custom Targets:
The form allows you to select from a range of processor types, architectures, and clock rates. For a custom device, you could for example select Low-end MCU and specify the clock rate, RAM, ROM, and maximum allowed latency for your application.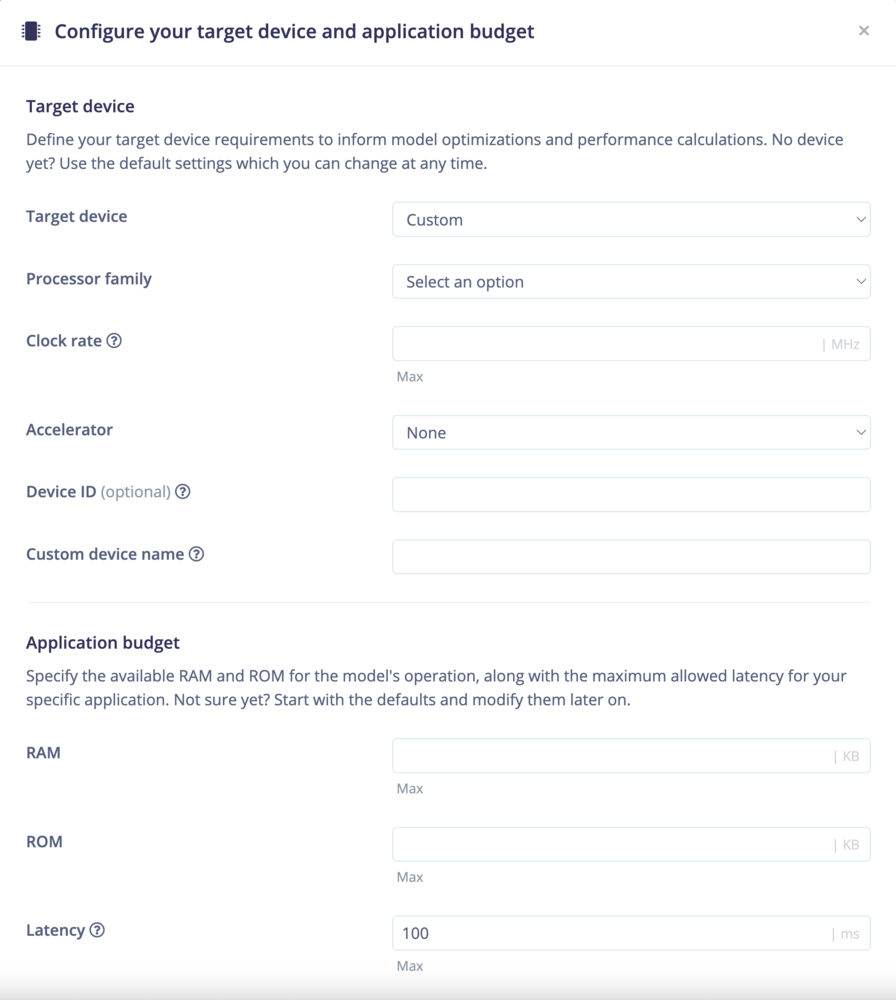
Custom Targets
- Custom: Select this for custom hardware specifications or devices not listed in Edge Impulse, allowing for a customized hardware profile. Selection Options
- Processor Type: Selections range from various processor types. Choosing GPU, AI accelerator’ or NPU deactivates the clock speed option, as it’s irrelevant for device estimation.
- Processor Architecture (Optional): Specify your device’s architecture to refine its configuration (e.g., Cortex-M0+, Cortex-M4F, Cortex-M7).
- Clock Rate (Optional): Set the clock rate for relevant processor types to estimate operational capabilities accurately. The units shown will be indicated by the | MHz | GHz as relevant to the scale of processor. As previously stated the clock rate field is disabled for GPU, AI accelerator, or NPU devices.
- Accelerator: If the device supports hardware acceleration, select from available options such as Arm Cortex-U55, NVIDIA Jetson Nano, and others.
- Device ID (Optional): Provide a unique identifier for your custom device model or chip architecture variant for easy recognition and setup.
- Custom Device Name (Optional): Provide a unique name for your custom device to easily identify it in your project.
- RAM: Specify the amount of RAM available on your device in kilobytes (kB).
- ROM: Specify the amount of ROM available on your device in kilobytes (kB).
- Latency: Specify the maximum allowed latency for your application in milliseconds (ms).

Save
- Save Target: Save your custom device and application budget configuration to apply it to your project.
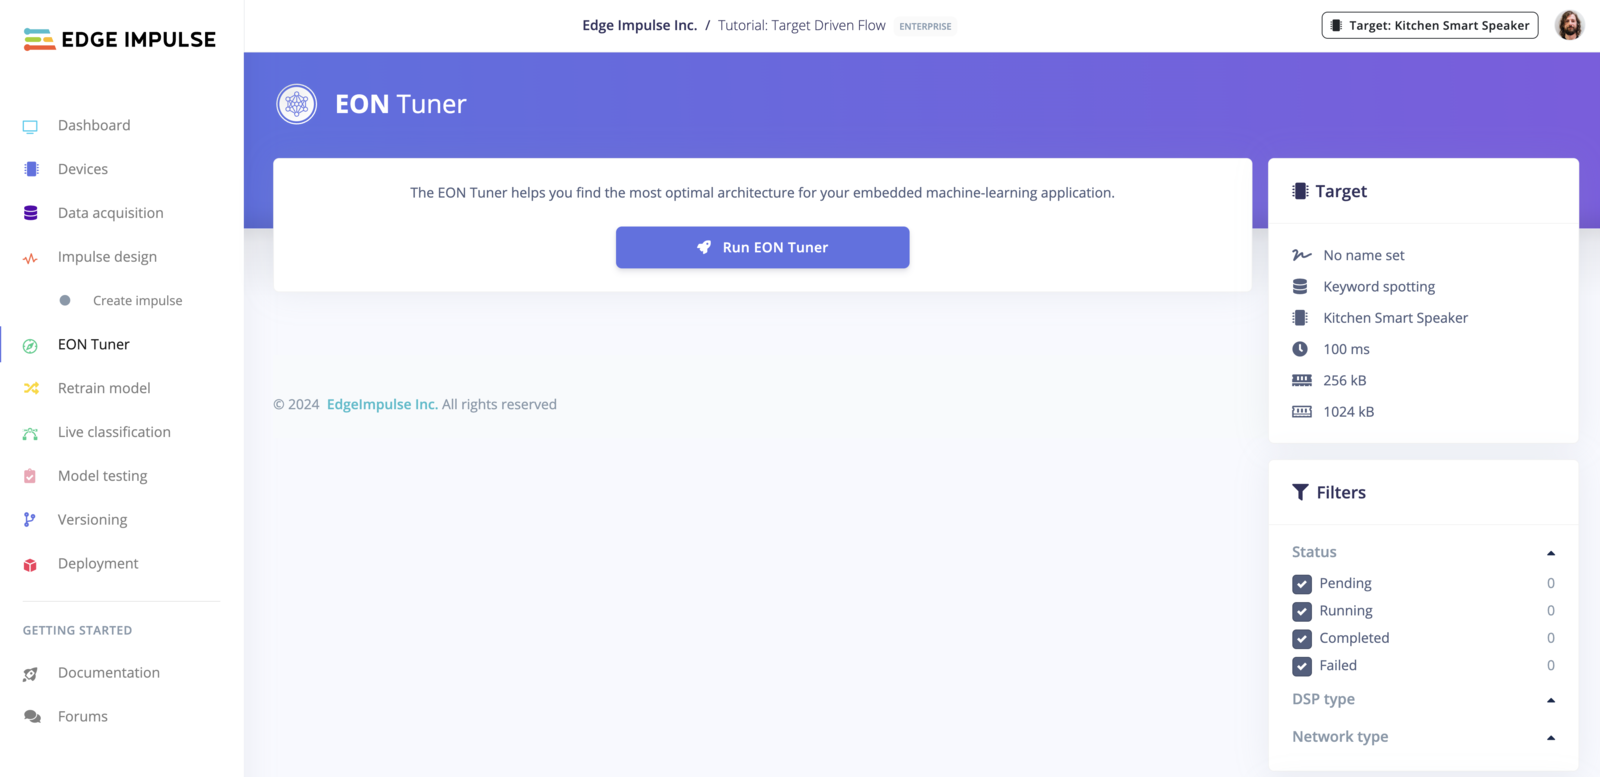
Navigating to EON Tuner with Updated Target Device
Top-level Navigation
Once saved the target device can be seen at the top level of navigation on all screens within your project. Your custom device name (e.g., ‘my first mcu’) and the specified parameters (100 ms latency, 256 kB RAM, 1024 kB ROM) are visible. The target device configuration is also taken into account during the performance estimation for deployment.
Top-level Navigation
Additional functionalities:
There are some additional considerations for targets mentioned in the tabs below, particularly for their generated binaries models and deployment formats.- Ethos Enabled Targets
- Vela for Non-Ethos Enabled Targets
- Think Silicon - NEOX Targets
For Ethos enabled targets, you can select them as profiling targets. After training, the Vela compiled model will be available on the dashboard. This feature is exclusive to Ethos enabled targets. These assets are only available in our studio, when deploying and selecting the deployment format, the library will include the Vela compiled model converted to a C header. While this is sufficient for most users, those needing the binary file directly on the flash may find it inconvenient to convert it back from a C header.
- Key Differences:
- C++ Library: The library will include the Vela compiled model converted to a C header.
- Vela Library: The Vela compiled model will be available on the dashboard.