

Sony's Spresense
Sony's Spresense is a small, but powerful development board with a 6 core Cortex-M4F microcontroller and integrated GPS, and a wide variety of add-on modules including an extension board with headphone jack, SD card slot and microphone pins, a camera board, a sensor board with accelerometer, pressure, and geomagnetism sensors, and Wi-Fi board - and it's fully supported by Edge Impulse. You'll be able to sample raw data, build models, and deploy trained machine learning models directly from the studio.
To get started with the Sony Spresense and Edge Impulse you'll need:
The Spresense main development board - available for around 55 USD from a wide range of distributors.
The Spresense extension board - to connect external sensors.
A micro-SD card to store samples.
In addition you'll want some sensors, these ones are fully supported (note that you can collect data from any sensor on the Spresense with the data forwarder):
For image models: the Spresense CXD5602PWBCAM1 camera add-on.
For accelerometer models: the Spresense Sensor EVK-70 add-on.
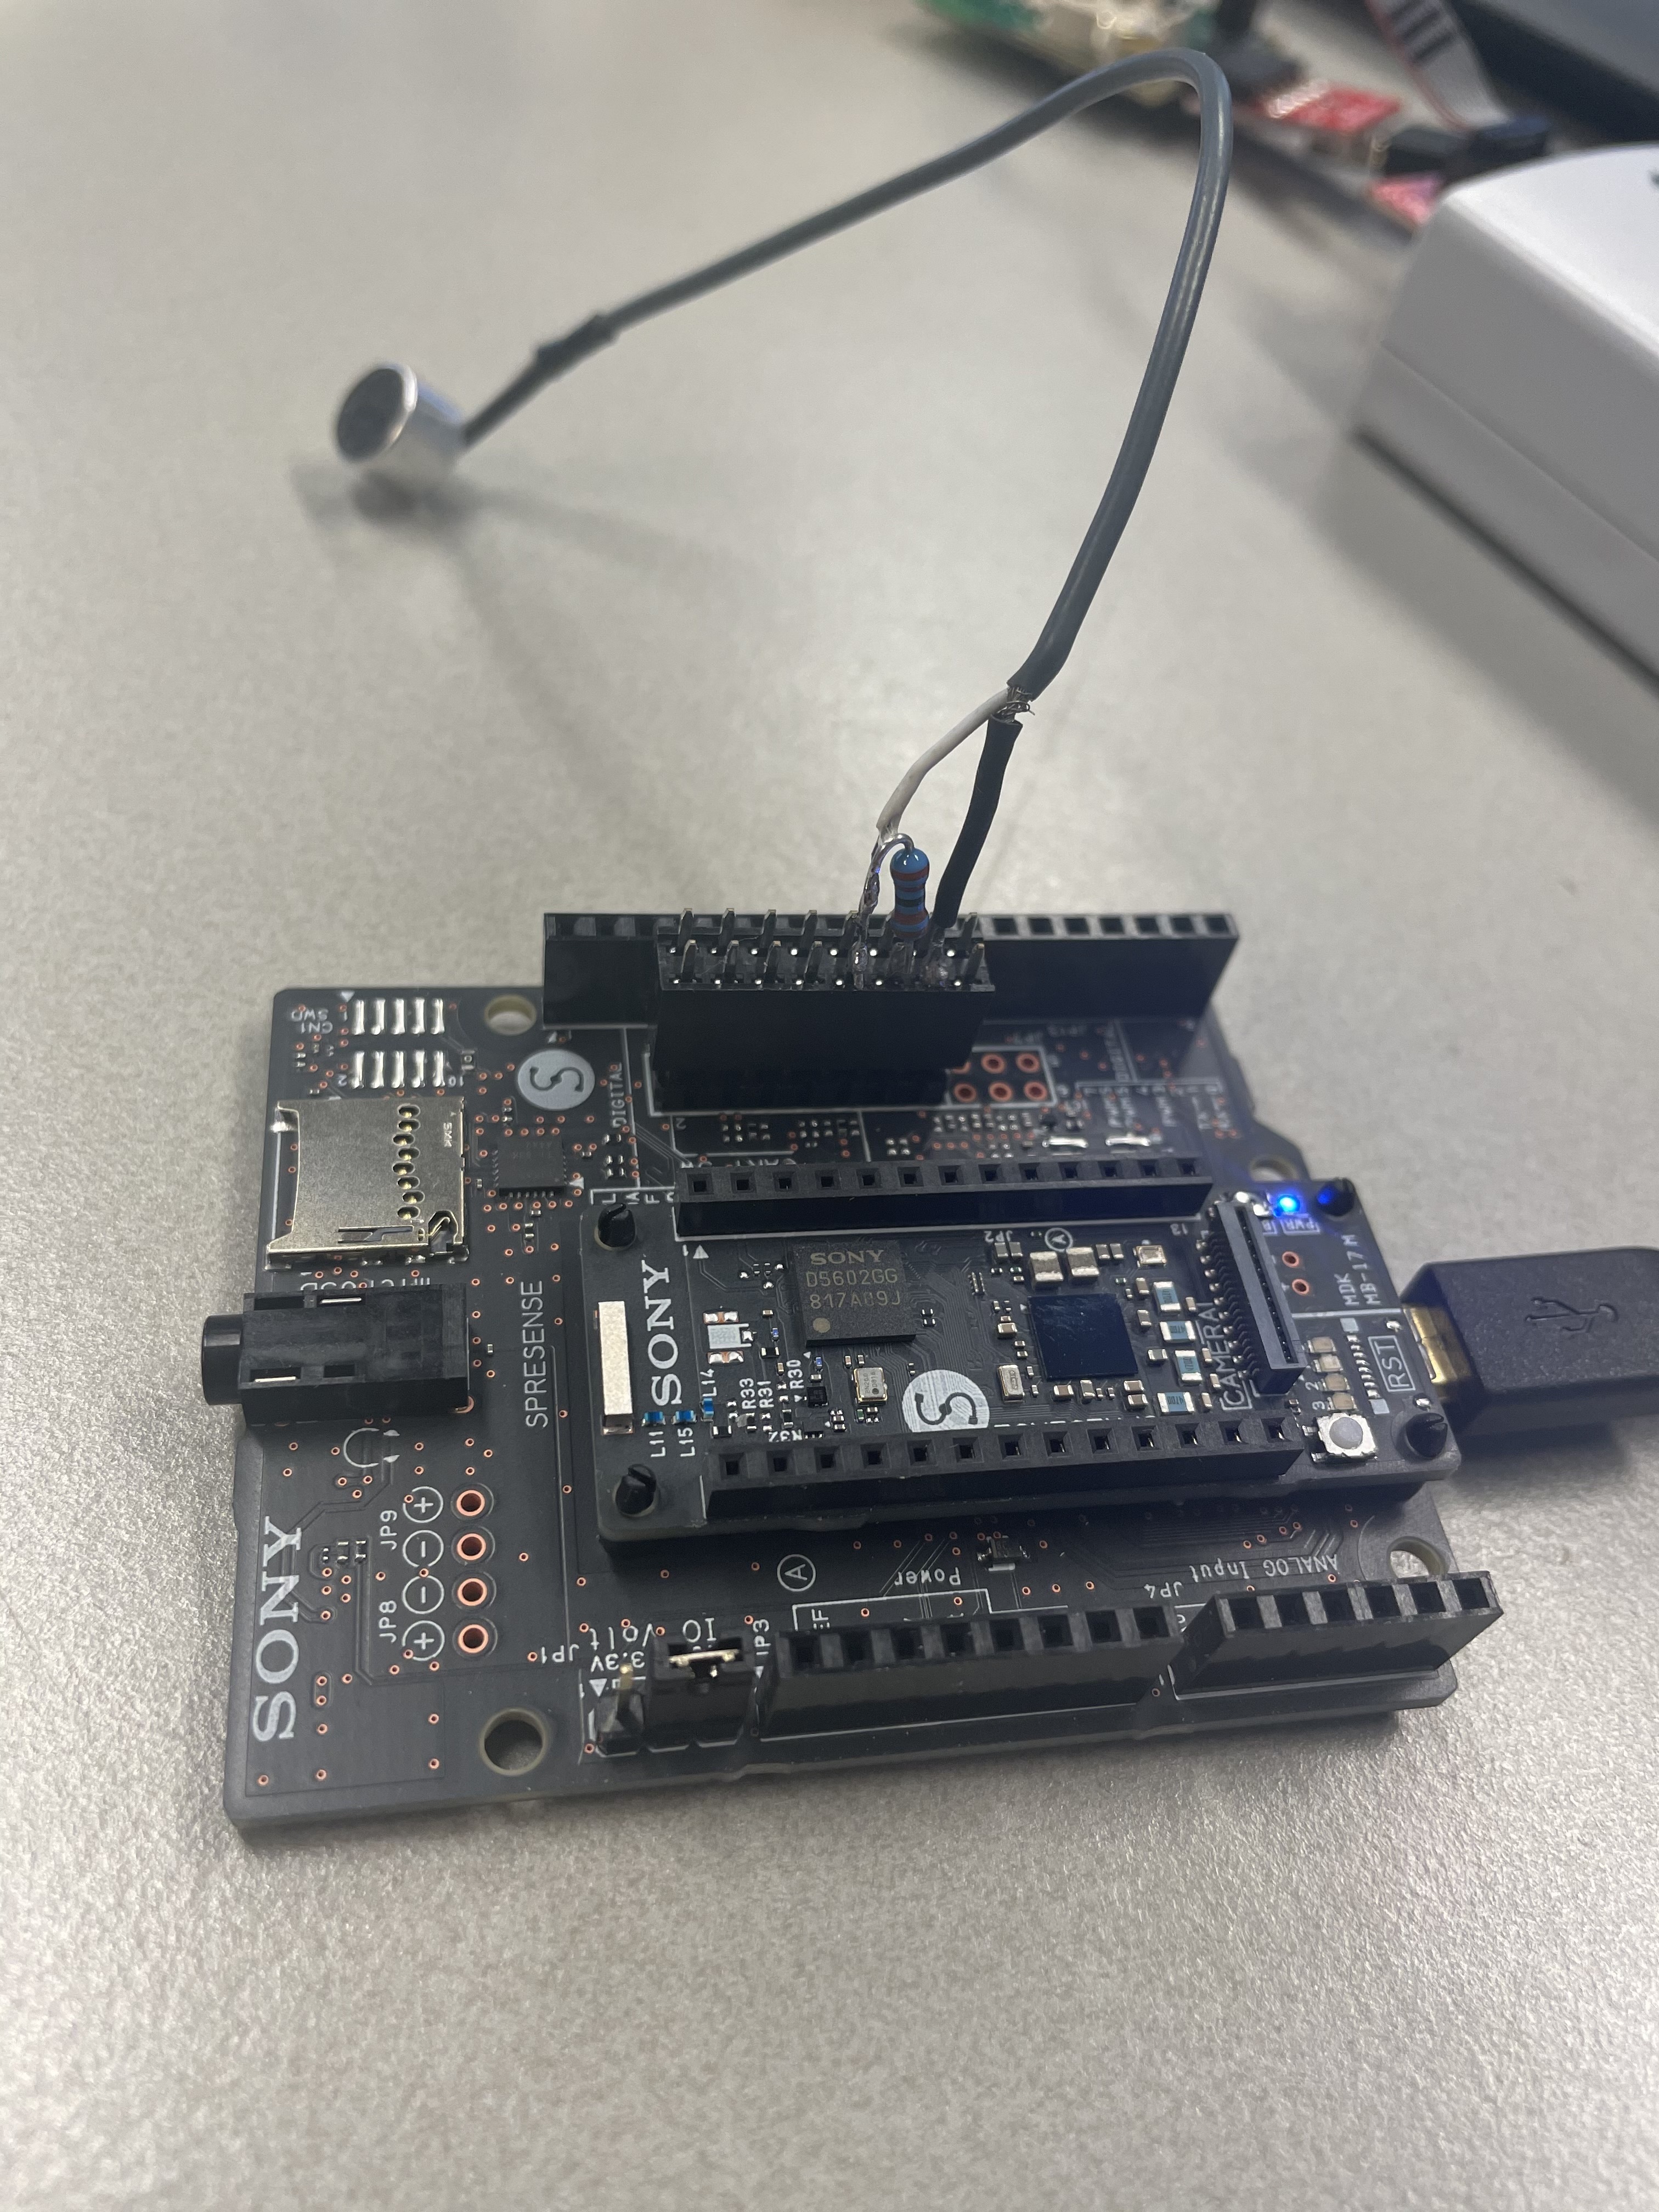
For audio models: an electret microphone and a 2.2K Ohm resistor, wired to the extension board's audio channel A, following this schema (picture here).
Note: for audio models you must also have a FAT formatted SD card for the extension board, with the Spresense's DSP files included in a
BINfolder on the card, see instructions here and a screenshot of the SD card directory here.
The Edge Impulse firmware for this development board is open source and hosted on GitHub: edgeimpulse/firmware-sony-spresense.

Installing dependencies
To set this device up in Edge Impulse, you will need to install the following software:
On Linux:
GNU Screen: install for example via
sudo apt install screen.
Problems installing the CLI?
See the Installation and troubleshooting guide.
Connecting to Edge Impulse
With all the software in place it's time to connect the development board to Edge Impulse.
1. Connect the optional camera, sensor, extension board, Wi-Fi add-ons, and SD card

Make sure the SD card is formatted as FAT before inserting it into the Spresense.
2. Connect the development board to your computer
Use a micro-USB cable to connect the main development board (not the extension board) to your computer.
3. Update the bootloader and the firmware
The development board does not come with the right firmware yet. To update the firmware:
Install Python 3.7 or higher.
Download the latest Edge Impulse firmware, and unzip the file.
Open the flash script for your operating system (
flash_windows.bat,flash_mac.commandorflash_linux.sh) to flash the firmware.Wait until flashing is complete. The on-board LEDs should stop blinking to indicate that the new firmware is running.
4. Setting keys
From a command prompt or terminal, run:
edge-impulse-daemonThis will start a wizard which will ask you to log in and choose an Edge Impulse project. If you want to switch projects run the command with --clean.
Alternatively, recent versions of Google Chrome and Microsoft Edge can collect data directly from your development board, without the need for the Edge Impulse CLI. See this blog post for more information.
5. Verifying that the device is connected
That's all! Your device is now connected to Edge Impulse. To verify this, go to your Edge Impulse project, and click Devices. The device will be listed here.

Next steps: building a machine learning model
With everything set up you can now build your first machine learning model with these tutorials:
Looking to connect different sensors? The Data forwarder lets you easily send data from any sensor into Edge Impulse.
Troubleshooting
Error when flashing
If you see:
ValueError: dlsym(RTLD_DEFAULT, kIOMasterPortDefault): symbol not foundUpgrade pyserial:
pip3 install --upgrade pyserialDaemon does not start
If the edge-impulse-daemon or edge-impulse-run-impulse commands do not start it might be because of an error interacting with the SD card or because your board has an old version of the bootloader. To see the debug logs, run:
edge-impulse-run-impulse --rawAnd press the RESET button on the board. If you see Welcome to nash you'll need to update the bootloader. To do so:
Install and launch the Arduino IDE.
Go to Preferences and under 'Additional Boards Manager URLs' add
https://github.com/sonydevworld/spresense-arduino-compatible/releases/download/generic/package_spresense_index.json(if there's already text in this text box, add a,before adding the new URL).Then go to Tools > Boards > Board manager, search for 'Spresense' and click Install.
Select the right board via: Tools > Boards > Spresense boards > Spresense.
Select your serial port via: Tools > Port and selecting the serial port for the Spresense board.
Select the Spresense programmer via: Tools > Programmer > Spresense firmware updater.
Update the bootloader via Tools > Burn bootloader.
Then update the firmware again (from step 3: Update the bootloader and the firmware).
Last updated
Was this helpful?