> ## Documentation Index
> Fetch the complete documentation index at: https://docs.edgeimpulse.com/llms.txt
> Use this file to discover all available pages before exploring further.
# IMU inference on Zephyr
> Run Edge Impulse machine learning models for real-time motion classification on Zephyr RTOS using IMU sensors
This tutorial shows how to run IMU-based Edge Impulse models on Zephyr RTOS using the Edge Impulse Zephyr Module. Drop in your model > build > flash > get real-time motion inference.\
Reference code: [https://github.com/edgeimpulse/ei-zephyr-imu-inference](https://github.com/edgeimpulse/ei-zephyr-imu-inference)
## Overview
This tutorial walks through running IMU (accelerometer/gyro) inference on Zephyr using the Edge Impulse Zephyr Module. The example supports any IMU accessible via Zephyr's sensor API and can run on 850+ Zephyr-supported development boards.
### Key Features
* Real-time IMU sampling via Zephyr's sensor framework
* Circular buffer + continuous inference
* Works with accelerometer-only or accel+gyro models
* Compatible with any IMU driver supported by Zephyr
## Prerequisites
Before starting, ensure you have:
* **Edge Impulse Zephyr Module workspace**
* **A trained IMU model**
* **A Zephyr-supported development board**
* **Development tools**
* Zephyr SDK 0.17.4+
* West 1.5.0+
## Supported Sensors (IMU Drivers)
Any IMU supported in Zephyr should work, the example included uses a ST sensor hat.
If you want to modify this example to use another board with an integrated IMU like the nicla vision.
First comment out the CMAKE declaration for the shield in ei-zephyr-imu-inference/CMakeLists.txt:
```
#set(SHIELD x_nucleo_iks02a1)
```
Also you will need to set the board to:
```
arduino_nicla_vision/stm32h747xx/m4
```
see your associated boards [Zephyr guide for more](https://docs.zephyrproject.org/latest/boards/arduino/nicla_vision/doc/index.html)
Your board's IMU must appear in Zephyr's device tree under I²C/SPI.
## 1. Initialize the Repository
```bash theme={"system"}
git clone https://github.com/edgeimpulse/ei-zephyr-imu-inference
cd ei-zephyr-imu-inference
west init -m https://github.com/edgeimpulse/ei-zephyr-imu-inference
west update
```
This fetches:
* Zephyr RTOS
* The Edge Impulse Zephyr Module
* All dependencies
## 2. Deploy Your Model
In Edge Impulse Studio:
1. Go to **Deployment**
2. Select **Zephyr library**
3. Click **Build**
4. Download the model `.zip`
Extract into `model/`:
```bash theme={"system"}
unzip -o ~/Downloads/your-model.zip -d model/
```
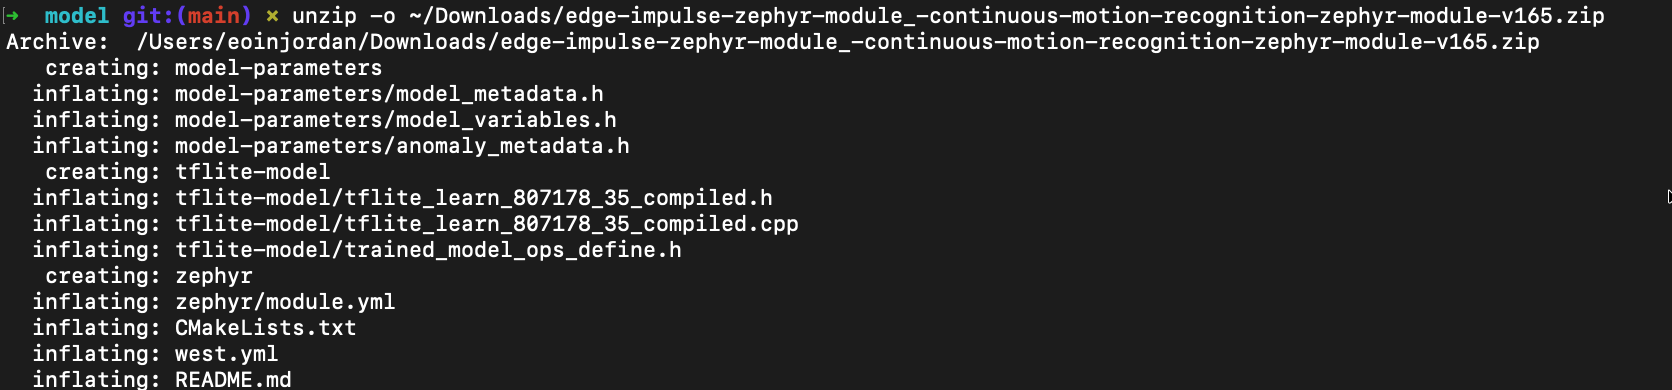 Ensure `model/` contains:
* `CMakeLists.txt`
* `edge-impulse-sdk/`
* `model-parameters/`
* `tflite-model/`
## 3. Build
Select your board:
```bash theme={"system"}
west build --pristine -b b_14s5i_iot01a
```
Ensure `model/` contains:
* `CMakeLists.txt`
* `edge-impulse-sdk/`
* `model-parameters/`
* `tflite-model/`
## 3. Build
Select your board:
```bash theme={"system"}
west build --pristine -b b_14s5i_iot01a
```
 Or specify in `.west/config`:
```ini theme={"system"}
[build]
board = b_14s5i_iot01a
```
Then build:
```bash theme={"system"}
west build --pristine
```
## 4. Flash
```bash theme={"system"}
west flash
```
Or specify a flash runner:
```bash theme={"system"}
west flash --runner jlink
west flash --runner nrfjprog
west flash --runner openocd
```
## 5. Monitor Output
```bash theme={"system"}
minicom -D /dev/ttyACM0 -b 115200
```
Expected output:
```
Sampling...
Predictions (DSP: 47 ms, Classification: 6 ms):
idle: 0.02
wave: 0.97
updown: 0.01
```
## How It Works
1. **Initialization** – IMU and inference engine start
2. **Sampling** – Sensor data collected at the model's sample rate
3. **Buffering** – Samples stored in a circular buffer
4. **Inference** – Classifier runs when a full window is available
5. **Results** – Predictions printed to the console
## Project Structure
```
model/ # Your Edge Impulse model (Zephyr library)
src/
main.cpp # App entry point
sensors/ # IMU drivers and helpers
inference/ # Inference state machine
CMakeLists.txt
prj.conf
west.yml
```
## Customizing the Example
### Use a different IMU
Enable its driver in `prj.conf`:
```ini theme={"system"}
CONFIG_LSM6DSOX=y
```
### Increase memory for larger models
```ini theme={"system"}
CONFIG_MAIN_STACK_SIZE=16384
```
### Add logging
```ini theme={"system"}
CONFIG_LOG=y
```
## Troubleshooting
### SDK not found
Run:
```bash theme={"system"}
west update
```
### Sensor not detected
Enable debug logs:
```ini theme={"system"}
CONFIG_I2C_LOG_LEVEL_DBG=y
CONFIG_SENSOR_LOG_LEVEL_DBG=y
```
### Inference inaccurate
* Ensure sample rate matches your training data
* Verify sensor axis order
* Test with raw features from Edge Impulse Studio
## Summary
You have successfully deployed an IMU-based Edge Impulse model on Zephyr RTOS! You can now extend this example by:
## Next Steps
For more advanced usage, consider:
* Porting the project to a new board
* Adding anomaly detection
For more examples and tutorials,
see the [Zephyr series overview](/tutorials/topics/zephyr/zephyr-module-series) for more in-depth tutorials on working with sensors and peripherals in Zephyr projects as we continue to expand this series!
Or specify in `.west/config`:
```ini theme={"system"}
[build]
board = b_14s5i_iot01a
```
Then build:
```bash theme={"system"}
west build --pristine
```
## 4. Flash
```bash theme={"system"}
west flash
```
Or specify a flash runner:
```bash theme={"system"}
west flash --runner jlink
west flash --runner nrfjprog
west flash --runner openocd
```
## 5. Monitor Output
```bash theme={"system"}
minicom -D /dev/ttyACM0 -b 115200
```
Expected output:
```
Sampling...
Predictions (DSP: 47 ms, Classification: 6 ms):
idle: 0.02
wave: 0.97
updown: 0.01
```
## How It Works
1. **Initialization** – IMU and inference engine start
2. **Sampling** – Sensor data collected at the model's sample rate
3. **Buffering** – Samples stored in a circular buffer
4. **Inference** – Classifier runs when a full window is available
5. **Results** – Predictions printed to the console
## Project Structure
```
model/ # Your Edge Impulse model (Zephyr library)
src/
main.cpp # App entry point
sensors/ # IMU drivers and helpers
inference/ # Inference state machine
CMakeLists.txt
prj.conf
west.yml
```
## Customizing the Example
### Use a different IMU
Enable its driver in `prj.conf`:
```ini theme={"system"}
CONFIG_LSM6DSOX=y
```
### Increase memory for larger models
```ini theme={"system"}
CONFIG_MAIN_STACK_SIZE=16384
```
### Add logging
```ini theme={"system"}
CONFIG_LOG=y
```
## Troubleshooting
### SDK not found
Run:
```bash theme={"system"}
west update
```
### Sensor not detected
Enable debug logs:
```ini theme={"system"}
CONFIG_I2C_LOG_LEVEL_DBG=y
CONFIG_SENSOR_LOG_LEVEL_DBG=y
```
### Inference inaccurate
* Ensure sample rate matches your training data
* Verify sensor axis order
* Test with raw features from Edge Impulse Studio
## Summary
You have successfully deployed an IMU-based Edge Impulse model on Zephyr RTOS! You can now extend this example by:
## Next Steps
For more advanced usage, consider:
* Porting the project to a new board
* Adding anomaly detection
For more examples and tutorials,
see the [Zephyr series overview](/tutorials/topics/zephyr/zephyr-module-series) for more in-depth tutorials on working with sensors and peripherals in Zephyr projects as we continue to expand this series!