> ## Documentation Index
> Fetch the complete documentation index at: https://docs.edgeimpulse.com/llms.txt
> Use this file to discover all available pages before exploring further.
# Deploy PyTorch models with ExecuTorch
> Train PyTorch models in Edge Impulse and export ExecuTorch programs using custom learning and deployment blocks
[ExecuTorch](https://pytorch.org/executorch/) is PyTorch's runtime for on-device inference. It takes a PyTorch model, lowers it to a compact `.pte` program, and runs it on phones, single-board computers, and microcontrollers with backends such as XNNPACK and CMSIS-NN.
In this tutorial, you'll connect PyTorch to Edge Impulse with two custom blocks: a **learning block** that trains a model and exports both ONNX (for Studio) and an ExecuTorch `.pte`, and a **deployment block** that packages a trained impulse into a `.pte` with a small runtime harness. At the end, you'll have a reusable PyTorch-to-edge pipeline in your own organization.
This tutorial uses the Edge Impulse CLI and Docker. Install the [Edge Impulse CLI](/tools/clis/edge-impulse-cli/installation) and [Docker](https://docs.docker.com/get-docker/) before you start.
## How the blocks fit together
Edge Impulse works with TensorFlow, TFLite, and ONNX, while ExecuTorch consumes PyTorch programs. The two blocks bridge that gap at different stages of the pipeline.
```mermaid theme={"system"}
flowchart LR
A[Project data
NumPy NHWC] --> B[Learning block
train PyTorch CNN]
B --> C[model.onnx]
C --> D[Edge Impulse
TFLite + profiling]
B -. optional .-> E[model.pte]
D --> F[Deployment block
ONNX to ExecuTorch]
F --> G[deploy.zip
model.pte + runtime]
```
| Block | Type | Input | Output |
| ------------------------ | ---------- | ----------------------------- | ------------------------------------- |
| PyTorch image classifier | Learning | Project data (NumPy) | `model.onnx` (+ optional `model.pte`) |
| ExecuTorch export | Deployment | Trained impulse (ONNX/TFLite) | `deploy.zip` with `model.pte` |
The learning block is available to all users. The deployment block is an enterprise feature.
## 1. Train a PyTorch model with a custom learning block
The learning block trains a compact CNN on your project's image data and outputs an ONNX model that Edge Impulse converts to TFLite for deployment.
This walkthrough uses the image classifier ([executorch-pytorch-classification-block](https://github.com/edgeimpulse/executorch-pytorch-classification-block)). The same block ships in four modality variants — image, audio (keyword spotting), time-series, and object detection. See [Source code](#source-code) for all of them; the steps below are identical, only the input data and `parameters.json` differ.
### Block structure
The block contains the standard [custom learning block](/studio/organizations/custom-blocks/custom-learning-blocks) files:
```bash theme={"system"}
executorch-pytorch-classification-block/
├── parameters.json # Block metadata and training parameters
├── model.py # SmallCNN, a resolution-independent classifier
├── train.py # Training entrypoint
├── requirements.txt # Pinned dependencies (CPU PyTorch, ONNX, ExecuTorch)
├── Dockerfile # Training container
└── tests/ # Model and data smoke tests
```
The `parameters.json` file declares the block as a machine learning block that operates on images and expects pixels scaled to `0..1`:
```json theme={"system"}
{
"version": 1,
"type": "machine-learning",
"info": {
"name": "PyTorch image classifier (ExecuTorch)",
"operatesOn": "image",
"imageInputScaling": "0..1"
},
"parameters": [
{ "name": "Number of training epochs", "type": "int", "param": "epochs", "value": 30 },
{ "name": "Learning rate", "type": "float", "param": "learning-rate", "value": 0.001 }
]
}
```
### Handle the data format
Edge Impulse provides image data as pre-scaled `float32` arrays in **NHWC** (batch, height, width, channels) order. PyTorch expects **NCHW**, so the training script transposes the arrays before training:
```python theme={"system"}
def to_nchw(x):
# NHWC (Edge Impulse) -> NCHW (PyTorch)
return np.transpose(x, (0, 3, 1, 2))
```
You only transpose for training. Because the block outputs ONNX, Edge Impulse applies the equivalent transpose on-device automatically.
### Export ONNX and ExecuTorch
After training, the block writes `model.onnx` for Studio and, when the `--export-pte` flag is set, an ExecuTorch program:
```python theme={"system"}
from executorch.backends.xnnpack.partition.xnnpack_partitioner import XnnpackPartitioner
from executorch.exir import to_edge_transform_and_lower
exported = torch.export.export(model, (sample_input,))
program = to_edge_transform_and_lower(
exported, partitioner=[XnnpackPartitioner()]
).to_executorch()
with open("model.pte", "wb") as f:
f.write(program.buffer)
```
`executorch==0.4.0` requires `torch==2.5.0`. Pin the two together and install the CPU wheels from `https://download.pytorch.org/whl/cpu` to avoid pulling CUDA packages into the build.
### Test the block locally
Download processed data from a project that has an image impulse, then run the container:
```bash theme={"system"}
edge-impulse-blocks runner --download-data input/
docker build -t executorch-pytorch-classification-block .
docker run --rm -v "$PWD":/app executorch-pytorch-classification-block \
--data-directory /app/input \
--out-directory /app/out \
--epochs 30 --learning-rate 0.001 --export-pte
```
You'll find `out/model.onnx` and `out/model.pte` when the run finishes.
### Push to Edge Impulse
```bash theme={"system"}
edge-impulse-blocks init
edge-impulse-blocks push
```
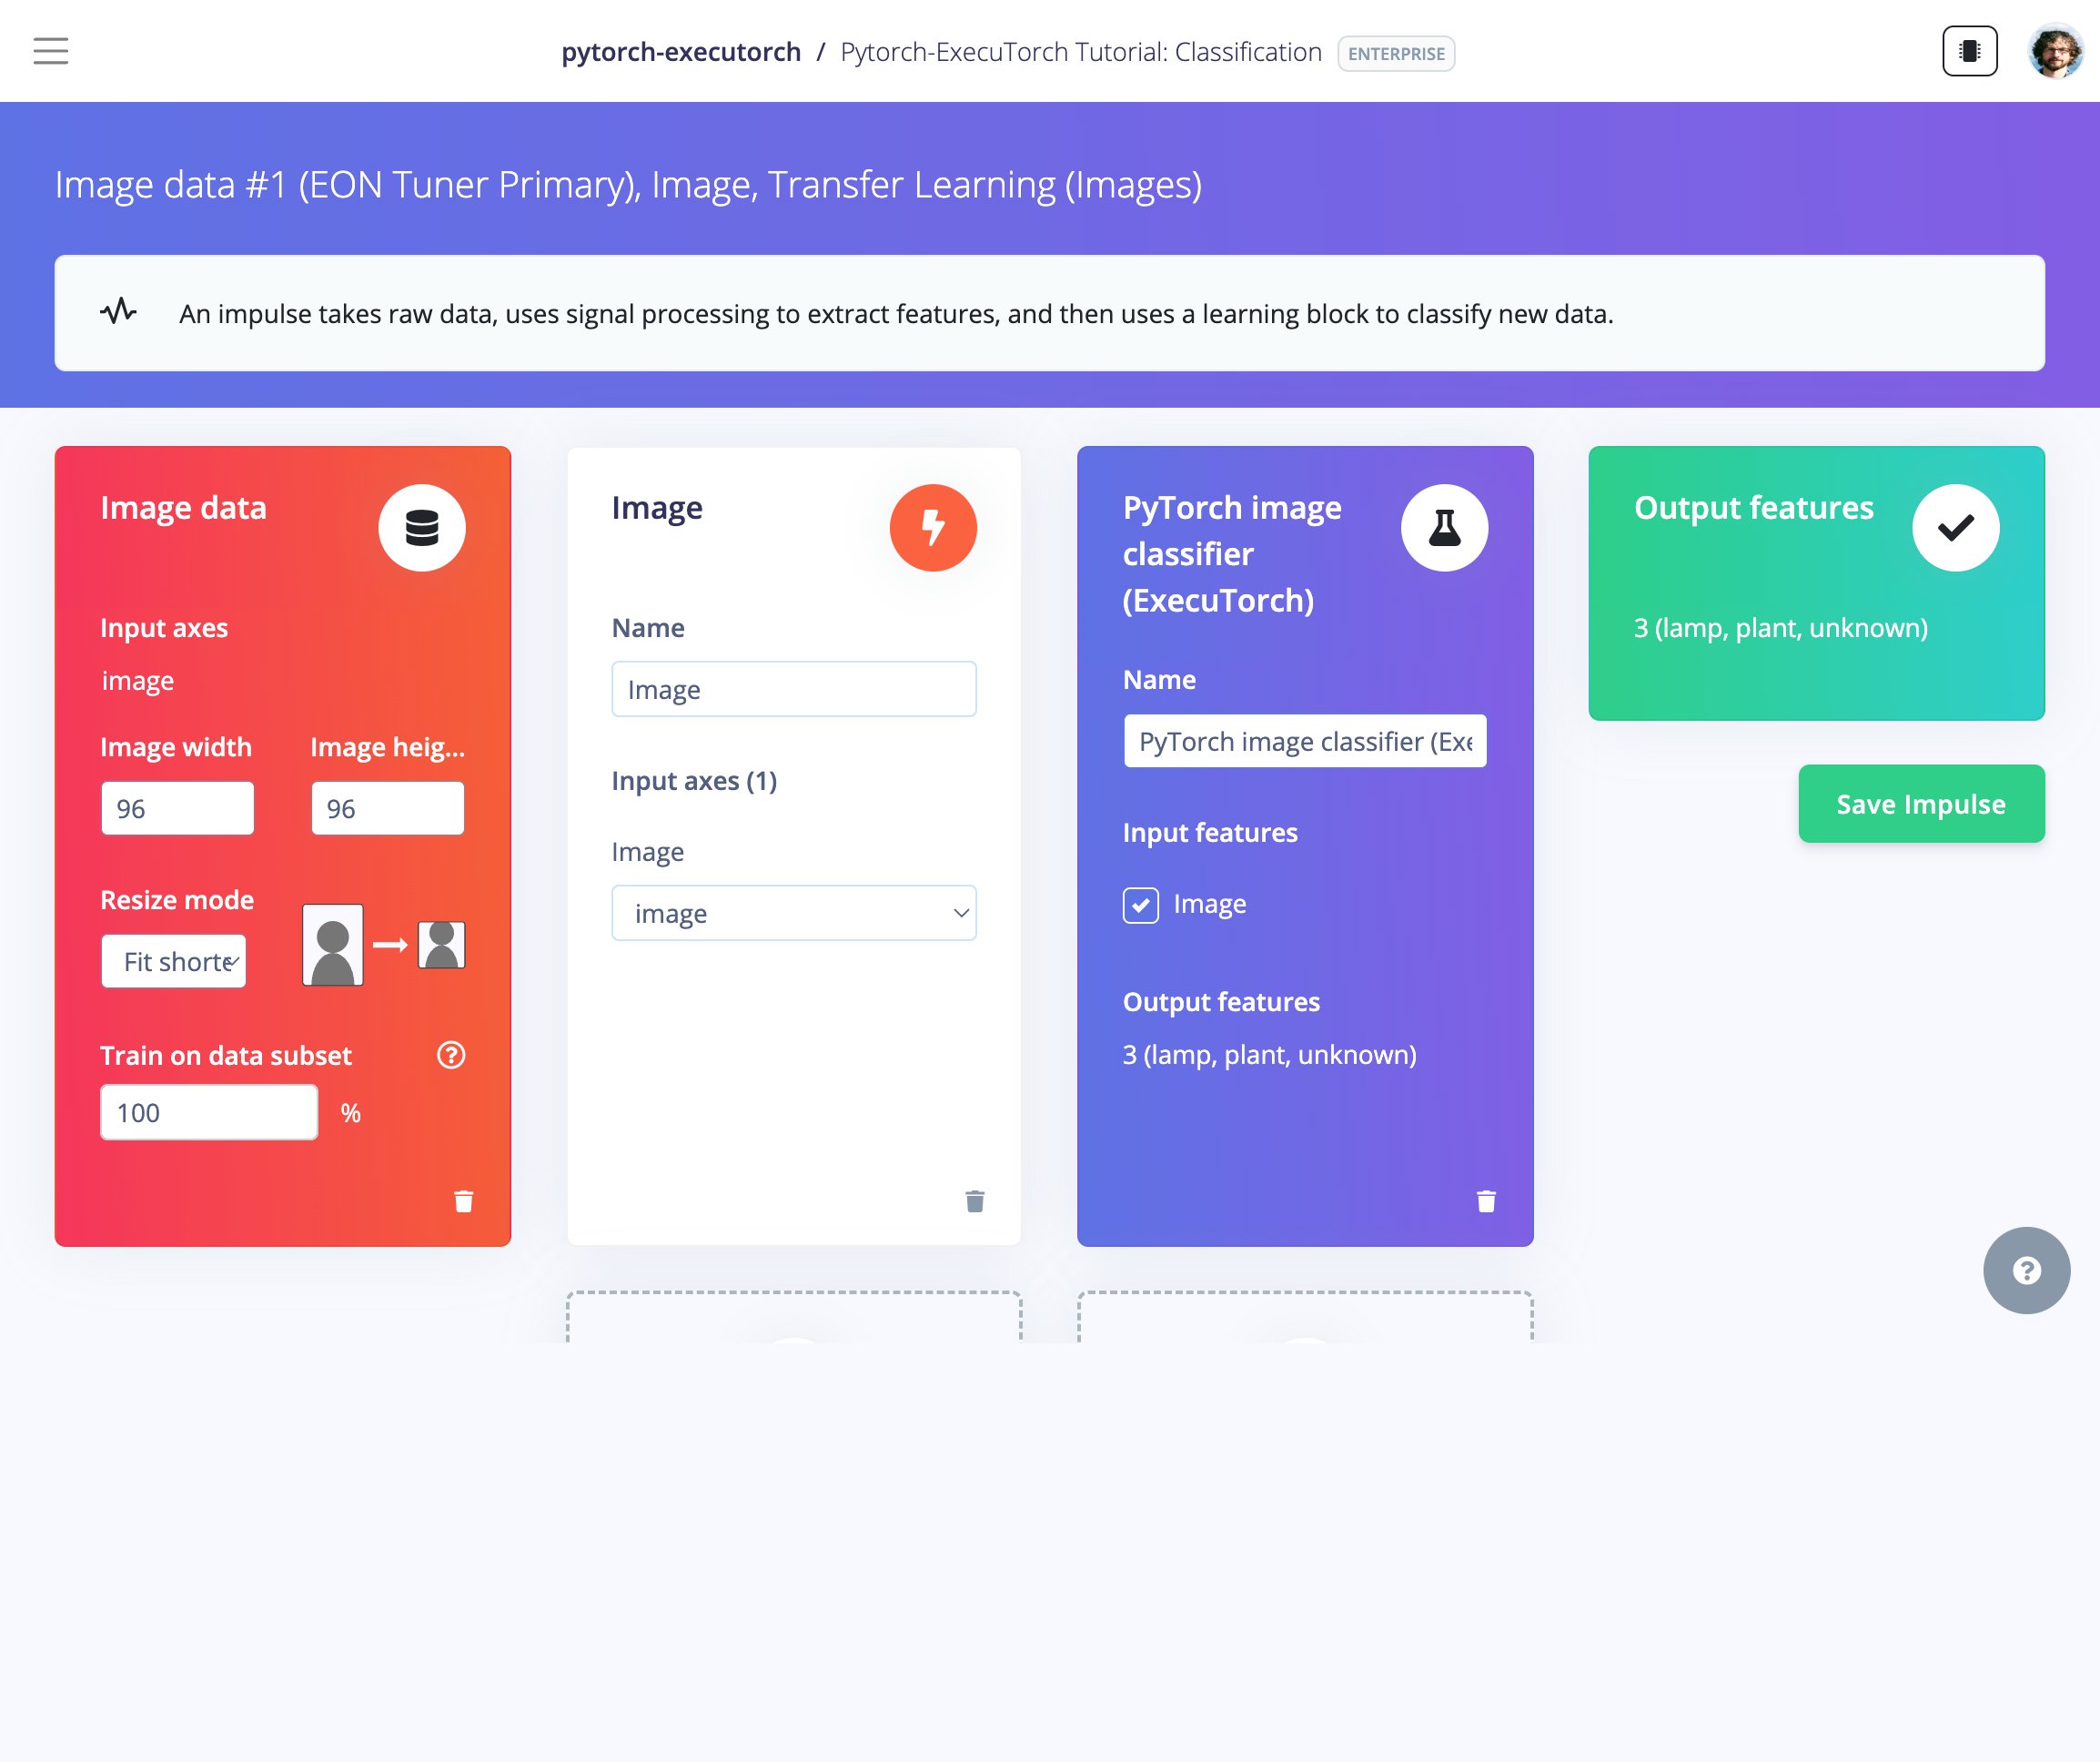
The block then appears under **Create impulse → Add learning block** in Studio.
 ### Train and test in Studio
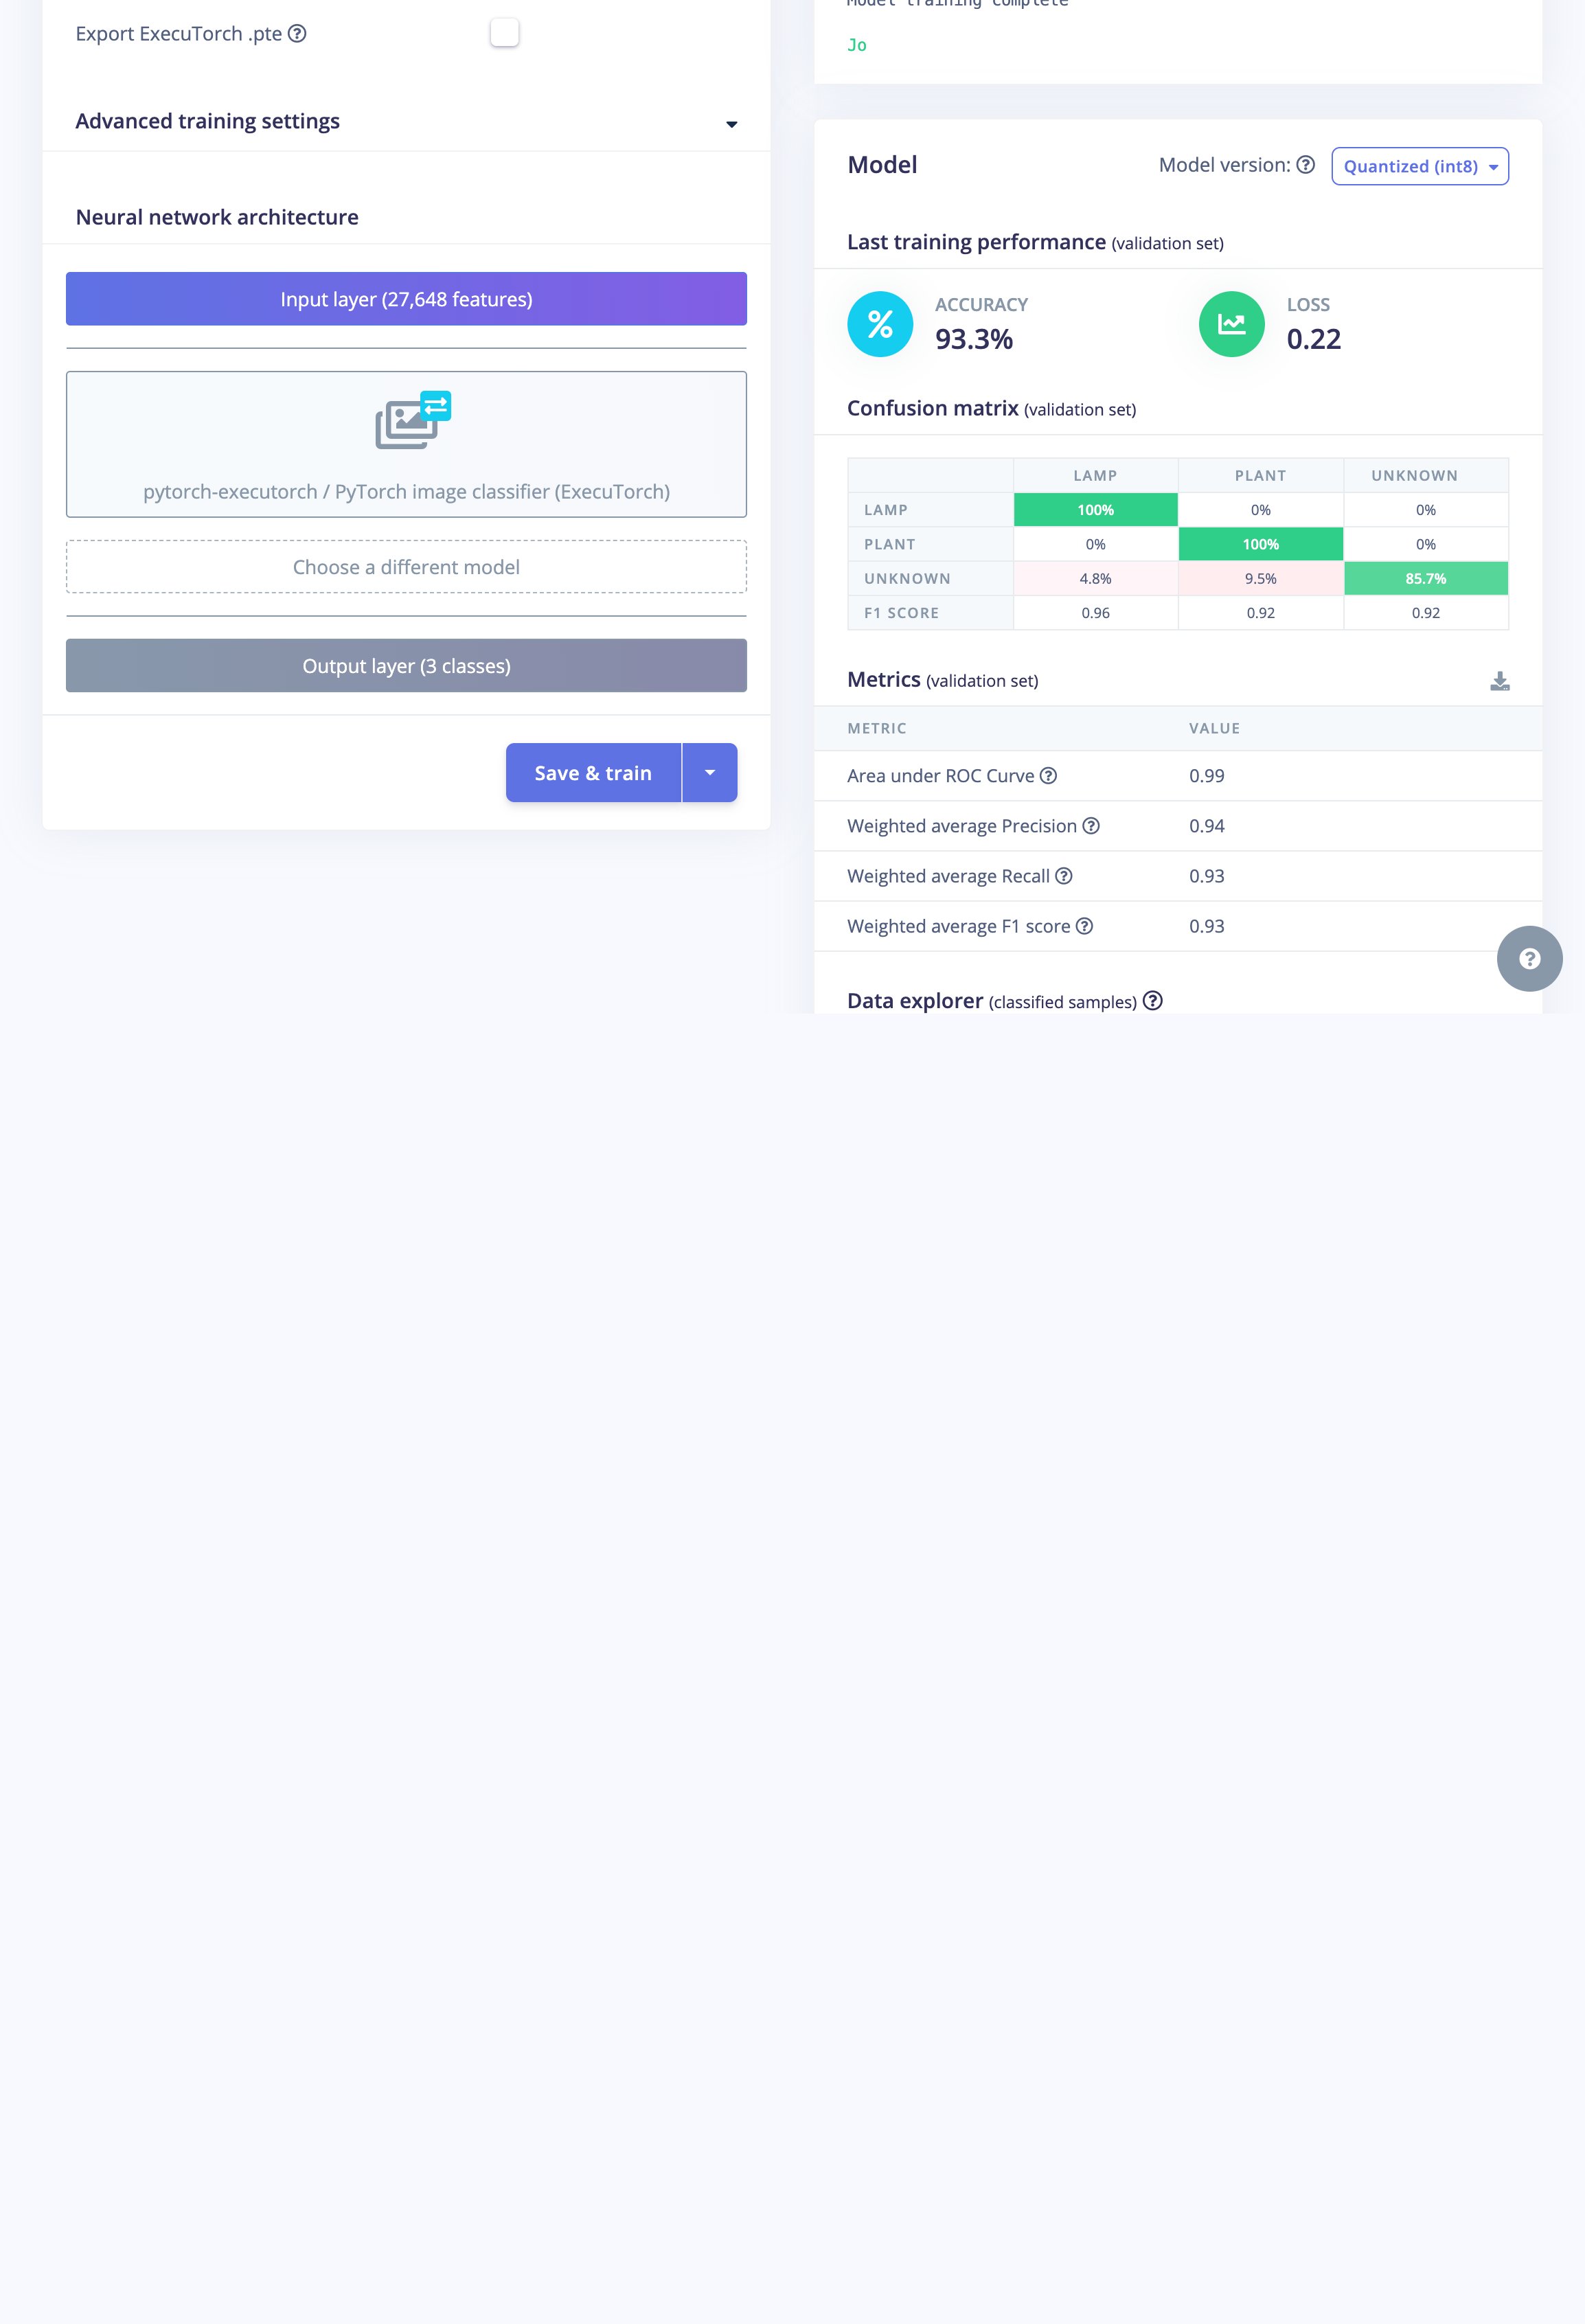
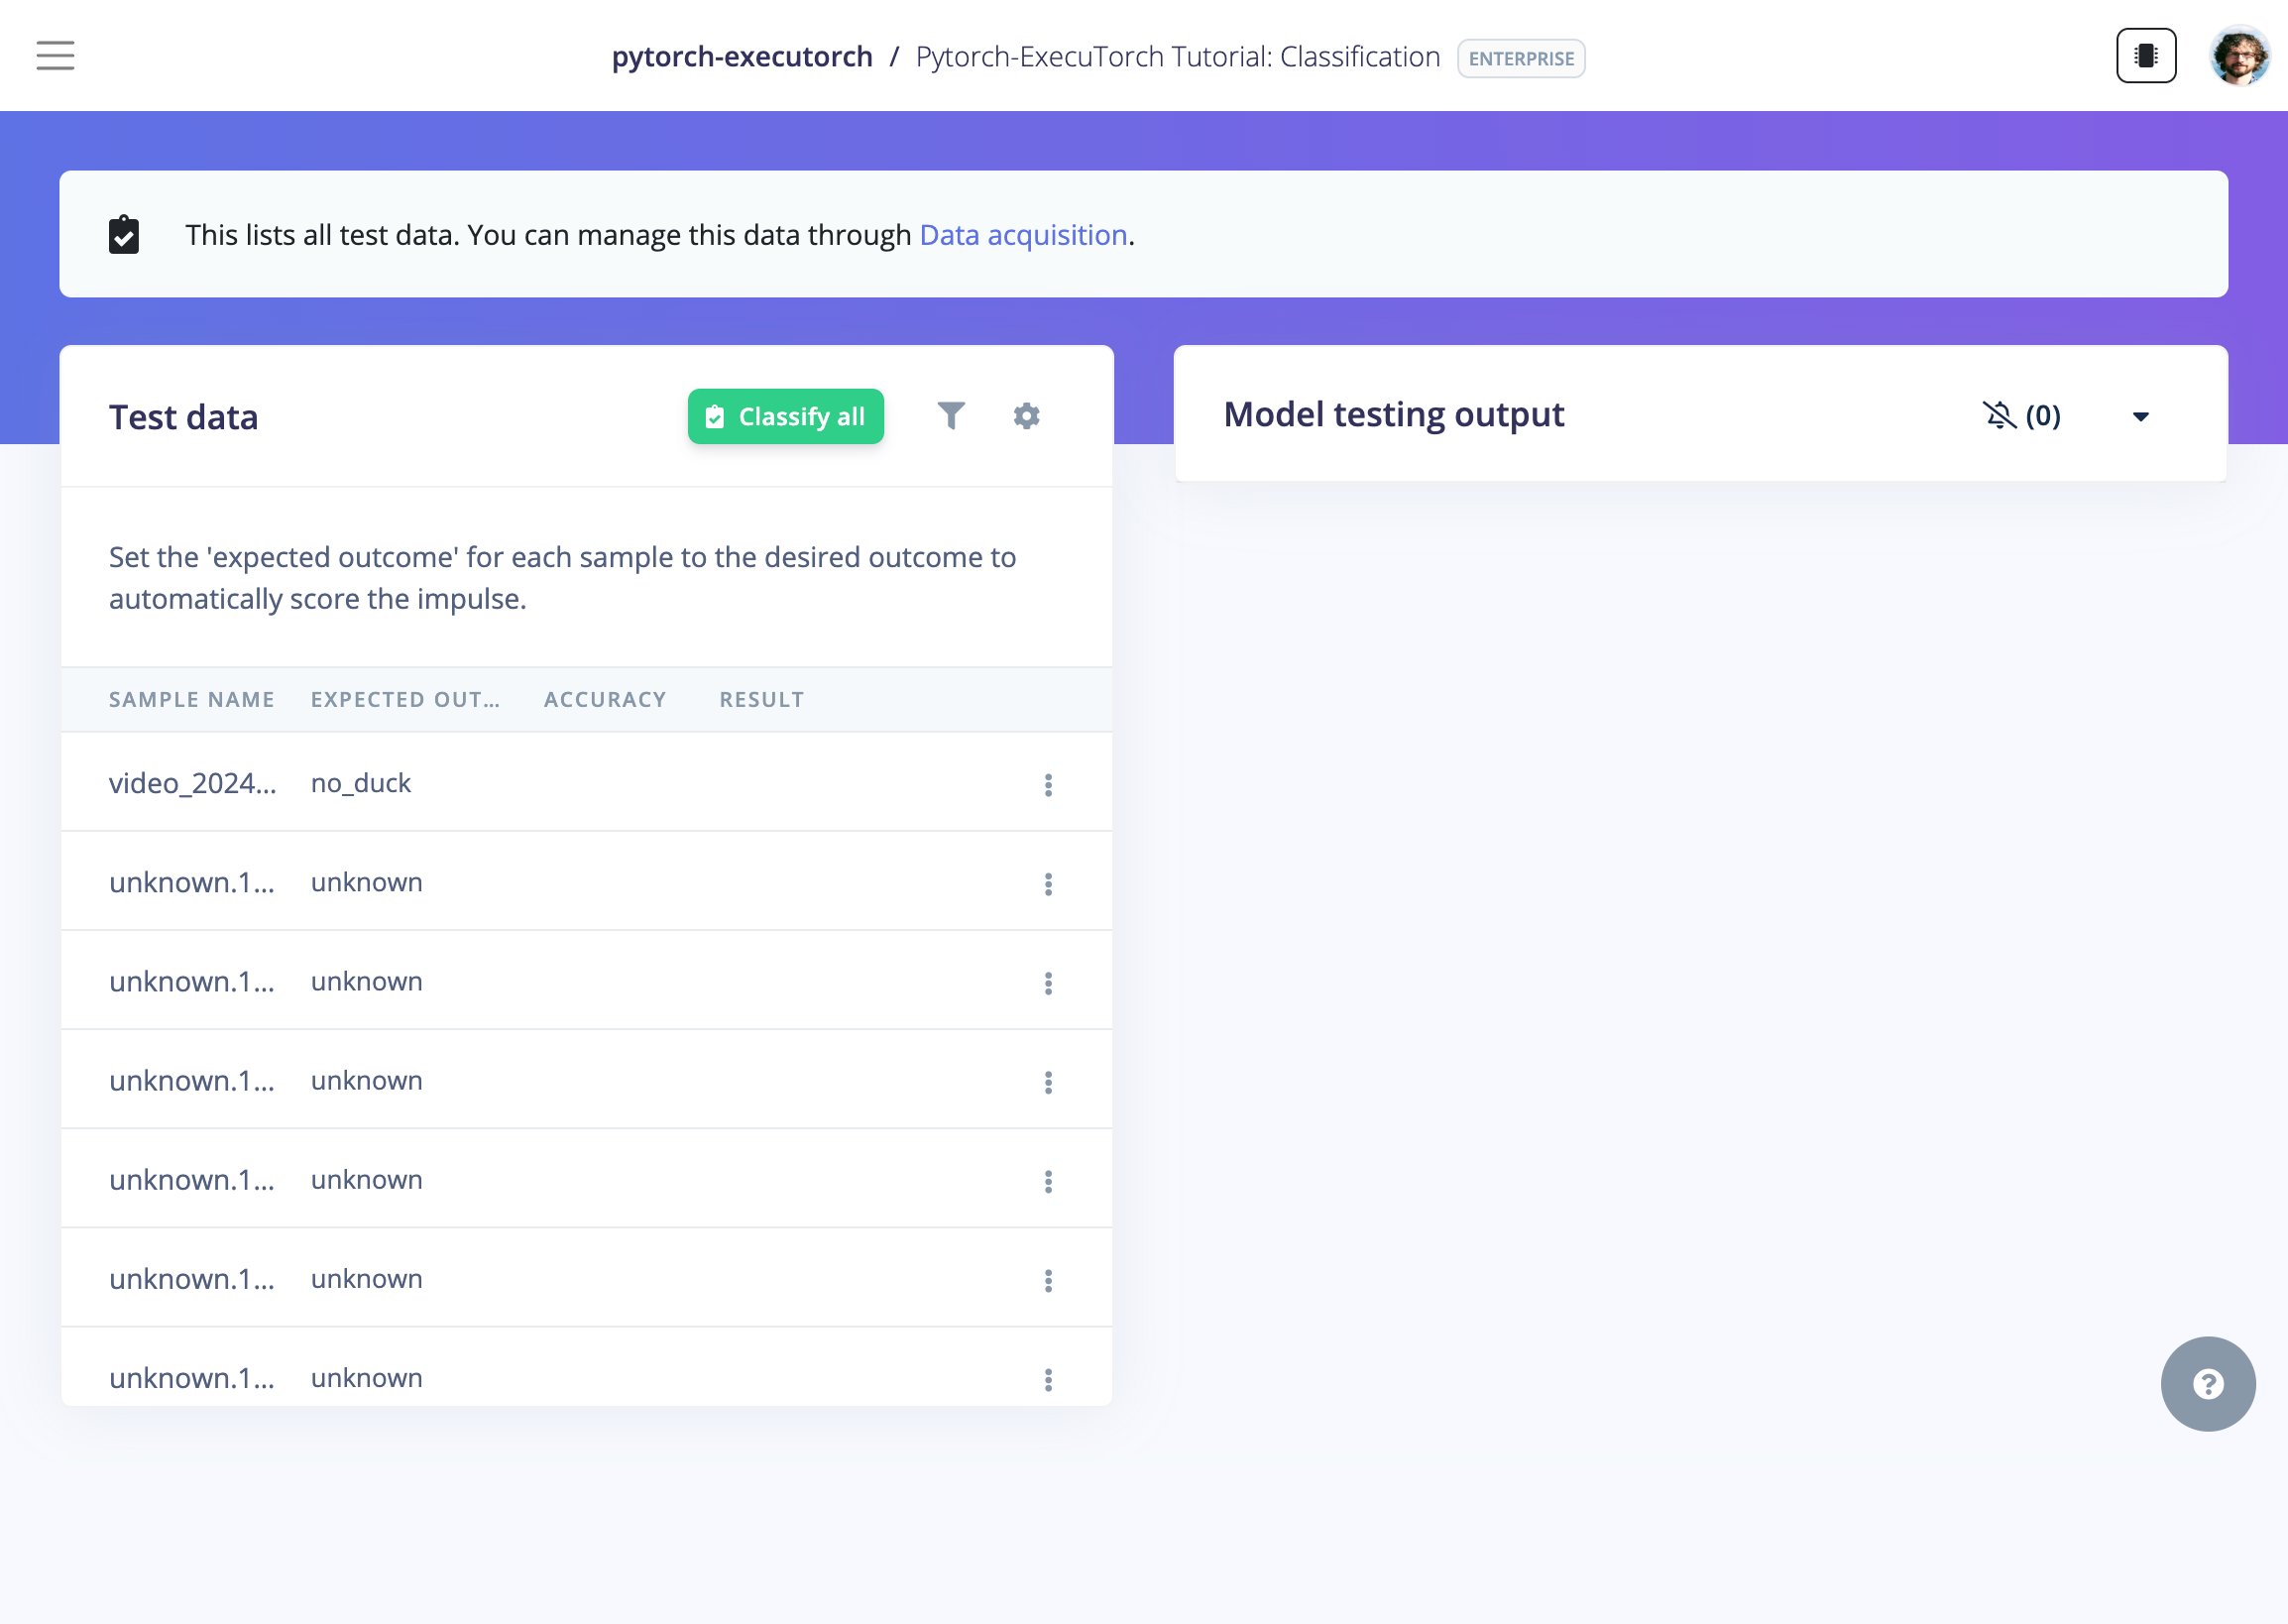
With the block added to your impulse, train it from the **Learning** page, then verify it generalizes on the **Model testing** page.
### Train and test in Studio
With the block added to your impulse, train it from the **Learning** page, then verify it generalizes on the **Model testing** page.
 ## 2. Export to ExecuTorch with a custom deployment block
**Only available on the Enterprise plan**
This feature is only available on the Enterprise plan. Review our [plans and pricing](https://edgeimpulse.com/pricing) or sign up for our free [expert-led trial](https://edgeimpulse.com/expert-led-trial) today.
The [custom deployment block](/studio/organizations/custom-blocks/custom-deployment-blocks) takes a trained impulse and produces an ExecuTorch deliverable. Because ExecuTorch consumes PyTorch, the block converts the exported ONNX model to PyTorch with `onnx2torch`, then lowers it to a `.pte`. The full source is in [executorch-deploy](https://github.com/edgeimpulse/executorch-deploy).
### Block structure
```bash theme={"system"}
executorch-deploy/
├── parameters.json # Deploy block metadata + backend selector
├── build.py # Entrypoint: metadata -> deploy.zip
├── app/
│ ├── run_pte.py # Runtime harness (loads a .pte, runs one pass)
│ └── convert.py # Offline ONNX -> .pte converter
├── requirements.txt
└── Dockerfile
```
Edge Impulse calls the entrypoint with the path to `deployment-metadata.json`, which points to the input and output folders:
```python theme={"system"}
metadata = json.load(open(args.metadata))
input_dir = metadata["folders"]["input"]
output_dir = metadata["folders"]["output"]
```
The block converts the model, copies in the runtime harness and label map, then writes `deploy.zip` to the output folder. See [deployment-metadata.json](/tools/specifications/files/deployment-metadata-json) for the full input schema.
### Test the block locally
```bash theme={"system"}
edge-impulse-blocks runner --download-data input/
docker build -t executorch-deploy .
docker run --rm -v "$PWD":/home executorch-deploy \
--metadata /home/input/deployment-metadata.json
```
The resulting `deploy.zip` contains `model.pte`, the source `model.onnx`, `labels.txt`, and the `app/` harness.
### Push to Edge Impulse
```bash theme={"system"}
edge-impulse-blocks init # choose "Deployment block"
edge-impulse-blocks push
```
The block then appears as a **Custom block** option on the project **Deployment** page.
## 2. Export to ExecuTorch with a custom deployment block
**Only available on the Enterprise plan**
This feature is only available on the Enterprise plan. Review our [plans and pricing](https://edgeimpulse.com/pricing) or sign up for our free [expert-led trial](https://edgeimpulse.com/expert-led-trial) today.
The [custom deployment block](/studio/organizations/custom-blocks/custom-deployment-blocks) takes a trained impulse and produces an ExecuTorch deliverable. Because ExecuTorch consumes PyTorch, the block converts the exported ONNX model to PyTorch with `onnx2torch`, then lowers it to a `.pte`. The full source is in [executorch-deploy](https://github.com/edgeimpulse/executorch-deploy).
### Block structure
```bash theme={"system"}
executorch-deploy/
├── parameters.json # Deploy block metadata + backend selector
├── build.py # Entrypoint: metadata -> deploy.zip
├── app/
│ ├── run_pte.py # Runtime harness (loads a .pte, runs one pass)
│ └── convert.py # Offline ONNX -> .pte converter
├── requirements.txt
└── Dockerfile
```
Edge Impulse calls the entrypoint with the path to `deployment-metadata.json`, which points to the input and output folders:
```python theme={"system"}
metadata = json.load(open(args.metadata))
input_dir = metadata["folders"]["input"]
output_dir = metadata["folders"]["output"]
```
The block converts the model, copies in the runtime harness and label map, then writes `deploy.zip` to the output folder. See [deployment-metadata.json](/tools/specifications/files/deployment-metadata-json) for the full input schema.
### Test the block locally
```bash theme={"system"}
edge-impulse-blocks runner --download-data input/
docker build -t executorch-deploy .
docker run --rm -v "$PWD":/home executorch-deploy \
--metadata /home/input/deployment-metadata.json
```
The resulting `deploy.zip` contains `model.pte`, the source `model.onnx`, `labels.txt`, and the `app/` harness.
### Push to Edge Impulse
```bash theme={"system"}
edge-impulse-blocks init # choose "Deployment block"
edge-impulse-blocks push
```
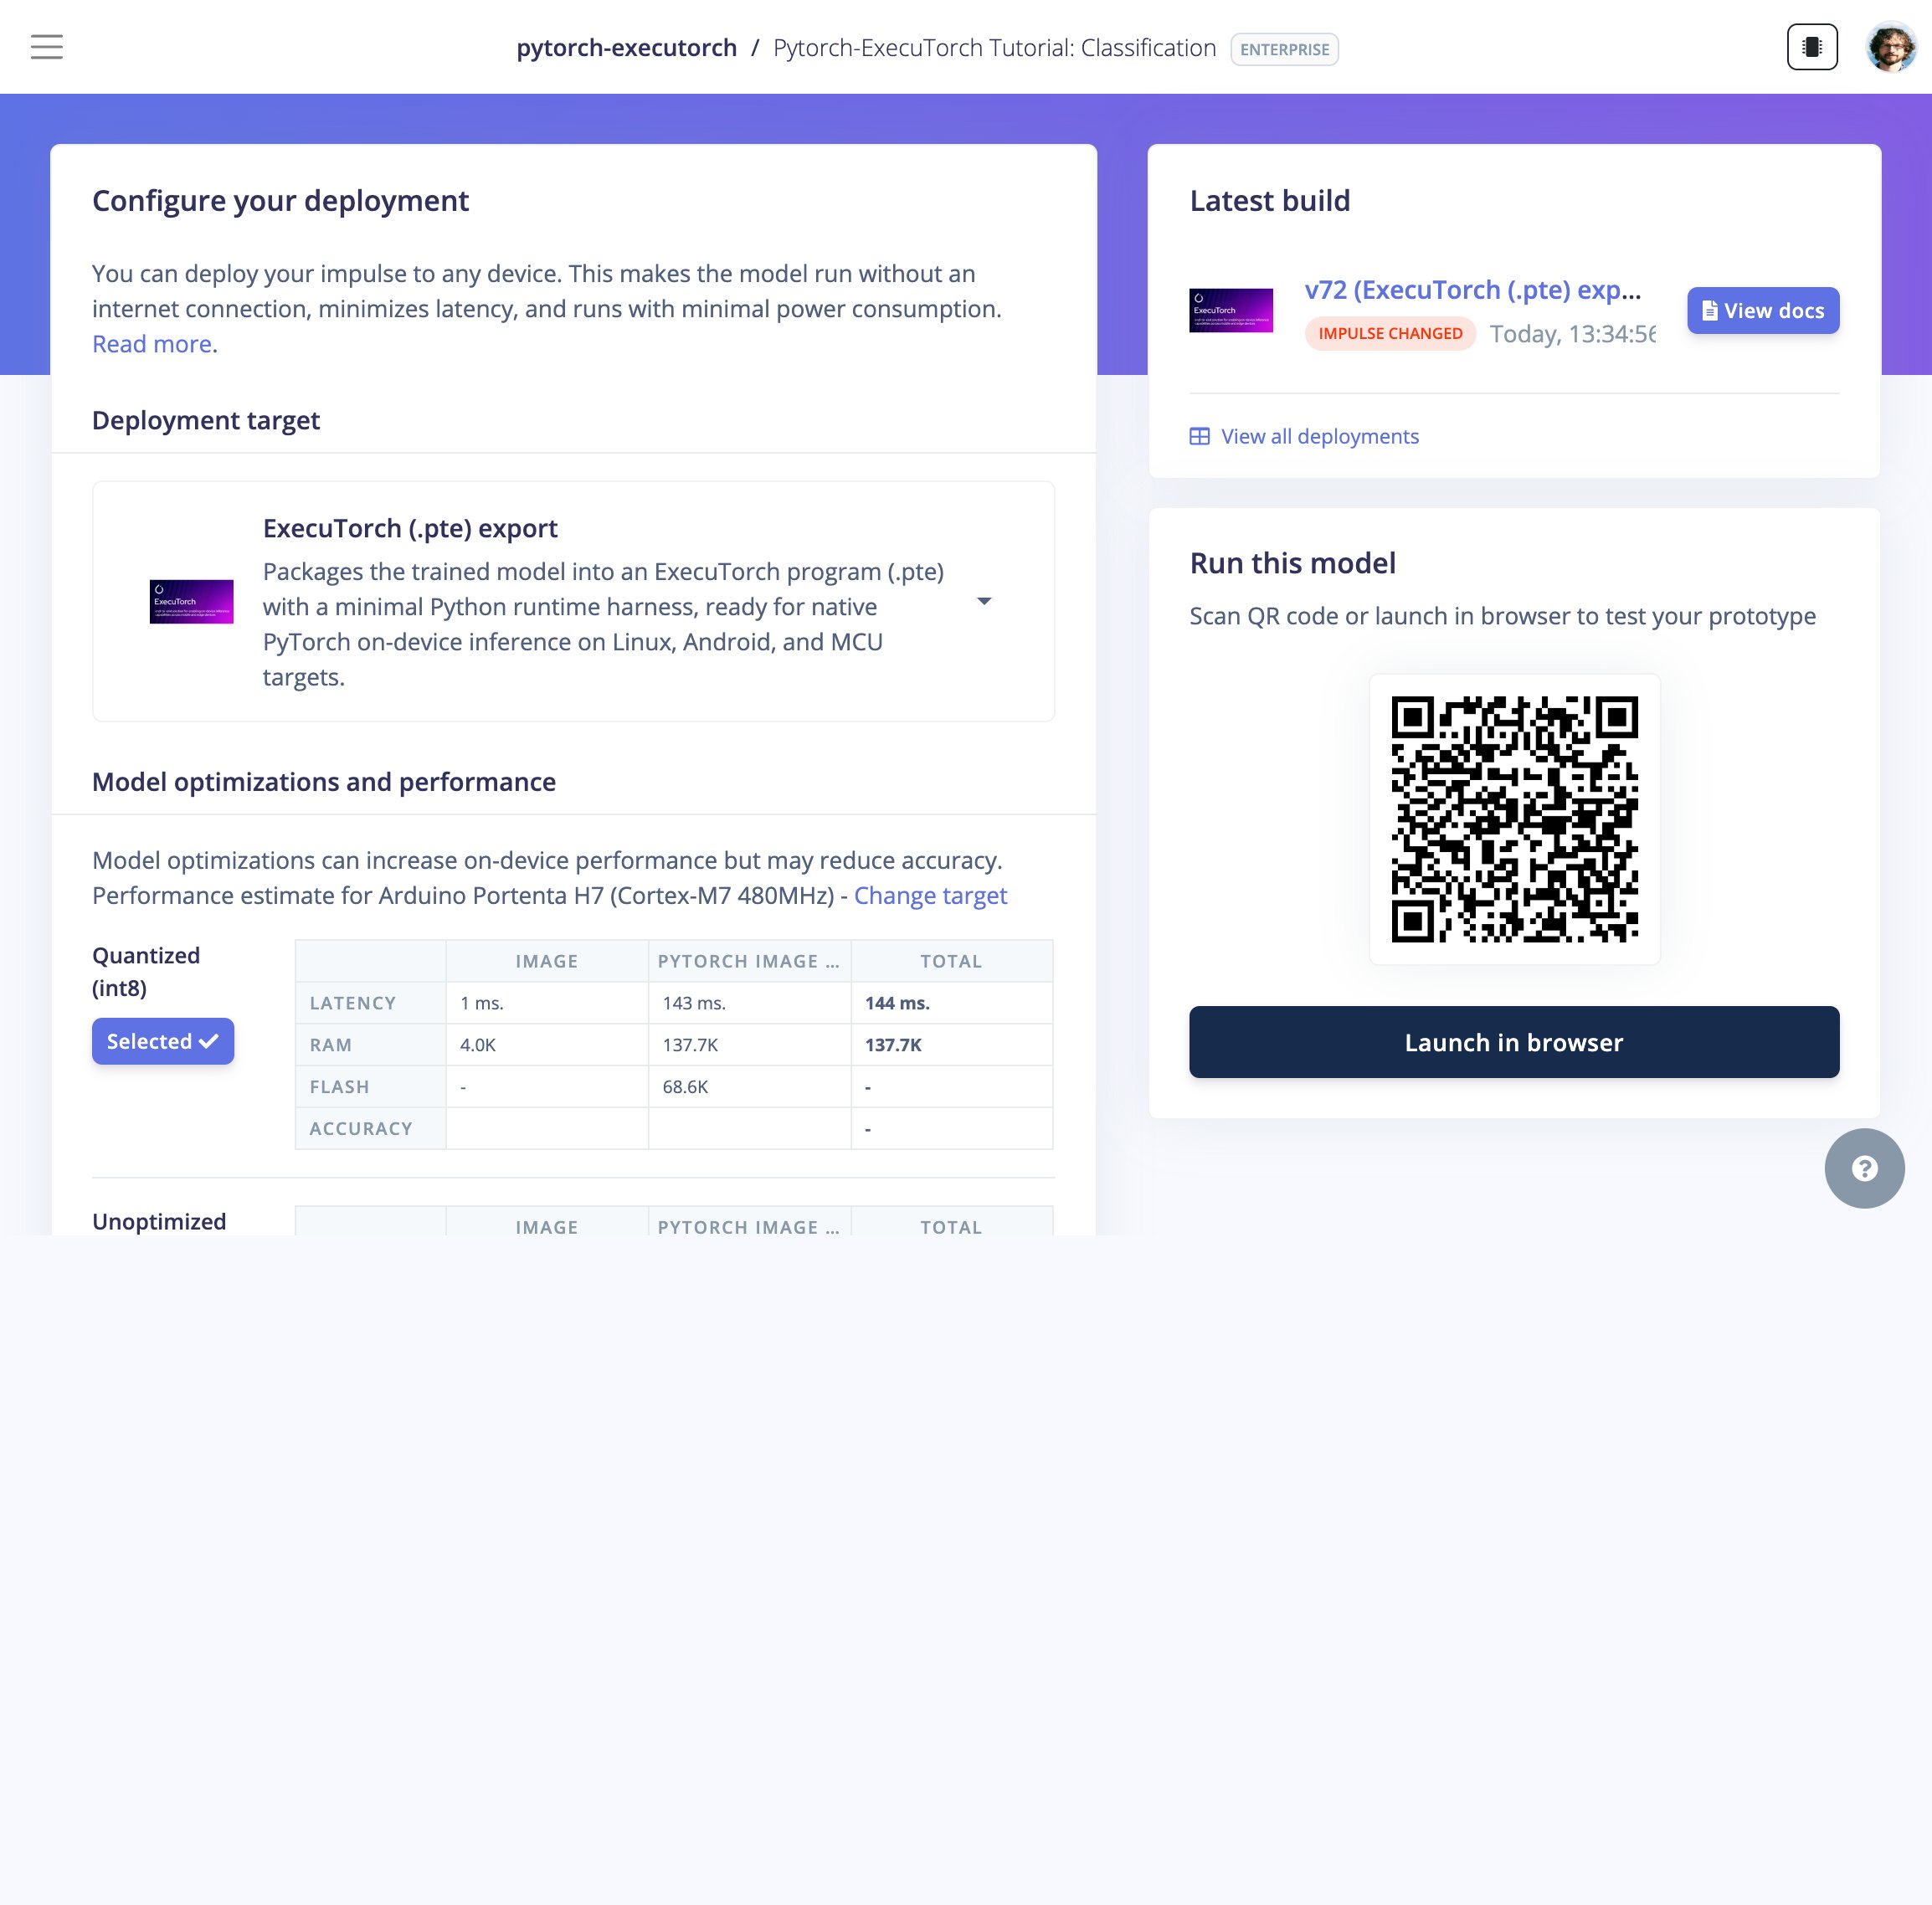
The block then appears as a **Custom block** option on the project **Deployment** page.
 ## Run the ExecuTorch program
On a Linux or ARM target with the ExecuTorch Python runtime installed, load the `.pte` and run a forward pass:
```python theme={"system"}
from executorch.runtime import Runtime
runtime = Runtime.get()
program = runtime.load_program("model.pte")
method = program.load_method("forward")
output = method.execute([sample_input])
```
Compare the output against the original PyTorch model to confirm the conversion is faithful.
The ONNX to PyTorch to ExecuTorch path works for common CNN graphs. Exotic operators may need a custom partitioner or manual conversion with `app/convert.py`. Validate on your target model before relying on it in production.
## Source code
Every block in this series is open source. The learning block comes in four modality variants that share the same structure — pick the one that matches your data. They all export an ONNX model for Studio plus an optional ExecuTorch `.pte`.
| Block | Modality | Repository |
| ------------------------- | ---------------------- | ------------------------------------------------------------------------------------------------------------------------------- |
| PyTorch image classifier | Image classification | [executorch-pytorch-classification-block](https://github.com/edgeimpulse/executorch-pytorch-classification-block) |
| PyTorch keyword spotting | Audio (MFE / MFCC) | [executorch-pytorch-kws-block](https://github.com/edgeimpulse/executorch-pytorch-kws-block) |
| PyTorch motion classifier | Time-series (spectral) | [executorch-pytorch-timeseries-block](https://github.com/edgeimpulse/executorch-pytorch-timeseries-block) |
| PyTorch FOMO detector | Object detection | [executorch-pytorch-object-detection-fomo-block](https://github.com/edgeimpulse/executorch-pytorch-object-detection-fomo-block) |
| ExecuTorch export | Deployment | [executorch-deploy](https://github.com/edgeimpulse/executorch-deploy) |
## Try it on Android
The [ExecuTorch Android demo](https://github.com/edgeimpulse/executorch-android-app) loads a **bare `.pte`** and runs it on-device with the XNNPACK CPU backend — no Edge Impulse C++ SDK and no TFLite. Each block's DSP (image scaling, motion spectral analysis, audio MFE) is hand-ported to Kotlin so the `.pte` only runs the neural network. Every product flavor bundles a different exported model under its own app id, so you can install them side by side.
## Run the ExecuTorch program
On a Linux or ARM target with the ExecuTorch Python runtime installed, load the `.pte` and run a forward pass:
```python theme={"system"}
from executorch.runtime import Runtime
runtime = Runtime.get()
program = runtime.load_program("model.pte")
method = program.load_method("forward")
output = method.execute([sample_input])
```
Compare the output against the original PyTorch model to confirm the conversion is faithful.
The ONNX to PyTorch to ExecuTorch path works for common CNN graphs. Exotic operators may need a custom partitioner or manual conversion with `app/convert.py`. Validate on your target model before relying on it in production.
## Source code
Every block in this series is open source. The learning block comes in four modality variants that share the same structure — pick the one that matches your data. They all export an ONNX model for Studio plus an optional ExecuTorch `.pte`.
| Block | Modality | Repository |
| ------------------------- | ---------------------- | ------------------------------------------------------------------------------------------------------------------------------- |
| PyTorch image classifier | Image classification | [executorch-pytorch-classification-block](https://github.com/edgeimpulse/executorch-pytorch-classification-block) |
| PyTorch keyword spotting | Audio (MFE / MFCC) | [executorch-pytorch-kws-block](https://github.com/edgeimpulse/executorch-pytorch-kws-block) |
| PyTorch motion classifier | Time-series (spectral) | [executorch-pytorch-timeseries-block](https://github.com/edgeimpulse/executorch-pytorch-timeseries-block) |
| PyTorch FOMO detector | Object detection | [executorch-pytorch-object-detection-fomo-block](https://github.com/edgeimpulse/executorch-pytorch-object-detection-fomo-block) |
| ExecuTorch export | Deployment | [executorch-deploy](https://github.com/edgeimpulse/executorch-deploy) |
## Try it on Android
The [ExecuTorch Android demo](https://github.com/edgeimpulse/executorch-android-app) loads a **bare `.pte`** and runs it on-device with the XNNPACK CPU backend — no Edge Impulse C++ SDK and no TFLite. Each block's DSP (image scaling, motion spectral analysis, audio MFE) is hand-ported to Kotlin so the `.pte` only runs the neural network. Every product flavor bundles a different exported model under its own app id, so you can install them side by side.
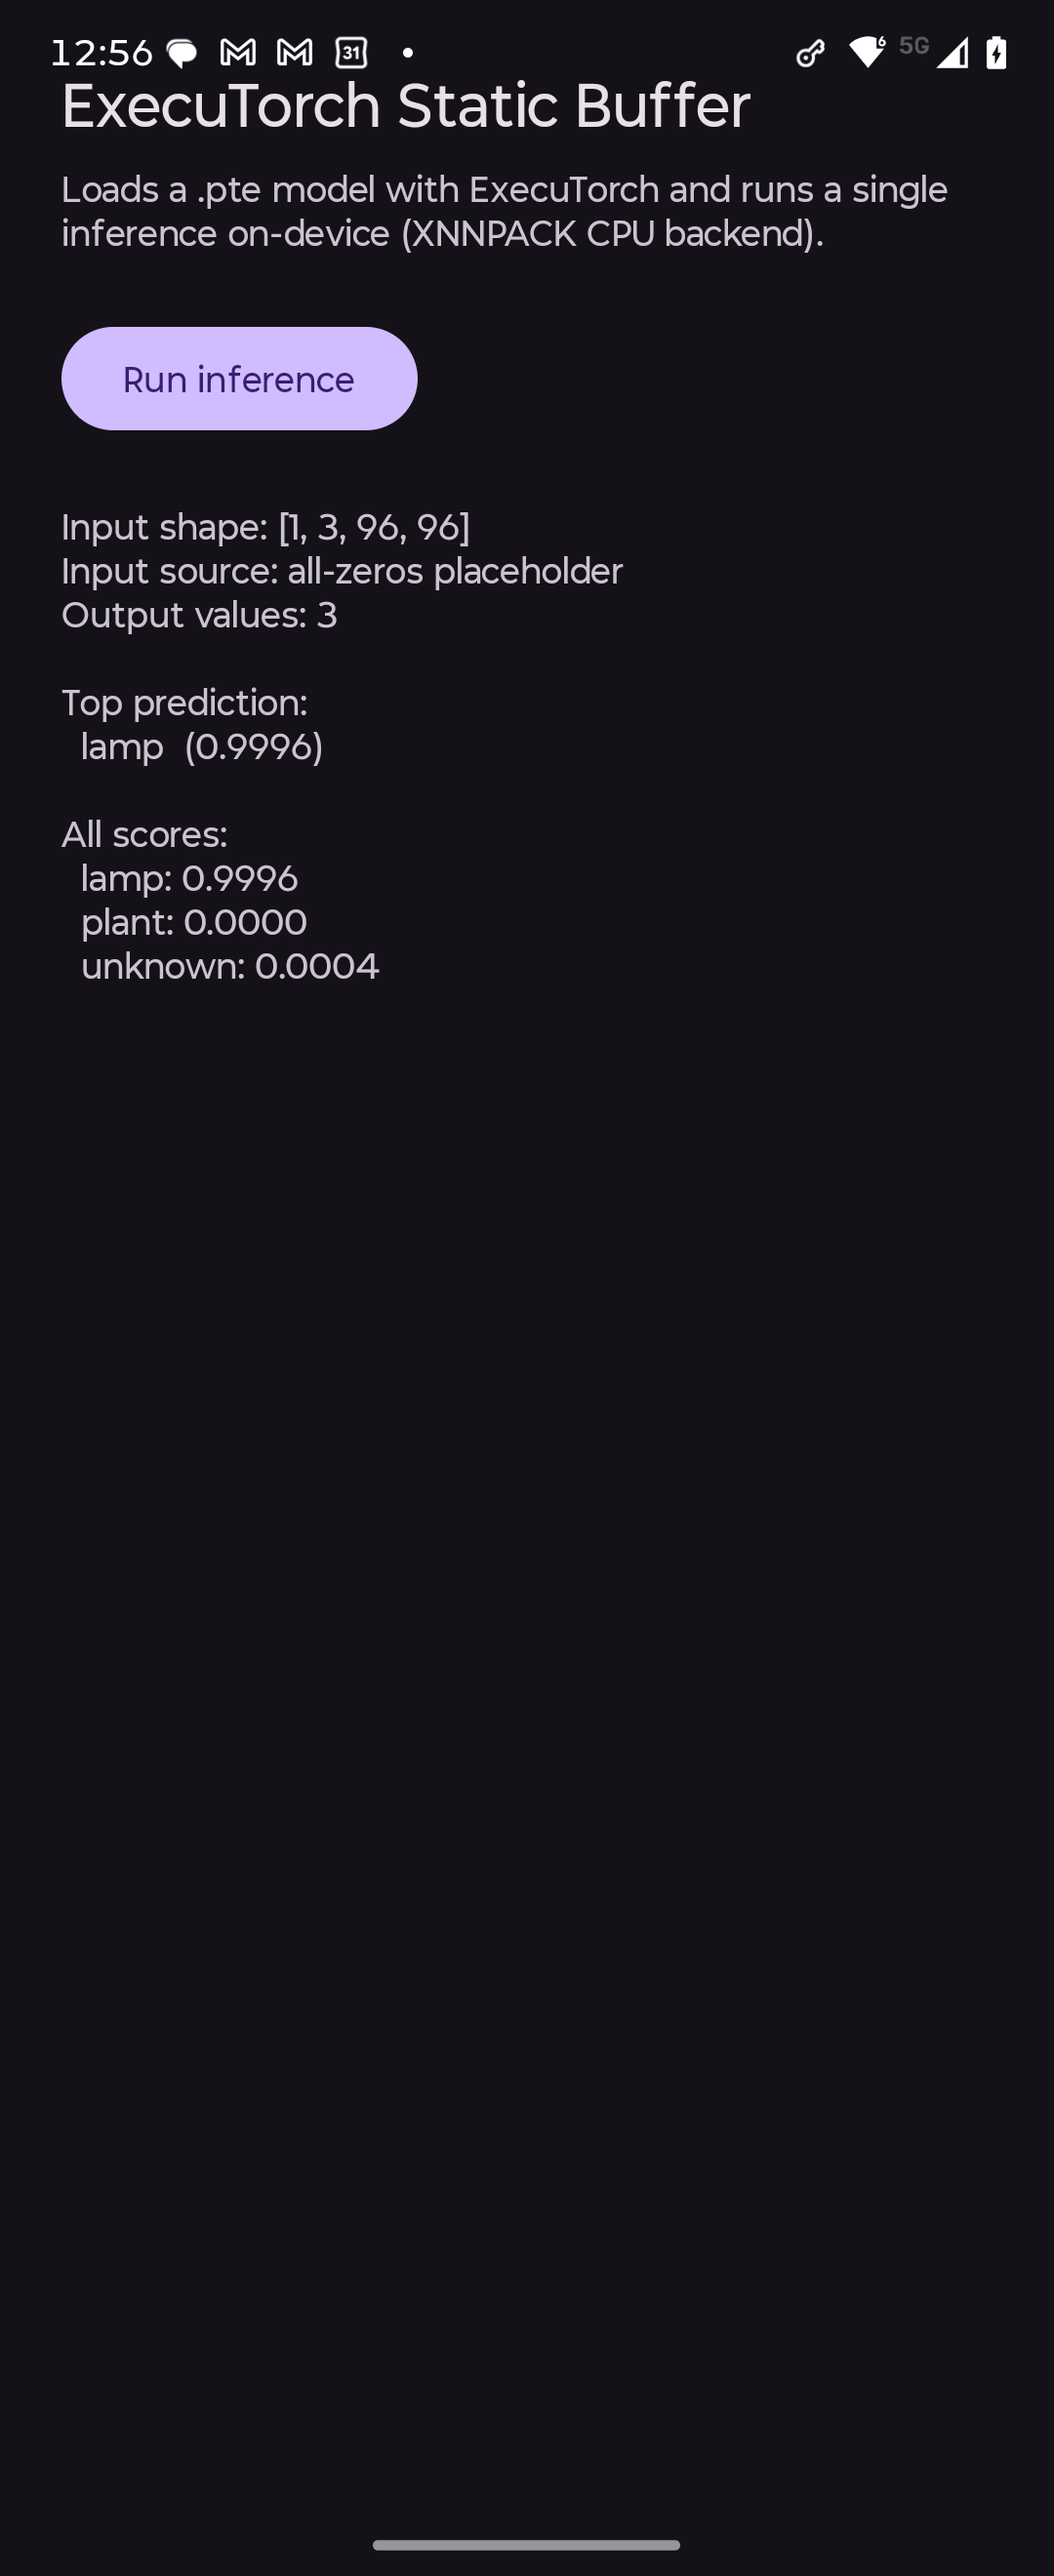

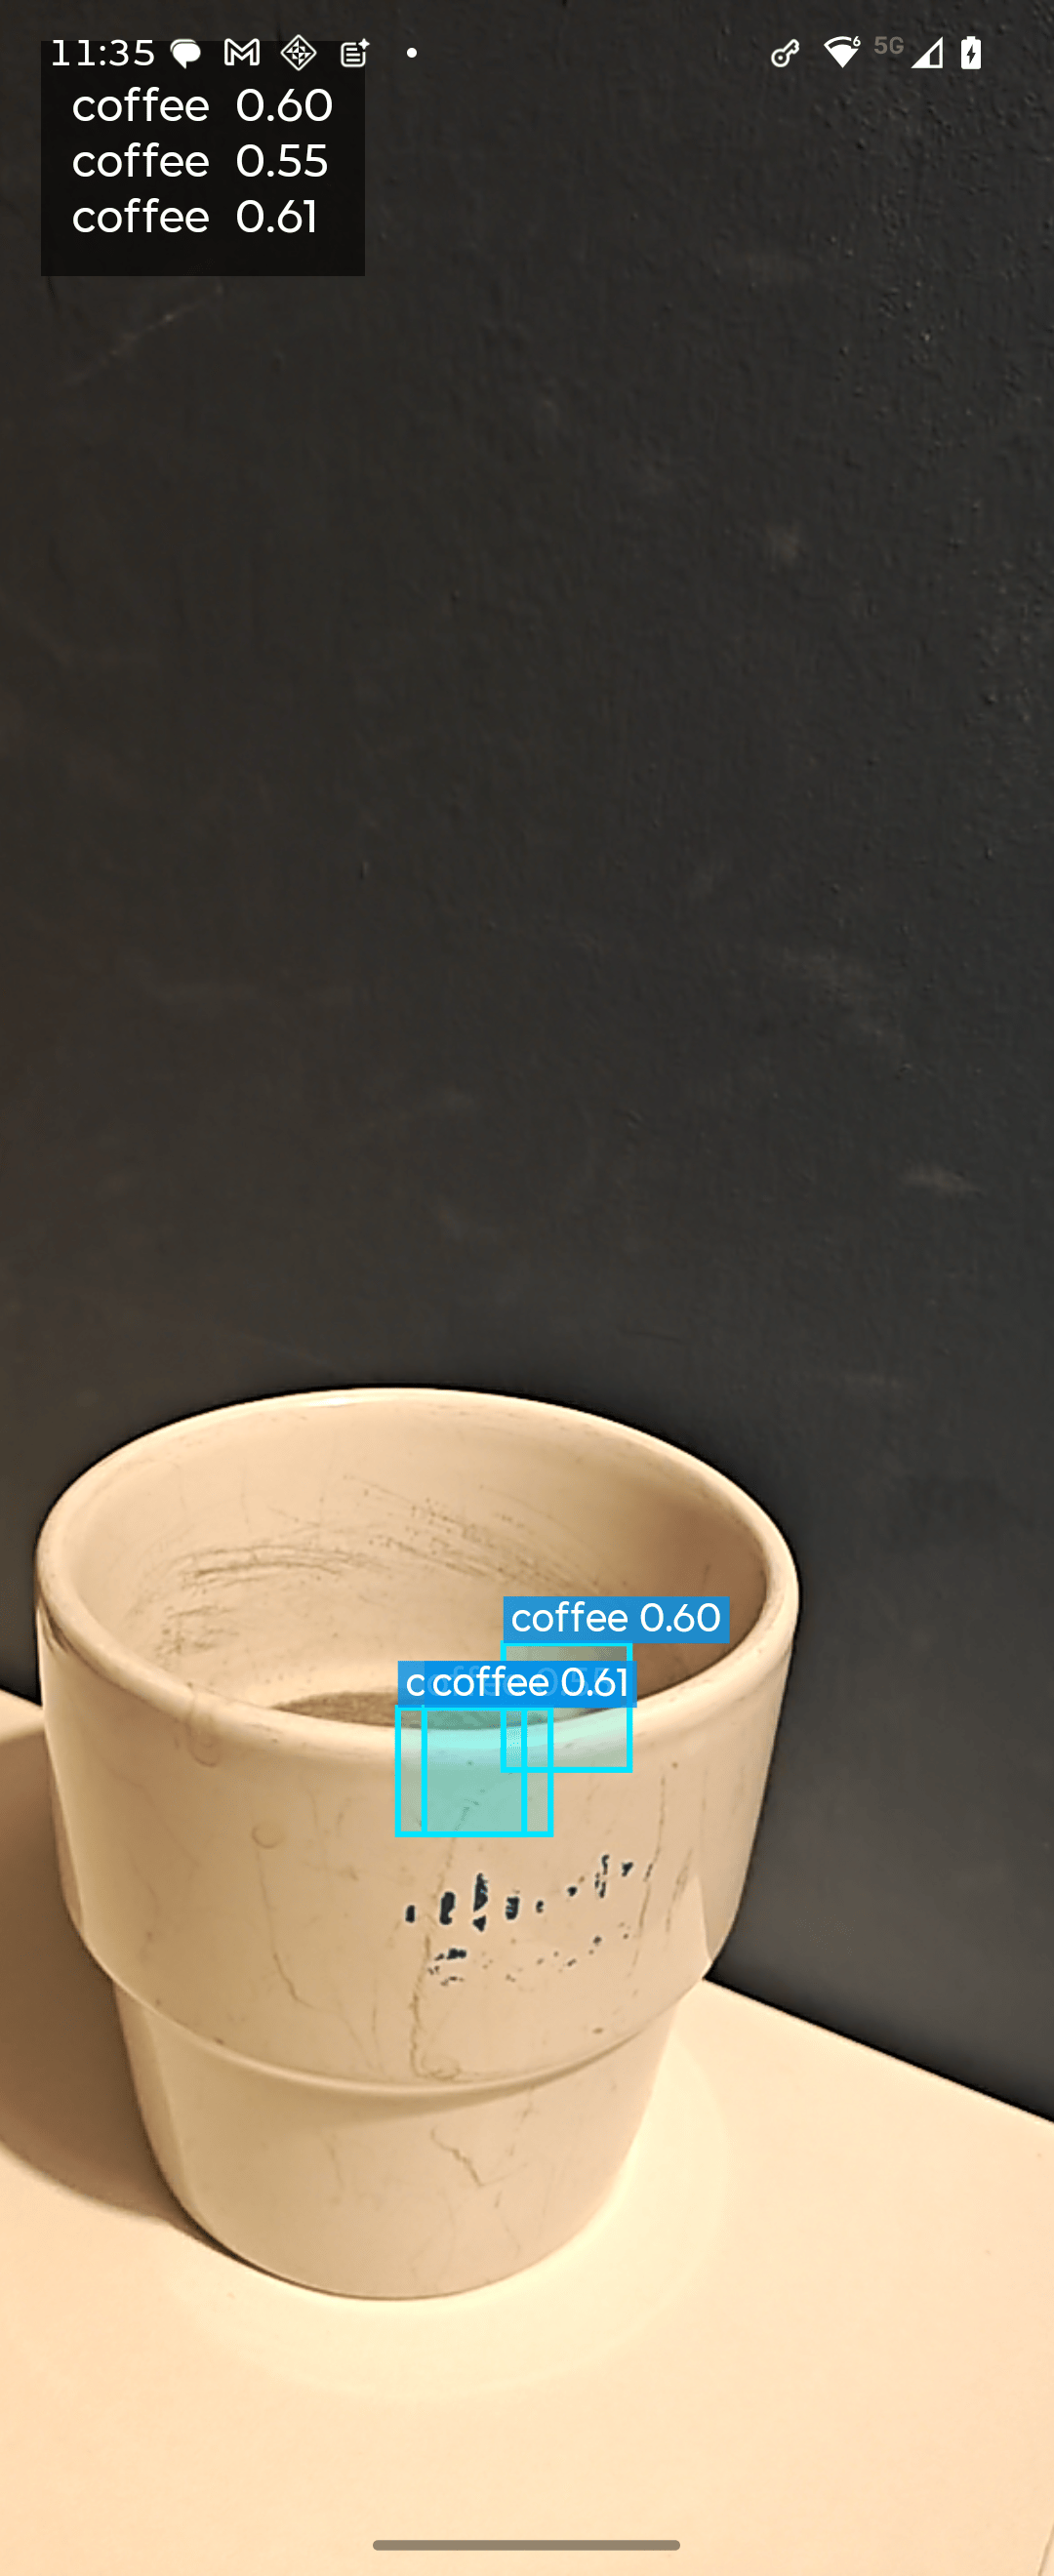
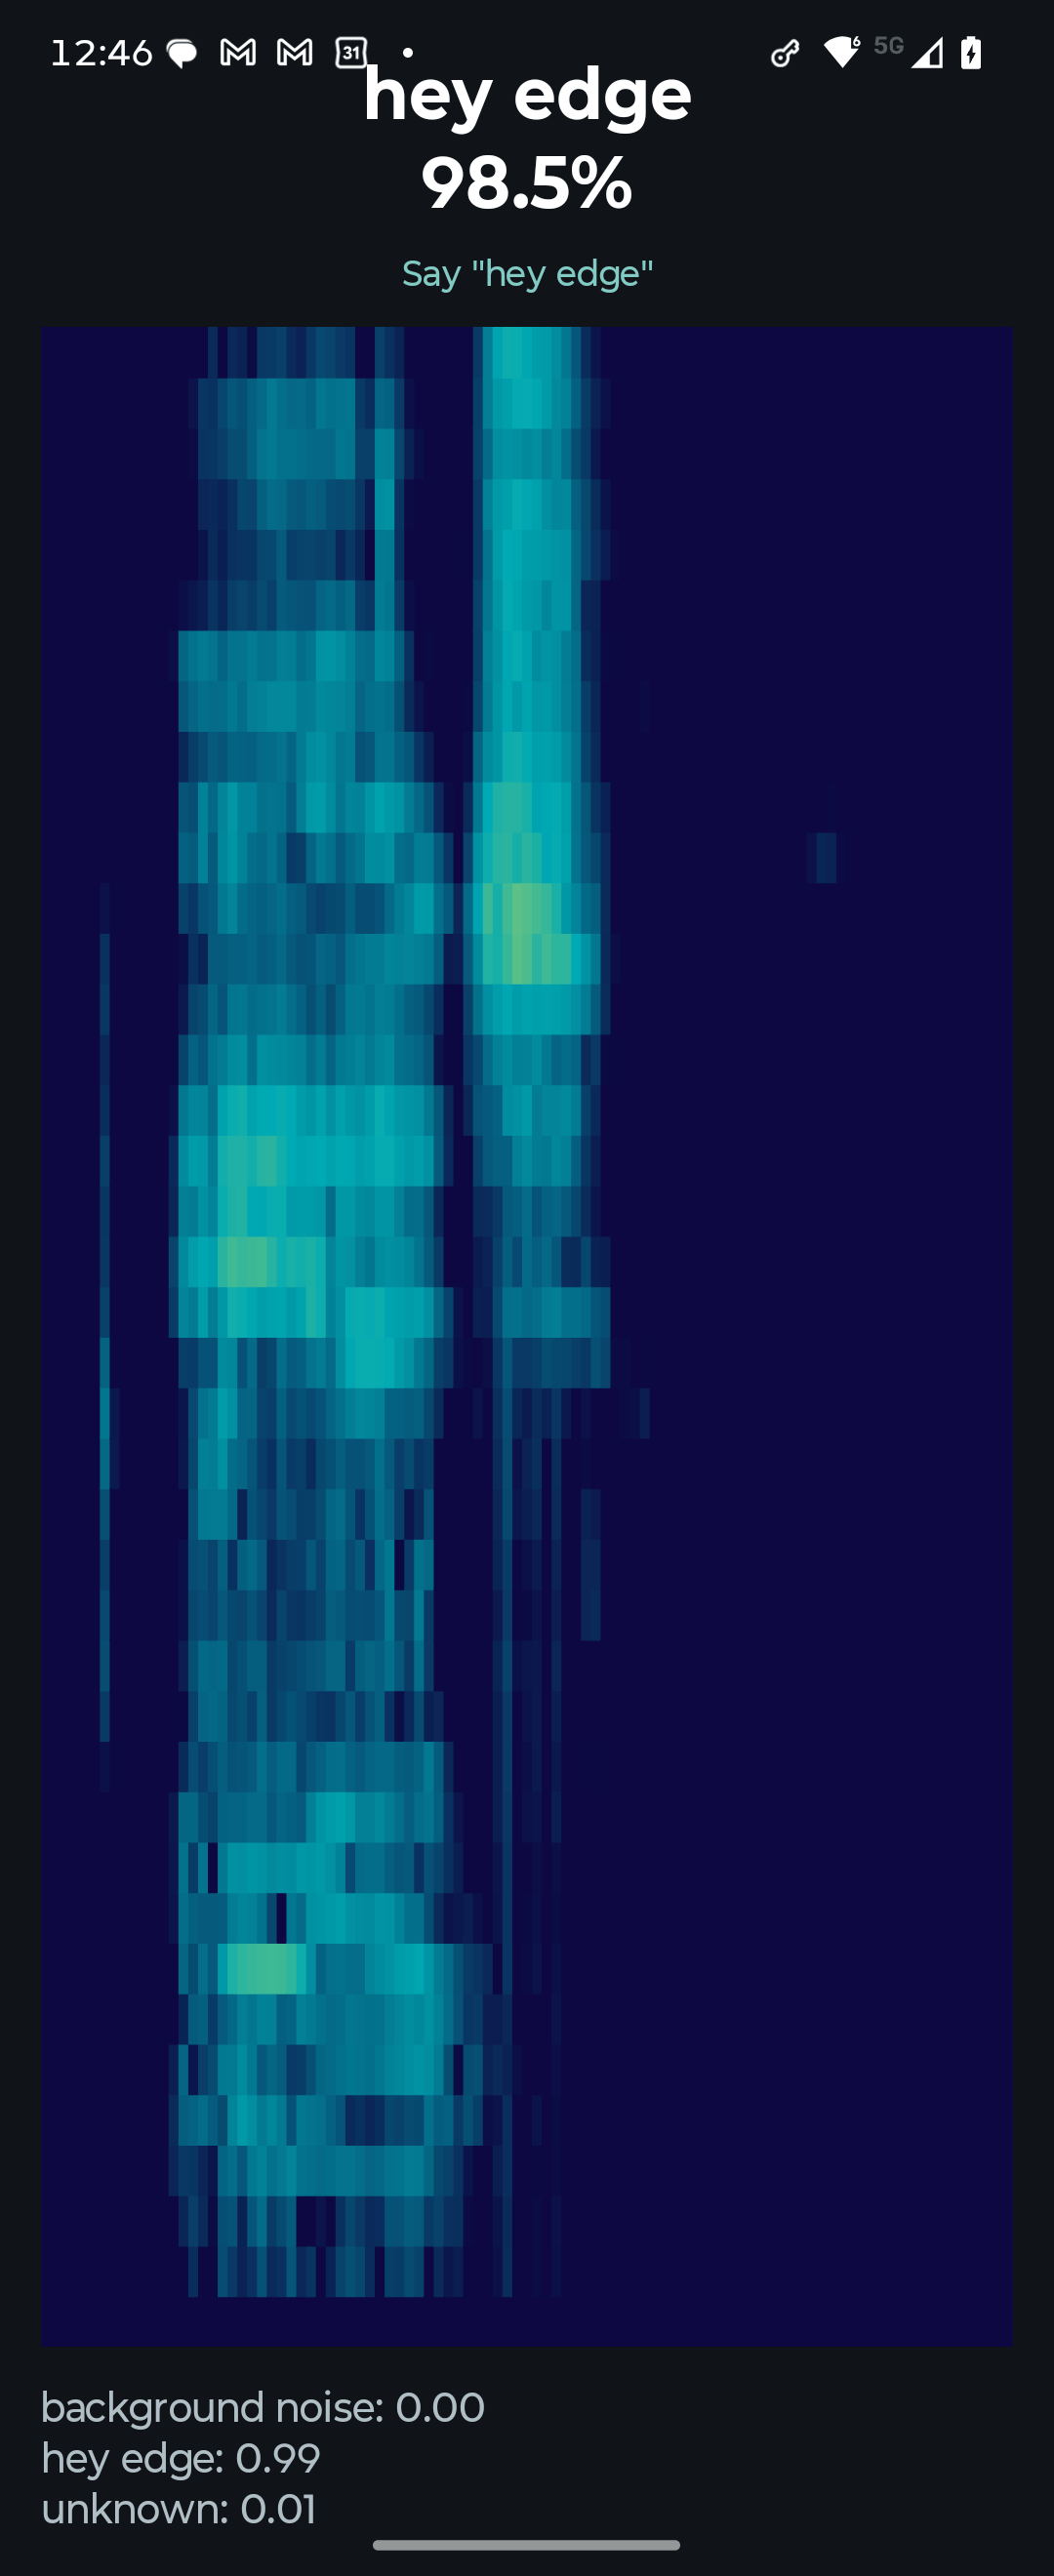 Grab a prebuilt APK from the [Releases](https://github.com/edgeimpulse/executorch-android-app/releases) page and sideload it — no build required:
| APK | Model | Input shape | Classes |
| ------------------------------ | ----------------------------------- | ------------------ | ------------------------------ |
| `app-staticbuffer-debug.apk` | Static buffer (single forward pass) | `[1, 3, 96, 96]` | lamp, plant, unknown |
| `app-classification-debug.apk` | Image classifier | `[1, 3, 96, 96]` | lamp, plant, unknown |
| `app-fomo-debug.apk` | FOMO object detection | `[1, 3, 320, 320]` | coffee, lamp |
| `app-timeseries-debug.apk` | Motion (spectral) | `[1, 39]` | idle, snake, updown, wave |
| `app-kws-debug.apk` | Keyword spotting (MFE) | `[1, 1, 99, 40]` | background, hey\_edge, unknown |
```bash theme={"system"}
adb install -r app-kws-debug.apk
```
**Extending to the Edge Impulse C++ SDK (later work).** This demo runs a **bare `.pte`** and hand-ports each block's DSP to Kotlin, so every new modality means re-implementing signal processing by hand. A future iteration could instead reuse Studio's exact DSP by linking the [Edge Impulse C++ SDK](/tools/libraries/sdks/inference/cpp) through JNI. That would involve exporting the full impulse as a C++ library, cross-compiling the SDK for Android (`arm64-v8a`) with the NDK, and calling `run_classifier` over a JNI bridge so raw sensor data flows straight into the SDK's DSP — removing the hand-ported Kotlin code entirely. You would then decide whether ExecuTorch still runs the neural network (SDK for DSP only) or the SDK handles both, and reconcile the input scaling and tensor layout between the two paths. See [example-android-inferencing](https://github.com/edgeimpulse/example-android-inferencing) for a JNI-based reference.
## Next steps
* [Custom learning blocks](/studio/organizations/custom-blocks/custom-learning-blocks)
* [Custom deployment blocks](/studio/organizations/custom-blocks/custom-deployment-blocks)
* [parameters.json specification](/tools/specifications/files/parameters-json)
* [Deployment overview](/studio/projects/deployment)
* [ExecuTorch Android demo](https://github.com/edgeimpulse/executorch-android-app)
Grab a prebuilt APK from the [Releases](https://github.com/edgeimpulse/executorch-android-app/releases) page and sideload it — no build required:
| APK | Model | Input shape | Classes |
| ------------------------------ | ----------------------------------- | ------------------ | ------------------------------ |
| `app-staticbuffer-debug.apk` | Static buffer (single forward pass) | `[1, 3, 96, 96]` | lamp, plant, unknown |
| `app-classification-debug.apk` | Image classifier | `[1, 3, 96, 96]` | lamp, plant, unknown |
| `app-fomo-debug.apk` | FOMO object detection | `[1, 3, 320, 320]` | coffee, lamp |
| `app-timeseries-debug.apk` | Motion (spectral) | `[1, 39]` | idle, snake, updown, wave |
| `app-kws-debug.apk` | Keyword spotting (MFE) | `[1, 1, 99, 40]` | background, hey\_edge, unknown |
```bash theme={"system"}
adb install -r app-kws-debug.apk
```
**Extending to the Edge Impulse C++ SDK (later work).** This demo runs a **bare `.pte`** and hand-ports each block's DSP to Kotlin, so every new modality means re-implementing signal processing by hand. A future iteration could instead reuse Studio's exact DSP by linking the [Edge Impulse C++ SDK](/tools/libraries/sdks/inference/cpp) through JNI. That would involve exporting the full impulse as a C++ library, cross-compiling the SDK for Android (`arm64-v8a`) with the NDK, and calling `run_classifier` over a JNI bridge so raw sensor data flows straight into the SDK's DSP — removing the hand-ported Kotlin code entirely. You would then decide whether ExecuTorch still runs the neural network (SDK for DSP only) or the SDK handles both, and reconcile the input scaling and tensor layout between the two paths. See [example-android-inferencing](https://github.com/edgeimpulse/example-android-inferencing) for a JNI-based reference.
## Next steps
* [Custom learning blocks](/studio/organizations/custom-blocks/custom-learning-blocks)
* [Custom deployment blocks](/studio/organizations/custom-blocks/custom-deployment-blocks)
* [parameters.json specification](/tools/specifications/files/parameters-json)
* [Deployment overview](/studio/projects/deployment)
* [ExecuTorch Android demo](https://github.com/edgeimpulse/executorch-android-app)