> ## Documentation Index
> Fetch the complete documentation index at: https://docs.edgeimpulse.com/llms.txt
> Use this file to discover all available pages before exploring further.
# YOLO-based On-Street Smart Parking Meter - Raspberry Pi 5
Created By: Jallson Suryo
Public Project Link: [https://studio.edgeimpulse.com/public/624749/live](https://studio.edgeimpulse.com/public/624749/live)
Demo Video link: [https://youtu.be/xL7PMEsPSeU](https://youtu.be/xL7PMEsPSeU)
GitHub Repo: [https://github.com/Jallson/YOLO\_based\_Parking\_Meter](https://github.com/Jallson/YOLO_based_Parking_Meter)
 ## Problem Statement
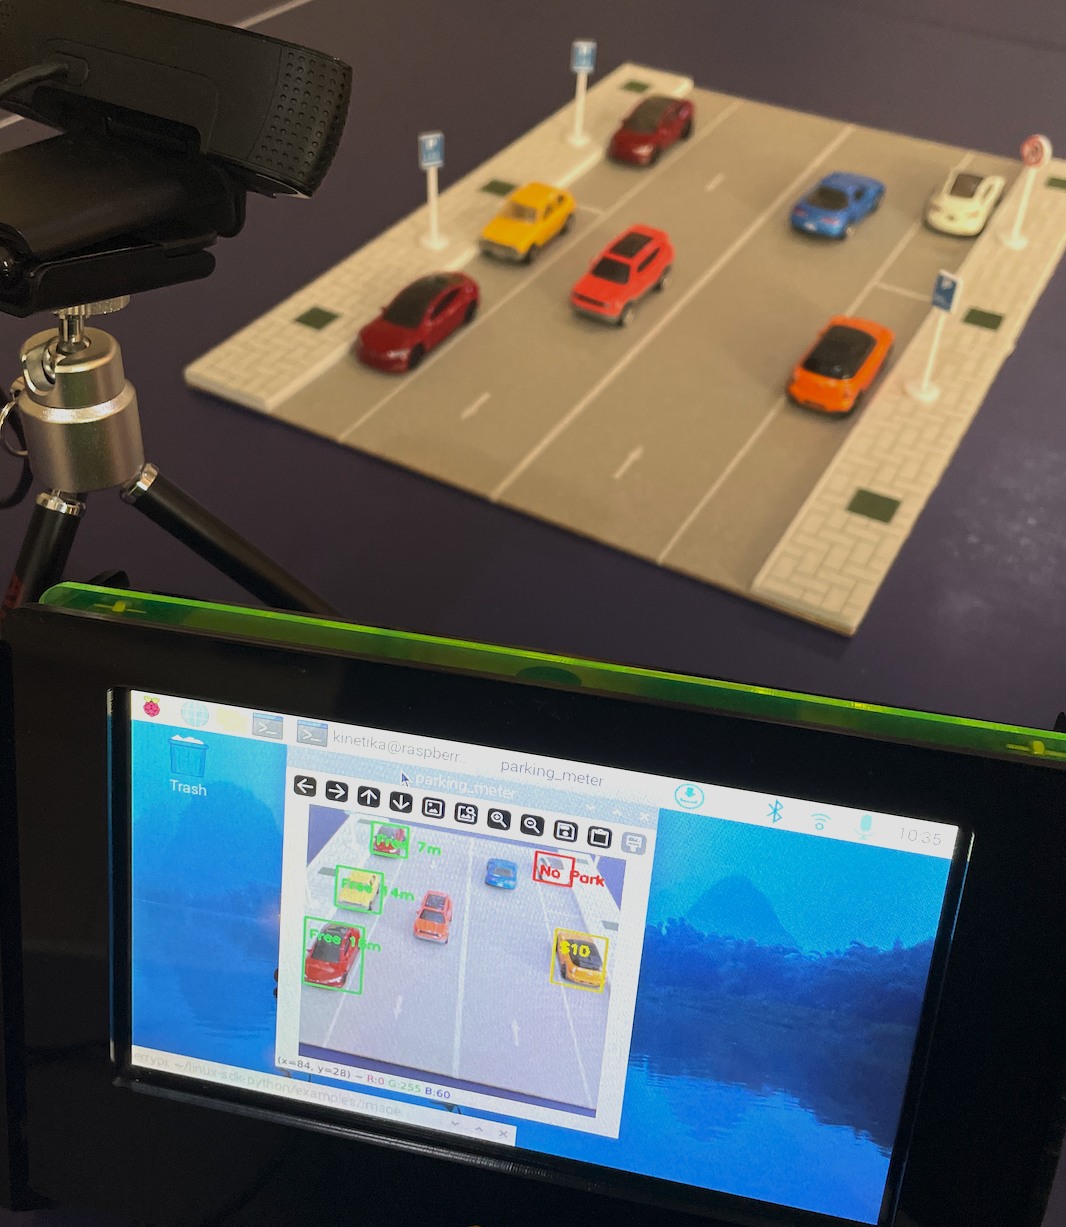
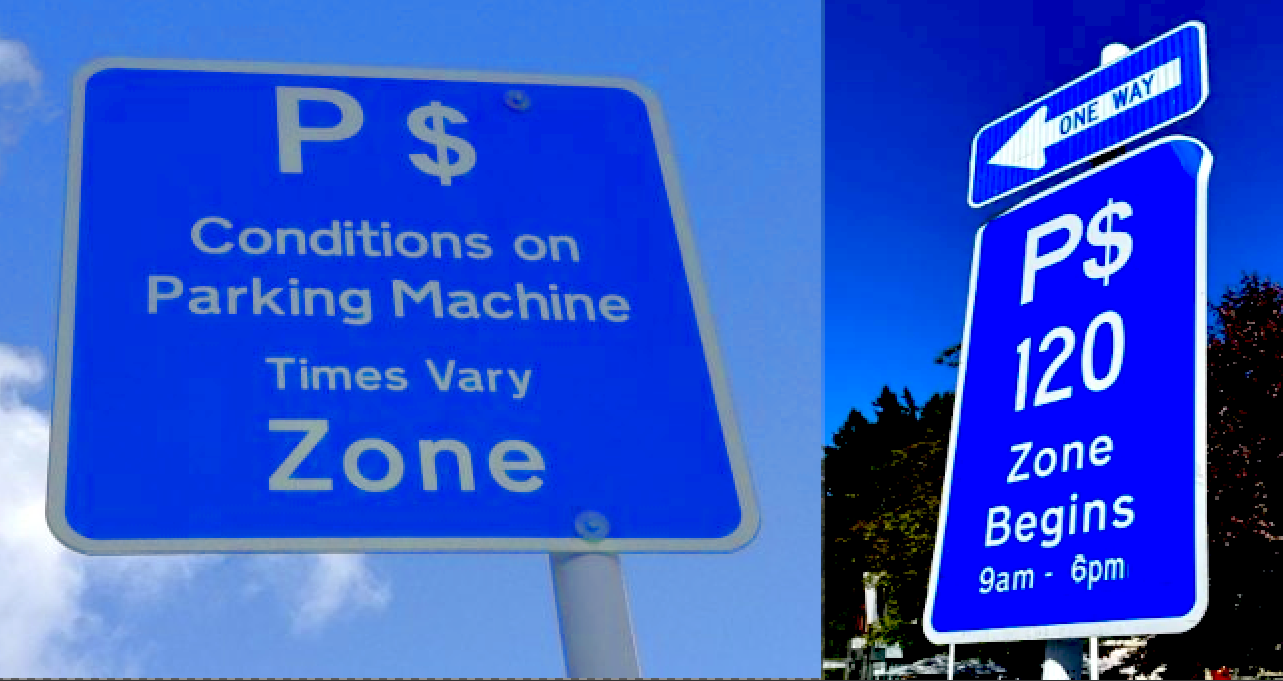
Traditional on-street parking enforcement, which relies on static signage, time-limited meters, and periodic monitoring by human attendants, is prone to inefficiencies, non-compliance, and enforcement gaps. These limitations often result in parking misuse, particularly in areas with time-restricted or paid zones, undermining both urban regulation and revenue. In the context of smart cities, there is a need for automated, intelligent systems that can monitor parking behavior in real-time.
## Problem Statement
Traditional on-street parking enforcement, which relies on static signage, time-limited meters, and periodic monitoring by human attendants, is prone to inefficiencies, non-compliance, and enforcement gaps. These limitations often result in parking misuse, particularly in areas with time-restricted or paid zones, undermining both urban regulation and revenue. In the context of smart cities, there is a need for automated, intelligent systems that can monitor parking behavior in real-time.
 ## Solution
To address this challenge and as part of a learning process in deploying vision-based Edge AI solutions, we developed this project powered by a YOLO-based object detection model. The model is trained and optimized using Edge Impulse Studio, then deployed on a Raspberry Pi 5 for real-time inference. Leveraging transfer learning and pre-trained weights from YOLO, we significantly reduced the amount of data required for model training while maintaining high accuracy for our targeted use case. This system integrates seamlessly with Python-based tracking logic, enabling enforcement of zone-specific parking rules (e.g., no-parking zones, paid durations, violation thresholds) with visual feedback and temporal tracking. The result is a low-cost, energy-efficient, and scalable solution suitable for modern urban parking management — a Smart Parking Meter.
## Solution
To address this challenge and as part of a learning process in deploying vision-based Edge AI solutions, we developed this project powered by a YOLO-based object detection model. The model is trained and optimized using Edge Impulse Studio, then deployed on a Raspberry Pi 5 for real-time inference. Leveraging transfer learning and pre-trained weights from YOLO, we significantly reduced the amount of data required for model training while maintaining high accuracy for our targeted use case. This system integrates seamlessly with Python-based tracking logic, enabling enforcement of zone-specific parking rules (e.g., no-parking zones, paid durations, violation thresholds) with visual feedback and temporal tracking. The result is a low-cost, energy-efficient, and scalable solution suitable for modern urban parking management — a Smart Parking Meter.
 ### Hardware Components
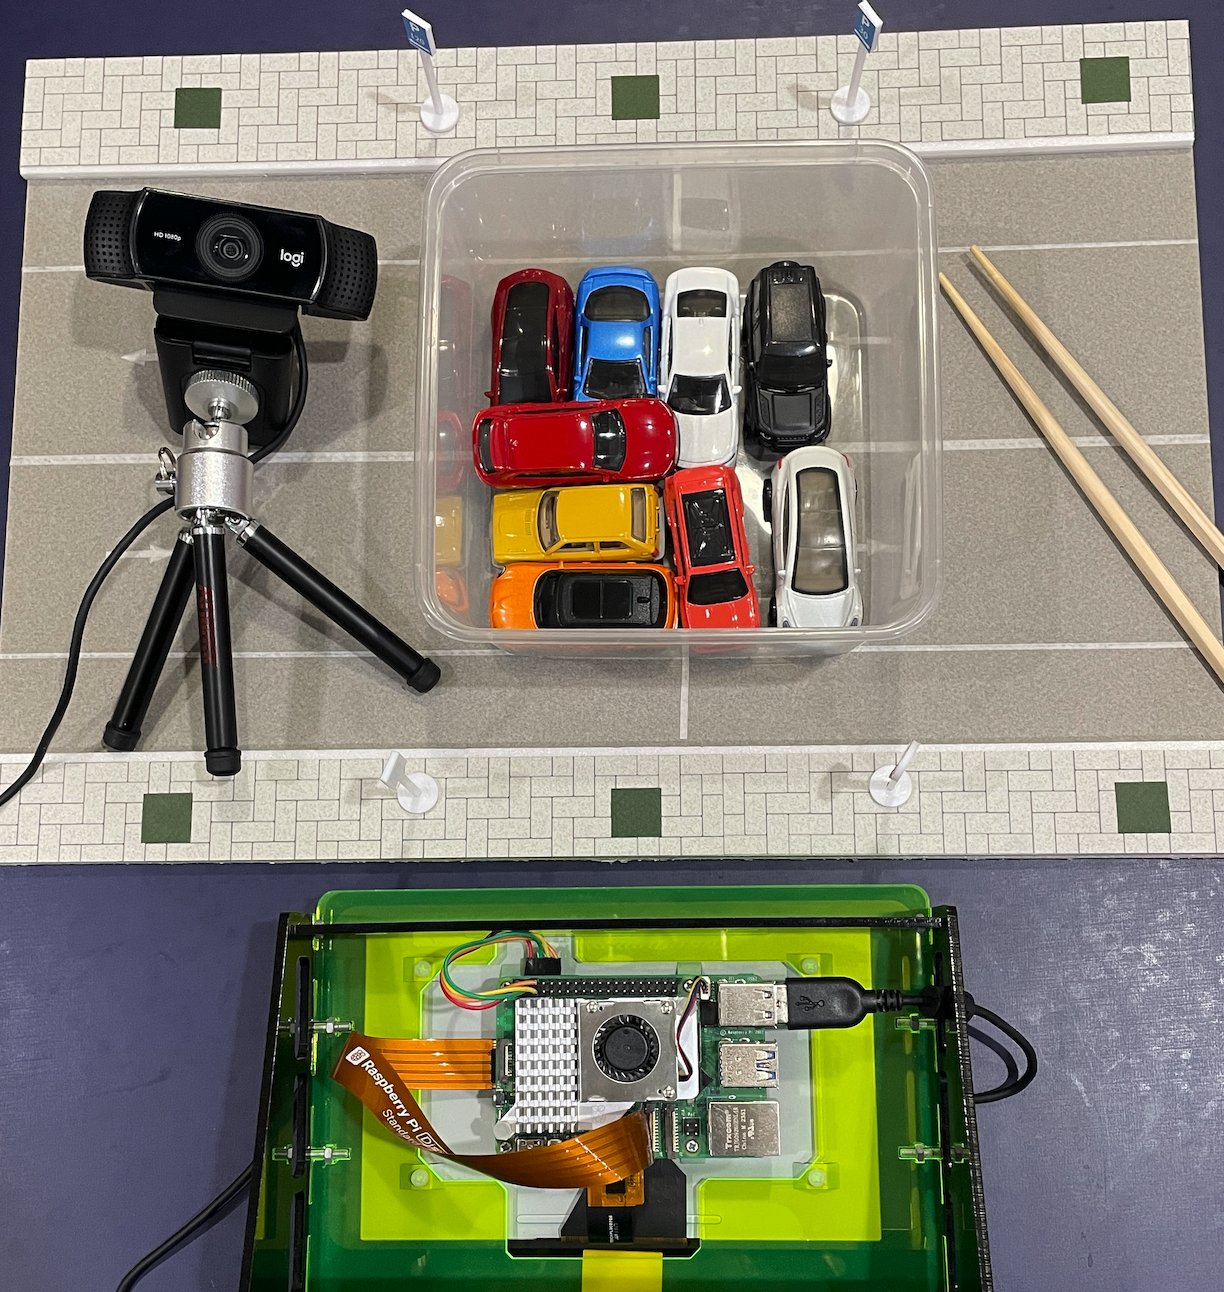
* Raspberry Pi 5
* Keyboard, mouse or PC/laptop via SSH
* USB Camera/webcam (eg. Logitech C920)
* LCD/monitor
* Mini tripod
* Car miniatures with Street Parking setup
### Hardware Components
* Raspberry Pi 5
* Keyboard, mouse or PC/laptop via SSH
* USB Camera/webcam (eg. Logitech C920)
* LCD/monitor
* Mini tripod
* Car miniatures with Street Parking setup
 ### Software & Online Services
* Edge Impulse Studio
* Edge Impulse Linux & Python SDK
* Raspberry Pi OS
* OpenCV
## Steps
### 1. Collecting Data
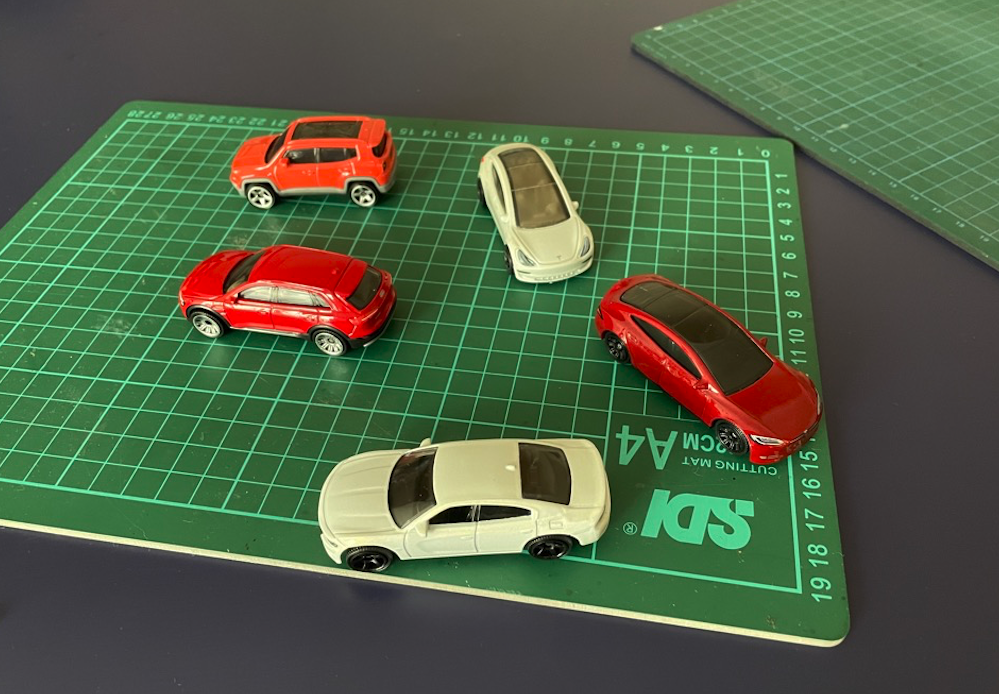
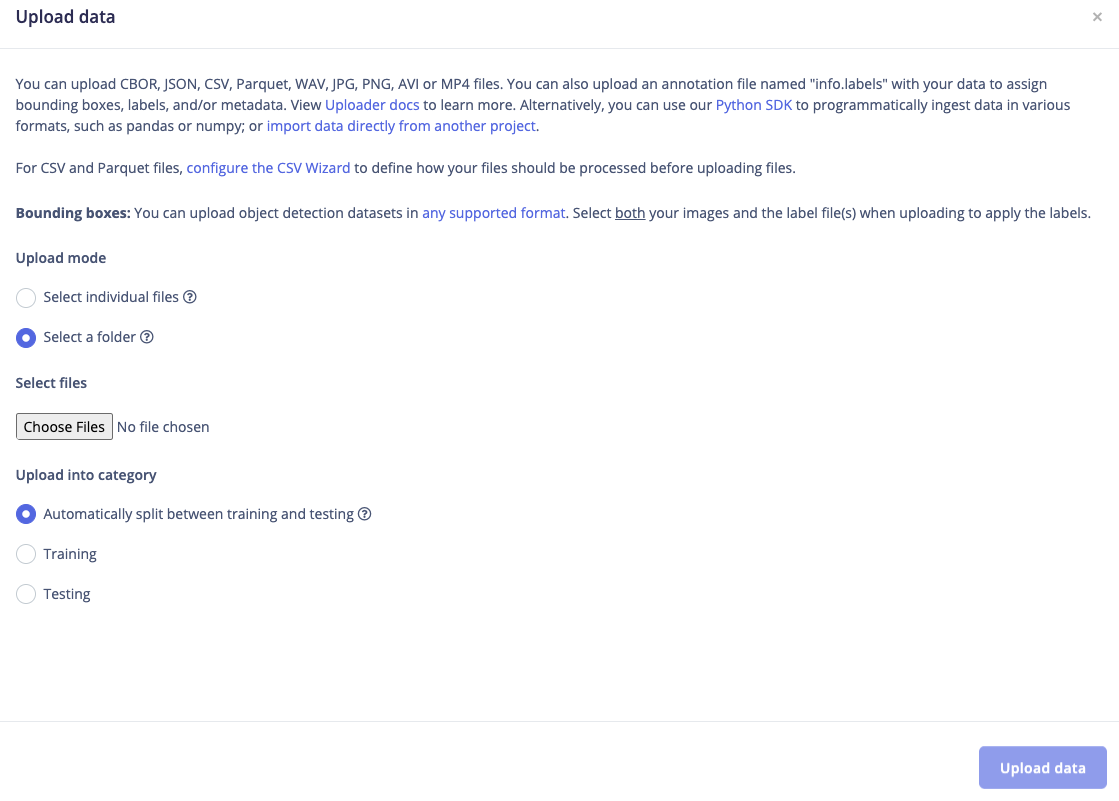
In the initial stage of building a model in Edge Impulse Studio, we need to prepare the data. You can collect your own data to better suit the purposes of your project; in this case we capture pictures from a smartphone camera and save them in a folder. For those who are not familiar with Edge Impulse Studio, please follow these steps —> Open [studio.edgeimpulse.com](https://studio.edgeimpulse.com), login or create an account, then create a new Project. Choose the Images project option, then Object detection. In Dashboard > Project Info, choose **Bounding Boxes** for labeling method and **Raspberry Pi** for target device. Then in Data acquisition, click on Upload Data tab. Choose your saved folder to upload your images.
### Software & Online Services
* Edge Impulse Studio
* Edge Impulse Linux & Python SDK
* Raspberry Pi OS
* OpenCV
## Steps
### 1. Collecting Data
In the initial stage of building a model in Edge Impulse Studio, we need to prepare the data. You can collect your own data to better suit the purposes of your project; in this case we capture pictures from a smartphone camera and save them in a folder. For those who are not familiar with Edge Impulse Studio, please follow these steps —> Open [studio.edgeimpulse.com](https://studio.edgeimpulse.com), login or create an account, then create a new Project. Choose the Images project option, then Object detection. In Dashboard > Project Info, choose **Bounding Boxes** for labeling method and **Raspberry Pi** for target device. Then in Data acquisition, click on Upload Data tab. Choose your saved folder to upload your images.
 ### 2. Labeling
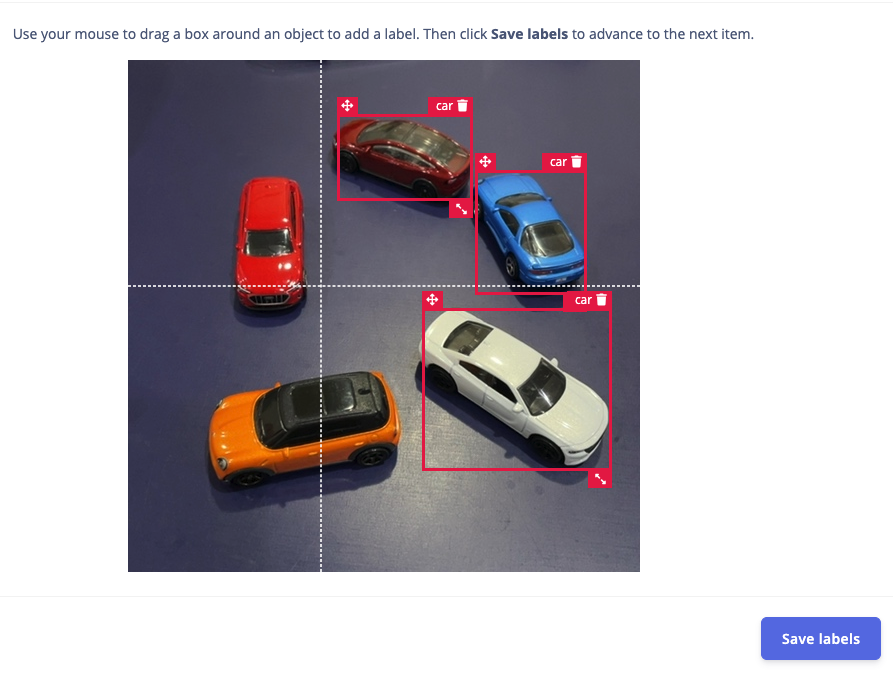
The next step is labeling, now click on Data Acquisition, click on Labeling queue tab, then drag a box around an object and label it, then click Save. Repeat this until all images are labelled. Alternatively, you can try Edge Impulse's new feature [AI auto labeling](/studio/projects/data-acquisition/ai-labeling) to help speed things up.
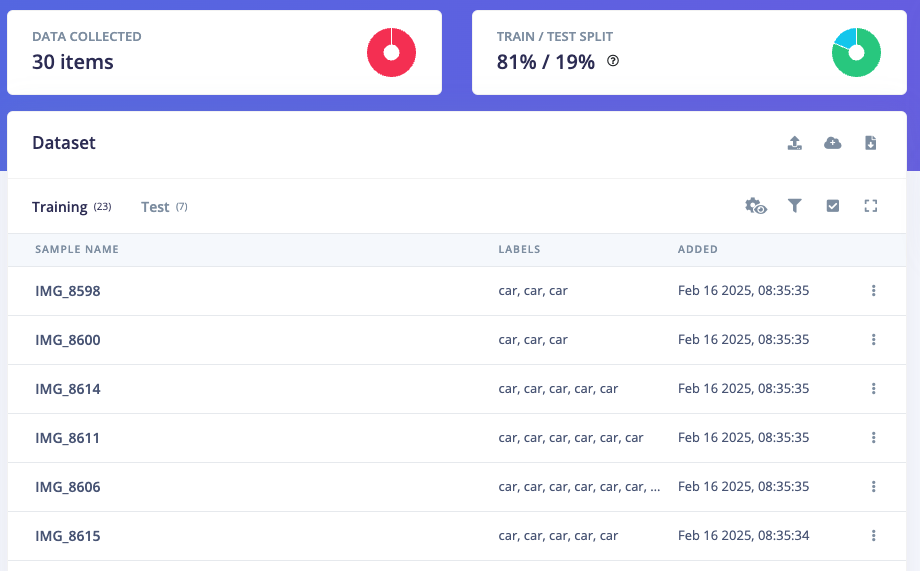
After labeling, it's recommended to split the data into Training and Testing sets, around an 80/20 ratio. If you haven't done this yet, click on Train / Test Split to automate this process.
### 2. Labeling
The next step is labeling, now click on Data Acquisition, click on Labeling queue tab, then drag a box around an object and label it, then click Save. Repeat this until all images are labelled. Alternatively, you can try Edge Impulse's new feature [AI auto labeling](/studio/projects/data-acquisition/ai-labeling) to help speed things up.
After labeling, it's recommended to split the data into Training and Testing sets, around an 80/20 ratio. If you haven't done this yet, click on Train / Test Split to automate this process.
 ### 3. Train and Build Model
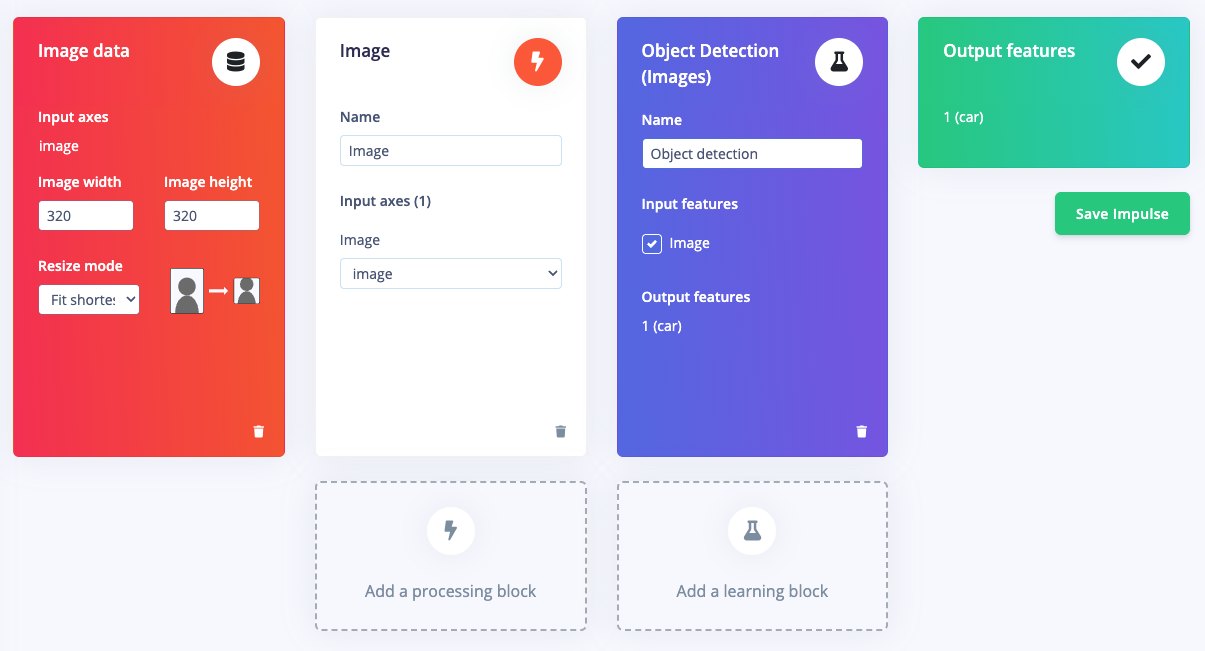
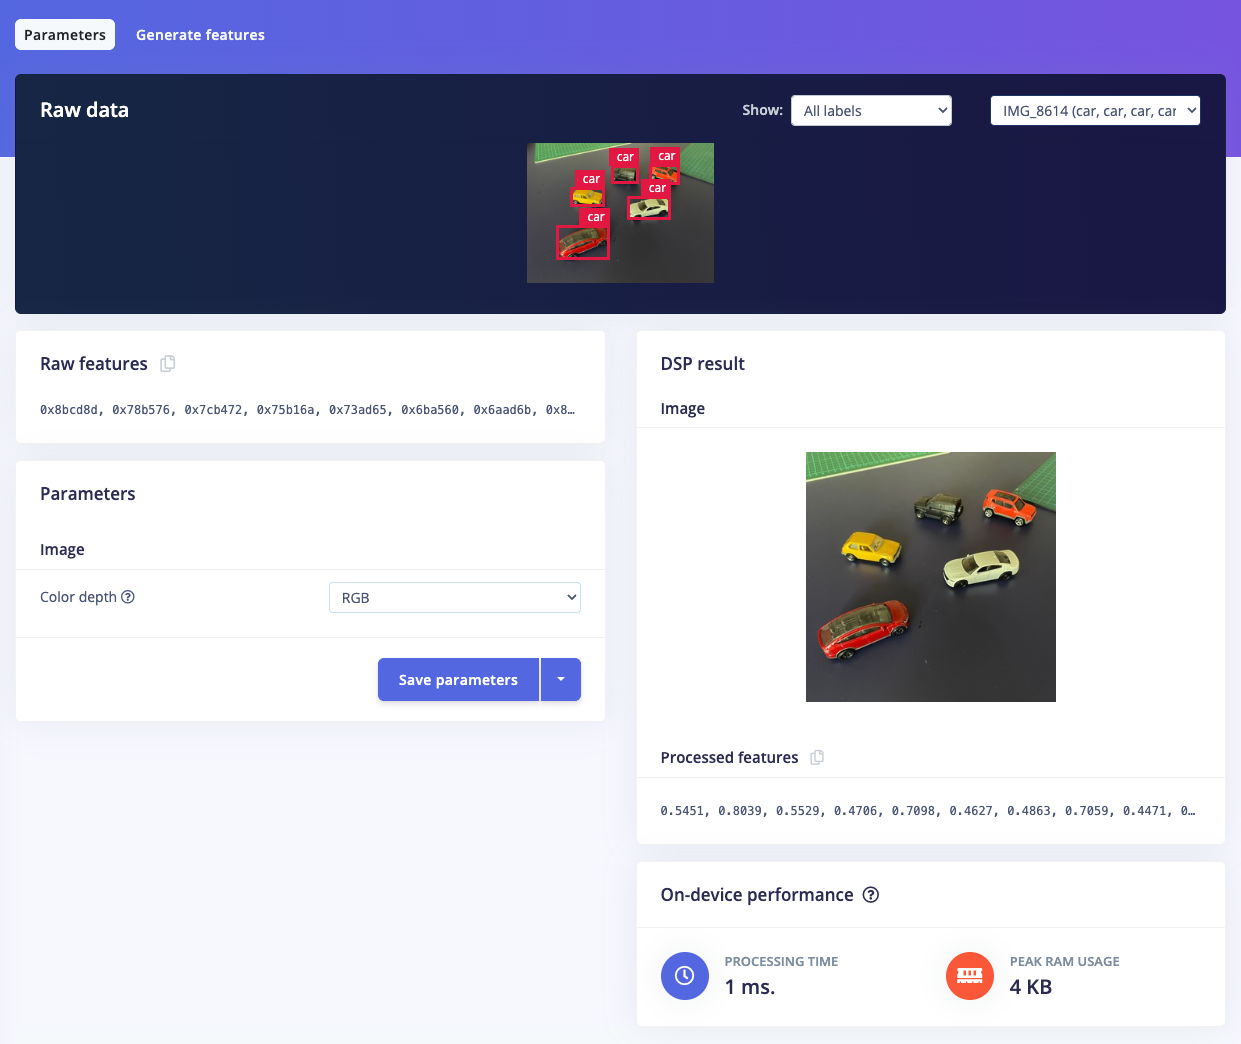
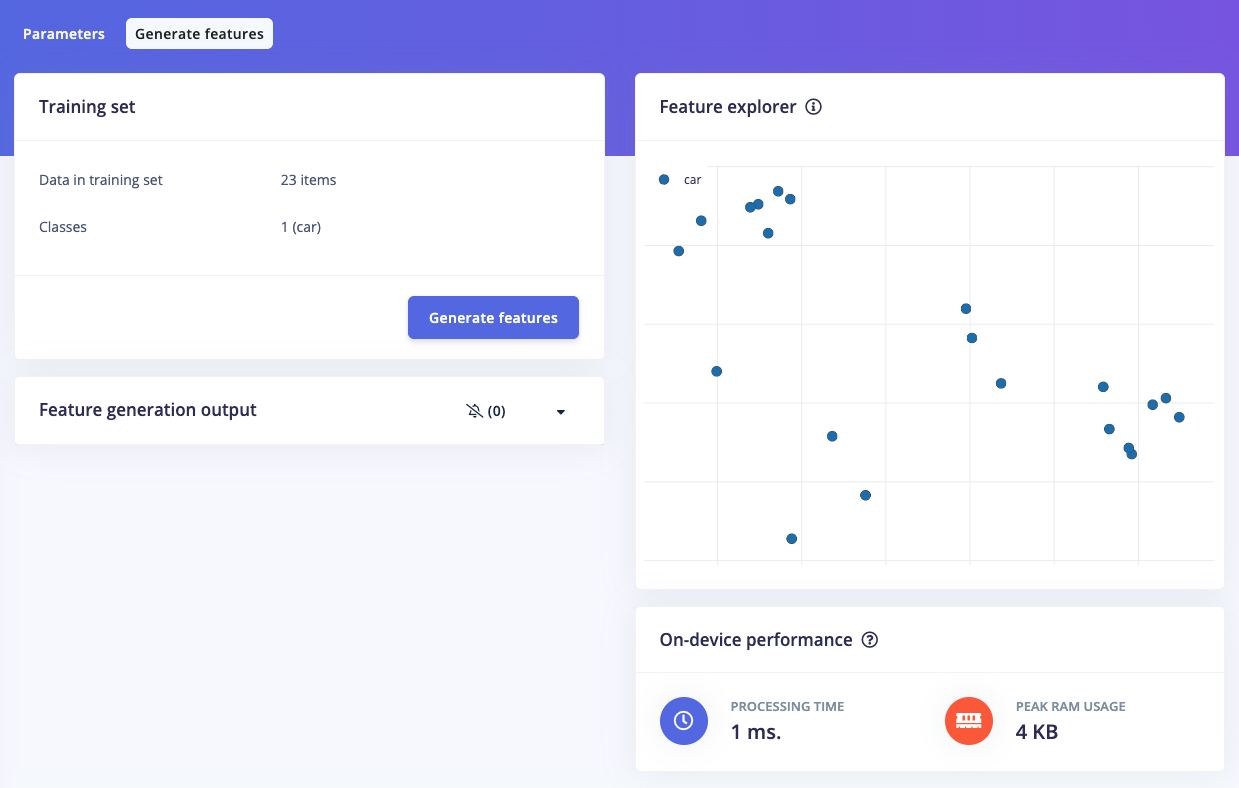
Once your labelled dataset is ready, go to Impulse Design > Create Impulse, and set the image width and height to **320x320**. Choose Fit shortest axis, then select Image and Object Detection as the learning blocks, and click Save Impulse. Next, navigate to the Image Parameters section, select RGB as the color depth, and press Save parameters. After that, click on Generate, where you'll be able to see a graphical distribution of the feature data.
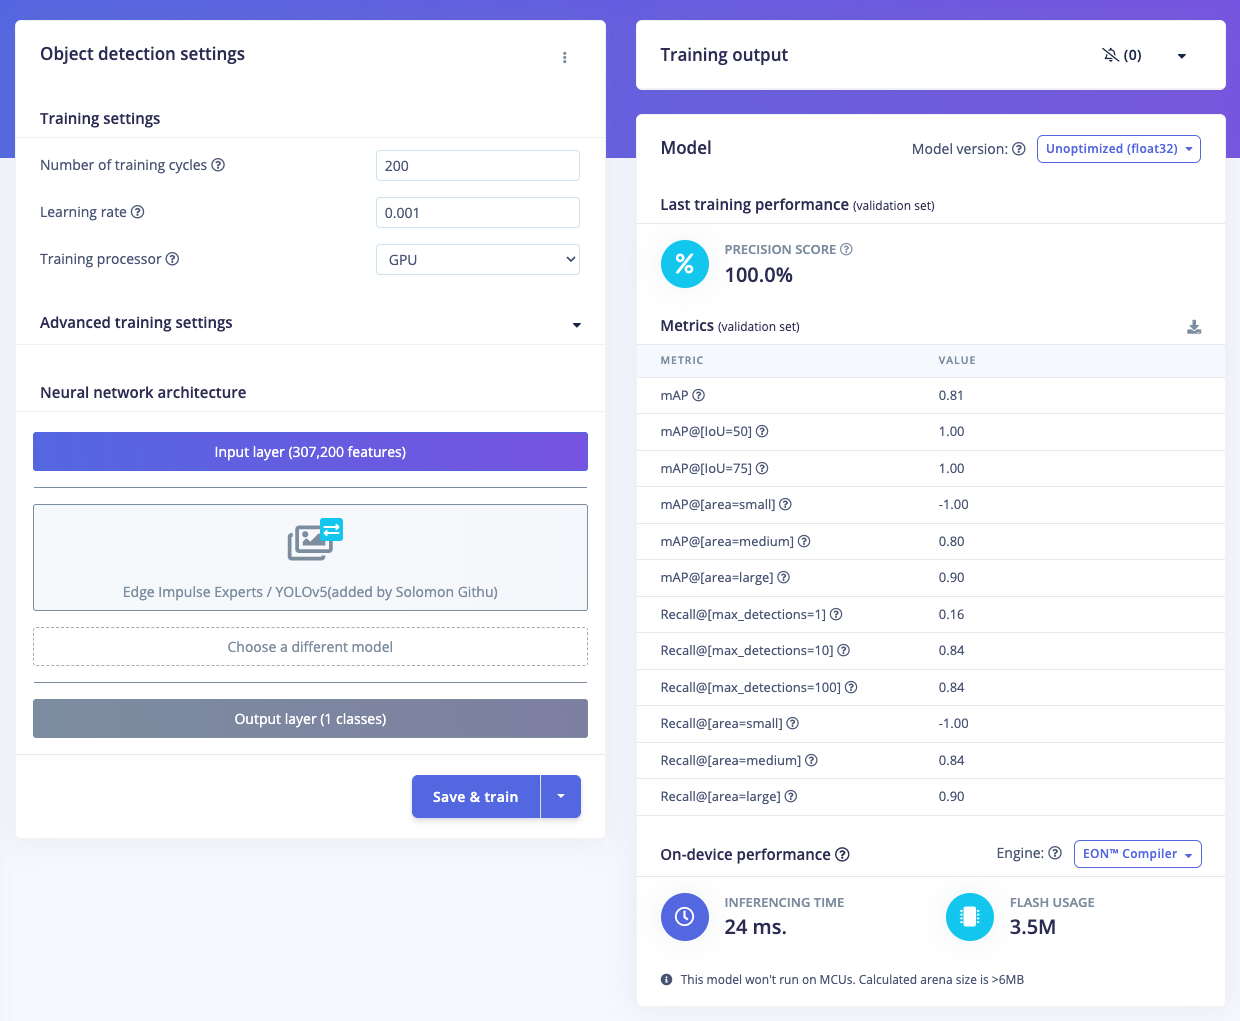
Now, move to the Object Detection section and configure the training settings. Select GPU as the processor and set the training cycles to around 200, and learning rate to 0.001. Choose **YOLOv5** as the neural network architecture — for higher resolutions (eg. 640x640), you can try YOLOv5 (Community blocks) with a model size of medium (YOLOv5m). Once done, start training by pressing Start training, and monitor the progress.
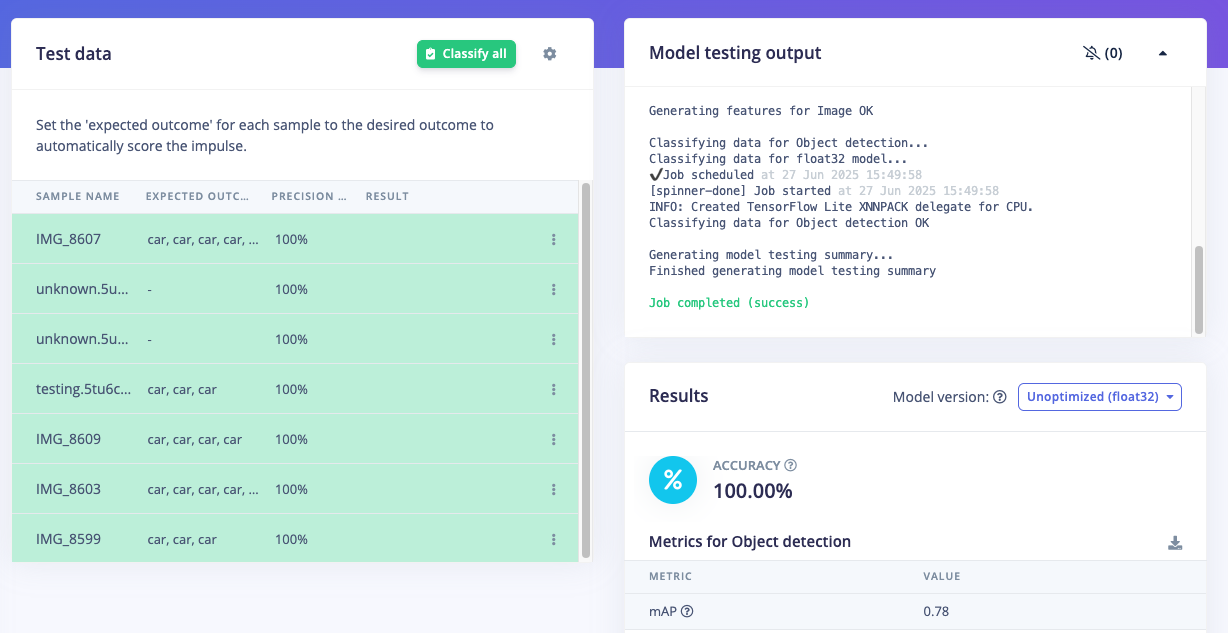
If everything goes well and the precision result is above 80%, proceed to the next step. Go to the Model Testing section, click Classify all, and if the result is around 90%, you can move on to the final step — Deployment.
### 3. Train and Build Model
Once your labelled dataset is ready, go to Impulse Design > Create Impulse, and set the image width and height to **320x320**. Choose Fit shortest axis, then select Image and Object Detection as the learning blocks, and click Save Impulse. Next, navigate to the Image Parameters section, select RGB as the color depth, and press Save parameters. After that, click on Generate, where you'll be able to see a graphical distribution of the feature data.
Now, move to the Object Detection section and configure the training settings. Select GPU as the processor and set the training cycles to around 200, and learning rate to 0.001. Choose **YOLOv5** as the neural network architecture — for higher resolutions (eg. 640x640), you can try YOLOv5 (Community blocks) with a model size of medium (YOLOv5m). Once done, start training by pressing Start training, and monitor the progress.
If everything goes well and the precision result is above 80%, proceed to the next step. Go to the Model Testing section, click Classify all, and if the result is around 90%, you can move on to the final step — Deployment.
 ### 4. Deploy Model on Raspberry Pi
Simply ensure that the model has been built in Edge Impulse Studio. Now, you can test, download the model, and run everything directly from the Raspberry Pi.
On the Raspberry Pi, there are several things that need to be done. Ensure you have the latest Raspberry Pi OS which supports the new Edge Impulse Linux CLI version >= 1.3.0. Then install all dependencies; follow the instructions [here](/hardware/boards/raspberry-pi-5) and you also need to install the Edge Impulse Linux Python SDK, please follow the instructions at this [link](/tools/libraries/sdks/inference/linux/python)
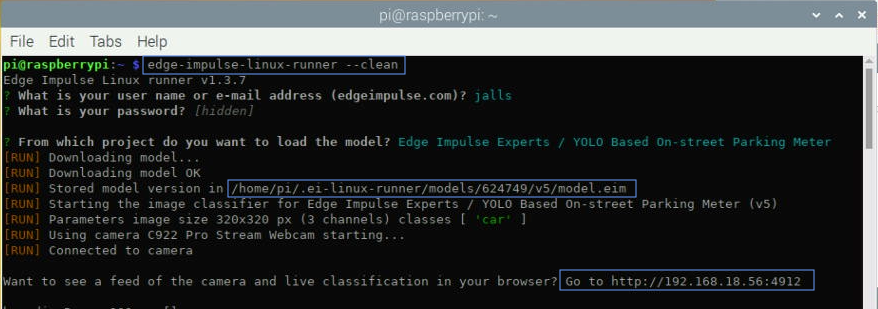
Next, build/download/run the model via the Edge Impulse runner. Open a terminal on the Raspberry Pi or `SSH` from your PC/laptop then simply type `edge-impulse-linux-runner` (you can add `--clean` to allow you to select your project if you've tried a different project in the past). Log in to your account then choose your project. This process will download the `model.eim`, which is specifically built for the aarch64 architecture (Pi 5 ARM64). During the process, the console will display the path where the `model.eim` has been downloaded. For example, in the image below, it shows the file located at `/home/pi/.ei-linux-runner/models/624749/v5`
### 4. Deploy Model on Raspberry Pi
Simply ensure that the model has been built in Edge Impulse Studio. Now, you can test, download the model, and run everything directly from the Raspberry Pi.
On the Raspberry Pi, there are several things that need to be done. Ensure you have the latest Raspberry Pi OS which supports the new Edge Impulse Linux CLI version >= 1.3.0. Then install all dependencies; follow the instructions [here](/hardware/boards/raspberry-pi-5) and you also need to install the Edge Impulse Linux Python SDK, please follow the instructions at this [link](/tools/libraries/sdks/inference/linux/python)
Next, build/download/run the model via the Edge Impulse runner. Open a terminal on the Raspberry Pi or `SSH` from your PC/laptop then simply type `edge-impulse-linux-runner` (you can add `--clean` to allow you to select your project if you've tried a different project in the past). Log in to your account then choose your project. This process will download the `model.eim`, which is specifically built for the aarch64 architecture (Pi 5 ARM64). During the process, the console will display the path where the `model.eim` has been downloaded. For example, in the image below, it shows the file located at `/home/pi/.ei-linux-runner/models/624749/v5`
 Once this file is downloaded, you can stop the inference process with Ctrl-C on the keyboard.
For convenience, you can use the following command to copy it to the home directory for easier access: `cp -v model.eim /home/pi`
Now the model is ready to run in a high-level language such as Python. To ensure this model works, we can re-run the EI Runner with a camera attached to the Raspberry Pi. You can see the camera feed and inference in a browser, at the local IP address of the Pi on port 4912. Run this command once again: `edge-impulse-linux-runner`
Once this file is downloaded, you can stop the inference process with Ctrl-C on the keyboard.
For convenience, you can use the following command to copy it to the home directory for easier access: `cp -v model.eim /home/pi`
Now the model is ready to run in a high-level language such as Python. To ensure this model works, we can re-run the EI Runner with a camera attached to the Raspberry Pi. You can see the camera feed and inference in a browser, at the local IP address of the Pi on port 4912. Run this command once again: `edge-impulse-linux-runner`
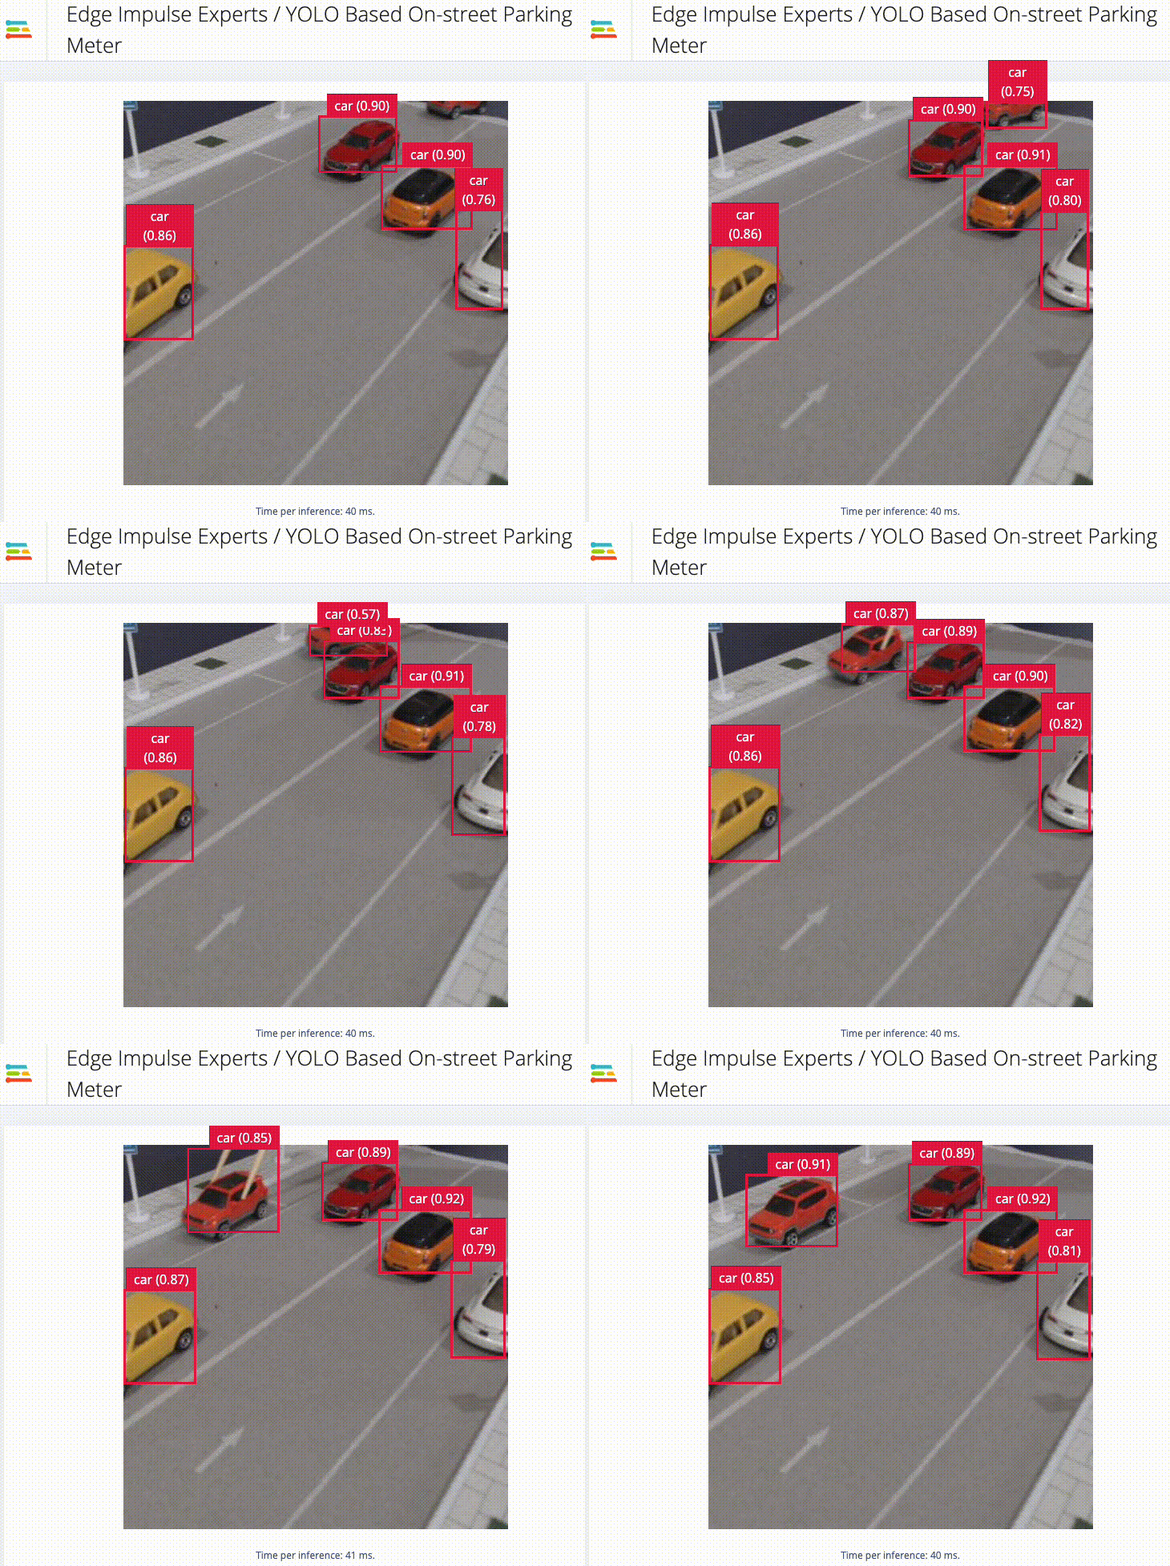 The inferencing time is around 40ms, which is an incredibly fast for object-detection speed.
### 5. Build a Smart Parking Application (Python)
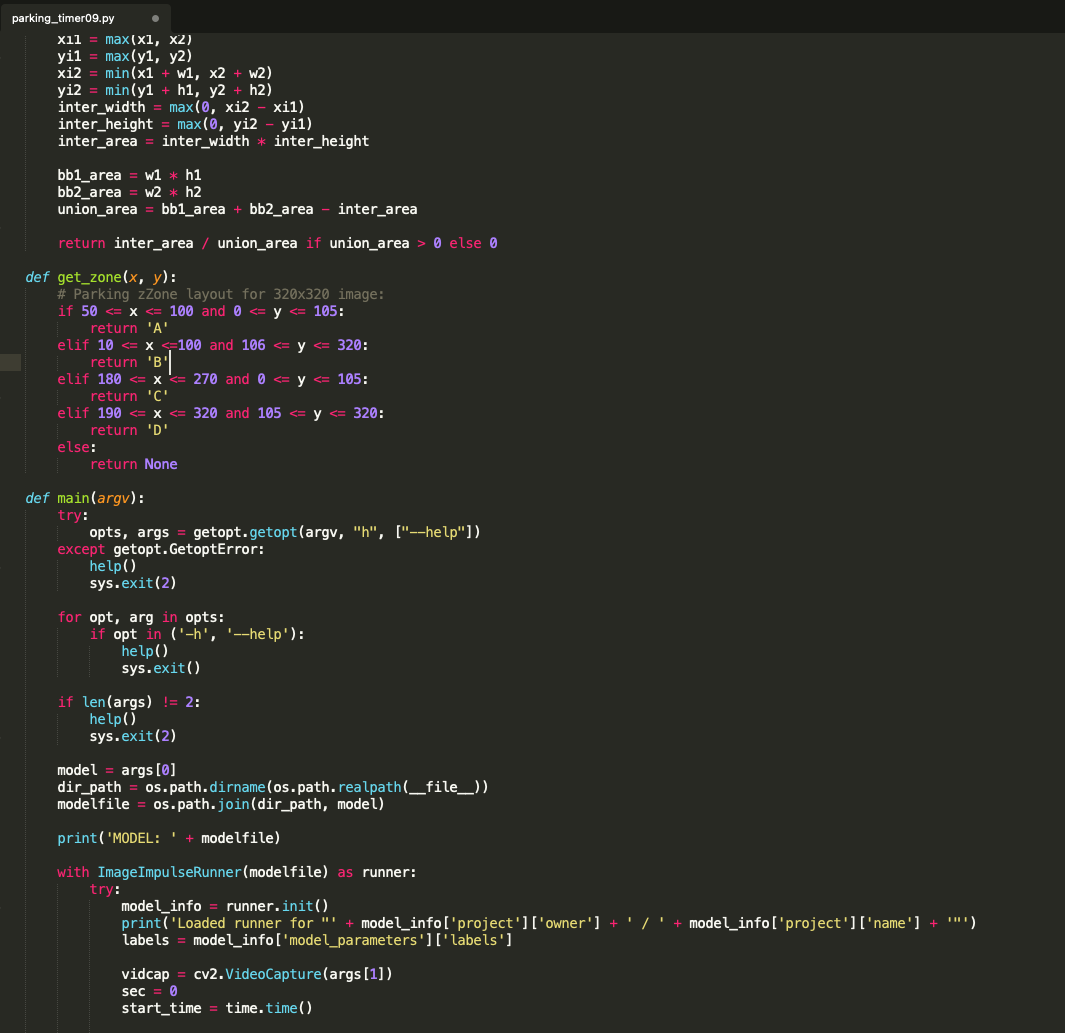
With the impressive accuracy of live inferencing using the Edge Impulse Runner, we can now create a Python-based Parking Meter program. This code performs object tracking and parking duration analysis using bounding boxes detected by our YOLOv5-based model. For every frame, it identifies the location and size of detected cars, then attempts to match them with previously tracked objects using Intersection over Union (IoU), distance between centers, and size similarity. If a match is found, it checks whether the object has moved; if not, it updates the tracked object's "stopped" duration. If the object has moved or reappeared after more than 3 seconds, it resets the timer. The system only starts displaying bounding boxes if a car has remained stationary for 5 seconds or more, ensuring it is actually parked.
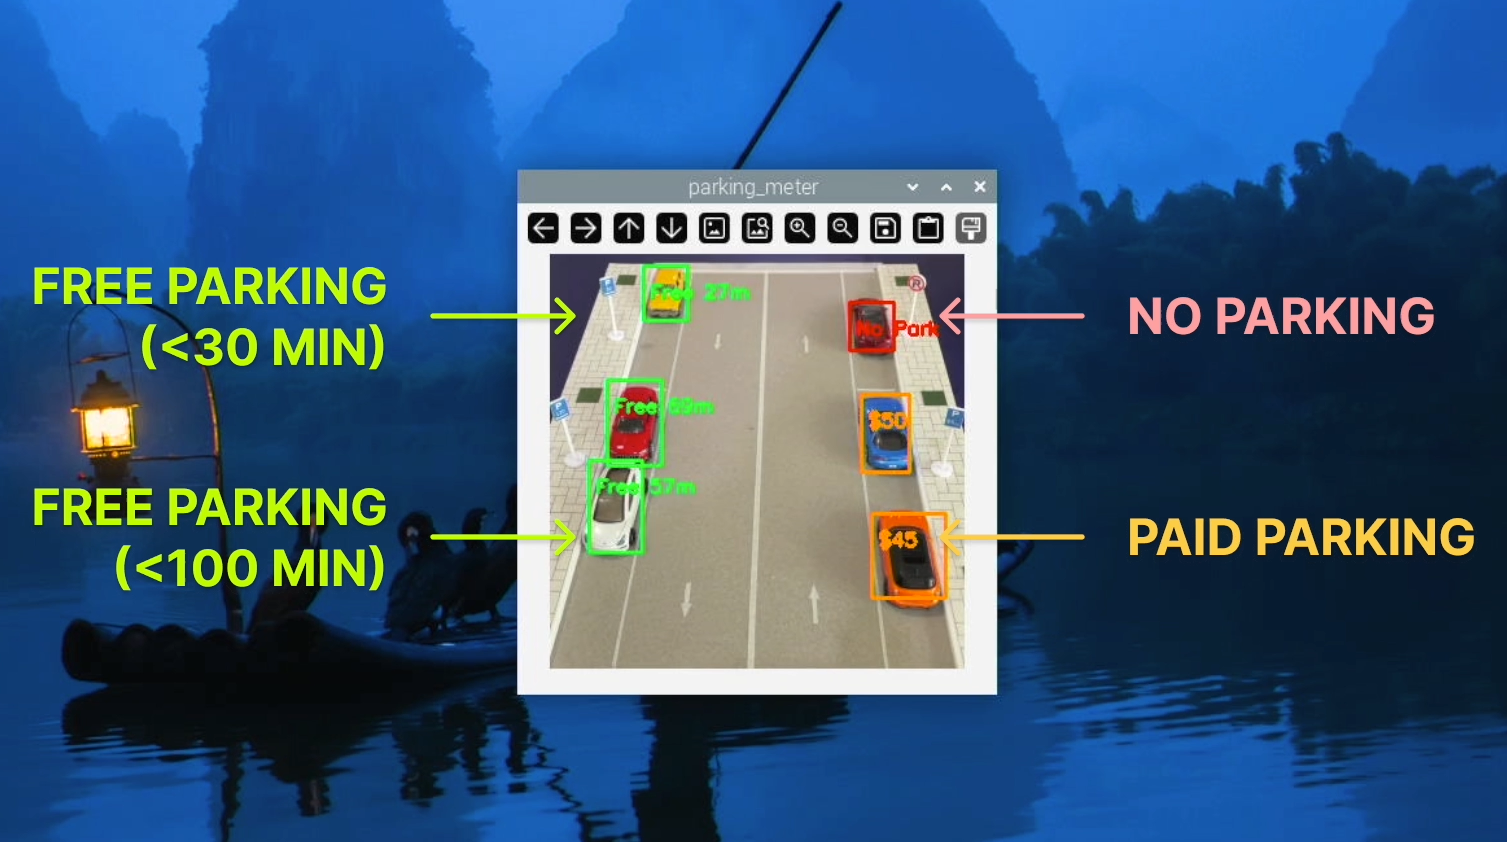
Each car is also assigned to one of four parking zones (A, B, C, or D) based on its location. Zone A and B allow parking but turn the bounding box red if the duration exceeds 30 or 100 seconds. Zone C is a no-parking zone and triggers a red box after just 5 seconds. Zone D is a paid parking area where the display shows a dollar amount instead of time, charging \$5 every 10 seconds. This zone-based logic allows for flexible rules depending on where the car is parked, and visual feedback is given via color-coded bounding boxes and overlaid text.
> Note: Minutes are converted to seconds. So that we don't have to wait for the actual parking time :-)
The inferencing time is around 40ms, which is an incredibly fast for object-detection speed.
### 5. Build a Smart Parking Application (Python)
With the impressive accuracy of live inferencing using the Edge Impulse Runner, we can now create a Python-based Parking Meter program. This code performs object tracking and parking duration analysis using bounding boxes detected by our YOLOv5-based model. For every frame, it identifies the location and size of detected cars, then attempts to match them with previously tracked objects using Intersection over Union (IoU), distance between centers, and size similarity. If a match is found, it checks whether the object has moved; if not, it updates the tracked object's "stopped" duration. If the object has moved or reappeared after more than 3 seconds, it resets the timer. The system only starts displaying bounding boxes if a car has remained stationary for 5 seconds or more, ensuring it is actually parked.
Each car is also assigned to one of four parking zones (A, B, C, or D) based on its location. Zone A and B allow parking but turn the bounding box red if the duration exceeds 30 or 100 seconds. Zone C is a no-parking zone and triggers a red box after just 5 seconds. Zone D is a paid parking area where the display shows a dollar amount instead of time, charging \$5 every 10 seconds. This zone-based logic allows for flexible rules depending on where the car is parked, and visual feedback is given via color-coded bounding boxes and overlaid text.
> Note: Minutes are converted to seconds. So that we don't have to wait for the actual parking time :-)
 All code, images and videos can be accessed at: [https://github.com/Jallson/YOLO\_based\_Parking\_Meter](https://github.com/Jallson/YOLO_based_Parking_Meter)
With a USB camera connected to the Raspberry Pi, run the program (`parkingmeter1.py`) with the following command:
`python3 parkingmeter1.py /model.eim`
To run the program (`parkingmeter2.py`) using a video file as input (e.g., video.mp4), we can add the path to the video file when executing the program:
`python3 parkingmeter2.py /model.eim /video.mp4`
> Note: For video/camera capture display, you cannot use a headless method from a PC/laptop. Instead, connect a monitor directly to the Raspberry Pi to view the visuals.
Check out our demo video:
## Conclusion
We have successfully implemented a YOLOv5-trained ML model into our Python-based visual parking meter system. Despite using a minimal dataset for training, the model achieved reliable accuracy in our use case. The integration of object detection and tracking allows the system to recognize parked vehicles, monitor their duration, and maintain consistent tracking even in challenging conditions like short disappearances or slight changes in bounding box size.
The system also supports multiple parking zones, each with its own enforcement rules, such as no-parking alerts, time-based violations, and dynamic fee calculation. This level of flexibility demonstrates the system’s ability to adapt to real-world constraints while keeping resource usage low. With its real-time performance, simple setup, and cost-effective hardware, the project has successfully met our objectives. The result is also scalable, well-suited for broader deployment in smart city infrastructure.
All code, images and videos can be accessed at: [https://github.com/Jallson/YOLO\_based\_Parking\_Meter](https://github.com/Jallson/YOLO_based_Parking_Meter)
With a USB camera connected to the Raspberry Pi, run the program (`parkingmeter1.py`) with the following command:
`python3 parkingmeter1.py /model.eim`
To run the program (`parkingmeter2.py`) using a video file as input (e.g., video.mp4), we can add the path to the video file when executing the program:
`python3 parkingmeter2.py /model.eim /video.mp4`
> Note: For video/camera capture display, you cannot use a headless method from a PC/laptop. Instead, connect a monitor directly to the Raspberry Pi to view the visuals.
Check out our demo video:
## Conclusion
We have successfully implemented a YOLOv5-trained ML model into our Python-based visual parking meter system. Despite using a minimal dataset for training, the model achieved reliable accuracy in our use case. The integration of object detection and tracking allows the system to recognize parked vehicles, monitor their duration, and maintain consistent tracking even in challenging conditions like short disappearances or slight changes in bounding box size.
The system also supports multiple parking zones, each with its own enforcement rules, such as no-parking alerts, time-based violations, and dynamic fee calculation. This level of flexibility demonstrates the system’s ability to adapt to real-world constraints while keeping resource usage low. With its real-time performance, simple setup, and cost-effective hardware, the project has successfully met our objectives. The result is also scalable, well-suited for broader deployment in smart city infrastructure.