> ## Documentation Index
> Fetch the complete documentation index at: https://docs.edgeimpulse.com/llms.txt
> Use this file to discover all available pages before exploring further.
# Hand Gestures as Game Controller - Raspberry Pi
Created By: Jallson Suryo
Public Project Link: [https://studio.edgeimpulse.com/public/766818/live](https://studio.edgeimpulse.com/public/766818/live)
Demo Video link: [https://youtu.be/HkK\_lvpNtck](https://youtu.be/HkK_lvpNtck)
GitHub Repo: [https://github.com/Jallson/Hand\_Gestures\_for\_Game\_Controller](https://github.com/Jallson/Hand_Gestures_for_Game_Controller)
***
## Introduction
This Edge Impulse project is designed to demonstrate how easy it is to collect data (photos), train a model, and deploy it to a Raspberry Pi unit within a simple Python game. The project also showcases the reliability of Edge Impulse Studio in creating small-footprint ML models, enabling low latency and low energy consumption — making real-time object detection possible, even without demanding the highest-performance hardware. This approach is ideal for use in the gaming industry as a cost-effective solution.
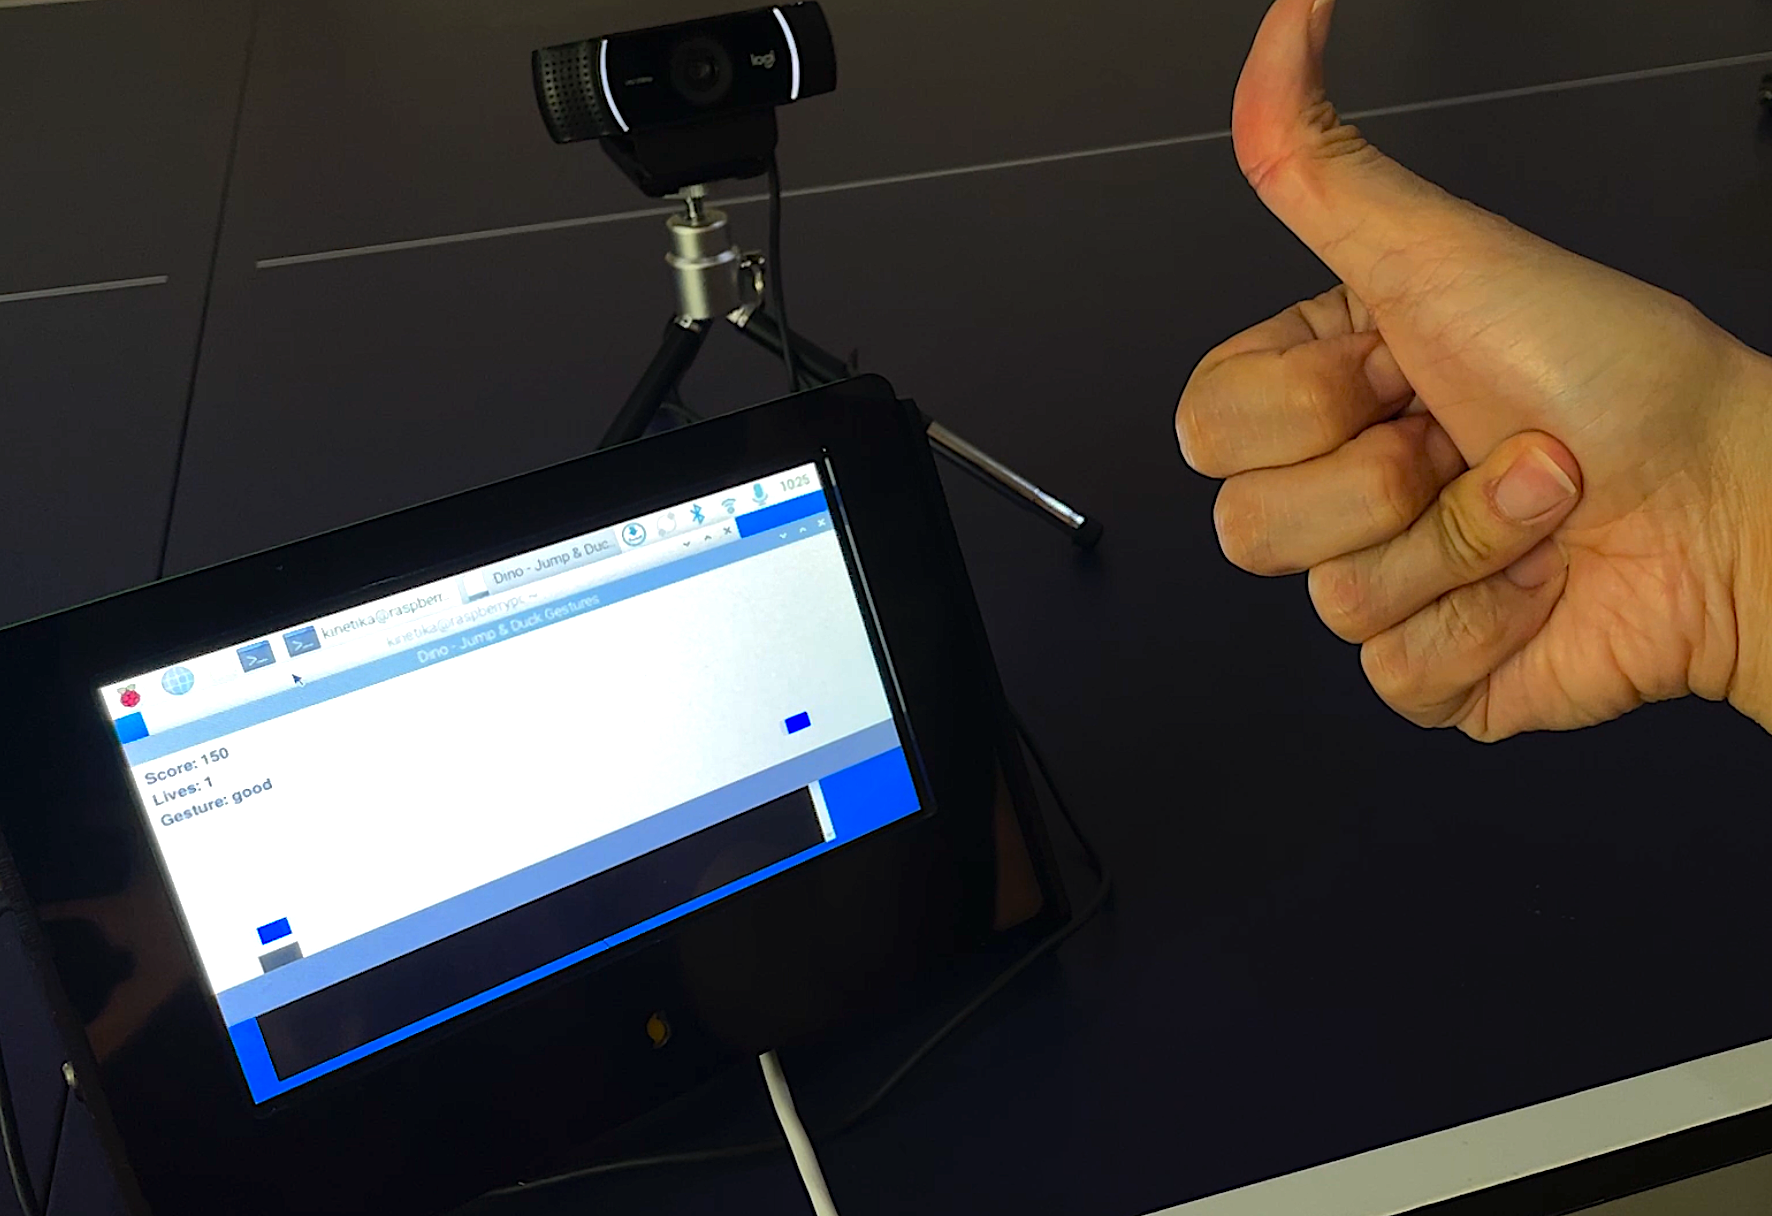 The main goal of this project is to encourage beginners to learn how to use Edge AI in practical applications. Therefore, it utilizes simple and widely popular components such as the Raspberry Pi, the PyGame library, and classic games as learning tools.
 ## How it Works
As an object detection project, we can use MobileNetV2 SSD with a relatively large dataset (for example, around 100 images per class), or alternatively, we can simplify the process by using YOLO, since YOLOv5 already comes pre-trained with basic hand recognition. This allows us to use a smaller dataset — in our case around 40 images per class will be enough.
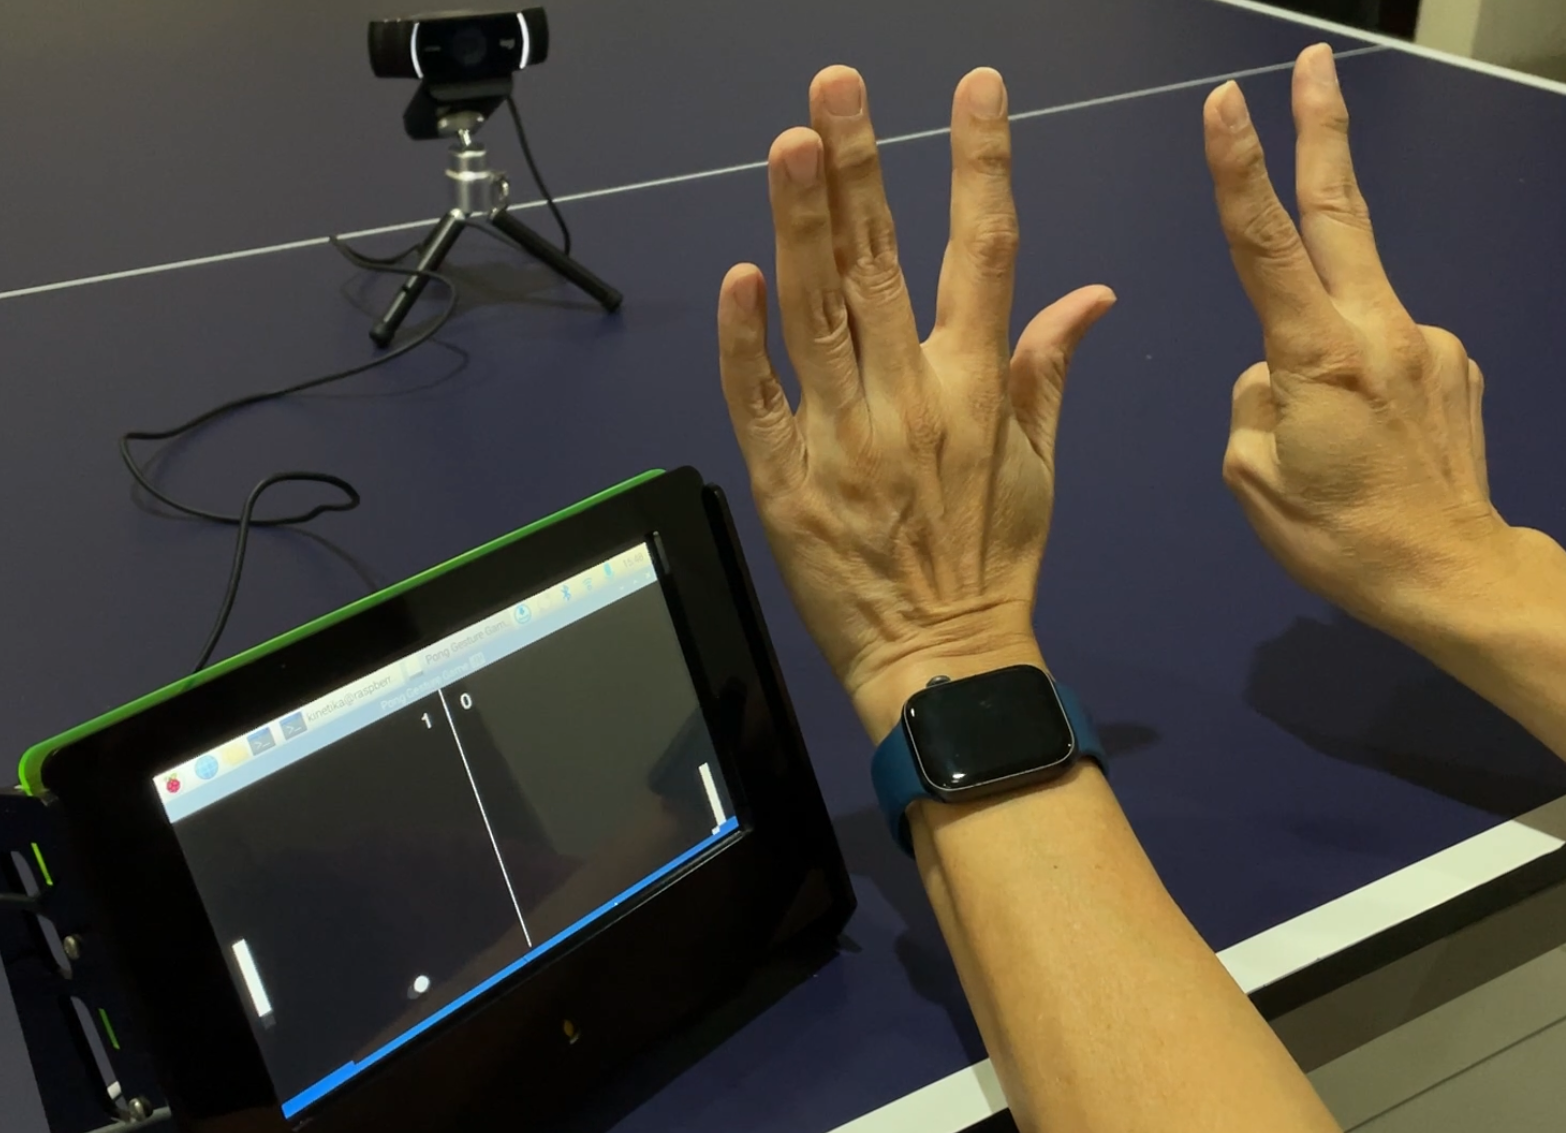
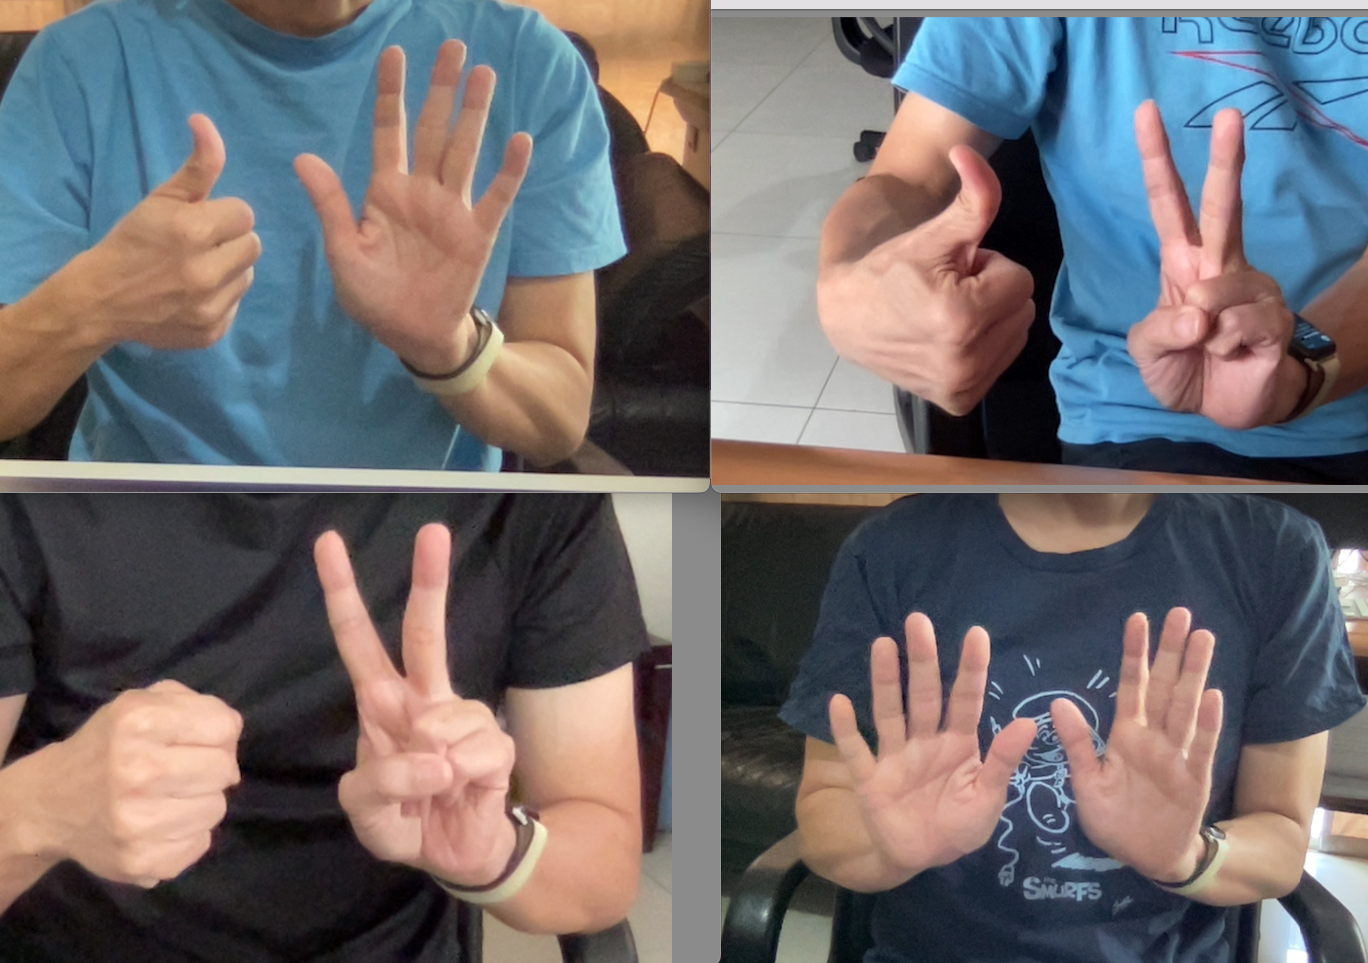
In this simulation, we will create four gesture classes: "neutral" (fist), "five" (open hand), "peace" (V-sign), and "good" (thumbs up). The bounding box detection will provide class data along with the object's x, y, w, and h values, which we will use as real-time input to replace a keyboard or joystick in the classic game we're developing.
The trained model will then be deployed to a Raspberry Pi, integrated into our Python code that uses the PyGame library for easy development and rendering of the game on an LCD display.
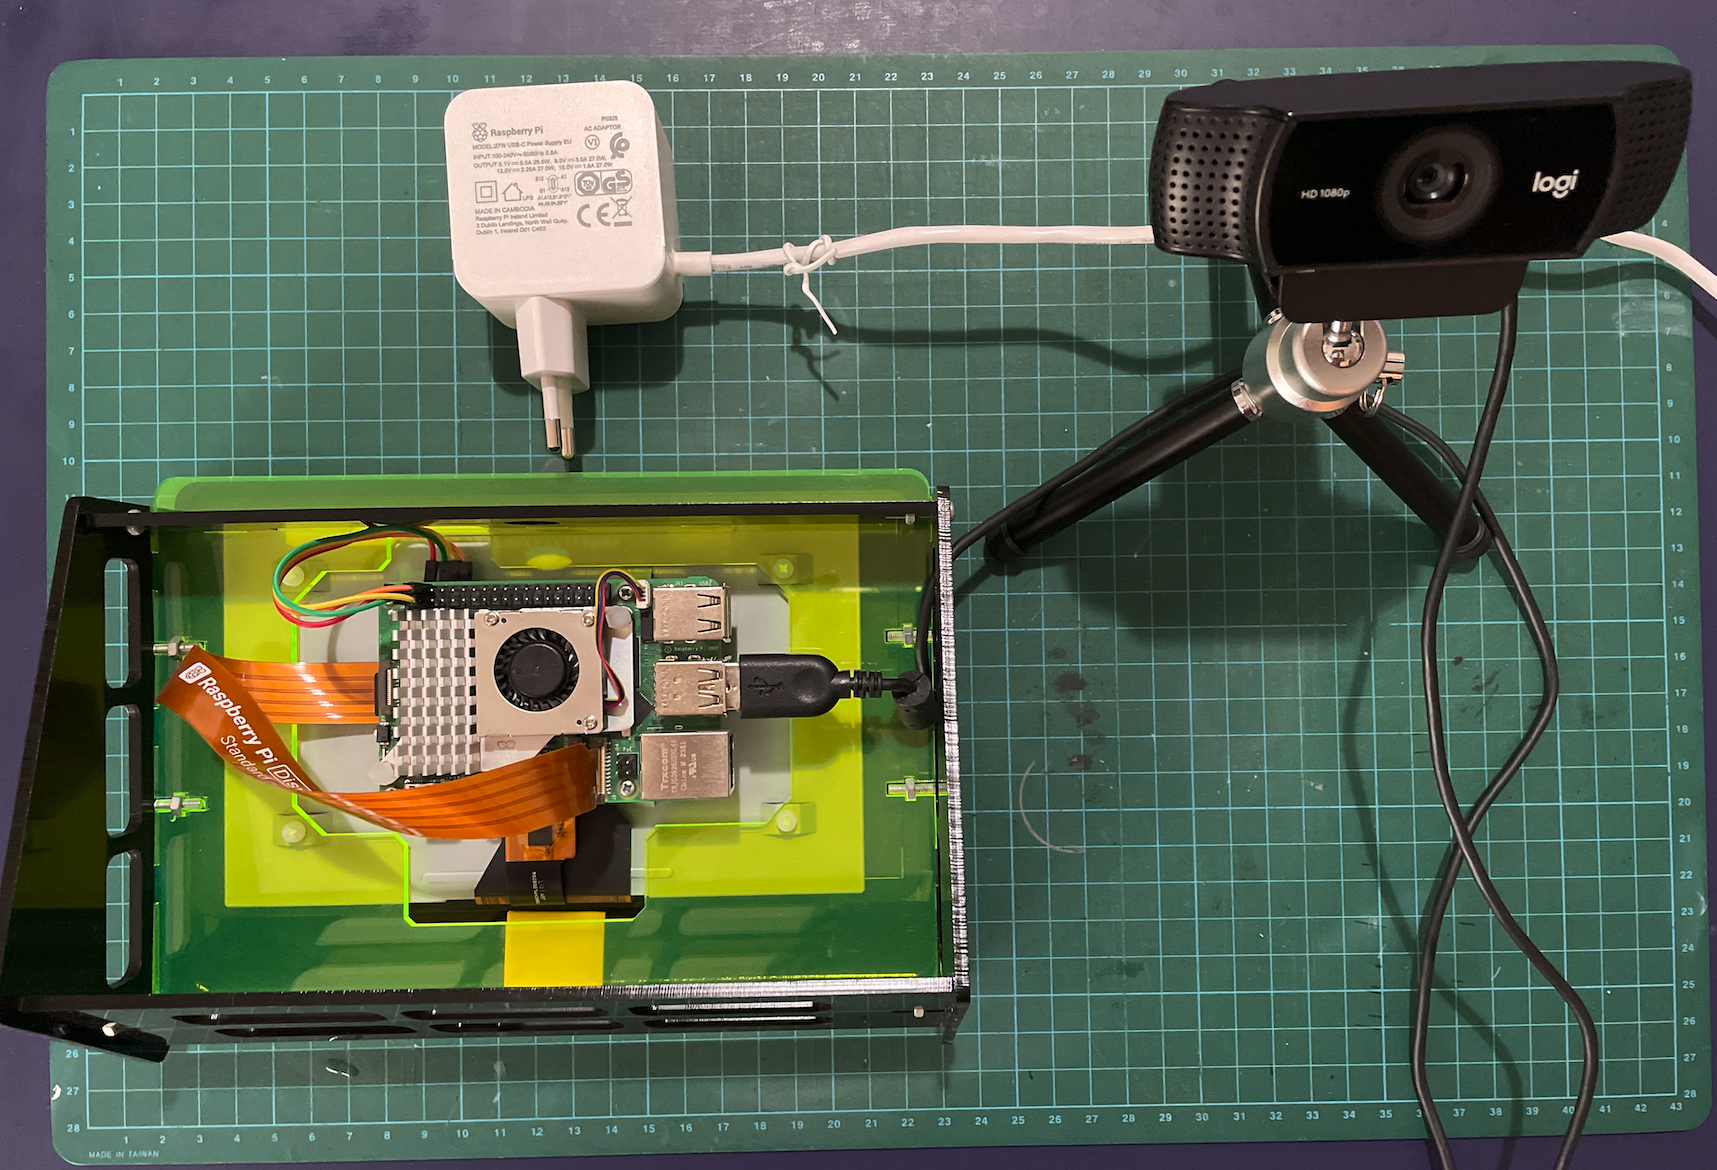
## Hardware Components
* Raspberry Pi 5
* Keyboard, mouse or PC/laptop via ssh
* USB Camera/webcam (eg. Logitech C920) or Pi Camera
* LCD/monitor
* Mini tripod (optional)
## How it Works
As an object detection project, we can use MobileNetV2 SSD with a relatively large dataset (for example, around 100 images per class), or alternatively, we can simplify the process by using YOLO, since YOLOv5 already comes pre-trained with basic hand recognition. This allows us to use a smaller dataset — in our case around 40 images per class will be enough.
In this simulation, we will create four gesture classes: "neutral" (fist), "five" (open hand), "peace" (V-sign), and "good" (thumbs up). The bounding box detection will provide class data along with the object's x, y, w, and h values, which we will use as real-time input to replace a keyboard or joystick in the classic game we're developing.
The trained model will then be deployed to a Raspberry Pi, integrated into our Python code that uses the PyGame library for easy development and rendering of the game on an LCD display.
## Hardware Components
* Raspberry Pi 5
* Keyboard, mouse or PC/laptop via ssh
* USB Camera/webcam (eg. Logitech C920) or Pi Camera
* LCD/monitor
* Mini tripod (optional)
 ## Software & Online Services
* Edge Impulse Studio
* Edge Impulse Linux & Python SDK
* Raspberry Pi OS
* OpenCV
* PyGame library
## Steps
### 1. Collecting Data
In the early stage of building a model using Edge Impulse Studio, the first step is to prepare your dataset. To ensure the model fits the specific needs of your project, it's best to collect your own data — in this case, by capturing images with your laptop's webcam and storing them in a designated folder.
For those who are new to Edge Impulse, begin by visiting [studio.edgeimpulse.com](https://studio.edgeimpulse.com), then log in or create a new account and start a fresh project. Select **Images** as the project type and choose **Object Detection** as the Learning block. In the Dashboard under Project Info, set the labeling method to **Bounding Boxes** and select Raspberry Pi as the target device. Once the project is set up, navigate to the **Data acquisition** section, open the **Upload Data** tab, and upload the folder containing your collected images.
## Software & Online Services
* Edge Impulse Studio
* Edge Impulse Linux & Python SDK
* Raspberry Pi OS
* OpenCV
* PyGame library
## Steps
### 1. Collecting Data
In the early stage of building a model using Edge Impulse Studio, the first step is to prepare your dataset. To ensure the model fits the specific needs of your project, it's best to collect your own data — in this case, by capturing images with your laptop's webcam and storing them in a designated folder.
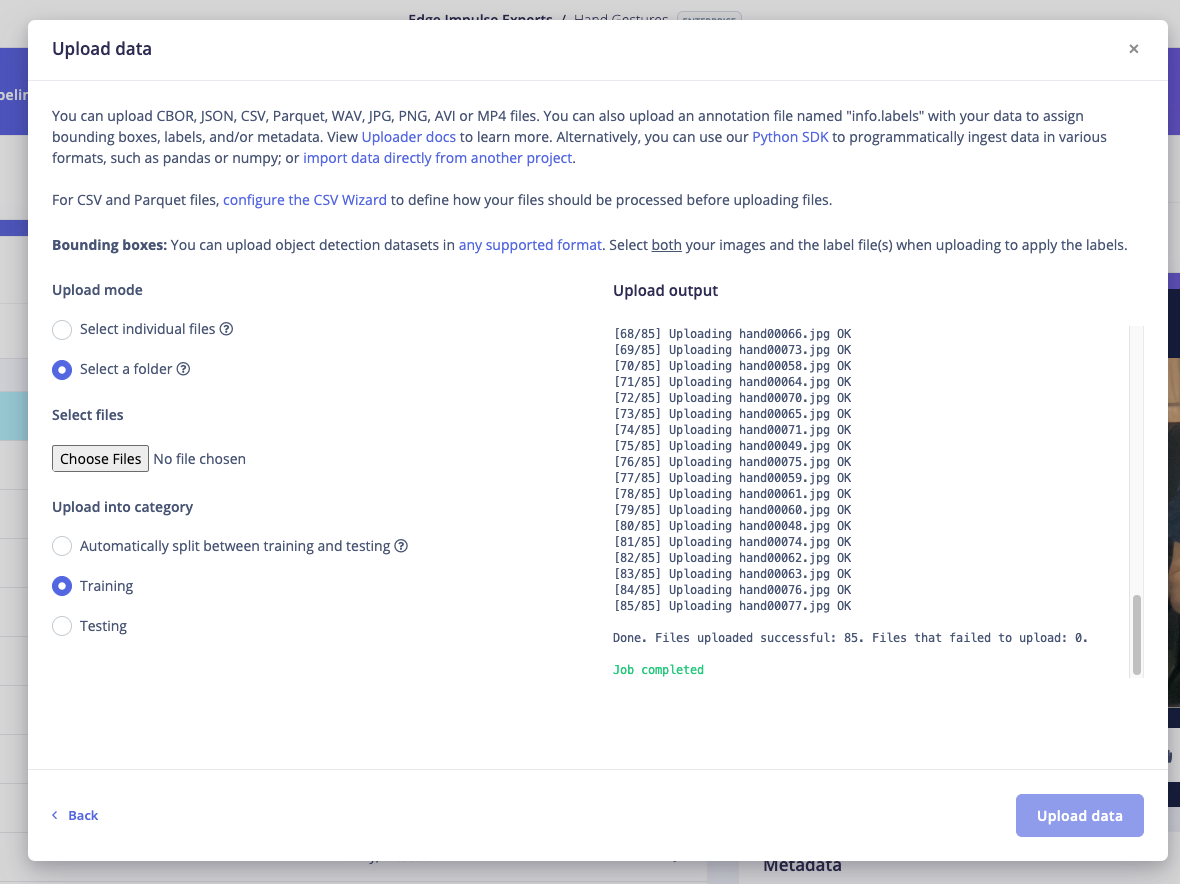
For those who are new to Edge Impulse, begin by visiting [studio.edgeimpulse.com](https://studio.edgeimpulse.com), then log in or create a new account and start a fresh project. Select **Images** as the project type and choose **Object Detection** as the Learning block. In the Dashboard under Project Info, set the labeling method to **Bounding Boxes** and select Raspberry Pi as the target device. Once the project is set up, navigate to the **Data acquisition** section, open the **Upload Data** tab, and upload the folder containing your collected images.
 ### 2. Labeling
The next stage is labeling, by navigating to **Data acquisition**, then open the **Labeling queue** tab. From there, draw a bounding box around each gesture in your images, assign the appropriate label (eg. neutral, good, peace, five) and click Save. Continue this process until all images in your dataset have been properly labeled.
Once labeling is complete, it's important to divide your dataset into Training and Testing sets — typically using an 80/20 ratio. If this hasn't been done automatically, you can easily manage it by selecting **Train / Test Split** and following the on-screen instructions.
### 2. Labeling
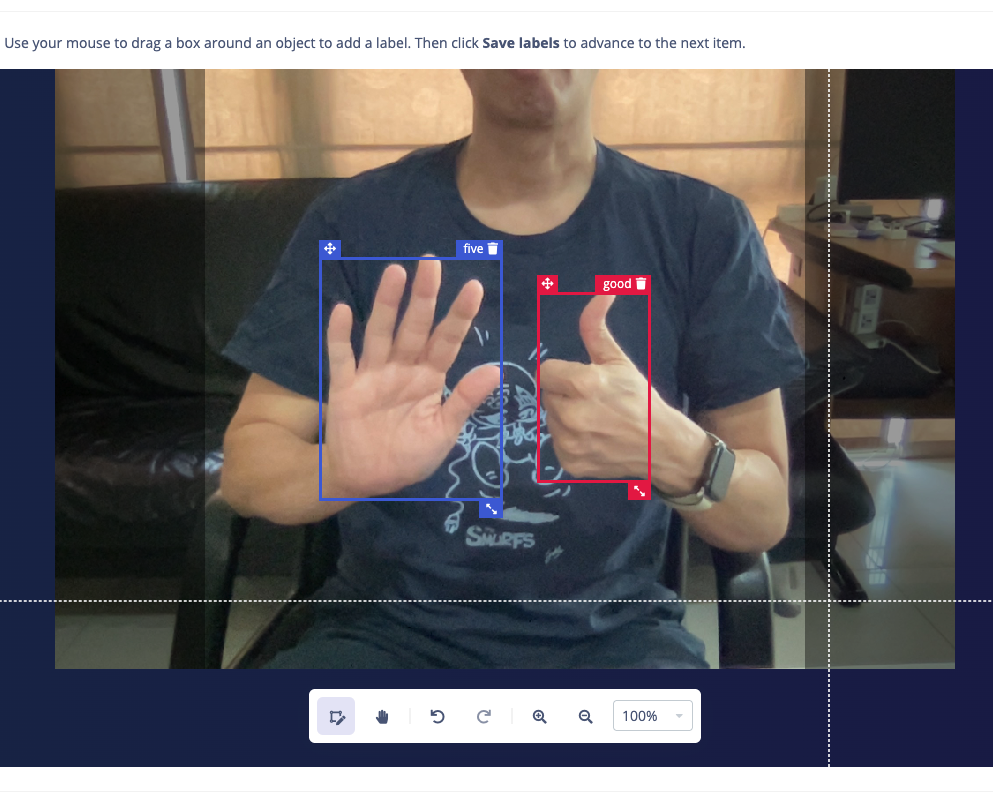
The next stage is labeling, by navigating to **Data acquisition**, then open the **Labeling queue** tab. From there, draw a bounding box around each gesture in your images, assign the appropriate label (eg. neutral, good, peace, five) and click Save. Continue this process until all images in your dataset have been properly labeled.
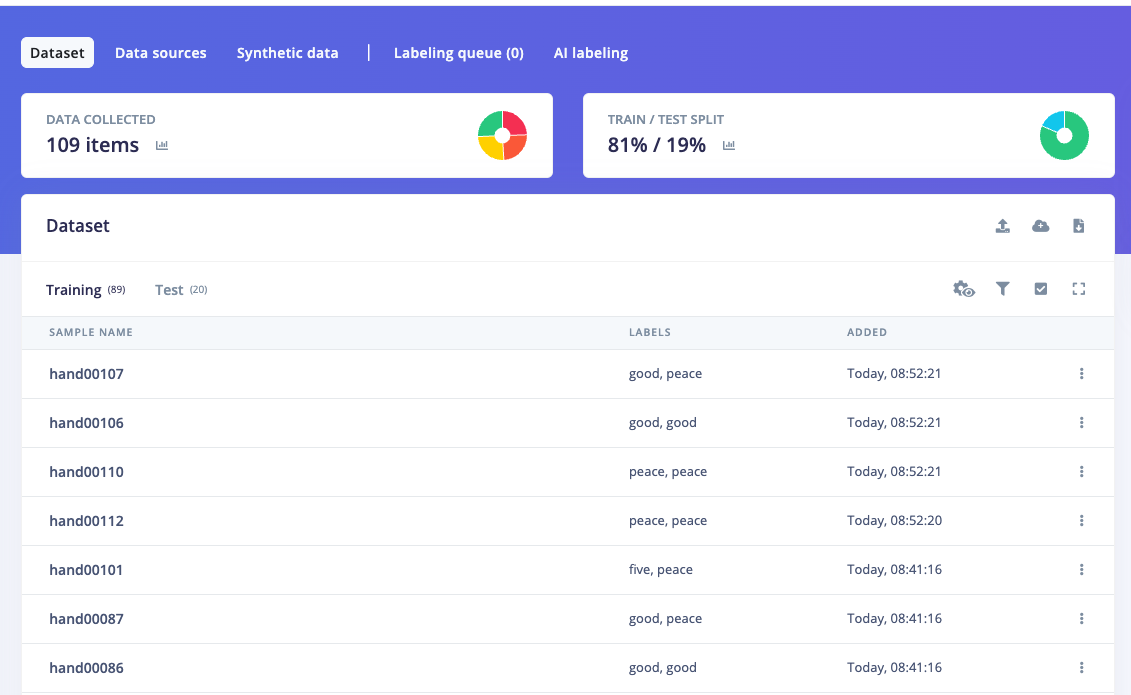
Once labeling is complete, it's important to divide your dataset into Training and Testing sets — typically using an 80/20 ratio. If this hasn't been done automatically, you can easily manage it by selecting **Train / Test Split** and following the on-screen instructions.
 ### 3. Train and Build Model
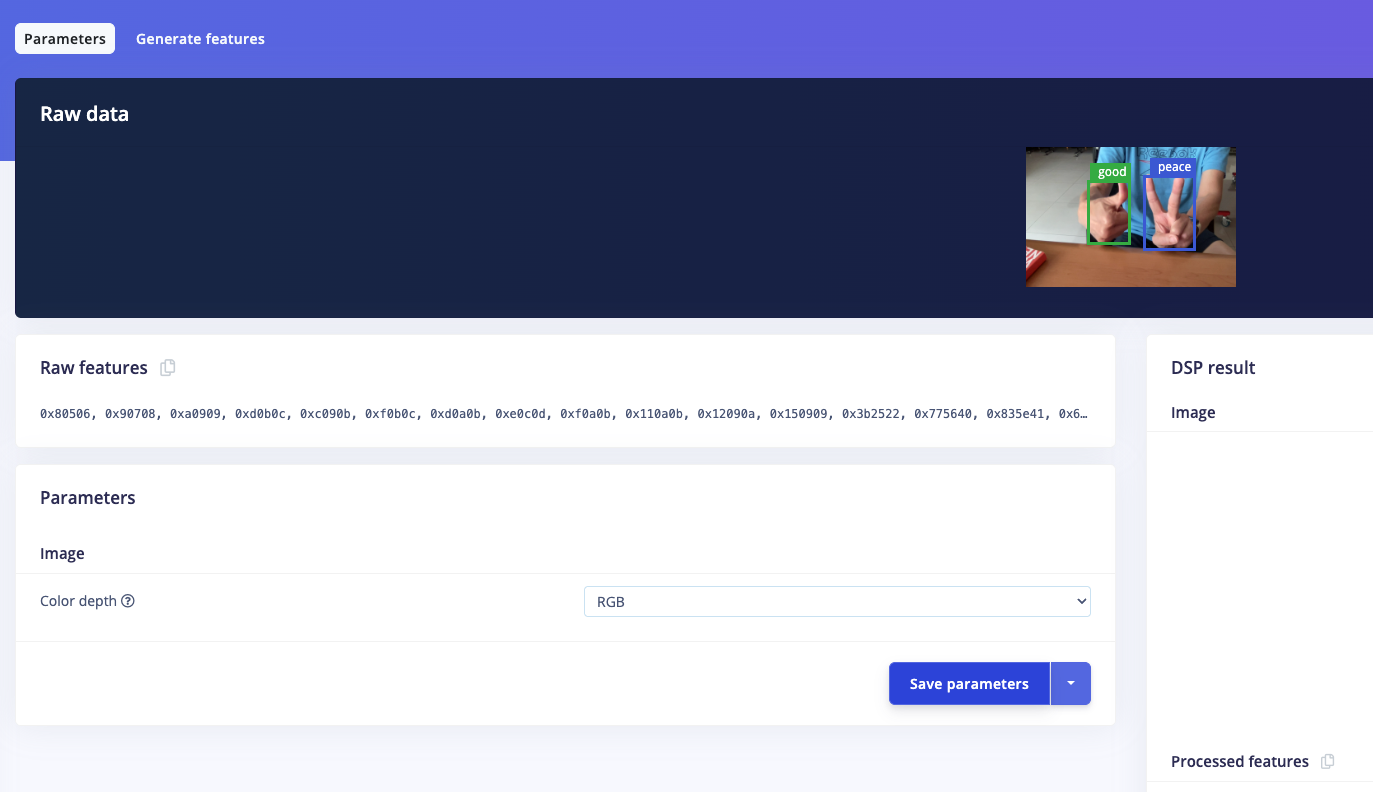
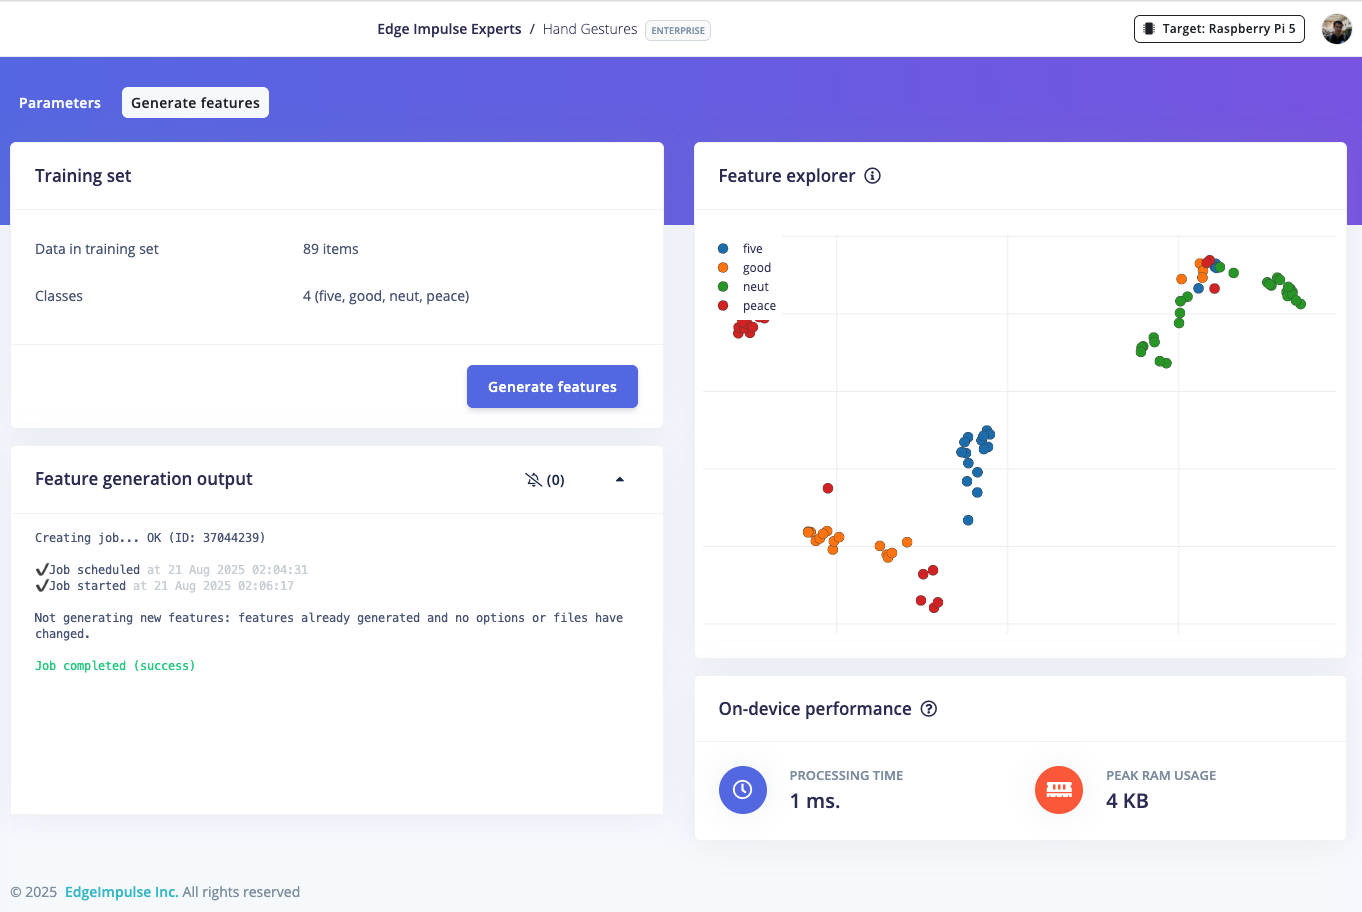
Once your labelled dataset is ready, go to **Impulse Design > Create Impulse**, and set the image width and height to 320x320. Choose **Fit shortest axis**, then select **Image** and **Object Detection** as the learning blocks, and click **Save Impulse**. Next, navigate to the **Image Parameters** section, select **RGB** as the color depth, and press **Save parameters**. After that, click on **Generate features**, where you'll be able to see a graphical distribution of your data.
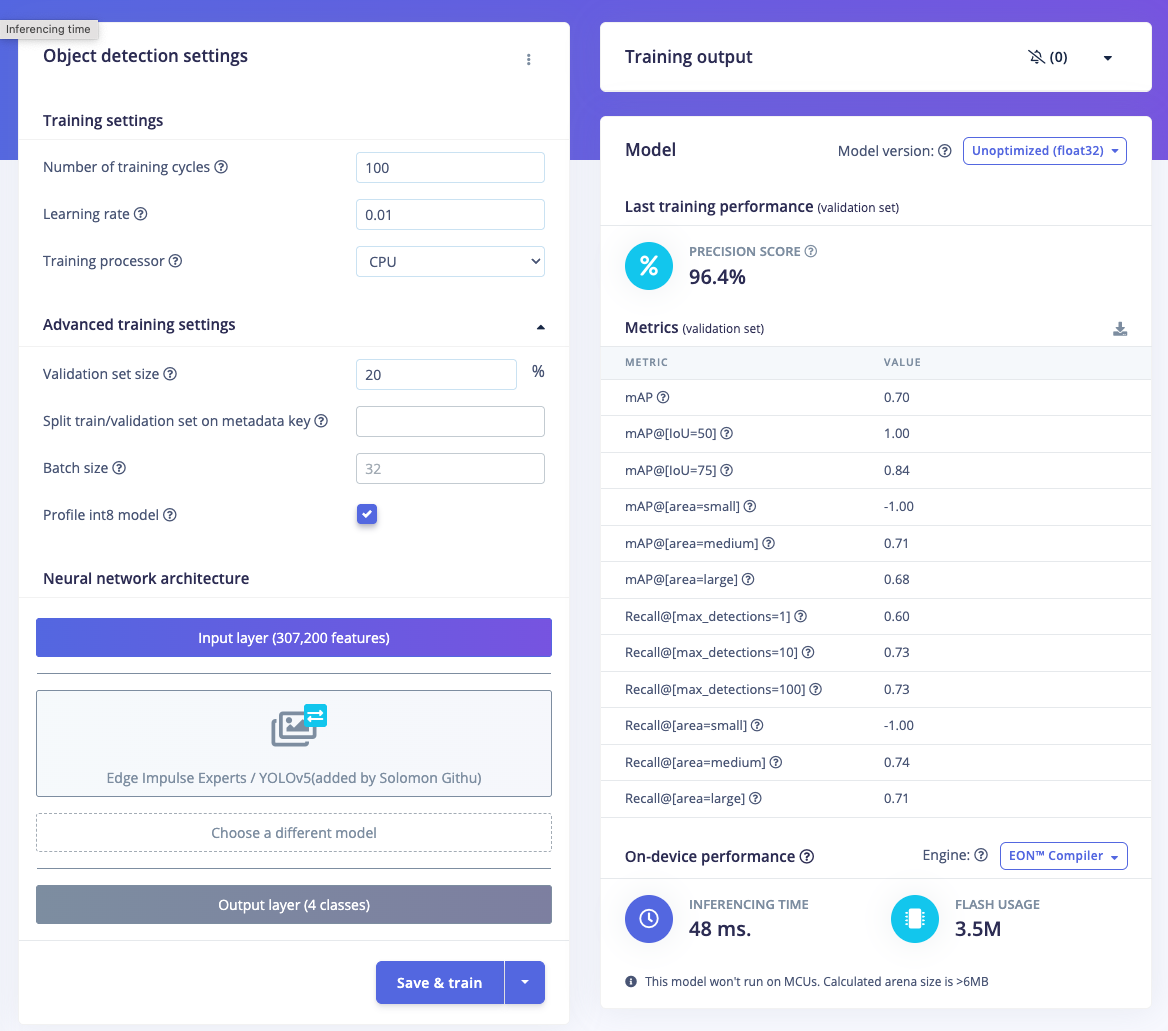
Now, move to the **Object Detection** section and configure the training settings. Select **CPU** and set the training cycles to around 100, with a Learning rate of 0.01. Choose YOLOv5 as the neural network architecture. Once ready, start training by pressing **Start training**, and monitor the progress.
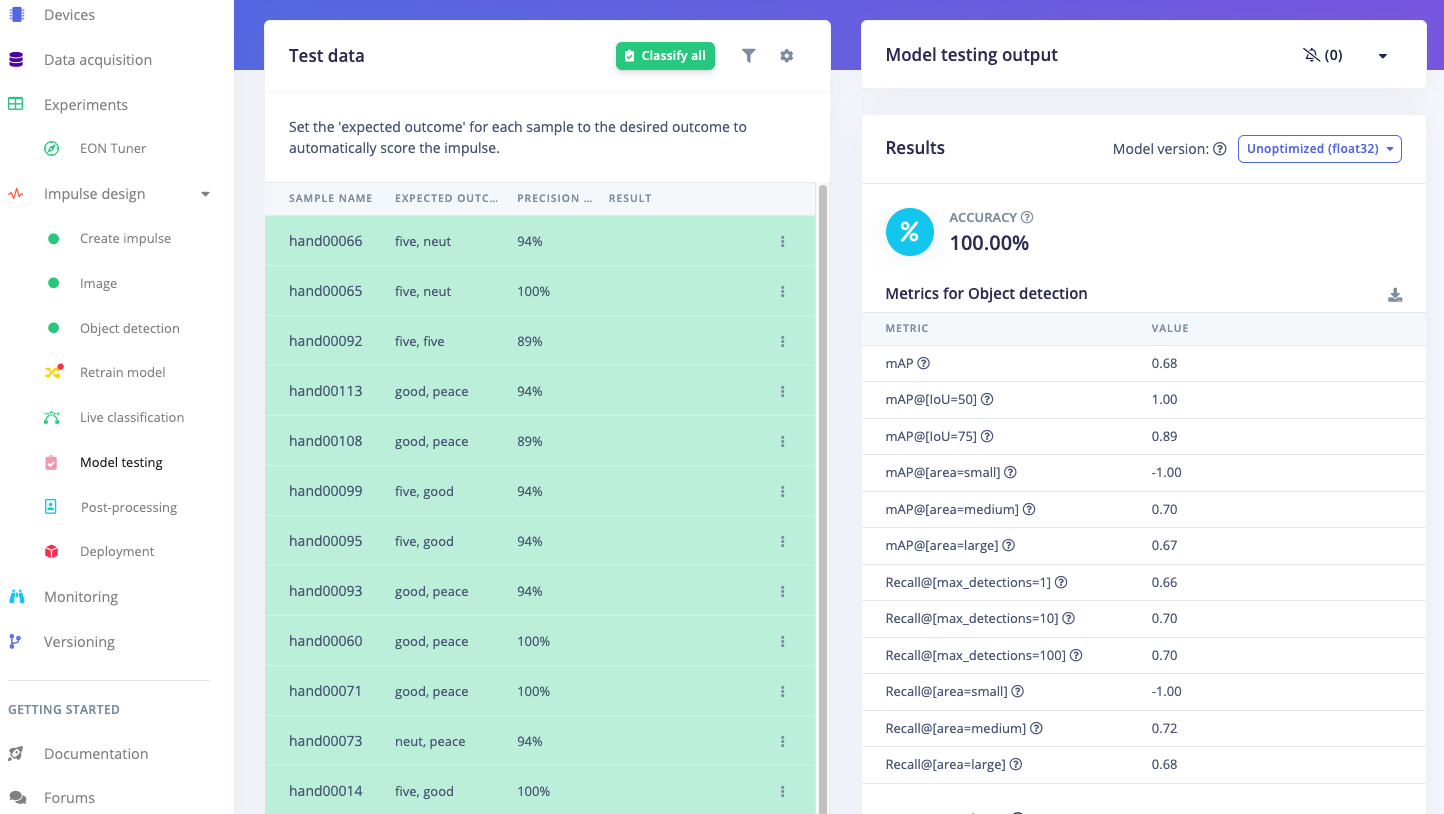
If everything goes well and the precision result is above 80%, proceed to the next step. Go to the **Model Testing** section, click **Classify all**, and if the result is around 90%, you can move on to the final step — Deployment.
### 3. Train and Build Model
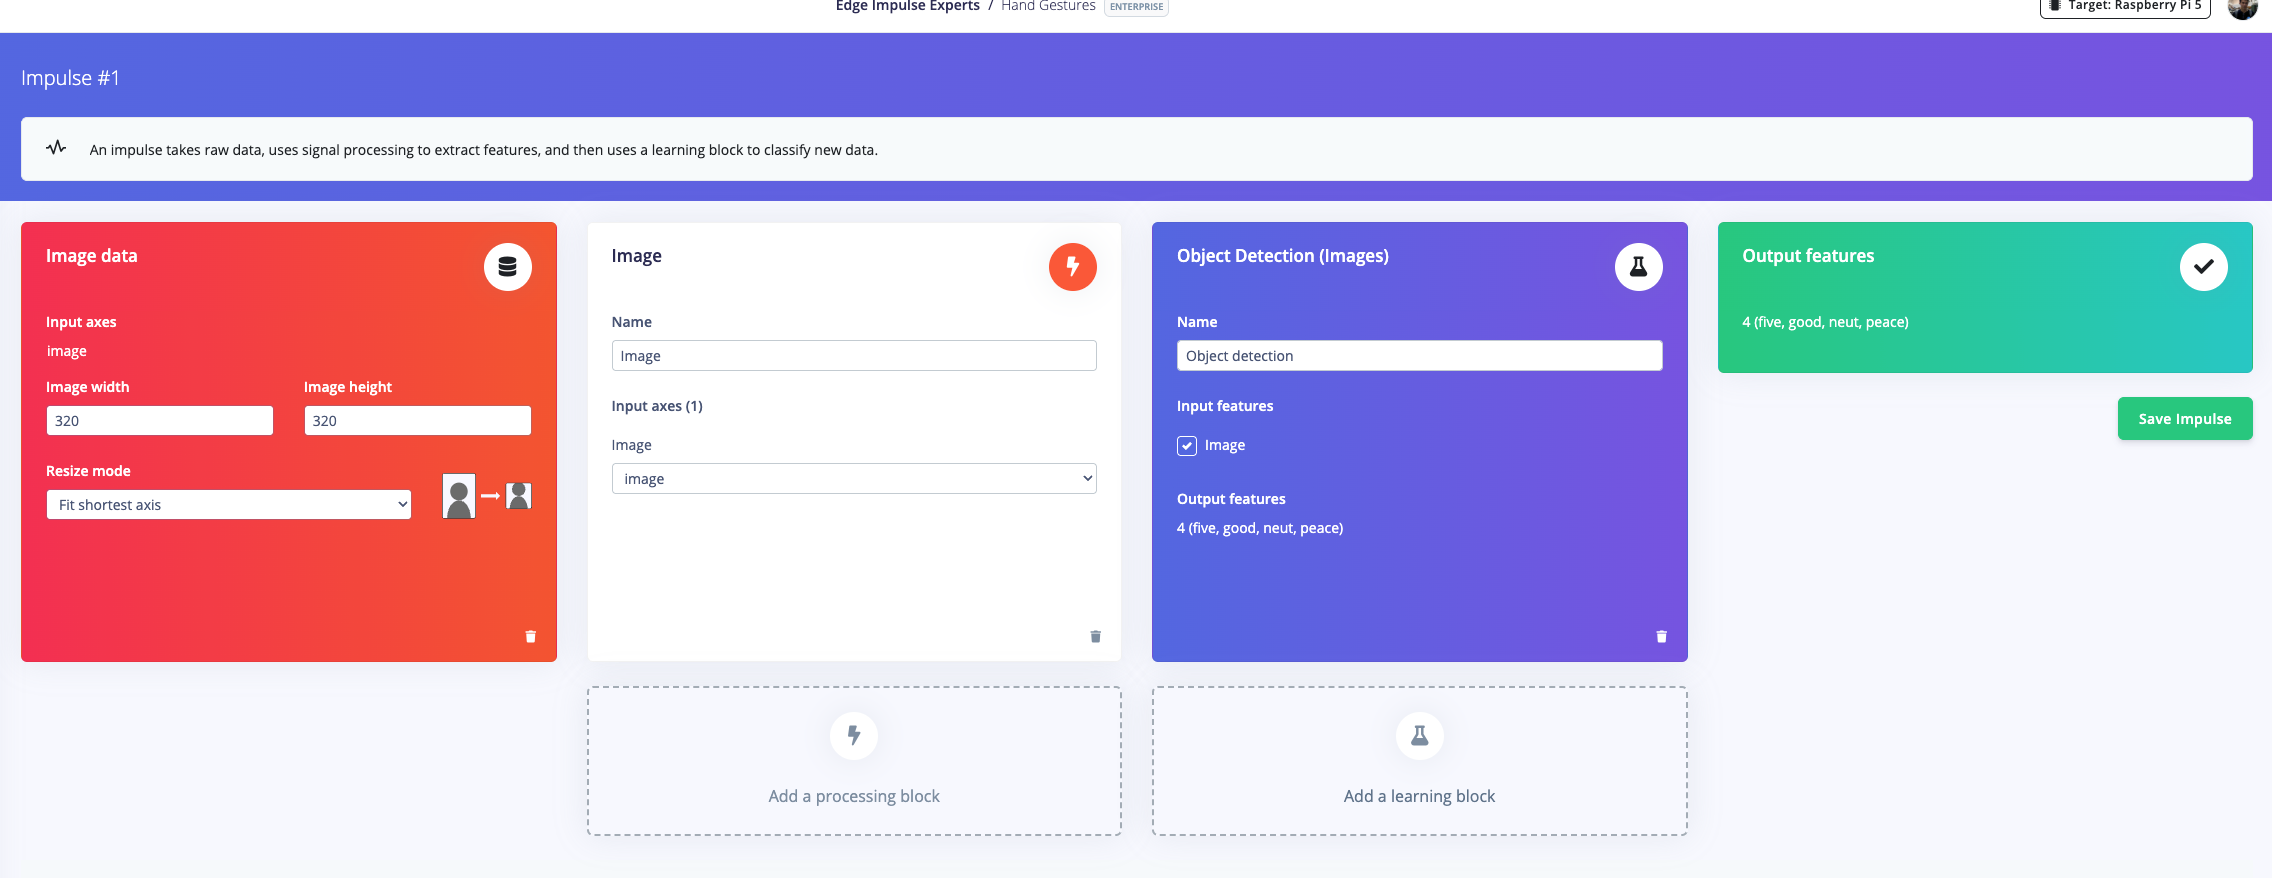
Once your labelled dataset is ready, go to **Impulse Design > Create Impulse**, and set the image width and height to 320x320. Choose **Fit shortest axis**, then select **Image** and **Object Detection** as the learning blocks, and click **Save Impulse**. Next, navigate to the **Image Parameters** section, select **RGB** as the color depth, and press **Save parameters**. After that, click on **Generate features**, where you'll be able to see a graphical distribution of your data.
Now, move to the **Object Detection** section and configure the training settings. Select **CPU** and set the training cycles to around 100, with a Learning rate of 0.01. Choose YOLOv5 as the neural network architecture. Once ready, start training by pressing **Start training**, and monitor the progress.
If everything goes well and the precision result is above 80%, proceed to the next step. Go to the **Model Testing** section, click **Classify all**, and if the result is around 90%, you can move on to the final step — Deployment.
 ### 4. Deploy Model on Raspberry Pi
After successfully building your model in Edge Impulse Studio, you can proceed with live classification by downloading the model and running it directly on your Raspberry Pi.
First, make sure your Raspberry Pi is running the latest OS that supports Edge Impulse Linux CLI version 1.3.0 or above. Then, install the required dependencies by following this guide: [https://docs.edgeimpulse.com/docs/edge-ai-hardware/cpu/raspberry-pi-5](https://docs.edgeimpulse.com/docs/edge-ai-hardware/cpu/raspberry-pi-5).
You'll also need the Linux Python SDK, which can be installed using the instructions here: [https://docs.edgeimpulse.com/docs/tools/edge-impulse-for-linux/linux-python-sdk](https://docs.edgeimpulse.com/docs/tools/edge-impulse-for-linux/linux-python-sdk).
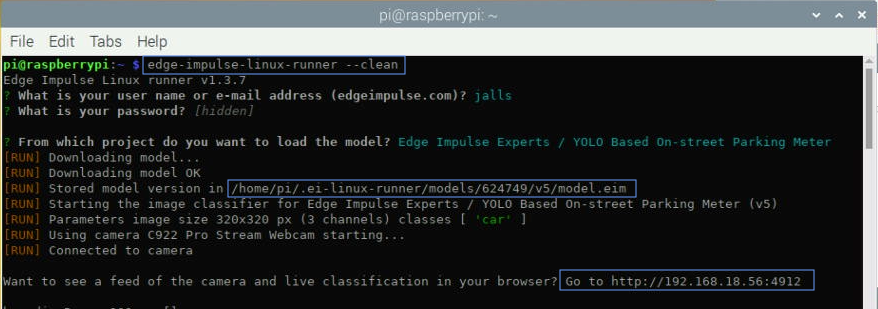
Once the setup is complete, open a terminal on your Raspberry Pi (or connect via SSH) and run:
`edge-impulse-linux-runner --clean`
Log in to your account, select your project, and the *model.eim* file will be automatically downloaded — optimized for the aarch64 architecture (Raspberry Pi 5 is ARM64). The console will display its location e.g: `/home/pi/.ei-linux-runner/models/.../v...`. When the download is finished, press Ctrl + C to stop the inference process, then move the model file to your home directory for easy access:
`cp -v model.eim /home/pi`
Your model is now ready to use in a Python program. To test it, run:
`edge-impulse-linux-runner`
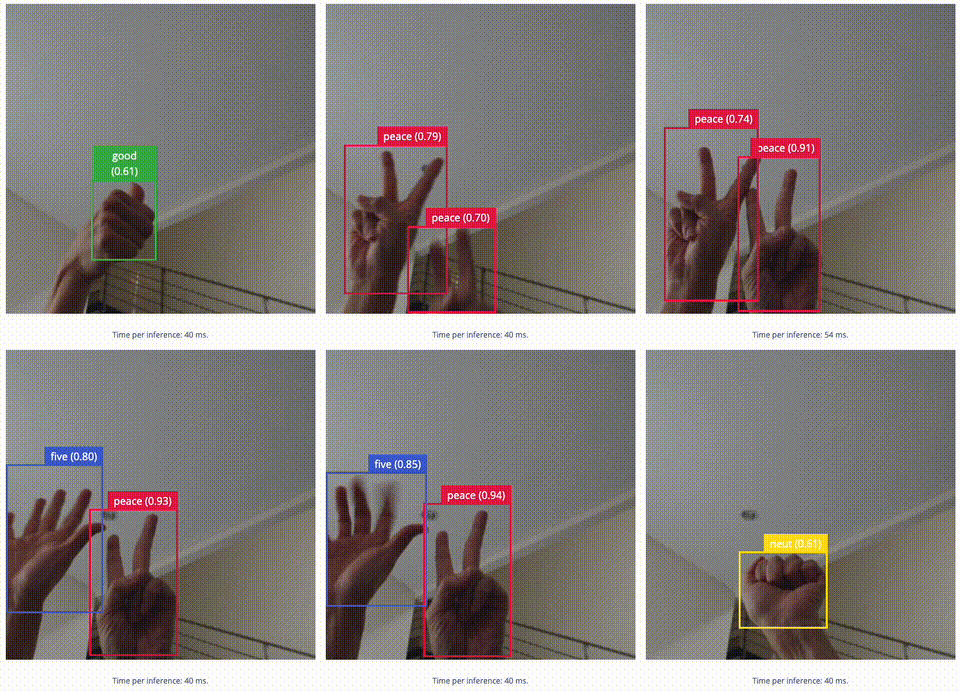
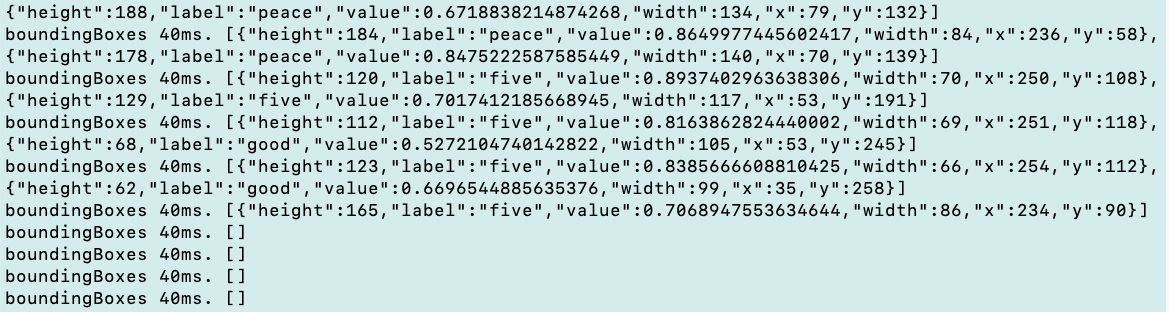
You'll be able to view the live inference through your browser at the local IP address shown in the console. Our inference time is around 40ms, delivering impressively fast real-time object detection.
### 4. Deploy Model on Raspberry Pi
After successfully building your model in Edge Impulse Studio, you can proceed with live classification by downloading the model and running it directly on your Raspberry Pi.
First, make sure your Raspberry Pi is running the latest OS that supports Edge Impulse Linux CLI version 1.3.0 or above. Then, install the required dependencies by following this guide: [https://docs.edgeimpulse.com/docs/edge-ai-hardware/cpu/raspberry-pi-5](https://docs.edgeimpulse.com/docs/edge-ai-hardware/cpu/raspberry-pi-5).
You'll also need the Linux Python SDK, which can be installed using the instructions here: [https://docs.edgeimpulse.com/docs/tools/edge-impulse-for-linux/linux-python-sdk](https://docs.edgeimpulse.com/docs/tools/edge-impulse-for-linux/linux-python-sdk).
Once the setup is complete, open a terminal on your Raspberry Pi (or connect via SSH) and run:
`edge-impulse-linux-runner --clean`
Log in to your account, select your project, and the *model.eim* file will be automatically downloaded — optimized for the aarch64 architecture (Raspberry Pi 5 is ARM64). The console will display its location e.g: `/home/pi/.ei-linux-runner/models/.../v...`. When the download is finished, press Ctrl + C to stop the inference process, then move the model file to your home directory for easy access:
`cp -v model.eim /home/pi`
Your model is now ready to use in a Python program. To test it, run:
`edge-impulse-linux-runner`
You'll be able to view the live inference through your browser at the local IP address shown in the console. Our inference time is around 40ms, delivering impressively fast real-time object detection.
 ### 5. Build a Gesture Detection Program (Python)
With the ML model tested and its performance verified, the next step is to integrate its hand gesture detection capability into a Python application — in this case, classic games such as Dino and Pong.
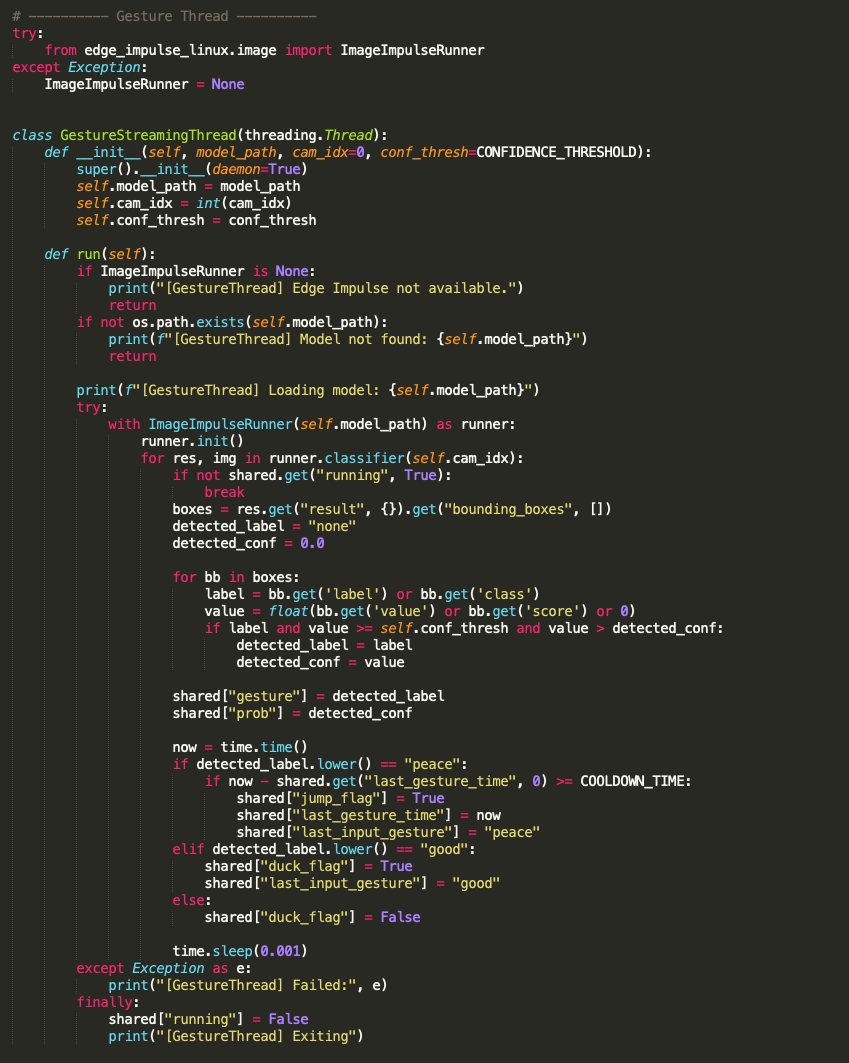
In the Dino game, the recognized gestures will act as input controls, similar to keyboard buttons or a joystick. When the model detects the “peace” gesture, the Dino will jump to avoid a cactus, while the “good” gesture will make the Dino duck to avoid a bird.
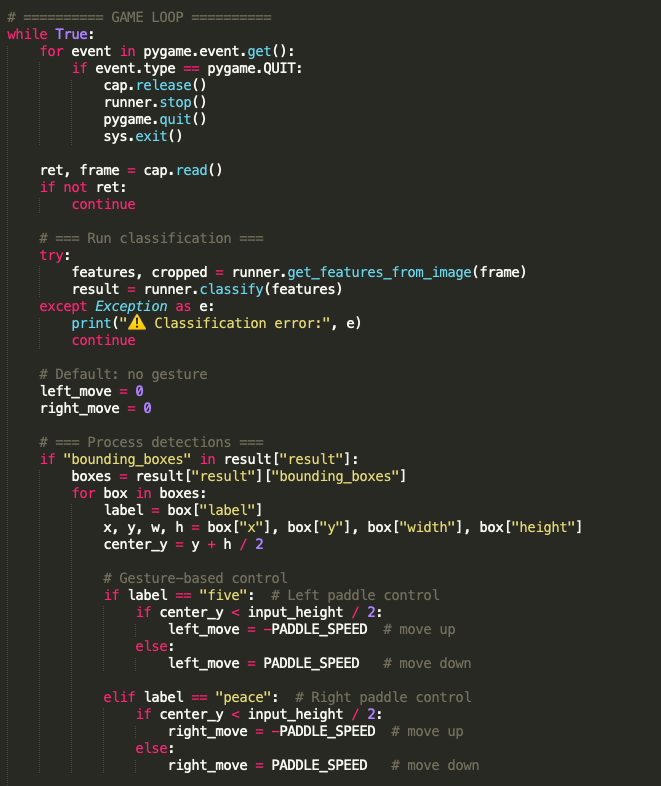
In the Pong game, gestures are used to distinguish between Player 1 and Player 2, using “five” and “peace” gestures respectively. Additionally, the vertical position of the detected hand gesture is mapped to control the paddle's movement within the game.
For more details, refer to the Python code located in the [GitHub repository for this project](https://github.com/Jallson/Hand_Gestures_for_Game_Controller).
### 5. Build a Gesture Detection Program (Python)
With the ML model tested and its performance verified, the next step is to integrate its hand gesture detection capability into a Python application — in this case, classic games such as Dino and Pong.
In the Dino game, the recognized gestures will act as input controls, similar to keyboard buttons or a joystick. When the model detects the “peace” gesture, the Dino will jump to avoid a cactus, while the “good” gesture will make the Dino duck to avoid a bird.
In the Pong game, gestures are used to distinguish between Player 1 and Player 2, using “five” and “peace” gestures respectively. Additionally, the vertical position of the detected hand gesture is mapped to control the paddle's movement within the game.
For more details, refer to the Python code located in the [GitHub repository for this project](https://github.com/Jallson/Hand_Gestures_for_Game_Controller).
 Check out a demo video here:
## Conclusion
This project shows how Edge Impulse and a Raspberry Pi can transform simple hand gestures into real-time game controls or other inputs. Through an easy workflow — from collecting and training data to deploying the model and integrating with Python games — it demonstrates that Edge AI can be practical, responsive, and affordable, even without high-end hardware.
By combining Edge Impulse Studio, PyGame, and classic games like Dino and Pong, this project makes learning AI-powered interaction both fun and accessible. It highlights how low-latency, low-power ML models can open the door to creative, hands-on applications for beginners and hobbyists alike.
Check out a demo video here:
## Conclusion
This project shows how Edge Impulse and a Raspberry Pi can transform simple hand gestures into real-time game controls or other inputs. Through an easy workflow — from collecting and training data to deploying the model and integrating with Python games — it demonstrates that Edge AI can be practical, responsive, and affordable, even without high-end hardware.
By combining Edge Impulse Studio, PyGame, and classic games like Dino and Pong, this project makes learning AI-powered interaction both fun and accessible. It highlights how low-latency, low-power ML models can open the door to creative, hands-on applications for beginners and hobbyists alike.