> ## Documentation Index
> Fetch the complete documentation index at: https://docs.edgeimpulse.com/llms.txt
> Use this file to discover all available pages before exploring further.
# CODICO Triple Vision Industrial AI Camera
The [Qualcomm Dragonwing™ Triple Vision Industrial AI Camera PERSPEC-1 (IMB-JM1005)](https://www.codico.com/en/perspec-2-industrial-vision-ai-solution-imb-jm1008), part of the PERSPEC series from CODICO and JMO, is an industrial‐grade, rugged AI camera platform powered by Qualcomm's Dragonwing QCS6490 system-on-chip. It supports **three concurrent high-resolution cameras**, multiple IOs, and is designed for quality inspection, defect detection, classification, etc., in harsh environments. It has a Kryo™ 670 CPU, Adreno™ 643L GPU and 12 TOPS Hexagon™ 770 NPU. It's fully supported by Edge Impulse - you'll be able to sample raw data, build models, and deploy trained machine learning models directly from the Studio. This solution has been developed to run multi-camera, multi-modal AI workloads in industrial settings such as automated product inspection, quality control and process monitoring.
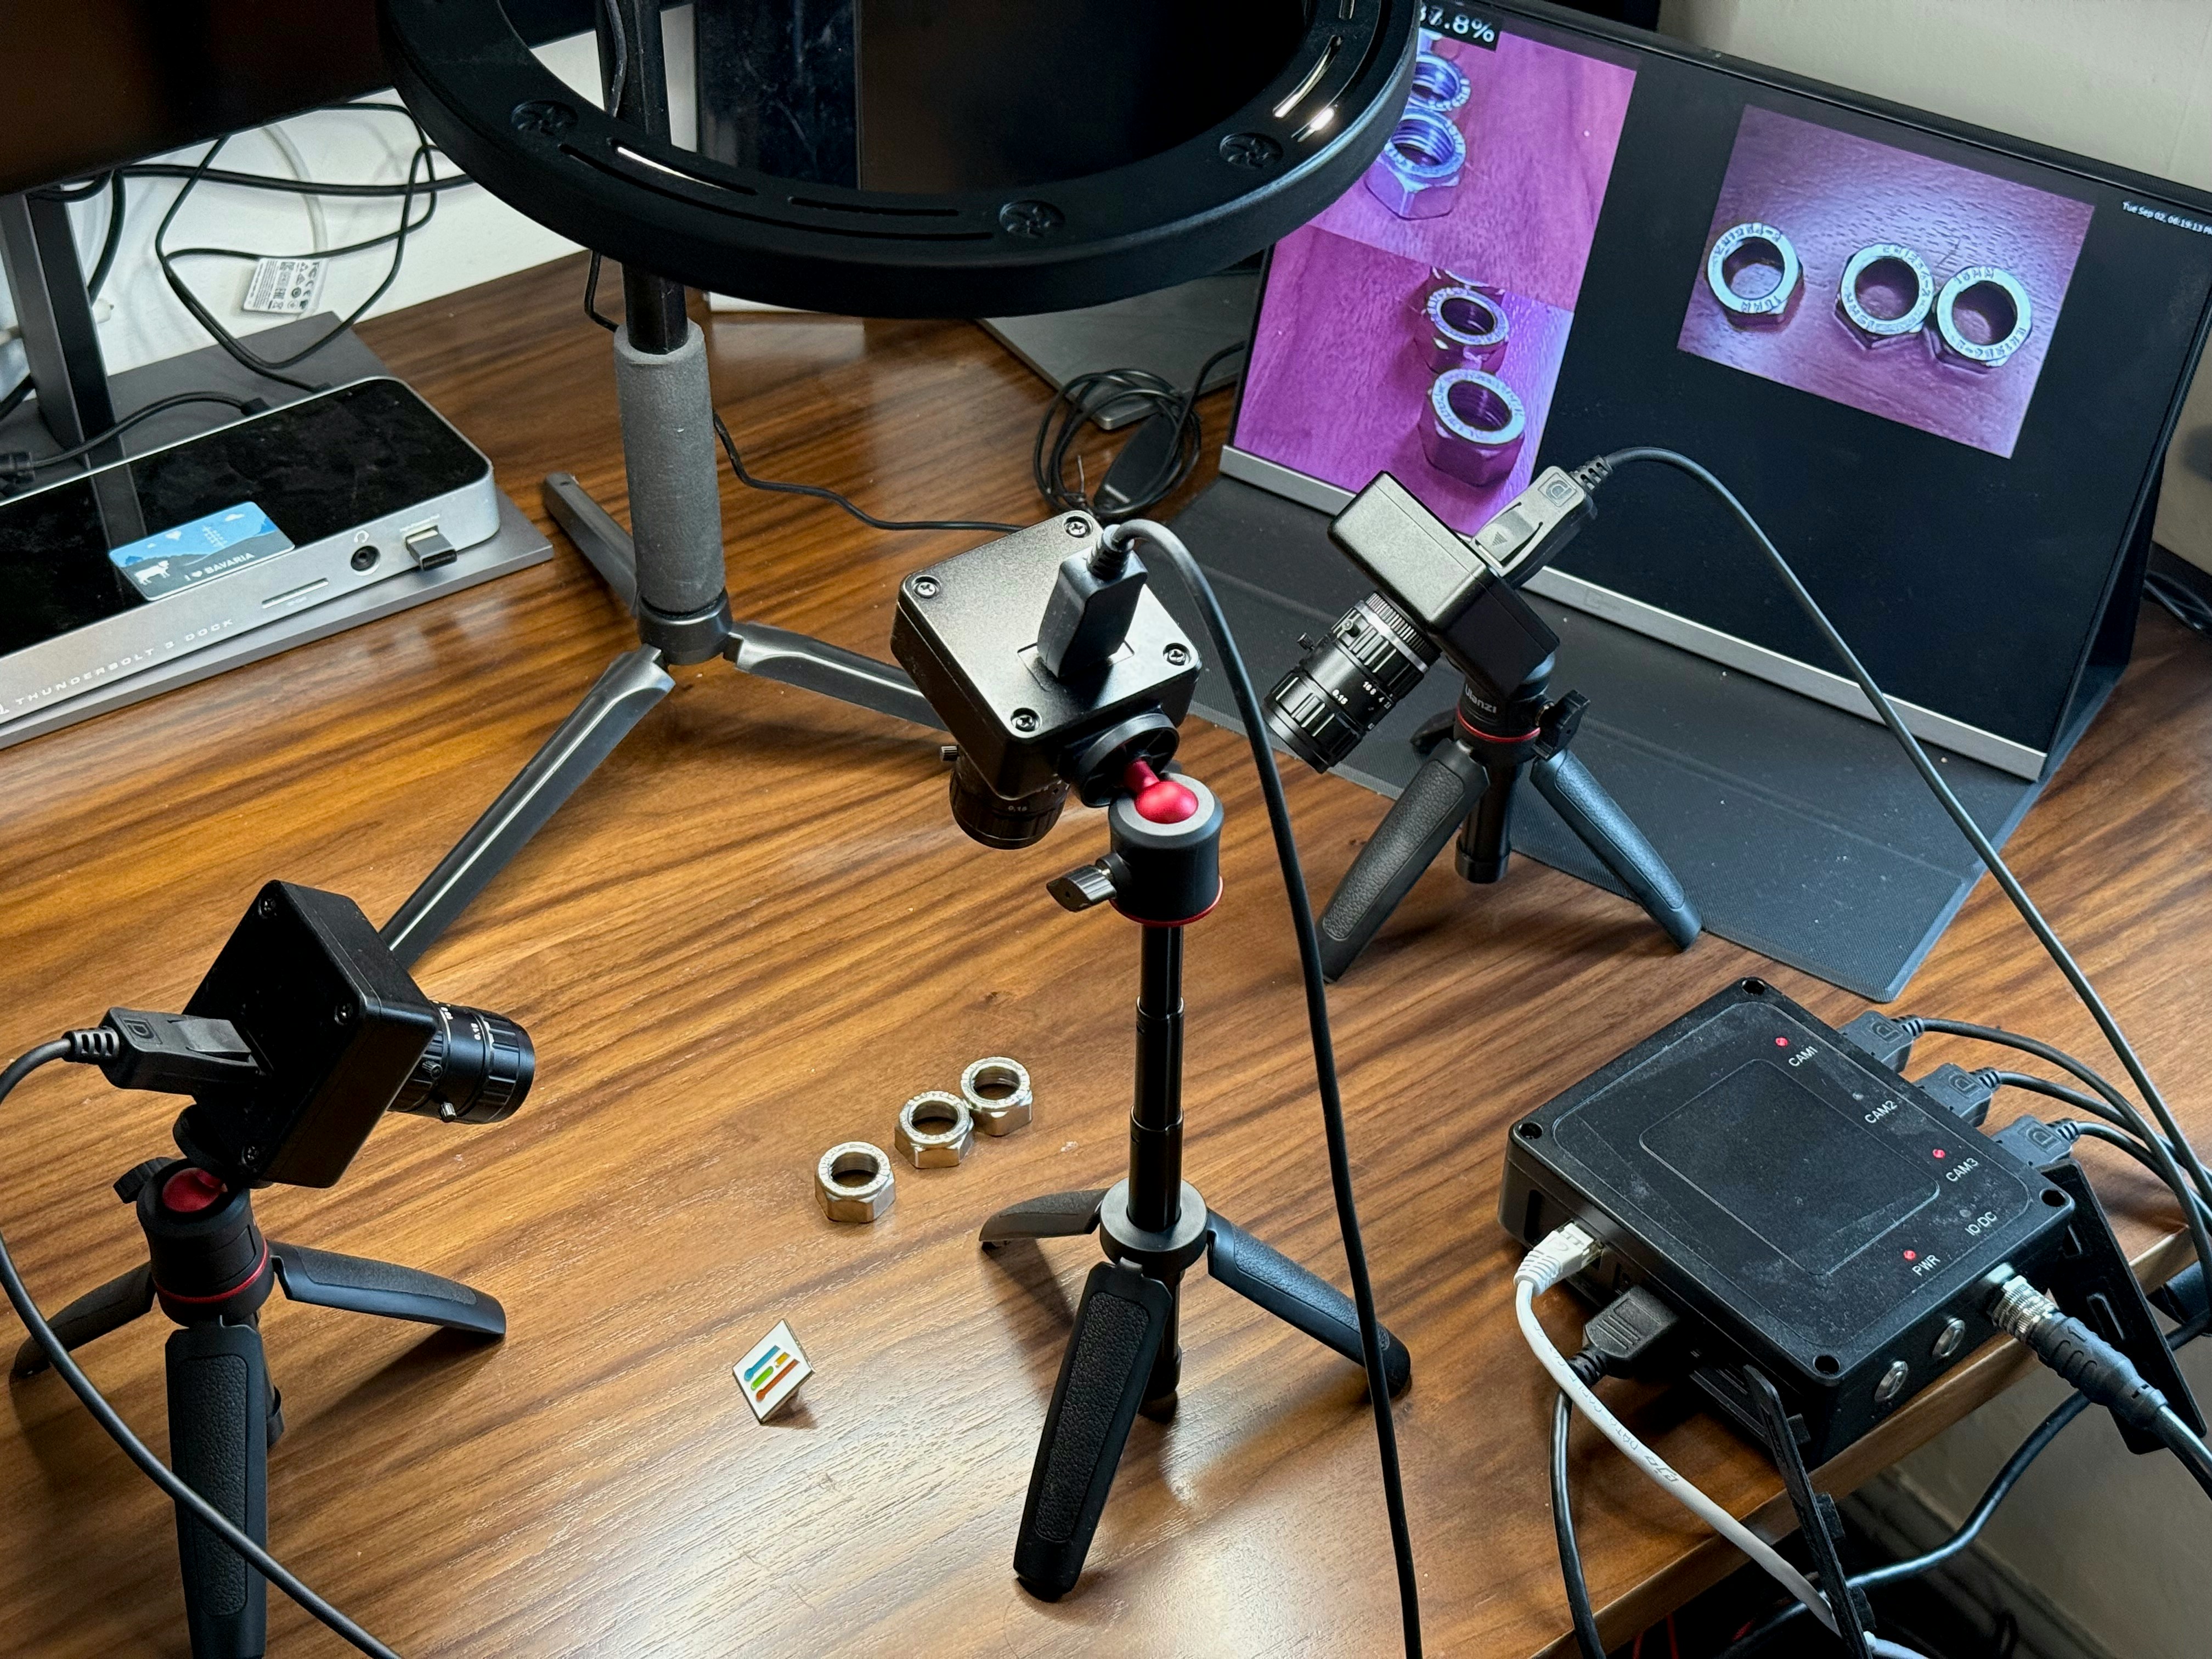 Key features:
* Comes with Ubuntu 20.04.6 LTS (Focal Fossa) out of the box.
* Camera resolution/frame rate – 12MP at 30fps (per camera)
* Lens Interface - C/CS, 12mm variable focal length, F2.8-F16 aperture (per camera)
* Compatible with Android, Ubuntu with Embedded Linux (Yocto) coming soon
* Inputs / Outputs: Ethernet, USB-C, DisplayPort channels, HDMI, GPIO / IO, etc.
* Power: 9-36 V DC. Operating temperature: −35 °C to +75 °C
## 1. Setting Up Your Dragonwing Triple Vision Industrial AI Camera
### Hardware Setup
* Connect the camera platform to power.
* Connect up to three cameras
* Attach a display via HDMI if needed.
* Attach a mouse and keyboard to the USB-C port if needed
* Connect via SSH for headless operation.
* It's recommended to use a HDMI display and mouse and keyboard for the configuration when you bring up the board for the first time.
### Connecting to the internet
Ethernet connection is recommended, however, you can activate a WiFi connection by following these steps.
1. Remount and enable read-and-write access to the default read-only rootfs filesystem prior to editing the '/data/misc/wifi/wpa\_supplicant.conf' file:
```
mount -o rw,remount /
```
Please note that your 'wpa\_supplicant.conf' file might be in another location, you can find out by running:
```
ps aux | grep wpa_supplicant
```
2. Stop wpa\_supplicant:
```
killall wpa_supplicant
```
3. Modify the content of the default `wpa_supplicant.conf` file to match the SSID and password of your router. You can use `vi` on the device to edit the file:
```
vi /data/misc/wifi/wpa_supplicant.conf
```
You can refer to the following configurations for security types specified in the default `wpa_supplicant.conf` file at `/etc` to add your required router configurations.
```
# Only WPA-PSK is used. Any valid cipher combination is accepted.
ctrl_interface=/var/run/sockets
network={
#Open
# ssid="example open network"
# key_mgmt=NONE
#WPA-PSK-Configuration
# Update the SSID to match that of the Wi-Fi SSID of your router.
ssid="QSoftAP"
# proto=WPA RSN
# key_mgmt=WPA-PSK
# pairwise=TKIP CCMP
# group=TKIP CCMP
# Update the password to match that of the Wi-Fi password of your router.
psk="1234567890"
#WEP-Configuration
# ssid="example wep network"
# key_mgmt=NONE
# wep_key0="abcde"
# wep_key1=0102030405
# wep_tx_keyidx=0
}
```
4. Save the modified `wpa_supplicant.conf` file and verify its content using the following command:
```
cat /data/misc/wifi/wpa_supplicant.conf
```
5. Reboot or power cycle the device. Wait for approximately one minute to establish a WLAN connection with the updated SSID and password.
### Enable SSH
Check if SSH is bound to localhost only:
```
cat /etc/ssh/sshd_config
```
If the output shows 127.0.0.1:22 instead of 0.0.0.0:22, SSH is only listening for local connections. Fix this by editing SSH configuration:
```
vi /etc/ssh/sshd_config
```
Ensure you have:
```
Port 22
ListenAddress 0.0.0.0
```
Then restart SSH:
```
systemctl restart ssh
```
By default, you are using the root user, so it is recommended to set up a password for the account by running:
```
passwd
```
And update your timezone based on where you are located:
```
timedatectl set-timezone Europe/London
```
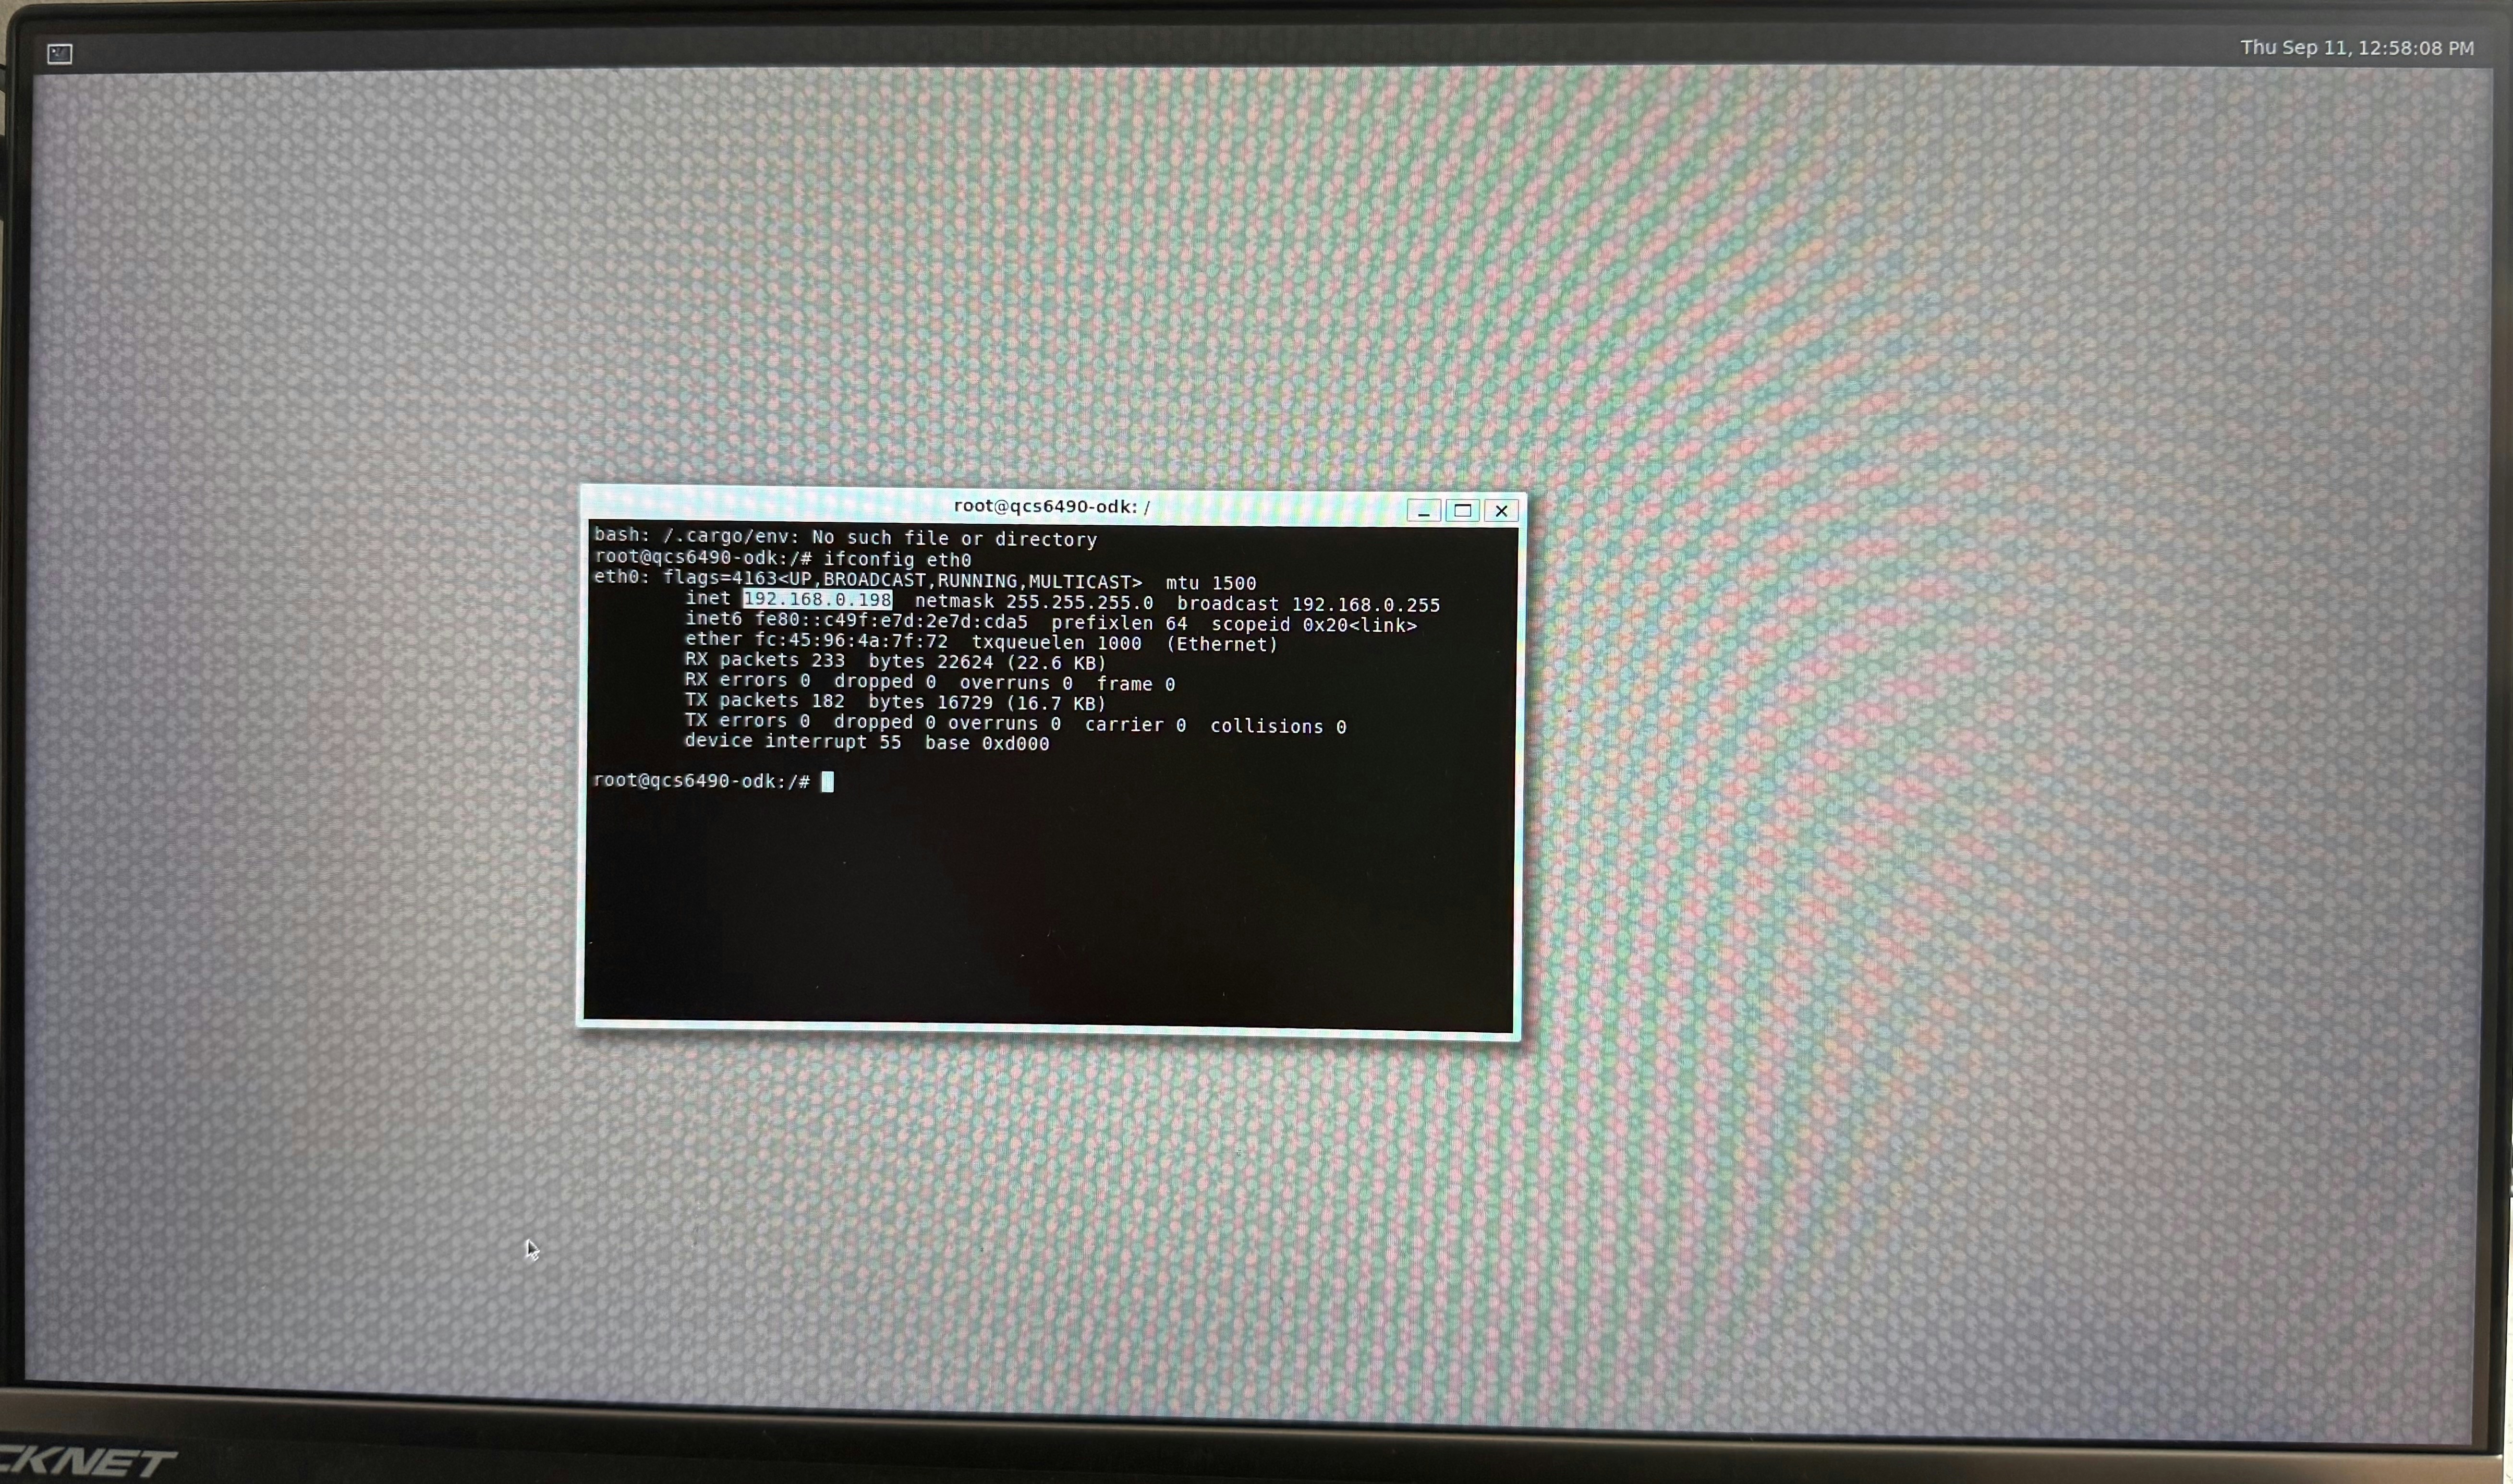
Depending on your network connection type (WiFi or ethernet), one of the following commands will give you the IP address of your board:
```
ifconfig wlan0
ifconfig eth0
```
Key features:
* Comes with Ubuntu 20.04.6 LTS (Focal Fossa) out of the box.
* Camera resolution/frame rate – 12MP at 30fps (per camera)
* Lens Interface - C/CS, 12mm variable focal length, F2.8-F16 aperture (per camera)
* Compatible with Android, Ubuntu with Embedded Linux (Yocto) coming soon
* Inputs / Outputs: Ethernet, USB-C, DisplayPort channels, HDMI, GPIO / IO, etc.
* Power: 9-36 V DC. Operating temperature: −35 °C to +75 °C
## 1. Setting Up Your Dragonwing Triple Vision Industrial AI Camera
### Hardware Setup
* Connect the camera platform to power.
* Connect up to three cameras
* Attach a display via HDMI if needed.
* Attach a mouse and keyboard to the USB-C port if needed
* Connect via SSH for headless operation.
* It's recommended to use a HDMI display and mouse and keyboard for the configuration when you bring up the board for the first time.
### Connecting to the internet
Ethernet connection is recommended, however, you can activate a WiFi connection by following these steps.
1. Remount and enable read-and-write access to the default read-only rootfs filesystem prior to editing the '/data/misc/wifi/wpa\_supplicant.conf' file:
```
mount -o rw,remount /
```
Please note that your 'wpa\_supplicant.conf' file might be in another location, you can find out by running:
```
ps aux | grep wpa_supplicant
```
2. Stop wpa\_supplicant:
```
killall wpa_supplicant
```
3. Modify the content of the default `wpa_supplicant.conf` file to match the SSID and password of your router. You can use `vi` on the device to edit the file:
```
vi /data/misc/wifi/wpa_supplicant.conf
```
You can refer to the following configurations for security types specified in the default `wpa_supplicant.conf` file at `/etc` to add your required router configurations.
```
# Only WPA-PSK is used. Any valid cipher combination is accepted.
ctrl_interface=/var/run/sockets
network={
#Open
# ssid="example open network"
# key_mgmt=NONE
#WPA-PSK-Configuration
# Update the SSID to match that of the Wi-Fi SSID of your router.
ssid="QSoftAP"
# proto=WPA RSN
# key_mgmt=WPA-PSK
# pairwise=TKIP CCMP
# group=TKIP CCMP
# Update the password to match that of the Wi-Fi password of your router.
psk="1234567890"
#WEP-Configuration
# ssid="example wep network"
# key_mgmt=NONE
# wep_key0="abcde"
# wep_key1=0102030405
# wep_tx_keyidx=0
}
```
4. Save the modified `wpa_supplicant.conf` file and verify its content using the following command:
```
cat /data/misc/wifi/wpa_supplicant.conf
```
5. Reboot or power cycle the device. Wait for approximately one minute to establish a WLAN connection with the updated SSID and password.
### Enable SSH
Check if SSH is bound to localhost only:
```
cat /etc/ssh/sshd_config
```
If the output shows 127.0.0.1:22 instead of 0.0.0.0:22, SSH is only listening for local connections. Fix this by editing SSH configuration:
```
vi /etc/ssh/sshd_config
```
Ensure you have:
```
Port 22
ListenAddress 0.0.0.0
```
Then restart SSH:
```
systemctl restart ssh
```
By default, you are using the root user, so it is recommended to set up a password for the account by running:
```
passwd
```
And update your timezone based on where you are located:
```
timedatectl set-timezone Europe/London
```
Depending on your network connection type (WiFi or ethernet), one of the following commands will give you the IP address of your board:
```
ifconfig wlan0
ifconfig eth0
```
 ### Desktop environment
This system is not running a standard desktop environment like GNOME or KDE. Instead, it's using Weston, a minimal and lightweight "compositor" that provides the basic foundation for a graphical session on top of the modern Wayland display protocol.
## 2. Installing the Edge Impulse Linux CLI
Once rebooted, open up the terminal once again, and install the Edge Impulse CLI and other dependencies via:
```bash theme={"system"}
$ wget https://cdn.edgeimpulse.com/firmware/linux/setup-edge-impulse-qc-linux.sh
$ sh setup-edge-impulse-qc-linux.sh
```
Make note the additional commands shown at the end of the installation process; the `source ~/.profile` command will be needed prior to running Edge Impulse in subsequent sessions.
## 3. Connecting to Edge Impulse
With all dependencies set up, run:
```bash theme={"system"}
$ edge-impulse-linux
```
This will start a wizard which asks you to log in and choose an Edge Impulse project. If you want to switch projects, or use a different camera (e.g. a USB camera) run the command with the `--clean` argument.
### Desktop environment
This system is not running a standard desktop environment like GNOME or KDE. Instead, it's using Weston, a minimal and lightweight "compositor" that provides the basic foundation for a graphical session on top of the modern Wayland display protocol.
## 2. Installing the Edge Impulse Linux CLI
Once rebooted, open up the terminal once again, and install the Edge Impulse CLI and other dependencies via:
```bash theme={"system"}
$ wget https://cdn.edgeimpulse.com/firmware/linux/setup-edge-impulse-qc-linux.sh
$ sh setup-edge-impulse-qc-linux.sh
```
Make note the additional commands shown at the end of the installation process; the `source ~/.profile` command will be needed prior to running Edge Impulse in subsequent sessions.
## 3. Connecting to Edge Impulse
With all dependencies set up, run:
```bash theme={"system"}
$ edge-impulse-linux
```
This will start a wizard which asks you to log in and choose an Edge Impulse project. If you want to switch projects, or use a different camera (e.g. a USB camera) run the command with the `--clean` argument.
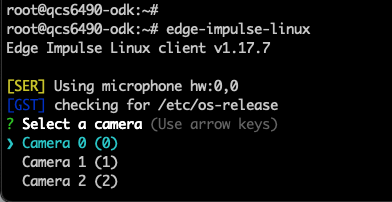 The CLI tool will automatically detect your board and give you a list of three cameras.
## 4. Verifying that your device is connected
That's all! Your device is now connected to Edge Impulse. To verify this, go to [your Edge Impulse project](https://studio.edgeimpulse.com/studio/profile/projects), and click **Devices**. The device will be listed here.
The CLI tool will automatically detect your board and give you a list of three cameras.
## 4. Verifying that your device is connected
That's all! Your device is now connected to Edge Impulse. To verify this, go to [your Edge Impulse project](https://studio.edgeimpulse.com/studio/profile/projects), and click **Devices**. The device will be listed here.
 ## Next steps: building a machine learning model
With everything set up you can now build your first machine learning model with these tutorials:
* [Responding to your voice](/tutorials/end-to-end/keyword-spotting)
* [Recognize sounds from audio](/tutorials/end-to-end/sound-recognition)
* [Adding sight to your sensors](/tutorials/end-to-end/image-classification)
* [Object detection](/tutorials/end-to-end/object-detection-bounding-boxes)
* [Visual anomaly detection with FOMO-AD](/studio/projects/learning-blocks/blocks/visual-anomaly-detection-fomo-ad)
Looking to connect different sensors? Our [Linux SDK](/tools/libraries/sdks/inference/linux) lets you easily send data from any sensor and any programming language (with examples in Node.js, Python, Go and C++) into Edge Impulse.
## Deploying back to device
You have multiple ways to deploy the model back to the device.
### Using the Edge Impulse Linux CLI
To run your Impulse locally on the device, open a terminal and run:
```bash theme={"system"}
$ edge-impulse-linux-runner
```
This will automatically compile your model with full hardware acceleration, download the model to your Rubik Pi 3, and then start classifying (use `--clean` to switch projects).
Alternatively, you can select the **Linux (AARCH64 with Qualcomm QNN)** option in the **Deployment** page.
## Next steps: building a machine learning model
With everything set up you can now build your first machine learning model with these tutorials:
* [Responding to your voice](/tutorials/end-to-end/keyword-spotting)
* [Recognize sounds from audio](/tutorials/end-to-end/sound-recognition)
* [Adding sight to your sensors](/tutorials/end-to-end/image-classification)
* [Object detection](/tutorials/end-to-end/object-detection-bounding-boxes)
* [Visual anomaly detection with FOMO-AD](/studio/projects/learning-blocks/blocks/visual-anomaly-detection-fomo-ad)
Looking to connect different sensors? Our [Linux SDK](/tools/libraries/sdks/inference/linux) lets you easily send data from any sensor and any programming language (with examples in Node.js, Python, Go and C++) into Edge Impulse.
## Deploying back to device
You have multiple ways to deploy the model back to the device.
### Using the Edge Impulse Linux CLI
To run your Impulse locally on the device, open a terminal and run:
```bash theme={"system"}
$ edge-impulse-linux-runner
```
This will automatically compile your model with full hardware acceleration, download the model to your Rubik Pi 3, and then start classifying (use `--clean` to switch projects).
Alternatively, you can select the **Linux (AARCH64 with Qualcomm QNN)** option in the **Deployment** page.
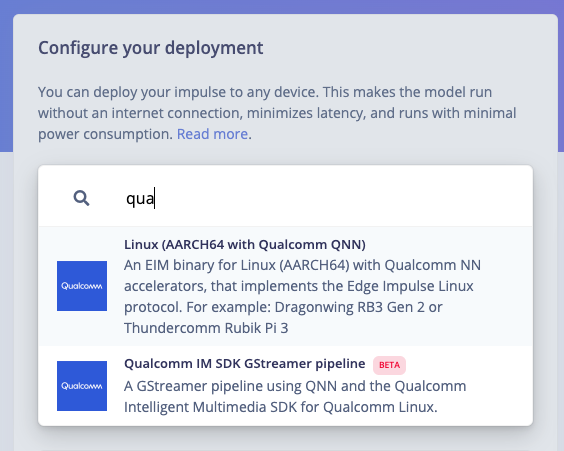 This will download an `.eim` model that you can run on your board with the following command:
```bash theme={"system"}
edge-impulse-linux-runner --model-file downloaded-model.eim
```
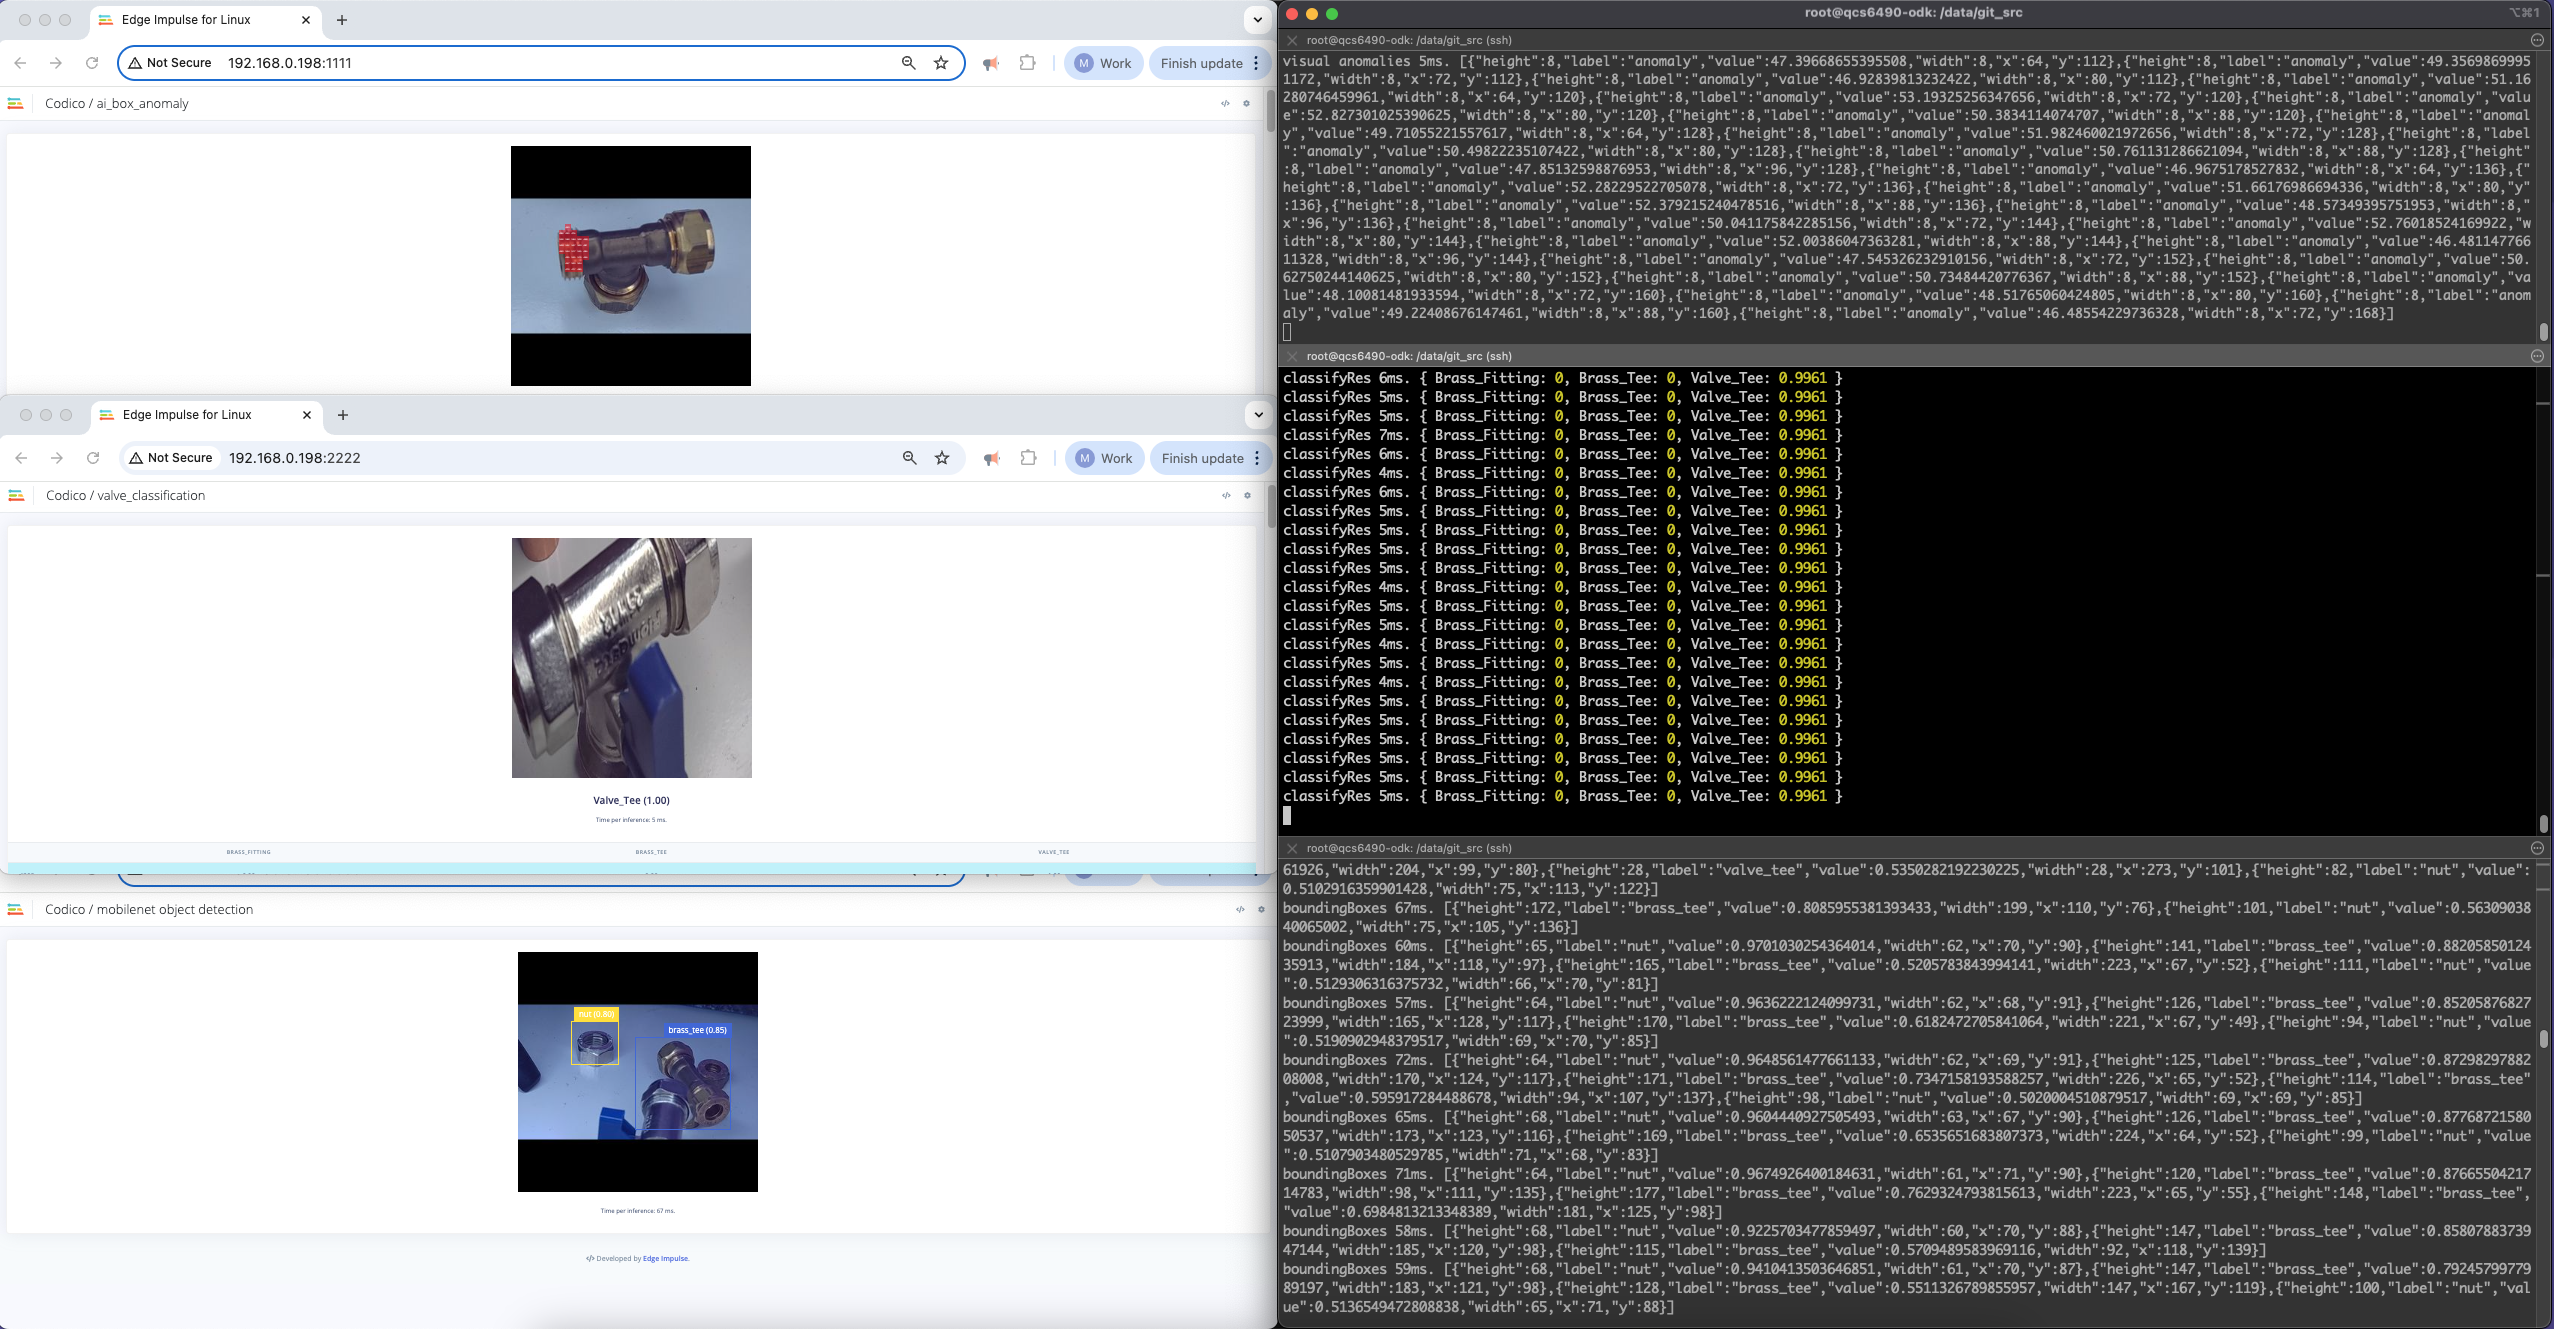
### Running multiple impulses in parallel?
You can pass the `--camera` argument to select which camera you want to use and pass PORT to select the preview port number:
```
PORT=1111 edge-impulse-linux-runner --model-file fomo.eim --camera 2
```
Now you can run 3 models in parallel, in three different terminal windows.
This will download an `.eim` model that you can run on your board with the following command:
```bash theme={"system"}
edge-impulse-linux-runner --model-file downloaded-model.eim
```
### Running multiple impulses in parallel?
You can pass the `--camera` argument to select which camera you want to use and pass PORT to select the preview port number:
```
PORT=1111 edge-impulse-linux-runner --model-file fomo.eim --camera 2
```
Now you can run 3 models in parallel, in three different terminal windows.
 ### Using the Edge Impulse Linux Inferencing SDKs
Our [Linux SDK](/tools/libraries/sdks/inference/linux) has examples on how to integrate the `.eim` model with your favorite programming language.
You can download either the quantized version and the float32 versions of your model, but the Qualcomm NN accelerator only supports quantized models. If you select the float32 version, the model will run on CPU.
### Using the IM SDK GStreamer option
When selecting this option, you will obtain a `.zip` folder. We provide instructions in the `README.md` file included in the compressed folder.
See more information on [Qualcomm IM SDK GStreamer pipeline](/hardware/deployments/run-qualcomm-im-sdk-gstreamer).
### Image model?
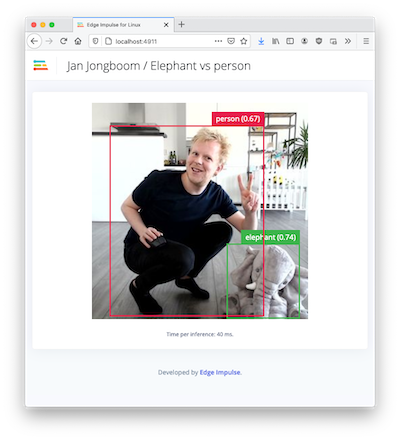
If you have an image model then you can get a peek of what your device sees by being on the same network as your device, and finding the ‘Want to see a feed of the camera and live classification in your browser’ message in the console. Open the URL in a browser and both the camera feed and the classification are shown:
### Using the Edge Impulse Linux Inferencing SDKs
Our [Linux SDK](/tools/libraries/sdks/inference/linux) has examples on how to integrate the `.eim` model with your favorite programming language.
You can download either the quantized version and the float32 versions of your model, but the Qualcomm NN accelerator only supports quantized models. If you select the float32 version, the model will run on CPU.
### Using the IM SDK GStreamer option
When selecting this option, you will obtain a `.zip` folder. We provide instructions in the `README.md` file included in the compressed folder.
See more information on [Qualcomm IM SDK GStreamer pipeline](/hardware/deployments/run-qualcomm-im-sdk-gstreamer).
### Image model?
If you have an image model then you can get a peek of what your device sees by being on the same network as your device, and finding the ‘Want to see a feed of the camera and live classification in your browser’ message in the console. Open the URL in a browser and both the camera feed and the classification are shown:
 ## Useful tips
Running from `/data`
If the filesystem (e.g., /data) is mounted with the `noexec` flag, Linux will refuse to execute any binaries from it.
So if you are running the software from inside /data do the following:
```bash theme={"system"}
mount -o remount,exec /data
```
### Executing from SSH session
Wayland/Weston compositor needs to be configured to work from SSH session:
We need the following two lines:
```bash theme={"system"}
export XDG_RUNTIME_DIR=/run/user/root && export WAYLAND_DISPLAY=wayland-0
```
```bash theme={"system"}
export WESTON_CONFIG_FILE=/etc/xdg/weston/weston.ini
```
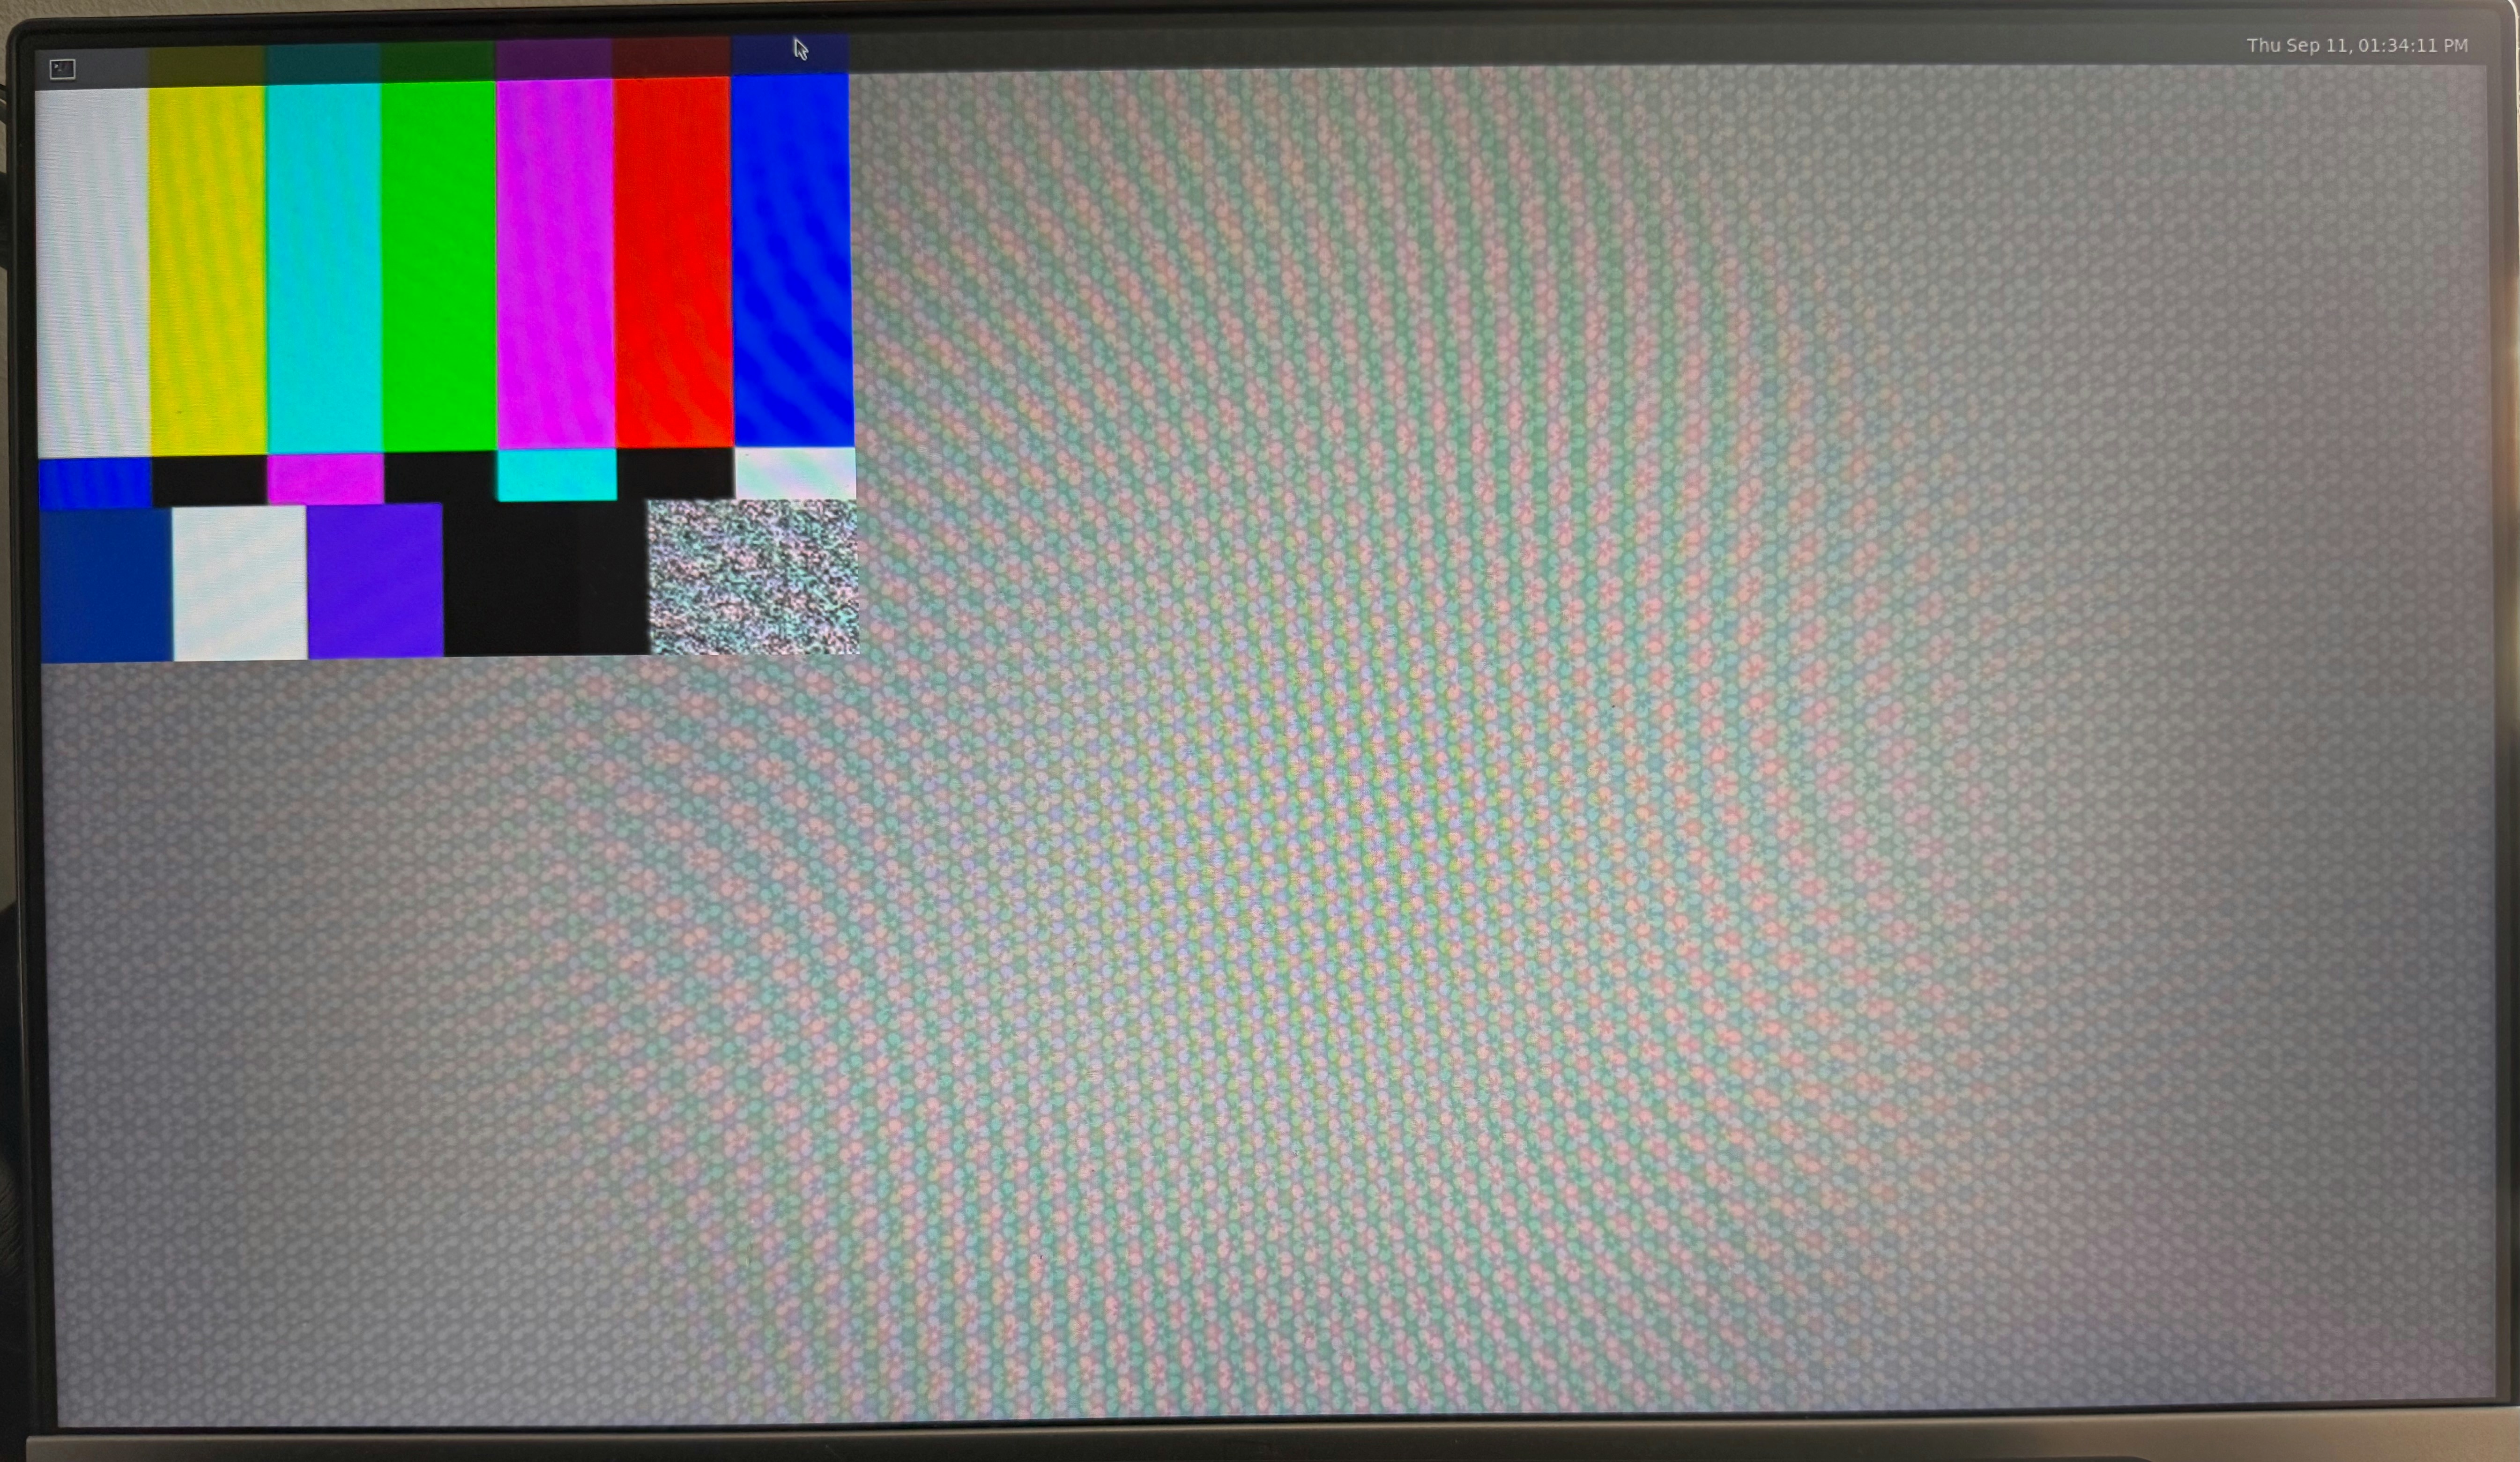
Testing your display:
To ensure your environment is setup correctly run the following:
```
gst-launch-1.0 -v videotestsrc ! autovideosink
```
You should see a test video source being displayed on the left top corner of your screen.
## Useful tips
Running from `/data`
If the filesystem (e.g., /data) is mounted with the `noexec` flag, Linux will refuse to execute any binaries from it.
So if you are running the software from inside /data do the following:
```bash theme={"system"}
mount -o remount,exec /data
```
### Executing from SSH session
Wayland/Weston compositor needs to be configured to work from SSH session:
We need the following two lines:
```bash theme={"system"}
export XDG_RUNTIME_DIR=/run/user/root && export WAYLAND_DISPLAY=wayland-0
```
```bash theme={"system"}
export WESTON_CONFIG_FILE=/etc/xdg/weston/weston.ini
```
Testing your display:
To ensure your environment is setup correctly run the following:
```
gst-launch-1.0 -v videotestsrc ! autovideosink
```
You should see a test video source being displayed on the left top corner of your screen.
 ### Testing the camera pipeline:
```
gst-launch-1.0 qtiqmmfsrc name=camsrc camera=0 ! video/x-raw,width=640,height=480 ! videoconvert ! waylandsink
```
You can use `camera=0,1,2` to switch between cameras
This command should show you live stream of the camera.
### Testing the camera pipeline:
```
gst-launch-1.0 qtiqmmfsrc name=camsrc camera=0 ! video/x-raw,width=640,height=480 ! videoconvert ! waylandsink
```
You can use `camera=0,1,2` to switch between cameras
This command should show you live stream of the camera.
 ### Edge Impulse GST Plugin:
If you are looking for a way to run the impulse natively in gstreamer, you can use the following plugin: [https://github.com/edgeimpulse/gst-plugins-edgeimpulse](https://github.com/edgeimpulse/gst-plugins-edgeimpulse)
If you build your model into this plugin, you will get a `libgstedgeimpulse.so` file that you can install in your system:
```_On the Qualcomm system, install to GStreamer plugins directory_ theme={"system"}
sudo cp libgstedgeimpulse.so /usr/lib/aarch64-linux-gnu/gstreamer-1.0/
```
This will allow you to use the Gstreamer plugin options to run the model:
```
gst-launch-1.0 qtiqmmfsrc name=camsrc camera=0 ! video/x-raw,width=640,height=480,format=NV12 ! videoconvert ! video/x-raw,format=RGB ! edgeimpulsevideoinfer ! edgeimpulseoverlay ! videoconvert ! waylandsink fullscreen=true
```
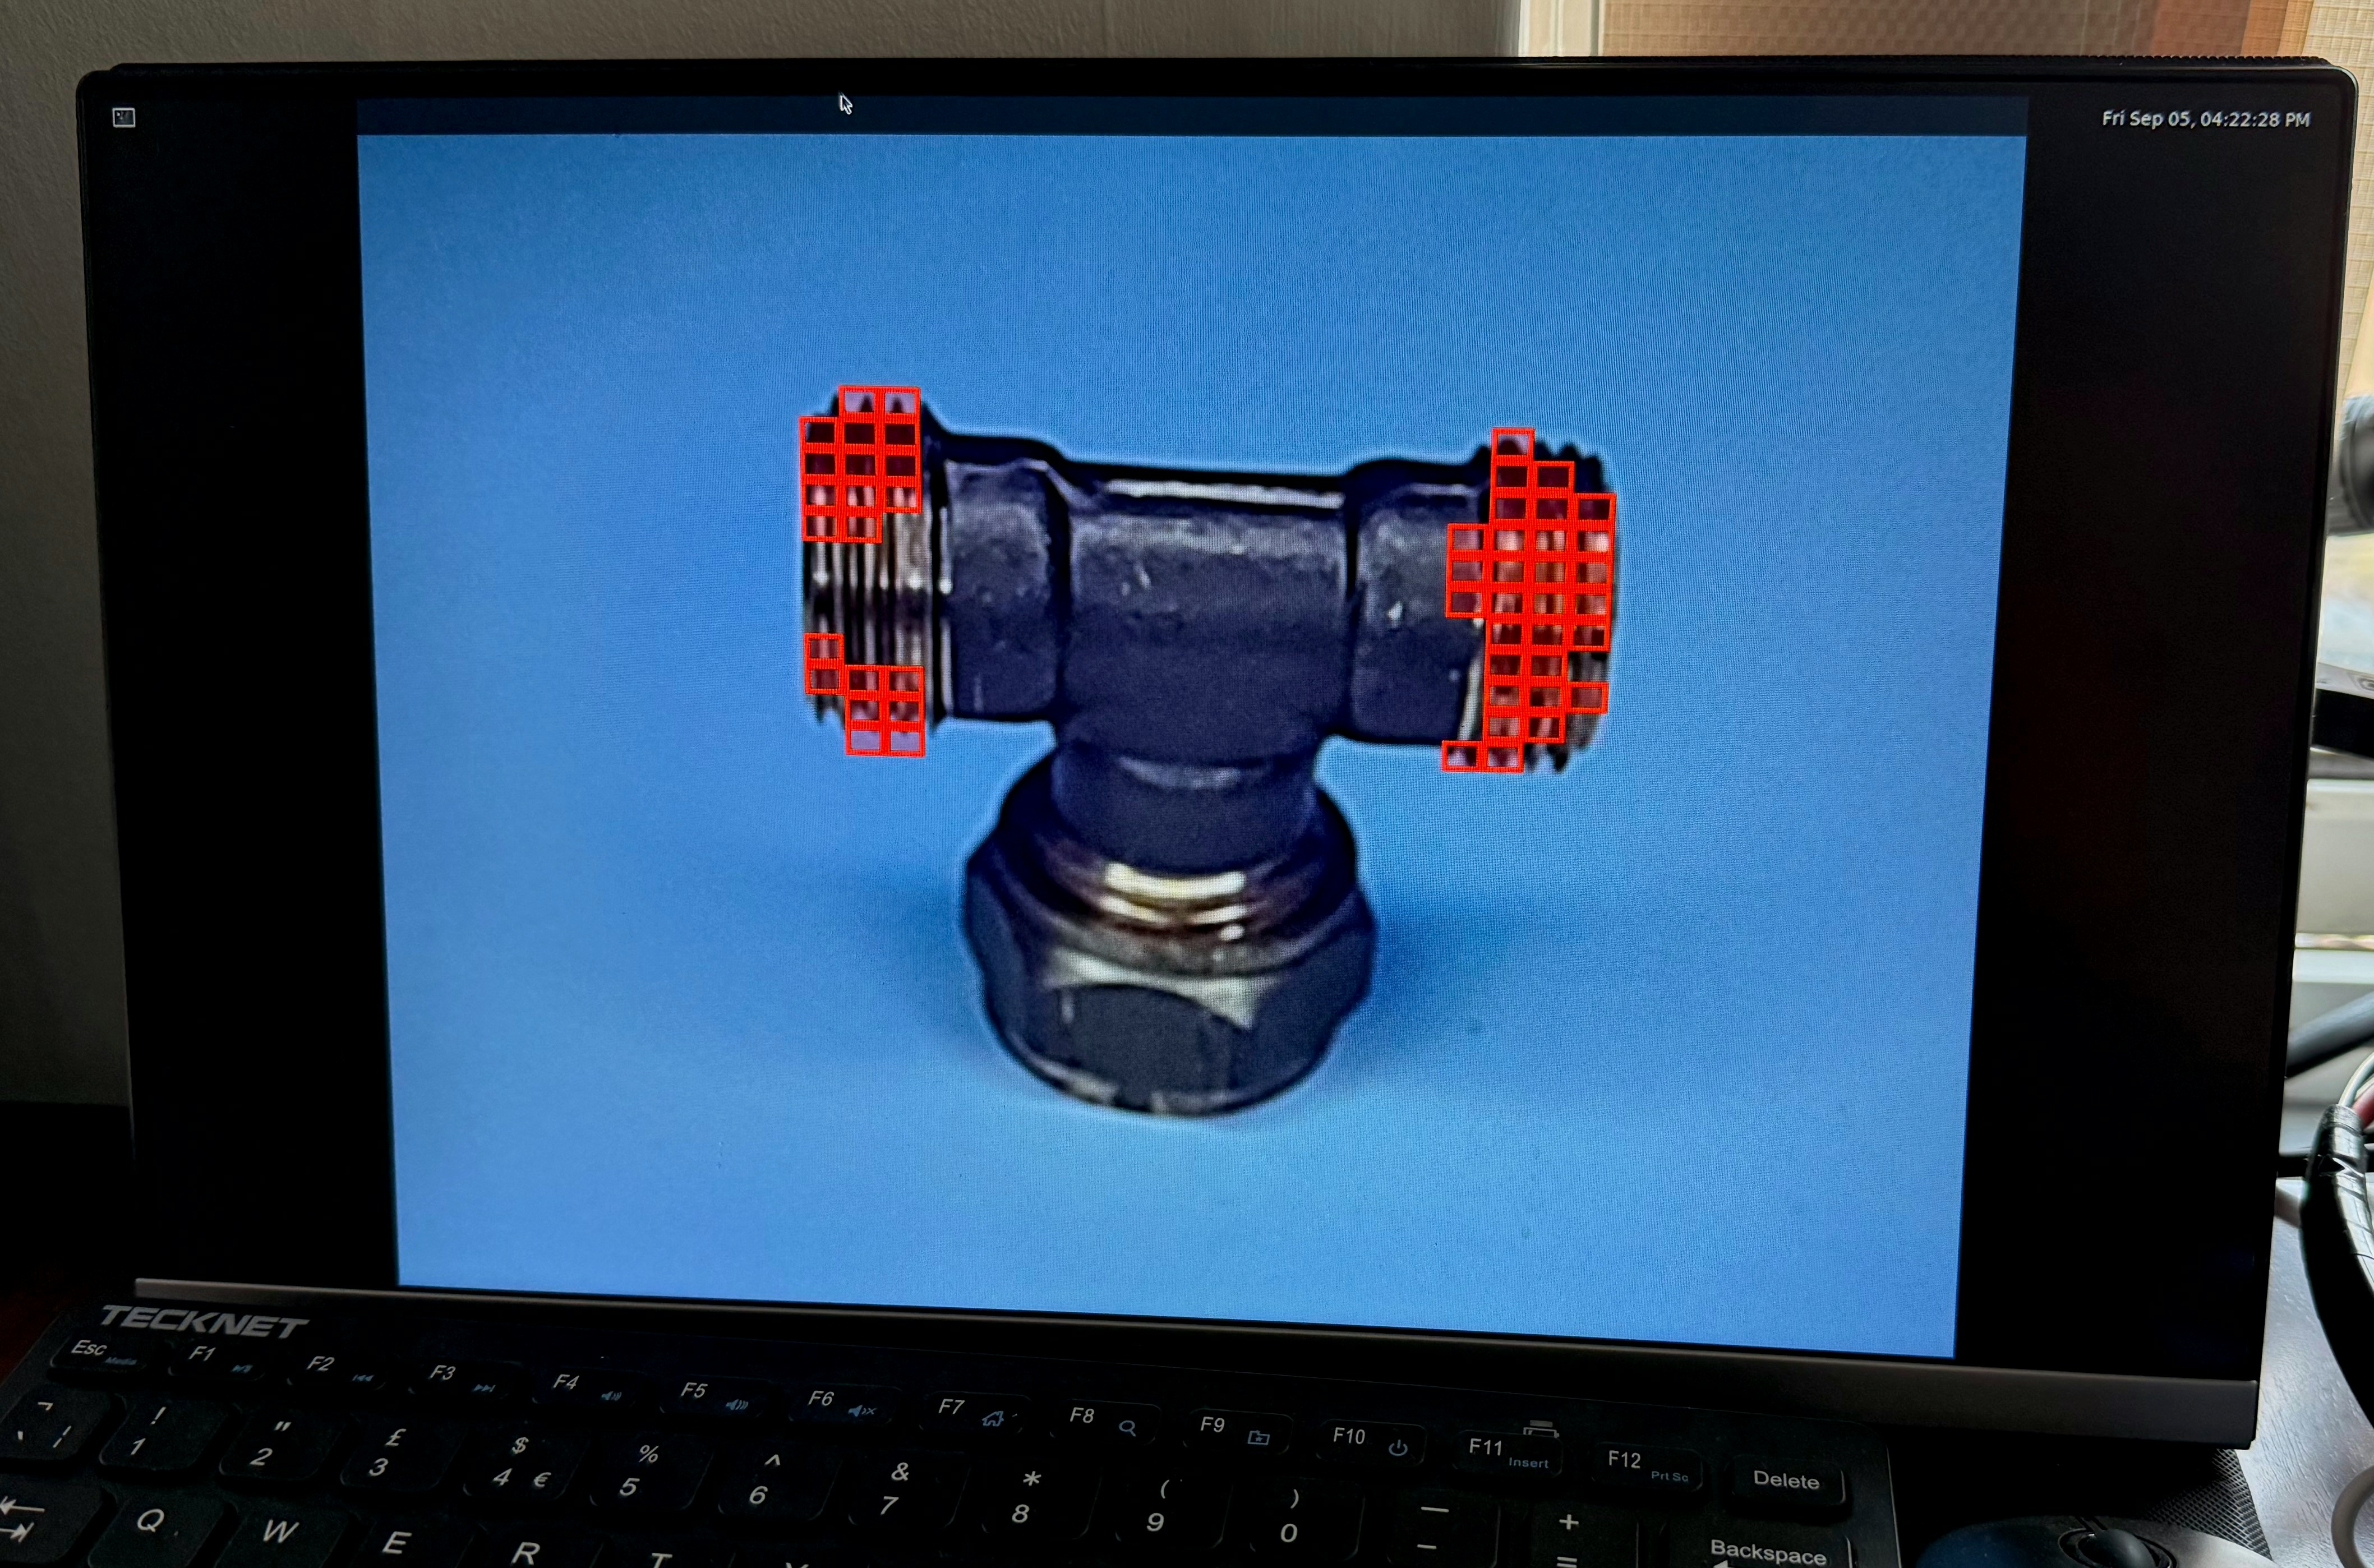
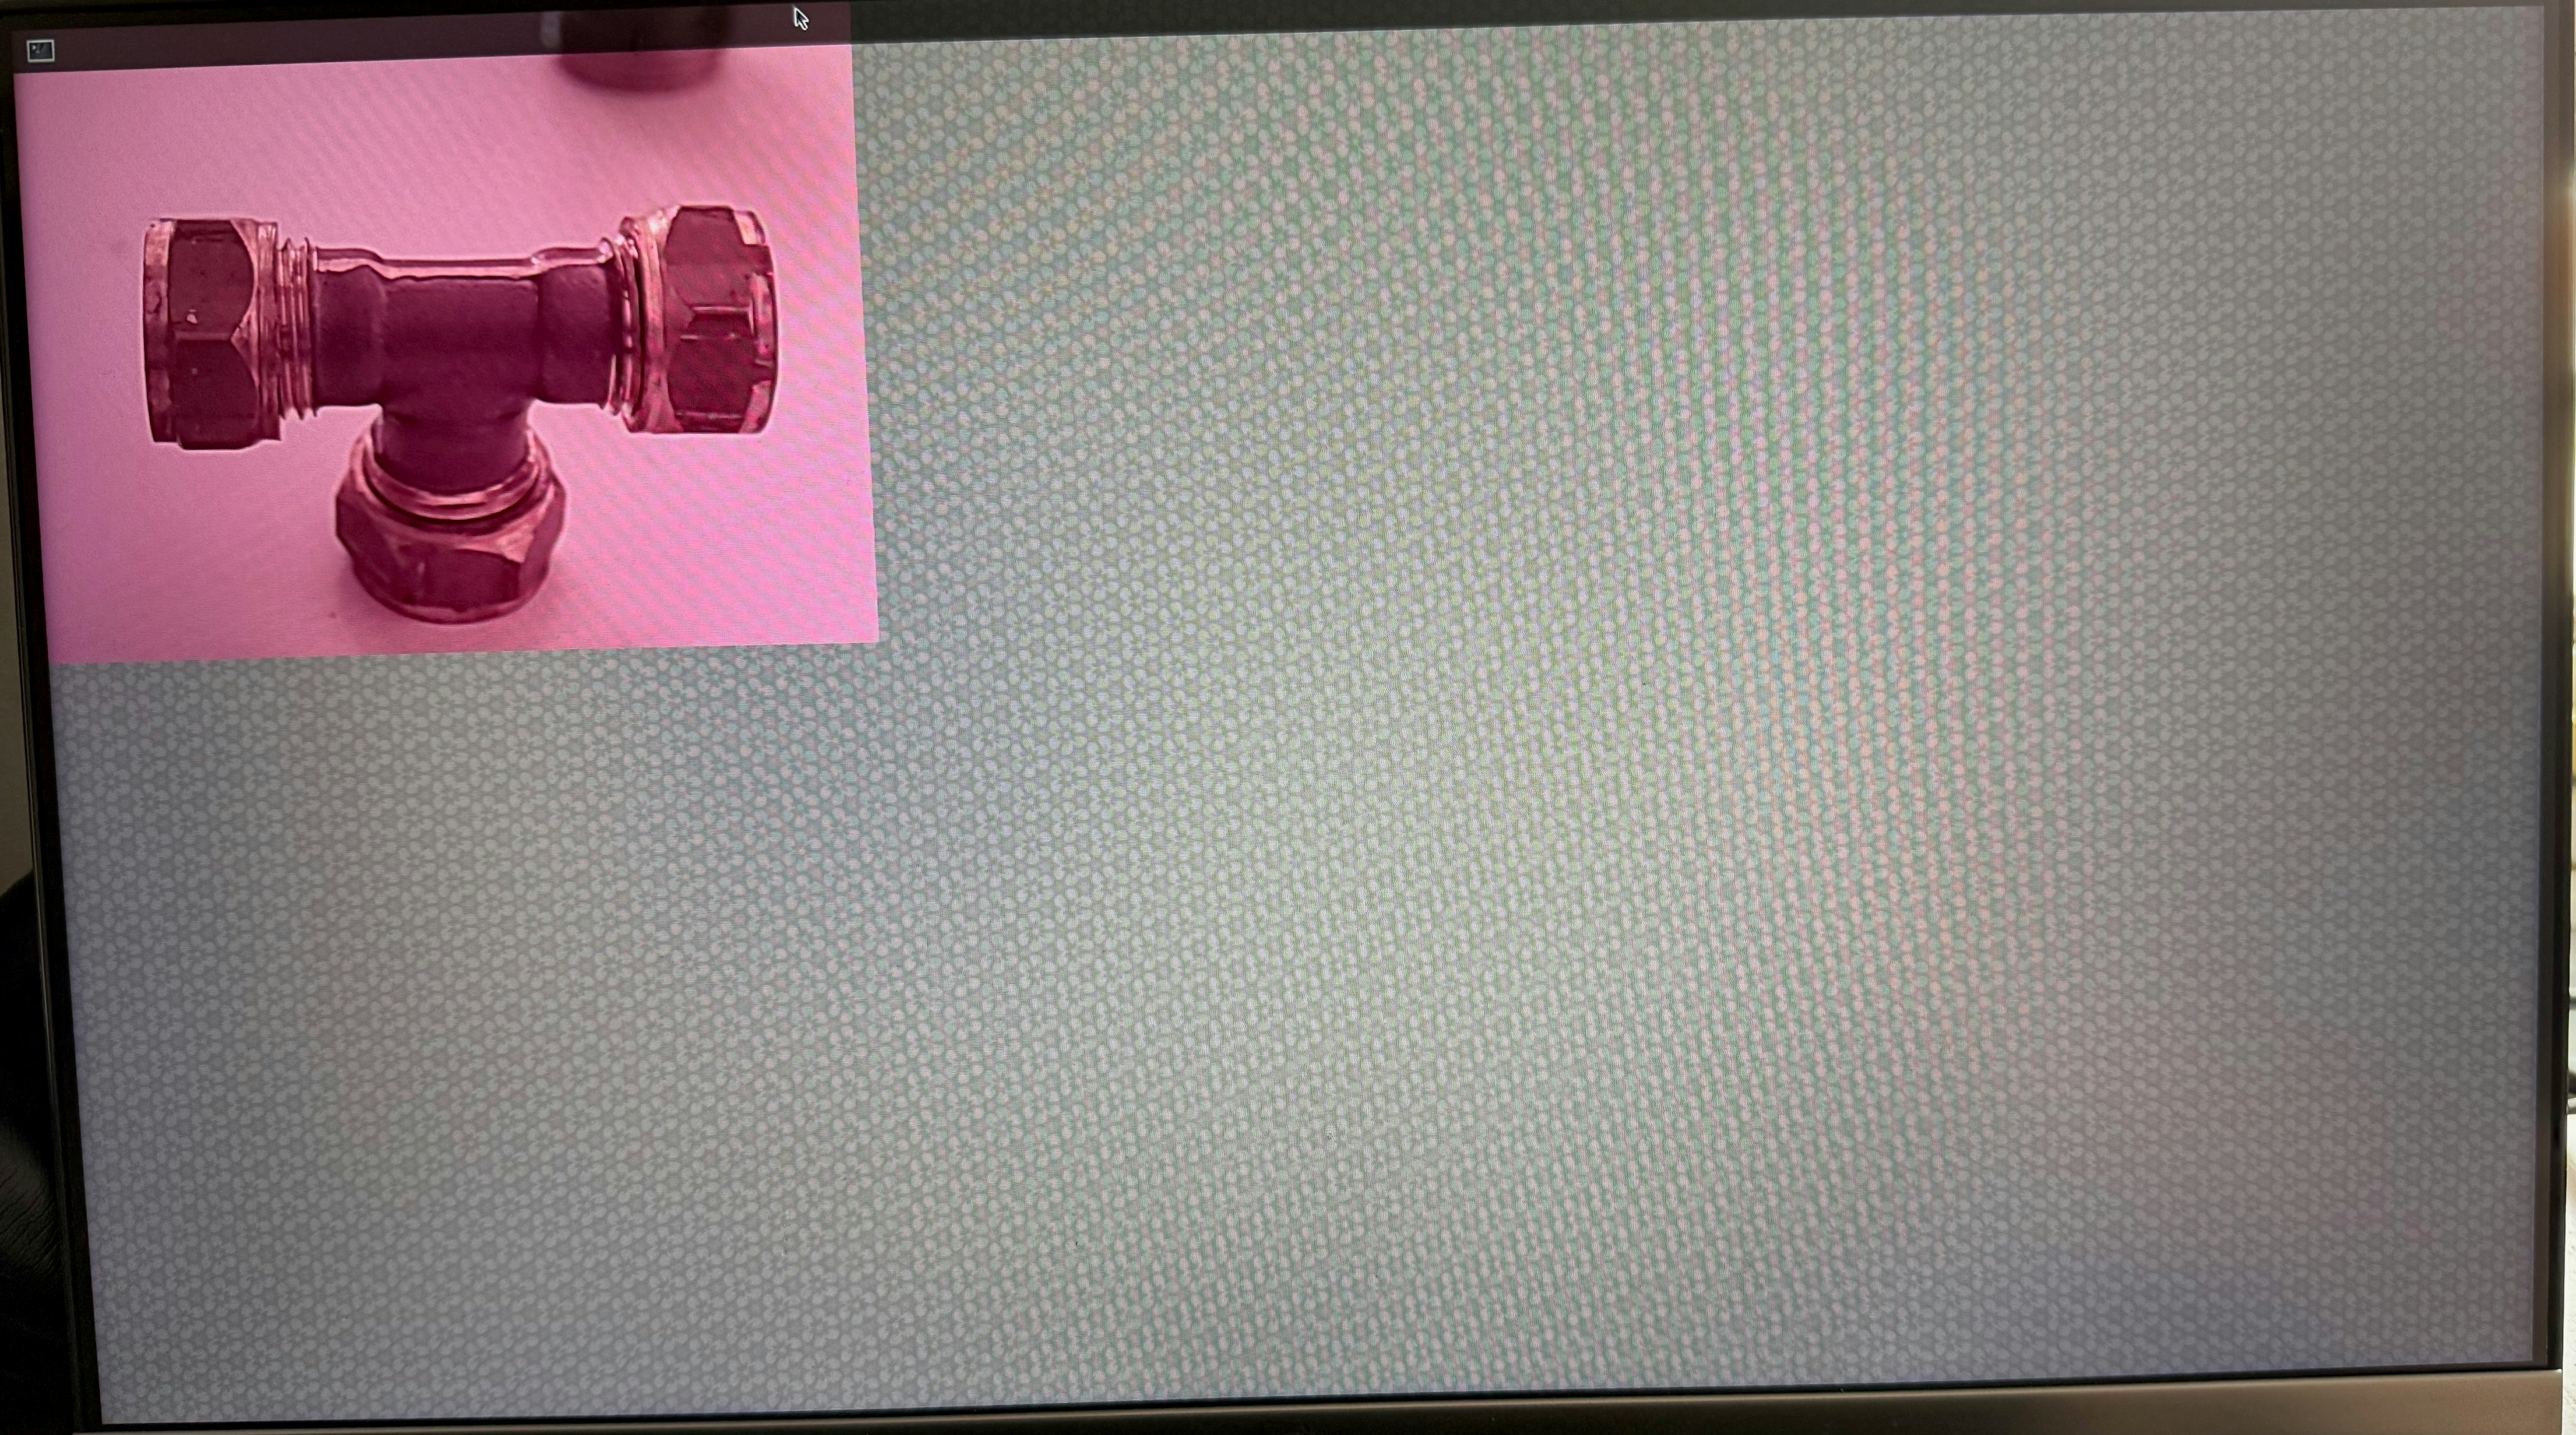
For example following is the output of an anomaly detection model that has overlays enabled to show the anomaly grid:
### Edge Impulse GST Plugin:
If you are looking for a way to run the impulse natively in gstreamer, you can use the following plugin: [https://github.com/edgeimpulse/gst-plugins-edgeimpulse](https://github.com/edgeimpulse/gst-plugins-edgeimpulse)
If you build your model into this plugin, you will get a `libgstedgeimpulse.so` file that you can install in your system:
```_On the Qualcomm system, install to GStreamer plugins directory_ theme={"system"}
sudo cp libgstedgeimpulse.so /usr/lib/aarch64-linux-gnu/gstreamer-1.0/
```
This will allow you to use the Gstreamer plugin options to run the model:
```
gst-launch-1.0 qtiqmmfsrc name=camsrc camera=0 ! video/x-raw,width=640,height=480,format=NV12 ! videoconvert ! video/x-raw,format=RGB ! edgeimpulsevideoinfer ! edgeimpulseoverlay ! videoconvert ! waylandsink fullscreen=true
```
For example following is the output of an anomaly detection model that has overlays enabled to show the anomaly grid: