> ## Documentation Index
> Fetch the complete documentation index at: https://docs.edgeimpulse.com/llms.txt
> Use this file to discover all available pages before exploring further.
# Run C++ library on Syntiant TinyML Board
Impulses can be deployed as an optimized Syntiant NDP 101/120 library. This packages all your signal processing blocks, configuration and learning blocks up into a single package. You can include this package in your own application to run the impulse locally. In this tutorial you'll export an impulse, and run the application on the Syntiant TinyML Board or Arduino Nicla Voice to control GPIO pins when the keyword 'go' or 'stop' is uttered, or if a circular motion is detected.
### Prerequisites
* [Edge Impulse CLI](/tools/clis/edge-impulse-cli/installation)
* [Arduino CLI](https://arduino.github.io/arduino-cli/latest/)
* Download/clone the firmware source code for your hardware:
* [Syntiant TinyML repo](https://github.com/edgeimpulse/firmware-syntiant-tinyml)
* [Arduino Nicla Voice repo](https://github.com/edgeimpulse/firmware-arduino-nicla-voice)
Make sure you followed the [Keyword spotting - Syntiant - RC Commands](/tutorials/hardware/syntiant-ndp-keyword-spotting) or [Motion recognition - Syntiant](/tutorials/hardware/syntiant-ndp-motion-recognition) tutorial, have a trained impulse, and can load code on your board.
**Naming your classes**
The NDP chip expects one and only negative class and it should be the last in the list. For instance, if your original dataset looks like: `yes, no, unknown, noise` and you only want to detect the keyword 'yes' and 'no', merge the 'unknown' and 'noise' labels in a single class such as `z_openset` (we prefix it with 'z' in order to get this class last in the list).
### Exporting Syntiant library
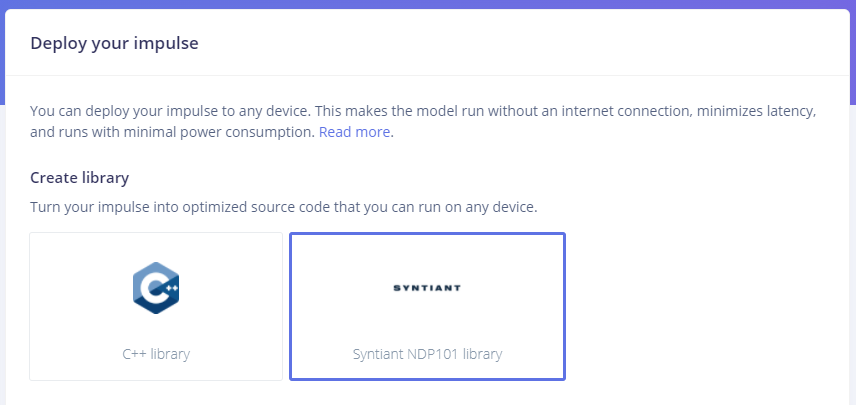
Go to the Deployment page of your project and select the Syntiant library option for either NDP101 (Syntiant TinyML) or NDP120 (Arduino Nicla Voice):
 Unzip the archive and copy the *model-parameters* content into the *src/model-parameters/* folder of the firmware source code.
The export also creates an ei\_model synpkg or bin file that we will use later on to flash the board.
### Customizing and compiling the source code
#### For Syntiant TinyML
You can add your custom logic to the main Arduino sketch by customizing the *on\_classification\_changed()* function. By default this function contains the following code to activate LEDs based on "stop" and "go" classes:
```
void on_classification_changed(const char *event, float confidence, float anomaly_score) {
// here you can write application code, e.g. to toggle LEDs based on keywords
if (strcmp(event, "stop") == 0) {
// Toggle LED
digitalWrite(LED_RED, HIGH);
}
if (strcmp(event, "go") == 0) {
// Toggle LED
digitalWrite(LED_GREEN, HIGH);
}
}
```
#### For Arduino Nicla Voice
Open the *src/ei\_syntiant\_ndp120.cpp* file and look at the *match\_event()* function. We can customize the code as follows to activate LEDs based on "stop" and "go" classes:
```
static void match_event(char* label)
{
if (_on_match_enabled == true){
if (strlen(label) > 0) {
got_match = true;
ei_printf("Match: %s\n", label);
if (strcmp(label, "go") == 0) {
nicla::leds.setColor(green);
}
if (strcmp(label, "stop") == 0) {
nicla::leds.setColor(red);
}
}
}
}
```
You will also need to disable the default LED activation in the *ei\_main()* function:
```
if (got_match == true){
got_match = false;
// nicla::leds.setColor(blue); // => disable default color
ThisThread::sleep_for(100);
nicla::leds.setColor(off);
}
```
#### Compiling the source code
Once you've added your own logic, to compile and flash the firmware run:
* **Windows**
* `update_libraries_windows.bat` (Syntiant TinyML only)
* `arduino-win-build.bat --build` for audio support (add `--with-imu` flag for IMU support)
* `arduino-win-build.bat --flash`
* **Linux and Mac**
* `./arduino-build.sh --build` for audio support (add `--with-imu` flag for IMU support)
* `./arduino-build.sh --flash`
### Deploying your impulse
#### On Syntiant TinyML
Once you've compiled the Arduino firmware:
* Take the .bin file output by Arduino and rename it to firmware.ino.bin.
* Replace the *firmware.ino.bin* from our default firmware (our default firmware can be downloaded from [here](/hardware/boards/syntiant-tinyml-board#1-download-the-firmware))
* Replace the ei\_model\*.bin file in our default firmware by the one from the Syntiant library.
* Launch the script for your OS to flash the board
#### On Arduino Nicla Voice
Once you've compiled the Arduino firmware:
* Take the .elf file output by Arduino and rename it to firmware.ino.elf.
* Replace the *firmware.ino.elf* from our default firmware (our default firmware can be downloaded from [here](/hardware/boards/arduino-nicla-voice#1-download-the-firmware))
* Replace the ei\_model.synpkg file in our default firmware by the one from the Syntiant library.
* Launch the script for your OS to flash the board
Great work! You've captured data, trained a model, and deployed it to your board. You can now control LEDs, activate actuators, or send a message to the cloud whenever you say a keyword or detect some motion!
Unzip the archive and copy the *model-parameters* content into the *src/model-parameters/* folder of the firmware source code.
The export also creates an ei\_model synpkg or bin file that we will use later on to flash the board.
### Customizing and compiling the source code
#### For Syntiant TinyML
You can add your custom logic to the main Arduino sketch by customizing the *on\_classification\_changed()* function. By default this function contains the following code to activate LEDs based on "stop" and "go" classes:
```
void on_classification_changed(const char *event, float confidence, float anomaly_score) {
// here you can write application code, e.g. to toggle LEDs based on keywords
if (strcmp(event, "stop") == 0) {
// Toggle LED
digitalWrite(LED_RED, HIGH);
}
if (strcmp(event, "go") == 0) {
// Toggle LED
digitalWrite(LED_GREEN, HIGH);
}
}
```
#### For Arduino Nicla Voice
Open the *src/ei\_syntiant\_ndp120.cpp* file and look at the *match\_event()* function. We can customize the code as follows to activate LEDs based on "stop" and "go" classes:
```
static void match_event(char* label)
{
if (_on_match_enabled == true){
if (strlen(label) > 0) {
got_match = true;
ei_printf("Match: %s\n", label);
if (strcmp(label, "go") == 0) {
nicla::leds.setColor(green);
}
if (strcmp(label, "stop") == 0) {
nicla::leds.setColor(red);
}
}
}
}
```
You will also need to disable the default LED activation in the *ei\_main()* function:
```
if (got_match == true){
got_match = false;
// nicla::leds.setColor(blue); // => disable default color
ThisThread::sleep_for(100);
nicla::leds.setColor(off);
}
```
#### Compiling the source code
Once you've added your own logic, to compile and flash the firmware run:
* **Windows**
* `update_libraries_windows.bat` (Syntiant TinyML only)
* `arduino-win-build.bat --build` for audio support (add `--with-imu` flag for IMU support)
* `arduino-win-build.bat --flash`
* **Linux and Mac**
* `./arduino-build.sh --build` for audio support (add `--with-imu` flag for IMU support)
* `./arduino-build.sh --flash`
### Deploying your impulse
#### On Syntiant TinyML
Once you've compiled the Arduino firmware:
* Take the .bin file output by Arduino and rename it to firmware.ino.bin.
* Replace the *firmware.ino.bin* from our default firmware (our default firmware can be downloaded from [here](/hardware/boards/syntiant-tinyml-board#1-download-the-firmware))
* Replace the ei\_model\*.bin file in our default firmware by the one from the Syntiant library.
* Launch the script for your OS to flash the board
#### On Arduino Nicla Voice
Once you've compiled the Arduino firmware:
* Take the .elf file output by Arduino and rename it to firmware.ino.elf.
* Replace the *firmware.ino.elf* from our default firmware (our default firmware can be downloaded from [here](/hardware/boards/arduino-nicla-voice#1-download-the-firmware))
* Replace the ei\_model.synpkg file in our default firmware by the one from the Syntiant library.
* Launch the script for your OS to flash the board
Great work! You've captured data, trained a model, and deployed it to your board. You can now control LEDs, activate actuators, or send a message to the cloud whenever you say a keyword or detect some motion!