> ## Documentation Index
> Fetch the complete documentation index at: https://docs.edgeimpulse.com/llms.txt
> Use this file to discover all available pages before exploring further.
# Run Arduino App Lab
This guide contains both current and legacy Arduino® App Lab information.
* The current version is `0.5.0` (March 2026), with major improvements such as deeper Edge Impulse integration.
* The legacy version documented `version 0.1.23` (early 2026 release).
The legacy instructions for version 0.1.23 are kept below for users still on the old version.
Impulses can be deployed via Arduino® App Lab to your Arduino® UNO™ Q and Arduino® VENTUNO™ Q. Arduino App Lab is a platform that enables developers to easily build and share Arduino applications and offers an intuitive interface to deploy the application locally in just one click.
Here's a video overview of the UNO Q with Arduino App Lab 0.5 and how to run custom models from Edge Impulse:
## Using the Arduino App Lab with Arduino UNO Q
Before you start, make sure your [UNO Q setup](/hardware/boards/arduino-uno-q) is properly set up. You can connect it directly to your computer via USB using the latest version of Arduino App Lab, or use a USB hub with an HDMI monitor, keyboard, and mouse to enable WiFi and SSH access (SBC mode).
If you're using SBC mode, Arduino App Lab will launch automatically when the board starts. If it doesn't appear, go to Applications (top-left corner) → Accessories → Arduino App Lab. When using Desktop or Network mode, simply ensure you have the latest version of the Arduino App Lab desktop application installed and it will automatically keep your board updated.
### Deploying Object detection application
If you have connected a USB webcam to your UNO Q, you can test the example application called `Detect objects on Camera`.
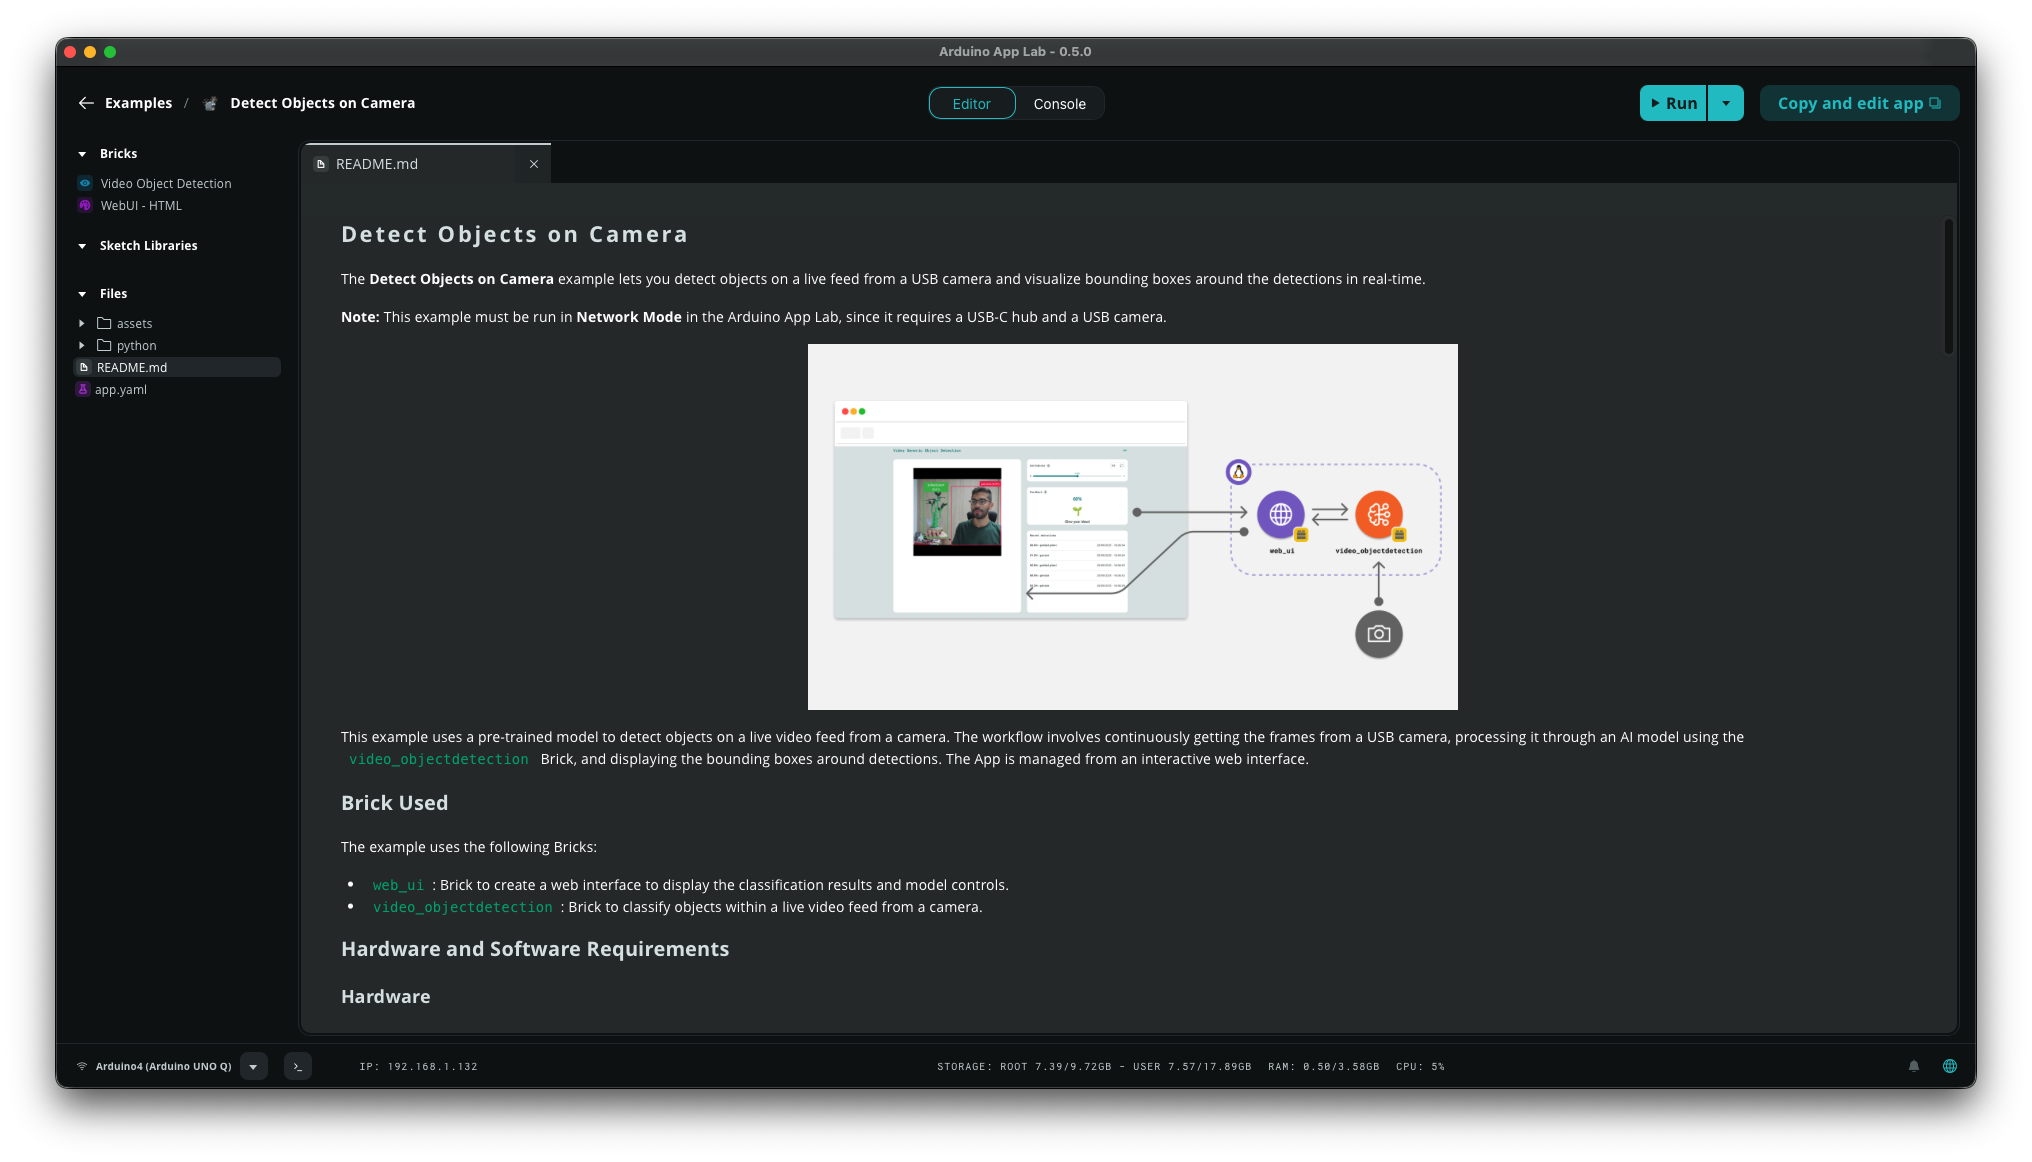 This application uses two bricks:
* `Video Object Detection` for real-time object detection using a pre-trained Edge Impulse model.
* `WebUI - HTML` which hosts a simple web interface and provides APIs and Websockets for interaction.
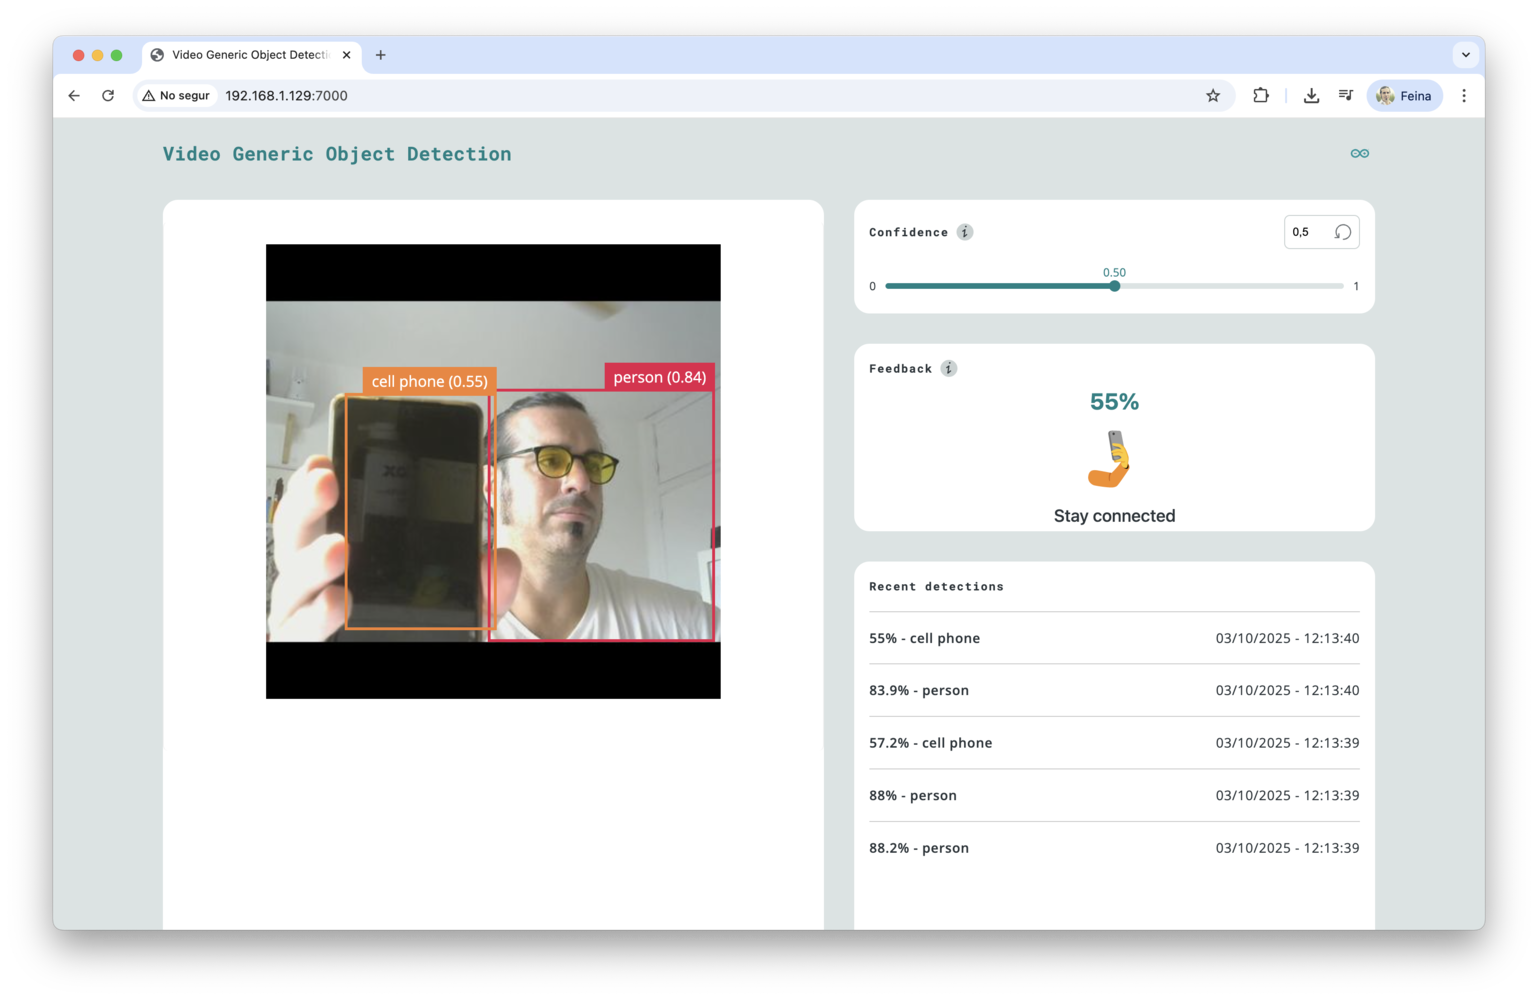
To access the application's UI, open a browser and go to the local IP address of your UNO Q using the port `7000`.
This application uses two bricks:
* `Video Object Detection` for real-time object detection using a pre-trained Edge Impulse model.
* `WebUI - HTML` which hosts a simple web interface and provides APIs and Websockets for interaction.
To access the application's UI, open a browser and go to the local IP address of your UNO Q using the port `7000`.
 ## Deploying a custom model
Now that you have tested the Arduino App Lab on your UNO Q, it’s time to create your own application using a model you have trained in your [Edge Impulse account](https://edgeimp.com/arduino).
## Deploying a custom model
Now that you have tested the Arduino App Lab on your UNO Q, it’s time to create your own application using a model you have trained in your [Edge Impulse account](https://edgeimp.com/arduino).
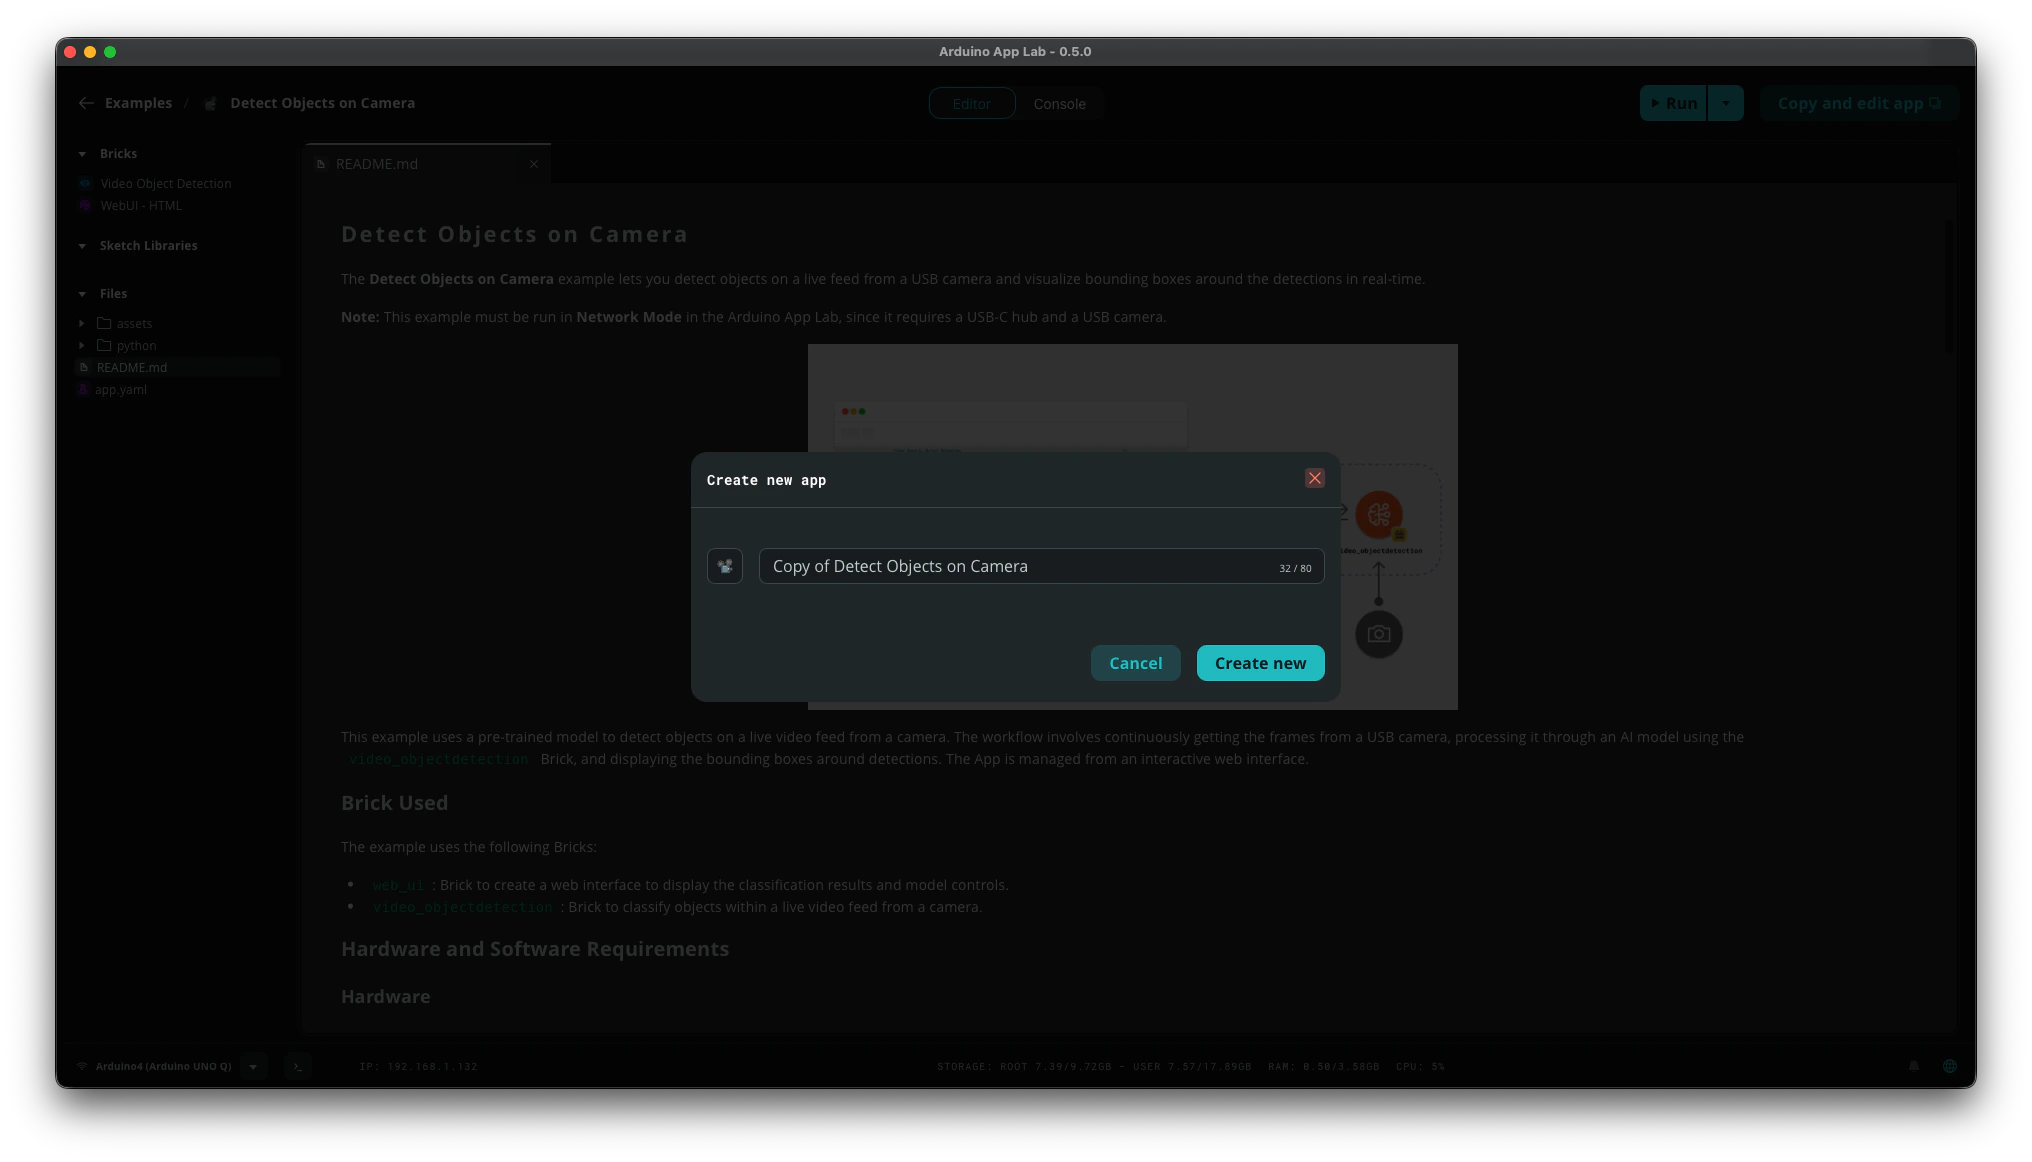 Start by opening the `Detect Objects on Camera` example in Arduino App Lab and click the `Copy and edit app` button. Give a new name and click `Create new`. The copied app will appear in the `My Apps` section.
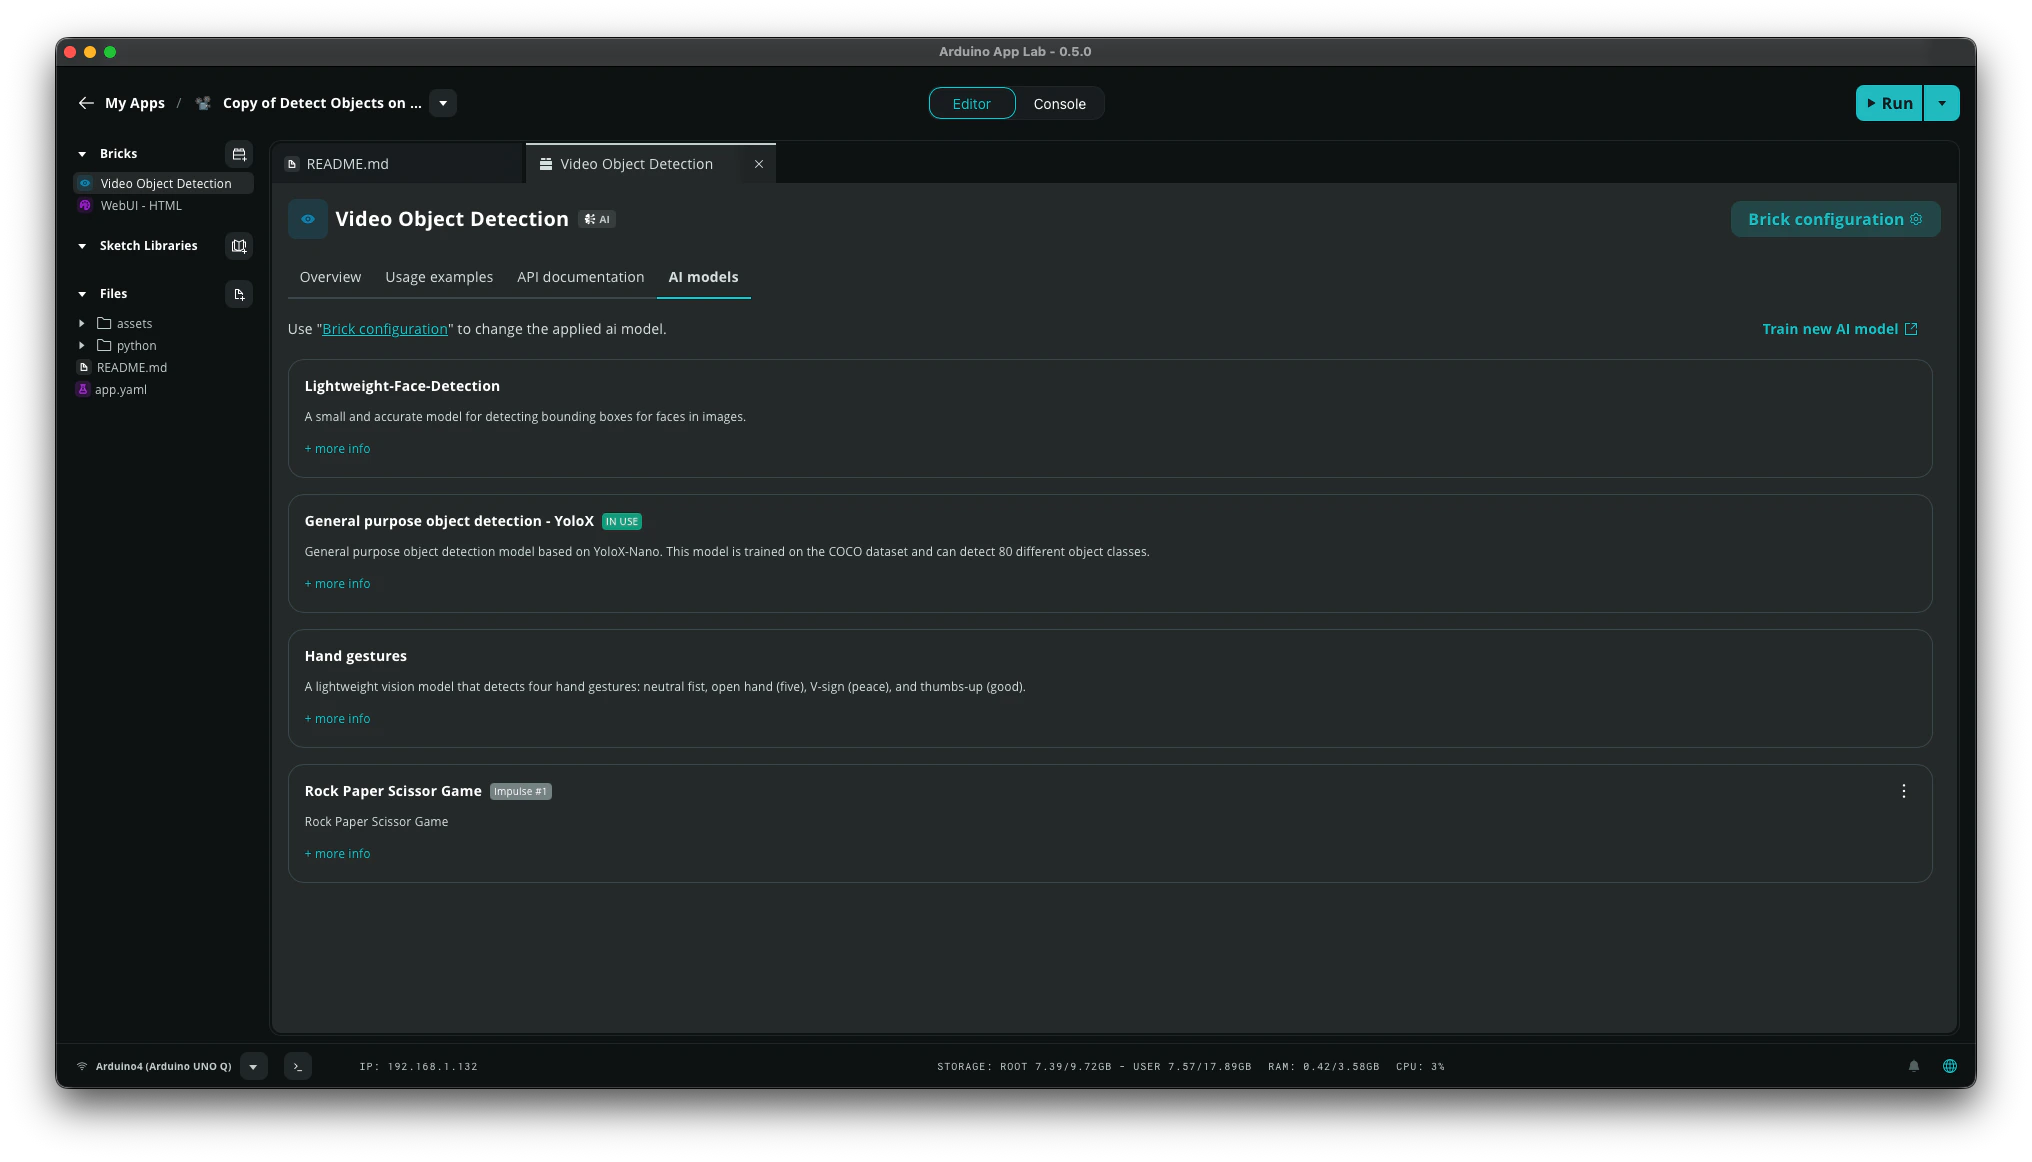
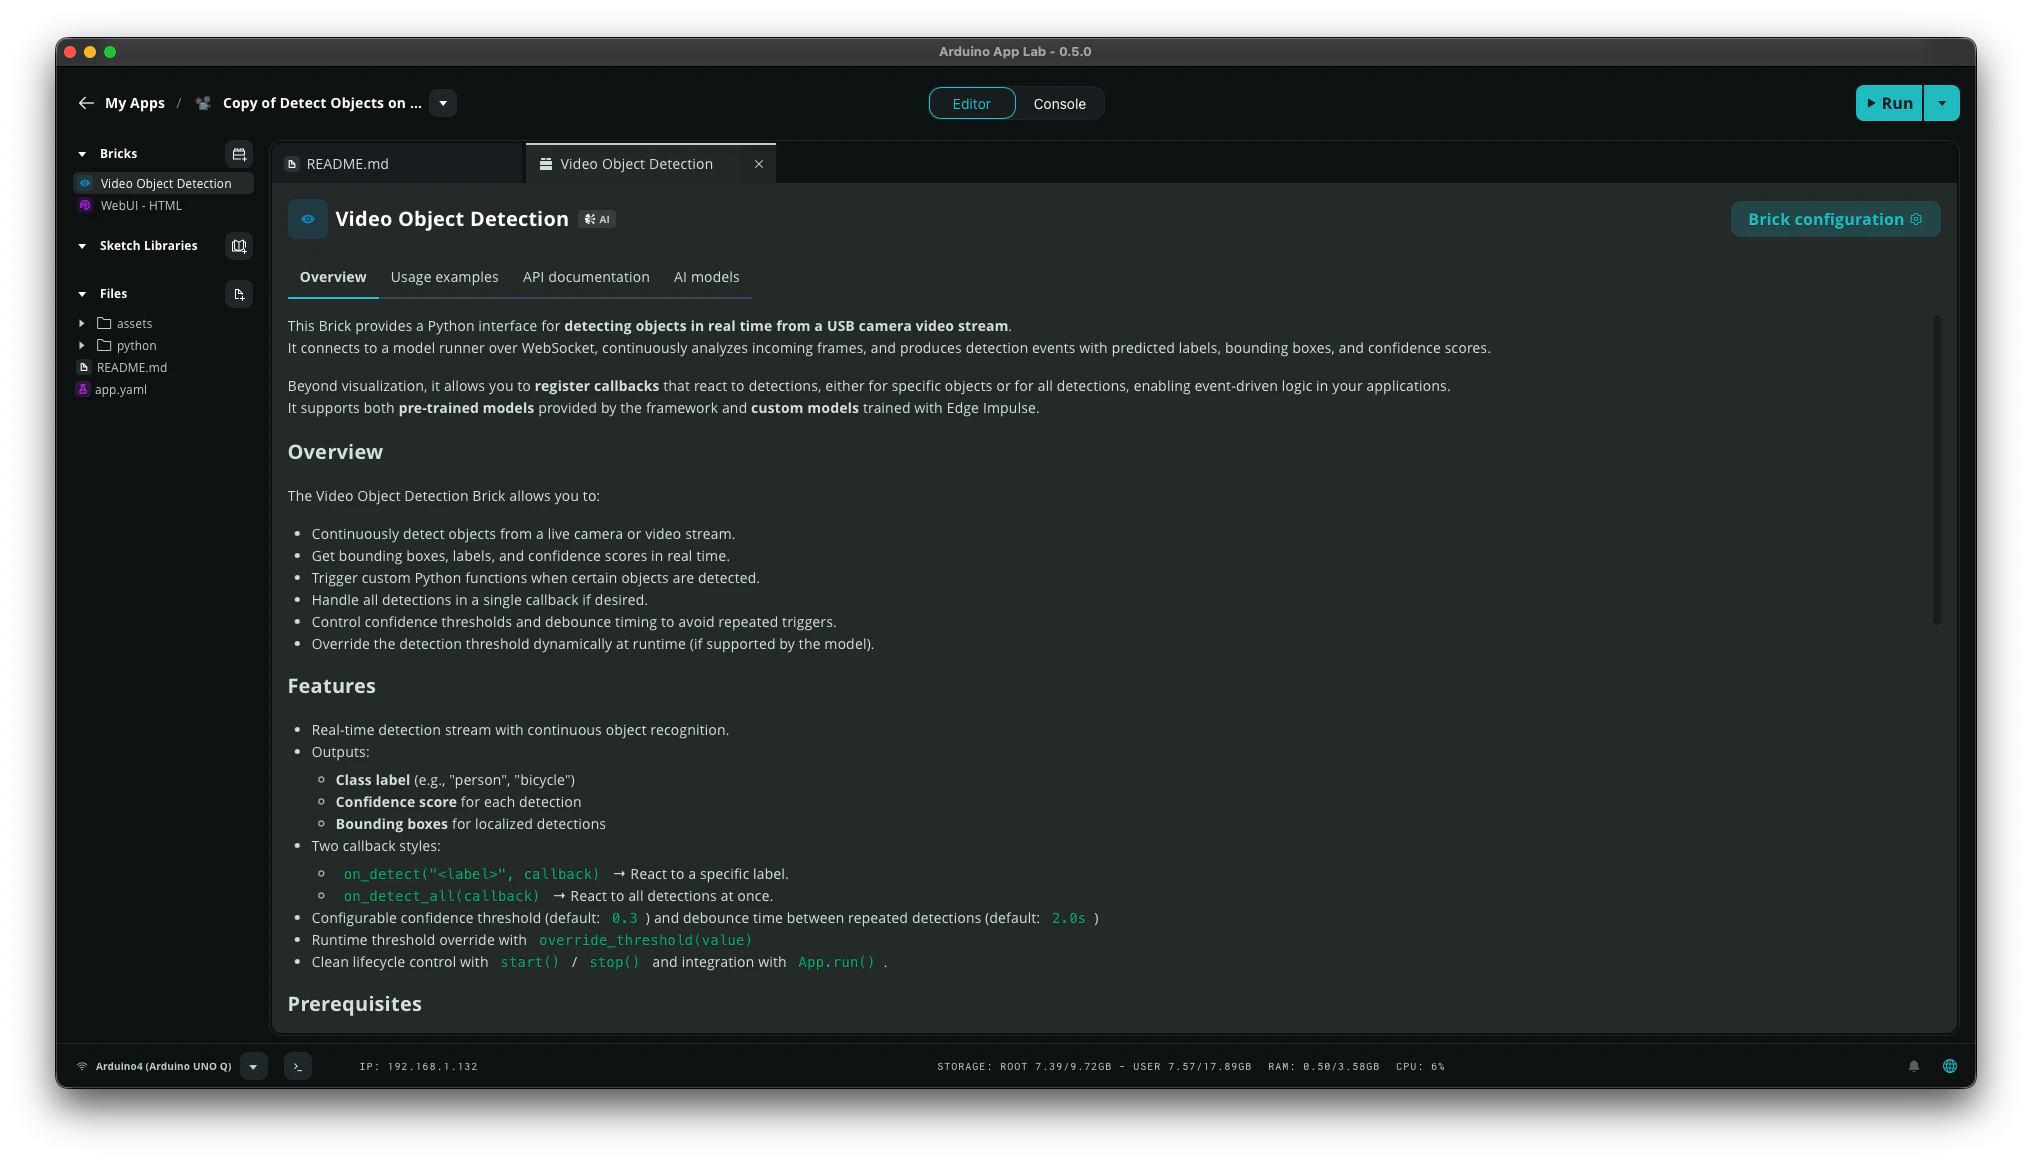 In your new app you will see two bricks `Video Object Detection` and `WebUI - HTML` as before. Click on the `Video Object Detection` brick and go to the `AI models` tab to view the available AI models for this brick.
If the model you want to use isn't listed, click `Train New AI model`. Training your own models give you control over what the AI recognizes in your application.
In your new app you will see two bricks `Video Object Detection` and `WebUI - HTML` as before. Click on the `Video Object Detection` brick and go to the `AI models` tab to view the available AI models for this brick.
If the model you want to use isn't listed, click `Train New AI model`. Training your own models give you control over what the AI recognizes in your application.
 To train your own AI model, you will first need an Arduino account. In case you don't have it yet, create it following the steps. You will also need a free Edge Impulse account to start building and training AI models.
If you are new to Edge Impulse, here are some helpful tutorials to get started:
* [Sound recognition](/tutorials/end-to-end/sound-recognition)
* [Keyword spotting](/tutorials/end-to-end/keyword-spotting)
* [Image classification](/tutorials/end-to-end/image-classification)
* [Motion recognition with anomaly detection (only for boards with built-in IMU sensor)](/tutorials/end-to-end/motion-recognition)
* [Object detection with centroids (FOMO)](/tutorials/end-to-end/object-detection-centroids)
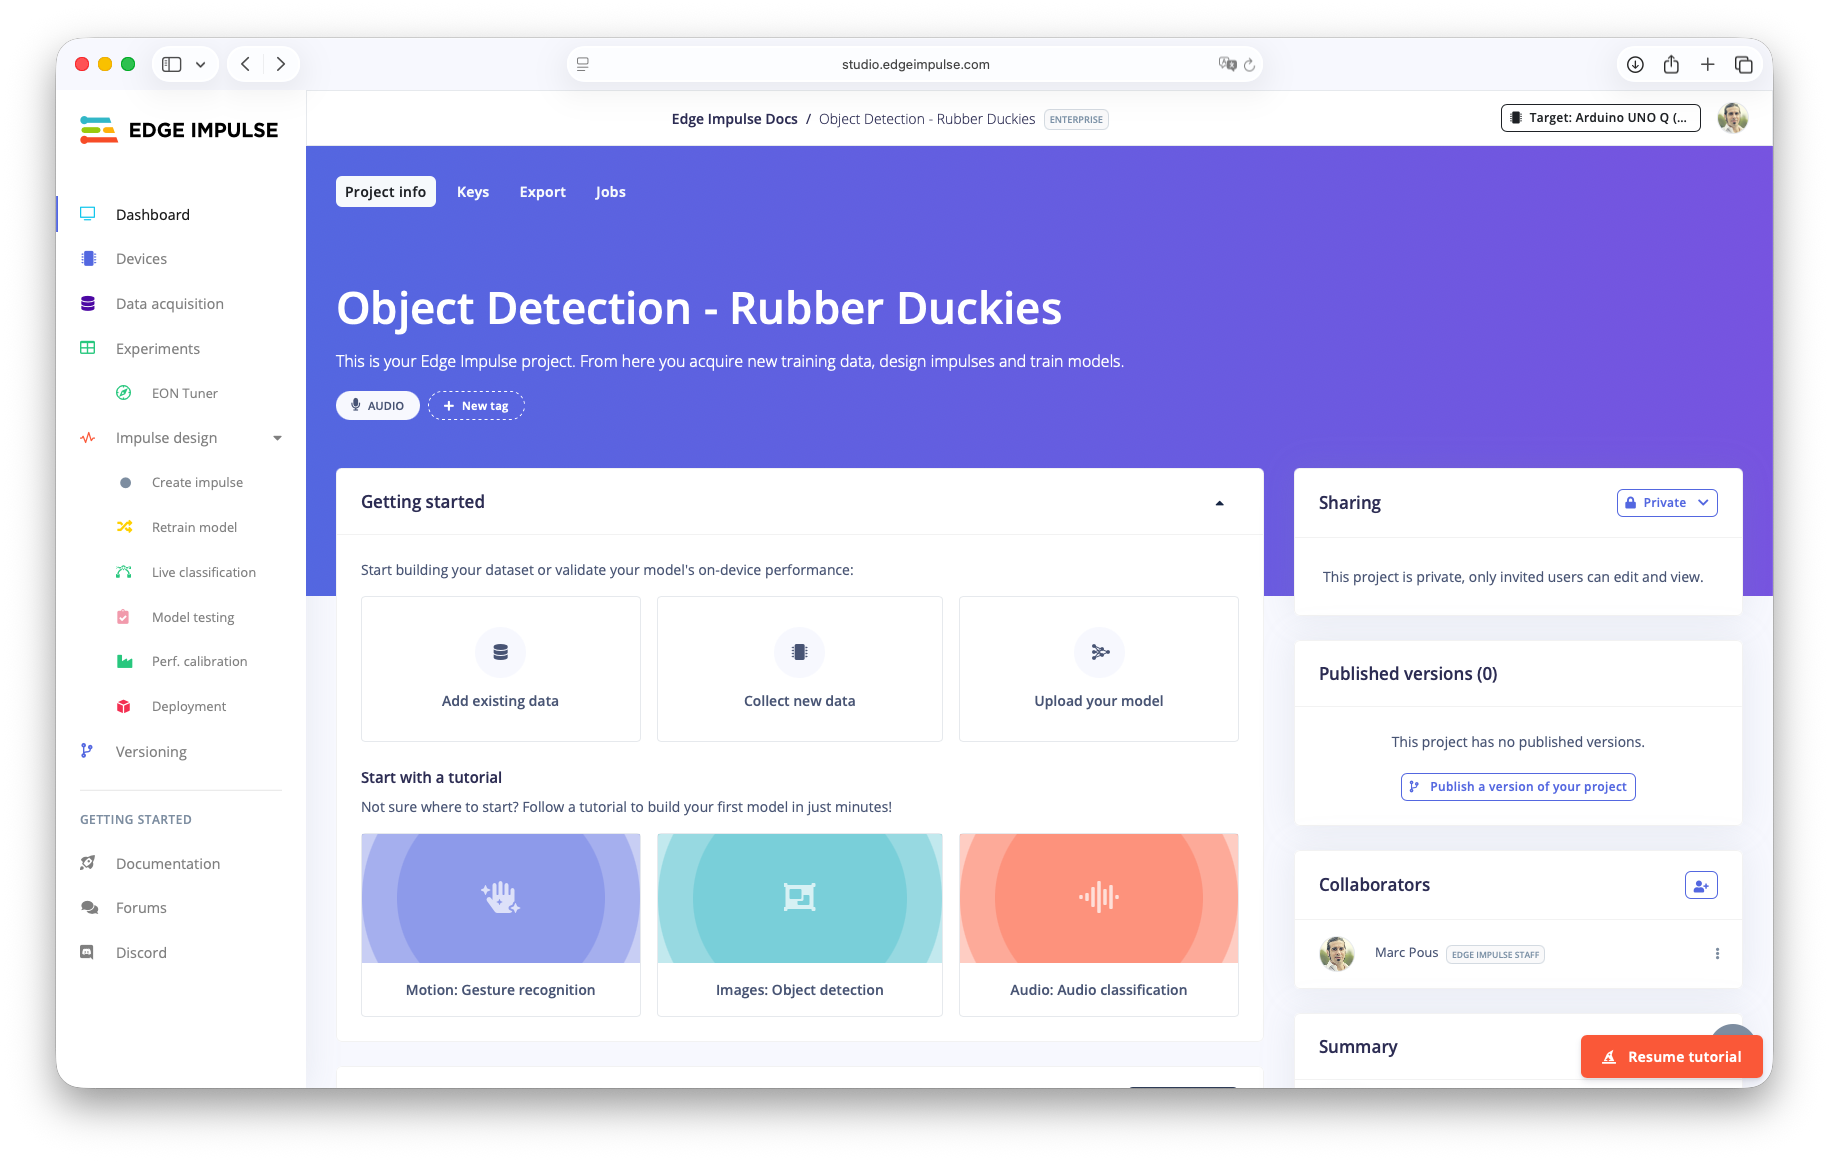
For this tutorial, we will use the [Object Detection Rubber Duckies](https://studio.edgeimpulse.com/public/783690/latest) public project. Clone this project into your Edge Impulse account.
To train your own AI model, you will first need an Arduino account. In case you don't have it yet, create it following the steps. You will also need a free Edge Impulse account to start building and training AI models.
If you are new to Edge Impulse, here are some helpful tutorials to get started:
* [Sound recognition](/tutorials/end-to-end/sound-recognition)
* [Keyword spotting](/tutorials/end-to-end/keyword-spotting)
* [Image classification](/tutorials/end-to-end/image-classification)
* [Motion recognition with anomaly detection (only for boards with built-in IMU sensor)](/tutorials/end-to-end/motion-recognition)
* [Object detection with centroids (FOMO)](/tutorials/end-to-end/object-detection-centroids)
For this tutorial, we will use the [Object Detection Rubber Duckies](https://studio.edgeimpulse.com/public/783690/latest) public project. Clone this project into your Edge Impulse account.
 ### Train your model in Edge Impulse Studio
Follow the steps through the Edge Impulse Studio to train your own AI model with this initial dataset of Rubber Ducks. Feel free to add new images of Rubber Ducks and label them properly.
* Open the cloned project and select UNO Q as your target hardware.
* In the menu, click `Create impulse`. Choose `Image` as the processing block and `Object Detection (Images)` as learning block. Then click `Save impulse`.
* Go to `Image` block, click `Save parameters` and then `Generate features`.
* Go to `Object Detection` block and train your neural network using FOMO (Faster Objects, More Objects) MobileNetV2 0.35 model. Click `Save & train`. Once the training is complete, you will see the Confusion matrix and the on-device performance metrics.
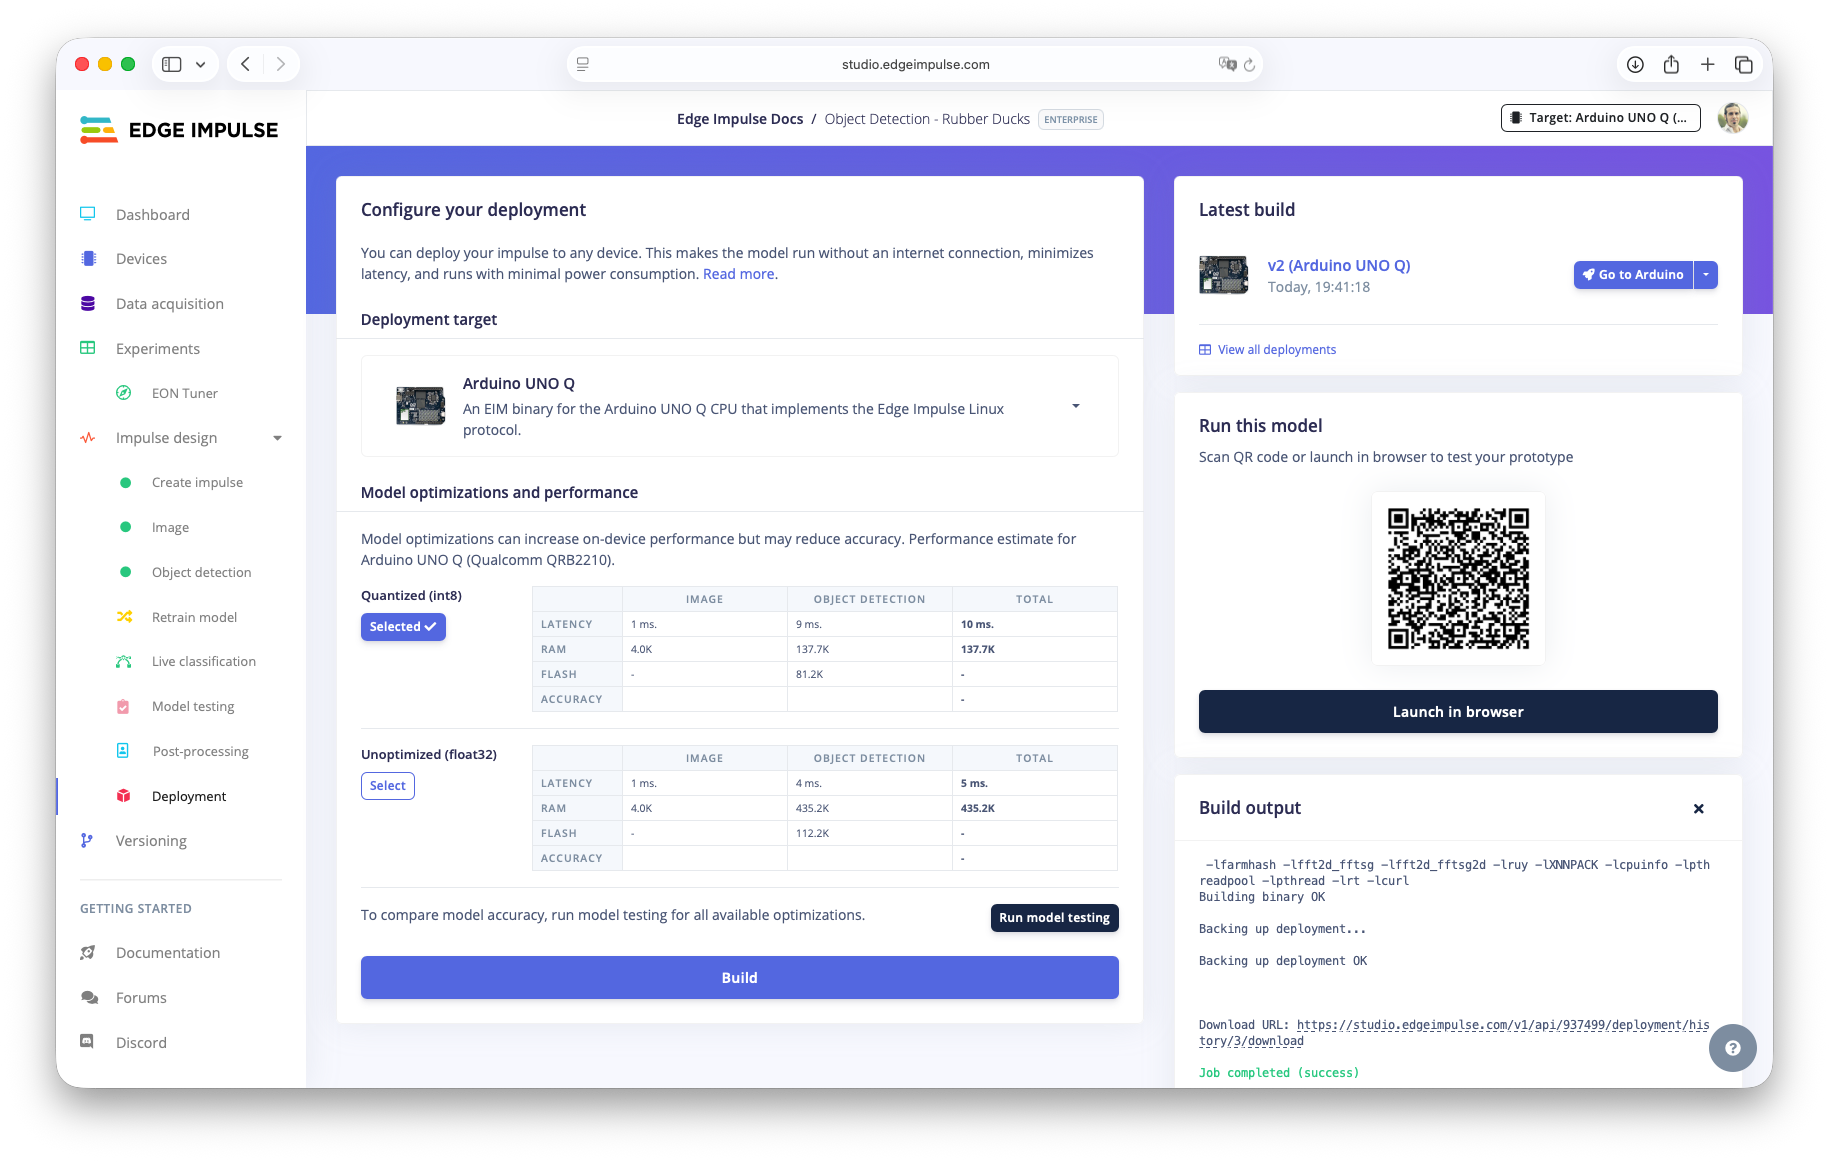
* Go to `Deployment`, select `UNO Q` as the Deployment target, and click `Build`. After the build finishes in the `Latest build` section click `Go to Arduino`.
### Train your model in Edge Impulse Studio
Follow the steps through the Edge Impulse Studio to train your own AI model with this initial dataset of Rubber Ducks. Feel free to add new images of Rubber Ducks and label them properly.
* Open the cloned project and select UNO Q as your target hardware.
* In the menu, click `Create impulse`. Choose `Image` as the processing block and `Object Detection (Images)` as learning block. Then click `Save impulse`.
* Go to `Image` block, click `Save parameters` and then `Generate features`.
* Go to `Object Detection` block and train your neural network using FOMO (Faster Objects, More Objects) MobileNetV2 0.35 model. Click `Save & train`. Once the training is complete, you will see the Confusion matrix and the on-device performance metrics.
* Go to `Deployment`, select `UNO Q` as the Deployment target, and click `Build`. After the build finishes in the `Latest build` section click `Go to Arduino`.
 ### Download and select the new custom model
Return to Arduino App Lab. Your new model should now appear in the Brick's AI models list. Find `Object Detection - Rubber Ducks` model, click `Download` and then once downloaded go to `Brick Configuration`.
### Download and select the new custom model
Return to Arduino App Lab. Your new model should now appear in the Brick's AI models list. Find `Object Detection - Rubber Ducks` model, click `Download` and then once downloaded go to `Brick Configuration`.
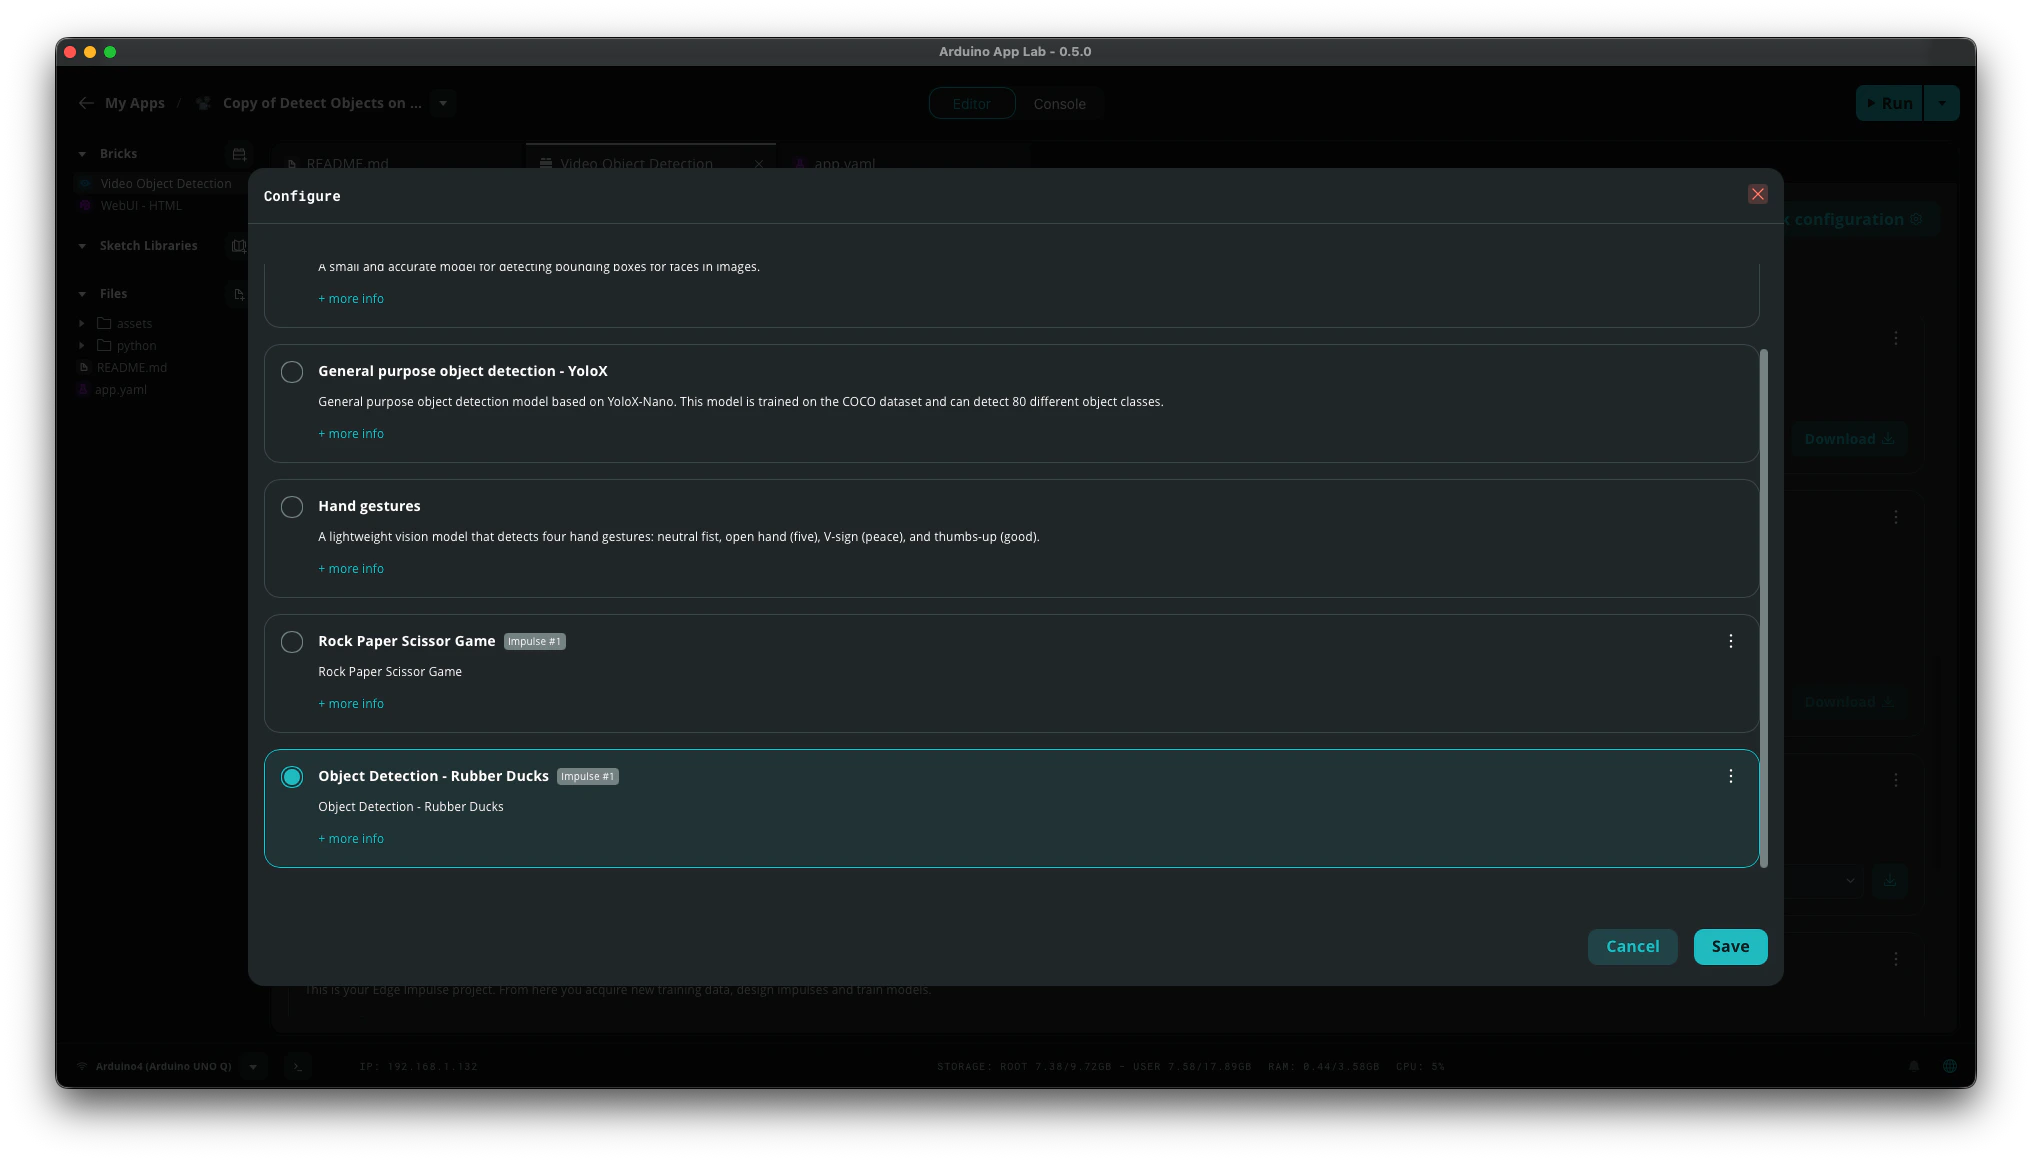
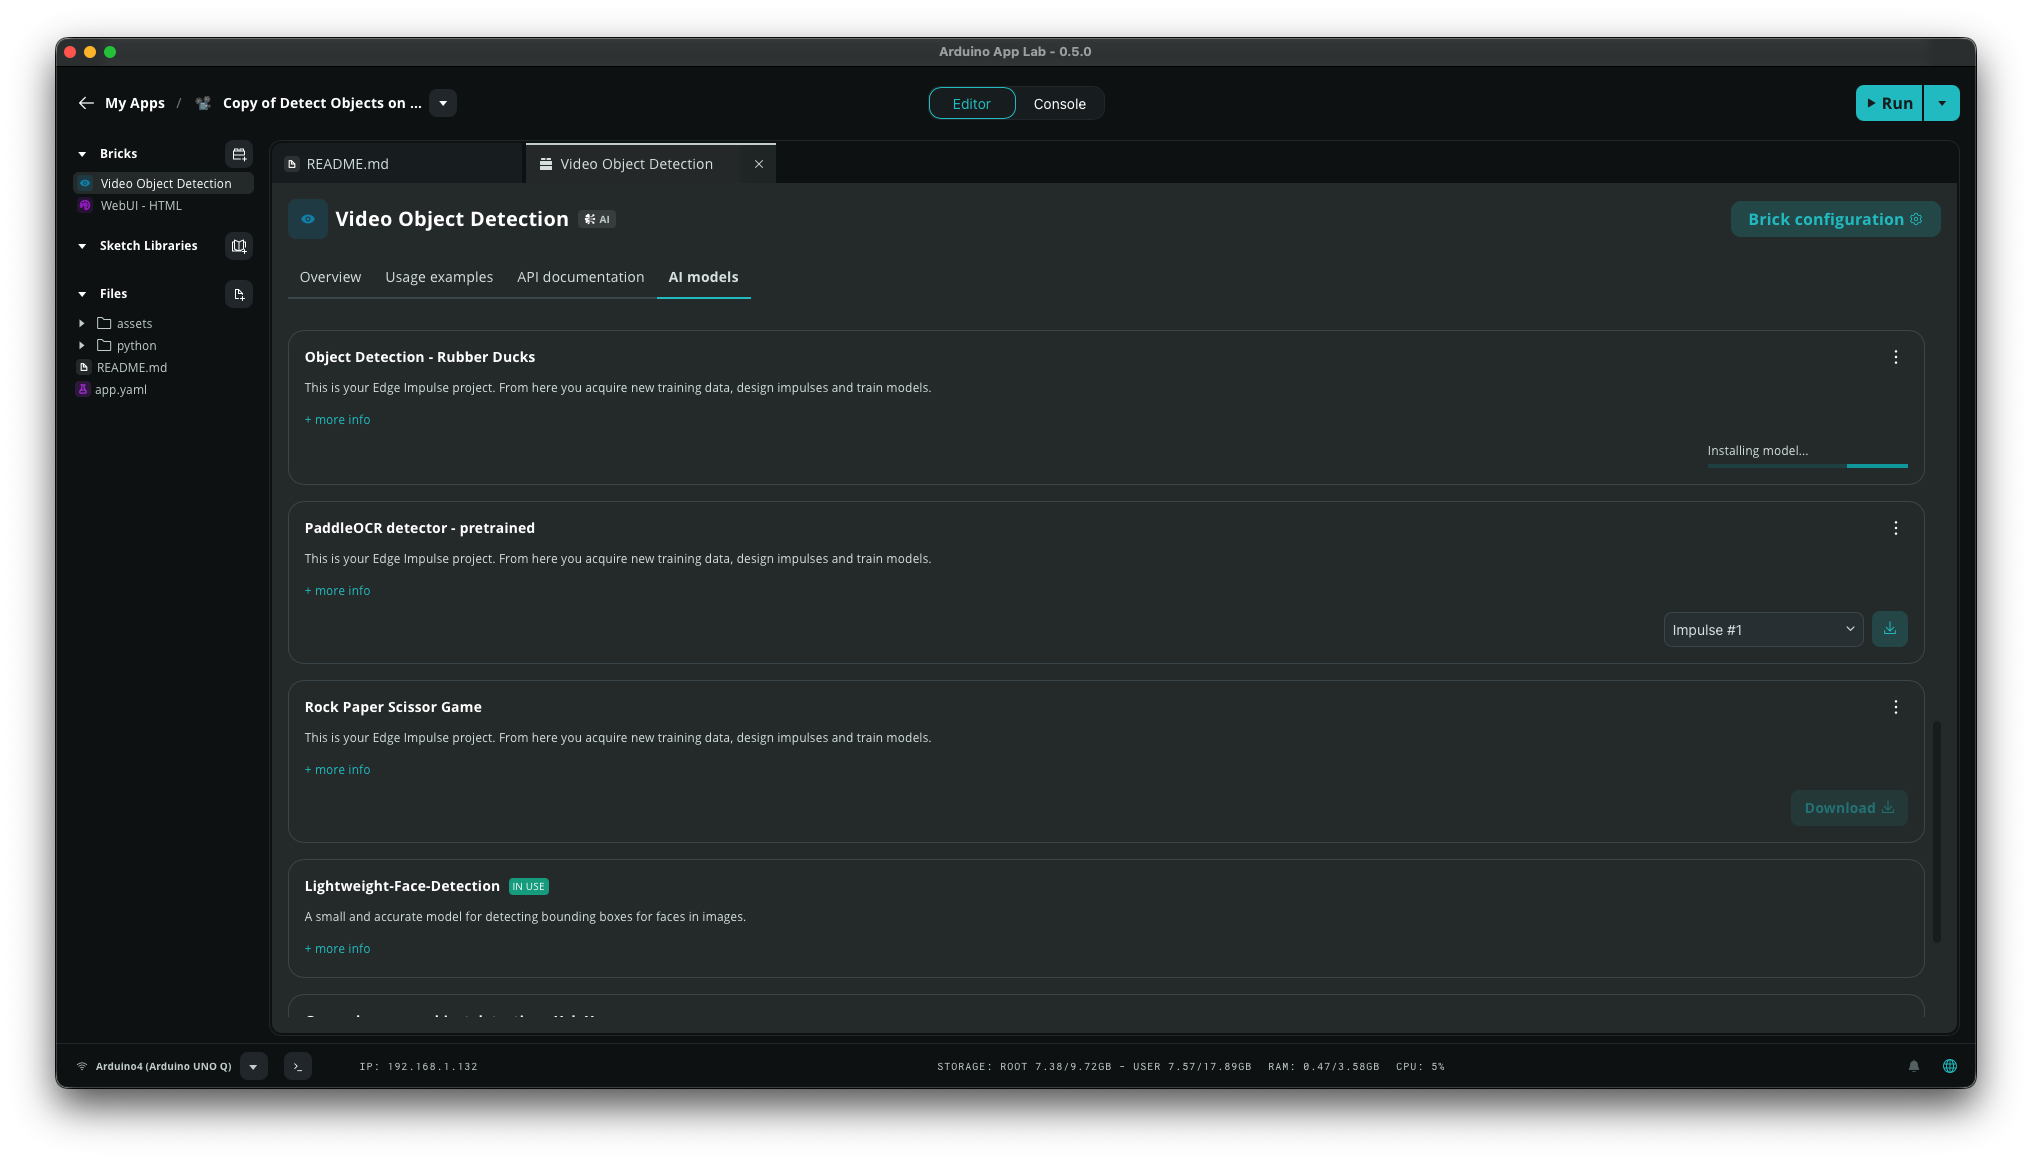 In `Brick Configuration` select your custom model and click `Save`.
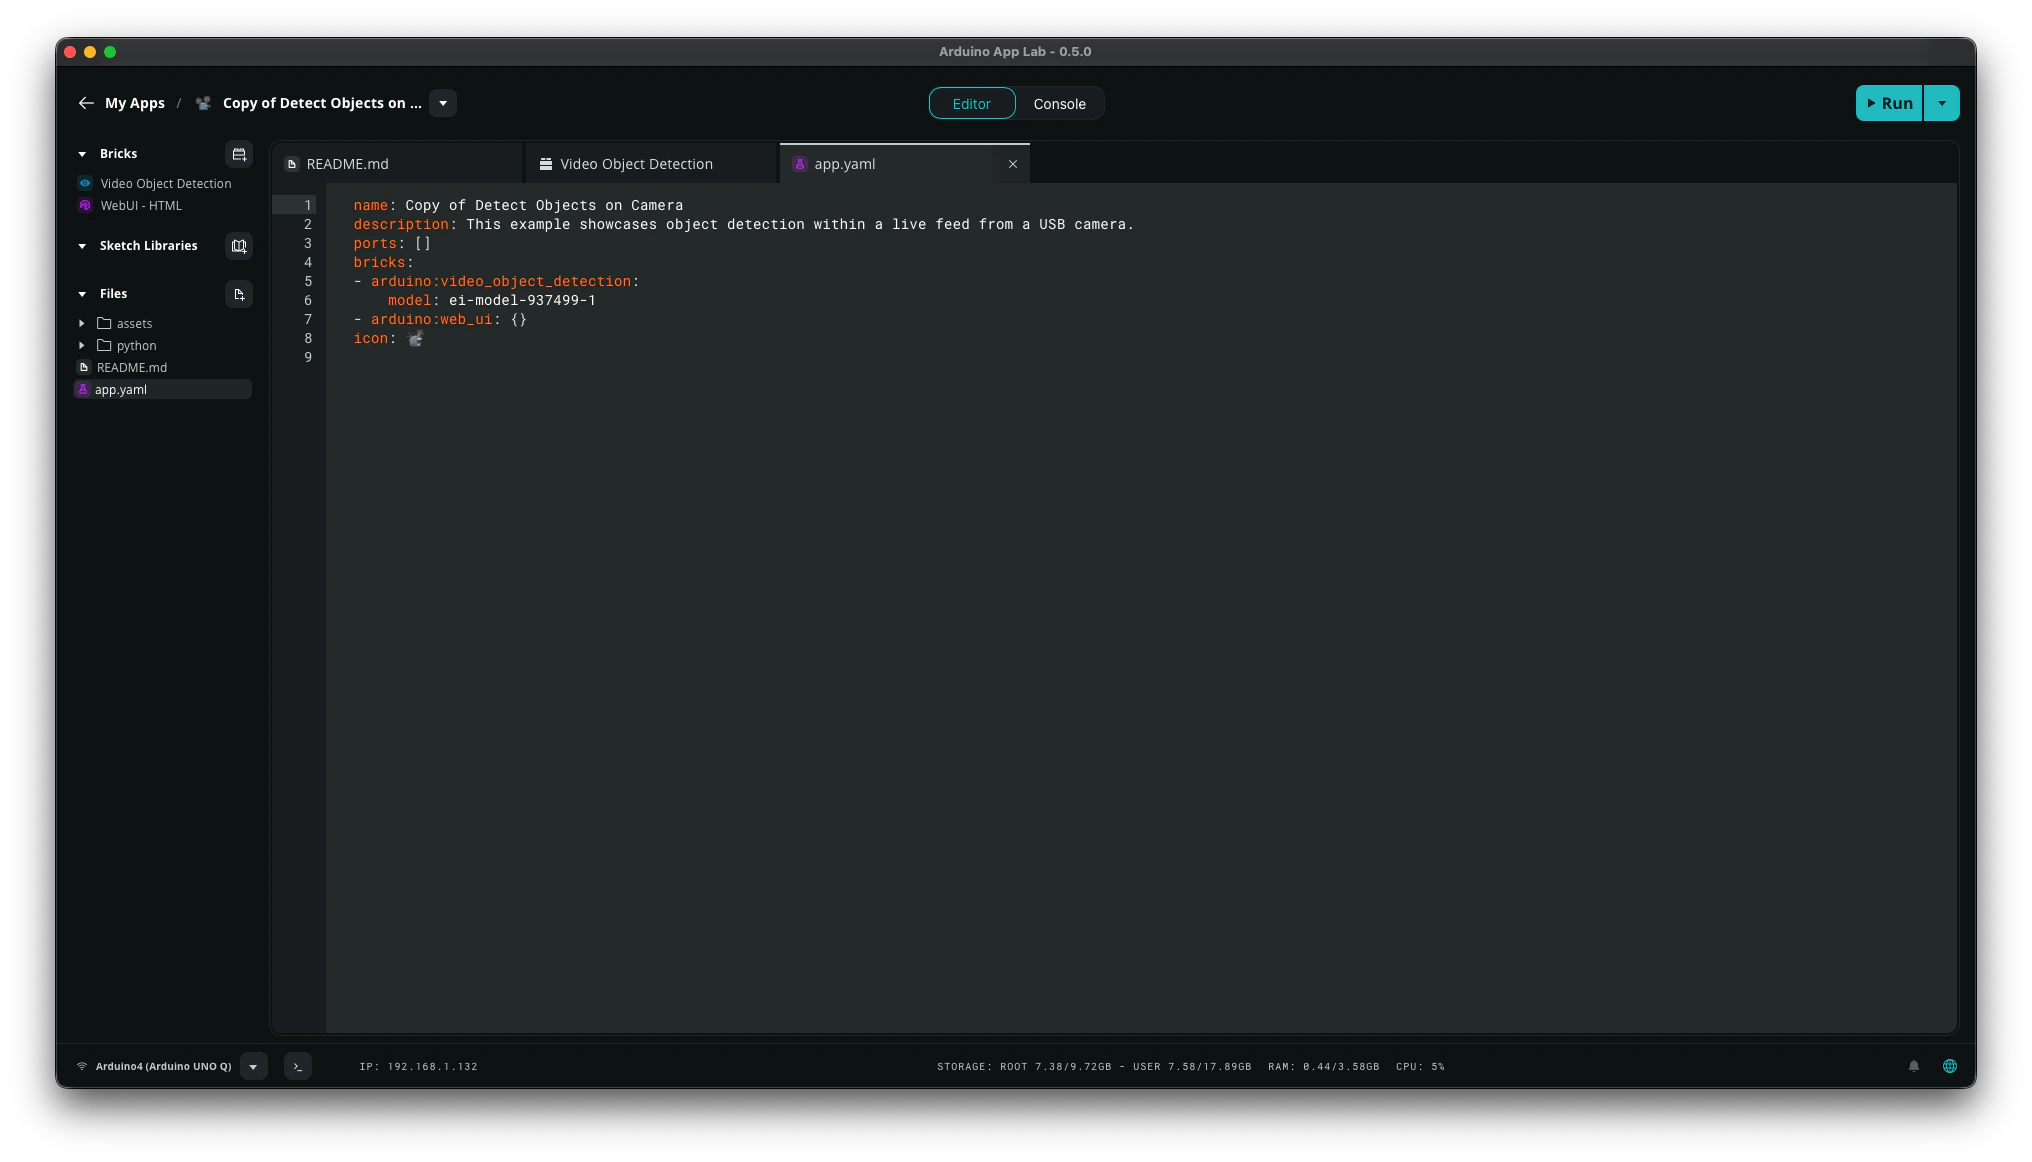
 You should see it automatically added to the `app.yaml` file under the Video Object Detection brick definition.
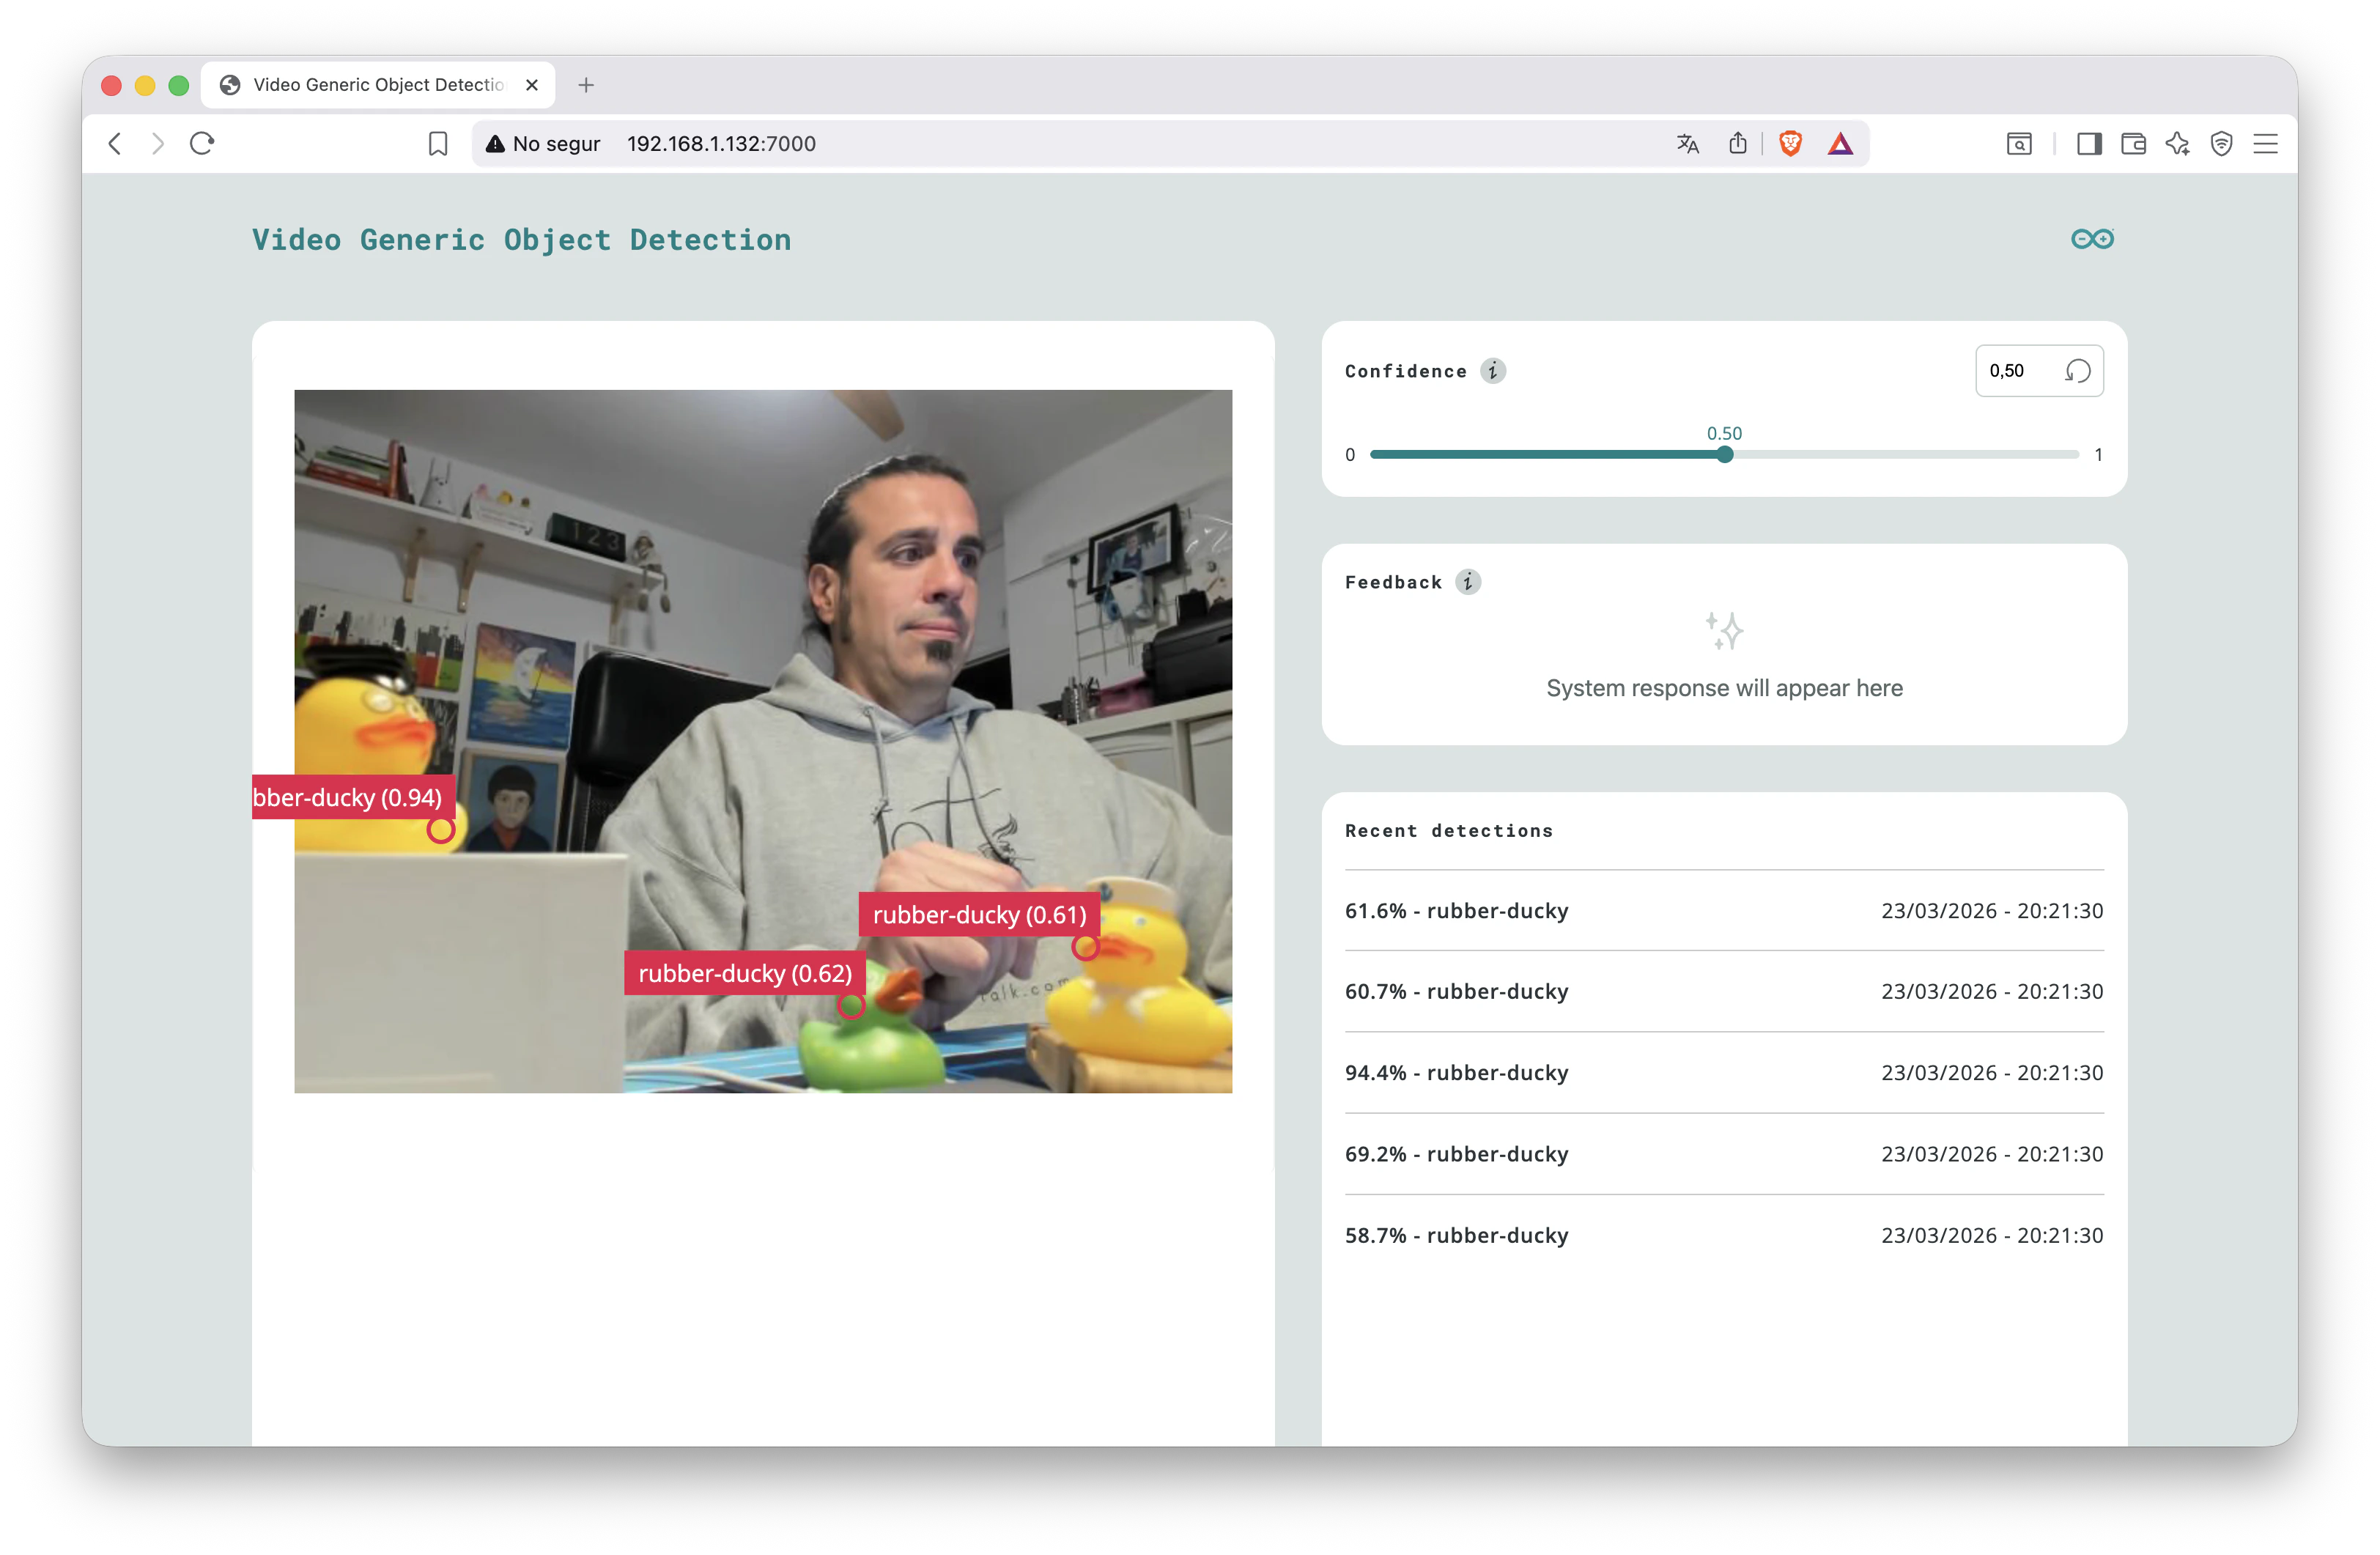
 Now run your app and test it. Check the Python console for detecting logs with confidence scores.
 Feel free to improve your model by adding more varied images (different angles, lighting, and backgrounds).
You now know how to go from the idea to creating your own AI model to running it live on your UNO Q. Happy building from here!
Feel free to create your own Arduino App Lab application and share your feedback with us in the [Edge Impulse forum](https://forum.edgeimpulse.com).
## Legacy Guide (v0.1.23)
**Deprecated feature**
This feature has been deprecated. Please see below for additional details.
**This content is kept for historical/reference purposes only**
This section describes the old workflow using Arduino App Lab version 0.1.23.
It is kept for reference only. We strongly recommend using Arduino App Lab 0.5.0 or newer.
In Edge Impulse Studio you can deploy your model as a either `Linux aarch64` or `Linux Arduino UNO Q (GPU)`. Then, import it on your UNO Q to run edge AI applications that use your custom model.
Feel free to improve your model by adding more varied images (different angles, lighting, and backgrounds).
You now know how to go from the idea to creating your own AI model to running it live on your UNO Q. Happy building from here!
Feel free to create your own Arduino App Lab application and share your feedback with us in the [Edge Impulse forum](https://forum.edgeimpulse.com).
## Legacy Guide (v0.1.23)
**Deprecated feature**
This feature has been deprecated. Please see below for additional details.
**This content is kept for historical/reference purposes only**
This section describes the old workflow using Arduino App Lab version 0.1.23.
It is kept for reference only. We strongly recommend using Arduino App Lab 0.5.0 or newer.
In Edge Impulse Studio you can deploy your model as a either `Linux aarch64` or `Linux Arduino UNO Q (GPU)`. Then, import it on your UNO Q to run edge AI applications that use your custom model.
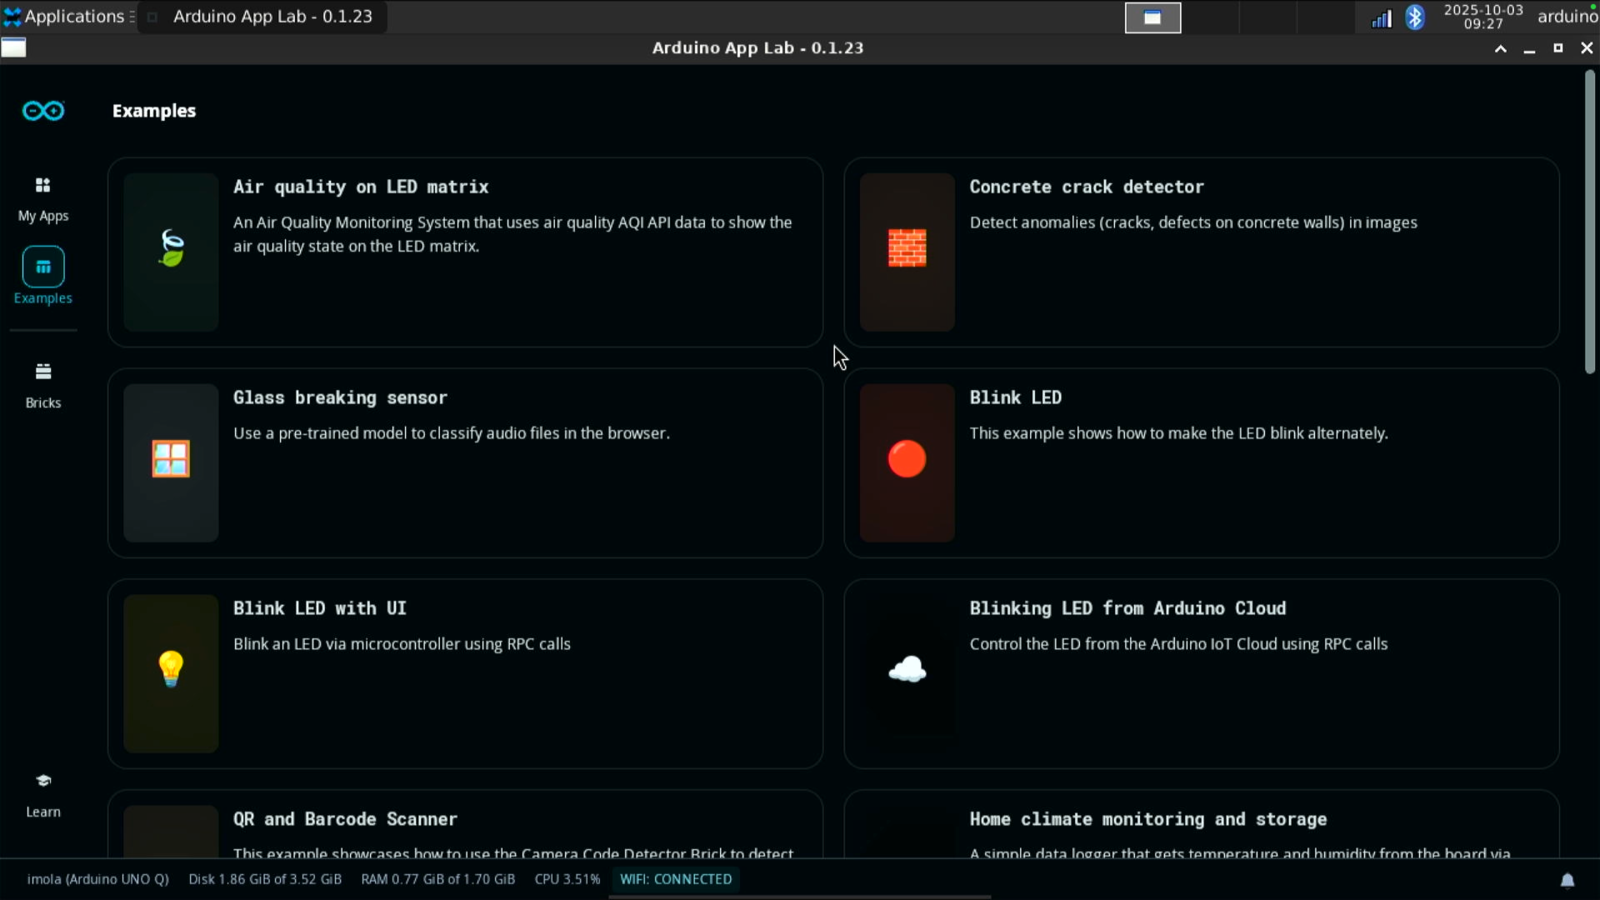 This tutorial guides you through deploying Arduino App Lab examples applications, and new custom applications that use your own impulse, to the Arduino UNO Q. The tutorial is designed for the UNO Q (2GB) using App Lab version 0.1.23.
Here's a video overview of the UNO Q and how to run custom models from Edge Impulse:
## Prerequisites
Before you start, make sure you have completed the [UNO Q setup](/hardware/boards/arduino-uno-q) using a monitor, keyboard, and mouse to enable WiFi and SSH access. Additionally, make sure you followed one of the following tutorials and have a trained impulse:
* [Sound recognition](/tutorials/end-to-end/sound-recognition)
* [Keyword spotting](/tutorials/end-to-end/keyword-spotting)
* [Image classification](/tutorials/end-to-end/image-classification)
* [Motion recognition with anomaly detection (only for boards with built-in IMU sensor)](/tutorials/end-to-end/motion-recognition)
* [Object detection with centroids (FOMO)](/tutorials/end-to-end/object-detection-centroids)
## Deploying an example application
The Arduino App Lab launches automatically when the UNO Q starts. If you don’t see it, go to Applications (top left corner), navigate to Accessories, and click on Arduino App Lab.
### Keyword spotting
First we are going to deploy the `Hey Arduino` application in the Arduino App Lab examples onto the UNO Q.
This tutorial guides you through deploying Arduino App Lab examples applications, and new custom applications that use your own impulse, to the Arduino UNO Q. The tutorial is designed for the UNO Q (2GB) using App Lab version 0.1.23.
Here's a video overview of the UNO Q and how to run custom models from Edge Impulse:
## Prerequisites
Before you start, make sure you have completed the [UNO Q setup](/hardware/boards/arduino-uno-q) using a monitor, keyboard, and mouse to enable WiFi and SSH access. Additionally, make sure you followed one of the following tutorials and have a trained impulse:
* [Sound recognition](/tutorials/end-to-end/sound-recognition)
* [Keyword spotting](/tutorials/end-to-end/keyword-spotting)
* [Image classification](/tutorials/end-to-end/image-classification)
* [Motion recognition with anomaly detection (only for boards with built-in IMU sensor)](/tutorials/end-to-end/motion-recognition)
* [Object detection with centroids (FOMO)](/tutorials/end-to-end/object-detection-centroids)
## Deploying an example application
The Arduino App Lab launches automatically when the UNO Q starts. If you don’t see it, go to Applications (top left corner), navigate to Accessories, and click on Arduino App Lab.
### Keyword spotting
First we are going to deploy the `Hey Arduino` application in the Arduino App Lab examples onto the UNO Q.
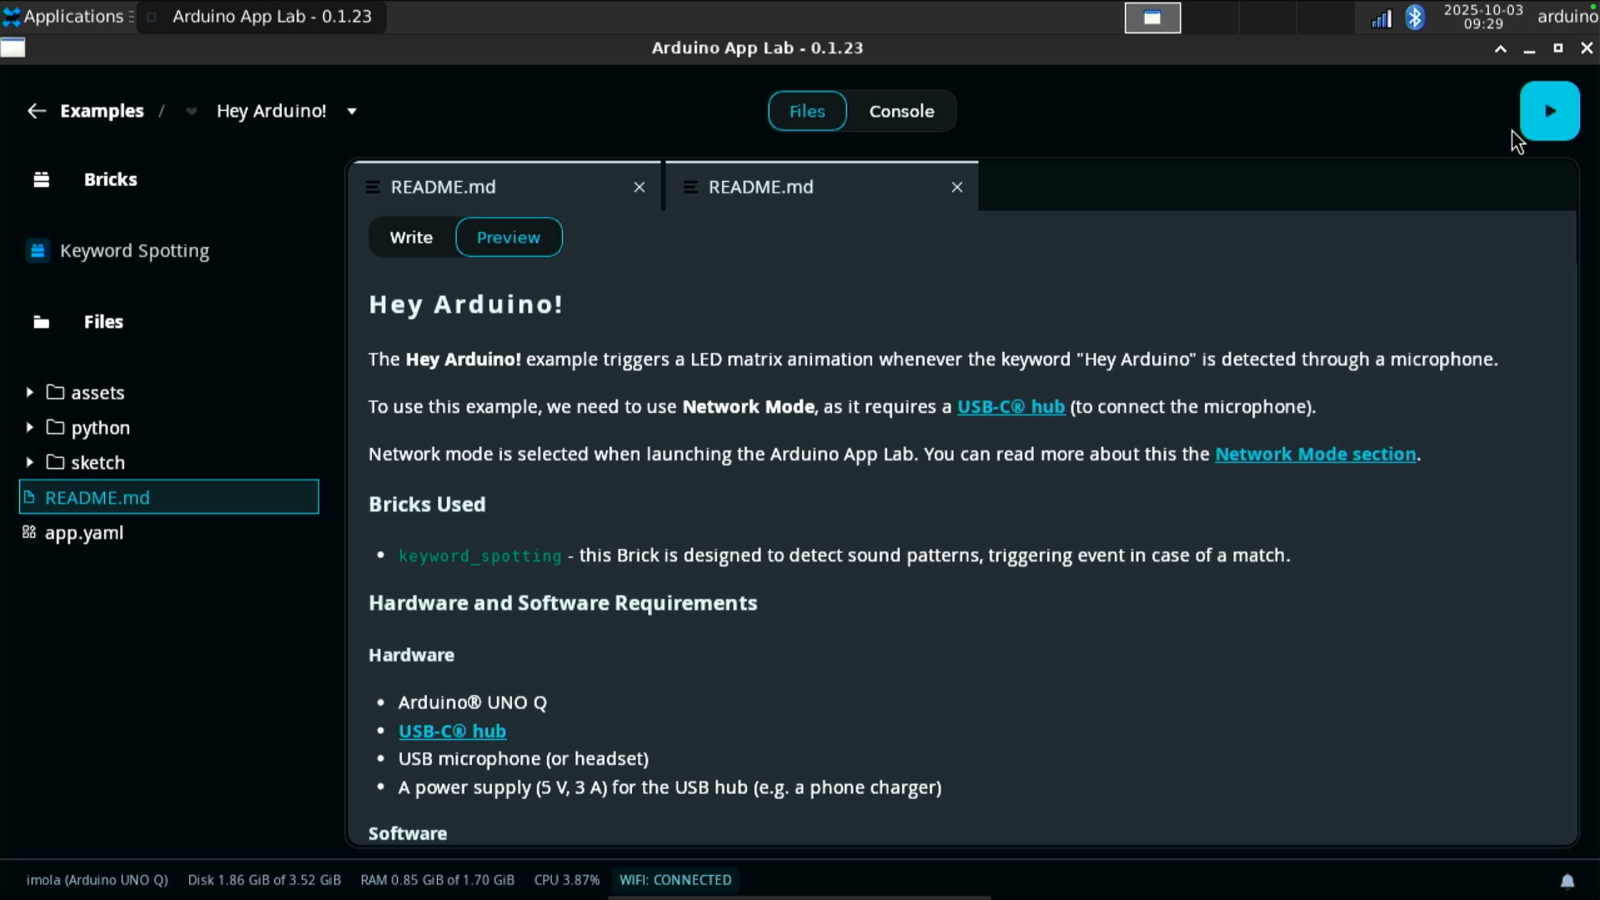 The `Hey Arduino` application is a keyword spotting application designed to trigger an LED matrix animation (a heart shape animation) when the phrase “Hey Arduino” is detected by the microphone.
This application is interesting as it takes advantage of both the CPU and the MCU available on the UNO Q. The CPU handles the keyword spotting, and the onboard microcontroller runs the Sketch to visualize the LED matrix animations once the keyword has been recognized.
The `Hey Arduino` application is a keyword spotting application designed to trigger an LED matrix animation (a heart shape animation) when the phrase “Hey Arduino” is detected by the microphone.
This application is interesting as it takes advantage of both the CPU and the MCU available on the UNO Q. The CPU handles the keyword spotting, and the onboard microcontroller runs the Sketch to visualize the LED matrix animations once the keyword has been recognized.
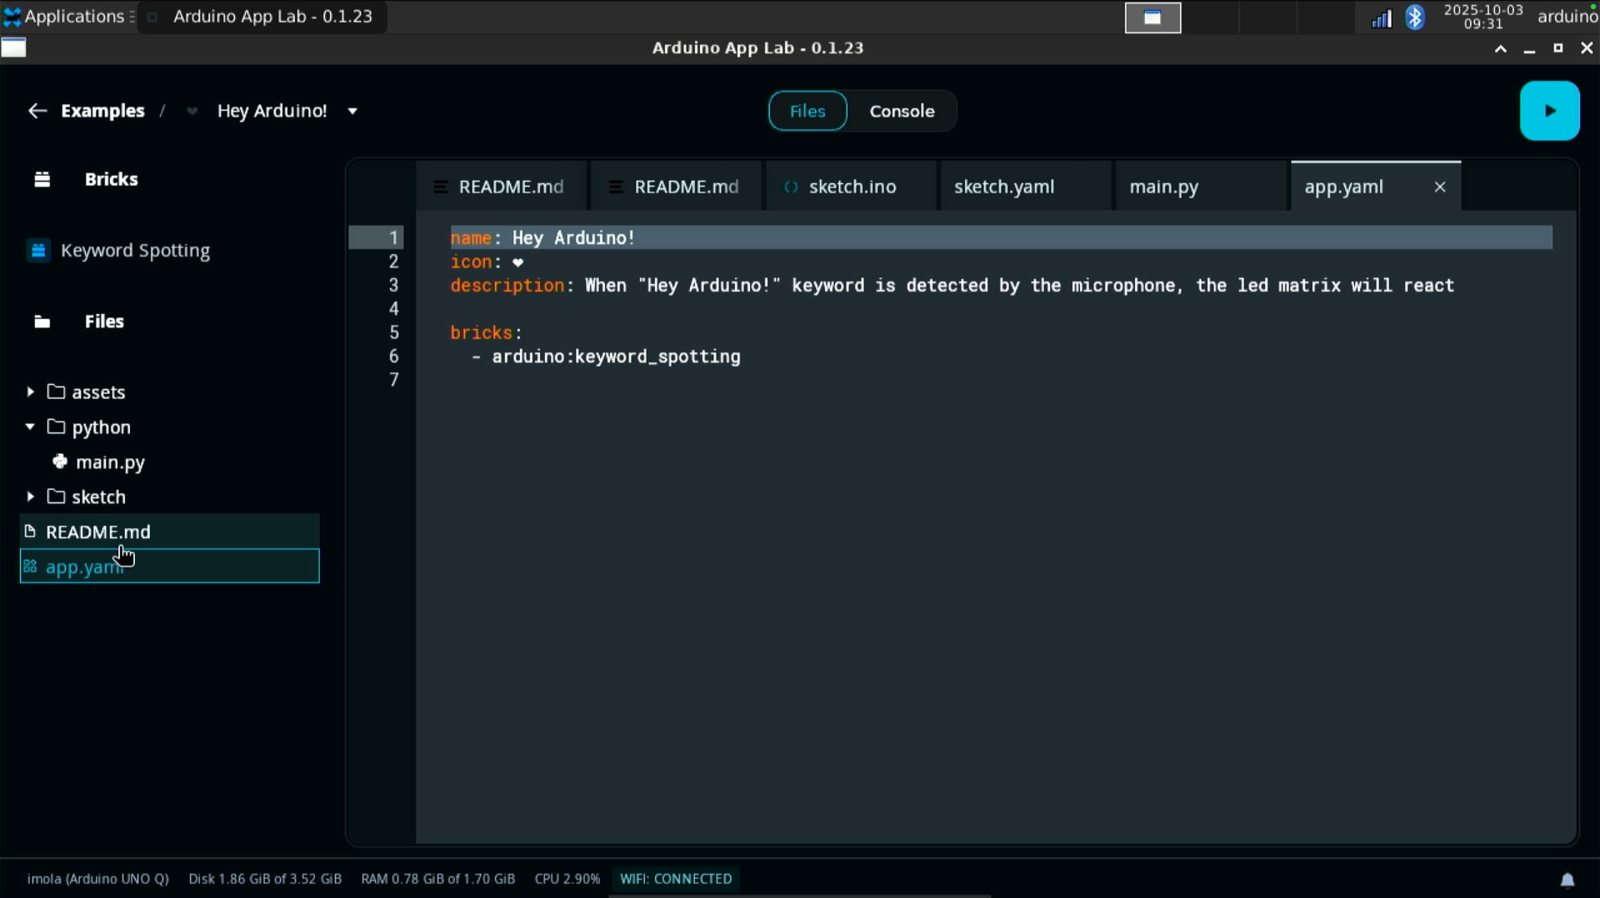 The application uses the `keyword_spotting` brick. A brick is like a code package that provides a specific functionality that is needed to the application. In this case, it adds the ability to detect sound patterns through a USB microphone and trigger an event when a match occurs.
The `keyword_spotting` brick uses a pre-trained Edge Impulse audio classification model that identifies `Hey Arduino`. It continuously monitors the audio and when it detects the keyword it triggers the microcontroller using the Bridge tool to activate the LED animation.
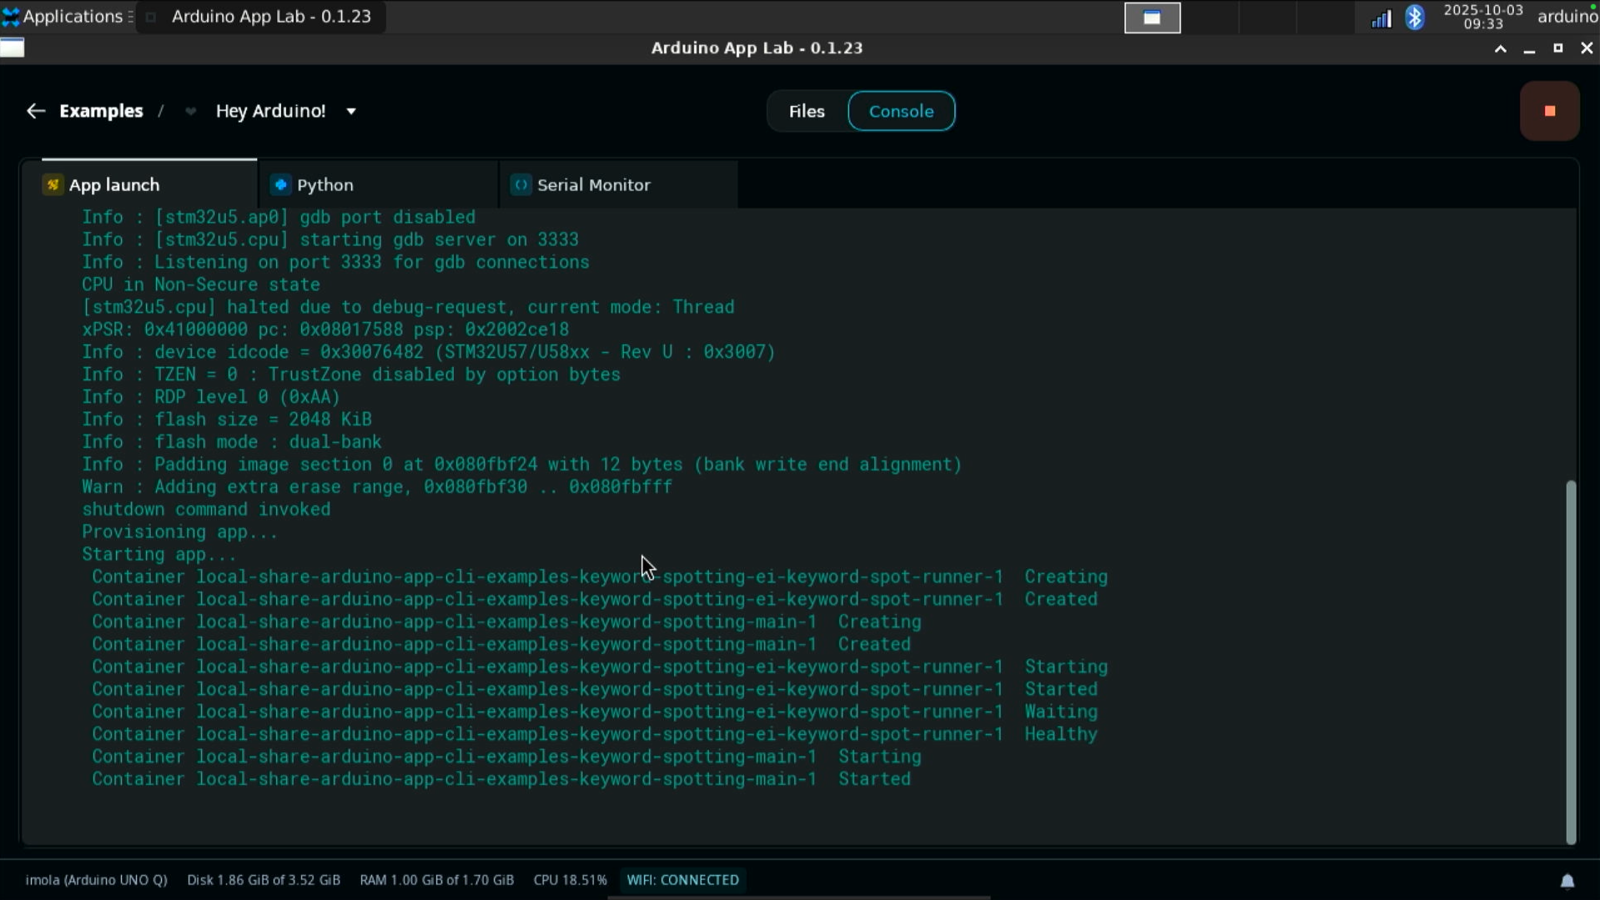
To deploy the application on your UNO Q click the green button in the top right corner. The App Launch starts deploying the application locally.
The application uses the `keyword_spotting` brick. A brick is like a code package that provides a specific functionality that is needed to the application. In this case, it adds the ability to detect sound patterns through a USB microphone and trigger an event when a match occurs.
The `keyword_spotting` brick uses a pre-trained Edge Impulse audio classification model that identifies `Hey Arduino`. It continuously monitors the audio and when it detects the keyword it triggers the microcontroller using the Bridge tool to activate the LED animation.
To deploy the application on your UNO Q click the green button in the top right corner. The App Launch starts deploying the application locally.
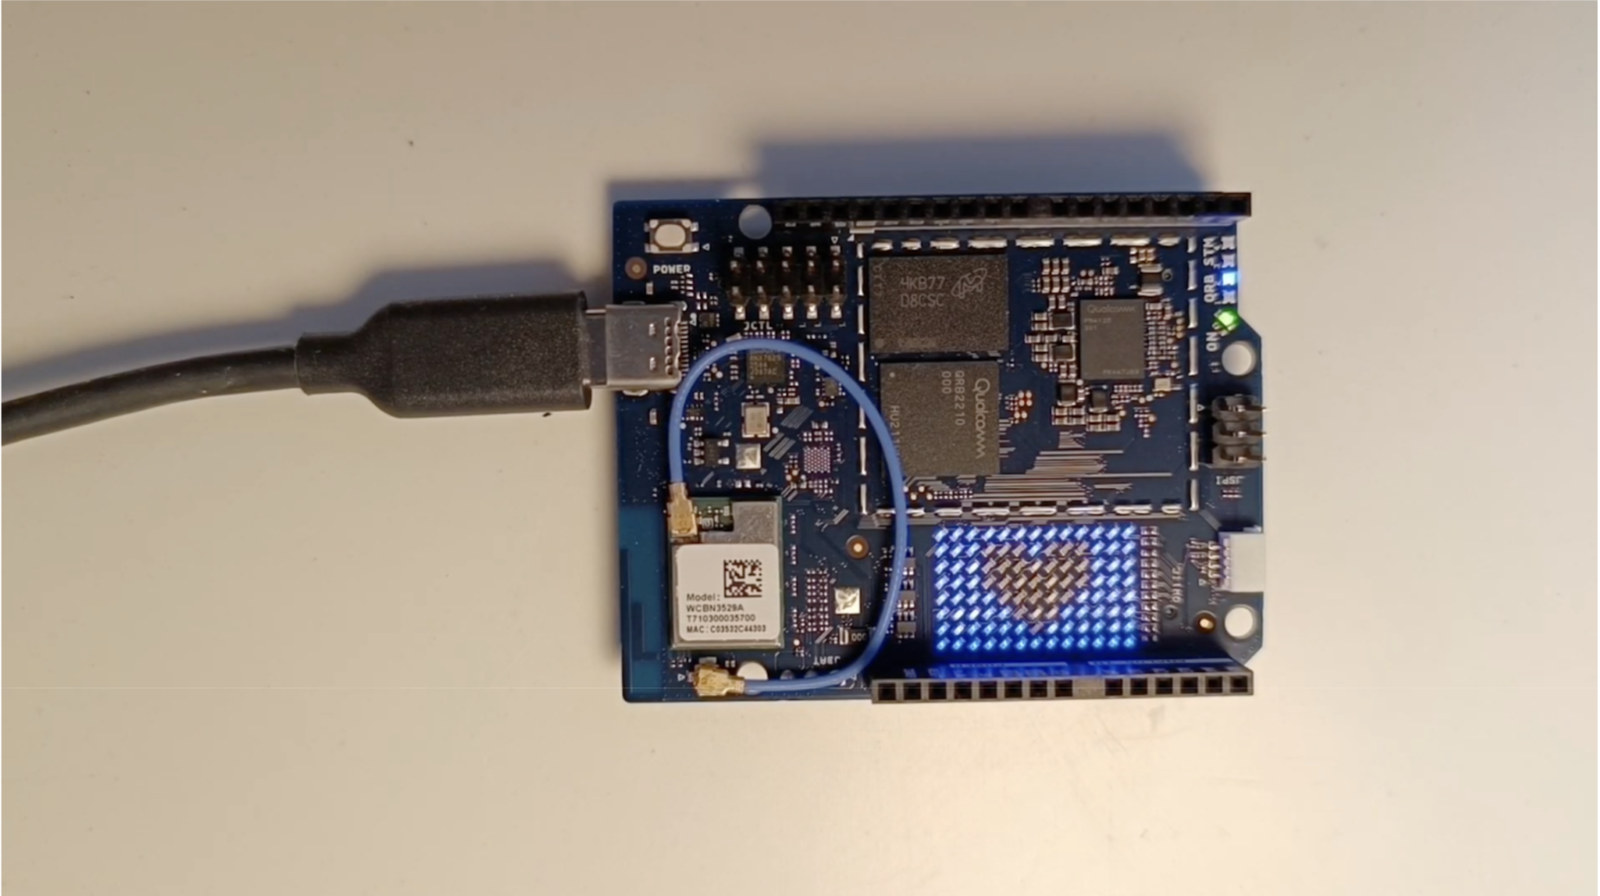
 Once the application is running on the UNO Q, say “Hey Arduino”. The LED animation should appear as soon as the keyword is detected.
 ### Object detection
If you have connected a USB webcam to your UNO Q, you can test the application `Detect objects on Camera`.
This application uses two bricks, the `video_object_detection` and the `WebUI - HTML` which hosts a web application and exposes APIs or Websockets to be used in the application.
### Object detection
If you have connected a USB webcam to your UNO Q, you can test the application `Detect objects on Camera`.
This application uses two bricks, the `video_object_detection` and the `WebUI - HTML` which hosts a web application and exposes APIs or Websockets to be used in the application.
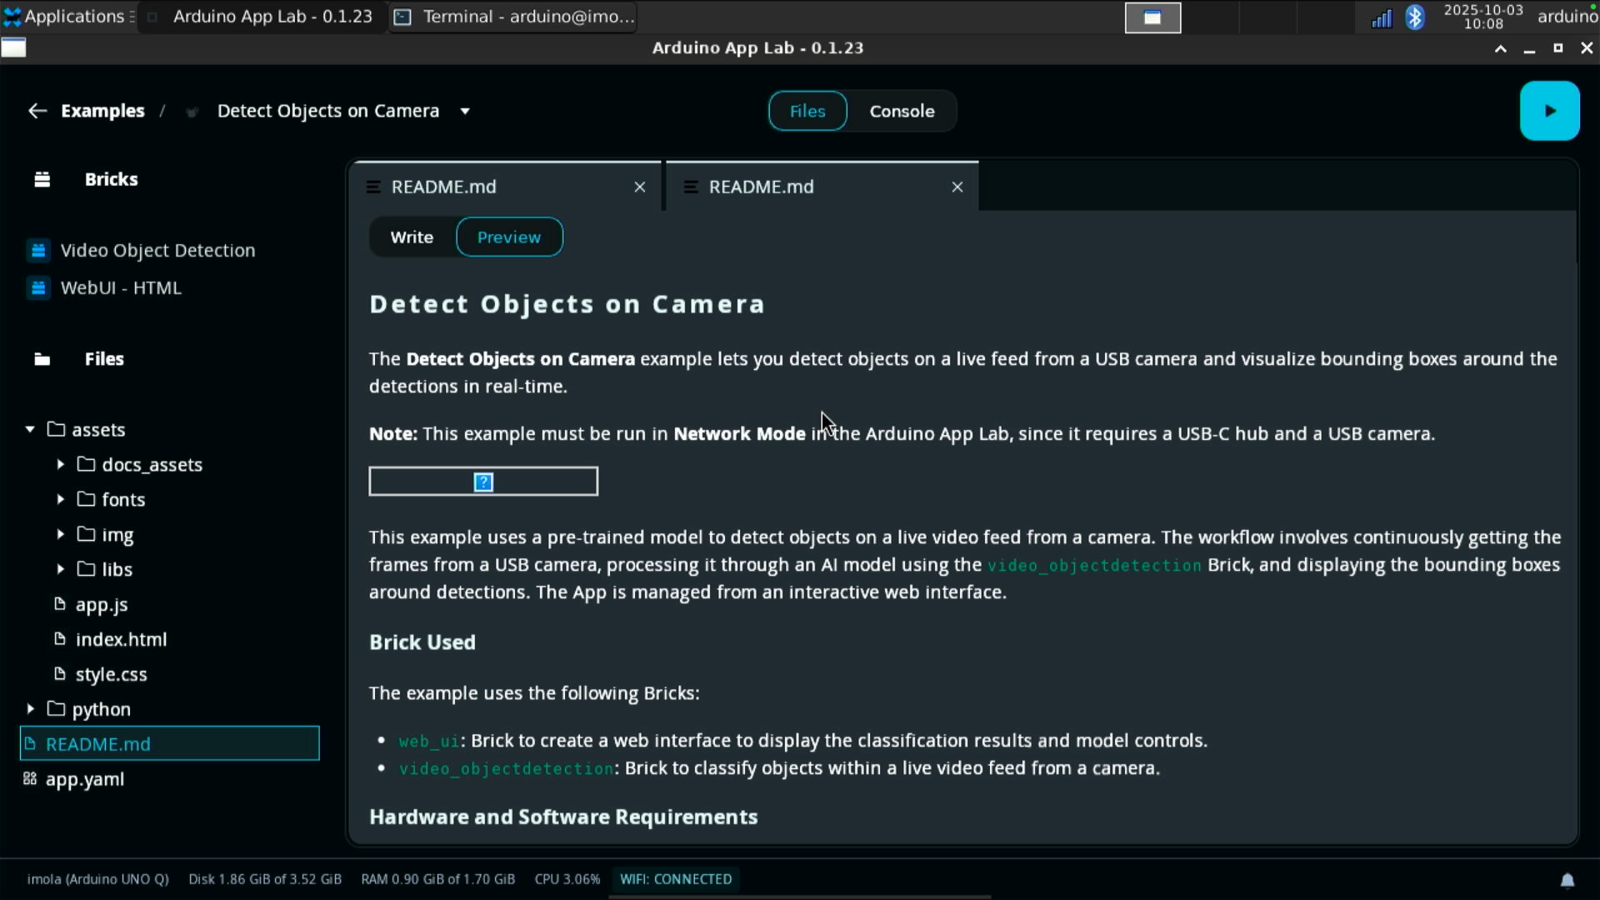 When you deploy this application on your UNO Q, a pre-trained Edge Impulse model uses the `video_object_detection` brick to find objects on a live video feed from the camera.
To access the UI of the application, use the browser and go to the local IP address of your UNO Q using the port `7000`.
## Deploying a custom application
Now that you have tested the Arduino App Lab on your UNO Q, it's time to create your own application using an impulse trained in your Edge Impulse account.
We are going to replicate the `Detect Objects on Camera` application and we will use a custom model, instead of the pre-trained model that comes with the brick. For this tutorial, we will use a face detection model.
### Creating a new app
Click on “My Apps” in the left menu of the Arduino App Lab and then click on the top right hand corner button called `Create new app +`.
When you deploy this application on your UNO Q, a pre-trained Edge Impulse model uses the `video_object_detection` brick to find objects on a live video feed from the camera.
To access the UI of the application, use the browser and go to the local IP address of your UNO Q using the port `7000`.
## Deploying a custom application
Now that you have tested the Arduino App Lab on your UNO Q, it's time to create your own application using an impulse trained in your Edge Impulse account.
We are going to replicate the `Detect Objects on Camera` application and we will use a custom model, instead of the pre-trained model that comes with the brick. For this tutorial, we will use a face detection model.
### Creating a new app
Click on “My Apps” in the left menu of the Arduino App Lab and then click on the top right hand corner button called `Create new app +`.
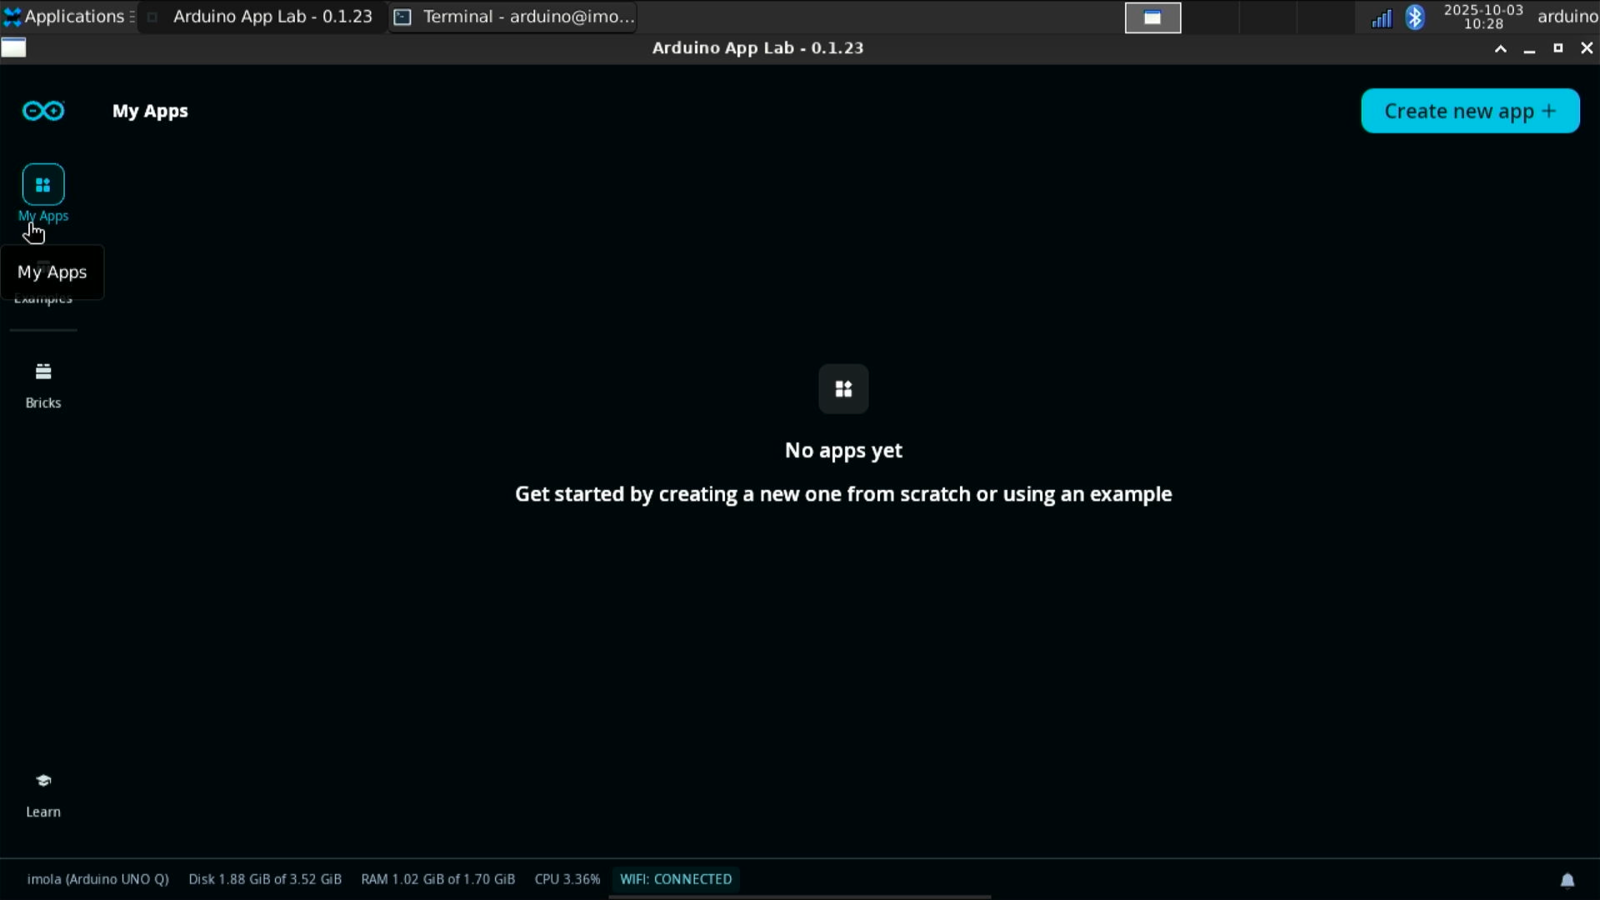 Give the application a name, and change the emoji if you’d like.
Inside the application, click on the left menu to add the bricks mentioned earlier (`video_object_detection` and `web_ui`).
Give the application a name, and change the emoji if you’d like.
Inside the application, click on the left menu to add the bricks mentioned earlier (`video_object_detection` and `web_ui`).
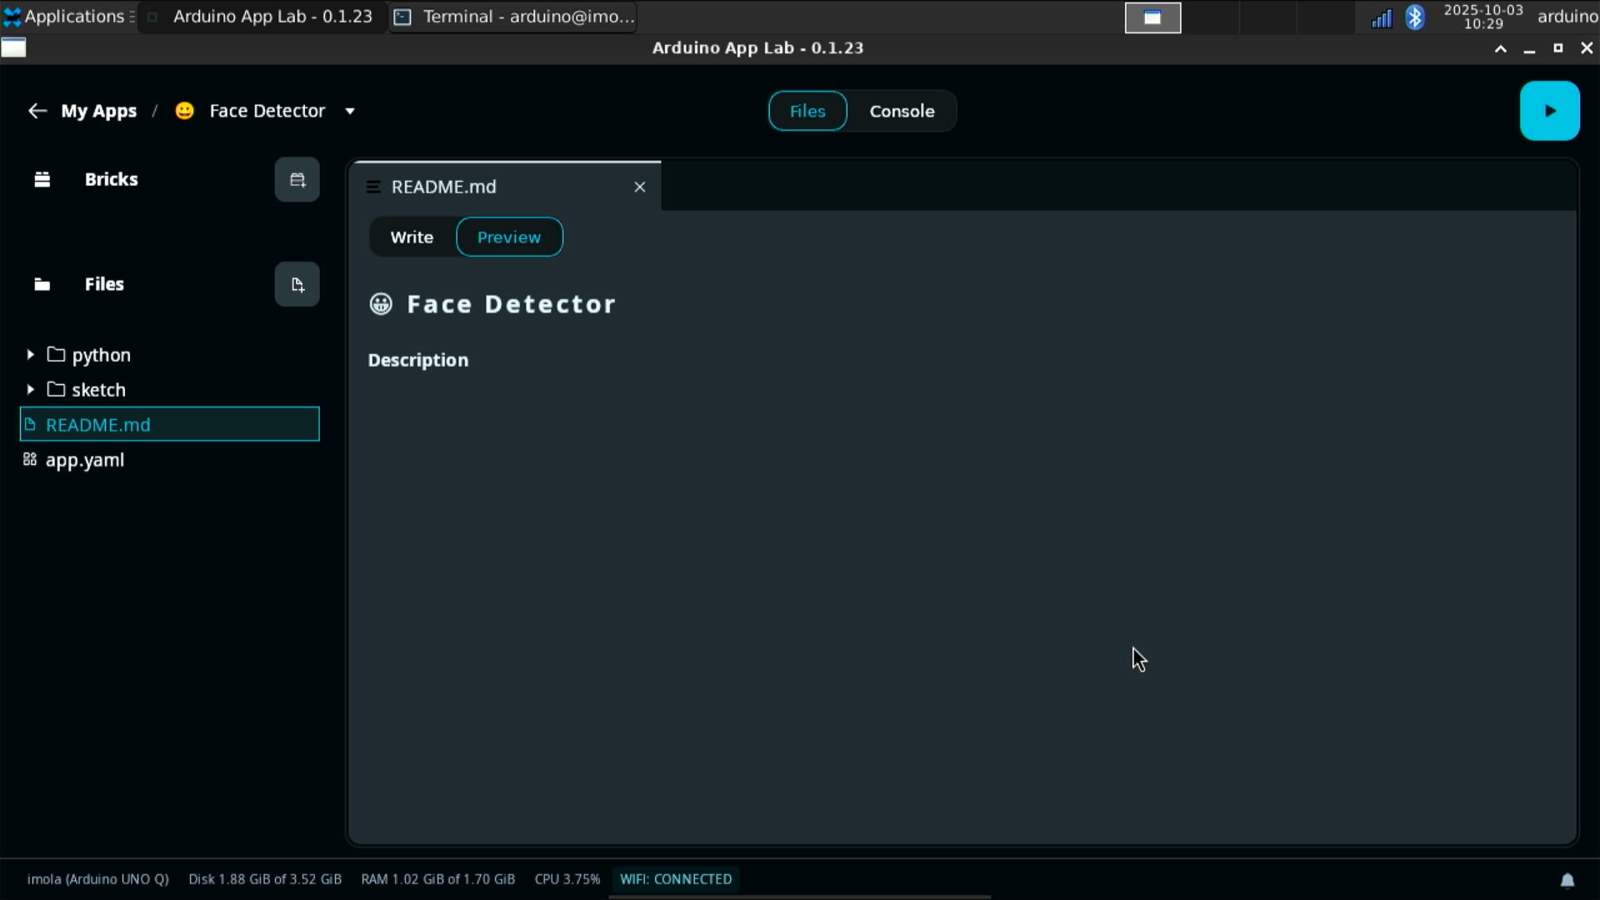 After you create the application, we will perform the rest of the steps over SSH, as some of the source code is not yet available in the Arduino App Lab GUI as of version `0.1.23`.
### Copying the impulse
Next, you will need the `.eim` file generated by Edge Impulse Studio for `Linux aarch64`. You can either download the Edge Impulse model using the [Edge Impulse Linux CLI](/tools/clis/edge-impulse-linux-cli) tools.
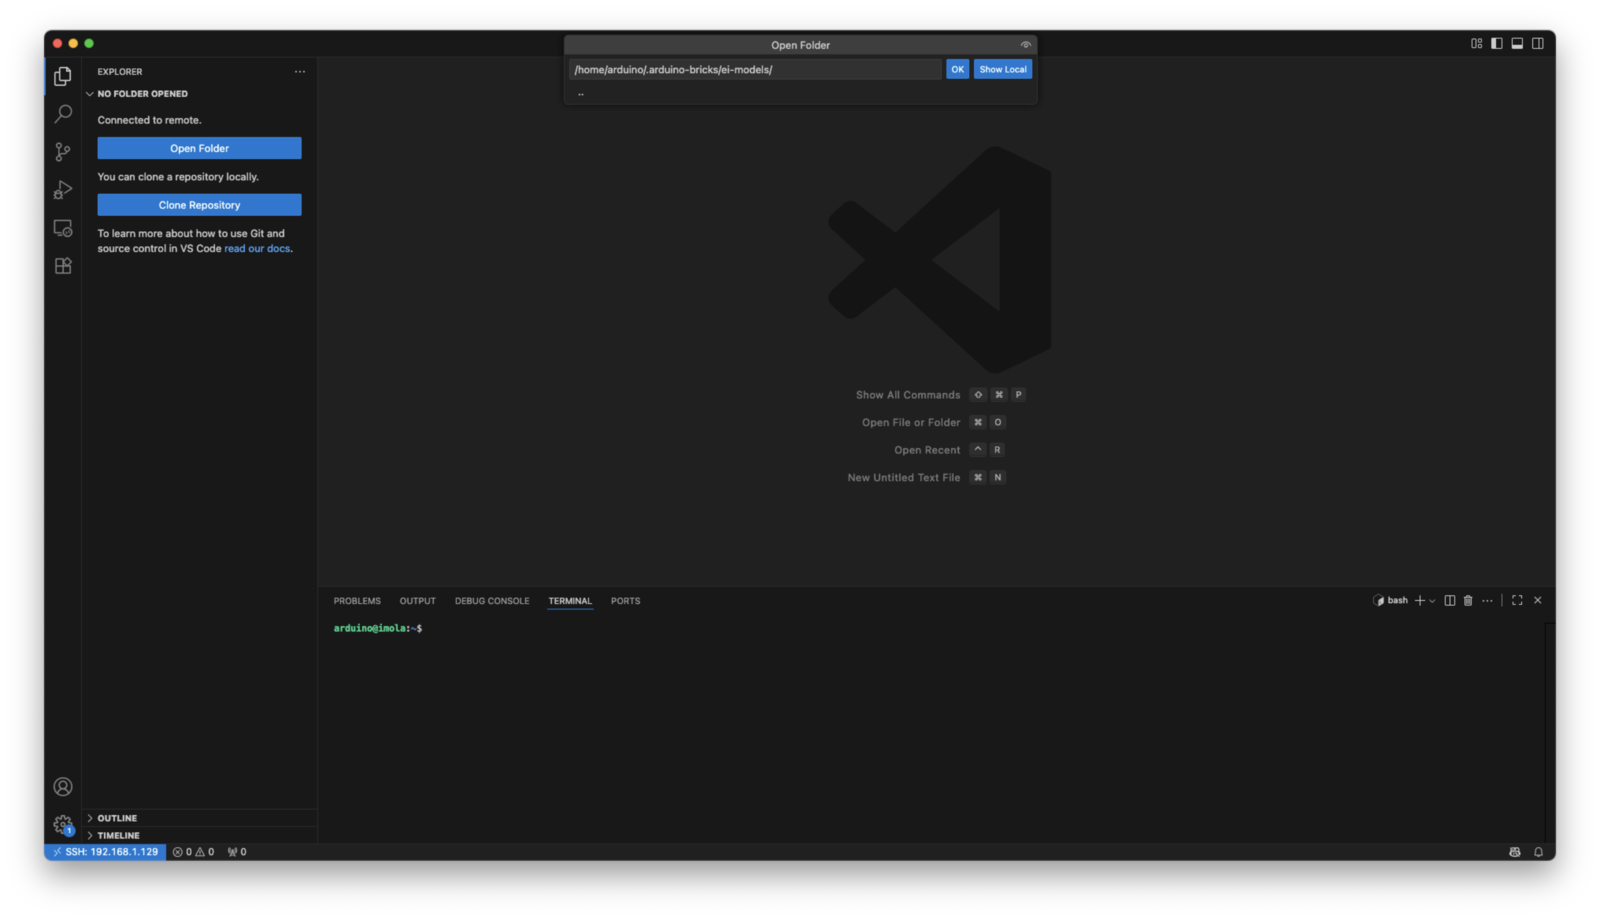
You can manually copy the `.eim` file to the following folder of the UNO Q or use VS Code (see below):
```
/home/arduino/.arduino-bricks/ei-models/
```
Placing your model here ensures the `video_object_detection` brick will use it for inference, instead of the default pre-trained model.
#### Using VS Code
To copy the file from your local computer to the UNO Q using the VS Code, follow these instructions:
* Connect to your UNO Q via SSH using the `Remote SSH` extension
* Open the target folder
* Drag and drop the `.eim` file from your local computer into that folder
After you create the application, we will perform the rest of the steps over SSH, as some of the source code is not yet available in the Arduino App Lab GUI as of version `0.1.23`.
### Copying the impulse
Next, you will need the `.eim` file generated by Edge Impulse Studio for `Linux aarch64`. You can either download the Edge Impulse model using the [Edge Impulse Linux CLI](/tools/clis/edge-impulse-linux-cli) tools.
You can manually copy the `.eim` file to the following folder of the UNO Q or use VS Code (see below):
```
/home/arduino/.arduino-bricks/ei-models/
```
Placing your model here ensures the `video_object_detection` brick will use it for inference, instead of the default pre-trained model.
#### Using VS Code
To copy the file from your local computer to the UNO Q using the VS Code, follow these instructions:
* Connect to your UNO Q via SSH using the `Remote SSH` extension
* Open the target folder
* Drag and drop the `.eim` file from your local computer into that folder
 ### Building the application
Go to your application in the folder:
```
/home/arduino/ArduinoApps/
```
Edit the `app.yaml` file from SSH using this new variable for the `video_object_detection` brick.
```
name: Faces Detector
description: "Faces Detector by Edge Impulse"
ports: []
bricks:
- arduino:video_object_detection: {
variables: {
EI_OBJ_DETECTION_MODEL: /home/arduino/.arduino-bricks/ei-models/.eim
}
}
- arduino:web_ui: {}
icon: 😀
```
In this case, you need to edit the `EI_OBJ_DETECTION_MODEL` variable. You can update models for other bricks or use cases using these variables:
```
EI_AUDIO_CLASSIFICATION_MODEL
EI_CLASSIFICATION_MODEL
EI_KEYWORD_SPOTTING_MODEL
EI_MOTION_DETECTION_MODEL
EI_OBJ_DETECTION_MODEL
EI_V_ANOMALY_DETECTION_MODEL
```
#### Copying additional assets
After you have saved your changes, follow the instructions below to copy the assets and webUI files from the example to your application and copy the main Python script.
```
cd ~/.local/share/arduino-app-cli/examples/video-generic-object-detection
cp -r assets/* /home/arduino/ArduinoApps/
cp python/main.py /home/arduino/ArduinoApps//python/
```
The application is now functionally identical to the `Detect objects on Camera` example that we used before, except it uses your own custom model trained with Edge Impulse Studio.
### Running the application
To run the application, type:
```
cd /home/arduino/ArduinoApps/
python3 main.py
```
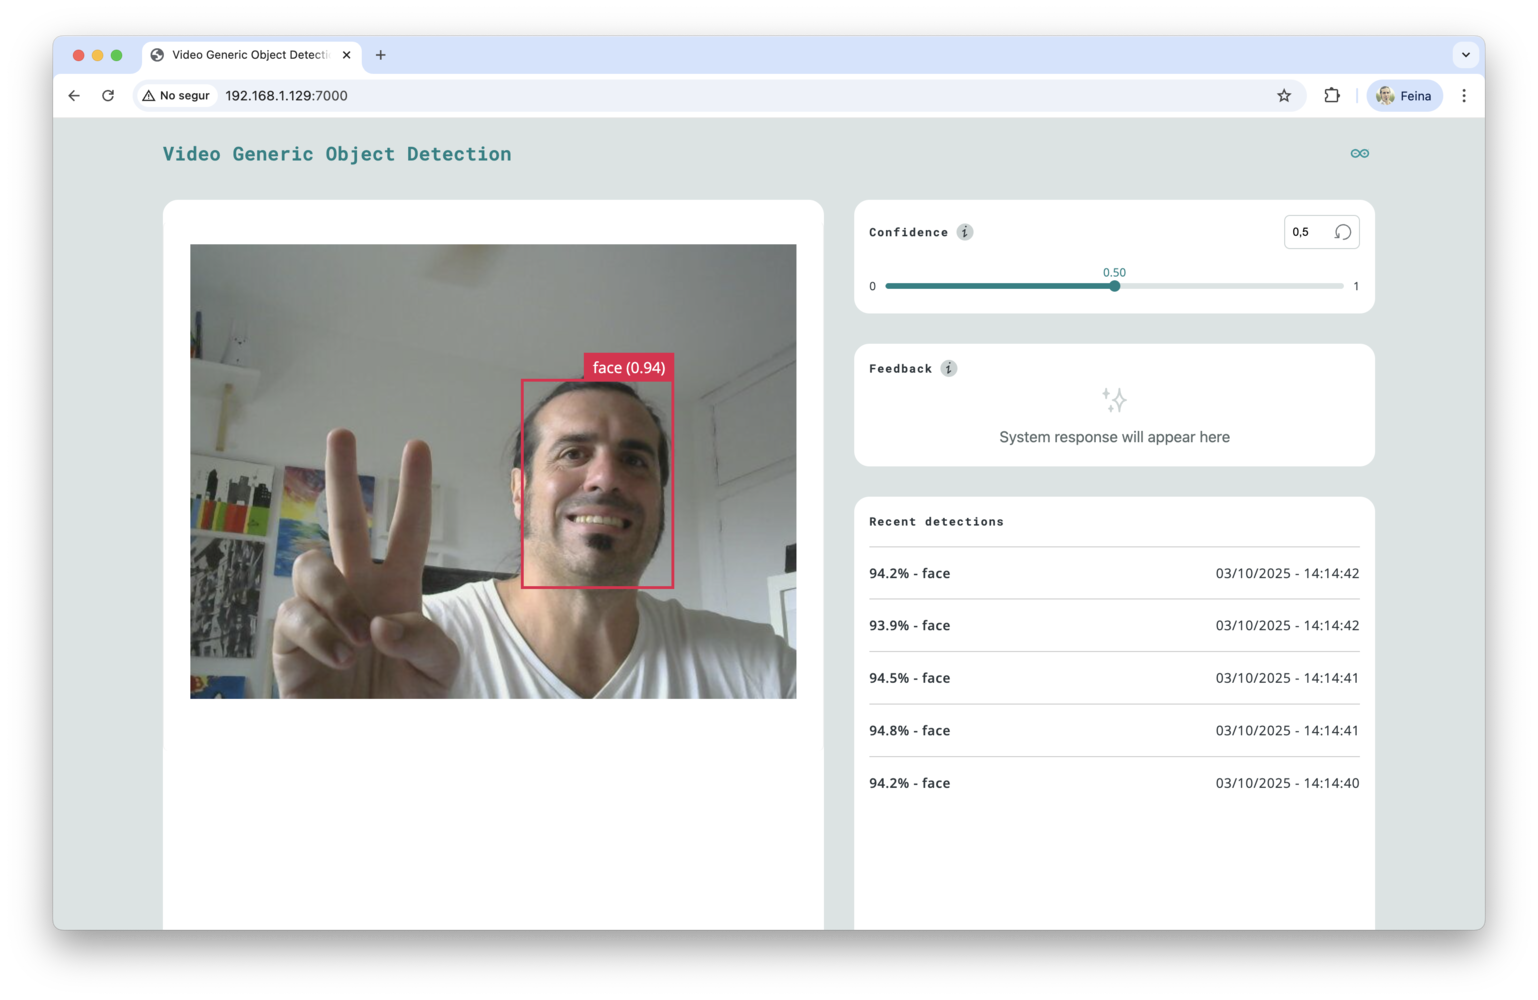
Deploy the application and open a browser and access the local IP address (or localhost in the UNO Q) with port 7000 to see the application. Now you will see the custom model detecting faces instead of generic objects.
### Building the application
Go to your application in the folder:
```
/home/arduino/ArduinoApps/
```
Edit the `app.yaml` file from SSH using this new variable for the `video_object_detection` brick.
```
name: Faces Detector
description: "Faces Detector by Edge Impulse"
ports: []
bricks:
- arduino:video_object_detection: {
variables: {
EI_OBJ_DETECTION_MODEL: /home/arduino/.arduino-bricks/ei-models/.eim
}
}
- arduino:web_ui: {}
icon: 😀
```
In this case, you need to edit the `EI_OBJ_DETECTION_MODEL` variable. You can update models for other bricks or use cases using these variables:
```
EI_AUDIO_CLASSIFICATION_MODEL
EI_CLASSIFICATION_MODEL
EI_KEYWORD_SPOTTING_MODEL
EI_MOTION_DETECTION_MODEL
EI_OBJ_DETECTION_MODEL
EI_V_ANOMALY_DETECTION_MODEL
```
#### Copying additional assets
After you have saved your changes, follow the instructions below to copy the assets and webUI files from the example to your application and copy the main Python script.
```
cd ~/.local/share/arduino-app-cli/examples/video-generic-object-detection
cp -r assets/* /home/arduino/ArduinoApps/
cp python/main.py /home/arduino/ArduinoApps//python/
```
The application is now functionally identical to the `Detect objects on Camera` example that we used before, except it uses your own custom model trained with Edge Impulse Studio.
### Running the application
To run the application, type:
```
cd /home/arduino/ArduinoApps/
python3 main.py
```
Deploy the application and open a browser and access the local IP address (or localhost in the UNO Q) with port 7000 to see the application. Now you will see the custom model detecting faces instead of generic objects.
 Feel free to create your own Arduino App Lab application and share your feedback with us in the [Edge Impulse forum](https://forum.edgeimpulse.com).