> ## Documentation Index
> Fetch the complete documentation index at: https://docs.edgeimpulse.com/llms.txt
> Use this file to discover all available pages before exploring further.
# STMicroelectronics STM32N6570-DK
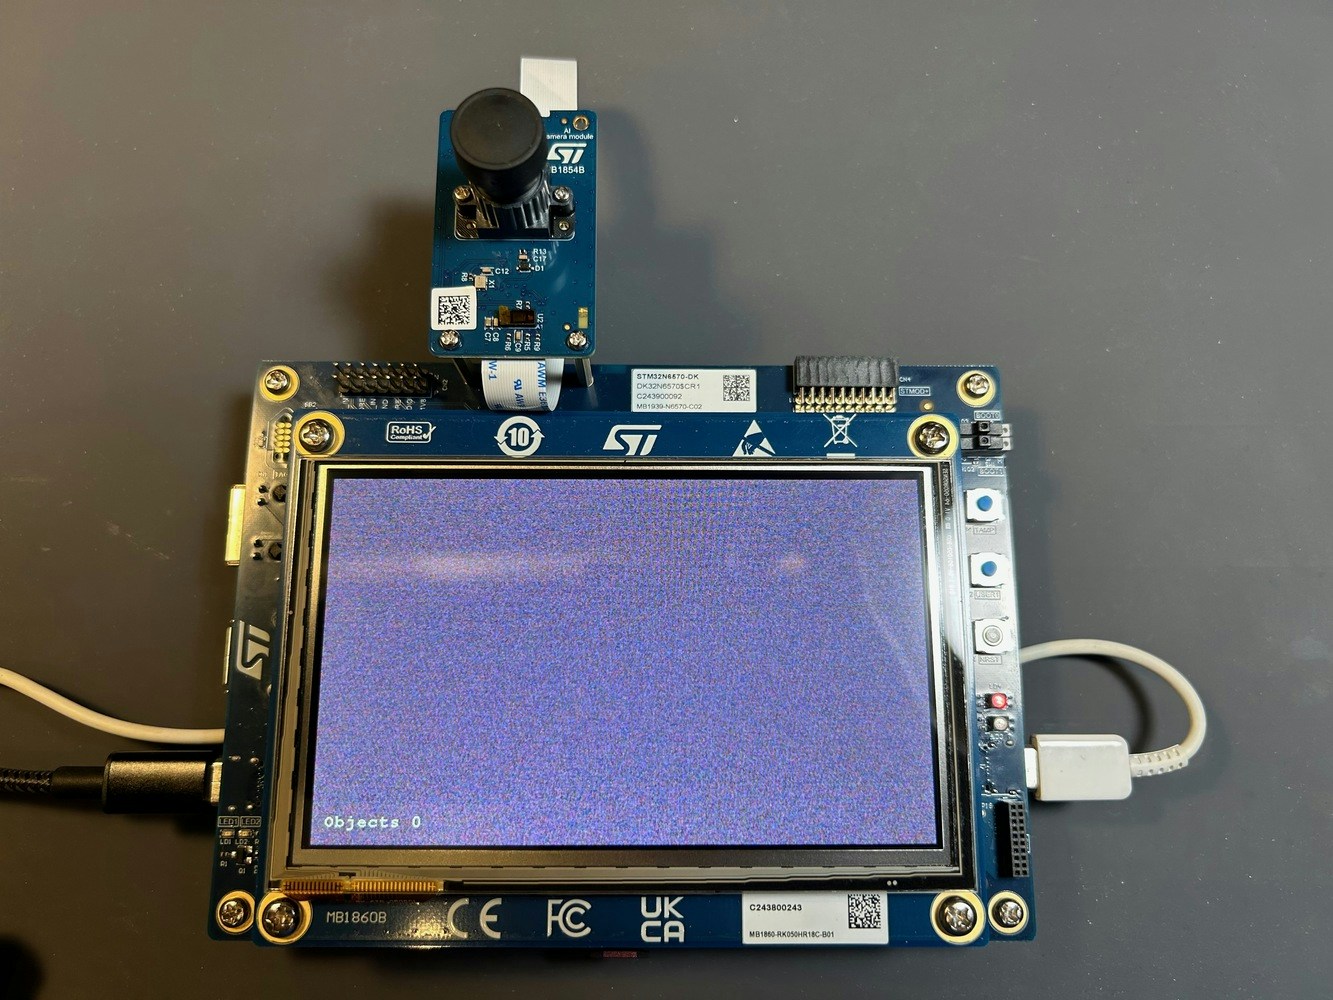
The STM32N6570-DK Discovery kit is a development board with the STM32N657X0H3Q Arm® Cortex®‑M55‑based microcontroller featuring ST Neural-ART Accelerator, H264 encoder, NeoChrom 2.5D GPU and 4.2 MB of contiguous SRAM. The kit also includes a camera and microphone with extensions to support other sensors. The kit is fully supported by Edge Impulse. You'll be able to sample raw data, build models, and deploy trained machine learning models directly from the studio.
 ### Installing dependencies
To set this device up in Edge Impulse, you will need to install the following software:
1. [Edge Impulse CLI](/tools/clis/edge-impulse-cli/installation).
2. [STM32 Cube Programmer](https://www.st.com/en/development-tools/stm32cubeprog.html). The firmware provided by Edge Impulse uses the CLI abilities of this program. Please add the program's location to your PATH using your operating system instructions.
#### 1. Connect the development board to your computer
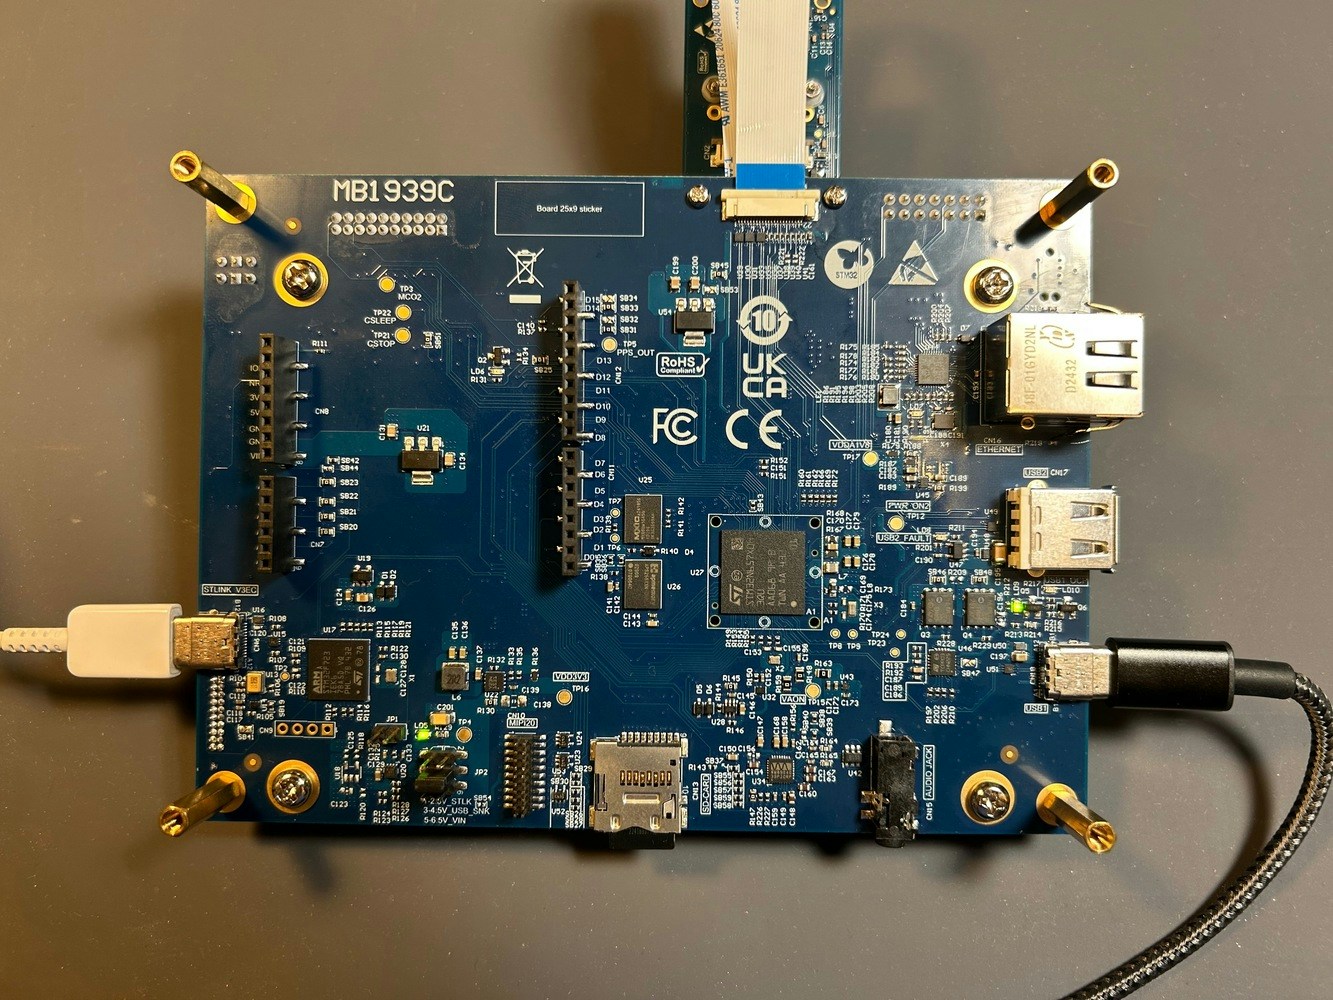
Use a USB-C cable to connect the development board to your computer to the USB-C connector `CN6` marked with `STLINK-V3EC`. Depending on your connection you may need additional power which can be added via the USB-C connection `CN8` marked `USB1`.
* If you are powering the board with just `CN6` then place jumper `JP2` on the 2 pins on the top (`1-2:5V_STLK`).
* If you are powering the board with `CN6` and `CN8` then place jumper `JP2` on the 2 pins in the middle (`3-4:5V_USB_STLK`).
### Installing dependencies
To set this device up in Edge Impulse, you will need to install the following software:
1. [Edge Impulse CLI](/tools/clis/edge-impulse-cli/installation).
2. [STM32 Cube Programmer](https://www.st.com/en/development-tools/stm32cubeprog.html). The firmware provided by Edge Impulse uses the CLI abilities of this program. Please add the program's location to your PATH using your operating system instructions.
#### 1. Connect the development board to your computer
Use a USB-C cable to connect the development board to your computer to the USB-C connector `CN6` marked with `STLINK-V3EC`. Depending on your connection you may need additional power which can be added via the USB-C connection `CN8` marked `USB1`.
* If you are powering the board with just `CN6` then place jumper `JP2` on the 2 pins on the top (`1-2:5V_STLK`).
* If you are powering the board with `CN6` and `CN8` then place jumper `JP2` on the 2 pins in the middle (`3-4:5V_USB_STLK`).
 #### 2. Update ST-LINK firmware
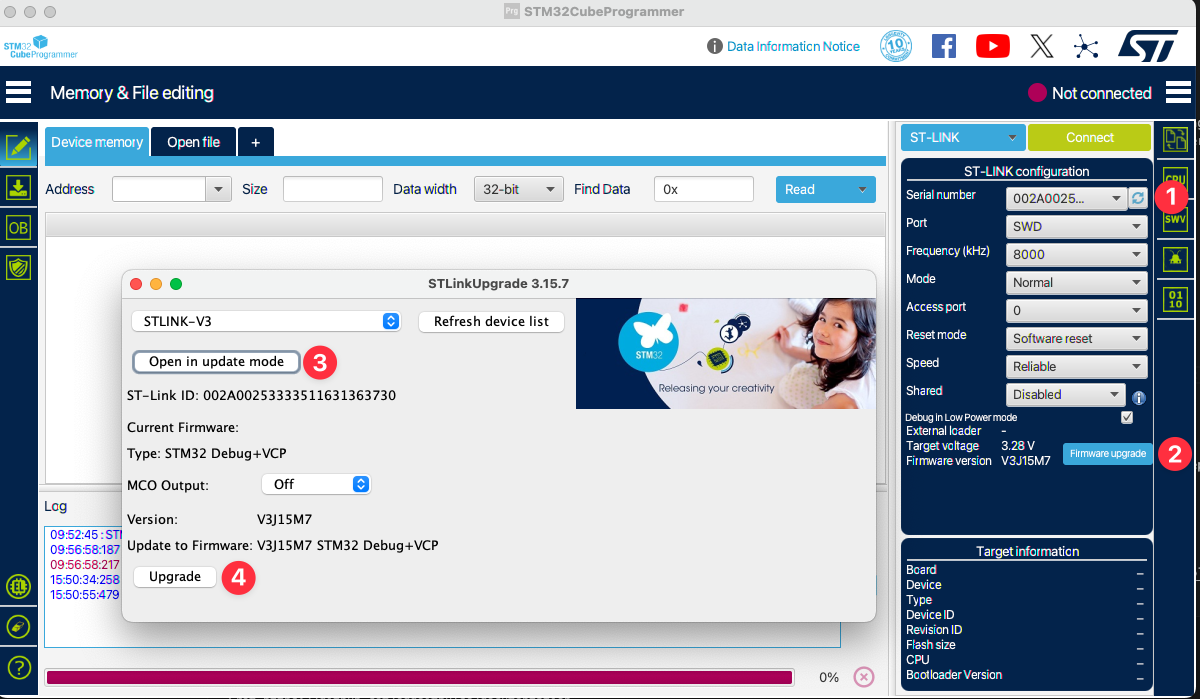
If you have a new kit you may need to update the firmware of the onboard ST-LINK. Open the STM32 Cube Programmer application and follow the instructions found here on the [ST website](https://www.st.com/en/development-tools/stsw-link007.html). Typically, you only need to click a few buttons to easily update the firmware on the ST-LINK device.
#### 2. Update ST-LINK firmware
If you have a new kit you may need to update the firmware of the onboard ST-LINK. Open the STM32 Cube Programmer application and follow the instructions found here on the [ST website](https://www.st.com/en/development-tools/stsw-link007.html). Typically, you only need to click a few buttons to easily update the firmware on the ST-LINK device.
 #### 3. Update the prebuilt firmware binaries
Three binaries must be programmed in the board external flash using the following procedure:
1. Download the default Edge Impulse firmware, model, and bootloader [here](https://cdn.edgeimpulse.com/firmware/st-stm32n6.zip). See the Readme and the scripts for the appropriate commands to flash the three files.
2. Switch `BOOT1` on the board switch to right position and reset the board using button `B1` labeled `NRST`
3. Program `ai_fsbl_cut_2_0.hex` (First stage bootloader)
```
LINUX
./flash.sh bootloader
MACOS
./flash.command bootloader
WINDOWS
flash.bat bootloader
```
4. Program `network_data.hex` (params of the networks; To be changed only when the network is changed)
```
LINUX
./flash.sh weights
MACOS
./flash.command weights
WINDOWS
flash.bat weights
```
5. Program `firmware-st-stm32n6.bin` (firmware application)
```
LINUX
./flash.sh firmware
MACOS
./flash.command firmware
WINDOWS
flash.bat firmware
```
6. Switch `BOOT1` on the board to left position and reset the board using button `B1` labeled `NRST`
When deploying a new binary both the `network_data.hex` and the `firmware-st-stm32n6.bin` need to be flashed. The bootloader only needs to be programmed once.
Please visit the [STM32N6 Series site](https://www.st.com/en/microcontrollers-microprocessors/stm32n6-series.html) for further programming information
#### 4. Connecting CLI to Development Kit
To start acquiring data from the device open a command prompt or terminal, run:
```
edge-impulse-daemon
```
This will start a wizard which will ask you to log in, choose an Edge Impulse project, and establish communication between your development kit and the Edge Impulse project chosen. If you want to switch projects run the command with `--clean`.
Only Object Detection projects using FOMO or YOLOV5 are supported with the N6 on Edge Impulse.
To start inferencing with a model on this device you need to complete an Edge Impulse project and download the binary from the project and flash using the above steps. Once flashed you may use the command:
```
edge-impulse-run-impulse
```
#### 5. Verifying that the device is connected
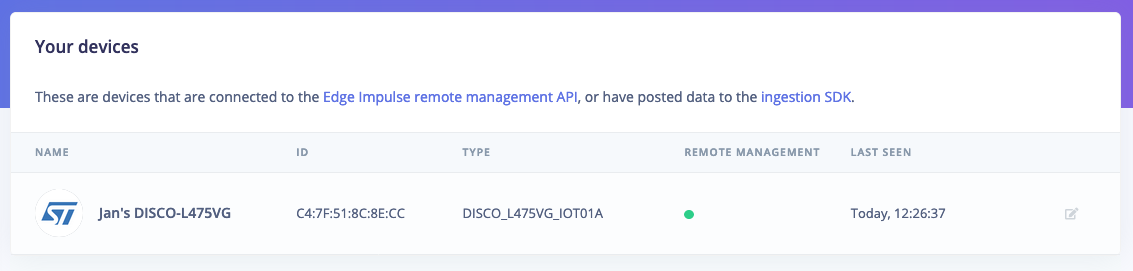
That's all! Your device is now connected to Edge Impulse. To verify this, go to [your Edge Impulse project](https://studio.edgeimpulse.com/studio/profile/projects), and click **Devices**. The device will be listed here.
#### 3. Update the prebuilt firmware binaries
Three binaries must be programmed in the board external flash using the following procedure:
1. Download the default Edge Impulse firmware, model, and bootloader [here](https://cdn.edgeimpulse.com/firmware/st-stm32n6.zip). See the Readme and the scripts for the appropriate commands to flash the three files.
2. Switch `BOOT1` on the board switch to right position and reset the board using button `B1` labeled `NRST`
3. Program `ai_fsbl_cut_2_0.hex` (First stage bootloader)
```
LINUX
./flash.sh bootloader
MACOS
./flash.command bootloader
WINDOWS
flash.bat bootloader
```
4. Program `network_data.hex` (params of the networks; To be changed only when the network is changed)
```
LINUX
./flash.sh weights
MACOS
./flash.command weights
WINDOWS
flash.bat weights
```
5. Program `firmware-st-stm32n6.bin` (firmware application)
```
LINUX
./flash.sh firmware
MACOS
./flash.command firmware
WINDOWS
flash.bat firmware
```
6. Switch `BOOT1` on the board to left position and reset the board using button `B1` labeled `NRST`
When deploying a new binary both the `network_data.hex` and the `firmware-st-stm32n6.bin` need to be flashed. The bootloader only needs to be programmed once.
Please visit the [STM32N6 Series site](https://www.st.com/en/microcontrollers-microprocessors/stm32n6-series.html) for further programming information
#### 4. Connecting CLI to Development Kit
To start acquiring data from the device open a command prompt or terminal, run:
```
edge-impulse-daemon
```
This will start a wizard which will ask you to log in, choose an Edge Impulse project, and establish communication between your development kit and the Edge Impulse project chosen. If you want to switch projects run the command with `--clean`.
Only Object Detection projects using FOMO or YOLOV5 are supported with the N6 on Edge Impulse.
To start inferencing with a model on this device you need to complete an Edge Impulse project and download the binary from the project and flash using the above steps. Once flashed you may use the command:
```
edge-impulse-run-impulse
```
#### 5. Verifying that the device is connected
That's all! Your device is now connected to Edge Impulse. To verify this, go to [your Edge Impulse project](https://studio.edgeimpulse.com/studio/profile/projects), and click **Devices**. The device will be listed here.
 ### Next steps: building a machine learning model
With everything set up you can now build your first machine learning model with these tutorials:
* [Object Detection End-to-End Tutorial](/tutorials/end-to-end/object-detection-bounding-boxes)
* [Object detection with centroids (FOMO)](/tutorials/end-to-end/object-detection-centroids)
### Deploying back to device
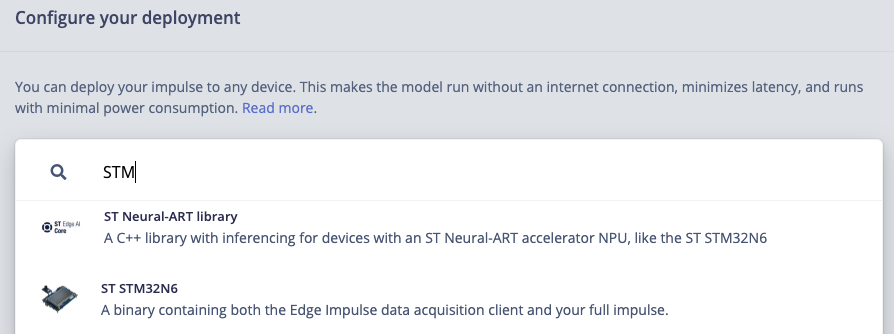
There are two deployment options available for the STM32N6. If you are using the dev kit with the default connections you may get a fully built binary for your kit using the `ST STM32N6` option. If you are wanting to work with source code and use on your own device please select the `ST Neural-ART` library deployment option. The `ST Neural-ART` option will generate source code that will use the ST accelerator found on the N6 series.
### Next steps: building a machine learning model
With everything set up you can now build your first machine learning model with these tutorials:
* [Object Detection End-to-End Tutorial](/tutorials/end-to-end/object-detection-bounding-boxes)
* [Object detection with centroids (FOMO)](/tutorials/end-to-end/object-detection-centroids)
### Deploying back to device
There are two deployment options available for the STM32N6. If you are using the dev kit with the default connections you may get a fully built binary for your kit using the `ST STM32N6` option. If you are wanting to work with source code and use on your own device please select the `ST Neural-ART` library deployment option. The `ST Neural-ART` option will generate source code that will use the ST accelerator found on the N6 series.
 ### Troubleshooting
#### Common Error Codes and Resolution Steps
**Errors during flashing:**
```
Error: Cannot connect to access port 1!
If you are trying to connect to a device with TrustZone enabled please try to connect with HotPlug mode.
If you are trying to connect to a device which supports Debug Authentication with certificate or password, please open your device using it.
```
also
```
Error: failed to erase memory
```
* Fully remove power from the board and then reconnect power to the board. Do not rely on the reset button to clear this error.
* USB C Cables: Inspect USB cables and swap with ones that have both power and data lines. Attempt again with certified USB cables.
### Troubleshooting
#### Common Error Codes and Resolution Steps
**Errors during flashing:**
```
Error: Cannot connect to access port 1!
If you are trying to connect to a device with TrustZone enabled please try to connect with HotPlug mode.
If you are trying to connect to a device which supports Debug Authentication with certificate or password, please open your device using it.
```
also
```
Error: failed to erase memory
```
* Fully remove power from the board and then reconnect power to the board. Do not rely on the reset button to clear this error.
* USB C Cables: Inspect USB cables and swap with ones that have both power and data lines. Attempt again with certified USB cables.