> ## Documentation Index
> Fetch the complete documentation index at: https://docs.edgeimpulse.com/llms.txt
> Use this file to discover all available pages before exploring further.
# Raspberry Pi Pico
# Raspberry Pi RP2040
The [Raspberry Pi RP2040](https://www.raspberrypi.com/products/rp2040/) is the debut microcontroller from Raspberry Pi - and it's fully supported by Edge Impulse. You'll be able to sample raw data, build models, and deploy trained machine learning models directly from the studio. It's available for around \$4 from Raspberry Pi foundation and a wide range of distributors.
# Raspberry Pi RP2350
The second generation of Raspberry Pi microcontroller is out: [Raspberry Pi RP2350](https://www.raspberrypi.com/products/rp2350/). Including a dual Cortex M33 (running @ 150MHz) with a hardware single precision floating point unit. Architecture switching allows the RP2350 to switch to a dual core RISC-V architecture. For this integration we focused on the Cortex M33.
# Get started
To get started with the Raspberry Pi Pico and Edge Impulse you'll need:
* A [Raspberry Pi RP2040 or RP2350 microcontroller](https://www.raspberrypi.com/products/). The pre-built firmware and Edge Impulse Studio exported binary are tailored for [Raspberry Pi Pico](https://www.raspberrypi.com/products/raspberry-pi-pico/), but with a few simple steps you can collect the data and run your models with other RP2040-based boards, such as [Arduino Nano RP2040 Connect](https://docs.arduino.cc/hardware/nano-rp2040-connect/). For more details, check out ["Using with other Pico boards"](/hardware/boards/raspberry-pi-pico#using-with-other-rp2040-boards).
* (Optional) If you are using the [Raspberry Pi Pico](https://www.raspberrypi.com/products/raspberry-pi-pico/), the [Grove Shield for Pi Pico](https://wiki.seeedstudio.com/Grove-Starter-Kit-for-Raspberry-Pi-Pico/) makes it easier to connect external sensors for data collection/inference.
The Edge Impulse firmware for this development board is open source and hosted on GitHub: [edgeimpulse/firmware-pi-rp2xxx](https://github.com/edgeimpulse/firmware-pi-rp2xxx).
 ### Installing dependencies
To set this device up in Edge Impulse, you will need to install the following software:
1. [Edge Impulse CLI](/tools/clis/edge-impulse-cli/installation).
2. If you'd like to interact with the board using a set of pre-defined AT commands (not necessary for standard ML workflow), you will need to also install a serial communication program, for example `minicom`, `picocom` or use Serial Monitor from Arduino IDE (if installed).
3. On Linux:
* GNU Screen: install for example via `sudo apt install screen`.
**Problems installing the CLI?**
See the [Installation and troubleshooting](/tools/clis/edge-impulse-cli/installation) guide.
### Connecting to Edge Impulse
With all the software in place, it's time to connect the development board to Edge Impulse.
#### 1. Connect the development board to your computer
Use a micro-USB cable to connect the development board to your computer while holding down the BOOTSEL button, forcing the Raspberry Pi Pico into USB Mass Storage Mode.
### Installing dependencies
To set this device up in Edge Impulse, you will need to install the following software:
1. [Edge Impulse CLI](/tools/clis/edge-impulse-cli/installation).
2. If you'd like to interact with the board using a set of pre-defined AT commands (not necessary for standard ML workflow), you will need to also install a serial communication program, for example `minicom`, `picocom` or use Serial Monitor from Arduino IDE (if installed).
3. On Linux:
* GNU Screen: install for example via `sudo apt install screen`.
**Problems installing the CLI?**
See the [Installation and troubleshooting](/tools/clis/edge-impulse-cli/installation) guide.
### Connecting to Edge Impulse
With all the software in place, it's time to connect the development board to Edge Impulse.
#### 1. Connect the development board to your computer
Use a micro-USB cable to connect the development board to your computer while holding down the BOOTSEL button, forcing the Raspberry Pi Pico into USB Mass Storage Mode.
 #### 2. Update the firmware
The development board does not come with the right firmware yet. To update the firmware:
1. Download the latest Edge Impulse firmware:
* [Pi Pico (RP2040)](https://cdn.edgeimpulse.com/firmware/raspberry-rp2040.zip)
* [Pi Pico 2 (RP2350)](https://cdn.edgeimpulse.com/firmware/raspberry-rp2350.zip) (this zip folder contains the WiFi version as well)
2. Drag the `ei_rp2040_firmware.uf2` / `ei_rp2350_firmware.uf2` file from the folder to the USB Mass Storage device.
3. Wait until flashing is complete, unplug and replug in your board to launch the new firmware.
#### 3. Setting keys
From a command prompt or terminal, run:
```
edge-impulse-daemon
```
This will start a wizard which will ask you to log in, and choose an Edge Impulse project. If you want to switch projects run the command with `--clean`.
Alternatively, recent versions of Google Chrome and Microsoft Edge can collect data directly from your development board, without the need for the Edge Impulse CLI. See [this blog post](https://edgeimpulse.com/blog/collect-sensor-data-straight-from-your-web-browser) for more information.
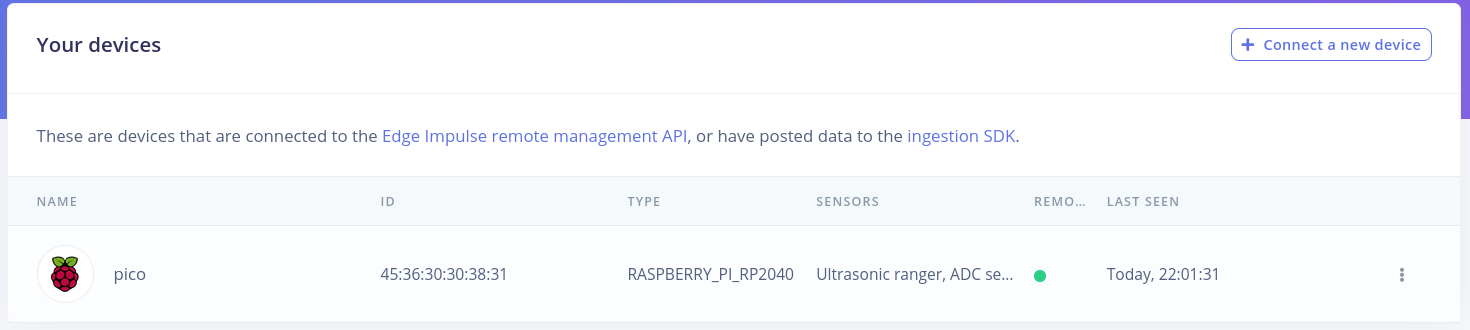
#### 4. Verifying that the device is connected
That's all! Your device is now connected to Edge Impulse. To verify this, go to [your Edge Impulse project](https://studio.edgeimpulse.com/studio/profile/projects), and click **Devices**. The device will be listed here.
#### 2. Update the firmware
The development board does not come with the right firmware yet. To update the firmware:
1. Download the latest Edge Impulse firmware:
* [Pi Pico (RP2040)](https://cdn.edgeimpulse.com/firmware/raspberry-rp2040.zip)
* [Pi Pico 2 (RP2350)](https://cdn.edgeimpulse.com/firmware/raspberry-rp2350.zip) (this zip folder contains the WiFi version as well)
2. Drag the `ei_rp2040_firmware.uf2` / `ei_rp2350_firmware.uf2` file from the folder to the USB Mass Storage device.
3. Wait until flashing is complete, unplug and replug in your board to launch the new firmware.
#### 3. Setting keys
From a command prompt or terminal, run:
```
edge-impulse-daemon
```
This will start a wizard which will ask you to log in, and choose an Edge Impulse project. If you want to switch projects run the command with `--clean`.
Alternatively, recent versions of Google Chrome and Microsoft Edge can collect data directly from your development board, without the need for the Edge Impulse CLI. See [this blog post](https://edgeimpulse.com/blog/collect-sensor-data-straight-from-your-web-browser) for more information.
#### 4. Verifying that the device is connected
That's all! Your device is now connected to Edge Impulse. To verify this, go to [your Edge Impulse project](https://studio.edgeimpulse.com/studio/profile/projects), and click **Devices**. The device will be listed here.
 ### Next steps: building a machine learning model
With everything set up you can now build your first machine learning model. Since Raspberry Pi Pico does not have any built-in sensors, we decided to add the following ones to be supported out of the box, with a pre-built firmware:
* [Grove Ultrasonic Ranger](https://wiki.seeedstudio.com/Grove-Ultrasonic_Ranger/) (GP16; pin D16 on Grove Shield for Pi Pico).
* [DHT11 Temperature & Humidity sensor](https://wiki.seeedstudio.com/Grove-TemperatureAndHumidity_Sensor/) (GP18; pin D18 on Grove Shield for Pi Pico).
* [LSM6DS3 Accelerometer & Gyroscope](https://wiki.seeedstudio.com/Grove-6-Axis_AccelerometerAndGyroscope/) (I2C0).
* [Analog Devices ADXL345 Accelerometer](https://www.seeedstudio.com/Grove-3-Axis-Digital-Accelerometer-16g.html) (I2C1).
* Analog signal sensor (pin A0).
There is a vast variety of analog signal sensors, that can take advantage of RP2040 10-bit ADC (Analog to Digital Converter), from common ones, such as Light sensor, Sound level sensor to more specialized ones, e.g. [Carbon Dioxide sensor](https://wiki.seeedstudio.com/Grove-Gas_Sensor-MQ9/), [Natural Gas sensor](https://wiki.seeedstudio.com/Grove-Gas_Sensor-MQ5/) or even an [EMG Detector](https://wiki.seeedstudio.com/Grove-EMG_Detector/).
Once you have the compatible sensors, you can then follow these tutorials:
* [Building a continuous motion recognition system](/tutorials/end-to-end/motion-recognition).
* [Building a sensor fusion model](/tutorials/end-to-end/environmental-sensor-fusion).
* [Recognizing sounds from audio](/tutorials/end-to-end/sound-recognition).
* [Keyword spotting](/tutorials/end-to-end/keyword-spotting).
Support for Arduino RP2040 Connect was added to the official RP2040 firmware for Edge Impulse. That includes data acquisition and model inference support for:
* onboard MP34DT05 microphone
* onboard ST LSM6DSOX 6-axis IMU
* the sensors described above still can be connected
Looking to connect different sensors? The [Data forwarder](/tools/clis/edge-impulse-cli/data-forwarder) lets you easily send data from any sensor into Edge Impulse.
### Using with other RP2040 boards
While RP2040 is a relatively new microcontroller, it was already utilized to build several boards:
* The official Raspberry Pi Pico RP2040
* Arducam Pico4ML (Camera, screen and microphone)
* Seeed Studio XIAO RP2040 (extremely small footprint)
* Black Adafruit Feather RP2040 (built-in LiPoly charger)
And others. While pre-built Edge Impulse firmware is mainly tested with Pico board, it is compatible with other boards, with the exception of I2C sensors and microphone - different boards use different pins for peripherals, so if you’d like to use LSM6DS3/LSM6DSOX accelerometer & gyroscope modules or microphone, you will need to change pin values in Edge Impulse RP2040 firmware source code, recompile it and upload it to the board.
### Next steps: building a machine learning model
With everything set up you can now build your first machine learning model. Since Raspberry Pi Pico does not have any built-in sensors, we decided to add the following ones to be supported out of the box, with a pre-built firmware:
* [Grove Ultrasonic Ranger](https://wiki.seeedstudio.com/Grove-Ultrasonic_Ranger/) (GP16; pin D16 on Grove Shield for Pi Pico).
* [DHT11 Temperature & Humidity sensor](https://wiki.seeedstudio.com/Grove-TemperatureAndHumidity_Sensor/) (GP18; pin D18 on Grove Shield for Pi Pico).
* [LSM6DS3 Accelerometer & Gyroscope](https://wiki.seeedstudio.com/Grove-6-Axis_AccelerometerAndGyroscope/) (I2C0).
* [Analog Devices ADXL345 Accelerometer](https://www.seeedstudio.com/Grove-3-Axis-Digital-Accelerometer-16g.html) (I2C1).
* Analog signal sensor (pin A0).
There is a vast variety of analog signal sensors, that can take advantage of RP2040 10-bit ADC (Analog to Digital Converter), from common ones, such as Light sensor, Sound level sensor to more specialized ones, e.g. [Carbon Dioxide sensor](https://wiki.seeedstudio.com/Grove-Gas_Sensor-MQ9/), [Natural Gas sensor](https://wiki.seeedstudio.com/Grove-Gas_Sensor-MQ5/) or even an [EMG Detector](https://wiki.seeedstudio.com/Grove-EMG_Detector/).
Once you have the compatible sensors, you can then follow these tutorials:
* [Building a continuous motion recognition system](/tutorials/end-to-end/motion-recognition).
* [Building a sensor fusion model](/tutorials/end-to-end/environmental-sensor-fusion).
* [Recognizing sounds from audio](/tutorials/end-to-end/sound-recognition).
* [Keyword spotting](/tutorials/end-to-end/keyword-spotting).
Support for Arduino RP2040 Connect was added to the official RP2040 firmware for Edge Impulse. That includes data acquisition and model inference support for:
* onboard MP34DT05 microphone
* onboard ST LSM6DSOX 6-axis IMU
* the sensors described above still can be connected
Looking to connect different sensors? The [Data forwarder](/tools/clis/edge-impulse-cli/data-forwarder) lets you easily send data from any sensor into Edge Impulse.
### Using with other RP2040 boards
While RP2040 is a relatively new microcontroller, it was already utilized to build several boards:
* The official Raspberry Pi Pico RP2040
* Arducam Pico4ML (Camera, screen and microphone)
* Seeed Studio XIAO RP2040 (extremely small footprint)
* Black Adafruit Feather RP2040 (built-in LiPoly charger)
And others. While pre-built Edge Impulse firmware is mainly tested with Pico board, it is compatible with other boards, with the exception of I2C sensors and microphone - different boards use different pins for peripherals, so if you’d like to use LSM6DS3/LSM6DSOX accelerometer & gyroscope modules or microphone, you will need to change pin values in Edge Impulse RP2040 firmware source code, recompile it and upload it to the board.