> ## Documentation Index
> Fetch the complete documentation index at: https://docs.edgeimpulse.com/llms.txt
> Use this file to discover all available pages before exploring further.
# Arduino Portenta H7
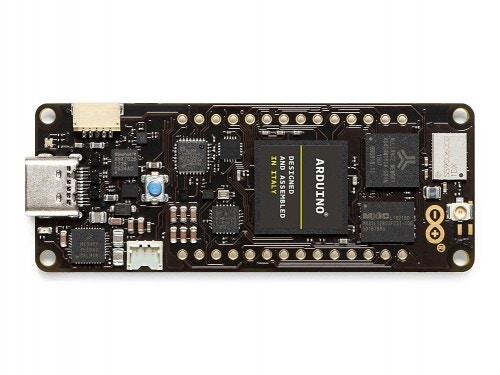
The Portenta H7 is a powerful development board from Arduino with both a Cortex-M7 microcontroller and a Cortex-M4 microcontroller, a BLE/WiFi radio, and an extension slot to connect the Portenta vision shield - which adds a camera and dual microphones. The Portenta H7 and the vision shield are available directly from [Arduino](https://store-usa.arduino.cc/products/portenta-h7?selectedStore=us) for \~\$150 in total.
There are two versions of the vision shield: one that has an Ethernet connection and one with a LoRa radio. Both of these can be used with Edge Impulse.
The Edge Impulse firmware for this development board is open source and hosted on GitHub: [edgeimpulse/firmware-arduino-portenta-h7](https://github.com/edgeimpulse/firmware-arduino-portenta-h7).
 ### Installing dependencies
To set this device up in Edge Impulse, you will need to install the following software:
1. [Edge Impulse CLI](/tools/clis/edge-impulse-cli/installation).
2. [Arduino CLI](https://arduino.github.io/arduino-cli/latest/).
* Here's an [instruction video for Windows](https://youtu.be/1jMWsFER-Bc).
* The [Arduino website](https://arduino.github.io/arduino-cli/installation/) has instructions for macOS and Linux.
3. On Linux:
* GNU Screen: install for example via `sudo apt install screen`.
**Problems installing the CLI?**
See the [Installation and troubleshooting](/tools/clis/edge-impulse-cli/installation) guide.
### Connecting to Edge Impulse
With all the software in place it's time to connect the development board to Edge Impulse.
#### 1. Connect the vision shield
Using the vision shield using two edge connectors on the back Portenta H7.
### Installing dependencies
To set this device up in Edge Impulse, you will need to install the following software:
1. [Edge Impulse CLI](/tools/clis/edge-impulse-cli/installation).
2. [Arduino CLI](https://arduino.github.io/arduino-cli/latest/).
* Here's an [instruction video for Windows](https://youtu.be/1jMWsFER-Bc).
* The [Arduino website](https://arduino.github.io/arduino-cli/installation/) has instructions for macOS and Linux.
3. On Linux:
* GNU Screen: install for example via `sudo apt install screen`.
**Problems installing the CLI?**
See the [Installation and troubleshooting](/tools/clis/edge-impulse-cli/installation) guide.
### Connecting to Edge Impulse
With all the software in place it's time to connect the development board to Edge Impulse.
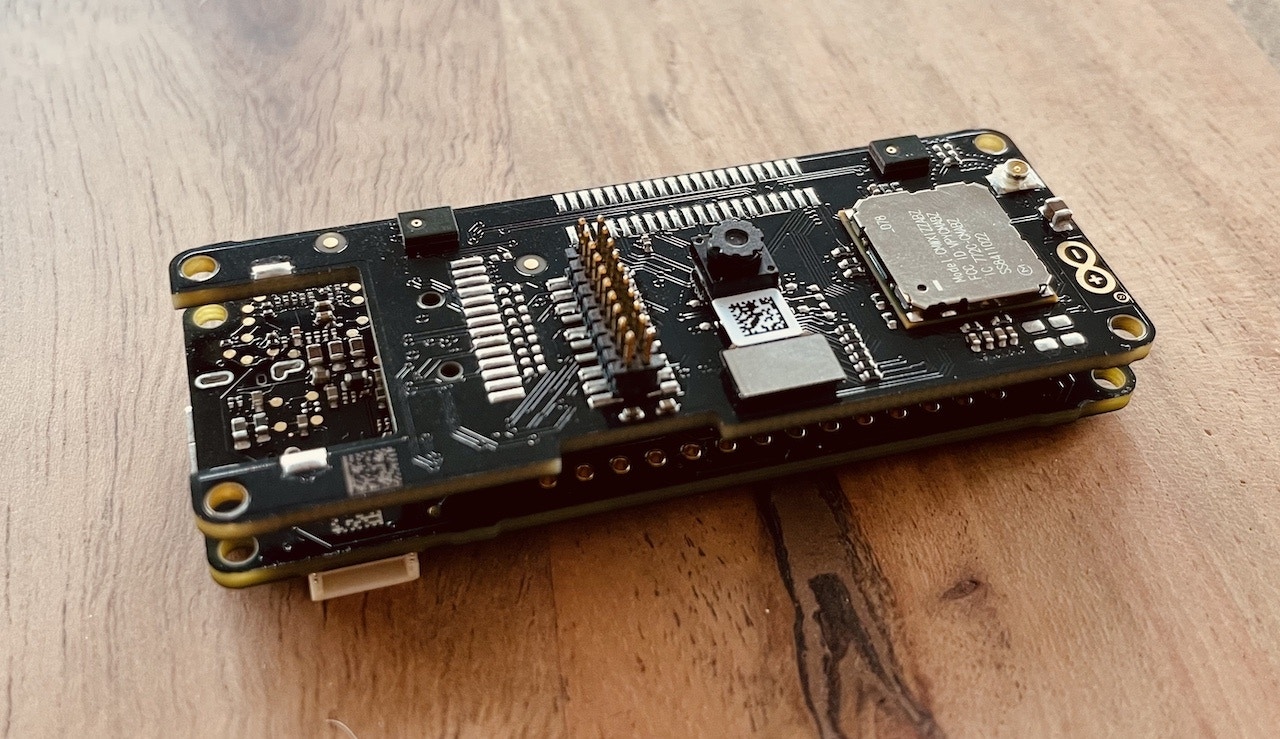
#### 1. Connect the vision shield
Using the vision shield using two edge connectors on the back Portenta H7.
 #### 2. Connect the development board to your computer
Use a USB-C cable to connect the development board to your computer. Then, double-tap the **RESET** button to put the device into bootloader mode. You should see the green LED on the front pulsating.
#### 3. Update the firmware
The development board does not come with the right firmware yet. To update the firmware:
1. [Download the latest Edge Impulse firmware](https://cdn.edgeimpulse.com/firmware/arduino-portenta-h7.zip), and unzip the file.
2. Double press on the RESET button on your board to put it in the bootloader mode.
3. Open the flash script for your operating system (`flash_windows.bat`, `flash_mac.command` or `flash_linux.sh`) to flash the firmware.
4. Wait until flashing is complete, and press the RESET button once to launch the new firmware.
#### 4. Setting keys
From a command prompt or terminal, run:
```
edge-impulse-daemon
```
This will start a wizard which will ask you to log in, and choose an Edge Impulse project. If you want to switch projects run the command with `--clean`.
Alternatively, recent versions of Google Chrome and Microsoft Edge can collect data directly from your development board, without the need for the Edge Impulse CLI. See [this blog post](https://edgeimpulse.com/blog/collect-sensor-data-straight-from-your-web-browser) for more information.
#### 5. Verifying that the device is connected
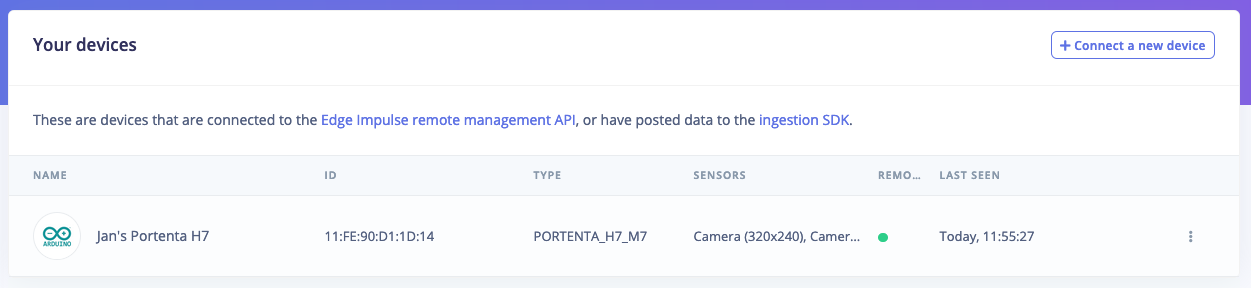
That's all! Your device is now connected to Edge Impulse. To verify this, go to [your Edge Impulse project](https://studio.edgeimpulse.com/studio/profile/projects), and click **Devices**. The device will be listed here.
#### 2. Connect the development board to your computer
Use a USB-C cable to connect the development board to your computer. Then, double-tap the **RESET** button to put the device into bootloader mode. You should see the green LED on the front pulsating.
#### 3. Update the firmware
The development board does not come with the right firmware yet. To update the firmware:
1. [Download the latest Edge Impulse firmware](https://cdn.edgeimpulse.com/firmware/arduino-portenta-h7.zip), and unzip the file.
2. Double press on the RESET button on your board to put it in the bootloader mode.
3. Open the flash script for your operating system (`flash_windows.bat`, `flash_mac.command` or `flash_linux.sh`) to flash the firmware.
4. Wait until flashing is complete, and press the RESET button once to launch the new firmware.
#### 4. Setting keys
From a command prompt or terminal, run:
```
edge-impulse-daemon
```
This will start a wizard which will ask you to log in, and choose an Edge Impulse project. If you want to switch projects run the command with `--clean`.
Alternatively, recent versions of Google Chrome and Microsoft Edge can collect data directly from your development board, without the need for the Edge Impulse CLI. See [this blog post](https://edgeimpulse.com/blog/collect-sensor-data-straight-from-your-web-browser) for more information.
#### 5. Verifying that the device is connected
That's all! Your device is now connected to Edge Impulse. To verify this, go to [your Edge Impulse project](https://studio.edgeimpulse.com/studio/profile/projects), and click **Devices**. The device will be listed here.
 ### Next steps: building a machine learning model
With everything set up you can now build your first machine learning model with these tutorials:
* [Keyword spotting](/tutorials/end-to-end/keyword-spotting)
* [Sound recognition](/tutorials/end-to-end/sound-recognition)
* [Image classification](/tutorials/end-to-end/image-classification)
* [object detection](/tutorials/end-to-end/object-detection-bounding-boxes).
* [Object detection with centroids (FOMO)](/tutorials/end-to-end/object-detection-centroids)
Looking to connect different sensors? The [Data forwarder](/tools/clis/edge-impulse-cli/data-forwarder) lets you easily send data from any sensor into Edge Impulse.
### Deploying back to device
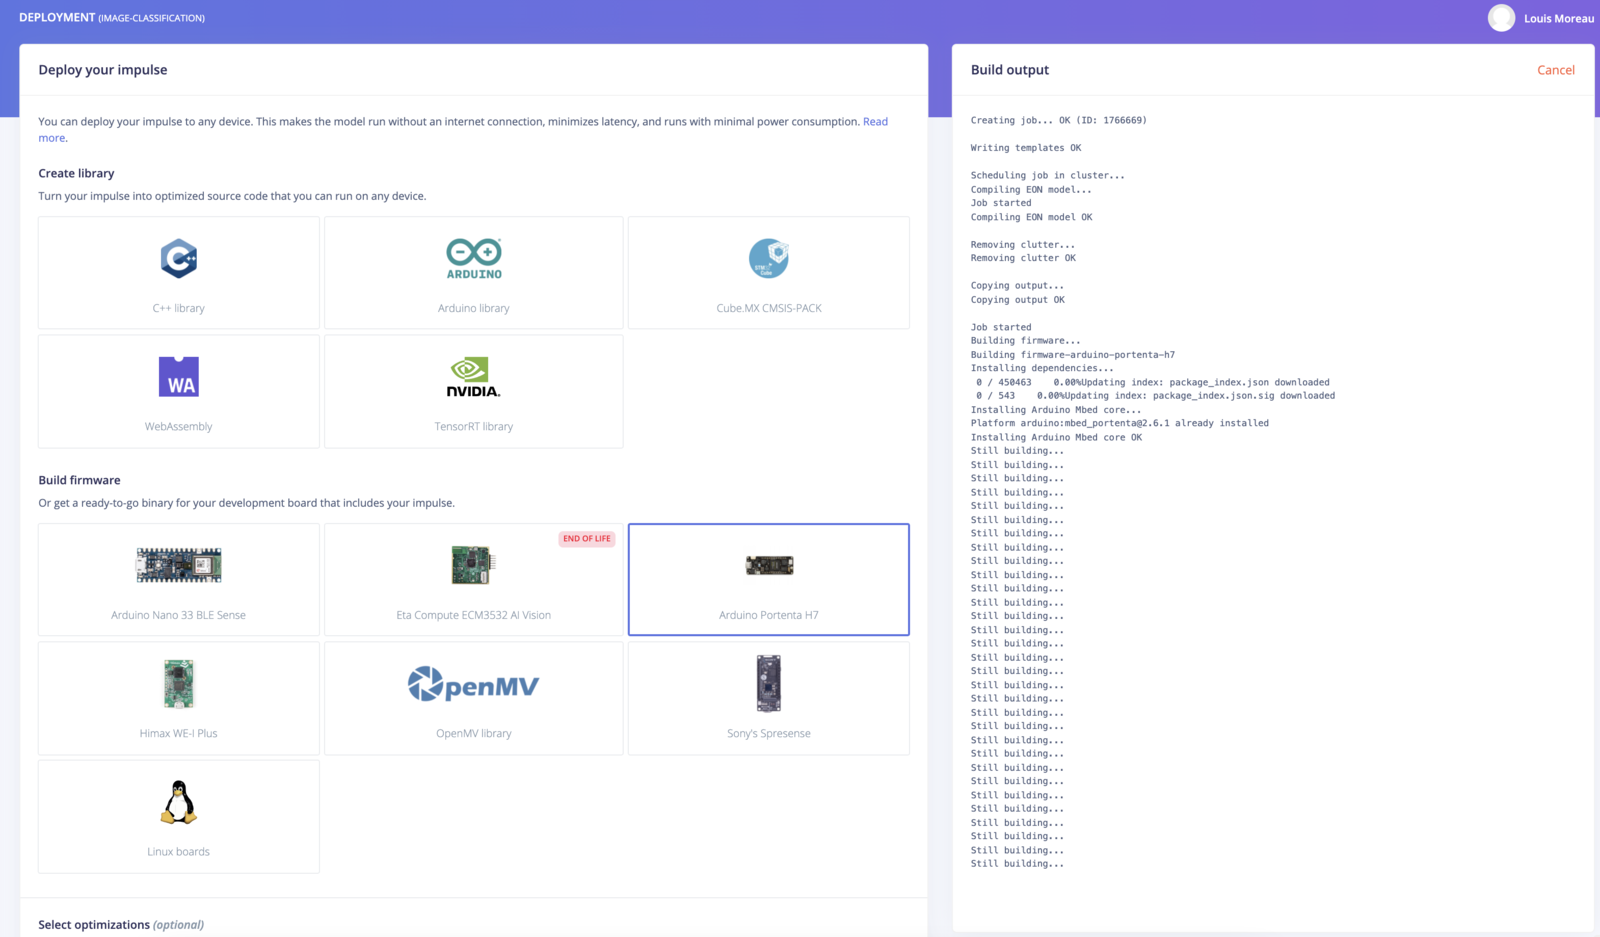
* Download your custom firmware from the **Deployment tab** in the Studio and install the firmware with the same method as in the "Update the firmware" section and run the `edge-impulse-run-impulse` command:
*Note that it may take up to 10 minutes to compile the firmware for the Arduino Portenta H7*
### Next steps: building a machine learning model
With everything set up you can now build your first machine learning model with these tutorials:
* [Keyword spotting](/tutorials/end-to-end/keyword-spotting)
* [Sound recognition](/tutorials/end-to-end/sound-recognition)
* [Image classification](/tutorials/end-to-end/image-classification)
* [object detection](/tutorials/end-to-end/object-detection-bounding-boxes).
* [Object detection with centroids (FOMO)](/tutorials/end-to-end/object-detection-centroids)
Looking to connect different sensors? The [Data forwarder](/tools/clis/edge-impulse-cli/data-forwarder) lets you easily send data from any sensor into Edge Impulse.
### Deploying back to device
* Download your custom firmware from the **Deployment tab** in the Studio and install the firmware with the same method as in the "Update the firmware" section and run the `edge-impulse-run-impulse` command:
*Note that it may take up to 10 minutes to compile the firmware for the Arduino Portenta H7*
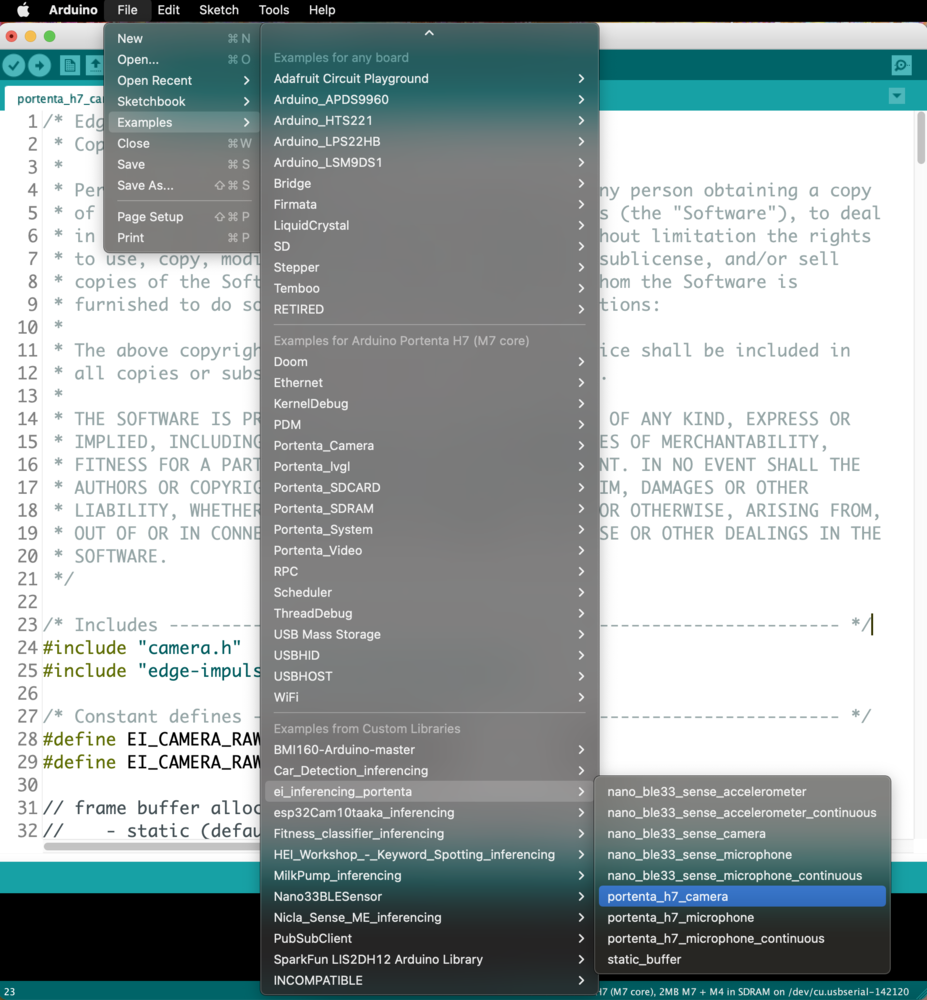
 * Use the [Run on Arduino](/hardware/deployments/run-arduino-2-0) tutorial and select one of the portenta examples:
 * For an end-to-end example that classifies data and then sends the result over LoRaWAN. Please see the [example-portenta-lorawan](https://github.com/edgeimpulse/example-portenta-lorawan) example.
### Troubleshooting
If you come across this issue:
```
Finding Arduino Mbed core...
arduino:mbed_portenta 2.6.1 2.6.1 Arduino Mbed OS Portenta Boards
Finding Arduino Mbed core OK
Finding Arduino Portenta H7...
Finding Arduino Portenta H7 OK at Arduino
dfu-util 0.10-dev
Copyright 2005-2009 Weston Schmidt, Harald Welte and OpenMoko Inc.
Copyright 2010-2021 Tormod Volden and Stefan Schmidt
This program is Free Software and has ABSOLUTELY NO WARRANTY
Please report bugs to http://sourceforge.net/p/dfu-util/tickets/
Warning: Invalid DFU suffix signature
A valid DFU suffix will be required in a future dfu-util release
No DFU capable USB device available
Error during Upload: uploading error: uploading error: exit status 74
Flashing failed. Here are some options:
If your error is 'incorrect FQBN' you'll need to upgrade the Arduino core via:
$ arduino-cli core update-index
$ arduino-cli core install arduino:mbed_portenta@2.6.1
Otherwise, double tap the RESET button to load the bootloader and try again
Press any key to continue . . .
```
You probably forgot to double press the RESET button before running the flash script.
* For an end-to-end example that classifies data and then sends the result over LoRaWAN. Please see the [example-portenta-lorawan](https://github.com/edgeimpulse/example-portenta-lorawan) example.
### Troubleshooting
If you come across this issue:
```
Finding Arduino Mbed core...
arduino:mbed_portenta 2.6.1 2.6.1 Arduino Mbed OS Portenta Boards
Finding Arduino Mbed core OK
Finding Arduino Portenta H7...
Finding Arduino Portenta H7 OK at Arduino
dfu-util 0.10-dev
Copyright 2005-2009 Weston Schmidt, Harald Welte and OpenMoko Inc.
Copyright 2010-2021 Tormod Volden and Stefan Schmidt
This program is Free Software and has ABSOLUTELY NO WARRANTY
Please report bugs to http://sourceforge.net/p/dfu-util/tickets/
Warning: Invalid DFU suffix signature
A valid DFU suffix will be required in a future dfu-util release
No DFU capable USB device available
Error during Upload: uploading error: uploading error: exit status 74
Flashing failed. Here are some options:
If your error is 'incorrect FQBN' you'll need to upgrade the Arduino core via:
$ arduino-cli core update-index
$ arduino-cli core install arduino:mbed_portenta@2.6.1
Otherwise, double tap the RESET button to load the bootloader and try again
Press any key to continue . . .
```
You probably forgot to double press the RESET button before running the flash script.